3-868-116-12 (1)
Video Cassette
Recorder
Operating Instructions
Owner's record
The model and serial numbers are located at the rear of the unit.
Record these numbers in the spaces provided below. Refer to them whenever
you call upon your Sony dealer regarding this product.
Model No._________________________
Serial No. _________________________
Declaration of Conformity
Trade Name:
SONY
Model No.:
SLV-N80/N70
Responsible Party: Sony Electronics Inc.
Address:
1 Sony Drive, Park Ridge, NJ.07656 USA
Telephone No.:
201-930-6970
This device complies with Part 15 of the FCC Rules. Operation is subject to
the following two conditions: (1) This device may not cause harmful
interference, and (2) this device must accept any interference received,
including interference that may cause undesired operation.
SLV-N80
SLV-N70
© 2000 Sony Corporation
2 WARNING
WARNING
To prevent fire or shock hazard, do not
expose the unit to rain or moisture.
This symbol is intended to alert the user
to the presence of uninsulated
"dangerous voltage" within the product's
enclosure that may be of sufficient
magnitude to constitute a risk of electric
shock to persons.
This symbol is intended to alert the user
to the presence of important operating
and maintenance (servicing) instructions
in the literature accompanying the
appliance.
CAUTION
To prevent electric shock, do not use this polarized
AC plug with an extension cord, receptacle or other
outlet unless the blades can be fully inserted to
prevent blade exposure.
Precautions
Safety
· Operate the unit only on 120 V AC, 60 Hz.
· If anything falls into the cabinet, unplug the unit
and have it checked by qualified personnel before
operating it any further.
· This unit is not disconnected from the AC power
source (mains) as long as it is connected to the
wall outlet, even if the unit itself has been turned
off.
· Unplug the unit from the wall outlet if you do not
intend to use it for an extended period of time. To
disconnect the cord, pull it out by the plug, never
by the cord.
· One blade of the plug is wider than the other for
the purpose of safety and will fit into the power
outlet only one way. If you are unable to insert
the plug fully into the outlet, contact your Sony
dealer.
Installing
· Allow adequate air circulation to prevent internal
heat buildup.
· Do not place the unit on surfaces (rugs, blankets,
etc.) or near materials (curtains, draperies) that
may block the ventilation slots.
· Do not install the unit near heat sources such as
radiators or air ducts, or in a place subject to
direct sunlight, excessive dust, mechanical
vibration or shock.
· Do not install the unit in an inclined position. It
is designed to be operated in a horizontal position
only.
· Keep the unit and cassettes away from equipment
with strong magnets, such as microwave ovens or
large loudspeakers.
· Do not place heavy objects on the unit.
· If the unit is brought directly from a cold to a
warm location, moisture may condense inside the
VCR and cause damage to the video head and
tape. When you first install the unit, or when you
move it from a cold to a warm location, wait for
about three hours before operating the unit.
Information
For customers in the USA
CAUTION
You are cautioned that any changes or modifications
not expressly approved in this manual could void
your authority to operate this equipment.
NOTE:
This equipment has been tested and found to
comply with the limits for a Class B digital device,
pursuant to Part 15 of the FCC Rules.
These limits are designed to provide reasonable
protection against harmful interference in a
residential installation.
This equipment generates, uses, and can radiate
radio frequency energy and, if not installed and used
in accordance with the instructions, may cause
harmful interference to radio communications.
However, there is no guarantee that interference will
not occur in a particular installation. If this
equipment does cause harmful interference to radio
or television reception, which can be determined by
turning the equipment off and on, the user is
encouraged to try to correct the interference by one
or more of the following measures:
· Reorient or relocate the receiving antenna.
· Increase the separation between the equipment
and receiver.
· Connect the equipment into an outlet on a circuit
different from that to which the receiver is
connected.
· Consult the dealer or an experienced radio/TV
technician for help.
Caution
Television programs, films, video tapes and other
materials may be copyrighted.
Unauthorized recording of such material may be
contrary to the provisions of the copyright laws.
Also, use of this recorder with cable television
transmission may require authorization from the
cable television transmission and/or program owner.

3
Table of contents
Getti
ng
Sta
rted
Table of contents
Getting Started
4 Step 1 : Unpacking
5 Step 2 : Setting up the remote commander
8 Step 3 : Hookups
30 Selecting a language
31 Setting the clock
38 Setting up the cable box control (SLV-N80 only)
44 Presetting channels
51 Setting up the VCR Plus+ GOLD system (SLV-N80 only)
58 Setting up the VCR Plus+ system (SLV-N70 only)
Basic Operations
62 Playing a tape
65 Recording TV programs
68 Recording TV programs using the
Dial Timer
73 Recording TV programs using the
VCR Plus+ or VCR Plus+ GOLD
system
76 Setting the timer manually
Additional Operations
79 Playing/searching at various speeds
81 Setting the recording duration time
82 Checking/changing/canceling timer
settings
84 Recording stereo and bilingual
programs
86 Searching using the Tape Guide
function (SLV-N80 only)
89 Searching using the index function
90 Searching for a selected point on the
tape
92 Locating a channel by Station ID
(SLV-N80 only)
93 Creating a favorite channel list with
Station ID (SLV-N80 only)
95 Adjusting the picture
97 Changing menu options
99 Editing with another VCR
Additional Information
101 General setup information
103 Troubleshooting
105 Specifications
106 Index to parts and controls
111 Index
Back Cover
Quick reference to using the VCR
VCR Plus+, C3, ALLSET and PlusCode are trademarks of Gemstar Development Corporation.
The VCR Plus+ system is manufactured under license from Gemstar Development Corporation.
4 Unpacking
Getting Started
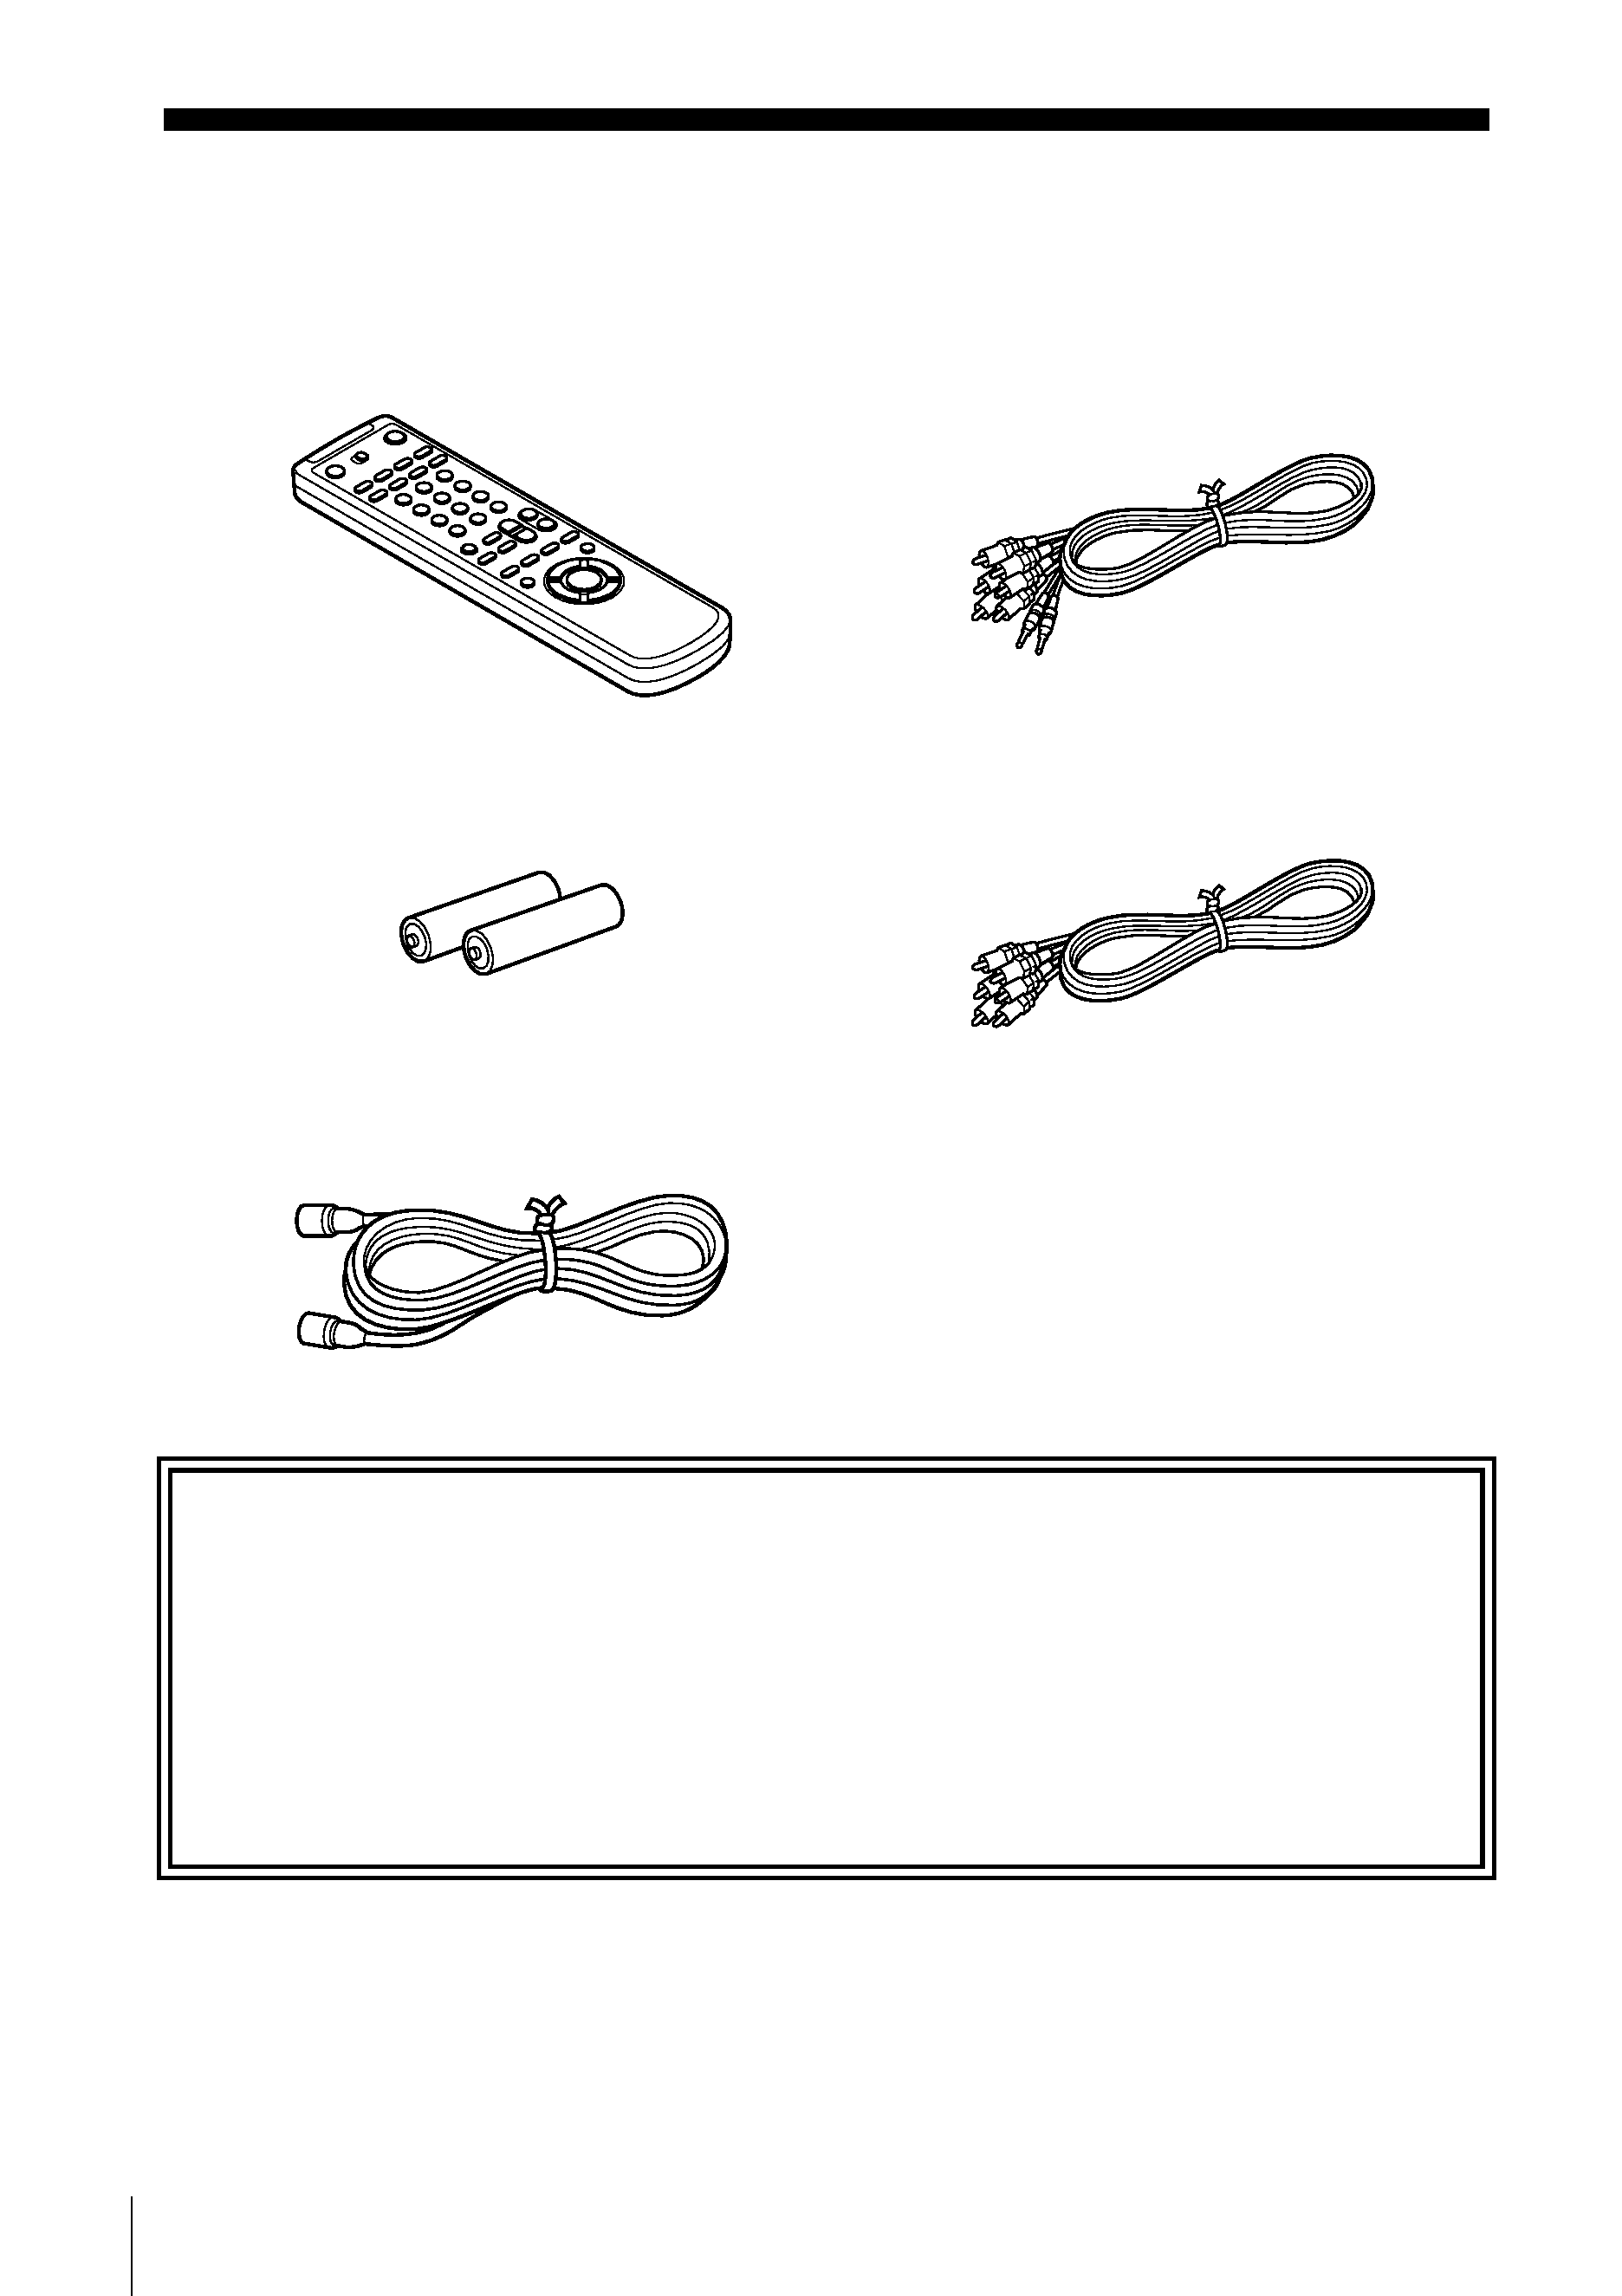
Step 1 : Unpacking
Check that you have received the following items with the VCR:
· Remote commander
· Audio/video cable (3-phono, 1-mini to 3-
phono, 1-mini) (SLV-N80 only)
· Size AA (R6) batteries
· Audio/video cable (3-phono to 3-phono)
(SLV-N70 only)
· 75-ohm coaxial cable with F-type connectors
Check your model name
The instructions in this manual are for the 2 models: SLV-N80 and N70. Check your
model number by looking at the rear panel of your VCR. SLV-N80 is the model used for
illustration purposes. Any difference in operation is clearly indicated in the text, for
example, "SLV-N70 only."
Getti
ng
Sta
rted
5
Setting up the remote commander
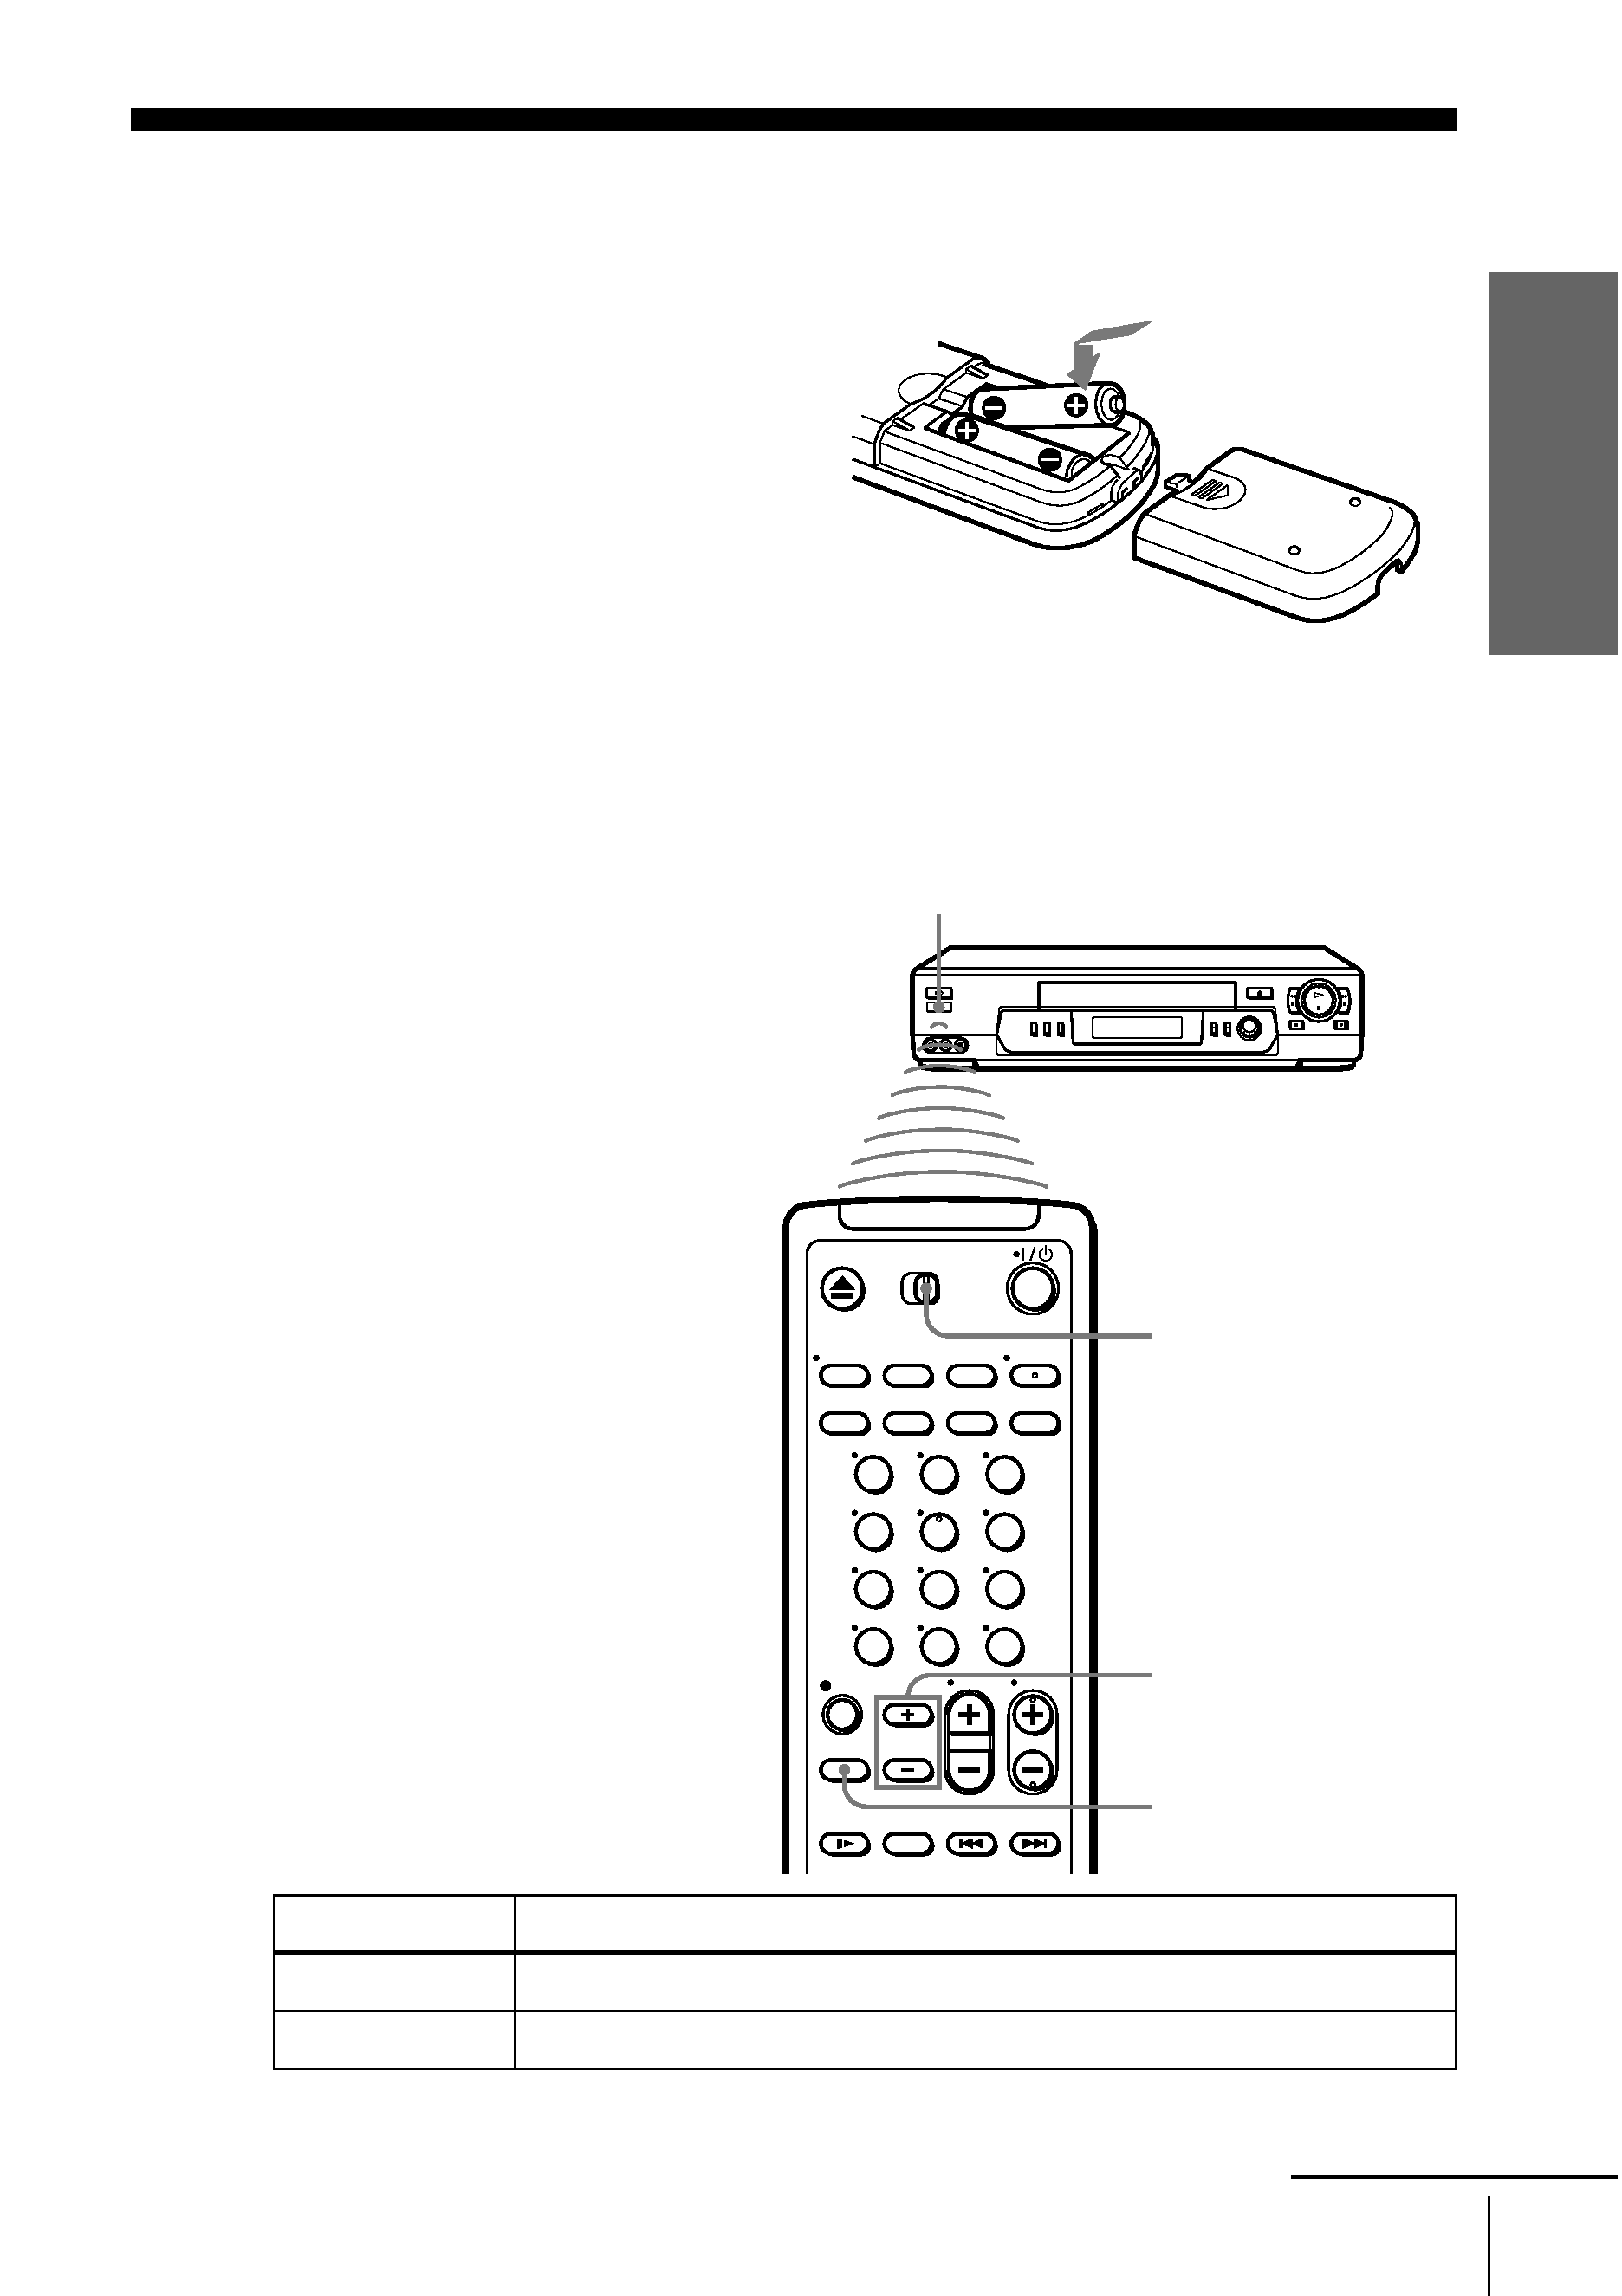
Step 2 : Setting up the remote commander
Inserting the batteries
Insert two size AA (R6) batteries
by matching the + and on the
batteries to the diagram inside the
battery compartment.
Insert the negative () end first,
then push in and down until the
positive (+) end clicks into
position.
Using the remote
commander
You can use this remote
commander to operate this VCR
and a Sony TV and/or AV receiver.
Buttons on the remote commander
marked with a dot (·) can be used
to operate your Sony TV.
The RECEIVER VOL +/ and
MUTING buttons can be used to
operate your Sony AV receiver.
To operate
Set [TV] / [VIDEO] to
the VCR
[VIDEO] and point at the remote sensor at the VCR
a Sony TV
[TV] and point at the remote sensor at the TV
123
456
789
0
RECEIVER VOL +/
[TV] / [VIDEO]
Remote sensor
MUTING
continued