3-866-140-11(1)
Video Cassette
Recorder
©1999 by Sony Corporation
SLV-M91HF
Hookup/Setup

2
Precautions
Safety
· Operate the unit only on 120 V AC, 60 Hz.
· If anything falls into the cabinet, unplug the
unit and have it checked by qualified
personnel before operating it any further.
· This unit is not disconnected from the AC
power source (mains) as long as it is
connected to the wall outlet, even if the unit
itself has been turned off.
· Unplug the unit from the wall outlet if you
do not intend to use it for an extended
period of time. To disconnect the cord, pull
it out by the plug, never by the cord.
· One blade of the plug is wider than the
other for the purpose of safety and will fit
into the power outlet only one way. If you
are unable to insert the plug fully into the
outlet, contact your Sony dealer.
Installing
· Allow adequate air circulation to prevent
internal heat buildup.
· Do not place the unit on surfaces (rugs,
blankets, etc.) or near materials (curtains,
draperies) that may block the ventilation
slots.
· Do not install the unit near heat sources
such as radiators or air ducts, or in a place
subject to direct sunlight, excessive dust,
mechanical vibration or shock.
· Do not install the unit in an inclined
position. It is designed to be operated in a
horizontal position only.
· Keep the unit and cassettes away from
equipment with strong magnets, such as
microwave ovens or large loudspeakers.
· Do not place heavy objects on the unit.
· If the unit is brought directly from a cold to
a warm location, moisture may condense
inside the VCR and cause damage to the
video head and tape. When you first install
the unit, or when you move it from a cold to
a warm location, wait for about three hours
before operating the unit.

3
* VCR Plus+, C3, ALLSET and PlusCode are trademarks of Gemstar Development Corporation. The
VCR Plus+ system is manufactured under license from Gemstar Development Corporation.
Table of contents
4
Step 1: Unpacking
5
Step 2: Setting up the remote commander
8
Step 3: Hookups
9
Audio/video (A/V) hookup
11
Hookup 1: Using cable box control
15
Hookup 2: No cable box, or incompatible cable box with only
a few scrambled channels
19
Hookup 3: Antenna hookup
23
Hookup 4: Incompatible cable box with many scrambled
channels
27
Hookup 5: DIRECTV digital satellite receiver
30
Hookup 6: Incompatible cable box with only a few scrambled
channels, using an A/B switch
35
Selecting a language
36
Setting the clock
42
Setting up the cable box control
47
Presetting channels
53
Setting up the VCR Plus+* GOLD system
58
General setup information
60
Index to parts and controls
back cover
Index
4
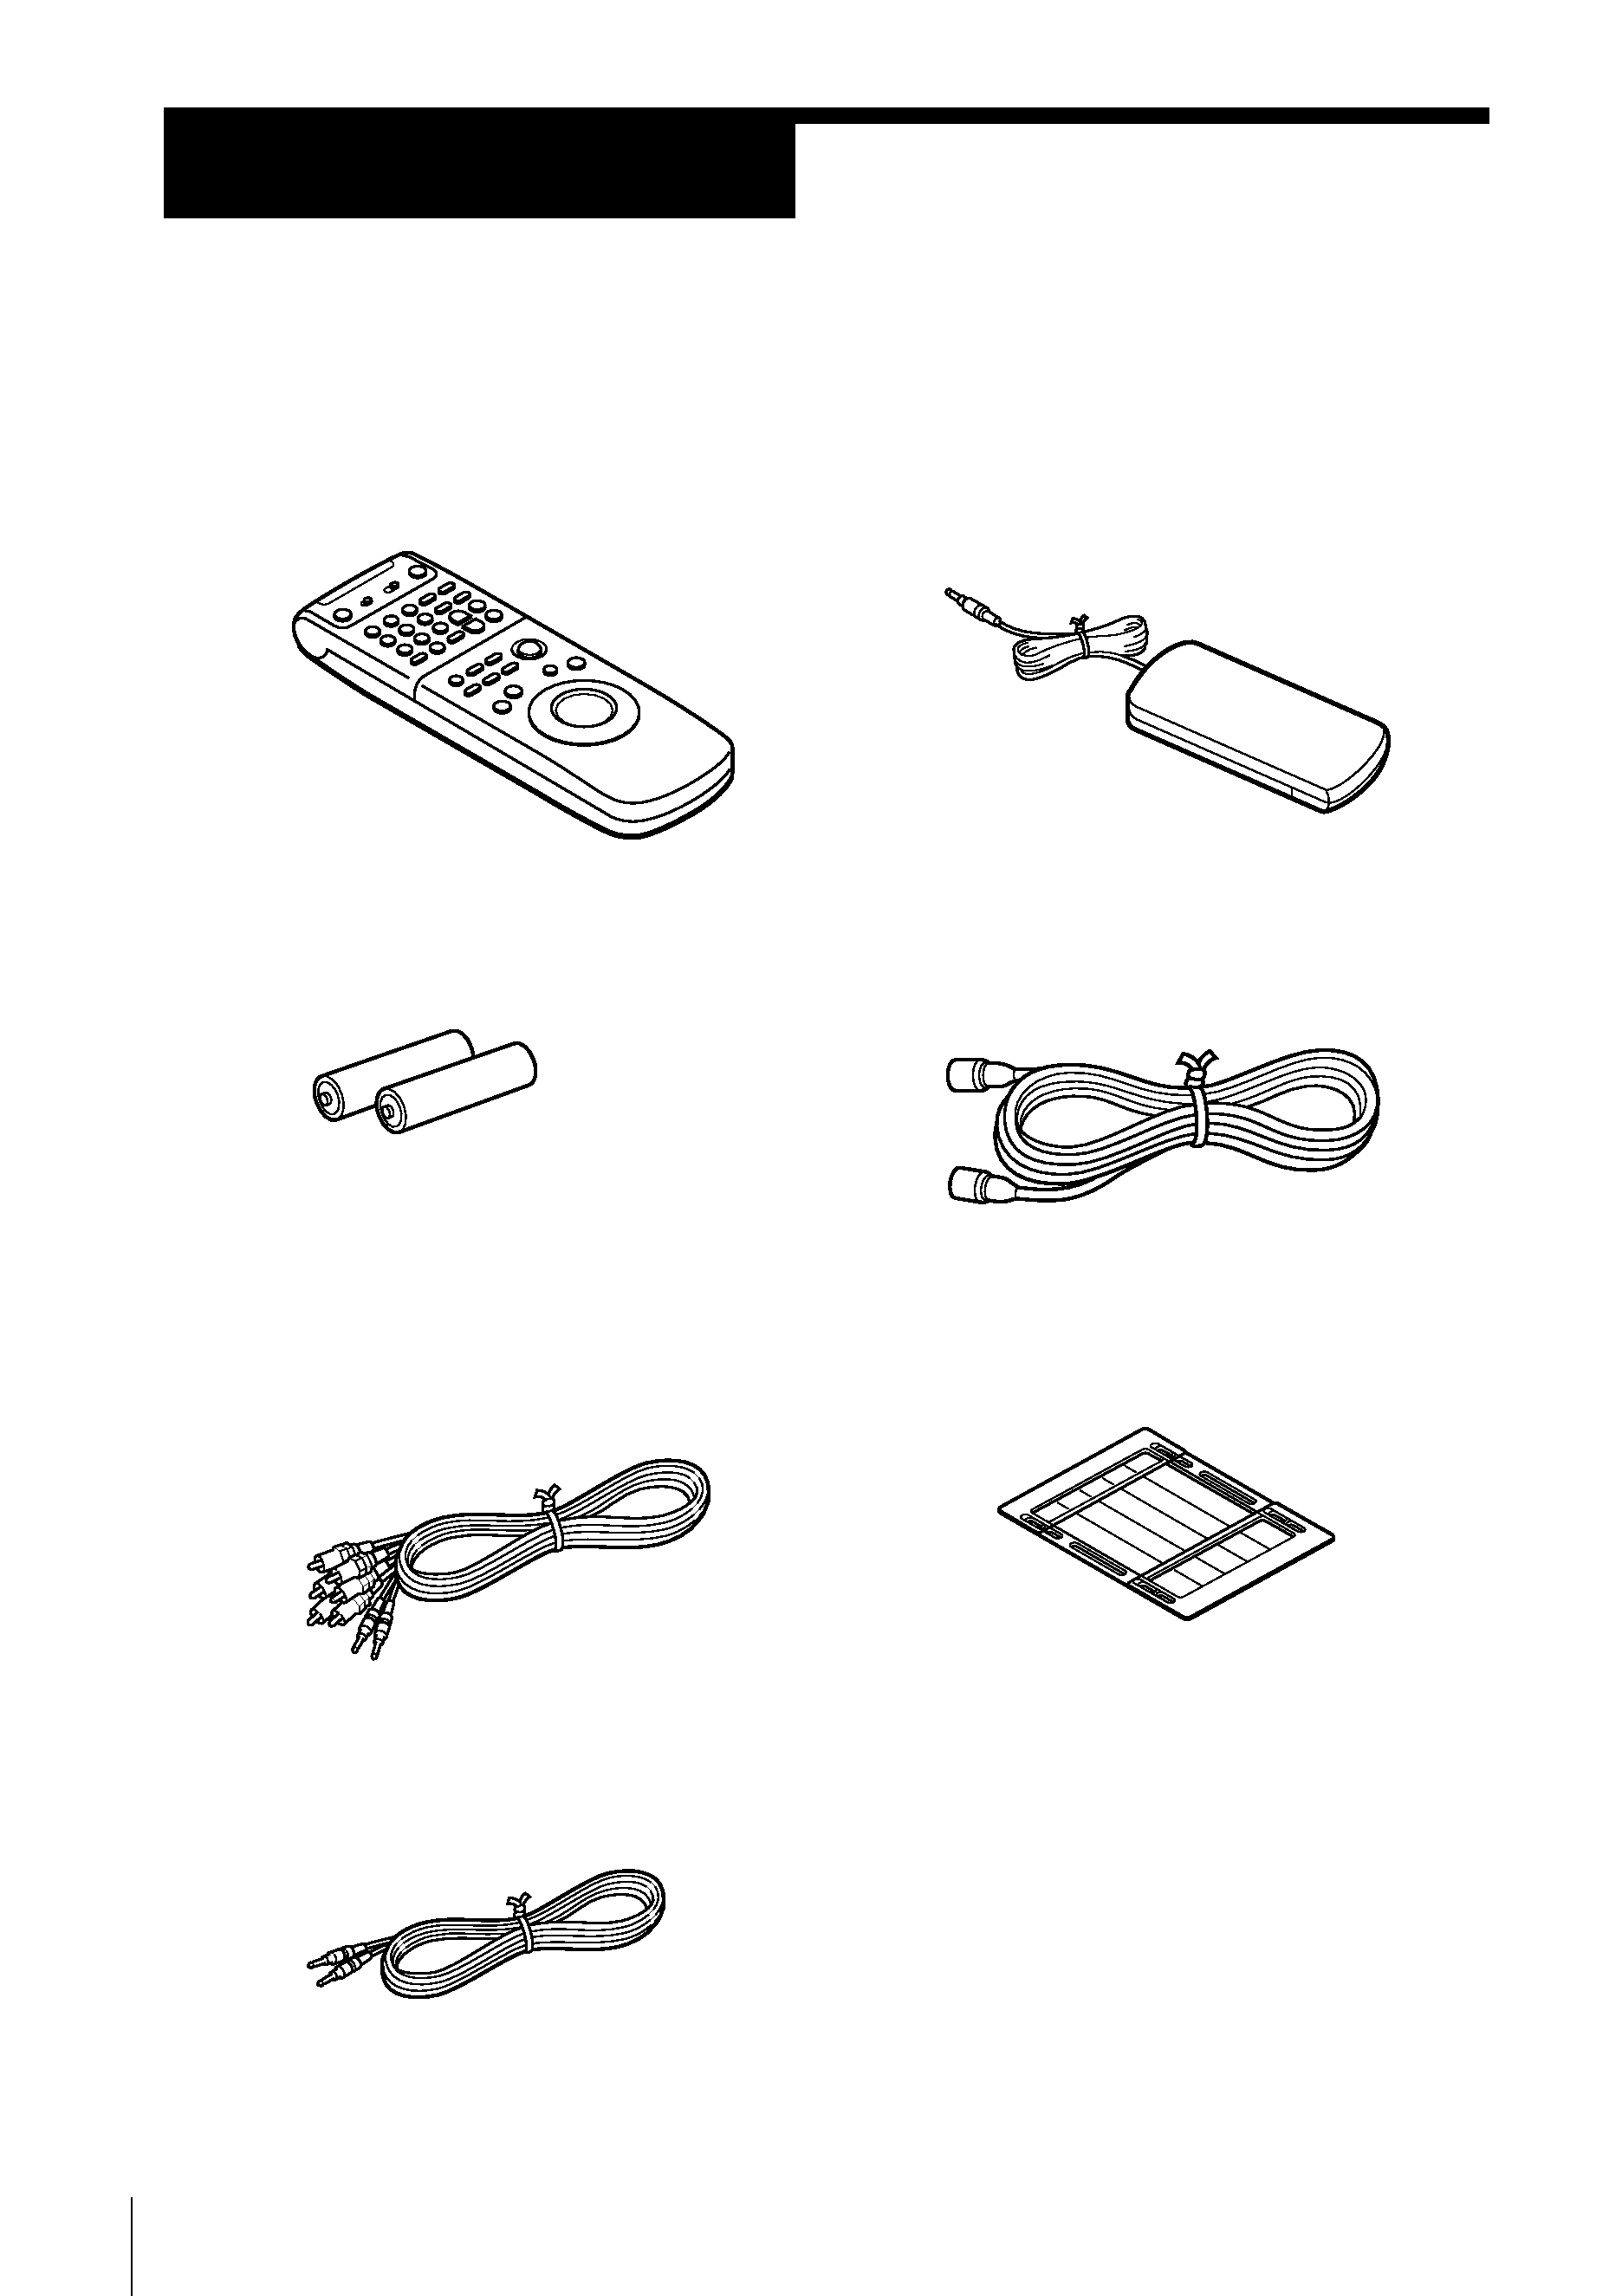
· Remote commander
· Size AA (R6) batteries
· Audio/video cable (3-phono, 1-mini
to 3-phono, 1-mini)
· Monaural cable (1-mini to 1-mini)
Step 1
Unpacking
Check that you have received the following items with the VCR:
· Cable Mouse (cable box controller)
· 75-ohm coaxial cable with F-type
connectors
· SmartFile labels
5
Step 2
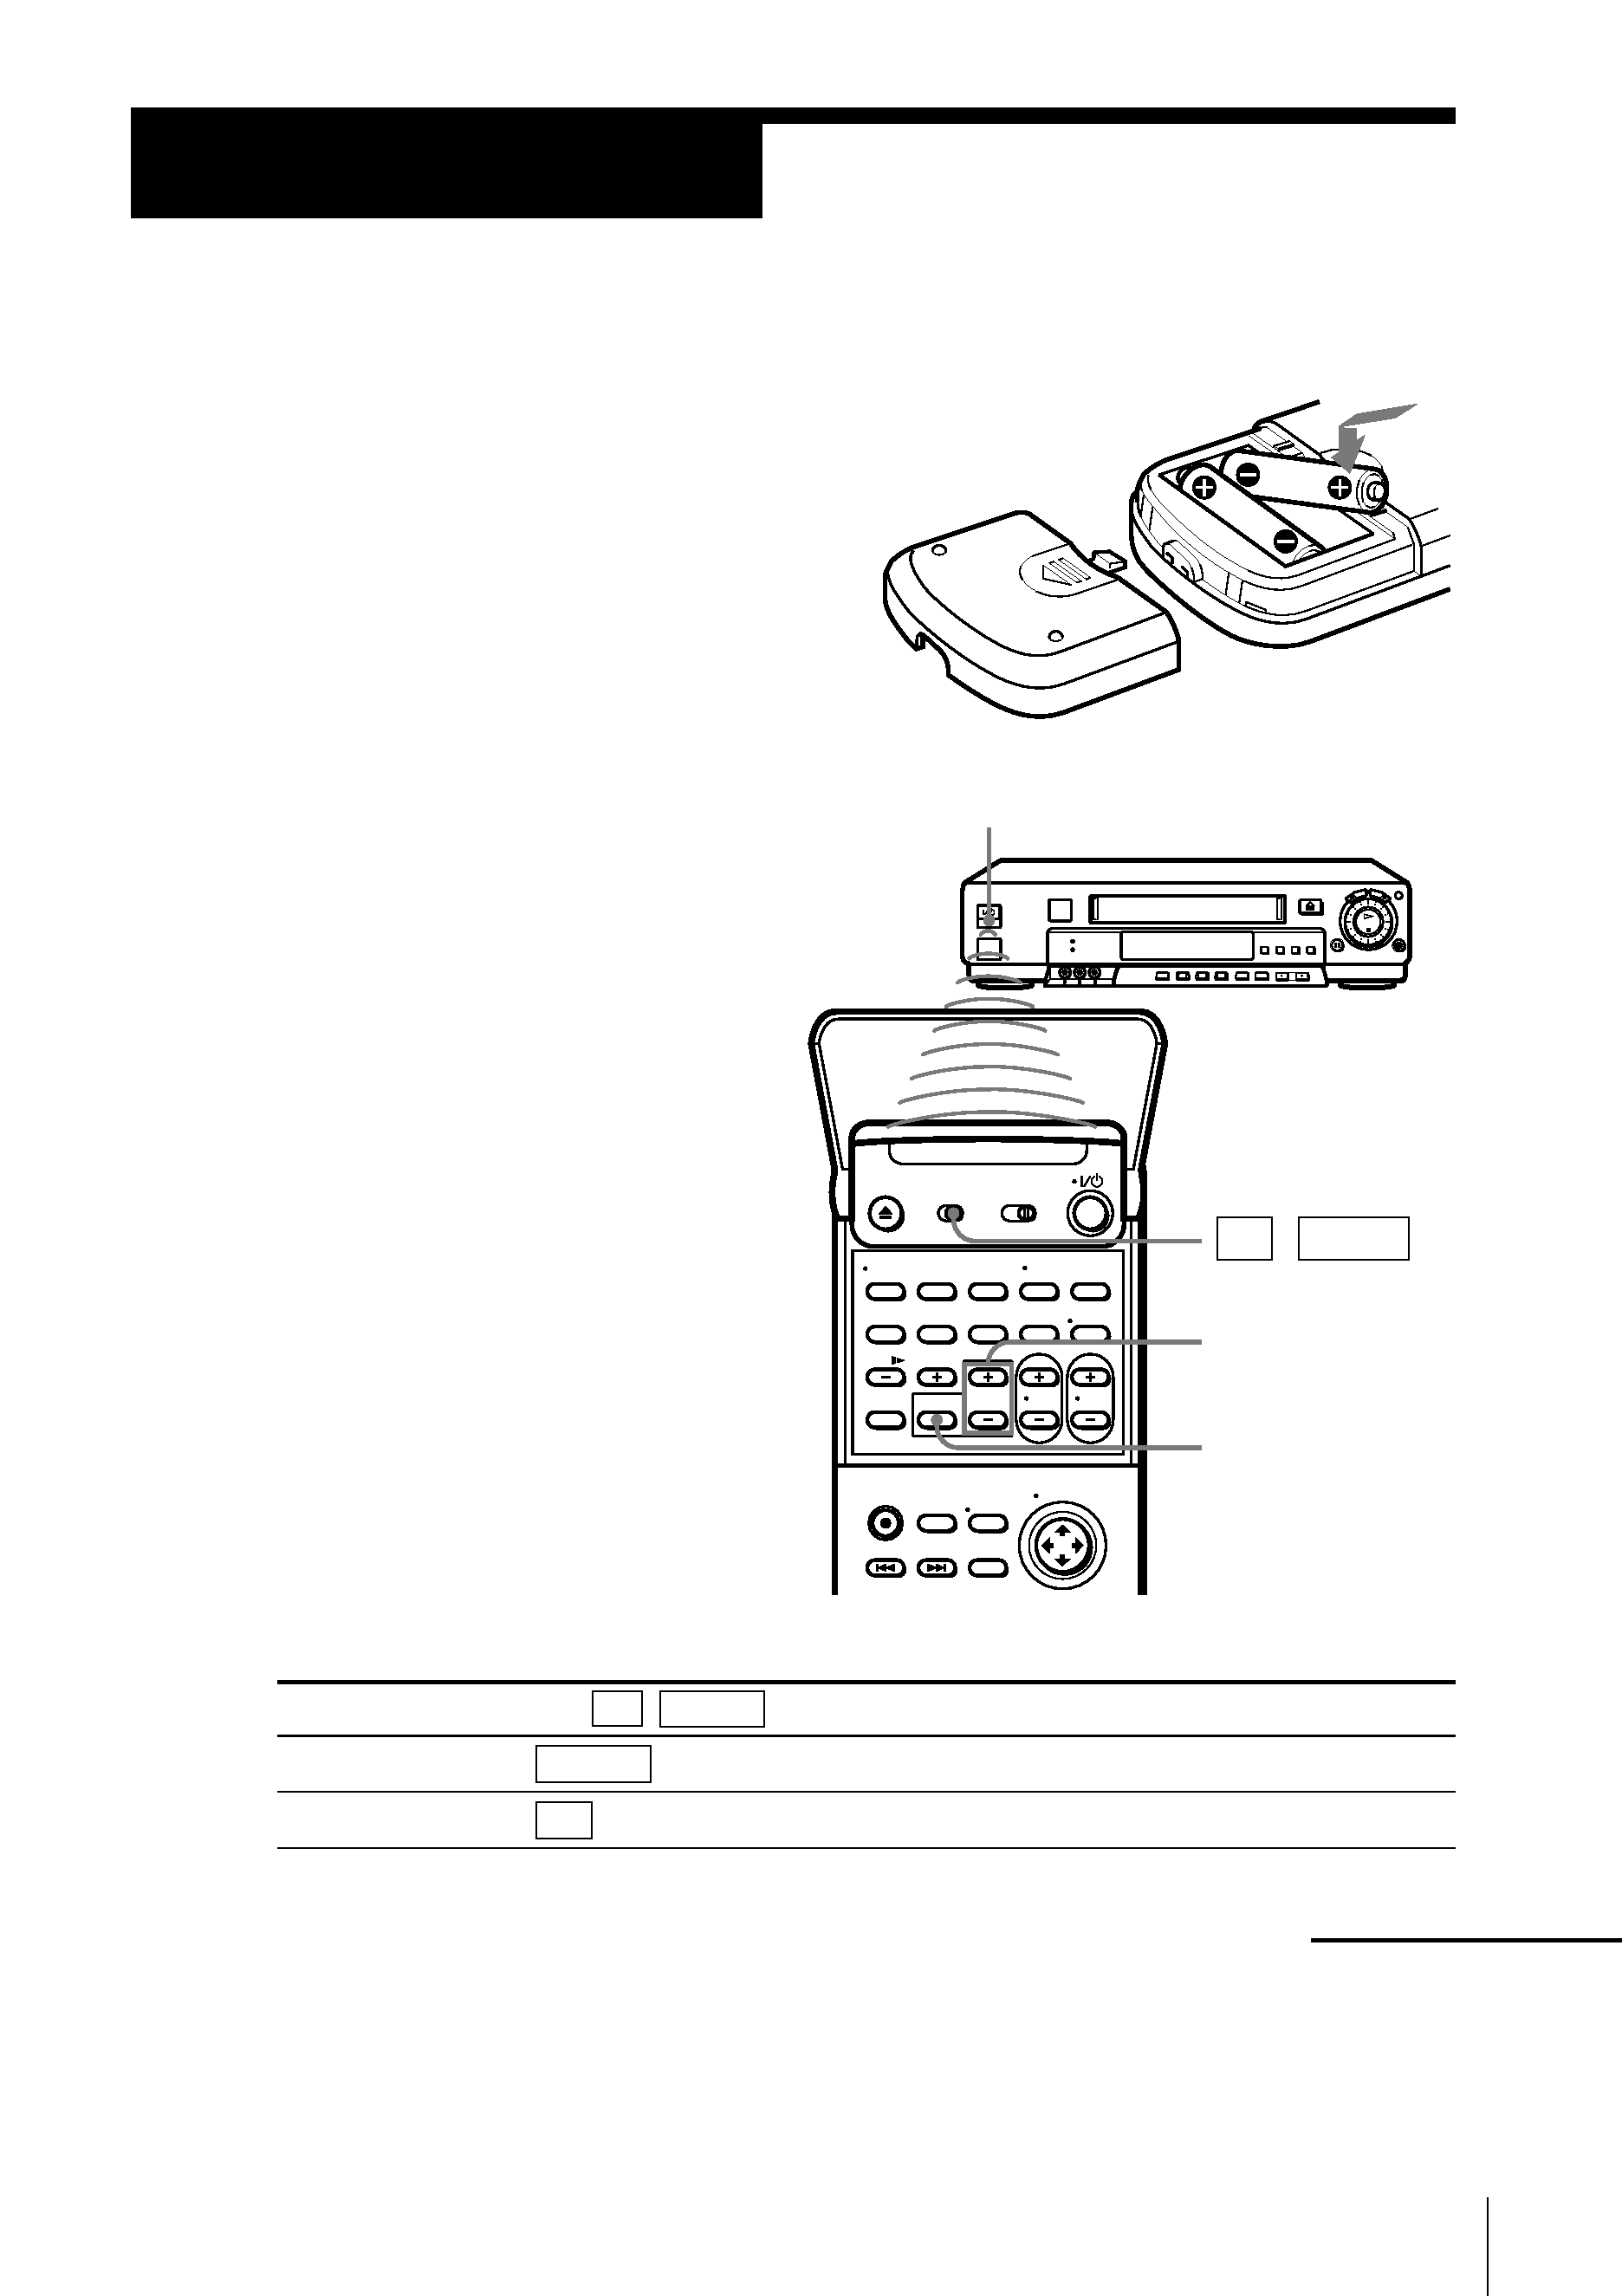
Setting up the remote commander
Inserting the batteries
Insert two size AA (R6) batteries by
matching the + and on the batteries
to the diagram inside the battery
compartment.
Insert the negative () end first, then
push in and down until the positive (+)
end clicks into position.
Using the remote commander
You can use this remote
commander to operate this VCR
and a Sony TV or AV receiver.
Buttons on the remote
commander marked with a dot
(·) can be used to operate your
Sony TV.
The RECEIVER VOL +/ and
MUTING buttons can be used to
operate your Sony AV receiver.
Remote sensor
To operate
the VCR
a Sony TV
TV / VIDEO
continued
MUTING
RECEIVER
VOL +/
Set TV / VIDEO to
VIDEO and point at the remote sensor on the VCR
TV and point at the remote sensor on the TV