
Supplementary Operating Instructions
Instructions d'utilisation supplémentaires
Zusatz-Bedienungsanleitung
Istruzioni supplementari per l'uso
Gebruiksaanwijzing-supplement
Kompletterande bruksanvisning
Manual de instrucciones suplementario
Manual de instruções suplementar
STEREO CASSETTE DECK
PLATINE CASSETTE STEREO
STEREO-CASSETTENDECK
REGISTRATORE STEREO A CASSETTA
STEREO CASSETTEDECK
STEREO KASSETTDÄCK
GRABADORA DE CASETE ESTÉREO
GRAVADOR DE CASSETES ESTÉREO
CT-F10
2
The exclamation point within an equilateral triangle is
intended to alert the user to the presence of important
operating and maintenance (servicing) instructions in
the literature accompanying the appliance.
IMPORTANT
The lightning flash with arrowhead symbol, within an
equilateral triangle, is intended to alert the user to the
presence of uninsulated "dangerous voltage" within the
product's enclosure that may be of sufficient magnitude
to constitute a risk of electric shock to persons.
CAUTION:
TO PREVENT THE RISK OF ELECTRIC SHOCK, DO
NOT REMOVE COVER (OR BACK). NO USER-SER-
VICEABLE PARTS INSIDE. REFER SERVICING TO
QUALIFIED SERVICE PERSONNEL.
RISK OF ELECTRIC SHOCK
DO NOT OPEN
CAUTION
WARNING: TO PREVENT FIRE
OR SHOCK HAZARD, DO NOT EXPOSE
THIS APPLIANCE TO RAIN OR MOISTURE.
ATTENTION: AFIN DE
PREVENIR TOUS RISQUES DE CHOC
ELECTRIQUE OU D`INCENDIE, NE PAS EX-
POSER CET APPAREIL A L`HUMIDITE OU A
LA PLUIE.
WARNUNG: ZUR VERMEI-
DUNG VON BRAND UND ELEKTRISCHEM
SCHLAG DIESE ANLAGE WEDER REGEN
NOCH FEUCHTIGKEIT AUSSETZEN.
ATTENZIONE:PER EVITARE IL
RISCHIO
DI
FIAMME
O
SCOSSE
ELETTRICHE, NON ESPORRE QUESTI
APPARECCHI
ALLA
PIOGGIA
O
ALL'UMIDITÀ.
WAARSCHUWING: STEL
DE APPARATUUR NIET BLOOT AAN REGEN
OF
VOCHT
OM
BRAND
OF
EEN
GEVAARLIJKE ELEKTRISCHE SCHOK TE
VOORKOMEN.
VARNING: FÖR ATT FÖRHINDRA
RISKEN FÖR ELDSVÅDA OCH ELSTÖTAR
SKALL DEN HÄR ANLÄGGNINGEN INTE
UTSÄTTAS FÖR REGN ELLER FUKT.
ADVERTENCIA: PARA
EVITAR
INCENDIOS
Y
DESCARGAS
ELÉCTRICAS, NO EXPONGA ESTE APARATO
A LA LLUVIA NI A LA HUMEDAD.
ADVERTÊNCIA: A FIM DE
EVITAR O PERIGO DE INCÊNDIO OU
CHOQUE ELÉCTRICO, NÃO EXPONHA O
APARELHO À CHUVA OU HUMIDADE.
This product complies with the Low Voltage
Directive (73/23/EEC), EMC Directives (89/
336/EEC, 92/31/EEC) and CE Marking
Directive (93/68/EEC).
Ce produit est conforme à la directive
relative aux appareils basse tension (73/23/
CEE), aux directives relatives à la
compatibilité électromagnétique (89/336/
CEE, 92/31/CEE) et à la directive CE
relative aux marquages (93/68/CEE).
Dieses Produkt entspricht den
Niederspannungsrichtlinien (73/23/EEC),
EMV-Richtlinien (89/336/EEC, 92/31/EEC)
und den CE-Markierungsrichtlinien (93/
68/EEC).
3
Questo prodotto è conforme alla direttiva
sul basso voltaggio (73/23/CEE), alle
direttive EMC (89/336/ CEE, 92/31/CEE) e
alla direttiva sul marchio CE (93/68/CEE).
Dit product voldoet aan de
laagspanningsrichtlijn (73/23/EEC), de
EMC-richtlijnen (89/336/EEC en 92/31/
EEC) en de CE-markeringsrichtlijn (93/68/
EEC).
Denna produkt uppfyller föreskrifterna i
Lågspänningsdirektiv (73/23/EEC), EMC-
direktiv (89/336/EEC, 92/31/EEC) och CE-
märkningsdirektiv (93/68/EEC).
Este producto cumple con la Directiva de
Bajo Voltaje (73/23/CEE), Directivas EMC
(89/336/CEE, 92/31/CEE) y Directiva de
Marcación CE (93/68/CEE).
Este produto cumpre a Directiva de
Voltagem Baixa (73/23/CEE), as Directivas
EMC (89/336/CEE, 92/31/CEE) e a
Directiva da Marcação CE (93/68/CEE).
· Dolby noise reduction manufactured under
license from Dolby Laboratories.
· "Dolby", and the double-D symbol are
trademarks of Dolby Laboratories.
· Fabriqué sous licence de Dolby Laborato-
ries.
· "Dolby" et le symbole double D sont des
marques de commerce de Dolby Laborato-
ries.
· In Lizenz von Dolby Laboratories hergestellt.
· "Dolby" und das Doppel-D-symbol sind
Warenzeichen der Dolby Laboratories.
· Prodotto sotto licenza della Dolby
Laboratories.
· "Dolby" ed il simbolo doppia D sono
marchi registrati della Dolby Laboratories.
· Vervaardigd in licentie van Dolby Laborato-
ries.
· "Dolby" en het dubbele D-symbool zijn
handelsmerken van Dolby Laboratories.
· Tillverkad på Dolby Laboratories-licens.
· "Dolby" och dubbel-D-symbolen är
registrerade varumärken som tillhör Dolby
Laboratories.
· Fabricado bajo licencia de Dolby Laborato-
ries.
· "Dolby" y el símbolo con una doble D son
marcas comerciales de Dolby Laboratories.
· Fabricado sob licença da Dolby Laborato-
ries.
· "Dolby" e o símbolo com duplo D são
marcas comerciais de Dolby Laboratories.
4
Connecting the cassette deck
to the CD tuner or optional
CD recorder
Connect this cassette deck to the CD-tuner or
optional CD recorder as described below.
· Important: When connecting or disconnecting
the system cable, make sure that the power is
switched off and the unit unplugged from the
wall outlet.
Thank you for buying this
Pioneer product.
Please read through these operating instructions
so you will know how to operate your model
properly. After you have finished reading the
instructions, put them away in a safe place or
future reference.
In some countries or regions, the shape of the
power plug and power outlet may differ from that
shown in the explanatory drawings. However, the
method of connecting and operating the unit is
the same.
· This component cannot be operated alone;
please use in combination with the CD Tuner
System XC-F10 and Power Amplifier M-F10.
These supplementary operating instructions
contain information relating to connections and
specifications for the Pioneer stereo cassette deck
CTF10.
For information on cassette tape maintenance,
actual operating procedures, and troubleshooting
regarding this component consult the main
Operating Instructions included with the CD Tuner
System (sold separately).
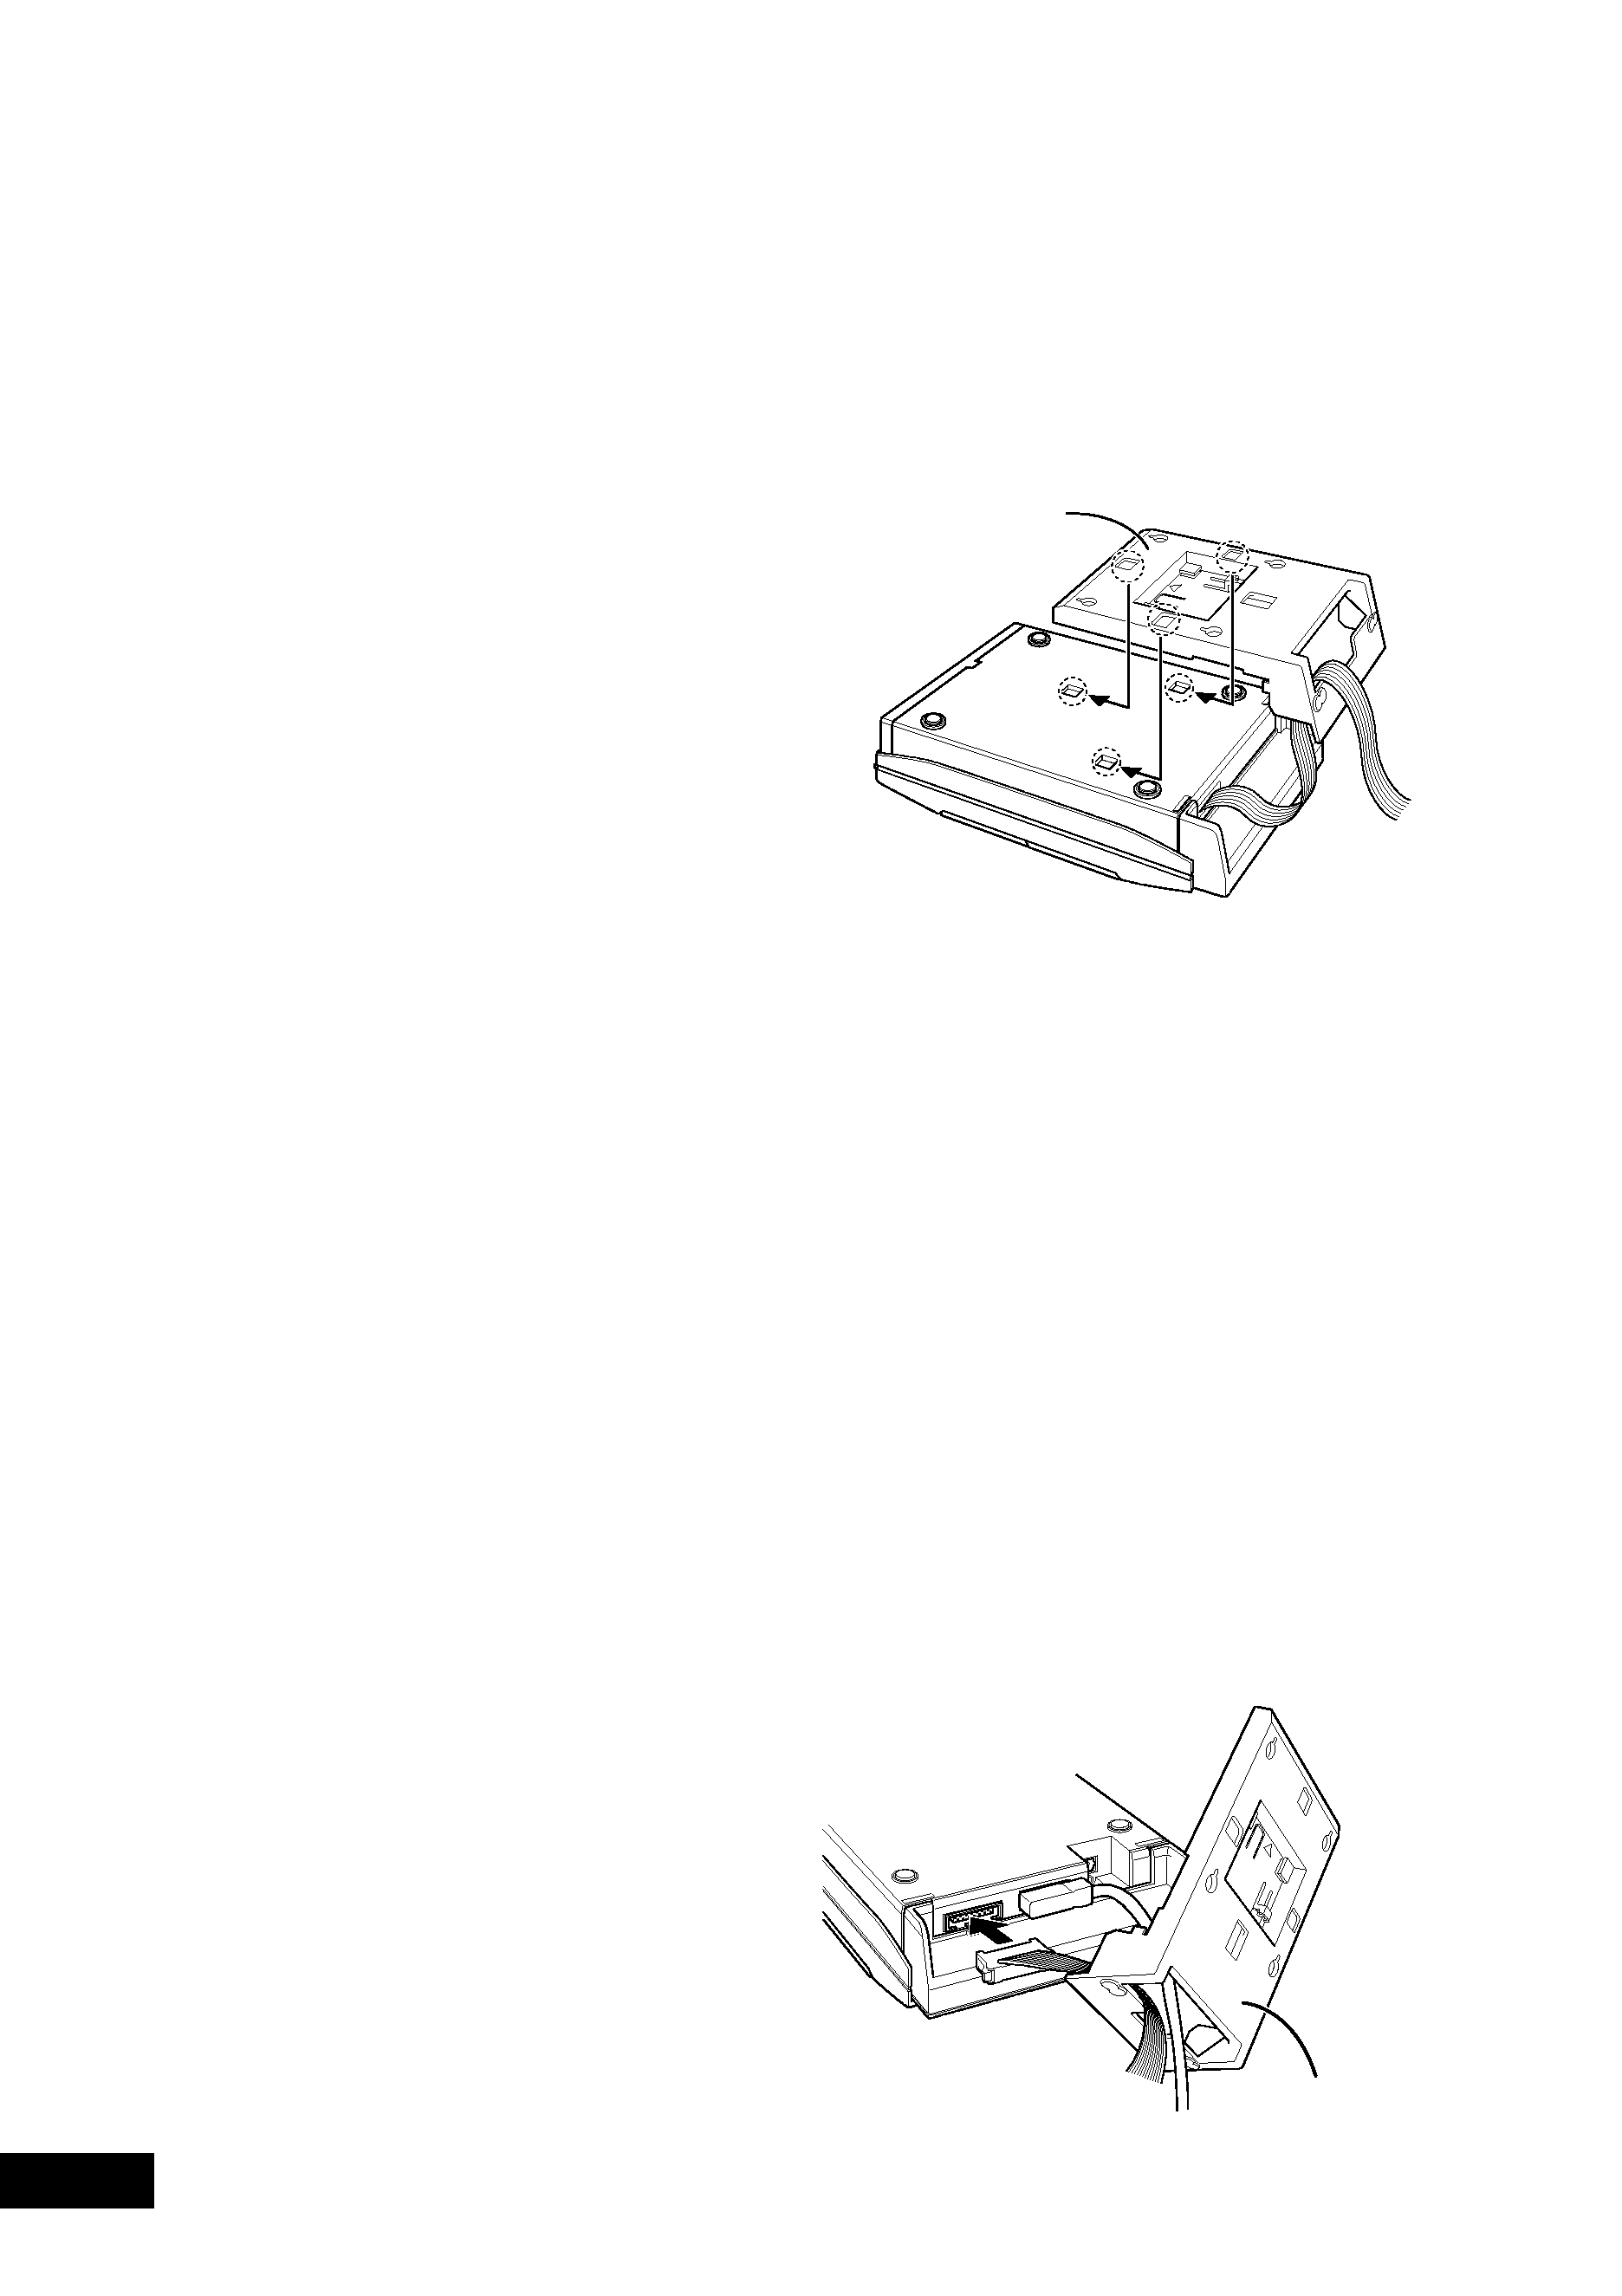
En
1 Thread the system cable through
Stand A, then slot the stand on to
the rear side of the unit.
Line up the three tabs on the Stand A with the
holes on the CD-tuner (or CD-Recorder), then
slot it into place.
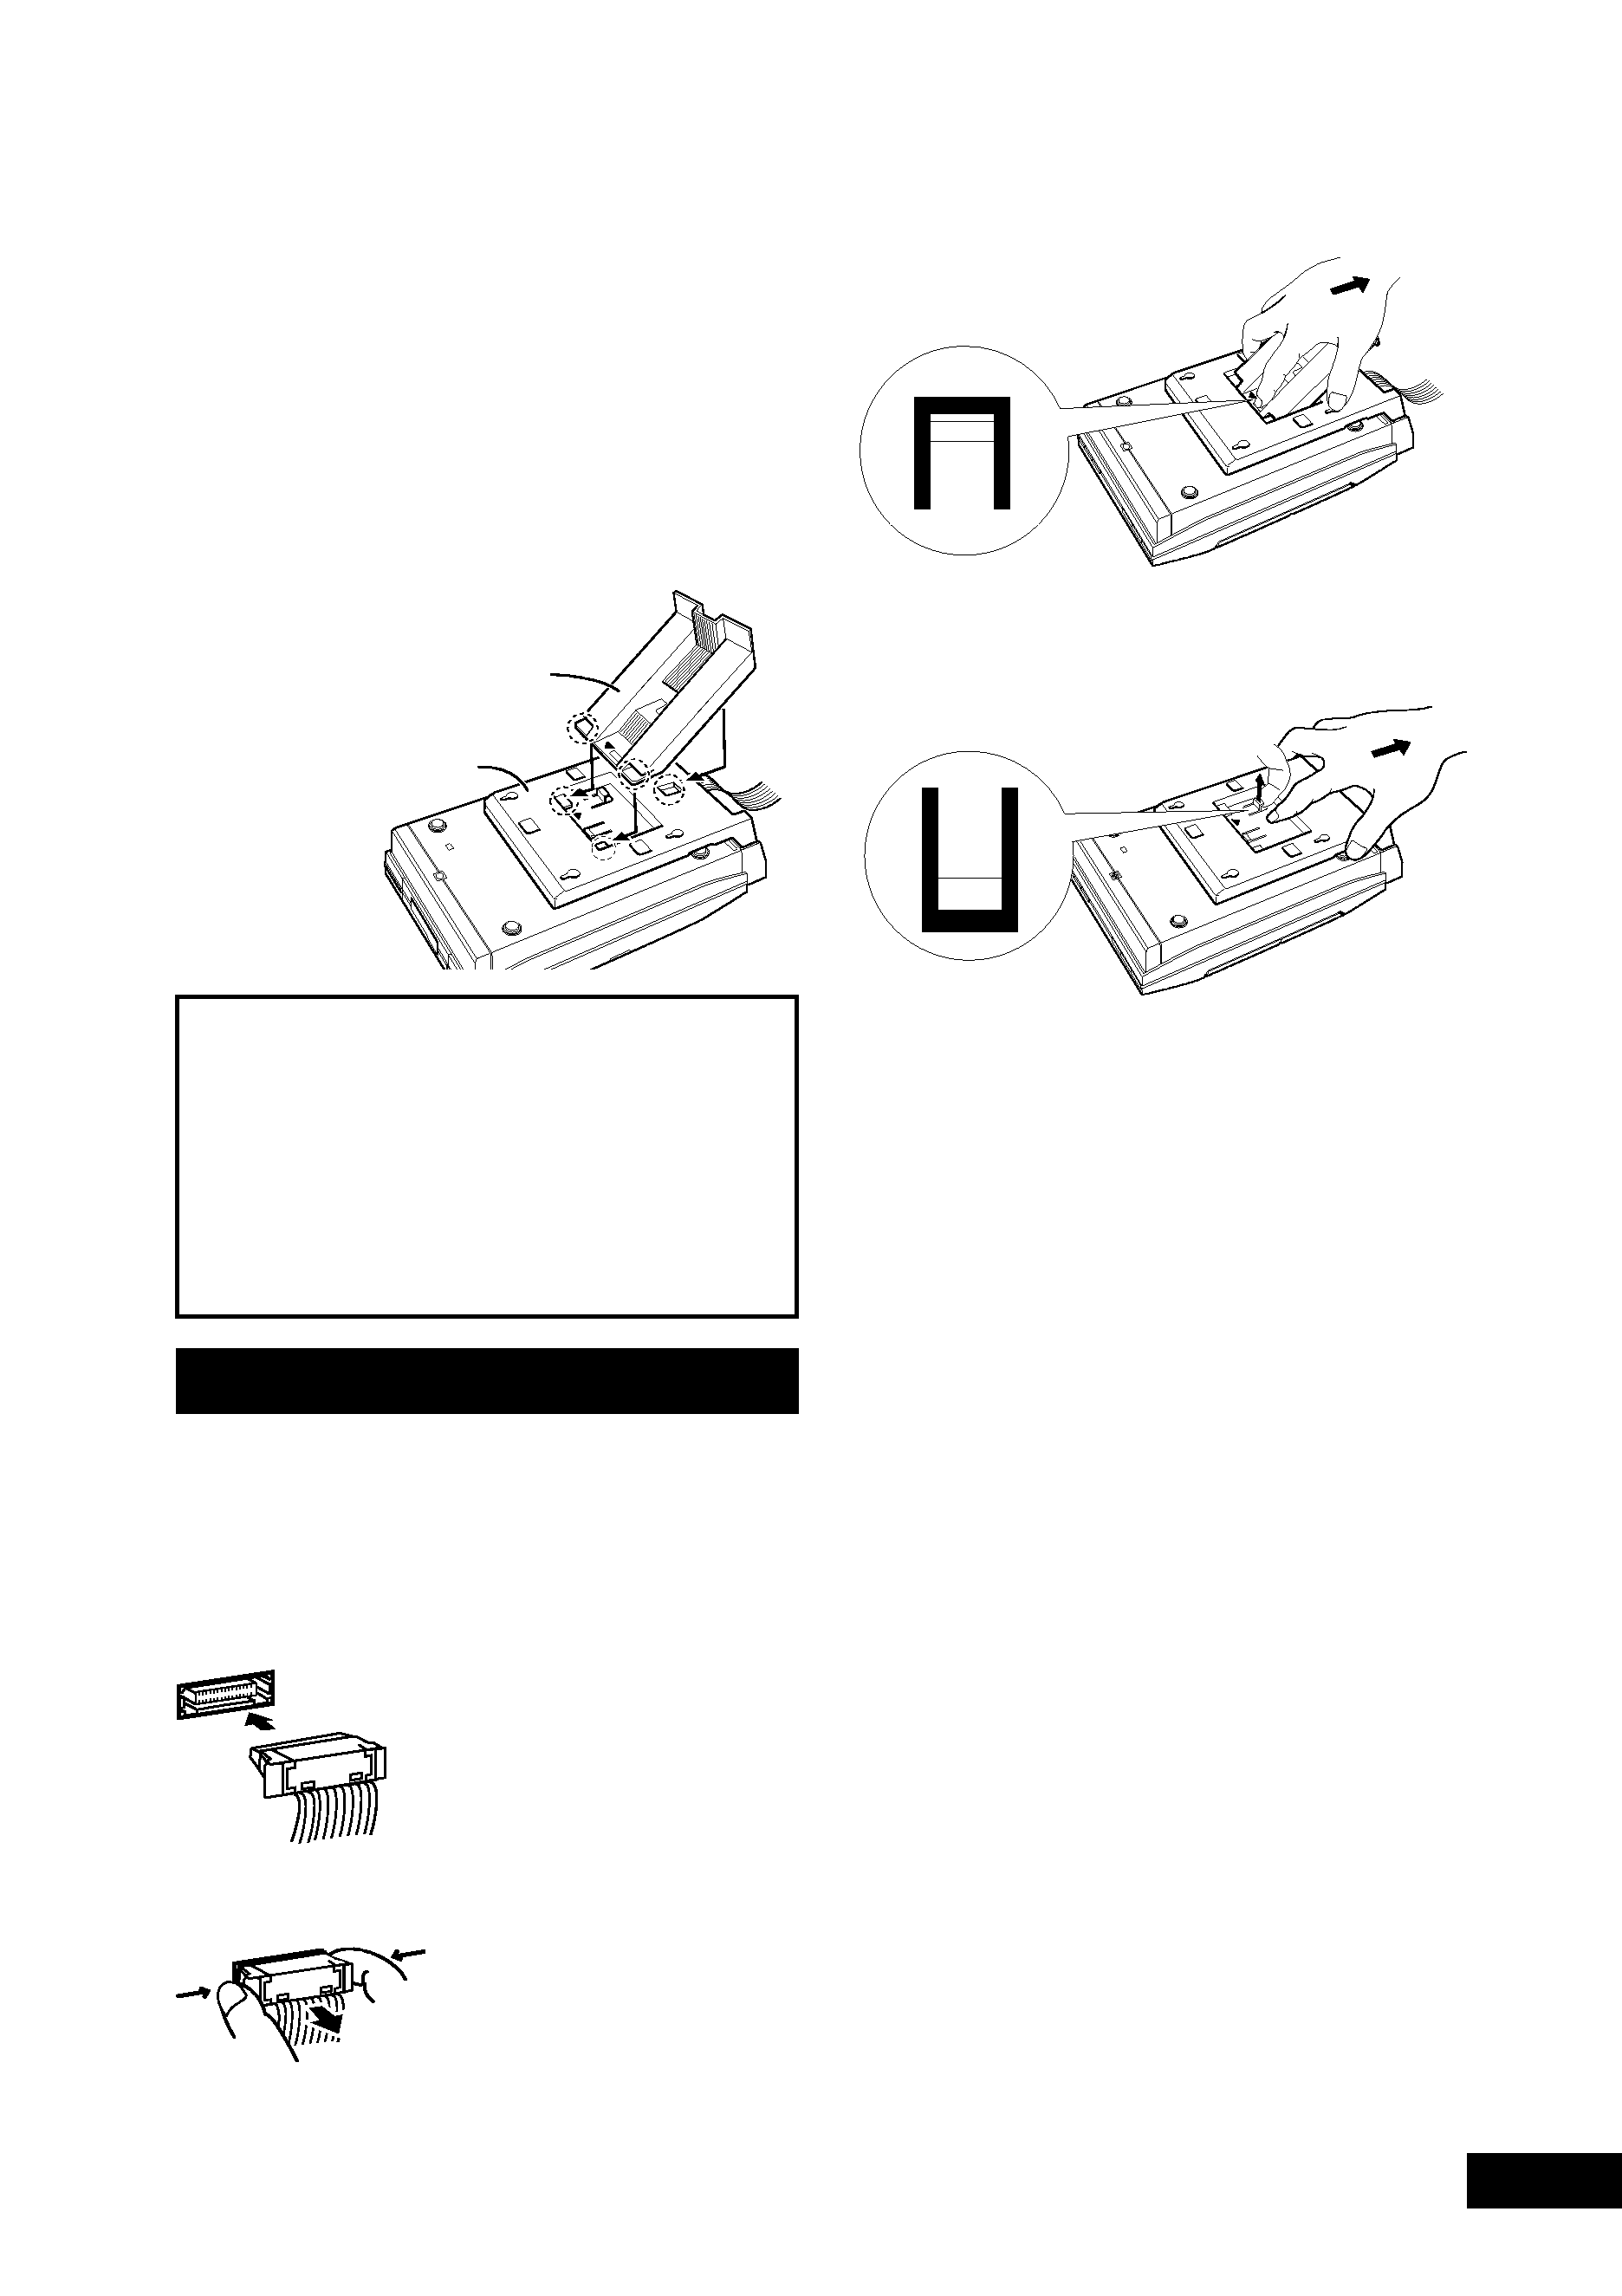
2 Connect the other end of the
ribbon cable to the CD-tuner unit
or to your optional CD-Recorder.
It's much easier to connect the ribbon cable if
Stand A is not attached. However, remember
that the cables must be threaded through the
stand for it to be attached. The following
illustration is for the CD-tuner set up only. For
the optional CD-Recorder, the ribbon cable
will be attached in the same manner, and the
ribbon cable from your CD-Recorder will link
the connection to the main unit.
If you have the optional cassette deck or CD-
Recorder, connect these before attaching
Stand A. (The ribbon cable can pass under the
Stand A to keep it tidy.)
Stand A
CD-tuner
XC-F10
Stand A
5
PULL
PUSH
En
Specifications
Stereo Cassette Deck: CT-F10
System ........................... 4-track, 2-channel stereo
Heads ......................... Recording/playback head x 1
Erase head x 1
Motor ...................................... DC Servo motor x 1
Frequency Response (20dB recording)
Type I (Normal) tape ................. 20 Hz16,000 Hz
± 6 dB
Type II (High/CrO2) tape .......... 20 Hz16,000 Hz
± 6 dB
Signal-to-Noise Ratio ................................... 56 dB
(EIAJ, peak recording level, audio compensation)
Noise Reduction Effect
Dolby B-type NR ON .... More than 10 dB (at 5 kHz)
Wow and Flutter.... 0.07% (WRMS),
± 0.14% (DIN)
Dimensions (with out Stands)
............................. 170 (W) x 268 (H) x 66 (D) mm
Weight ......................................................... 1.5 kg
Accessories
Stand A ................................................................ 1
Stand B ................................................................ 1
Operating instructions ......................................... 1
Warranty card ....................................................... 1
Note: Specifications and design subject to possible
modification without notice, due to improvements.
· To remove Stand B, push the center tab, as
indicated, and slide off.
· To remove Stand A, pull the tab, as indicated,
and slide off.
3 If you plan to use the cassette
deck on a table-top or shelf,
attach Stand B.
Line up the tab on Stand B with the center
hole on Stand A and slot it into place. Stand B
will slide under the two tabs on the back of
Stand A.
If you are going to wall-mount the unit, see
Wall-mounting your system of the main
Operating Instructions.
To insert, hold the
connector and push firmly
into the socket until you
hear it click home.
To remove, hold the
connector securely on
either side with thumb and
forefinger and pull out
from the socket.
Ribbon cables
IMPORTANT: Never connect or disconnect the
system ribbon cables while the power plug is
connected to the wall outlet. Doing so may
damage the unit.
Published by Pioneer Corporation.
Copyright © 2000 Pioneer Corporation.
All rights reserved.
Important
Pioneer bears no responsibility for accidents
resulting from faulty assembly or installa-
tion, insufficient mounting strength of walls
or other building fixtures, misuse or natural
disasters.
Stand B
Stand A