
39
Table of Content
Table of Content
39
Arrangement of Controls
41
Anti-theft Device
42
Code number entry
42
Remove portable panel
43
Inserting portable panel
43
General Operation
44
Switch on / off
44
Adjust volume
44
Mute function
44
Activate tone menu
44
Adjust bass
45
Adjust treble
45
Adjust balance
45
Fader
45
Loudness on /off
46
Linear adjustment
46
Adjust mono / stereo
46
Radio Operation
47
Select operating mode
47
Select waveband
47
Switch on radio menu mode
47
Setting procedures for transmitter selection
48
NBC (Next Best Chain) function
48
FM transmitter search
48
AM, LW transmitter search mode
49
Scan search
49
Direct frequency entry
49
Programme type display/search (PTY)
50
FM 1/FM 2 transmitter - request/store
50
AM, LW transmitter - request/store
51
AM, LW autostore
51
Manual tuning
51
Regionalisation
52
Traffic Program (TP)
53
EON transmitter - display / select
53
EON transmitter - switch on / off
53
Traffic program transmitter - display / select
53
Anouncement stand-by - switch on/off
54
Mute function - switch on/off
54
Telephone mute function
55
Time request
55
Tape Operation
56
Cassettes - insert / eject
56
Track switching
56
Radio operation during forward / rewind
56
Fast forward / rewind
57
Music search - forwards / backwards
57
Dolby NR
57
Skip blank
58
Scan search
58
Cleaning the cassette mechanism
58
English.bk : Inhalt.fm5 Seite 39 Dienstag, Januar 9, 2001 8:02 AM

40
Table of Content
CD Operation
59
Compact Disc (CD) instructions
59
CDs - insert / eject
59
Track skip - forwards / backwards
60
Scan search
60
Fast forward / rewind
60
Relative time, number of tracks and total playing time 61
Random Play
61
Direct track selection
61
Temperature protection circuit
62
CD/MD Changer Operation
63
Operational readiness of CD/MD changer
63
CD magazine - load / unload
63
Playing CD/MDs
64
User Menu
65
User menu - request / quit
65
USER memory
65
Illumination colour setting (COLOR) (only 4327, 4337) 65
GAL setting
66
Telephone mute characteristics (PHONE)
66
DRIVER setting
67
AUX input (AUX IN)
67
Viewing angle setting (ANGLE)
67
Service Menu
68
Connection Instructions
69
Removal / Installation Guide
70
General Instructions
72
Frequency search
72
Chain search
72
RDS SYSTEM
72
EON (Enhanced Other Network)
72
PTY (Program Type)
73
Technical Data
74
NOTICE
75
DOLBY and the double D-ymbol
are trademarks of Dolby Laboratories
Licensing Corporation.
Dolby noise reduction system manufactured under license from Dolby Labo-
ratories Licensing Corporation.
English.bk : Inhalt.fm5 Seite 40 Dienstag, Januar 9, 2001 8:02 AM
41
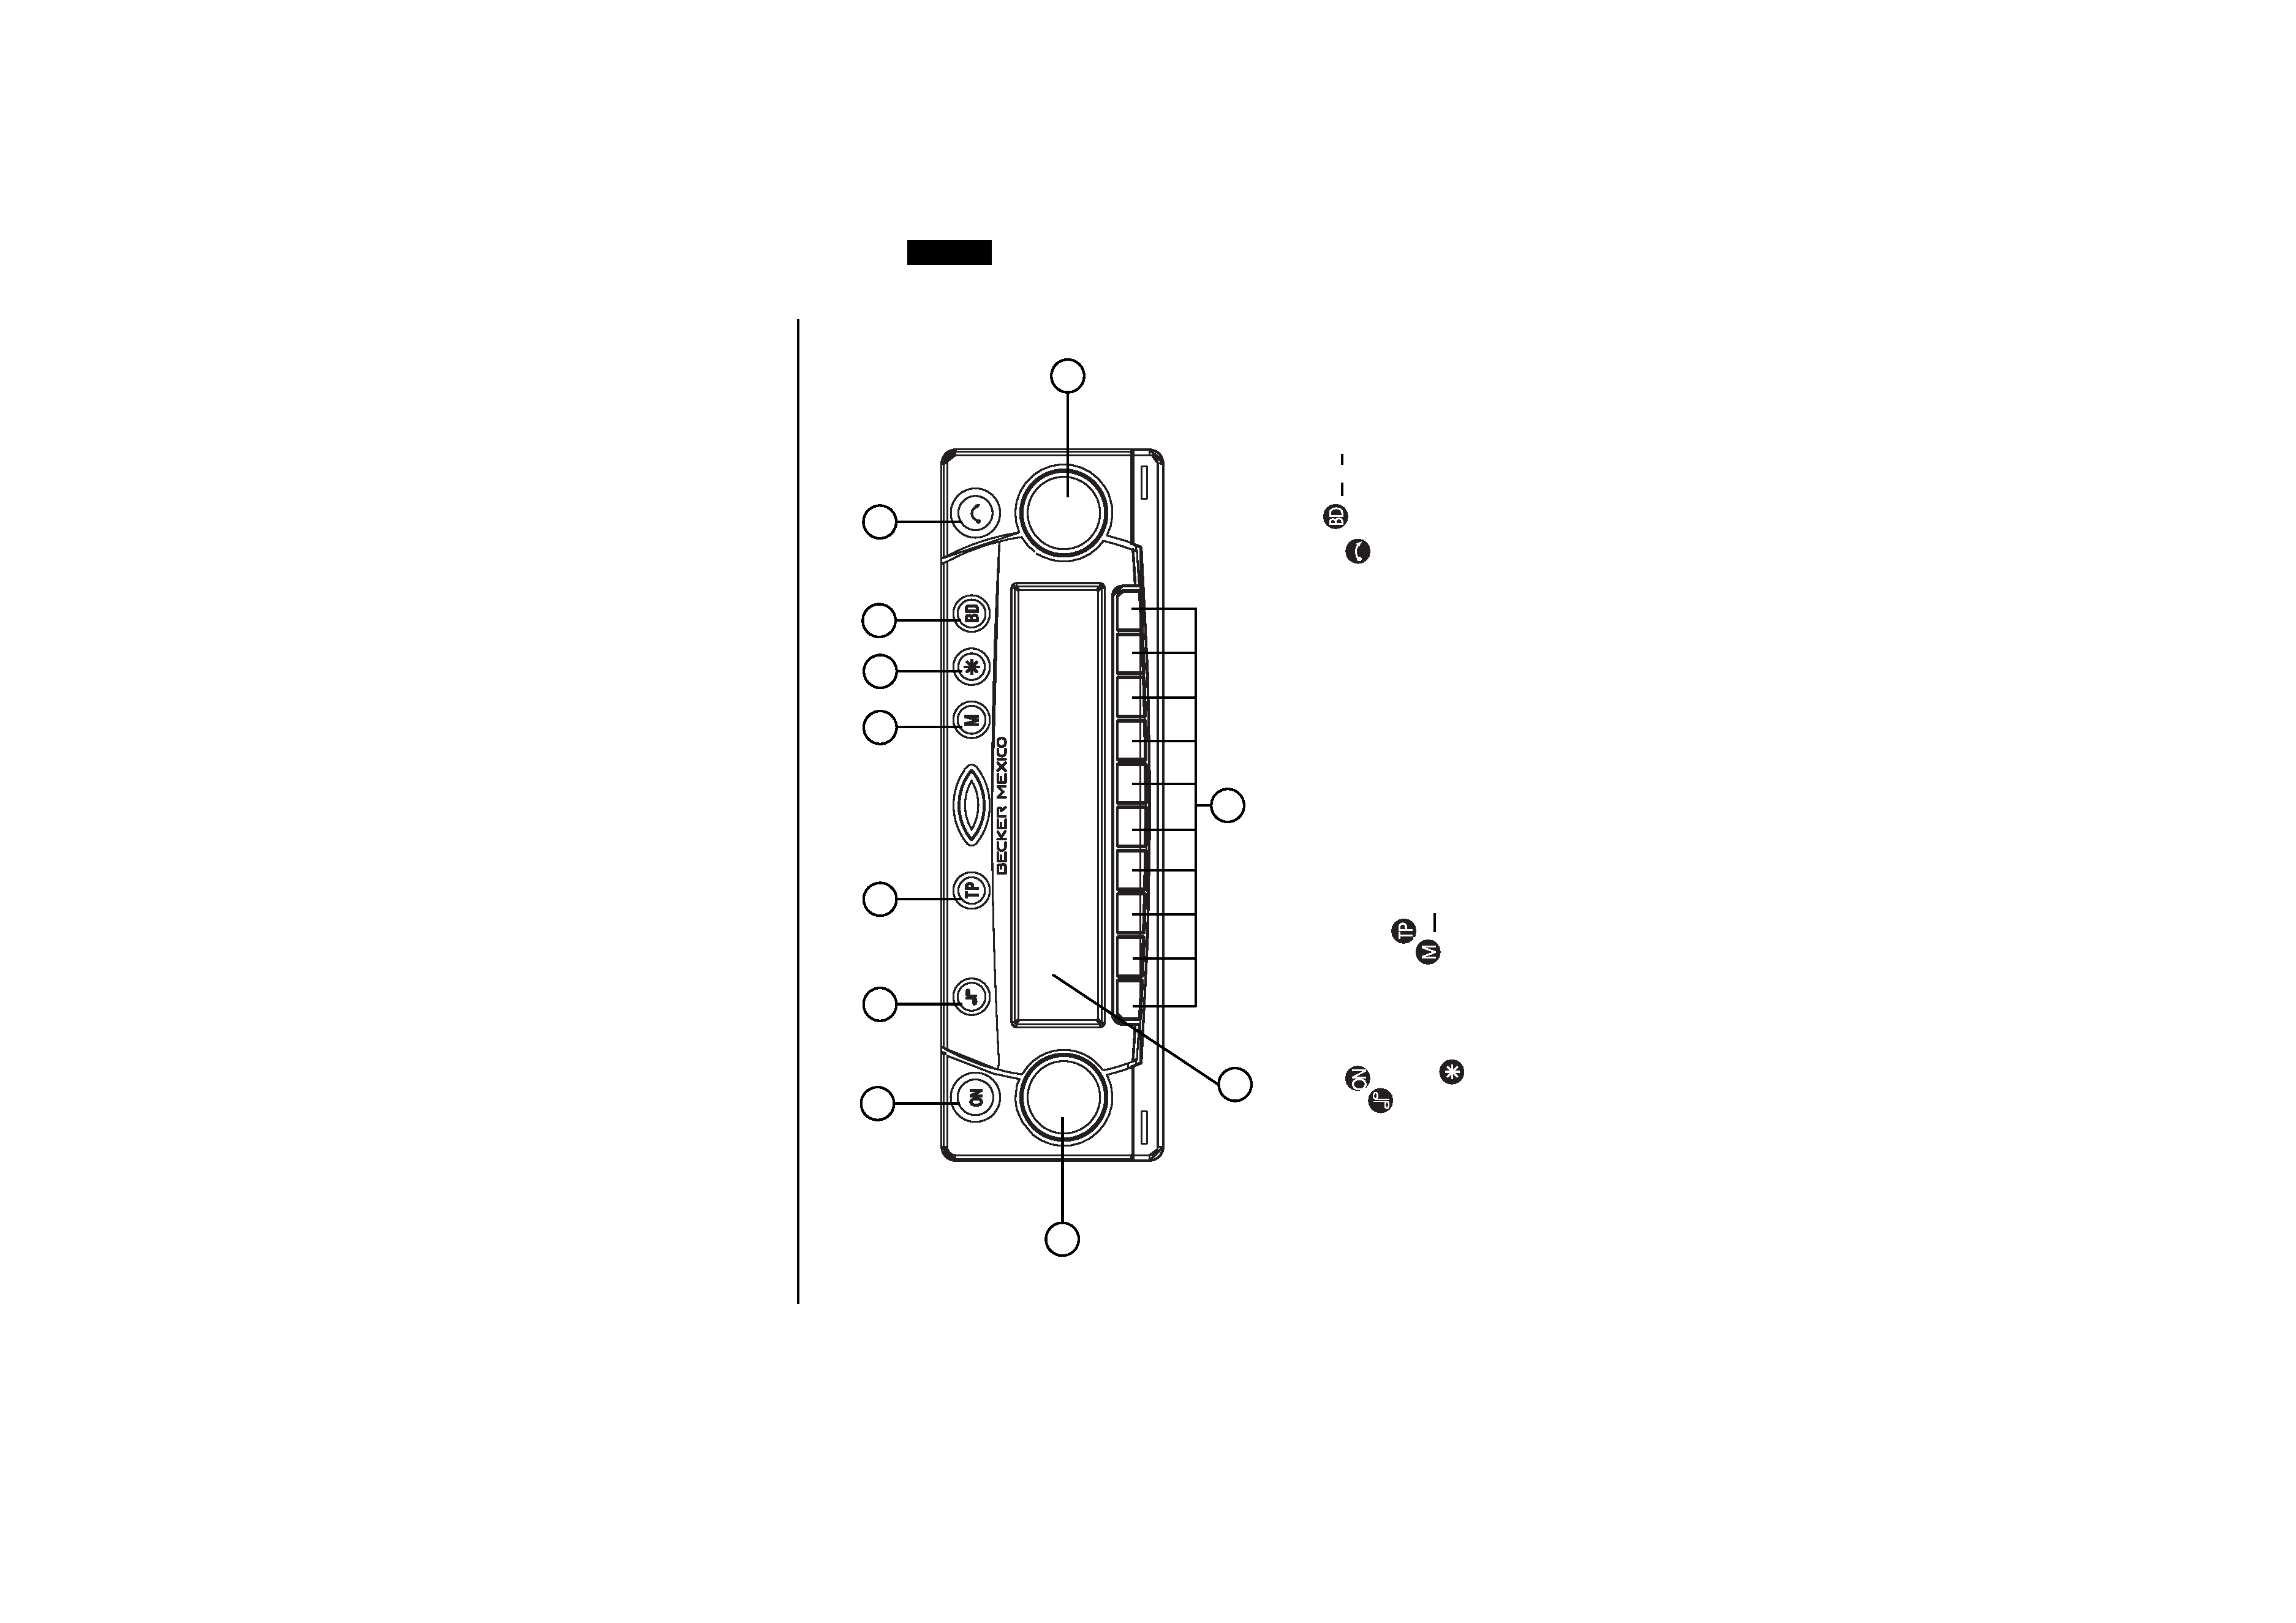
Arrangement of Controls
2
3
4
5
6
7
8
1
9
10
11
1 Volume control
2 On / off switch (
)
3 Tone button (
)
4 Road traffic announcement button (
)
5 Operating mode selector button (
M
ode)
6 Function button (
)
7 Waveband selector button (
B
and)
8 Tape/CD eject button (
)
9 Right rotary control
10 Multifunction buttons
11 Display
English.bk : tasten.fm5 Seite 41 Dienstag, Januar 9, 2001 8:02 AM
42
Anti-theft Device
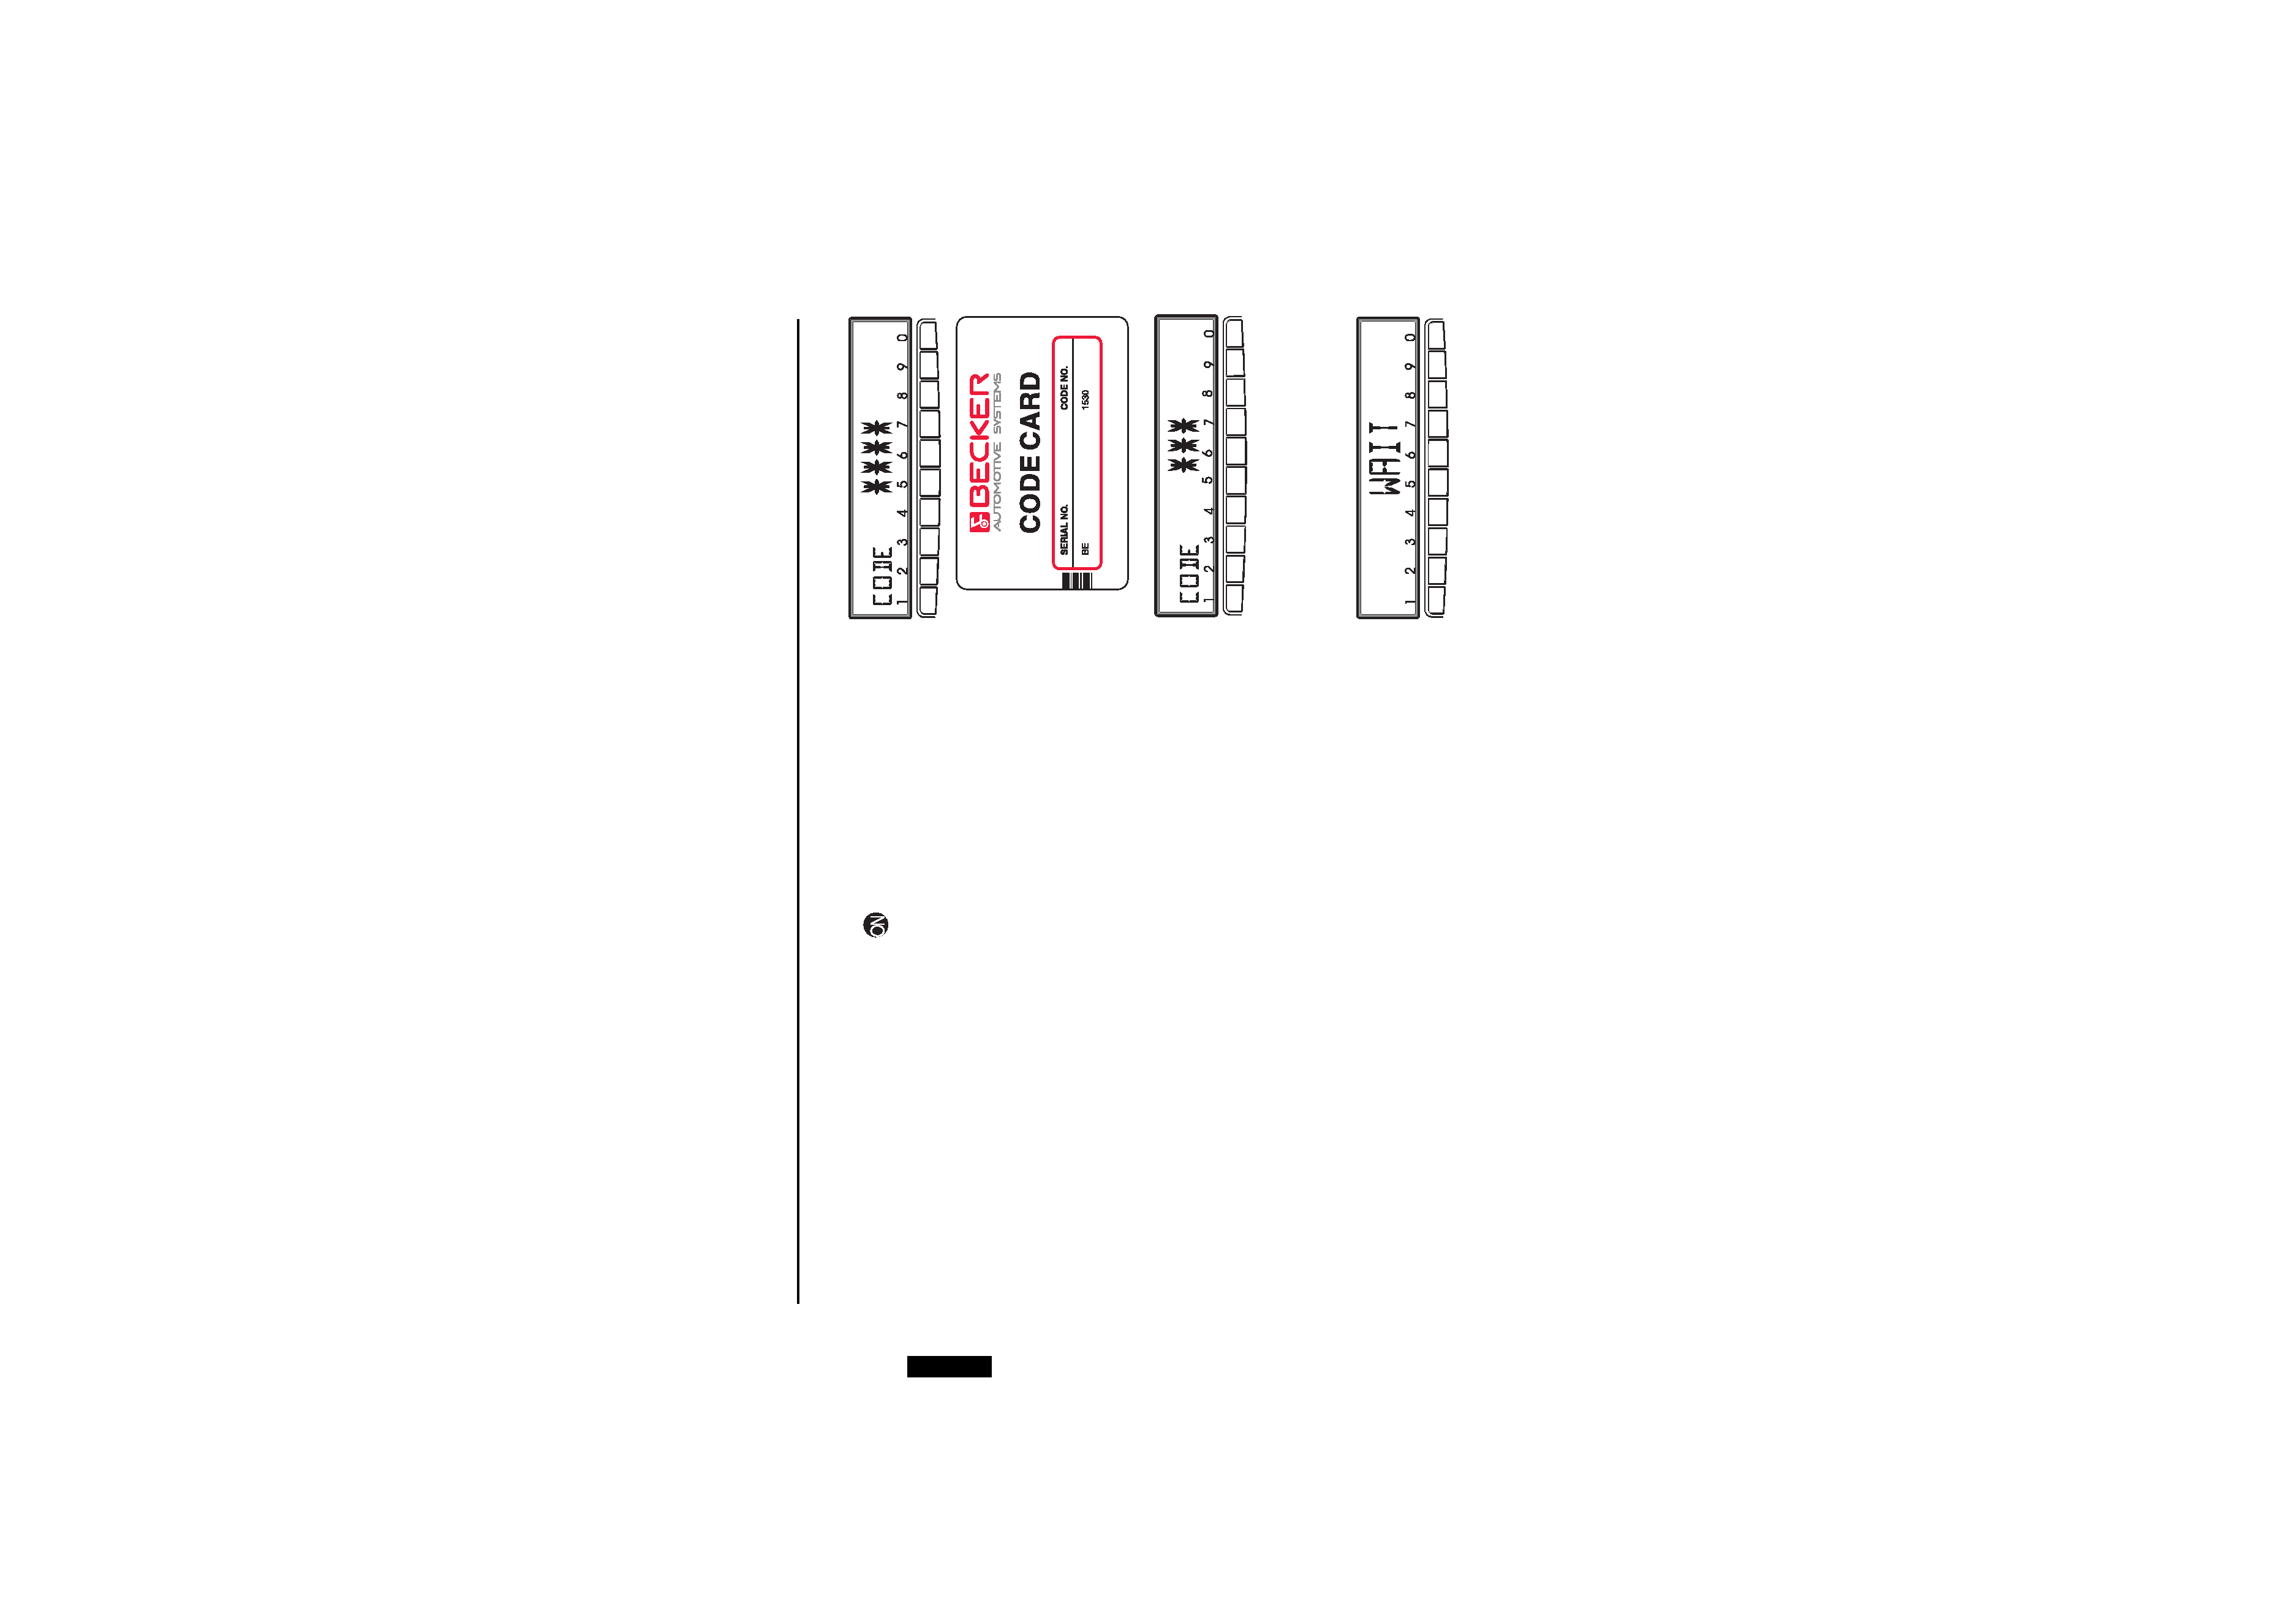
Code number entry
If the car radio is disconnected from the power supply, it is theft-protected upon
reconnection. After switching on at the
button, the prompt CODE, follo-
wed by 4 stars is displayed.
The four-digit code must then be entered using the multifunction buttons "1-0".
Example : Code number 1530 (the code number can be found on the enclosed
CODE CARD).
Enter code number using the multifunction buttons.
The first star is extinguished after entry of the first digit. The second star is
extinguished after entry of the second digit, etc. The unit switches on automa-
tically after entry of the 4th digit, if this and all other digits have been correctly
entered.
Note :
It is essential that the CODE CARD be kept in a safe place outside
the vehicle. Thus, illegal use is not possible. The accompanying
sticker should be attached to the inside of the vehicle windscreen/
window.
If an incorrect code number is entered, the prompt CODE with the four stars is
displayed again. After entering incorrect code three times WAIT is displayed
and the unit is disabled for approx. 60 minutes. Three further incorrect entries
block the unit again for 60 minutes.
Attention : The waiting time applies only to ignition and unit switched on.
!
English.bk : dieb.fm5 Seite 42 Dienstag, Januar 9, 2001 8:02 AM
43
Anti-theft Device
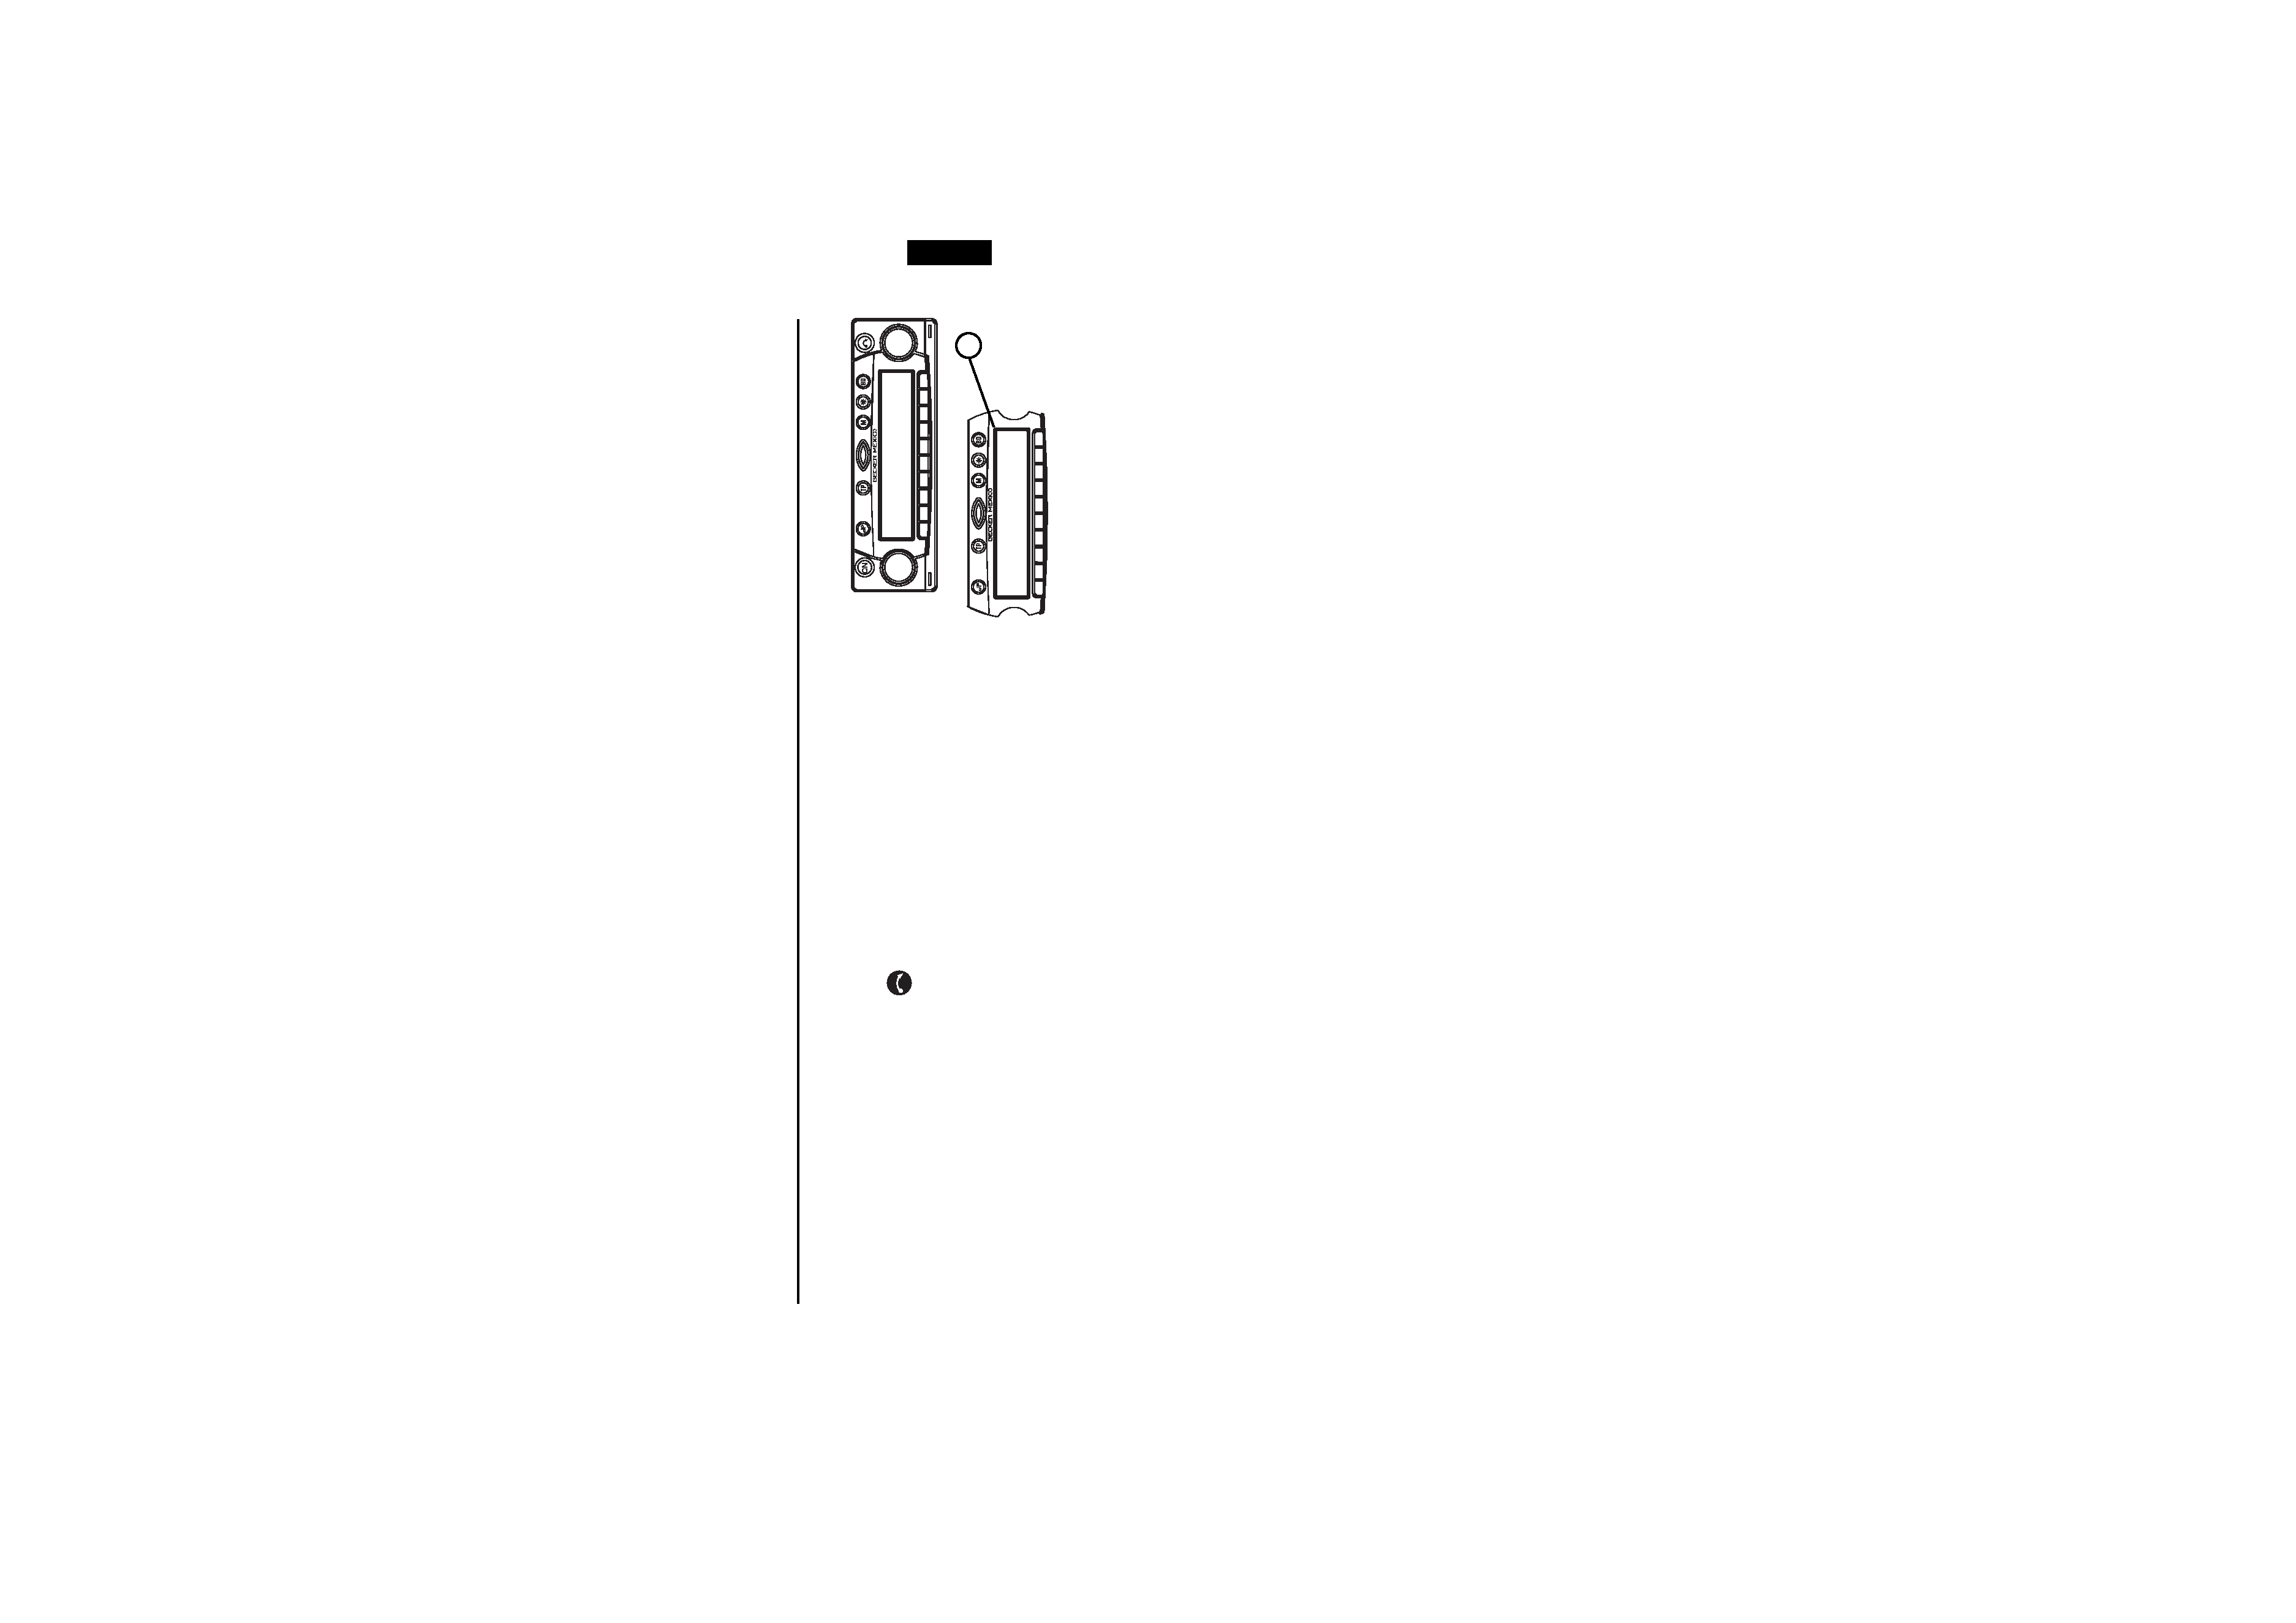
Remove portable panel
As effective anti-theft device, the portable panel (A) can be removed from the
unit.
For this purpose, press and hold
button. The display folds forwards.
The portable component can then be pulled out.
The volume is limited to a maximum value after the display has been folded
down. After 20 seconds an audible signal indicates that the control component
is folded down. The unit is switched to mute. The unit switches off after a furt-
her 10 seconds.
Note :
For safety reasons, it is not permitted to leave the portable panel
open when driving
Attention : Please insert the portable panel in the accompanying protective
cover after removal.
Do not touch the metal contacts on the portable panel or on the
radio.
Inserting portable panel
Insert the portable panel so that it engages first in the lower left catch and then
in the lower right. Then press the portable panel into the upper catches.
Or position portable panel directly over all four catches and press in firmly to
engage.
For proper functioning, ensure that the portable panel is firmly engaged in all
four catches.
If a new portable panel or one from another unit is utilised, the code number
must be entered, as previously described, in order to activate the unit.
!
A
English.bk : dieb.fm5 Seite 43 Dienstag, Januar 9, 2001 8:02 AM