9A08901101
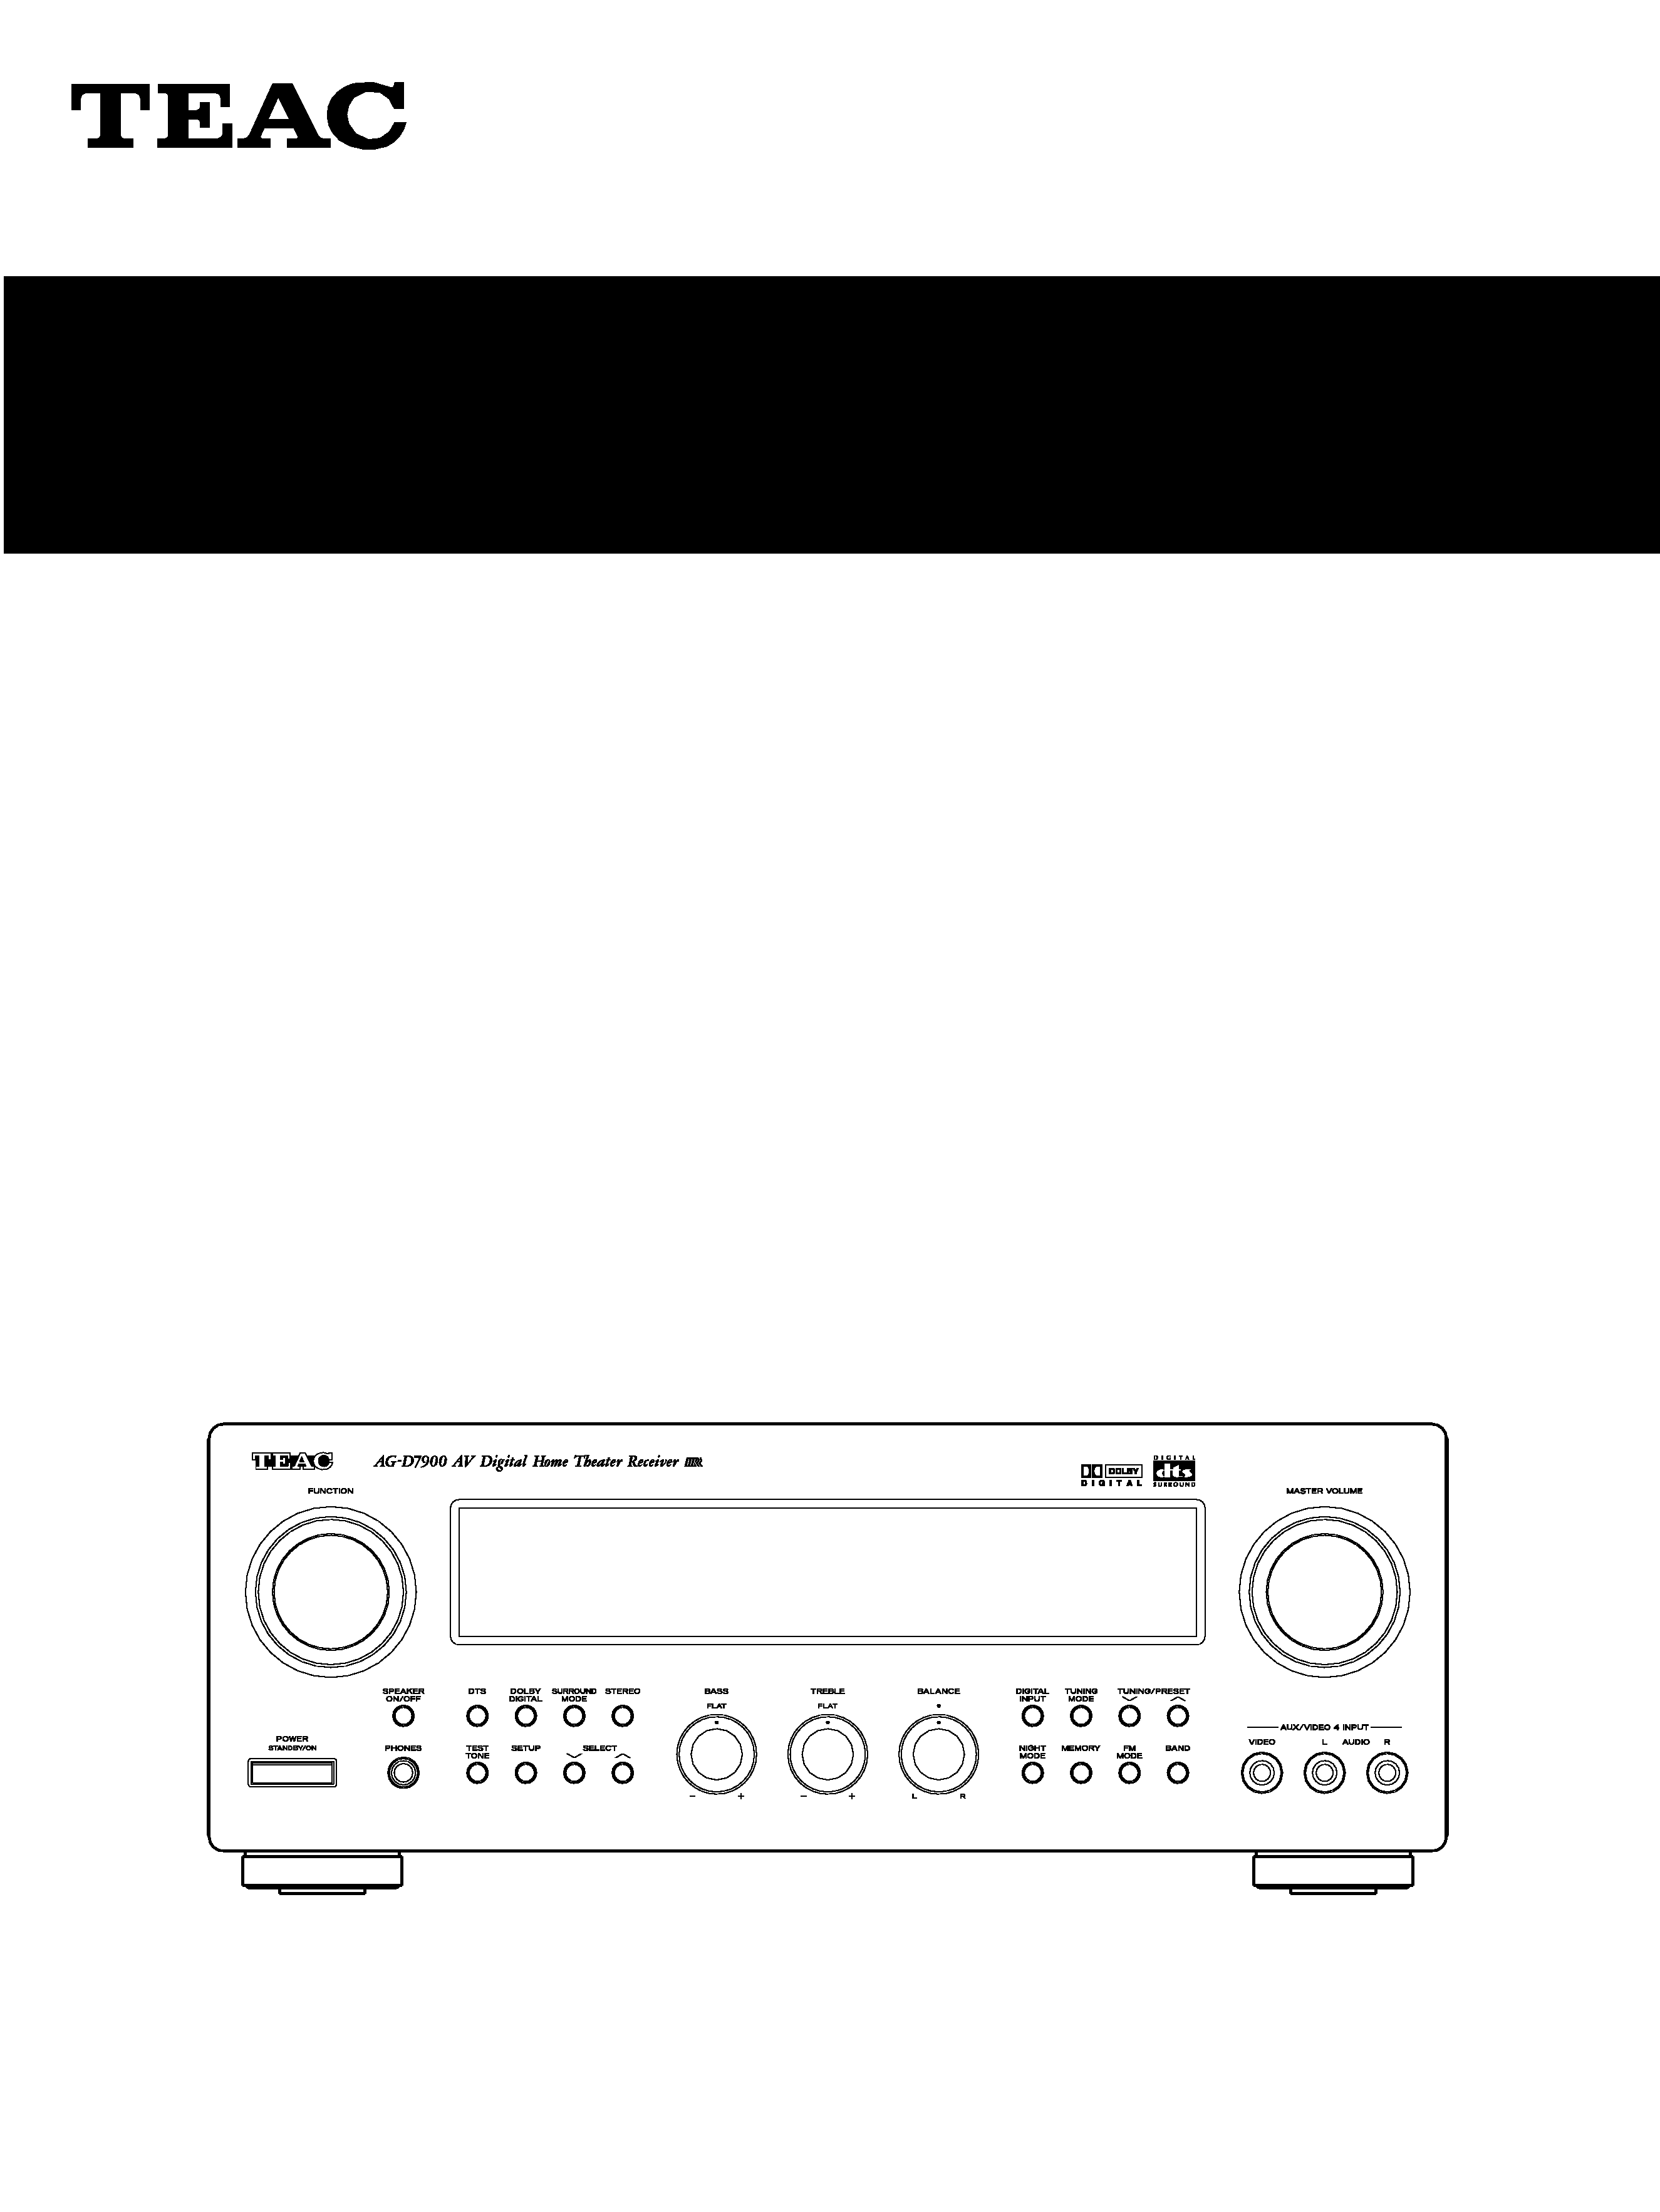
AG-D7900
AV Digital Home Theater Receiver
OWNER'S MANUAL
MANUEL DU PROPRIETAIRE
Thanks for buying a TEAC. Read this manual carefully to get the best performance from this unit.
Nous vous remercions pour l'achat d'un appareil TEAC. Lire ce manuel avec attention pour obtenir les
meilleures performances possibles de cet appareil.

2
CAUTION:
<
Read all of these Instructions.
<
Save these Instructions for later use.
<
Follow all Warnings and Instructions marked on the audio
equipment.
1) Read Instructions -- All the safety and operating instructions
should be read before the product is operated.
2) Retain Instructions -- The safety and operating instructions
should be retained for future reference.
3) Heed Warnings -- All warnings on the product and in the
operating instructions should be adhered to.
4) Follow Instructions -- All operating and use instructions
should be followed.
5) Cleaning -- Unplug this product from the wall outlet before
cleaning. Do not use liquid cleaners or aerosol cleaners. Use a
damp cloth for cleaning.
6) Attachments -- Do not use attachments not recommended by
the product manufacturer as they may cause hazards.
7) Water and Moisture -- Do not use this product near water _ for
example, near a bath tub, wash bowl, kitchen sink, or laundry tub; in
a wet basement; or near a swimming pool; and the like.
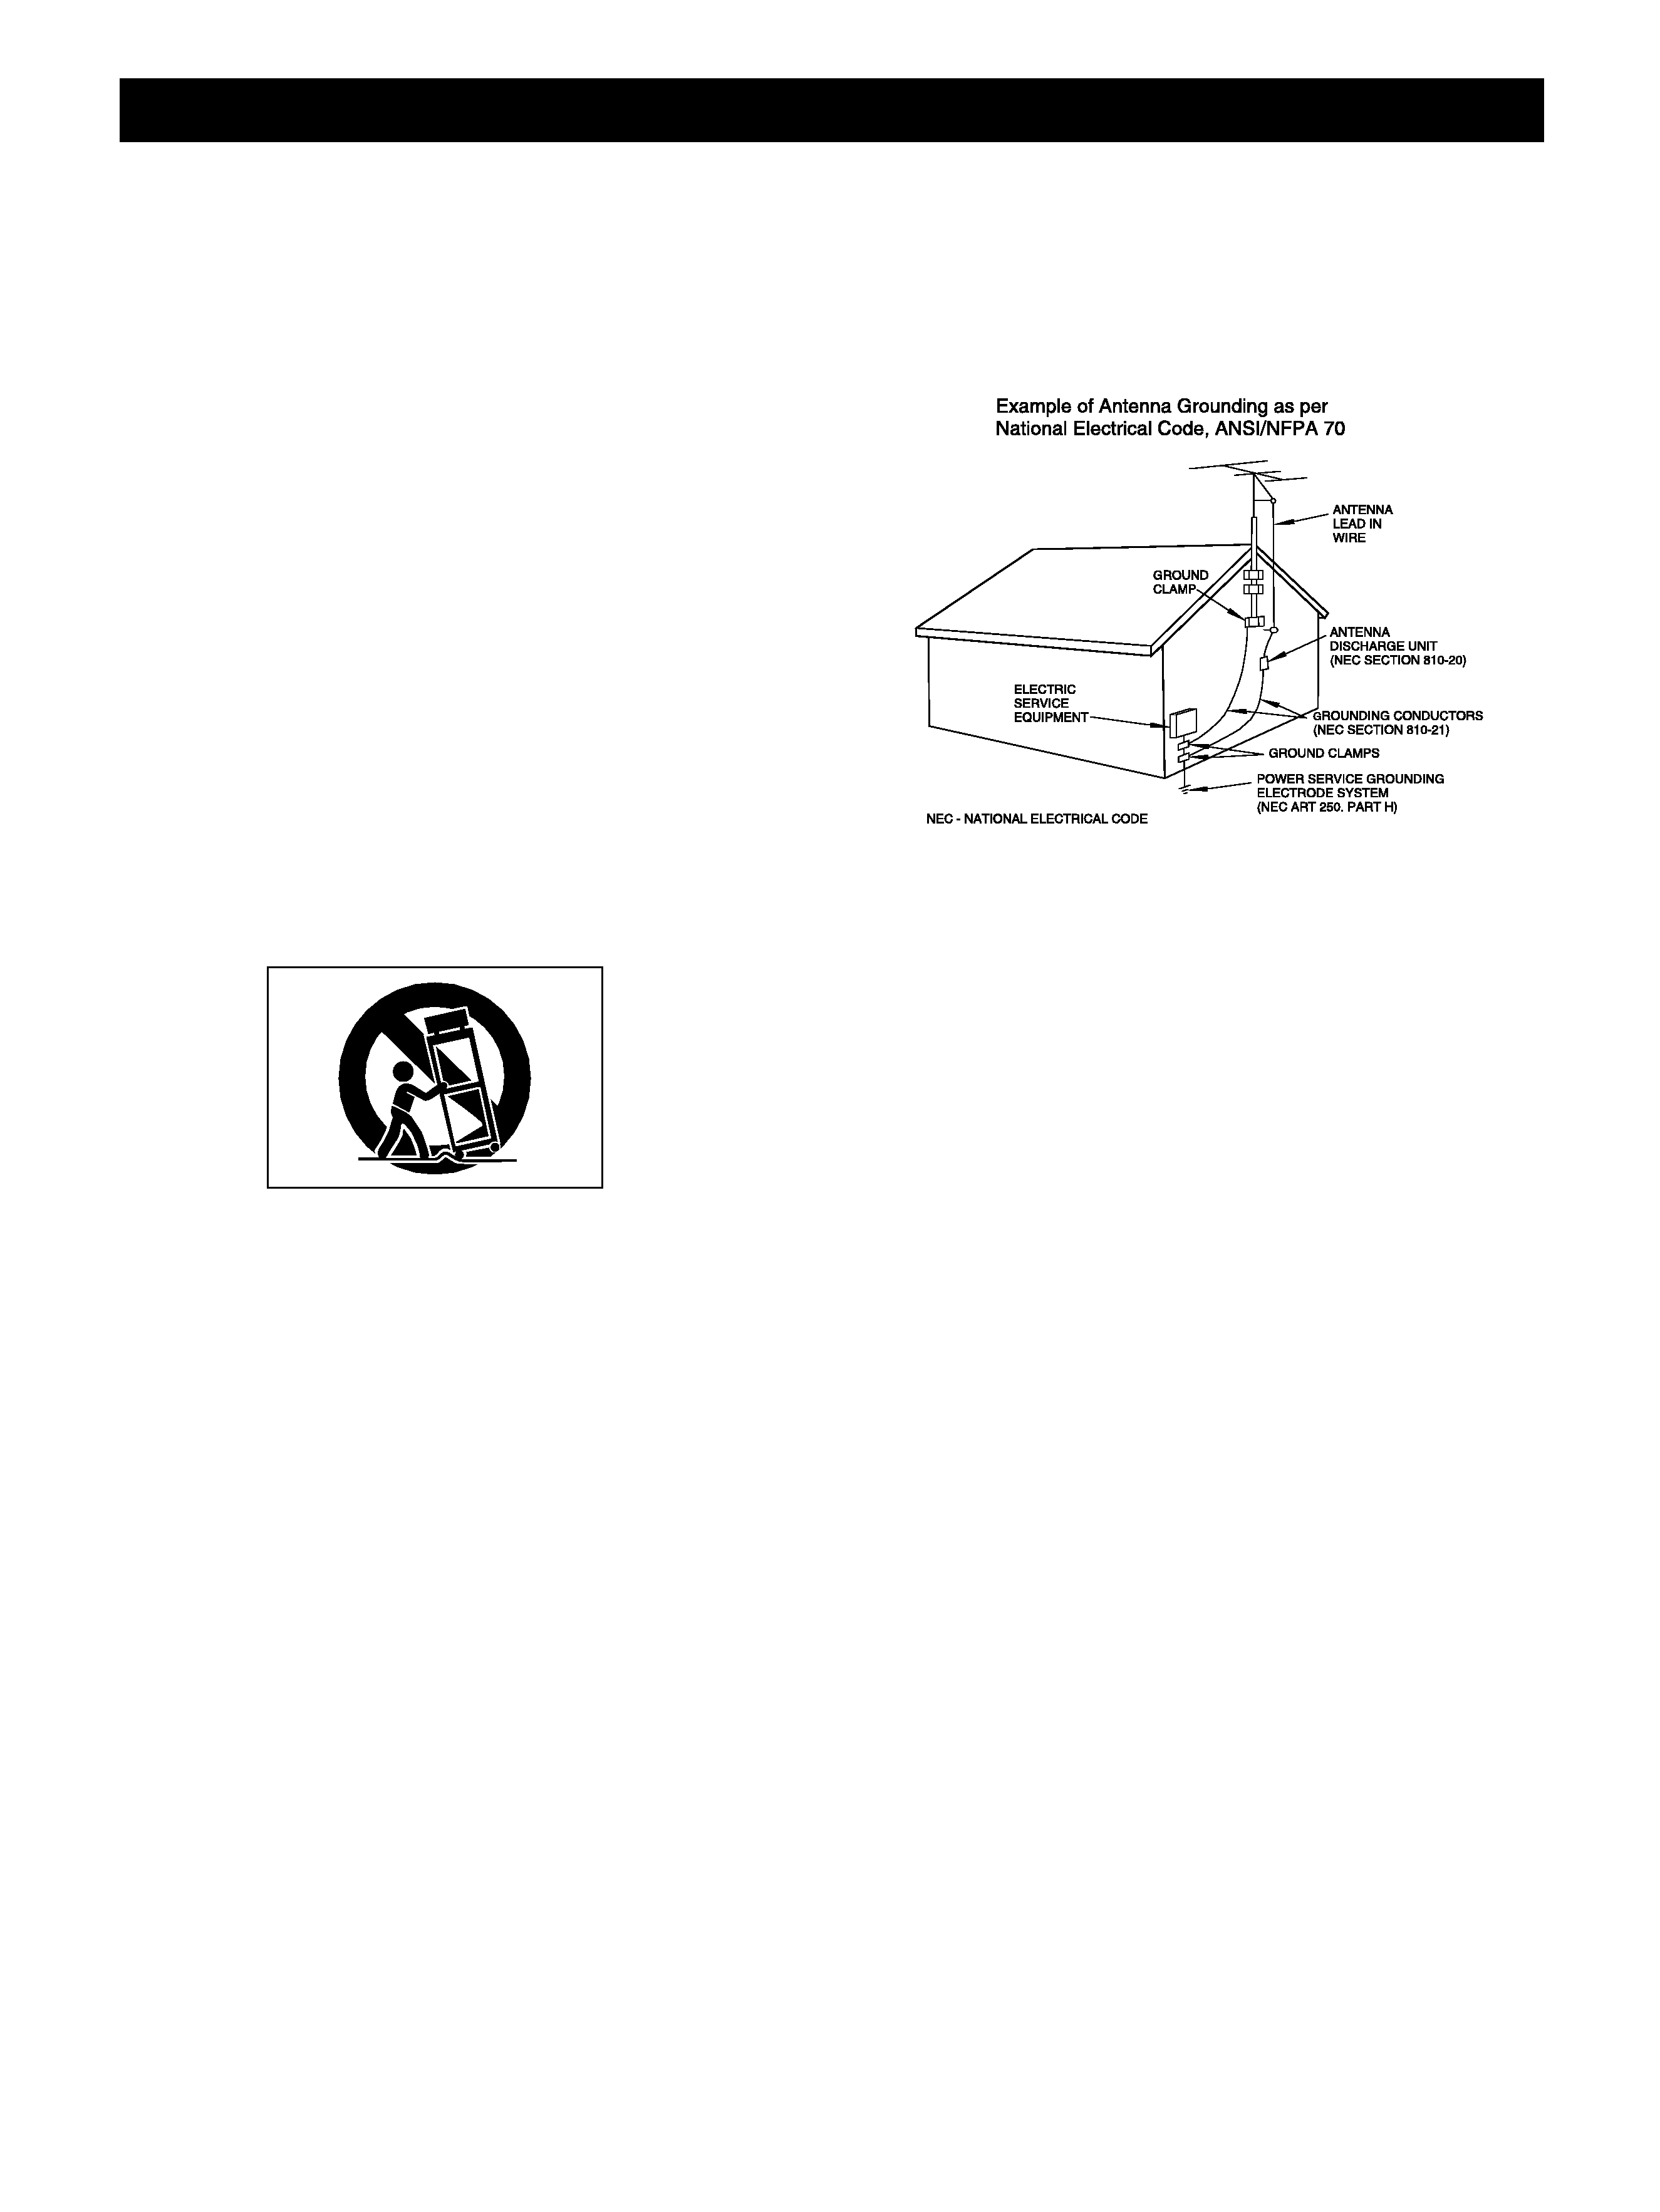
8) Accessories -- Do not place this product on an unstable cart,
stand, tripod, bracket, or table. The product may fall, causing
serious injury to a child or adult, and serious damage to the product.
Use only with a cart, stand, tripod, bracket, or table recommended
by the manufacturer, or sold with the product. Any mounting of the
product should follow the manufacturer's instructions, and should
use a mounting accessory recommended by the manufacturer.
9) A product and cart combination should be moved with care.
Quick stops, excessive force, and uneven surfaces may cause the
product and cart combination to overturn.
"Note to CATV system installer:
This reminder is provided to call the CATV system installer's
attention to Section 820-40 of the NEC which provides guidelines
for proper grounding and, in particular, specifies that the cable
ground shall be connected to the grounding system of the building,
as close to the point of cable entry as practical."
15) Lightning -- For added protection for this product during a
lightning storm, or when it is left unattended and unused for long
periods of time, unplug it from the wall outlet and disconnect the
antenna or cable system. This will prevent damage to the product
due to lightning and power-line surges.
16) Power Lines -- An outside antenna system should not be
located in the vicinity of overhead power lines or other electric light
or power circuits, or where it can fall into such power lines or
circuits. When installing an outside antenna system, extreme care
should be taken to keep from touching such power lines or circuits
as contact with them might be fatal.
17) Overloading -- Do not overload wall outlets, extension cords,
or integral convenience receptacles as this can result in risk of fire
or electric shock.
18) Object and Liquid Entry -- Never push objects of any kind
into this product through openings as they may touch dangerous
voltage points or short-out parts that could result in a fire or electric
shock. Never spill liquid of any kind on the product.
19) Servicing -- Do not attempt to service this product yourself as
opening or removing covers may expose you to dangerous voltage
or other hazards. Refer all servicing to qualified service personnel.
20) Damage Requiring Service -- Unplug this product from the
wall outlet and refer servicing to qualified service personnel under
the following conditions:
a) when the power-supply cord or plug is damaged.
b) if liquid has been spilled, or objects have fallen into the product.
c) if the product has been exposed to rain or water.
d) if the product does not operate normally by following the
operating instructions. Adjust only those controls that are covered
by the operating instructions as an improper adjustment of other
controls may result in damage and will often require extensive work
by a qualified technician to restore the product to its normal
operation.
e) if the product has been dropped or damaged in any way.
f ) when the product exhibits a distinct change in performance _
this indicates a need for service.
21) Replacement Parts -- When replacement parts are required,
be sure the service technician has used replacement parts specified
by the manufacturer or have the same characteristics as the original
part. Unauthorized substitutions may result in fire, electric shock, or
other hazards.
22) Safety Check -- Upon completion of any service or repairs to
this product, ask the service technician to perform safety checks to
determine that the product is in proper operating condition.
23) Wall or Ceiling Mounting -- The product should be mounted
to a wall or ceiling only as recommended by the manufacturer.
24) Heat -- The product should be situated away from heat sources
such as radiators, heat registers, stoves, or other products
(including amplifiers) that produce heat.
10) Ventilation -- Slots and openings in the cabinet are provided
for ventilation and to ensure reliable operation of the product and to
protect it from overheating, and these openings must not be
blocked or covered. The openings should never be blocked by
placing the product on a bed, sofa, rug, or other similar surface.
This product should not be placed in a built-in installation such as a
bookcase or rack unless proper ventilation is provided or the
manufacturer's instructions have been adhered to.
11) Power Sources -- This product should be operated only from
the type of power source indicated on the marking label. If you are
not sure of the type of power supply to your home, consult your
product dealer or local power company. For products intended to
operate from battery power, or other sources, refer to the operating
instructions.
12) Grounding or Polarization -- This product may be equipped
with a polarized alternating-current line plug (a plug having one
blade wider than the other). This plug will fit into the power outlet
only one way. This is a safety feature. If you are unable to insert the
plug fully into the outlet, try reversing the plug. If the plug should
still fail to fit, contact your electrician to replace your obsolete outlet.
Do not defeat the safety purpose of the polarized plug.
13) Power-Cord Protection -- Power-supply cords should be
routed so that they are not likely to be walked on or pinched by
items placed upon or against them, paying particular attention to
cords at plugs, convenience receptacles, and the point where they
exit from the product.
14) Outdoor Antenna Grounding -- If an outside antenna or
cable system is connected to the product, be sure the antenna or
cable system is grounded so as to provide some protection against
voltage surges and built-up static charges. Article 810 of the
National Electrical Code, ANSI/NFPA 70, provides information with
regard to proper grounding of the mast and supporting structure,
grounding of the lead-in wire to an antenna discharge unit, size of
grounding conductors, location of antenna-discharge unit,
connection to grounding electrodes, and requirements for the
grounding electrode.
IMPORTANT SAFETY INSTRUCTION

3
Contents
Sommaire
Before Use.......................................................4
Before Connection .........................................5
Connection ......................................................6
Connecting Antennas ..................................11
Remote Control Unit .....................................13
Basic Operations ..........................................15
Radio Reception ...........................................18
Direct Tuning ..........................................19
Preset Tuning..........................................20
Video Operations ..........................................22
Playing Video Sources ..........................22
Tape Dubbing..........................................23
S.A.V.E System Function.......................23
Available Surround Modes .........................24
Speaker Positioning .....................................27
Speaker Configuration.................................28
Delay Time .....................................................31
Test Tone .......................................................32
Troubleshooting............................................33
Specifications ...............................................34
Avant Utilisation .............................................4
Avant d'effectuer les raccordements.........5
Connexions ......................................................6
Raccordements d'antenne .........................11
Télécommande .............................................13
Fonctionnement de base.............................15
Réception de la radio...................................18
Syntonisation directe ............................19
Syntonisation préréglée........................20
Fonctionnement Vidéo.................................22
Lecture de sources vidéo .....................22
Copie de bande.......................................23
Fonction S.A.V.E System.......................23
Modes Surround disponibles .....................24
Disposition des enceintes acoustiques....27
Configuration de haut-parleurs..................28
Durée de retard ............................................31
Test de tonalité .............................................32
En cas de difficultés.....................................33
Caractéristiques Techniques .....................35
The equipment draws nominal nonoperating
power from the AC outlet with its POWER
switch in the STANDBY position.
For CANADA
AC POWER CORD CONNECTION
CAUTION:
TO PREVENT ELECTRIC SHOCK, MATCH
WIDE BLADE OF PLUG TO WIDE SLOT,
FULLY INSERT.
CORDE DE CONNEXION CA
ATTENTION:
POUR ÉVITER LES CHOCS ÉLECTRIQUES,
INTRODUIRE LA LAME LA PLUS LARGE DE LA
FICHE DANS LA BORNE CORRESPONDANTE
DE LA PRISE ET POUSSER JUSQU'AU
FOND.
Pour le CANADA
WARNING: TO PREVENT FIRE OR SHOCK HAZARD, DO NOT EXPOSE THIS APPLIANCE TO RAIN OR MOISTURE.
CAUTION: TO REDUCE THE RISK OF ELECTRIC SHOCK, DO NOT REMOVE COVER (OR BACK). NO USER-
SERVICEABLE PARTS INSIDE. REFER SERVICING TO QUALIFIED SERVICE PERSONNEL.
Y
E
R THE EXCLAMATION POINT WITHIN AN EQUILATERAL TRIANGLE IS INTENDED TO ALERT THE USER TO THE PRESENCE OF IMPORTANT
OPERATING AND MAINTENANCE (SERVICING) INSTRUCTIONS IN THE LITERATURE ACCOMPANYING THE APPLIANCE.
THE LIGHTNING FLASH WITH ARROWHEAD SYMBOL, WITHIN AN EQUILATERAL TRIANGLE, IS INTENDED TO ALERT THE USER TO THE
PRESENCE OF UNINSULATED "DANGEROUS VOLTAGE" WITHIN THE PRODUCT'S ENCLOSURE THAT MAY BE OF SUFFICIENT MAGNITUDE TO
CONSTITUTE A RISK OF ELECTRIC SHOCK TO PERSONS.
TO THE USER
This equipment has been tested and
found to comply with the limits for a
Class B digital device, pursuant to Part
15 of the FCC Rules. These limits are
designed
to
provide
reasonable
protection against interference in a
residential area. This device generates
and uses radio frequency energy and if
not installed and used in accordance
with the instructions, it may cause
interference to radio or TV reception.
If this unit does cause interference with
TV or radio reception you can try to
correct the interference by one or more
of the following measures:
a) Reorient or relocate the receiving
antenna.
b) Increase the separation between
the equipment and the receiver.
c) Plug the equipment into a different
outlet so that it is not on the same circuit
as the receiver.
If necessary, consult the dealer or an
experienced radio/TV technician for
additional suggestions.
CAUTION
Changes or modifications to this
equipment not expressly approved by
TEAC CORPORATION for compliance
could void the user's authority to operate
this equipment.
Cet appareil consomme un faible courant
même si cet interrupteur est en position
relâchée.

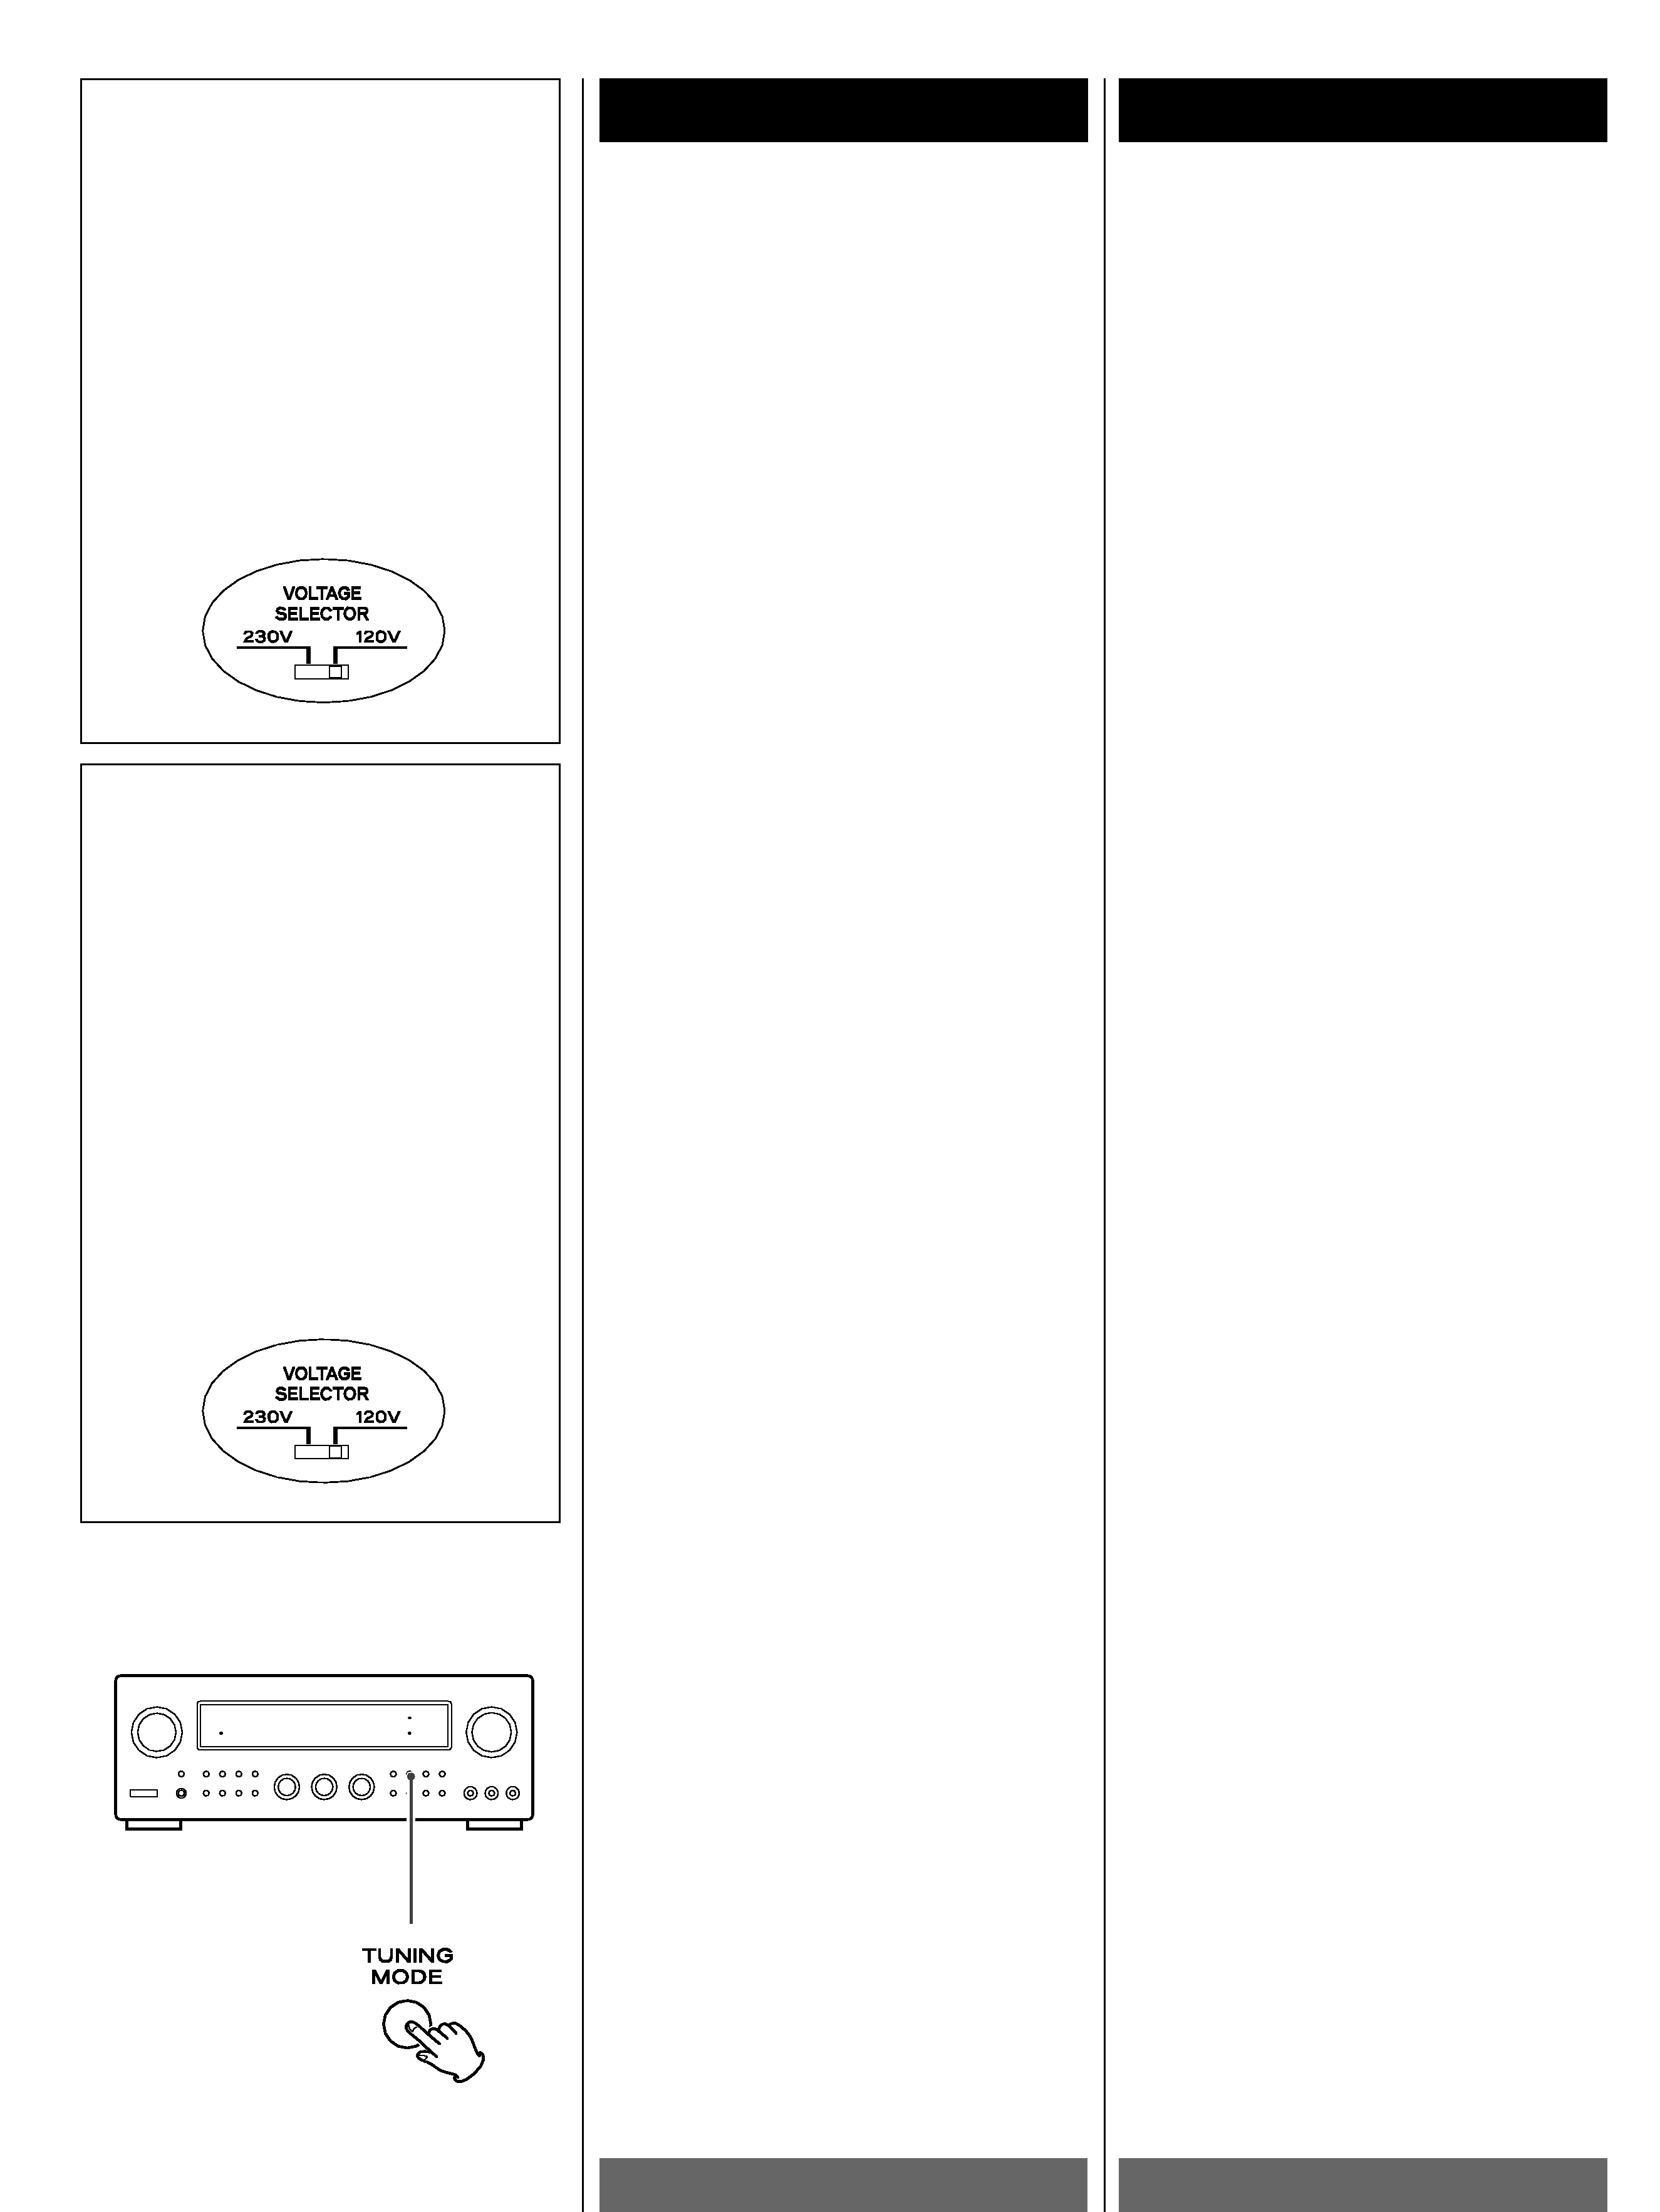
Voltage Conversion
(General export models only)
Be sure to remove the power cord from
the AC outlet before repositioning the
voltage converter switch.
1. Locate the voltage selector on the rear
panel.
2. Using a flat-bladed screwdriver, set to
the appropriate 230V or 120V position
according to your area.
IN NORTH AMERICA USE ONLY ON 120 V
SUPPLY.
Changement de tension
(Modèles
s'exportation
générale
seulement)
Bien débrancher le cordon d'alimentation
de la prise secteur avant de repositionner
le sélecteur de changement de tension.
1. Localiser le sélecteur de tension par le
arrièle du appareil.
2. En utilisant un tournevis à lame plate,
régler sur la position appropriée 230V
ou 120V en fonction de la tension
locale.
DANS
L'AMÉRIQUE
DU
NORD:
UTILISABLE SUR 120 V D'ALIMENTATION
UNIQUEMENT.
Before Use
ENGLISH
FRANÇAIS
Avant Utilisation
4
Read this before operation
< Choose the installation location of your unit
carefully. Avoid placing it in direct sunlight
or close to a source of heat. Also avoid
locations subject to vibrations and
excessive dust, heat, cold or moisture.
< The ventilation holes should not be
covered. Make sure there is enough space
above and beside the amplifier/receiver
(about 4 inches). Do not place a CD player
or other equipment on top of the
amplifier/receiver.
< Do not open the cabinet as this might result
in damage to the circuitry or electrical
shock. If a foreign object should get into
the set, contact your dealer.
< When removing the power plug from the
wall outlet, always pull directly on the plug,
never yank the cord.
< Do not attempt to clean the unit with
chemical solvents as this might damage
the finish. Use a clean, dry cloth.
< Keep this manual in a safe place for future
reference.
Lire ceci avant de faire fonctionner
l'appareil
< Choisir avec soin l'endroit où vous placerez
votre appareil. Eviter de le placer
directement au soleil ou près d'une source
de chaleur. Eviter aussi les endroits sujets à
des vibrations, à de la poussière excessive,
à la chaleur, au froid ou à l'humidité.
< Les trous de ventilation ne doivent pas être
couverts. S'assurer qu'il y a un espace d'au
moins 10 cm au dessus et d'au moins 10 cm
à côté de l'amplificateur/récepteur. Ne pas
placer un lecteur CD ou un autre appareil
sur le dessus de l'amplificateur/récepteur.
< Ne pas ouvrir le coffret car ceci risquerait
de provoquer des dommages aux circuits
ou des chocs électriques. Si un objet
rentre dans l'appareil, contacter votre
revendeur.
< Lors du débranchement du cordon
d'alimentation de la prise murale, toujours
tirer sur la fiche et non sur le cordon.
< Ne pas essayer de nettoyer l'appareil avec
des solvants chimiques car ceci pourrait
endommager le fini de l'appareil. Utiliser
un chiffon propre et sec.
< Garder
soigneusement
ce
manuel
d'instructions
pour
une
référence
ultérieure.
Back-up Memory Function
This is the function which preserves the
preset memory and most-recent memory
functions. In the event of a power failure, or if
the power cord of this unit is disconnected
from the electric outlet, the back-up memory
will preserve the preset memory and most-
recent memory functions for as long as
approximately 3 days.
To Prevent Erasing the Memory
If the power supply is interrupted for 3 days
or longer, the memory settings will be
erased.
When to Use RESET Switch
< When this system is subjected to an
electrical shock.
< When the power is irregular.
In these cases, try the following (in power
on VCR/VIDEO 1 function.):
Press the TUNING MODE button for more
than 3 seconds.
Note:
If the TUNING MODE button is pressed for
more than 3 seconds in VCR/VIDEO 1
function or Standby mode, all the memory
will be erased.
Fonction de mémoire de soutien
C'est la fonction qui retient la mémoire des
préréglages et les fonctions mémoire les plus
récentes. Dans le cas d'une panne de
courant, ou si le cordon d'alimentation de cet
appareil est débranché de la prise de
courant, la mémoire de soutien retiendra la
mémoire des préréglages et les fonctions
mémoire les plus récentes pendant 3 jours
environ.
Pour éviter d'effacer la mémoire
Si l'alimentation est interrompue pendant 3
jours ou plus, les réglages de la mémoire
seront effacés.
UTILISATION DU COMMUTATEUR DE
REMISE À ZÉRO
< En cas de court-circuit sur l'appareil.
< En cas de variation de l'alimentation.
Dans ces cas, essayez ce qui suit (avec la
fonction VCR/VIDEO 1 en service.):
Appuyez sur la touche TUNING MODE
pendant plus de 3 secondes.
Remarque:
Si la touche TUNING MODE dans la
fonction VCR/VIDEO 1 ou mode d'attente,
est pressée pendant plus de 3 secondes,
toutes les mémoires sont effacées.

5
ENGLISH
FRANÇAIS
Before Connection
A
Avant d'effectuer les raccordements
Speaker Connections
Caution:
To avoid damaging the speakers with a
sudden high-level signal, be sure to switch
the power off before connecting the
speakers.
< Check the impedance of your speakers.
Connect speaker with an impedance of 8
ohms or more.
The amplifier's red speaker terminals are
the + (positive) terminals and the black
terminals are the _ (negative) terminals.
< The + side of the speaker cable is
marked to make it distinguishable from the
_ side of the cable. Connect this marked
side to the red + terminal and the
unmarked side to the black terminal.
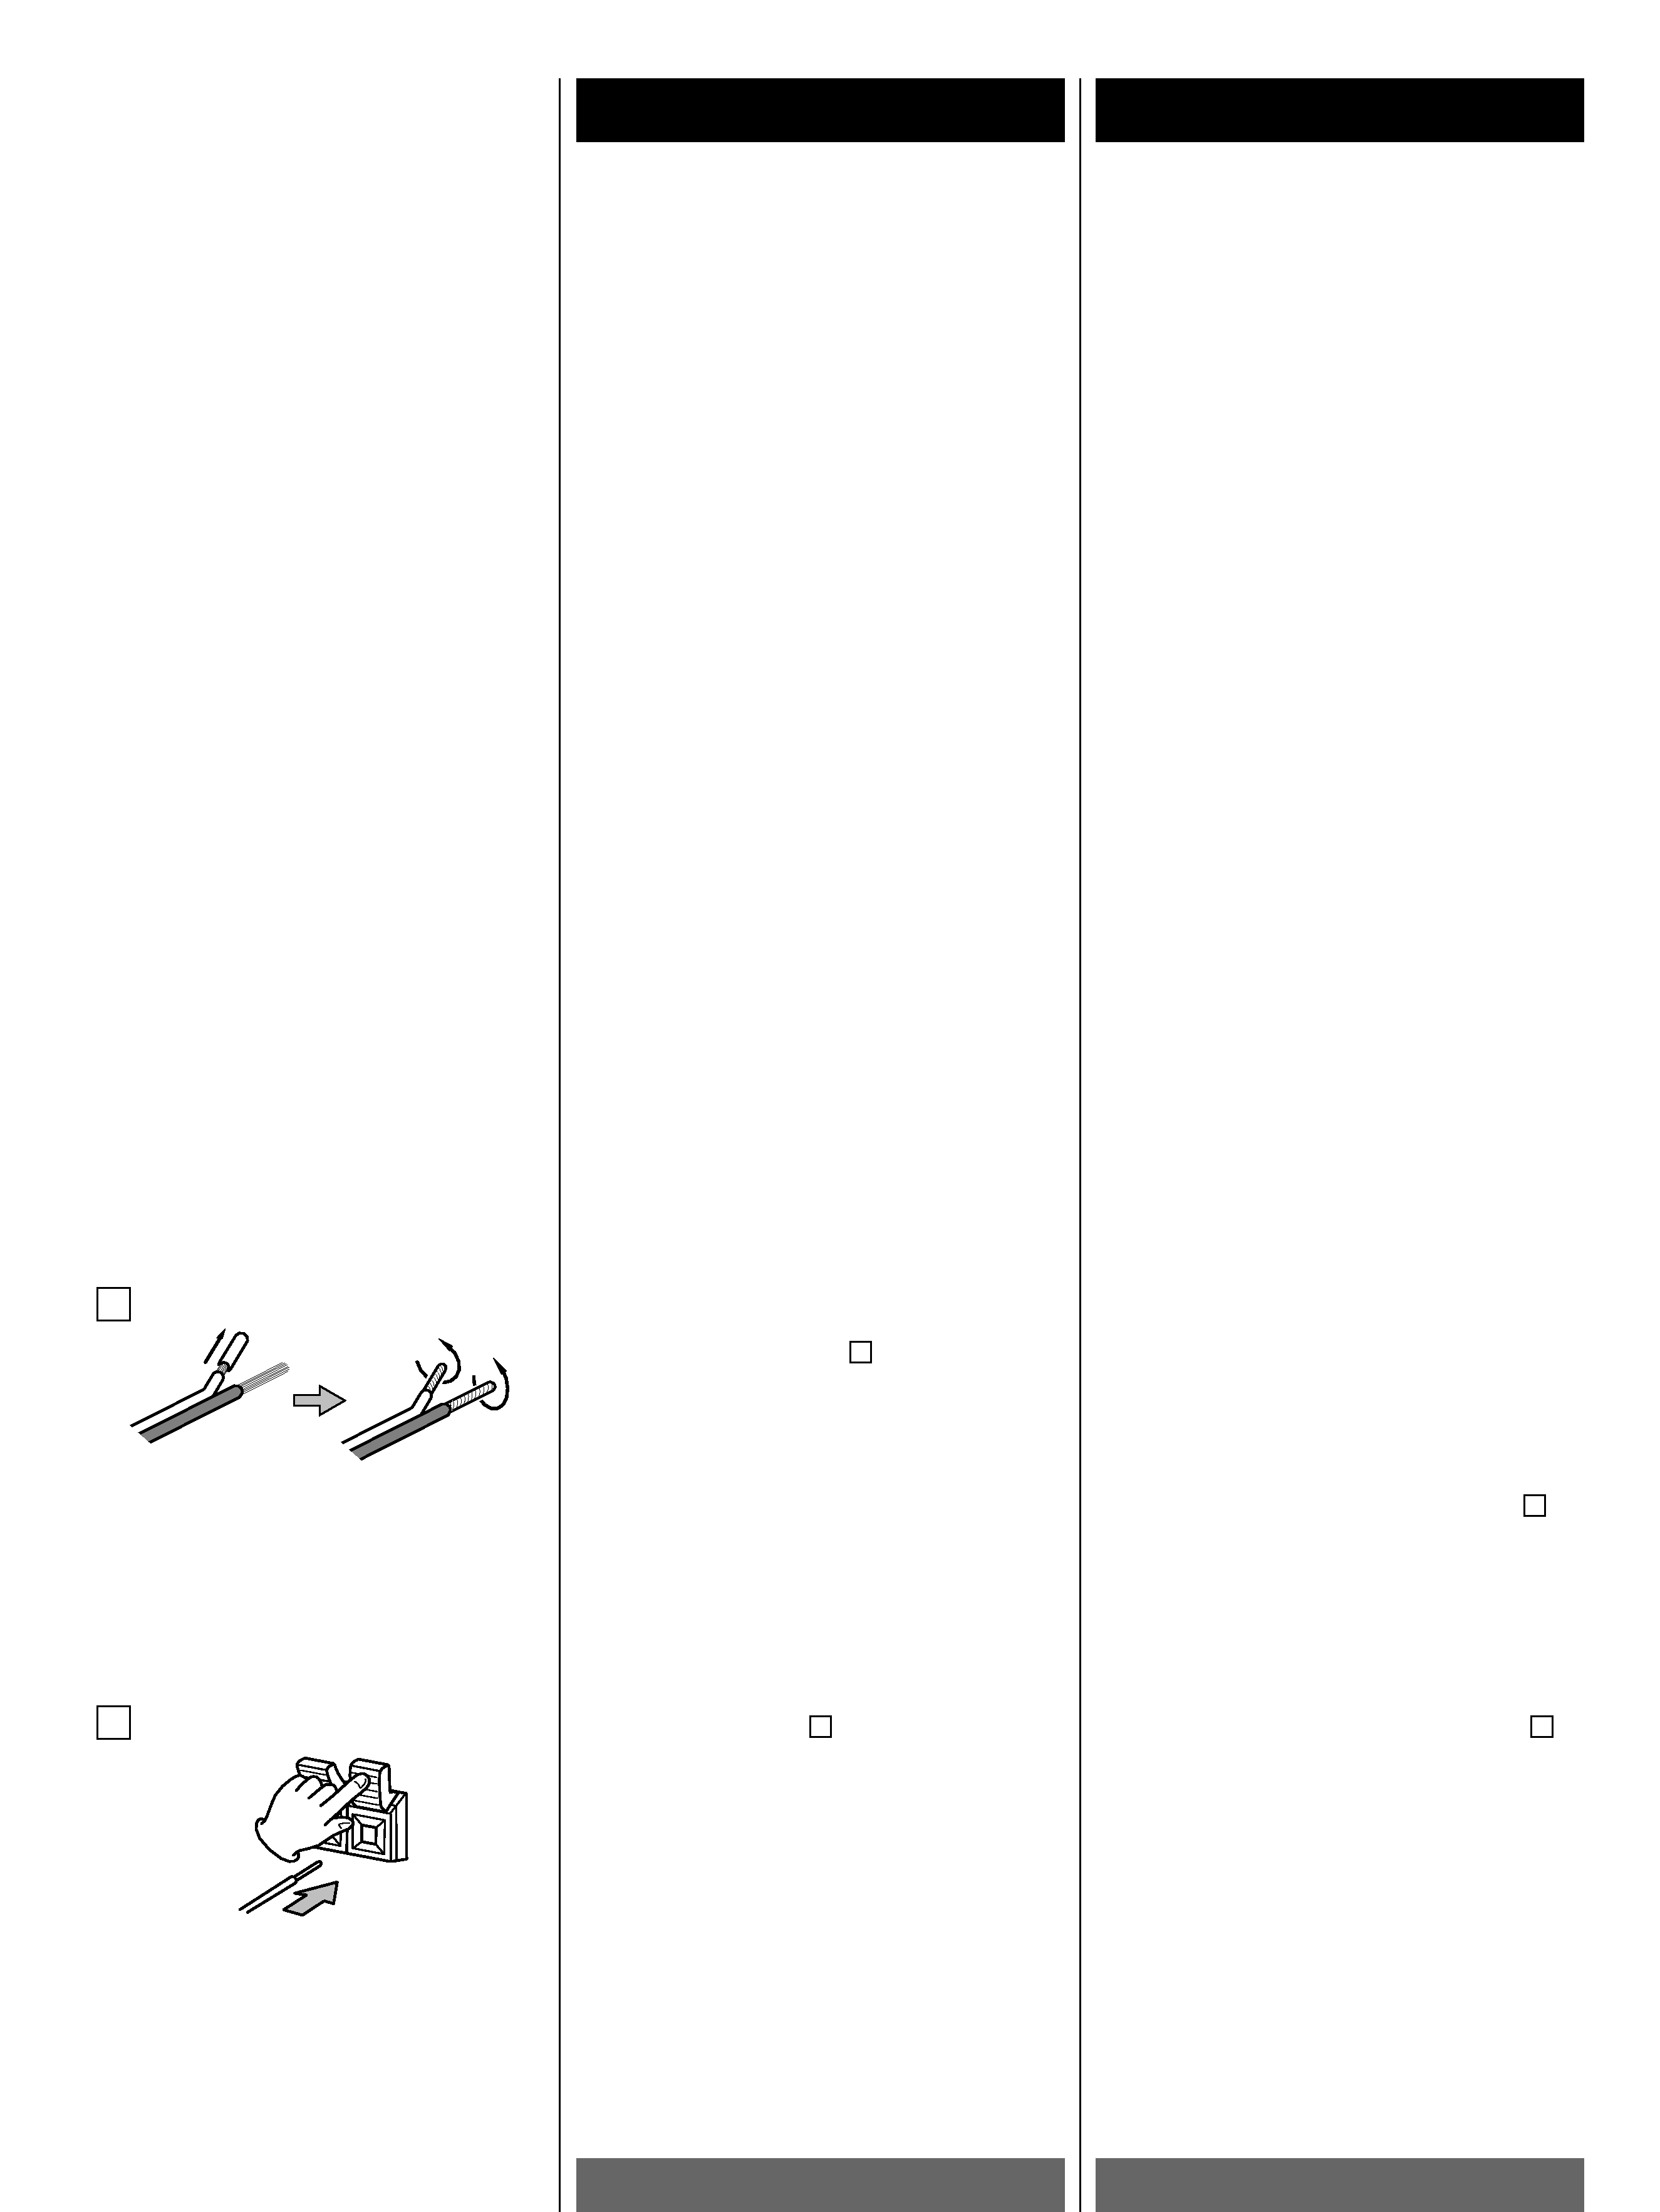
< Prepare the speaker cords for connection
by stripping off approximately 10 mm or
less (no more as this could cause a short-
circuit) of the outer insulation.
Twist the wires tightly together so that
they are not straggly : A
Branchement des haut-parleurs
Attention:
Pour éviter d'endommager les haut-parleurs
en entrant soudainement un signal de niveau
élevé, bien couper l'alimentation avant de
raccorder les haut-parleurs.
< Vérifiez l'impédance des enceintes.
Vous pouvez brancher des enceintes
ayant une impédance nominale de 8 ohms
ou plus.
Sur l'amplificateur les bornes rouges
SPEAKER sont les bornes + (positives),
les noires sont les bornes _ (négatives).
< L'extrémité + du câble de l'enceinte est
marquée pour la distinguer de l'extrémité
_. Branchez l'extrémité marquée sur la
borne rouge + , et l'extrémité non
marquée sur la borne noire.
< Avant de brancher les cordons des
enceintes, préparez-les en dénudant le fil
sur 10 mm maximum. (le dénuder
davantage peut provoquer un court-
circuit.)
Torsadez les fils ensemble pour éviter
qu'ils ne partent dans tous les sens : A
How to connect
Press the lever, insert the stripped and
twisted end (approx. 3/8") of the cord, then
release the lever :
Make sure it is fastened securely by
pulling the cord lightly.
B
Branchement des enceintes
Appuyer
sur
le
levier,
introduire
l'extrémité dénudée et torsadée (10 mm
environ) du fil, puis relâcher le levier:
Assurez-vous que le fil est bien fixé en
place en tirant légèrement sur le cordon.
B
CAUTION
Turn off the power of all the equipment
before making connections.
Read instructions of each component you
intend to use with this unit.
ATTENTION
Mettre tous les éléments de votre chaîne
hors tension avant de procéder au
raccordement de cet appareil.
Lire attentivement le mode d'emploi de
chacun des éléments que vous souhaitez
utiliser avec cet appareil.
< Be sure to insert each plug securely. To
prevent hum and noise, do not bundle the
connection cords with the power cord or
speaker cord.
< Assurez vous que chaque fiche est bien
enfoncée. Pour éviter tout ronflement ou
bruit parasite, ne pas regrouper les fils de
connexion avec le cordon d'alimentation
ou avec les fils des enceintes.
B
