SSM-125CE
© 1997 by Sony Corporation
3-709-345-21 (1)
Black and White Monitor
D
F
EN
S
I
Operating Instructions Page 2 _______________________________________________
Mode d'emploi Page 10 _______________________________________________________
Bedienungsanleitung Seite 18 _______________________________________________
Manual de instrucciones Página 26 __________________________________________
Bruksanvisning Sid 34 _______________________________________________________
Istruzioni per l'uso Pagina 42 _________________________________________________
ES

2
English
For the customers in the United Kingdom
WARNING
THIS APPARATUS MUST BE EARTHED
IMPORTANT
The wires in this mains lead are coloured in accordance with
the following code:
Green-and-yellow:
Earth
Blue:
Neutral
Brown:
Live
As the colours of the wires in the mains lead of this
apparatus may not correspond with the coloured markings
identifying the terminals in your plug, proceed as follows:
The wire which is coloured green-and-yellow must be
connected to the terminal in the plug which is marked by the
letter E or by the safety earth symbol Y or coloured green or
green-and-yellow.
The wire which is coloured blue must be connected to the
terminal which is marked with the letter N or coloured black.
The wire which is coloured brown must be connected to the
terminal which is marked with the letter L or coloured red.
Ensure that your equipment is connected correctly If you
are in any doubt consult a qualified electrician.
Before operating the unit, please read this manual
thoroughly and retain it for future reference.
WARNING
To prevent fire or shock hazard, do not expose the
unit to rain or moisture.
Dangerously high voltages are present inside the
unit.
Do not open the cabinet. Refer servicing to
qualified personnel only.
This unit is not intended to be used with computer work
stations.

3
Table of Contents
Features .............................................................................. 3
Precautions ......................................................................... 4
Location and Function of Controls .................................. 5
Front Panel ...................................................................... 5
Rear Panel ....................................................................... 6
Connections ........................................................................ 7
Connecting a Video Camera or a VCR ........................... 7
Connecting the Monitors ................................................. 8
Specifications ...................................................................... 9
Features
· This unit can be used as a closed circuit television monitor
or a video preview/playback monitor.
· Loop through connection allows up to three monitors to
display the same picture.
· Electronic circuits provide safeguards against interference,
noise and change of signal strength to maintain a clear and
stable picture.
EnglishEN

4
Precautions
Cleaning
Clean the unit with a lightly damp soft cloth. Use a mild
household detergent. Never use strong solvents such as
thinner or benzine as they might damage the finish of the
unit.
If you have any question or problem concerning your unit
that is not covered in this manual, please consult your
nearest Sony dealer.
Safety
· The unit operates on 230 V AC, 50/60 Hz.
· Should any liquid or solid object fall into the cabinet,
unplug the unit and have it checked by qualified personnel
before operating it any further.
· Unplug the unit from the wall outlet if it is not going to be
used for several days or more. To disconnect the cord,
pull it out by the plug. Never pull the cord itself.
· Allow adequate air circulation to prevent internal heat
build-up. Do not place the unit on surfaces (rugs,
blankets, etc.) or near materials (curtains, draperies) that
may block the ventilation holes.
· Height and vertical linearity controls located at the rear
panel are for special adjustments by qualified personnel
only.
Installation
· Do not install the unit in an extremely hot or humid place
or in a place subject to excessive dust or mechanical
vibration.
· The unit is not designed to be waterproof. Exposure to
rain or water may damage the unit.
5
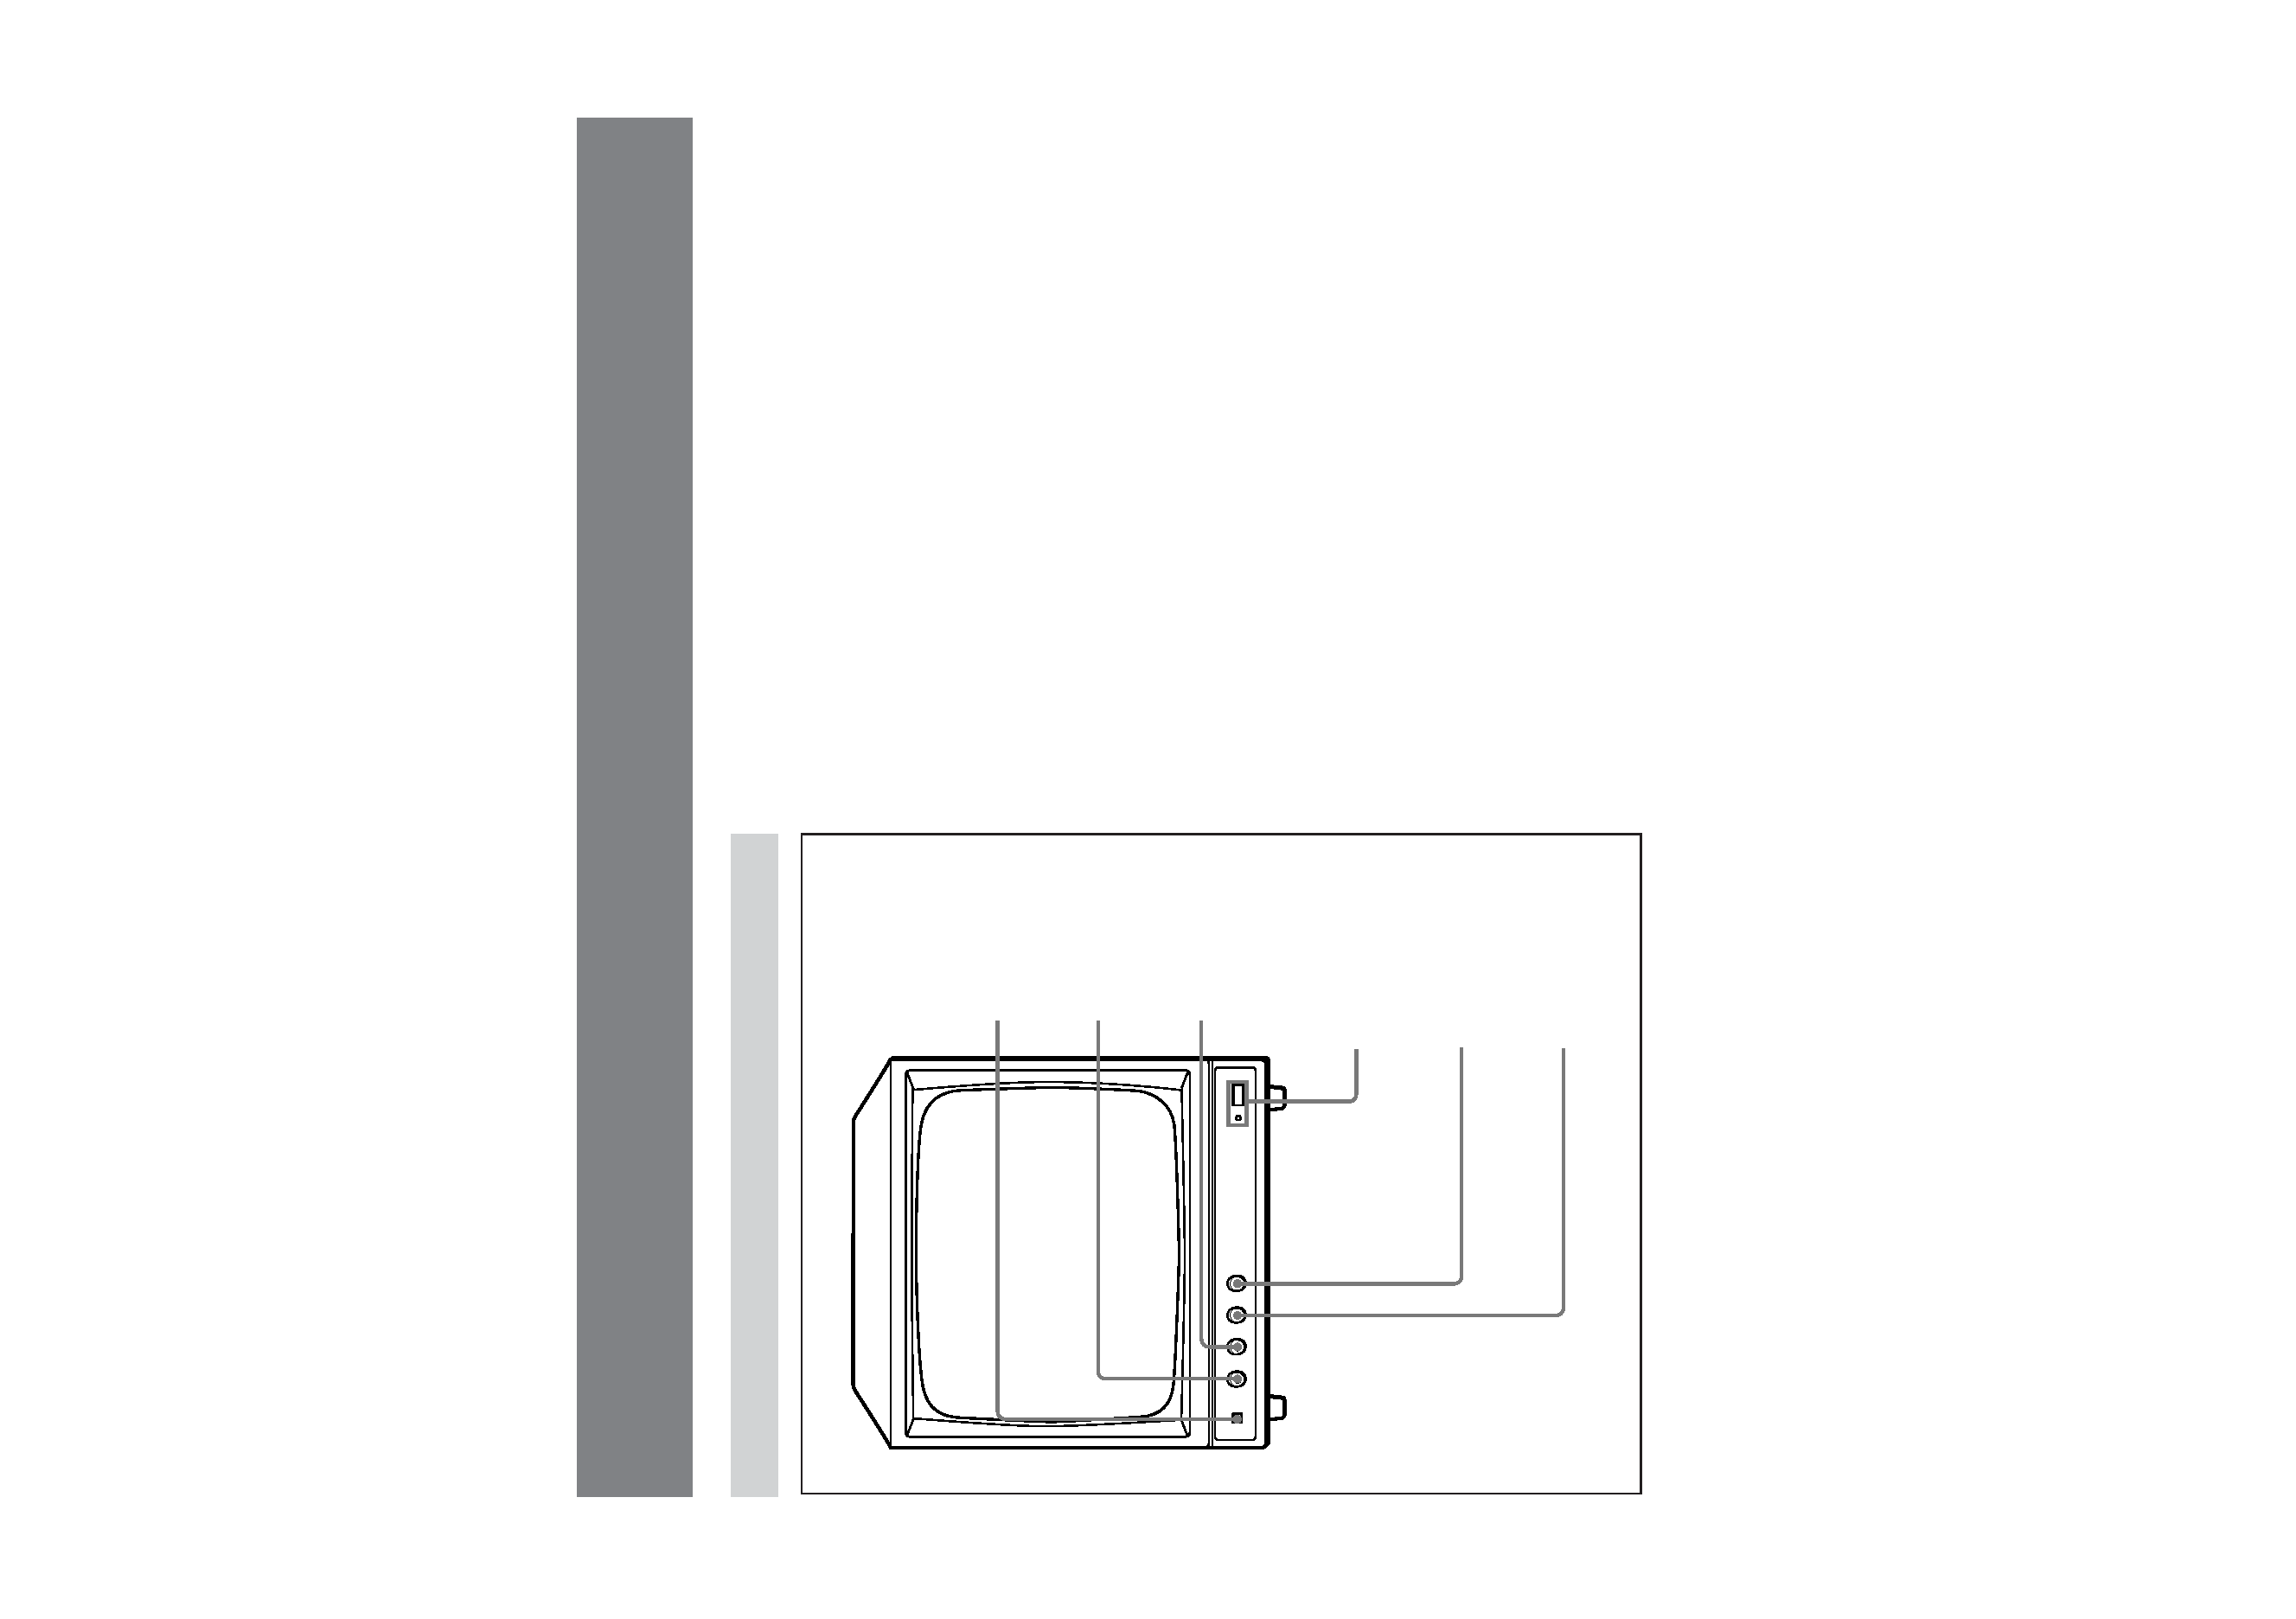
1 INPUT select switch
Keep this switch released (øA) to monitor the signal from
the VIDEO A IN connector.
Depress this switch (ØB) to monitor the signal from the
VIDEO B IN connector.
2 H-HOLD (horizontal hold) control
When the picture does not appear in the centre of the screen,
or some of the letters are missing on the screen, turn the H-
HOLD control to move the picture horizontally.
3 V-HOLD (vertical hold) control
When the picture rolls up or down on the screen, turn the V-
HOLD control until a single stationary picture is obtained.
4 POWER switch and indicator
To turn on the monitor, depress this switch. The green
indicator lights up.
To turn off the monitor, press the switch again.
5 CONTRAST control
Turn clockwise to increase picture contrast and
counterclockwise to decrease it.
6 BRIGHT (brightness) control
Turn clockwise for a brighter picture and counterclockwise
for a darker picture.
Location and Function of Controls
Front Panel
CONTRAST
control
POWER switch
and indicator
BRIGHT control
1
2
3
4
5
6
INPUT select
switch
H-Hold
control
V-HOLD
control