3-867-315-21 (1)
©1999 by Sony Corporation
FR
Operating Instructions
Mode d`emploi
SPP-A974
US
Cordless
Telephone
with Answering System

2
US
Caution: Users should not attempt to
make such connections themselves, but
should contact the appropriate electric
inspection authority, or electrician, as
appropriate.
NOTICE: The Ringer Equivalence
Number (REN) assigned to each
terminal device provides an indication
of the maximum number of terminal
allowed to be connected to a telephone
interface. The termination on an
interface may consist of any
combination of devices subject only to
the requirement that the sum of the
Ringer Equivalence Number of all the
devices does not exceed 5.
IMPORTANT INSTRUCTION TO
USERS
Your model (SPP-A974) has been
approved by the Industry Canada.
Note
Operation is subject to the following two
conditions: (1) this device may not cause
interference, and (2) this device must
accept any interference, including
interference that may cause undesired
operation of the device.
Privacy of communications may not be
ensured when using this telephone.
DIGITAL SECURITY CODE
Your SPP-A974 has been assigned a
permanent and unique digital security
code out of possible 16.8 million codes.
WARNING
To prevent fire or shock hazard, do
not expose the unit to rain or
moisture.
To avoid electrical shock, do not open
the cabinet. Refer servicing to
qualified personnel only.
INDUSTRY CANADA NOTICE
NOTICE: The Industry Canada label
identifies certified equipment. This
certification means that the equipment
meets certain telecommunications
network protective, operational and
safety requirements as prescribed in the
appropriate Terminal Equipment
Technical Requirements document(s).
The Department does not guarantee the
equipment will operate to the user's
satisfaction.
Before installing this equipment, users
should ensure that it is permissible to be
connected to the facilities of the local
telecommunications company. The
equipment must also be installed using
an acceptable method of connection.
The customer should be aware that
compliance with the above conditions
may not prevent degradation of service
in some situations.
Repairs to certified equipment should be
coordinated by a representative
designated by the supplier. Any repairs
or alterations made by the user to this
equipment, or equipment malfunctions
may give the telecommunications
company cause to request the user to
disconnect the equipment.
Users should ensure for their own
protection that the electrical ground
connections of the power utility,
telephone lines and internal metallic
water pipe system, if present, are
connected together. This precaution may
be particularly important in rural areas.

3
US
Table of contents
Table of contents
Getting Started
4
Read this first
5
Step 1: Checking the package
contents
6
Step 2: Setting up the base unit
9
Step 3: Preparing the battery
pack
12
Step 4: Entering the area code
15
Identifying the parts
Basics
18
Making calls
19
Redialing
20
Receiving calls
Telephone Features
22
Phone Directory
22
Storing phone numbers and
names
24
Changing a stored name and/
or phone number
25
Erasing a memory location
25
Making calls from the Phone
Directory
26
Setting the ringer type
26
Turning off the ringer of the
handset
27
Paging
Answering Machine
Features
28
Setting up the answering
machine
28
Setting the time and day of
the week
29
Recording the greeting
31
Setting the number of rings
32
Setting the audible message
alert
33
Turning on the answering
function
34
Playing back messages
35
Adjusting the speaker volume
35
Erasing messages
36
Selecting the Announcement
Only Mode
37
Screening calls
37
Turning on/off the screening
calls function
38
Recording a memo message
39
Operating from an outside phone
39
Setting the remote ID code
(security code)
40
Picking up new messages
Caller ID Features
41
Understanding the Caller ID
service
41
When you receive a call
42
Looking at the Caller ID list
42
Viewing the Caller ID list
43
Erasing data from the Caller
ID list
45
Using the Caller ID list
45
Calling back a number from
the Caller ID list
46
Storing a number of the Caller
ID list into the Phone
Directory
47
To change the number of
digits of the phone number
49
Using "Caller ID with Visual Call
Waiting" service
Additional Information
50
Mounting the base unit on a wall
51
Notes on power sources
51
Maintenance
52
Troubleshooting
55
Specifications
56
Index
US
Getting Started
4
US
Getting Started
Base unit
Read this first
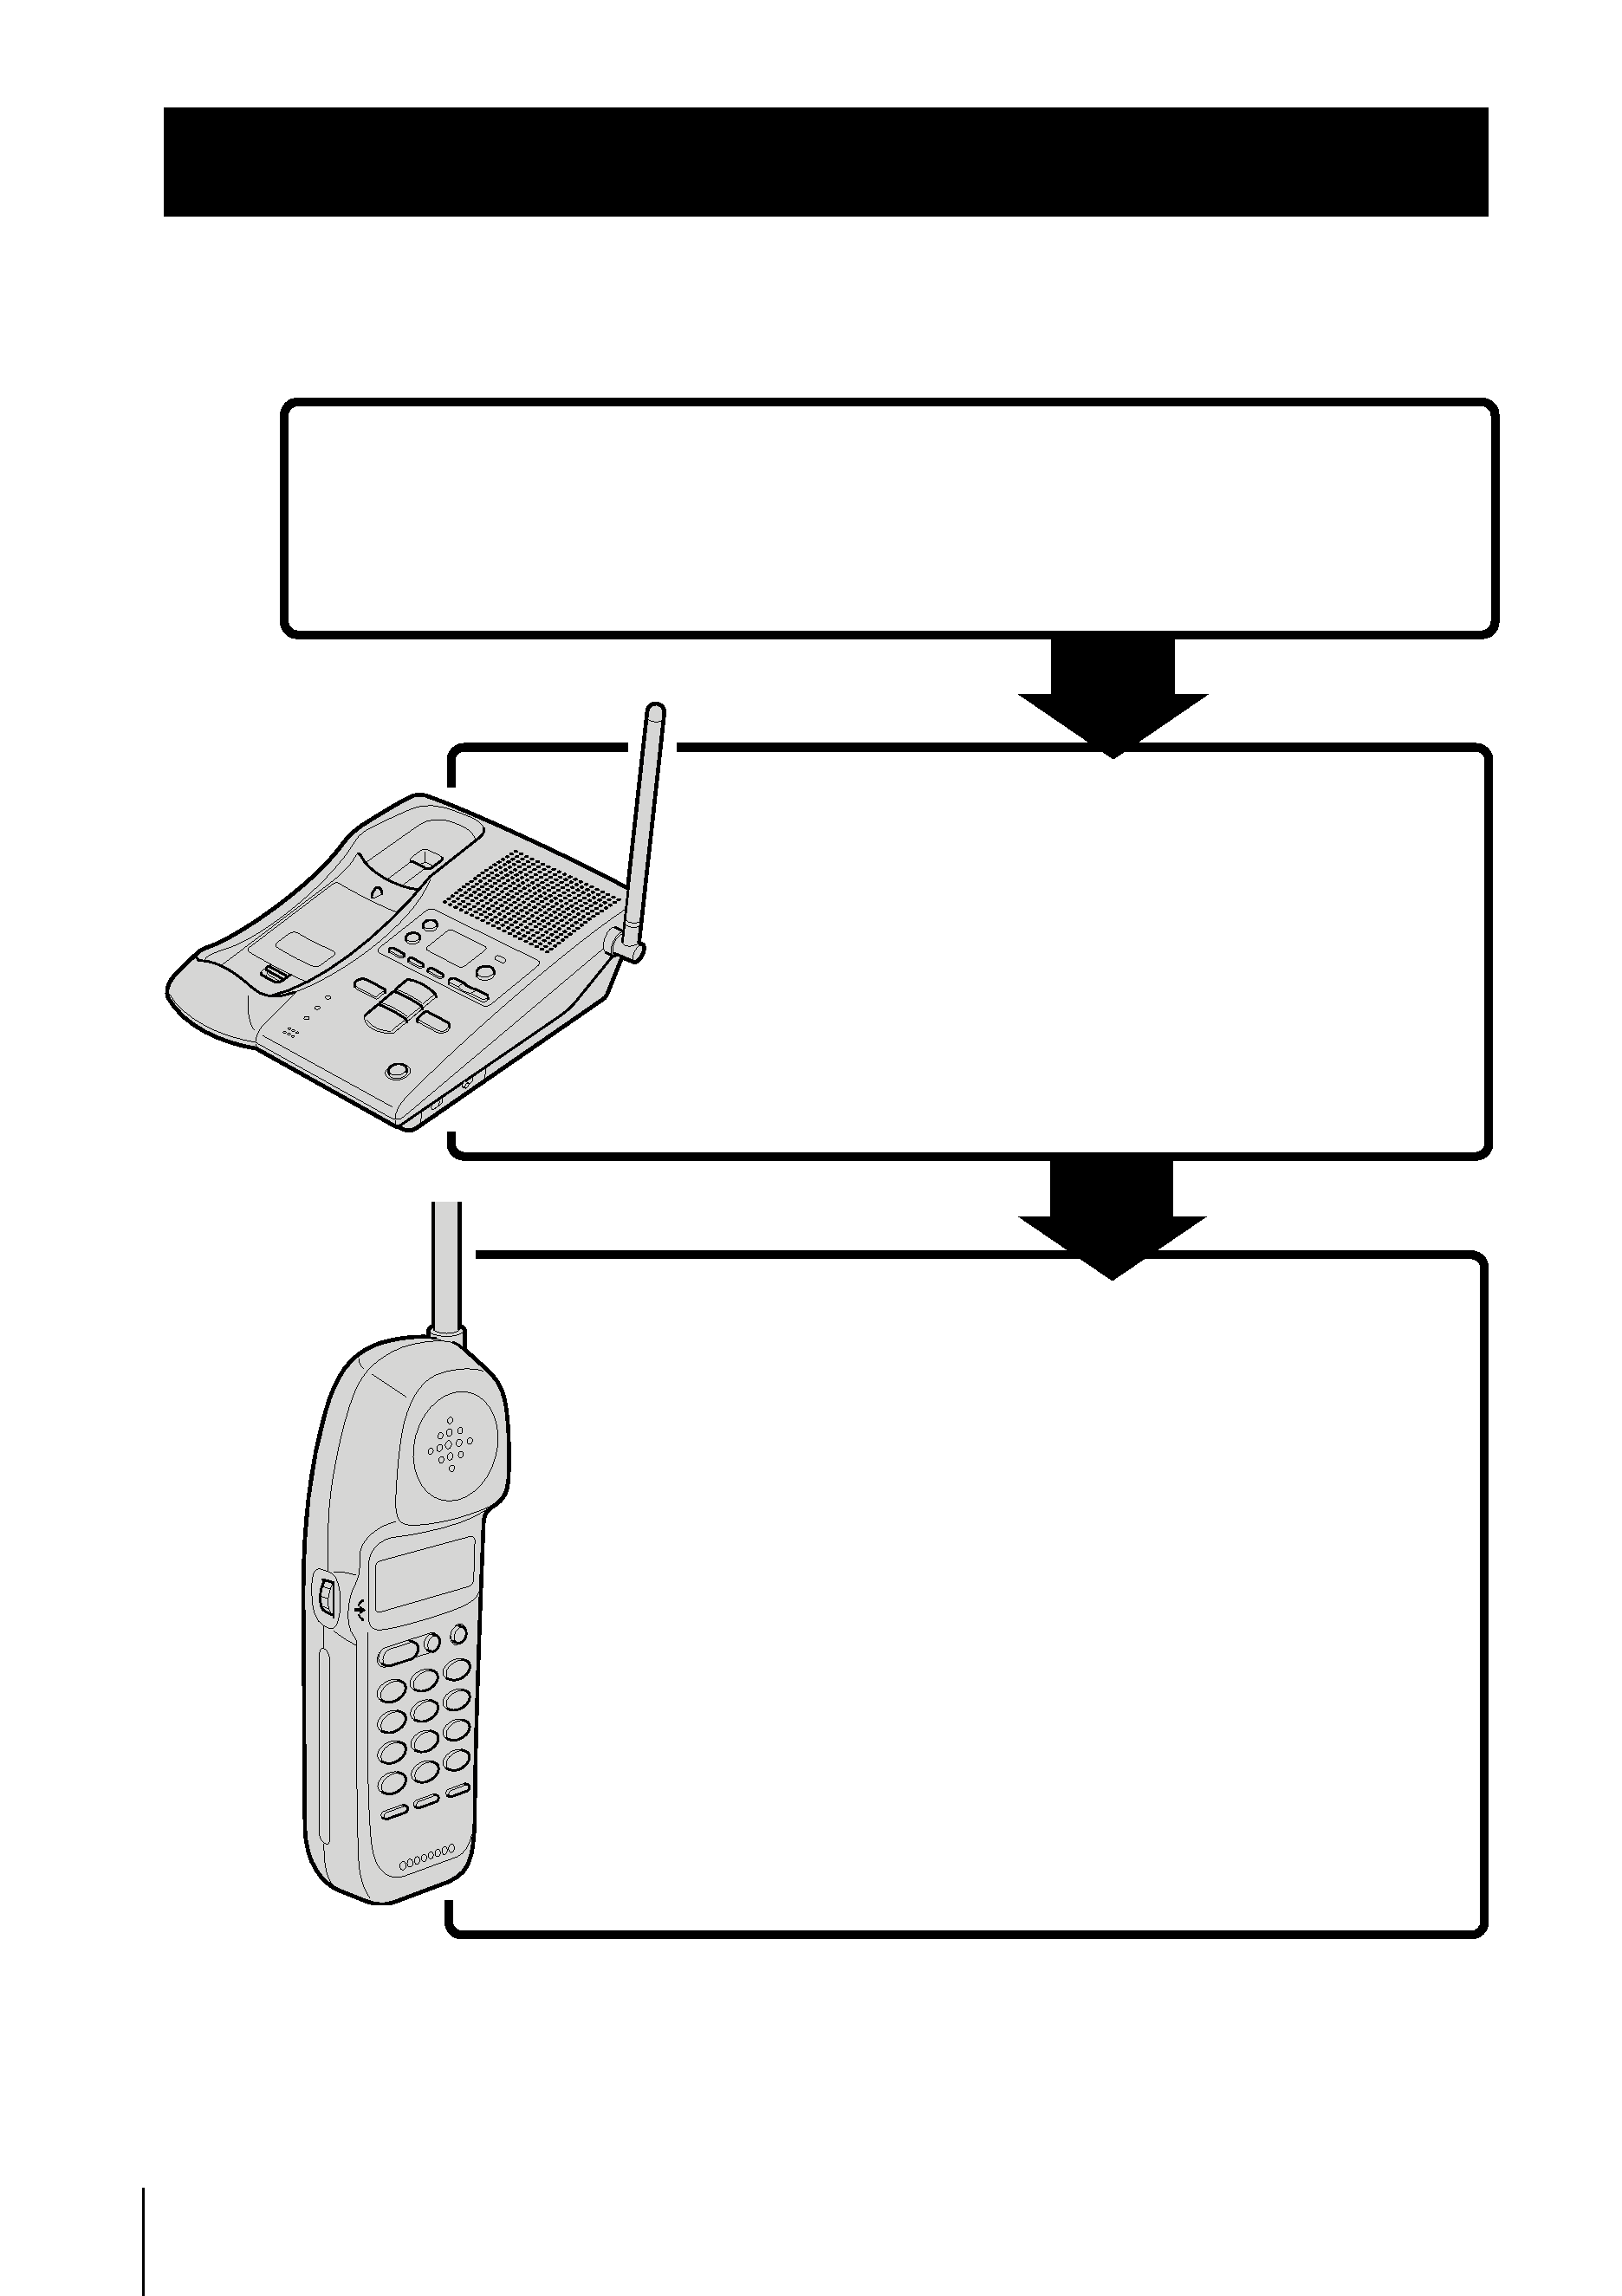
Before you use your phone, you must first set it up. Here's a quick way
to set up your phone: Steps 1, 2, 3 and 4.
Step 2 (pages 6 to 8)
Next, you need to do three things to set
up the base unit, including finding the
best location for the base unit.
Step 3 (pages 9 to 10)
Then, insert the battery pack into the
handset and charge it for more than 12
hours.
Step 4 (pages 12 to 14)
Finally, enter the area code to use the
Caller ID service.
First, unpack the phone and the supplied
accessories.
Step 1 (page 5)
That's it!
Handset
Getting
Started
5
US
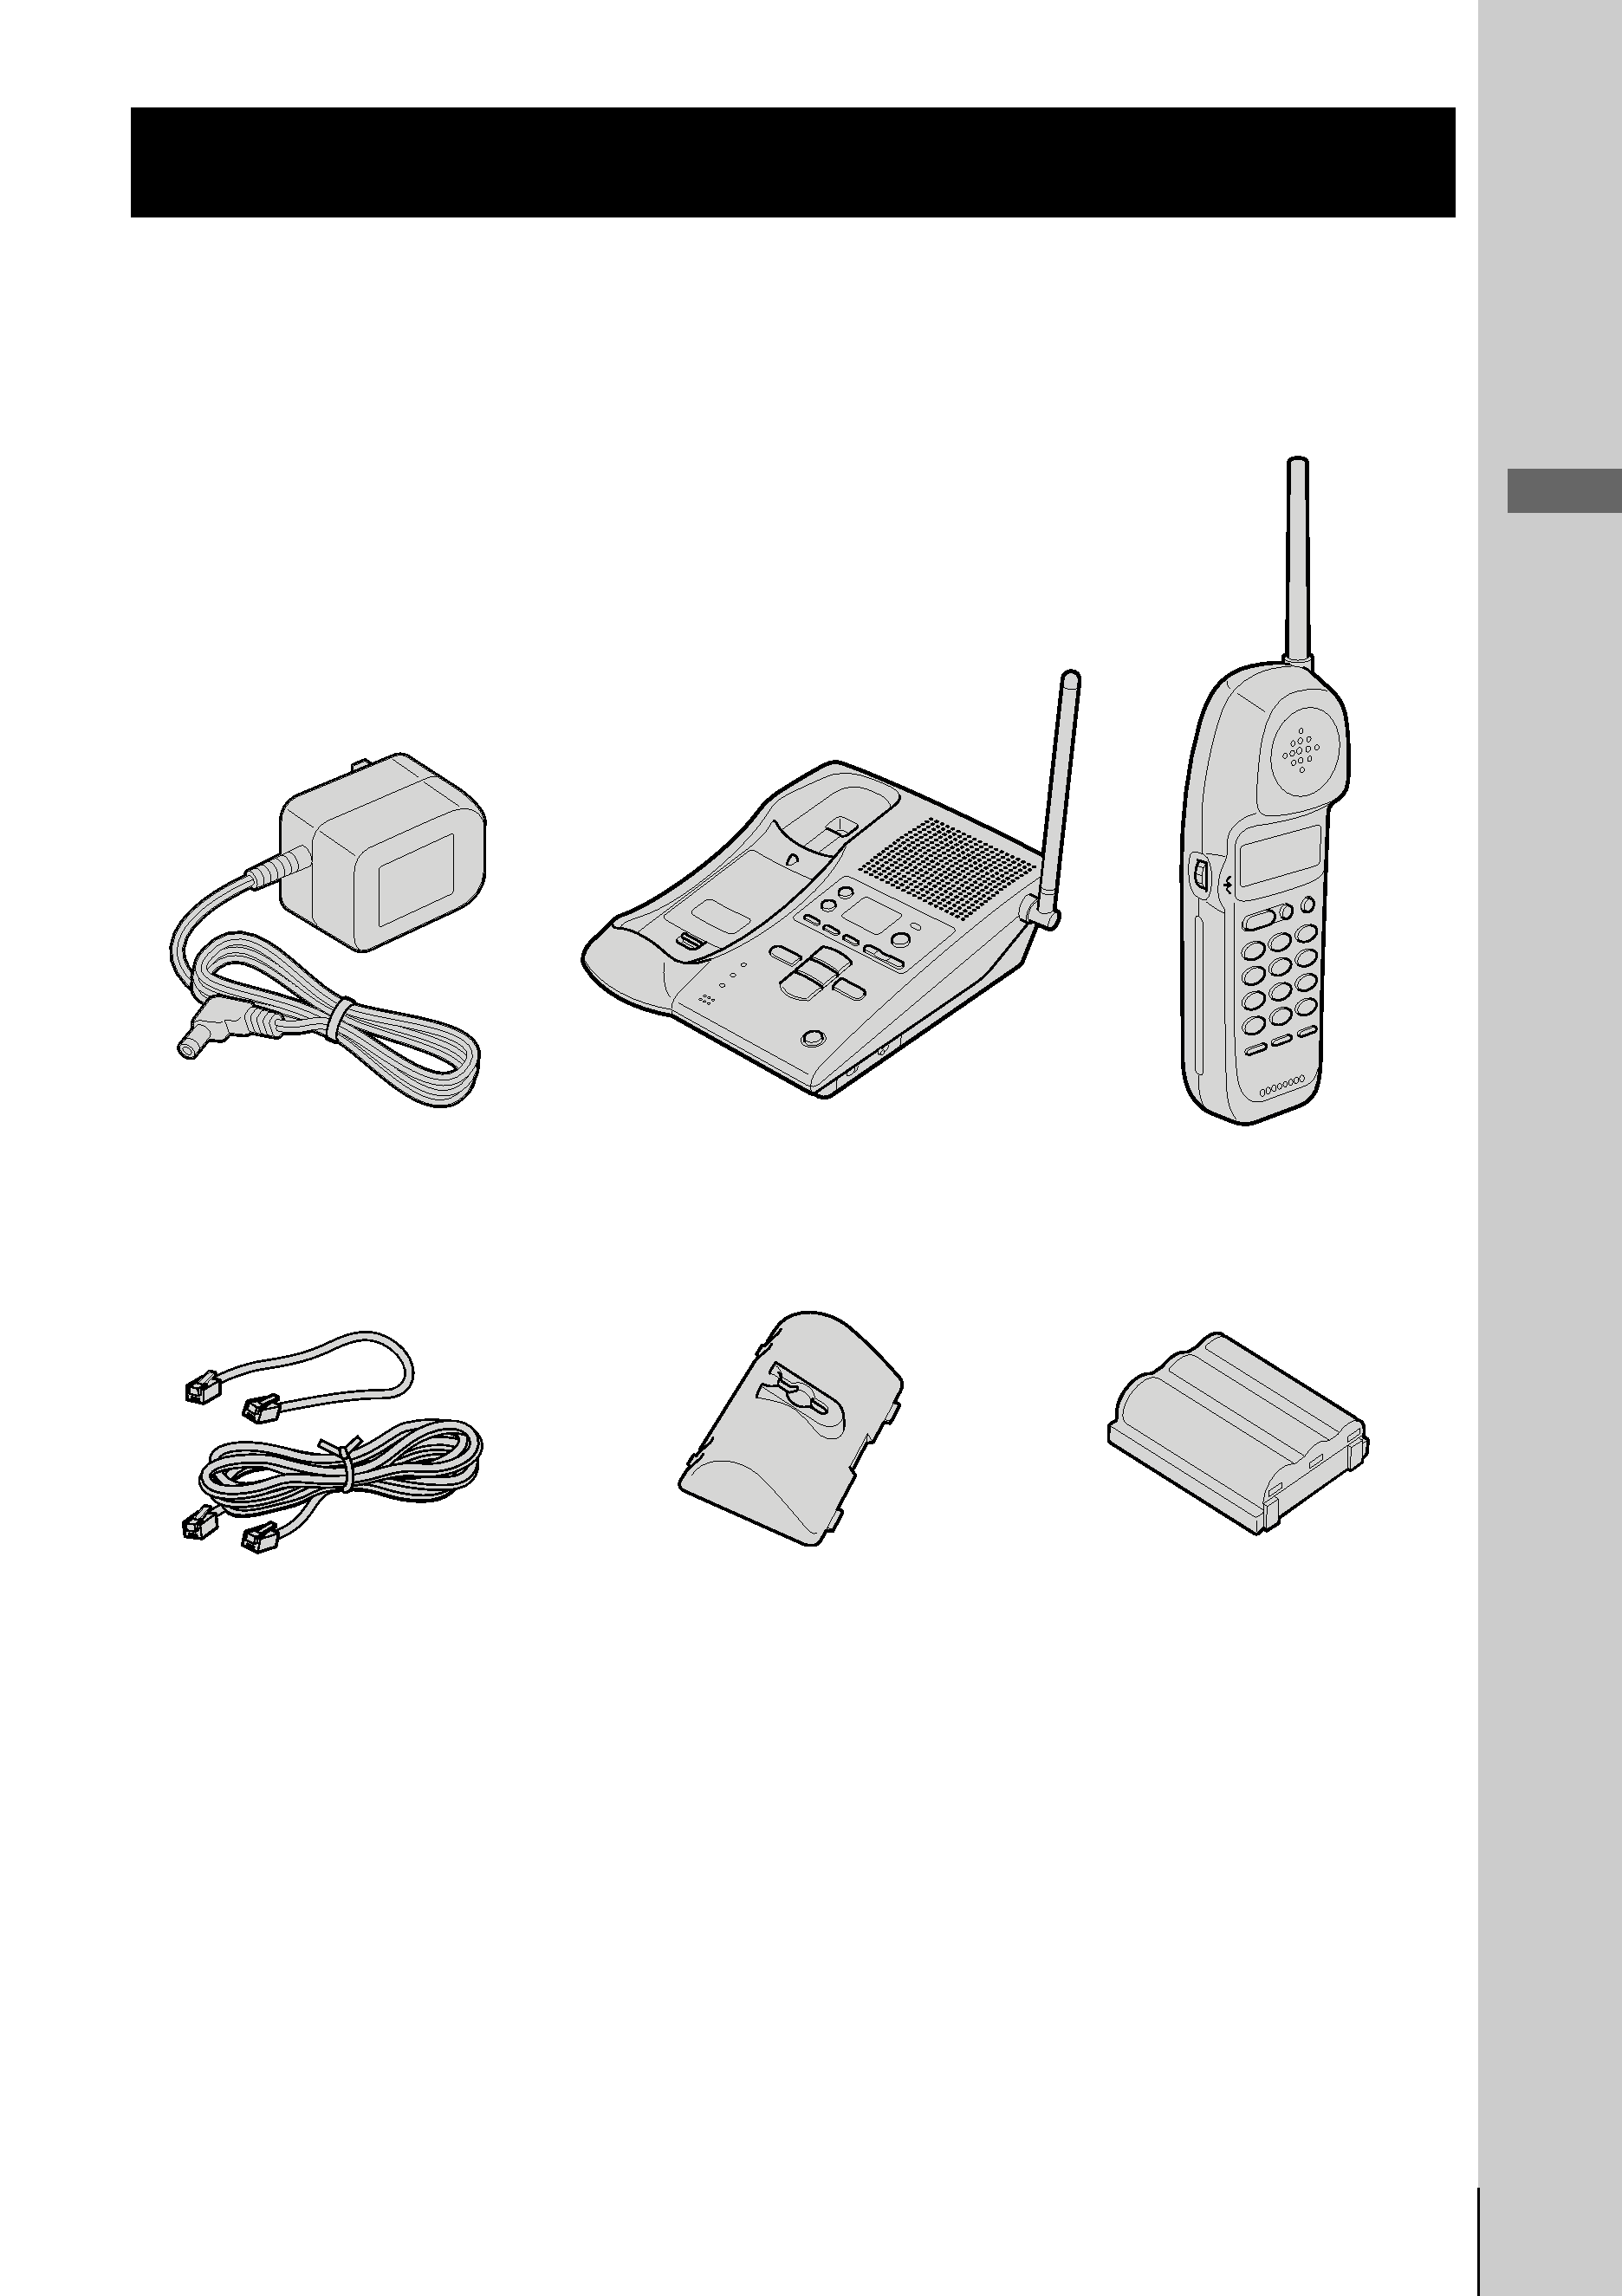
Getting Started
Telephone line cords (2)
Handset
AC power adaptor (AC-T128)
Wall bracket for base unit
Base unit
Rechargeable battery
pack (BP-T23)
Step 1
Checking the package contents
Make sure you have received the following items in the package.
If anything is missing, contact your local Sony dealer.