
3-864-784-11(1)
Remote
Commander
Operating Instructions
© 1998 by Sony Corporation
RM-TP501

2
Precautions
CAUTION (Lithium battery)
Danger of explosion if battery is incorrectly
replaced. Replace only with the same or equivalent
type recommended by the manufacturer. Discard
used batteries according to the manufacturer's
instructions.
On operation
Before connecting other components, be sure to turn off and
unplug the receiver.
On cleaning
Clean the cabinet, panel and controls with a soft cloth slightly
moistened with a mild detergent solution. Do not use any type of
abrasive pad, scouring powder or solvent such as alcohol or
benzine.
If you have any question or problem concerning your
receiver, please consult your nearest Sony dealer.
About This Manual
· The following icon is used in this manual:
z Indicates hints and tips for making the task easier.

3
TABLE OF CONTENTS
Preparations
4
Compatible Components and Functions 4
Preparing the Commander 5
Screen Hierarchy 8
Location of Parts and Basic
Operations
9
Front panel 9
Rear panel 10
Operation
11
Basic Operations 11
Example: Operating a CD Player 13
Example: Operating the Tuner 14
Example: Recording from CD to MD 15
Selecting Sound Fields 16
Adjusting Sound Fields 17
Adjusting the Commander's Operating
Environment 18
Additional information
22
Precautions during use 22
Troubleshooting 23
Specifications Back Cover
Index Back Cover

4
Preparations
This chapter describes how to prepare
the remote commander for operation.
Be sure to read this section before
operating.
Compatible Components
and Functions
This unit is a remote control system that utilizes infrared
rays to control a receiver and AV components connected
to the receiver.
Compatible Components
This unit can be used to operate Sony AV components as
well as AV components manufactured by other
manufacturers. Set up is necessary in order to operate
components manufactured by other companies (see page
18).
Functions
This unit is a bidirectional remote commander. Not only
does it transmit infrared rays for operation of the receiver,
it can also receive infrared rays emitted by the receiver to
display characters and other information supplied by
other components connected to the receiver with a
CONTROL A1 cord.
5
Pr
eparations
Please be sure to carry out the procedures described in
"Setting up the commander" on page 6 after inserting the
batteries.
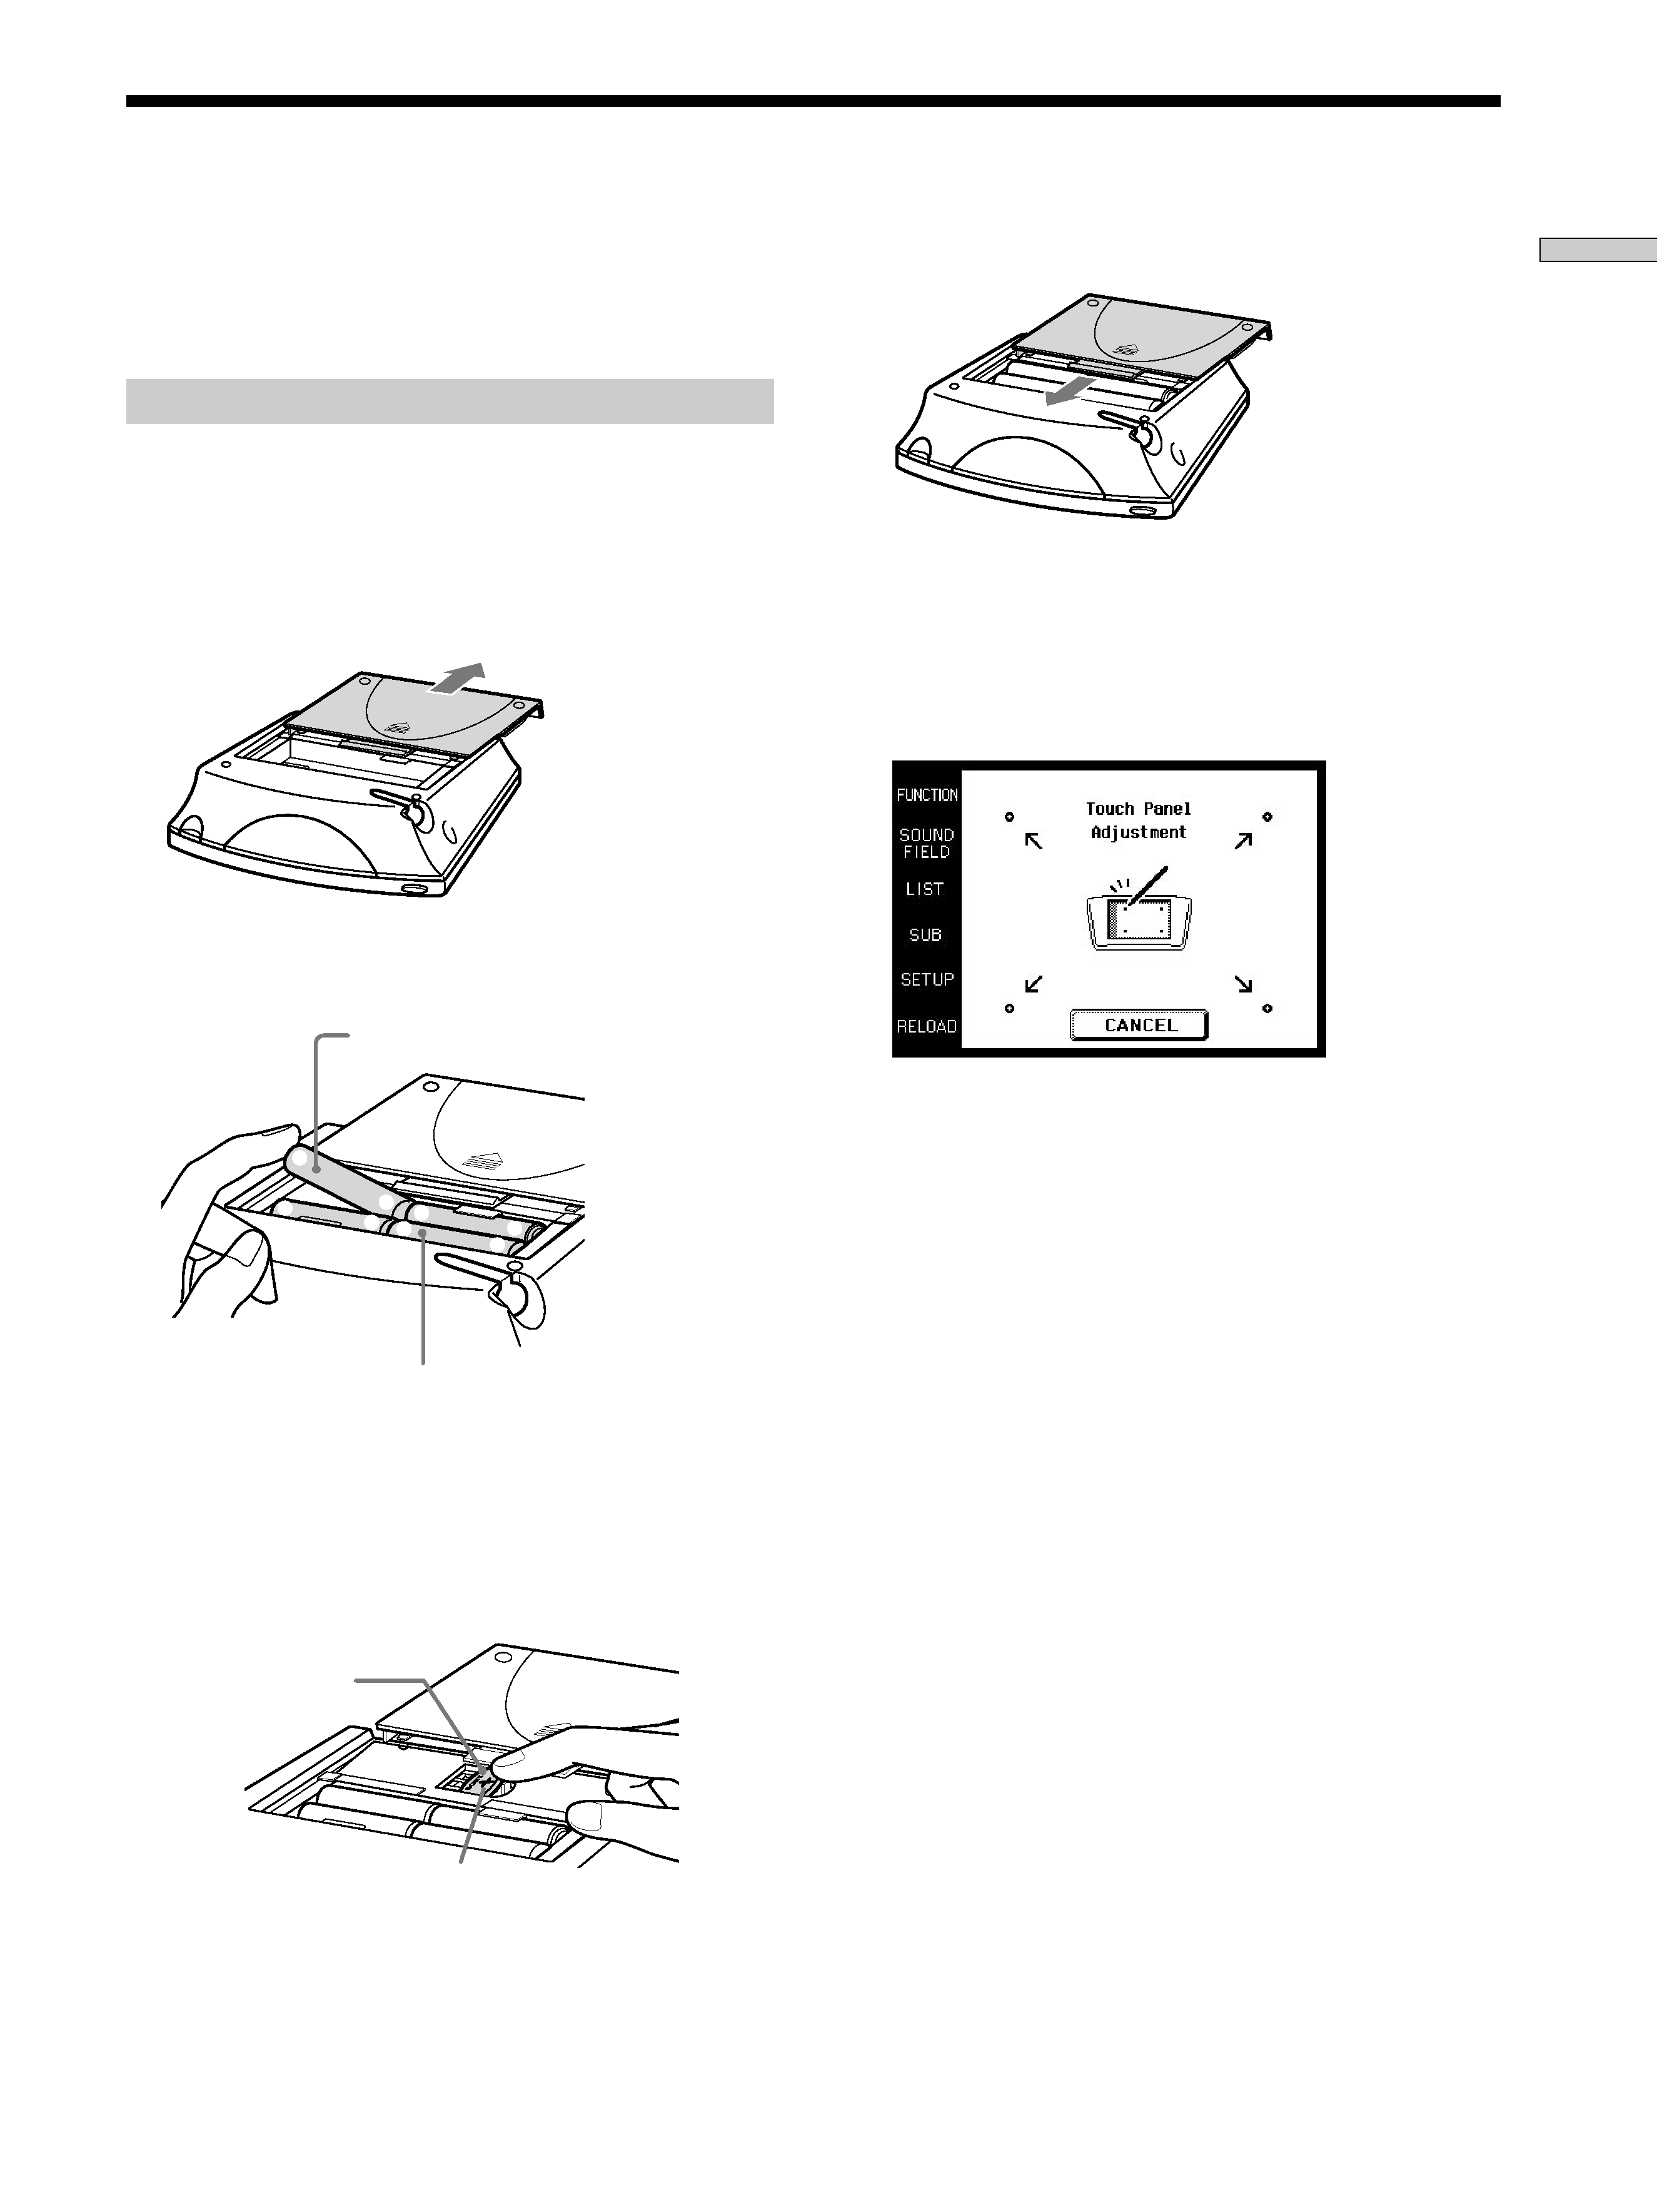
Inserting batteries into the commander
Insert the four size-AA (LR6) alkaline batteries (for
commander operation) and lithium battery (for
preservation of the commander's internal memory).
1 Remove the battery compartment cover.
2 Insert the alkaline batteries.
3 Insert the lithium battery.
After wiping the lithium battery thoroughly with a
dry cloth, insert it into the compartment with the
positive (+) pole side facing up.
Preparing the Commander
4 Close the battery compartment cover.
After inserting the batteries, touching the touch panel
turns on the light and displays the touch panel (LCD)
adjustment screen. Follow the procedure on the next
page for touch panel adjustment and initial
communication.
Notes
· The LCD lights up when touched.
· VOL+/, MUTING and SLEEP can be used even when the
LCD is not lit.
· Pressing BACK LIGHT/COMMANDER OFF turns the
backlight off. Holding it down for about 2 seconds turns the
LCD off. To conserve battery power, be sure to regularly turn
off the LCD or power when not in use.
· If the commander is not used for approx. 1 minute, the LCD
turns off automatically (Auto Off function). The auto off time
can be adjusted (see page 21).
Push in direction of
arrow
Always insert the negative () pole
side of batteries first.
Size-AA alkaline batteries
Coin shaped lithium
battery CR2032
Positive (+) pole side up
]
]
}
}
]
}
]
}