Getting Started
1
© 1999 Sony Corporation
Printed in U.S.A.
9-884-613-02 (1)
Operating Instructions
KV-13VM42/43
KV-20VM42
KV-20VS42
Trinitron Color Video/TV
Mode d'emploi
Manuel de instrucciones
®
Owner's Record
The model and serial numbers are located at the rear
of the video TV. Record these numbers in the spaces
provided below. Refer to them whenever you call
upon your Sony dealer regarding this product.
Model No.
Serial No.
G
US
FR
ES
KV-13VM42/43/KV-20VM42/KV-20VS42
2 Getting Started
WARNING
Safety
· Operate the Video/TV only on 120 V AC.
· One blade of the plug is wider than the other for safety
purposes and will fit into the power outlet only one
way. If you are unable to insert the plug fully into the
outlet, contact your dealer.
· Should any liquid or solid object fall into the cabinet,
unplug the Video/TV and have it checked by qualified
personnel before operating it any further.
· Unplug the Video/TV from the wall outlet if you are
not to going to use it for several days or more. To
disconnect the cord, pull it out by the plug. Never pull
the cord itself.
Installing
· To prevent internal heat build-up, do not block the
ventilation openings.
· Do not install the Video/TV in a hot or humid place, or
in a place subject to excessive dust or mechanical
vibration.
Cleaning
Clean the Video/TV with a soft dry cloth. Never use
strong solvents such as thinner or benzine, which might
damage the finish of the cabinet.
Transport
Keep the original carton and packing materials to use for
safety transport of your Video/TV in the future.
Information
You are cautioned that any changes or modifications not
expressly approved in this manual could void your
authority to operate this equipment.
If you have any questions or problems concerning your
Video/TV, please contact your nearest Sony dealer.
This Video/TV receiver displays closed captioning in
accordance with 15.119 of the FCC rules.
Caution
Television programs, films, video tapes and other
materials may be copyrighted. Unauthorized recording
of such material may be contrary to the provisions of the
copyright laws. Also, use of this Video/TV receiver for
other private viewing of programs broadcast on VHF or
UHF or transmitted by cable companies for the use of the
general public may require authorization from the
broadcaster/cable company and/or program owner.
To prevent fire or shock hazard, do not expose
the unit to rain or moisture.
This symbol is intended to alert the user to
the presence of uninsulated "dangerous
voltage" within the product's enclosure
that may be of sufficient magnitude to
constitute a risk of electric shock to
persons.
This symbol is intended to alert the user to
the presence of important operating and
maintenance (servicing) instructions in the
literature accompanying the product.
CAUTION
TO PREVENT ELECTRIC SHOCK, DO NOT USE THIS
POLARIZED AC PLUG WITH AN EXTENSION CORD,
RECEPTACLE OR OTHER OUTLET UNLESS THE
BLADES CAN BE FULLY INSERTED TO PREVENT
BLADE EXPOSURE.
When using TV games, computers, and similar products
with your Video/TV, keep the brightness and contrast
functions at low settings. If a fixed (non-moving) pattern
is left on the screen for long periods of time at a high
brightness or contrast setting, the image can be
permanently imprinted onto the screen. These types of
imprints are not covered by your warranty because they
are the result of misuse.
Note to CATV system installer
This reminder is provided to call the CATV system
installer's attention to Article 820-40 of the NEC that
provides guidelines for proper grounding and, in
particular, specifies that the cable ground shall be
connected to the grounding system of the building as
close to the point of cable entry as practical.
Note on condensation
If the Video/TV is brought directly from a cold to a
warm location, moisture may condense inside the VCR
and cause damage to the video head and tape. When you
first install the Video/TV, or when you move it from a
cold to a warm location, wait for about one hour before
operating the Video/TV.
Precautions

Getting Started
3
Contents
US
Getting Started
Step 1 -- Preparation ................................................. 4
Checking the supplied accessories ....................... 4
Inserting batteries into the remote control .......... 4
Step 2 -- Connecting the Antenna ........................... 5
Connecting an antenna ........................................... 5
Connecting an antenna/cable TV system ........... 5
Step 3 -- Setting Up the Video/TV Automatically
AUTO SET UP ...........................................................................
6
Erasing and adding channels ................................ 7
Setting cable TV on or off ....................................... 9
Presetting channels AUTO PROGRAM ..................... 10
Changing the menu language ............................. 11
Step 4 -- Setting the Clock ...................................... 12
Setting the clock automatically ........................... 12
Setting the date and clock manually .................. 15
Step 5 -- Setting Up VCR Plus+ system* ............ 16
Setting the guide channel ..................................... 16
Basic Operations
Watching the TV ....................................................... 18
Switching the Video/TV on and off ................... 18
Selecting TV programs ......................................... 18
Adjusting the volume ........................................... 18
Muting the sound .................................................. 18
Switching quickly between two channels ......... 18
Adjusting the picture ............................................ 19
Adjusting the sound (KV-20VS42 only) ............. 20
Selecting stereo or bilingual programs
(KV-20VS42 only) ............................................... 21
Listening to surround sound effects
(KV-20VS42 only) ............................................... 23
Displaying on-screen information ...................... 24
Watching a video input signal through
the line input jacks ............................................. 24
Listening with headphones ................................. 24
Playing a Tape ........................................................... 25
Inserting a video cassette ..................................... 25
Ejecting a video cassette ....................................... 25
Protecting your cassette against accidental
erasure ................................................................. 25
Resetting the tape counter ................................... 25
Playing a tape ........................................................ 26
Playing a tape repeatedly AUTO REPEAT ............. 27
Displaying on-screen information ...................... 28
Displaying the tape counter ................................ 28
Recording TV Programs .......................................... 29
Recording TV programs ....................................... 29
Recording with the TV off ................................... 29
Recording TV Programs Using the Timer............. 30
Setting the timer .................................................... 30
Using the Video/TV before timer recording
starts ..................................................................... 32
Checking the timer settings ................................. 33
Changing or cancelling the timer settings ......... 33
Recording using QUICK TIMER ......................... 34
Recording TV Programs Using VCR Plus+ system .. 35
Additional Operations
Automatically Switching the Video/TV
On or Off ON/OFF TIMER .................................. 36
Switching Off Automatically Sleep Timer ................. 37
Selecting the Video/TV's Cable Box Input
Channel CHANNEL FIX ......................................... 38
Displaying Caption Vision/XDS ............................ 39
Blocking Out Programs Parental Control ................. 40
Activating the Parental Control feature ............. 40
Selecting custom ratings in U.S.A. ...................... 43
Selecting custom ratings in Canada.................... 46
Changing the password ....................................... 47
If you have forgotten your password ................. 48
What the Ratings Mean ........................................... 49
Ratings in U.S.A. ................................................... 49
Ratings in Canada ................................................. 50
Setting Your Favorite Channels FAVORITE
CHANNEL .................................................................................
52
Searching Using the Index Function ...................... 54
Playing back to the beginning of each
program Index Scan ....................................................... 54
Locating the desired program Index Search ......... 54
Enhancing Video Picture Quality ........................... 55
Adjusting the tracking automatically ................. 55
Adjusting the tracking manually ........................ 55
Reducing the Picture Noise ..................................... 56
Connecting Optional Equipment ........................... 57
Watching the picture input from optional
equipment ........................................................... 57
Additional Information
Troubleshooting ........................................................ 58
Specifications ............................................................. 60
Index to Parts and Controls .................................... 61
Video/TV set--front ............................................. 61
Remote control ....................................................... 62
* VCR Plus+ and PlusCode are registered trademarks of
Gemstar Development Corporation.
The VCR Plus+ system is manufactured under license from
Gemstar Development Corporation.
The instructions in this manual are for models
KV-13VM42, KV-13VM43, KV-20VM42, and KV-
20VS42. Before you begin to read this manual,
refer to the model number located on the rear of
your Video/TV. Model KV-20VS42 is used for
illustration purposes throughout this manual.
Any differences in operation are indicated in the
text, for example, "KV-20VS42 only."
4 Getting Started
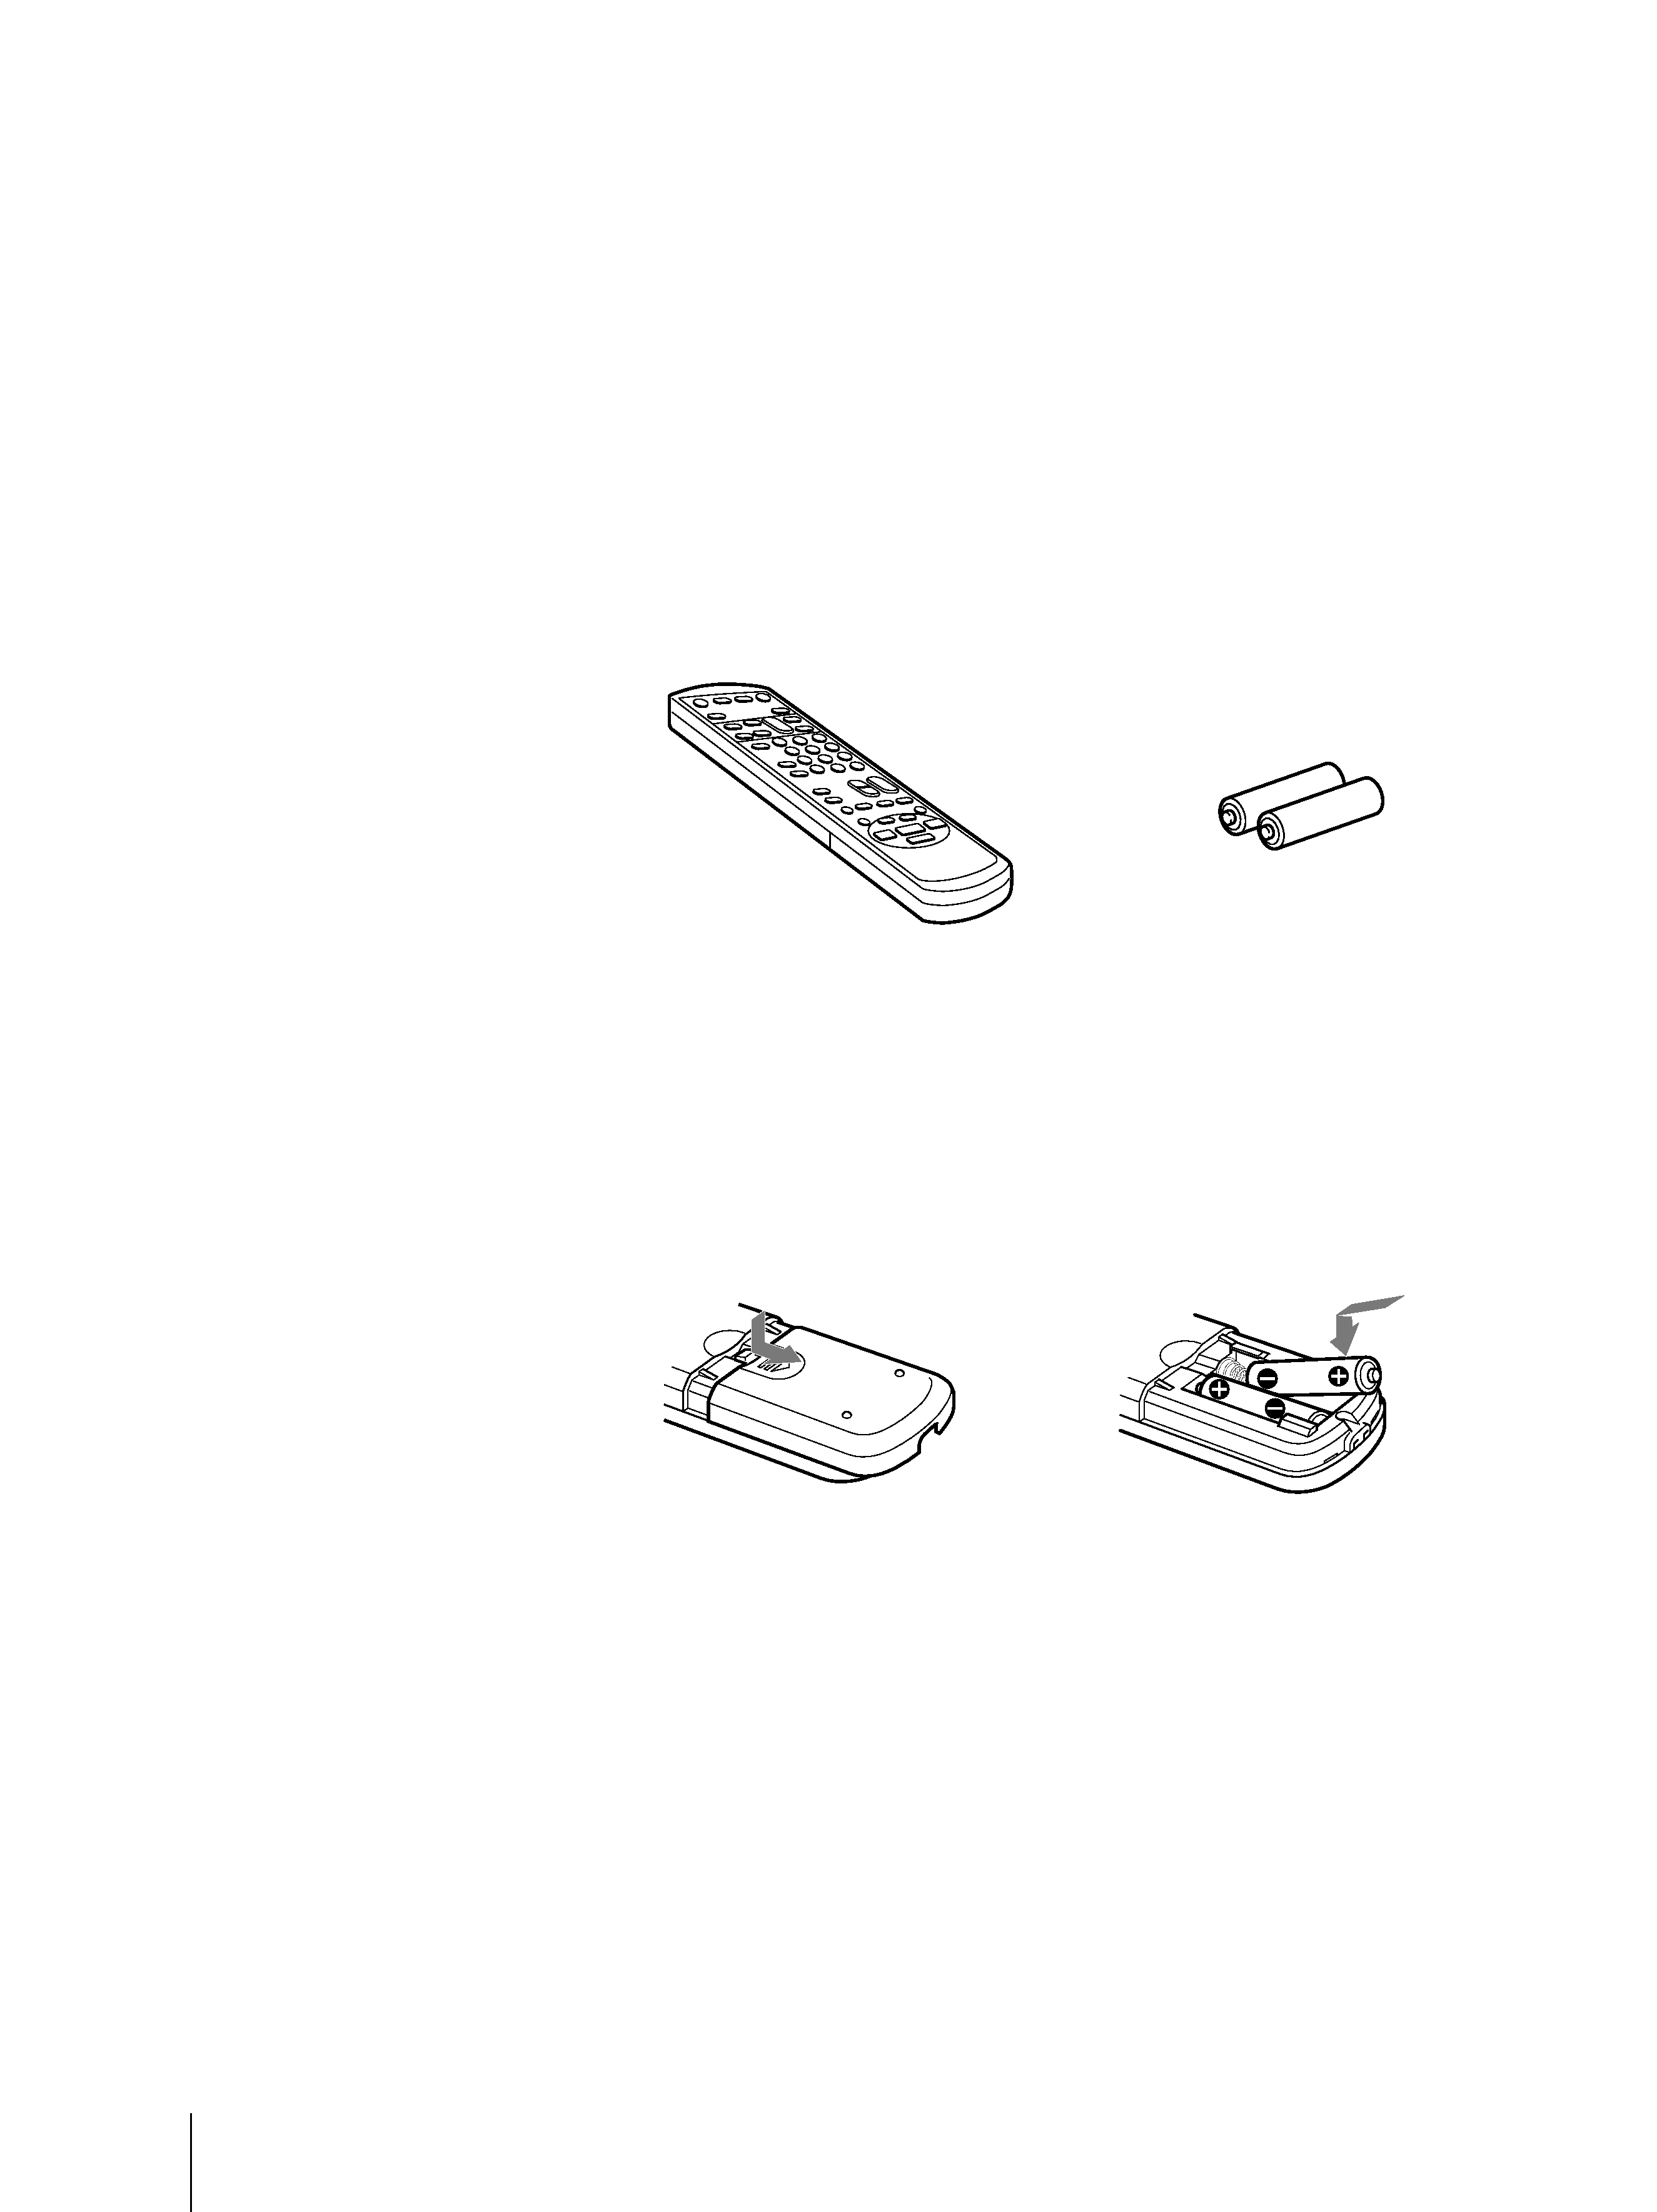
Checking the supplied accessories
When you have taken everything out of the carton, check that you have
these items:
· Remote control
· Two size AA (R6) batteries
Inserting batteries into the remote
control
Getting Started
Step 1 -- Preparation
Turn the remote control
over, and remove the cover.
Check the polarities and insert the
two size AA (R6) batteries correctly.
Notes
· With normal use, the batteries
should last about three to six
months.
· If you do not use the remote
control for an extended period of
time, remove the betteries to avoid
possible damage from battery
leakage.
· Do not use a new battery with an
old one.
· Do not use different types of
batteries.
Inserting the batteries
Insert two size AA (R6) batteries by
matching the + and on the
batteries to the diagram inside the
battery compartment.
Insert the negative () end first, then
push in and down until the positive
(+) end clicks into position.
Getting Started
5
Step 2 -- Connecting the Antenna
Although you can use either an indoor or outdoor antenna with your
Video/TV, we recommend connecting an outdoor antenna or a cable TV
system for better picture quality.
Connecting an antenna
Connect your antenna cable to the VHF/UHF antenna terminal. If you
cannot connect your antenna cable directly to the terminal, follow the
instructions that match your cable type.
Connecting an antenna/cable TV
system
Connecting a single cable to the antenna
Connect the cable directly to the antenna.
Connecting to a cable box
Some pay cable TV systems use scrambled or encoded signals that require
a cable box to view all channels.
If you control all channel selection through your cable box, you should
consider using the CHANNEL FIX feature (see "Selecting the Video/TV's
Cable Box Input Channel CHANNEL FIX" on page 38.)
Notes
· Most VHF/UHF combination
antennas have a signal splitter.
Remove the splitter before
attaching the appropriate
connector.
· If you use the U/V mixer, snow
and noise may appear in the
picture when viewing cable TV
channels over 37 (W+1).
· The cable box is supplied by the
cable company.
(Rear of Video/TV)
VHF/UHF
(Rear of Video/TV)
VHF/UHF
(Rear of Video/TV)
VHF/UHF
Antenna connector
(not supplied)
EAC-66 U/V mixer
(not supplied)
(Rear of Video/TV)
VHF/UHF
(Rear of Video/TV)
VHF/UHF
A
75-ohm coaxial
cable
B
300-ohm
twin lead cable
C
Coaxial cable and
twin lead cable