SERVICE MANUAL
HVL-HL1
VIDEO LIGHT
SPECIFICATIONS
PARTS LIST
Ref. No.
Part No.
Description
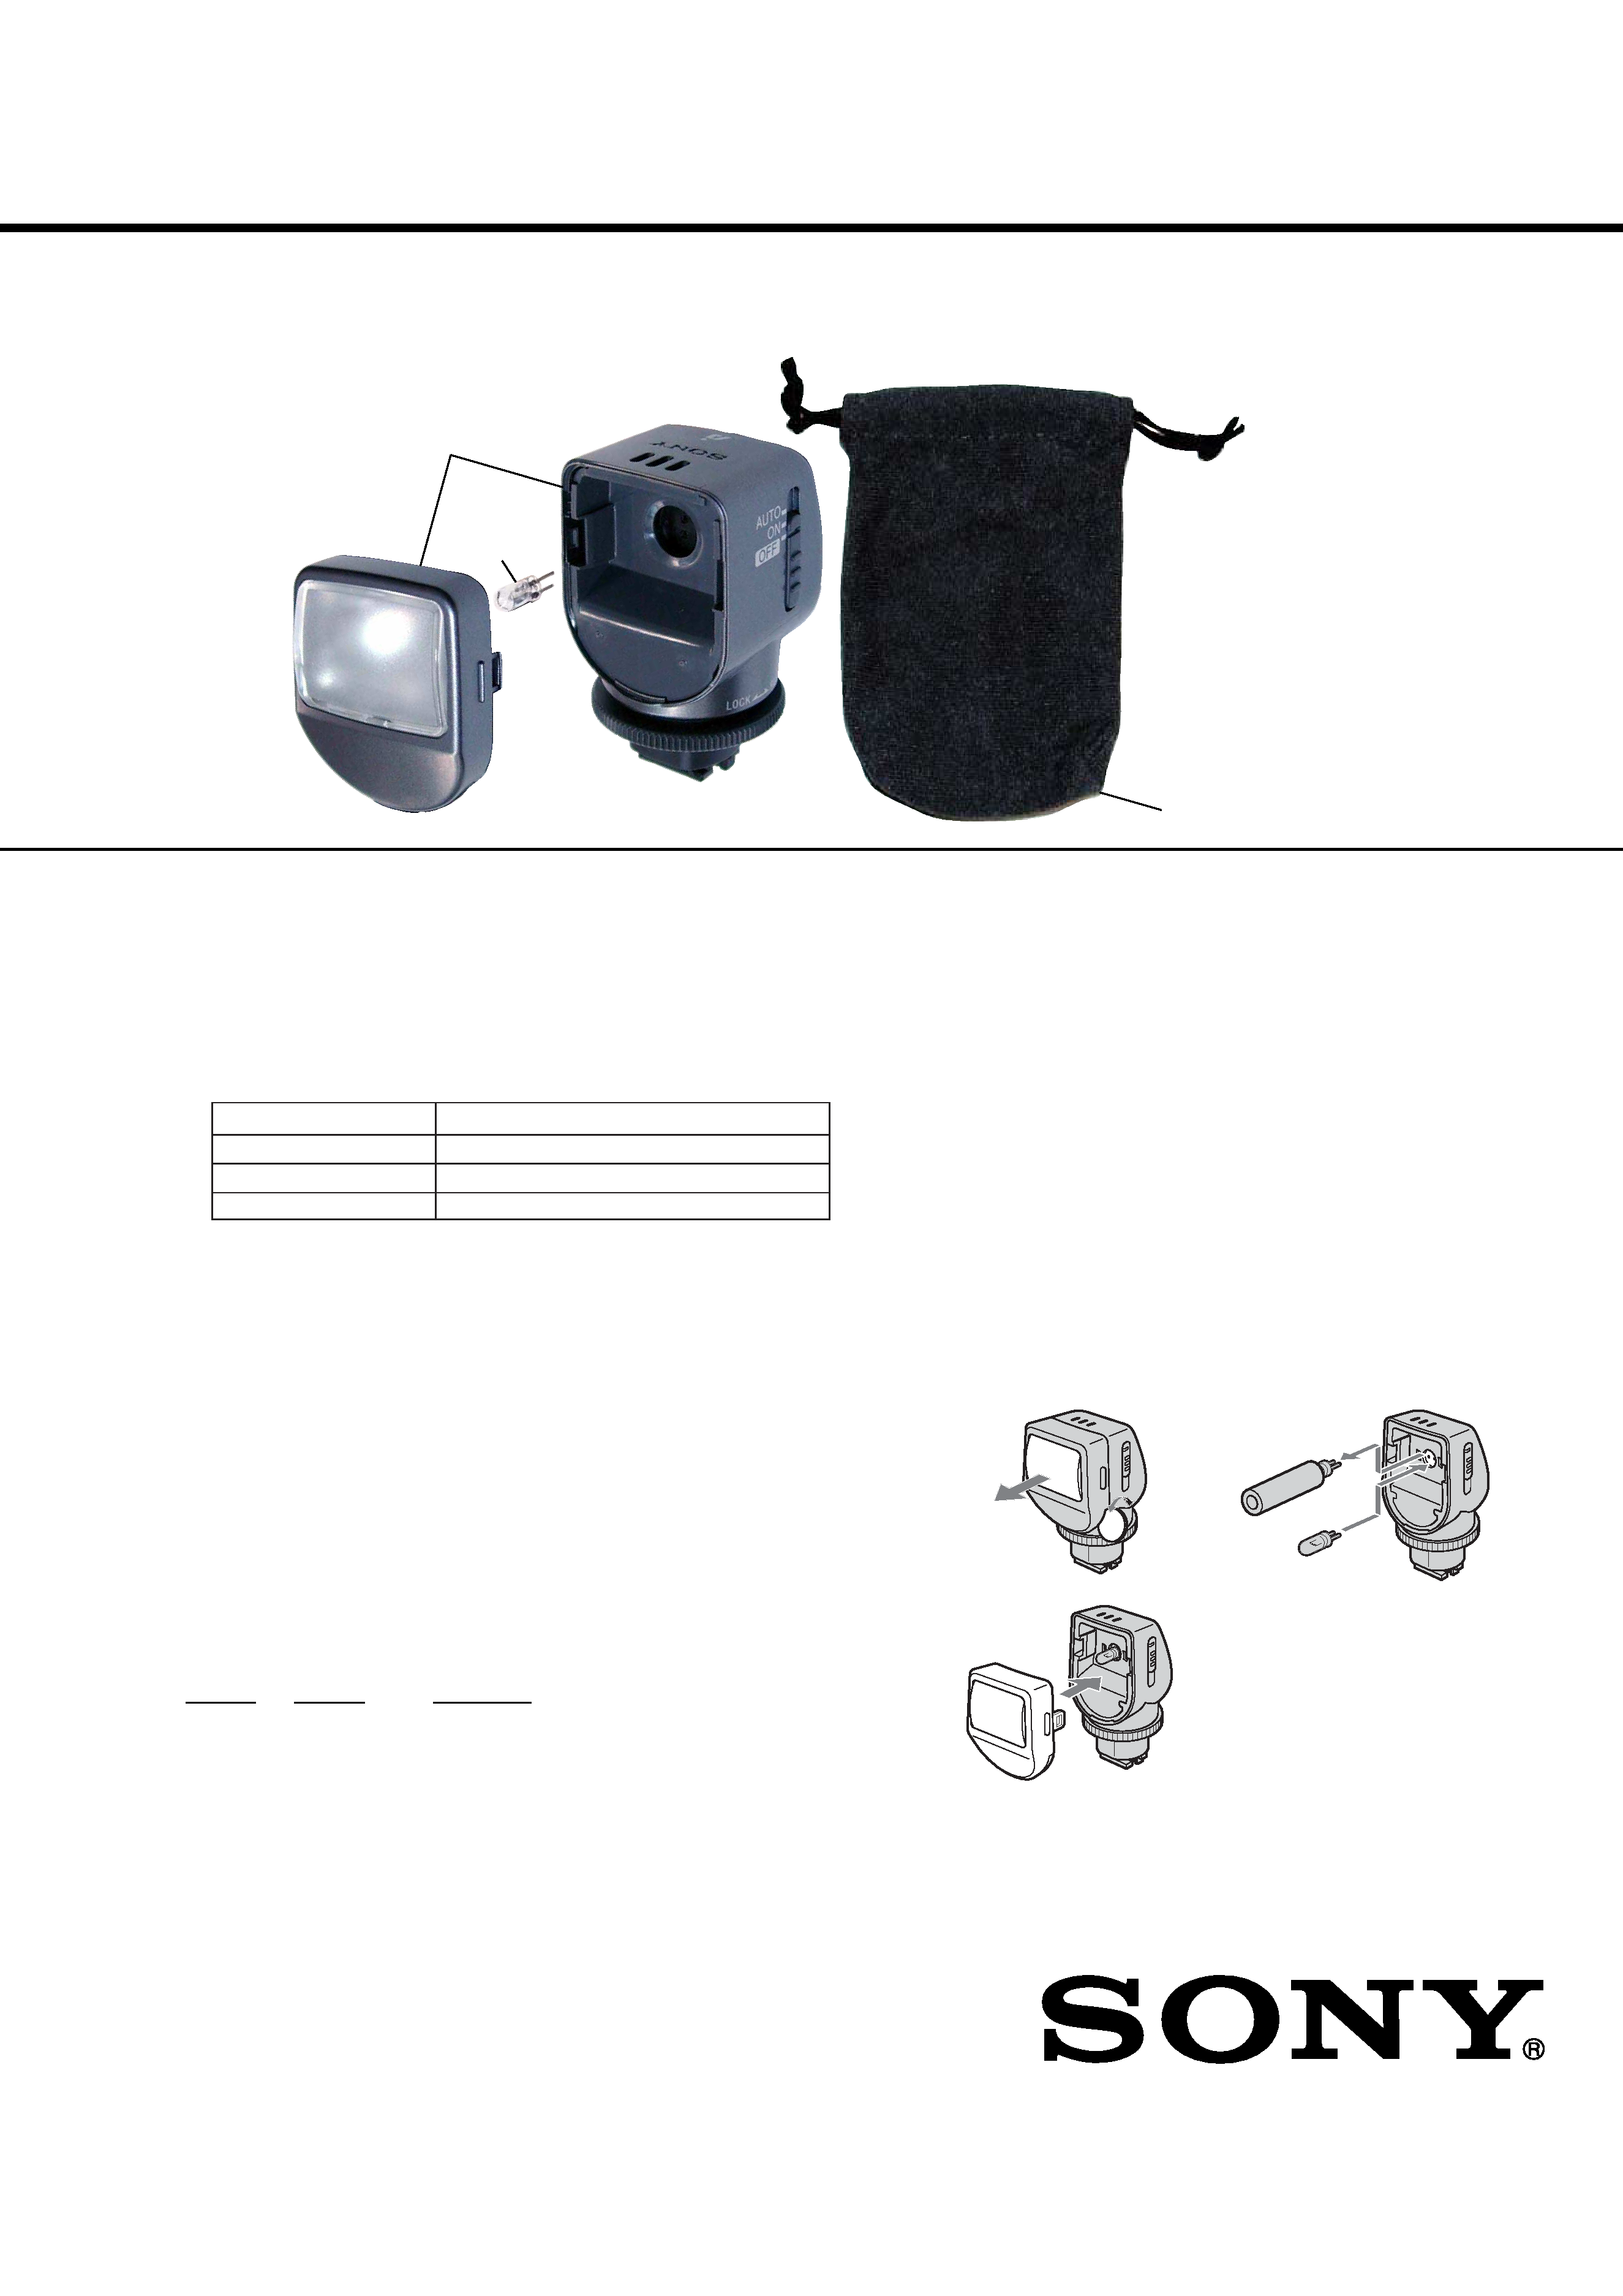
1
A-1092-061-A LIGHT ASSY
2
A-1099-823-A LAMP (SERVICE USE), XENON
3
3-082-390-01 POUCH
2-515-130-11 MANUAL, INSTRUCTION
(ENGLISH, FRENCH, SPANISH, ITALIAN)
(US, CND, AEP)
2-515-130-21 MANUAL, INSTRUCTION (GERMAN, DUTCH,
PORTUGUESE, SWEDISH) (AEP)
2-515-130-31 MANUAL, INSTRUCTION
(RUSSIAN, ARABIC, TRADITIONAL CHINESE,
SIMPLIFIED CHINESE, KOREAN) (AEP, CH)
Sony EMCS Co.
2005A0500-1
© 2005. 1
Published by DI Technical Support Section
9-876-785-11
US Model
Canadian Model
AEP Model
Chinese Model
Ver 1.0 2005.01
HVL-HL1
1
3
2
·Abbreviation
CH
: Chinese model
CND : Canadian model
Power requirements
7.2 V DC
Power consumption
Approx. 3.0 W
Maximum luminous intensity
Approx. 100 cd
Lighting direction
Horizontal
Lighting angle
Approx. 15 degrees
Continuous lighting time
Lighting duration
Type of battery pack
Used with camcorder (DCR-HC90)*
NP-FA50
35 (30)
NP-FA70
70 (60)
(Approx. minutes using fully-charged battery pack)
*When used with the LCD panel closed. Duration with the LCD panel
open is shown in parentheses.
Illumination range
Approx. 1 m (3 1/4 ft) : 100 lux,
Approx. 2 m (6 1/2 ft) : 25 lux,
Approx. 3 m (9 3/4 ft) : 12 lux
Color temperature
Approx. 3,000 K
Average life of lamp
Approx. 100 hours
Otmhers
Dimensions
Approx. 31.5
× 57.5 × 40 mm
(1 1/4
× 2 3/8 × 1 5/8 inches) (w/h/d)
Mass
Approx. 30 g (1.1 oz)
Included items
Video light (1)
Pouch (1)
Set of printed documentation
Design and specifications are subject to change without notice.
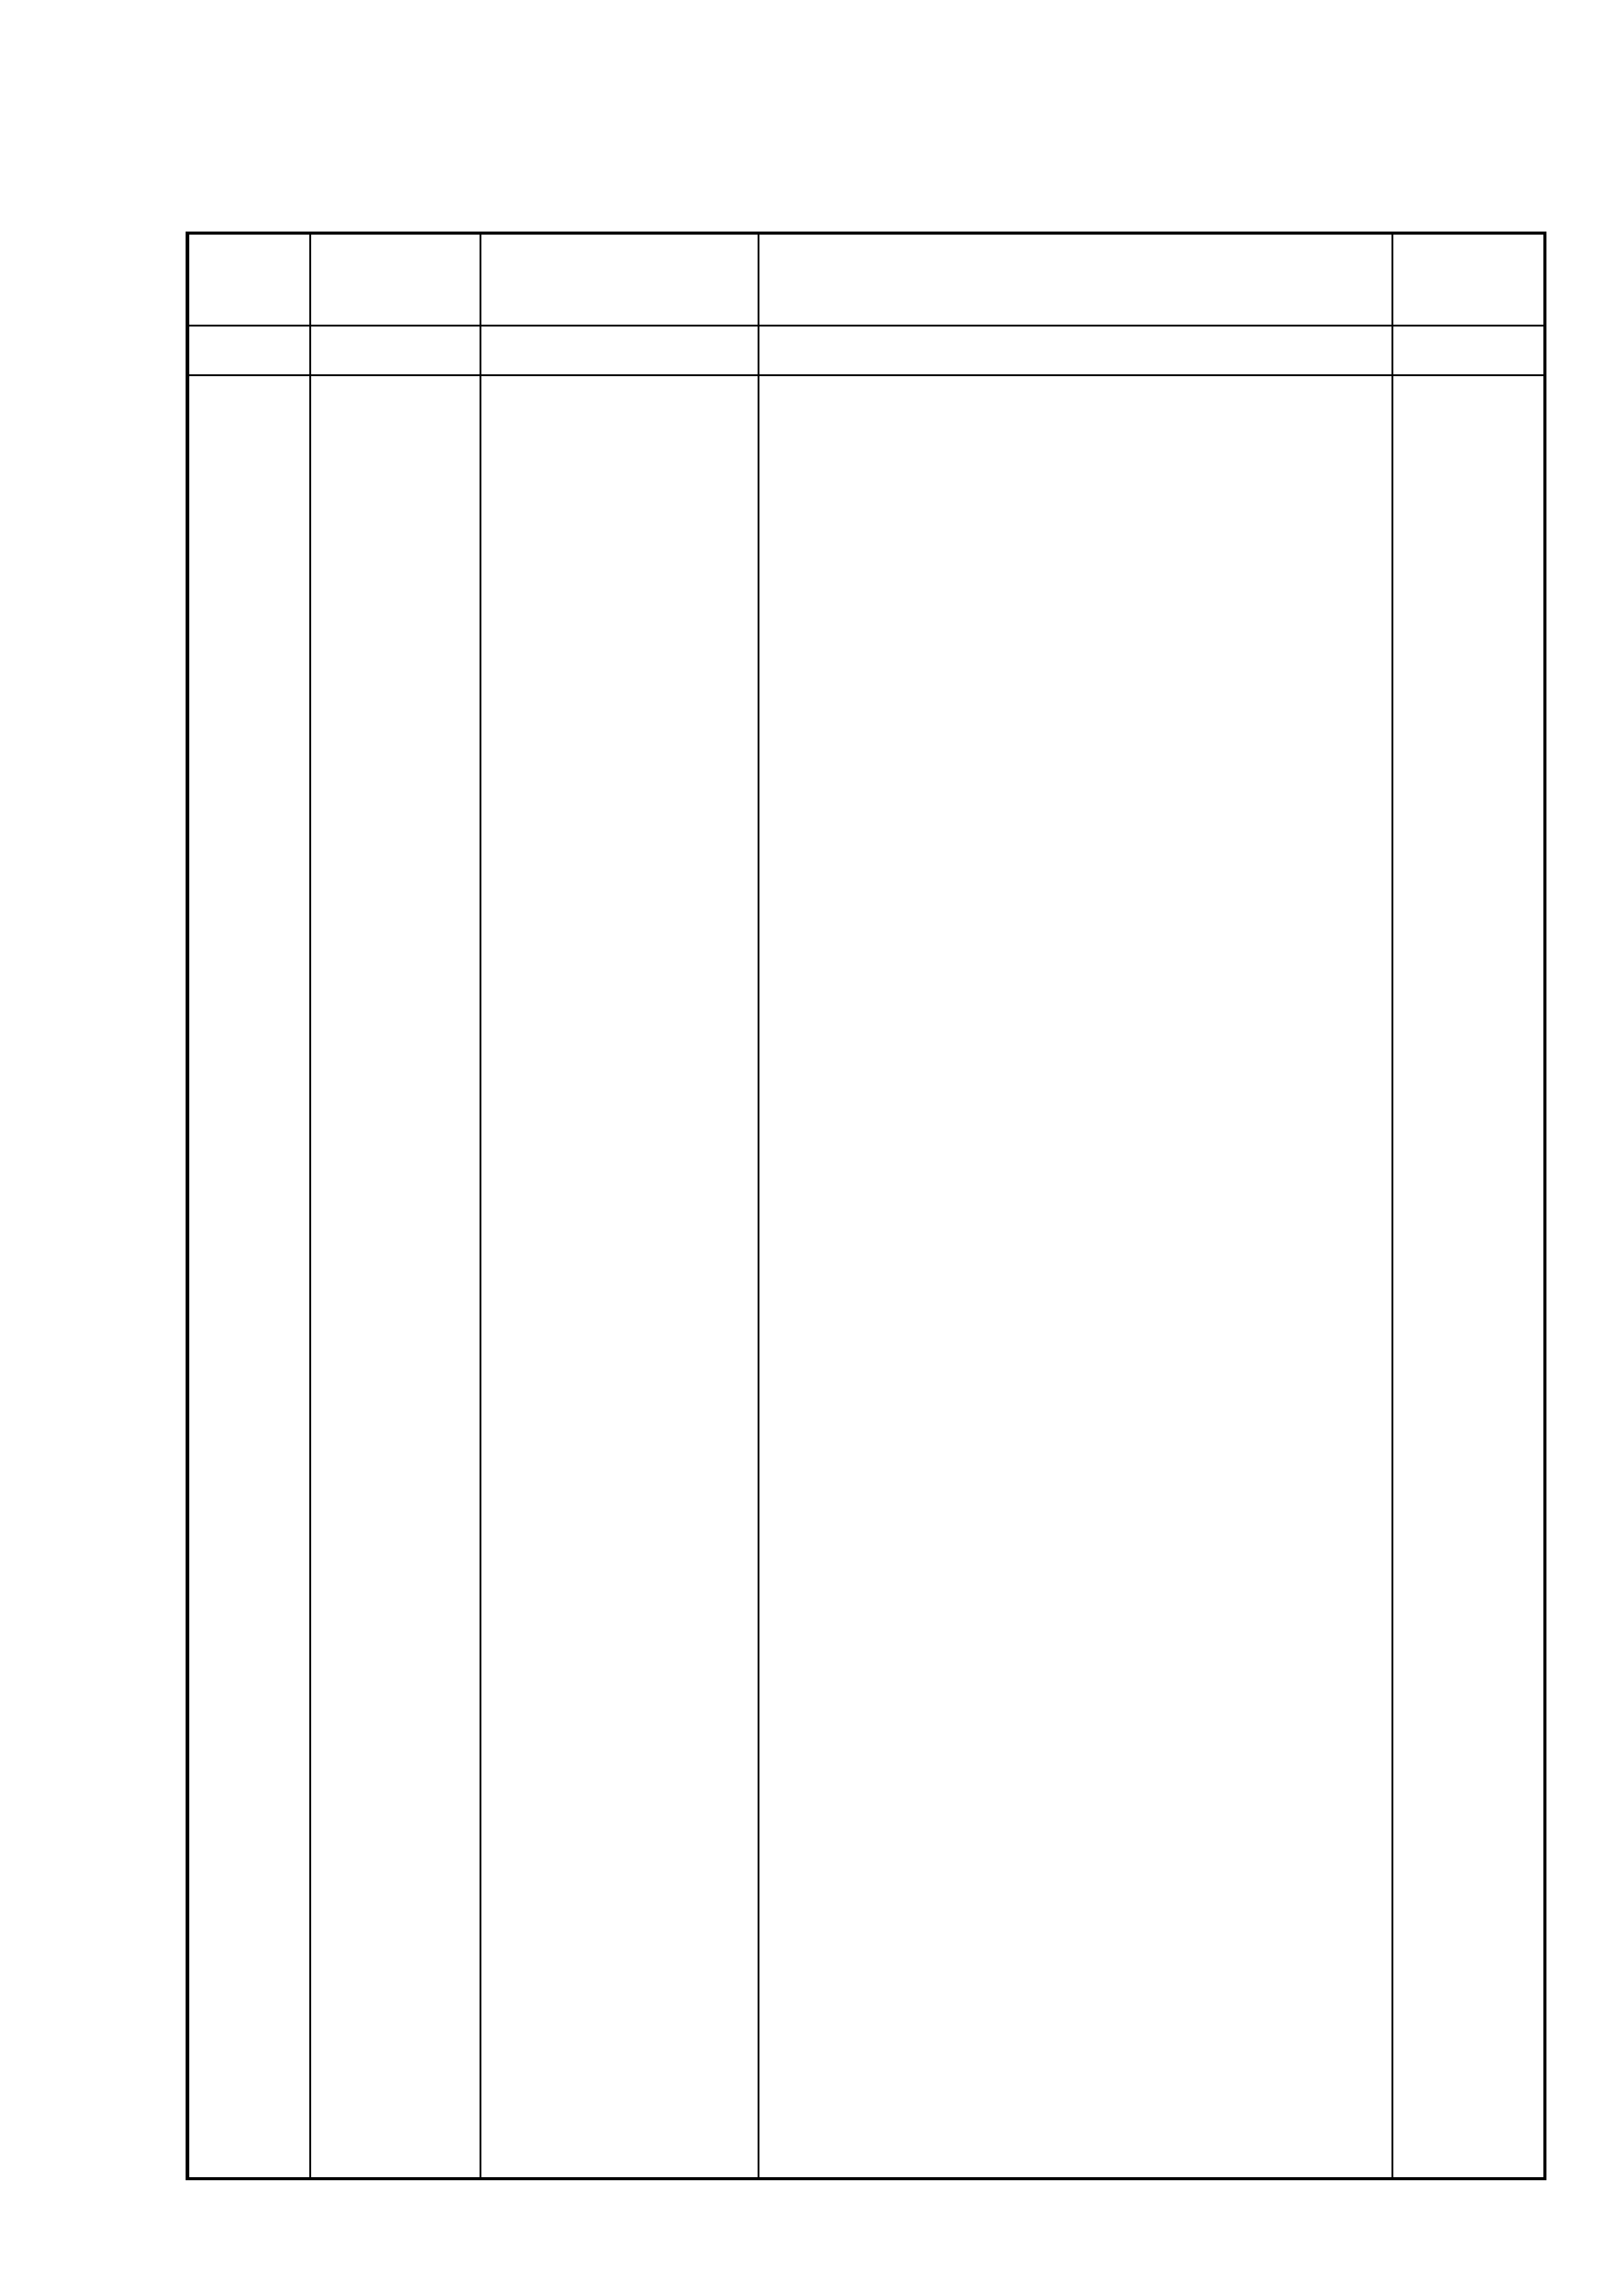
Replacing the lamp
Use the Sony XB-3L xenon lamp. Consult your Sony dealer or local authorized Sony
service facility for replacement of xenon lamp XB-3L.
Order the following parts number when purchasing the xenon lamp : A-1099-823-s.
The lamp is hot when it has just burned out. Wait until the lamp cools down before
removing it.
1Remove the front cover by inserting someting like a coin after
making sure that the unit is cool enough to handle.
2Replace the lamp.
1
Cover the old lamp with the tube supplied with the new lamp
for replacement and pull the tube out to replace the old lamp.
2
Insert the new lamp into the socket straightly.
* Do not tilt the lamp.
3
Insert the pawls on the front cover and attach it.
Notes
· The lamp is hot when it has just burned out. Make sure that the lamp is cool
enough to handle.
· To prevent the lamp from being smudged with fingerprints, handle it with a dry
cloth. If the lamp is smudged, wipe it completely clean.
2
1
3
1
2
Revision History
Reverse
Ver.
1.0
Date
2005.01
History
Official Release
Contents
--
S.M. Rev.
issued
--
987678511.pdf
HVL-HL1