Step 2: Setting the Clock
B
Getting Started
Installing the Software
Install the "Digital Voice Editor" software in your
computer's hard disk.
Notes
· When you install the "Digital Voice Editor" for ICD-MS/SX/
ST/S/BP/BM/P Series, you can create compatible file
formats (mentioned in "About the File Formats").
When you install the "Digital Voice Editor" for ICD-MS/SX/
ST/S/BP/BM Series, you can create all the compatible file
types except for the DVF (TRC) files. (You can play back the
DVF (TRC) files.)
When installing both types of the "Digital Voice Editor",
make sure to select overwrite installation to handle all
the compatible file formats.
·Do not connect the IC recorder to the computer before
installing the Software.
· Be sure to close all running programs before installing the
"Digital Voice Editor" software.
· When installing or uninstalling the software in Windows®
2000 Professional, make sure to log on Windows as the user
name of "Administrator. "
· When installing or uninstalling the software in Windows®
XP Professional/Home Edition, log on as a user name with
the "Computer administrator" user account. (To find if the
user name has a "Computer administrator" user account,
open the "User Accounts" from the "Control Panel" and
refer to the section beneath the user name being displayed.)
· When the "Memory Stick Voice Editor 1.0/1.1/1.2/2.0"
software has already been installed, installing the supplied
software will automatically remove the "Memory Stick Voice
Editor" software. (Messages are not removed.)
· After installing, the Microsoft DirectX module is also installed
depending on the operation system of your computer. This
module is not deleted after uninstalling the software.
· After installing the "Digital Voice Editor" software, do not
install the "Memory Stick Voice Editor 1.0/1.1/1.2/2.0"
software. The "Digital Voice Editor" will not work properly.
With the supplied software, you can save or edit the
messages in the "Memory Stick".
1 Turn on your computer and start up
Windows.
2 Insert the supplied CD-ROM into the CD-
ROM drive.
The installer starts up automatically and the
welcome window appears.
If the installer does not start up, double click [DVE
Setup.exe] in the [English] folder.
If you have already installed a previous
version of the "Digital Voice Editor" or any
version of the "Memory Stick Voice Editor"
The dialog box to uninstall the previous version
may be displayed. (Messages are not removed.)
Follow the instructions on the screen to uninstall
the software and then the installation of the
current version starts.
3 Follow the displayed instructions.
When the [Restart] dialog box appears, click [OK]
to restart the computer.
Now the installation is completed.
When the dialog box used to input the
owner name is displayed
Input the owner name for your identification with
the Digital Voice Editor.
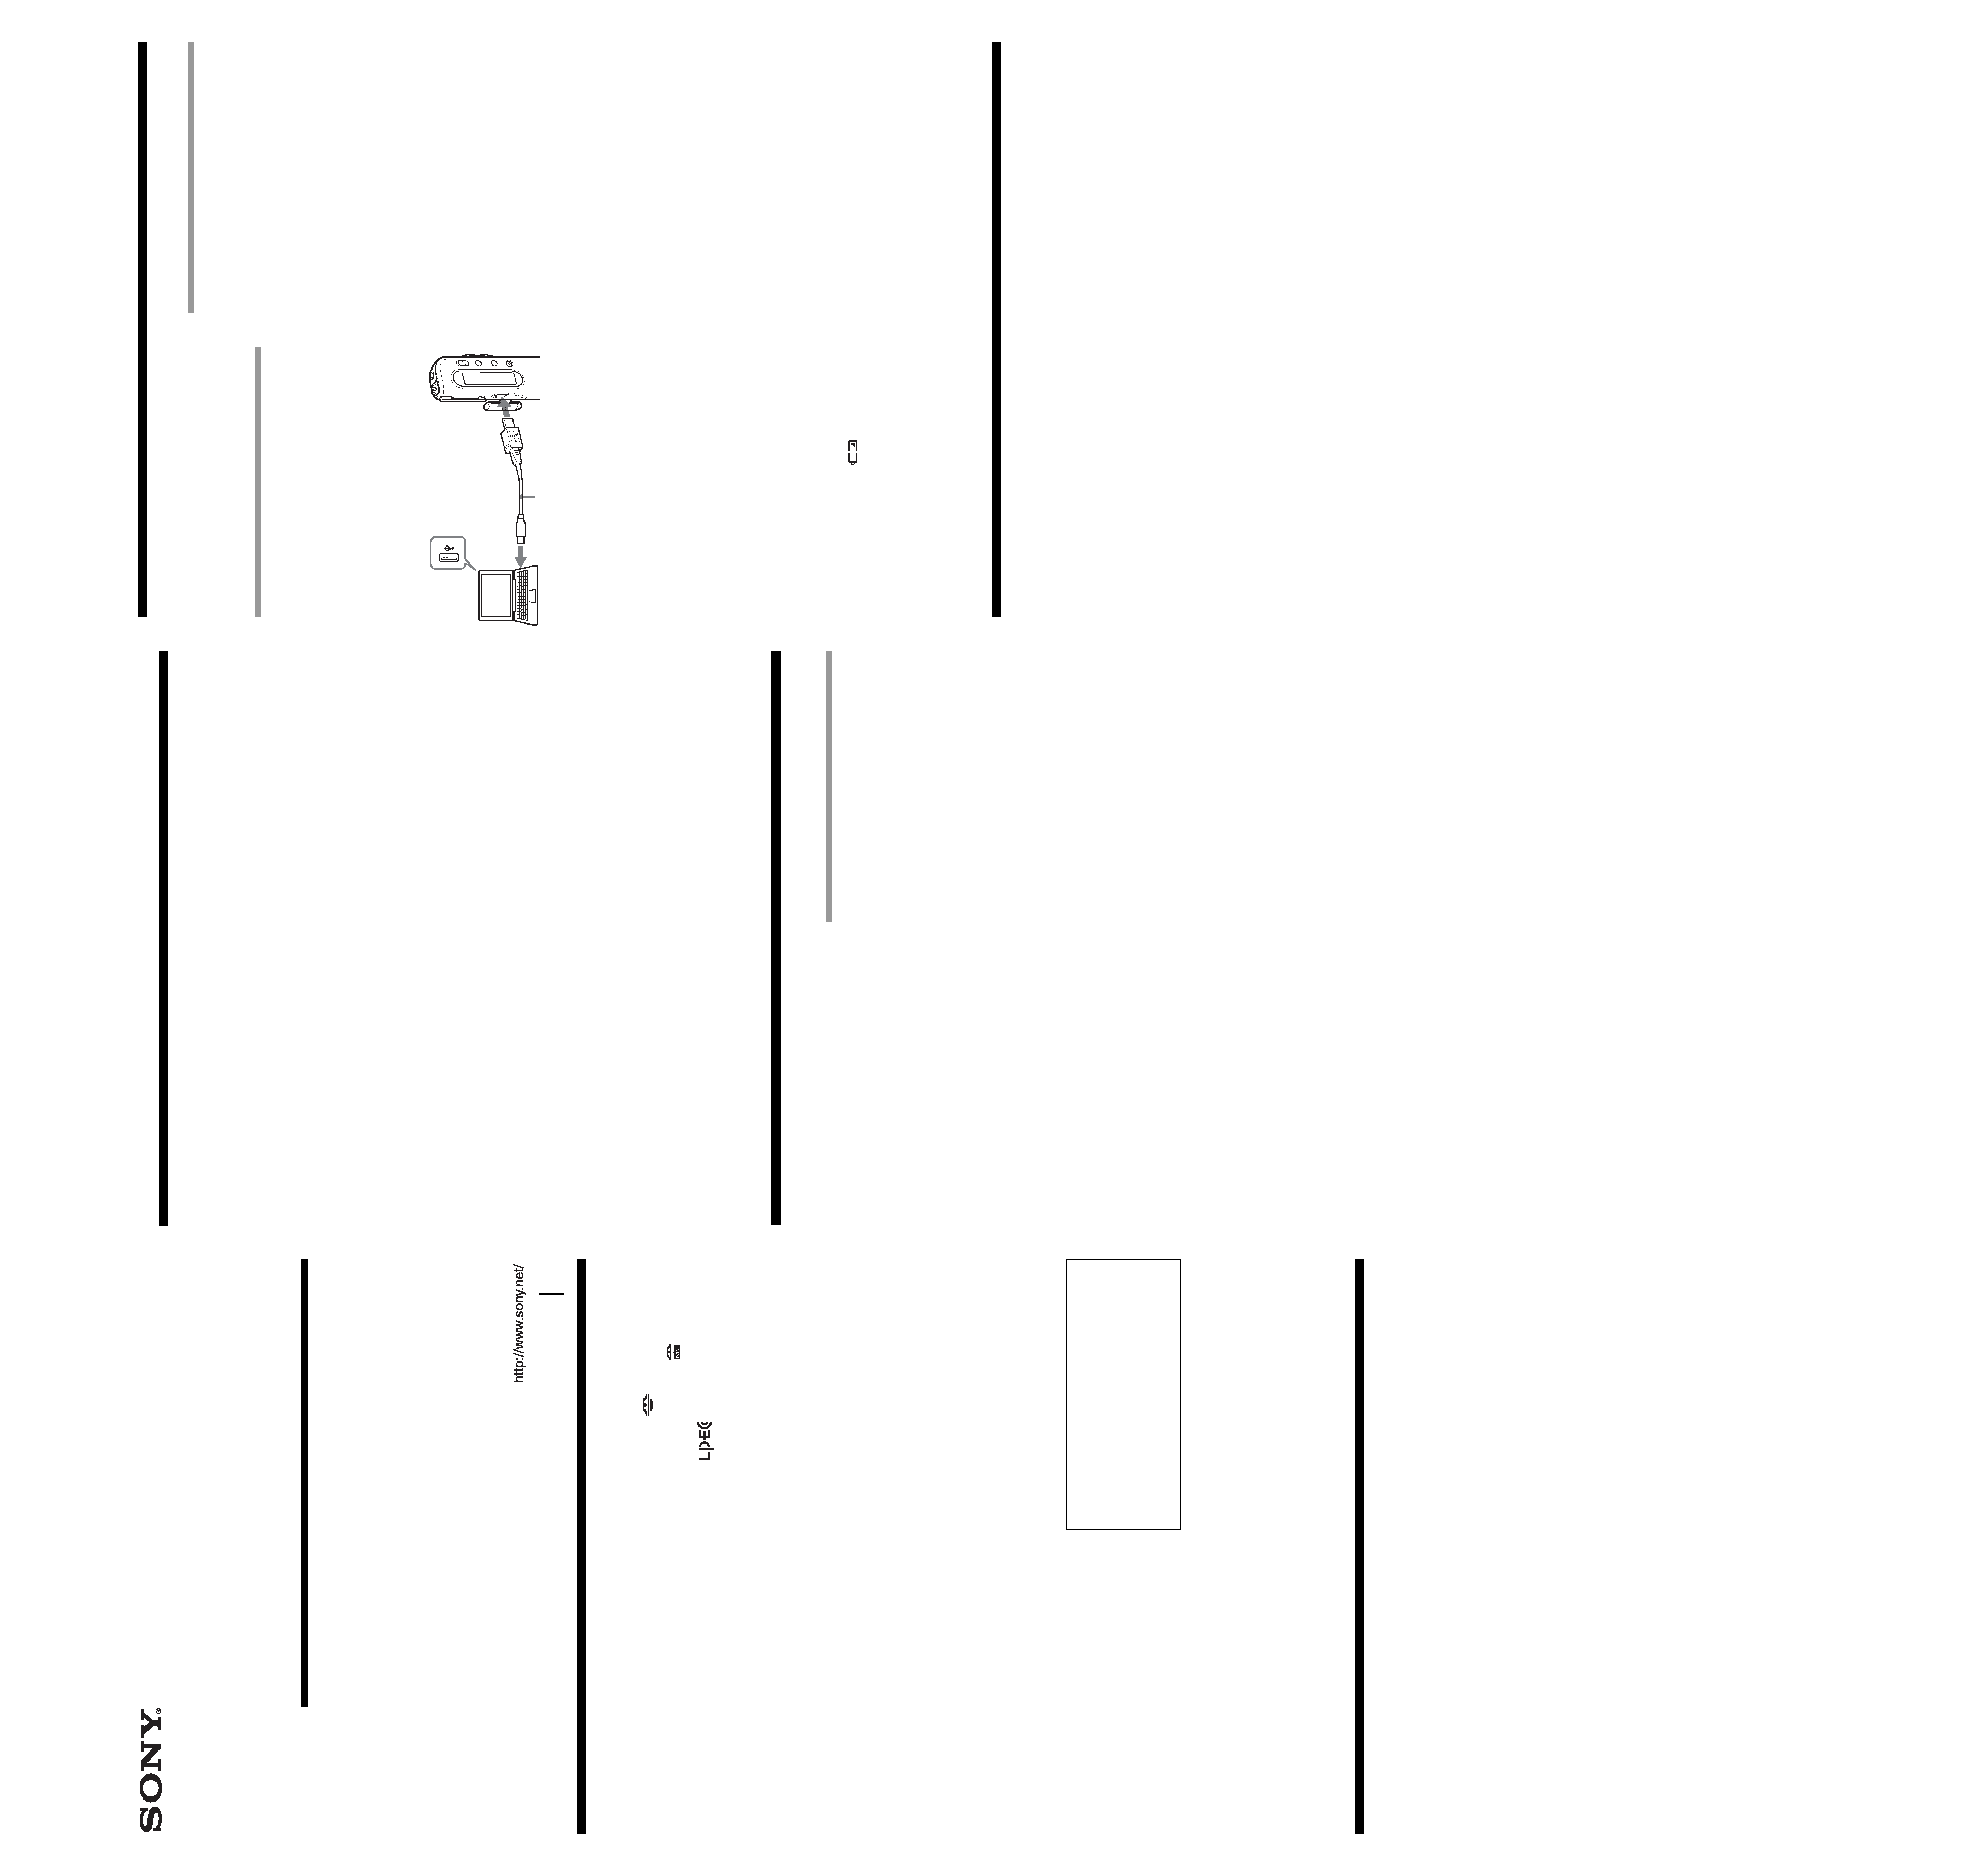
To USB connector
of IC recorder
USB connecting
cable (supplied)
To USB connector
of your computer
Inserting a "Memory Stick" to
your computer (ICD-MS series)
Remove the "Memory Stick" from the IC recorder and
insert it to your computer by using either of the
following methods:
If your computer has a "Memory Stick" slot
Insert the "Memory Stick" directly into the slot.
If your computer does not have a "Memory
Stick" slot
Use either of the devices below to insert the "Memory
Stick" to your computer. In either case, you need to
install the driver for the device. For details, refer to
the instruction manual of the device you use.
· Using the Sony PC Card Adaptor (ex. MSAC-PC3)
Insert the "Memory Stick" into the PC Card
Adaptor. Then insert the PC Card Adaptor into the
PC card slot of your computer.
Note
When using the PC Card Adaptor, make sure to release the
LOCK switch of the "Memory Stick".
· Using the USB-compatible Sony Memory Stick
Reader/Writer (ex. MSAC-US70)
Connect the Memory Stick Reader/Writer to the
USB connector of your computer with the supplied
cable. Insert the "Memory Stick" into the Memory
Stick Reader/Writer.
Using the IC recorder as a removable
disk (ICD-MS515, ICD-S/ICD-BM series)
Data storage function (ICD-S series)
"Memory Stick" reader/writer function (the
IC recorder equipped with a USB connector)
When connecting the IC recorder and your computer
through the USB connectors, you can temporarily save
an image or text file of your computer onto the IC
recorder or the "Memory Stick" as follows:
1 Connect the IC recorder and your computer
through the USB connectors.
2 Open "My Computer" in the Windows and
check to see that a new removable disk is
correctly recognized.
3 Use the Explorer or another to copy files of
your computer onto the removable disk.
Notes
·A file saved without using the "Digital Voice Editor" cannot
be played or displayed on the IC recorder even if it is of a
compatible file format.
· When you view the contents of the removable disk with the
Explorer, the VOICE folder will be displayed. Make sure to
use the "Digital Voice Editor" software to move, copy, add,
or delete a file in the VOICE folder.
· According to the size of the files copied, the maximum
recordable time of the IC recorder may reduce.
· Do not format the removable disk on your computer.
Notes
· Be sure to install the "Digital Voice Editor" software before
connecting the IC recorder to your computer. Otherwise, a
message like [Found New Hardware Wizard] may appear
when you connect the IC recorder to your computer. In this
case, click [Cancel].
· Depending on the IC recorder you use, the [Hardware
Installation] warning message may appear when you
connect the IC recorder to the USB connector of your
computer for the first time in Windows® XP Professional/
Home Edition. In this case, you may ignore the message
without problem and click [Continue Anyway] to proceed
with the software installation or proceed with using the
software.
· Do not connect more than two USB devices to your
computer. Normal operation will not be guaranteed.
· Use of this IC recorder with a USB hub or a USB extension
cable is not guaranteed.
·A malfunction may occur depending on the USB devices
connected at any one time.
· Before connecting the IC recorder to the computer, check the
remaining battery power of the IC recorder (more than one
segment of the battery indicator "
" should be on) . If
the batteries are exhausted, communication between the IC
recorder and the computer may not succeed.
· When you connect the IC recorder to the computer, make
sure that the IC recorder is in the stop mode.
· We recommend you disconnect the cable from the computer
when you do not use the "Digital Voice Editor".
Connecting the IC Recorder to your Computer
You can transfer the IC recorder data onto your
computer either by connecting the IC recorder to the
computer or inserting the "Memory Stick" into the
computer.
Connecting through the USB
connectors (for the IC recorder
equipped with a USB connector)
Use the USB connecting cable supplied with the IC
recorder to connect the USB connectors of the IC
recorder and your computer.
The IC recorder is recognized by the computer as soon
as the cable is connected. You can connect or
disconnect the cable when the IC recorder and the
computer are turned on or off.
3-264-819-11 (1)
Digital Voice Editor 2
Operating Instructions
Before You Begin
2004 Sony Corporation
Printed in China
Notice for Users
About the File Formats
The "Digital Voice Editor" can handle the following
file formats. Depending on the file format, some
editorial or saving functions may be limited on the
"Digital Voice Editor".
· DVF file [LPEC: for ICD-SX/ST series] (Digital
Voice File/file extension: *.dvf)
Sound file format used in recording messages on
the Sony IC recorder ICD-SX/ST series equipped
with a USB connector. You can select ST (stereo),
SP and LP recording modes.
· DVF file [LPEC: for ICD-BPx50 series] (Digital
Voice File/file extension: *.dvf)
Monaural sound file format used in recording
messages on the Sony IC recorder ICD-BPx50 series
equipped with a USB connector. You can select SP
and LP recording modes. The sound quality in the
LP mode is improved from an LP mode DVF file for
ICD-BP100/BPx20 series.
· DVF file [LPEC: for ICD-BP100/BPx20 series]
(Digital Voice File/file extension: *.dvf)
Monaural sound file format used in recording
messages on the Sony IC recorder ICD-BP100/
BPx20 series equipped with a USB connector. You
can select SP and LP recording modes.
· DVF file [TRC: for ICD-Px8 series] (Digital Voice
File/file extension: *.dvf)
Monaural sound file format used in recording
messages on the Sony IC recorder ICD-Px8 series
equipped with a USB connector. You can select SP
and LP recording modes.
· DVF file [TRC: for ICD-Px7 series] (Digital Voice
File/file extension: *.dvf)
Monaural sound file format used in recording
messages on the Sony IC recorder ICD-Px7 series
equipped with a USB connector. You cannot select
the recording mode.
· MSV file [LPEC] (Memory Stick Voice file/file
extension: *.msv )
Monaural sound file format used in recording
messages on the Memory Stick IC recorder ICD-
MS515 and ICD-S series. You can select SP and LP
recording modes.
· MSV file [LPEC: for ICD-BM series] (Memory Stick
Voice file/file extension: *.msv)
Sound file format used in recording messages on
the Sony Memory Stick IC recorder ICD-BM series.
You can select ST (stereo), SP and LP recording
modes.
· MSV file [ADPCM] (Memory Stick Voice file/file
extension: *.msv)
Monaural sound file format used in recording
messages on the Memory Stick IC recorder ICD-
MS1. You can select SP and LP recording modes.
· WAV file (WAV FILE [8/11/16kHz, 16 bit,
monaural] [44.1kHz, 16 bit, stereo] file/file
extension: *.wav)
PCM 8/11/16kHz, 16 bit monaural, or 44.1kHz 16
bit stereo sound file used in recorded sound in
standard Windows application software.
· MP3 file (MP3 file/file extension: *.mp3 )
The MP3 file stores digital audio such as sound or
songs and is commonly used to distribute it over
Internet.
Note: Digital Voice Editor cannot save a file in
the MP3 file format.
On the recording modes (ST/SP/LP)
· ST: Stereo recording mode. The file size becomes relatively
larger than in the SP mode recording. (For the ICD-SX/ST/
BM series only)
· SP: Standard play monaural recording mode in better sound
quality. The file size becomes relatively larger than in the LP
mode recording.
· LP: Long play monaural recording mode.
Notes
The "Digital Voice Editor 2" does not support the ICS file
format (Sony IC recorder Sound file/file extension: *.ics ) used
in recording messages on the IC recorder ICD-R100. To use an
ICS file with the "Digital Voice Editor 2", use the software
compatible with the ICS file format such as "ICS converter",
"Sony ICD-PCLINK software" or "Digital Voice Editor Ver.
1.x" to convert an ICS file into a WAV file. (The ICS Converter
is available on the Sony web site as free software. )
System Requirements
Your computer and system software must meet the
following minimum requirements.
· IBM PC/AT or compatible
CPU: 266MHz Pentium® II processor or higher
RAM: 64MB or more
Hard disk space: 70MB or more depending on
the size and number of sound files you store.
CD-ROM drive/"Memory Stick" drive*1
USB connector*2 (compatible with the standard
USB 1.1)
Sound board: Sound Blaster 16 compatible
Display: High color (16 bit) or more and 800 x
480 dots or more
· OS: Microsoft® Windows® XP Professional/XP
Home Edition/2000 Professional/Millennium
Edition/98 Second Edition/98 standard installation
*3 (You cannot use this software with Windows® 95
or Windows® NT.)
*1 If you do not connect your IC recorder to your computer via
USB connectors, you need a computer with a "Memory
Stick" slot or optional "Memory Stick" adaptors as shown
below to transfer the "Memory Stick" data to your computer:
PC Card Adaptor for "Memory Stick" (ex. MSAC-PC3)
Memory Stick Reader/Writer (ex. MSAC-US70)
Depending on the adaptors, more system requirements may
be needed. We do not recommend the use of a floppy disk
adaptor for "Memory Stick".
*2 You need the USB connector to connect your IC recorder
equipped with a USB connector. You also need the
connector to use the Memory Stick Reader/Writer (ex.
MSAC-US70).
*3For usual use of the software in the Windows® 2000
Professional, make sure to log on Windows as a user name
belonging to the "Administrators" or "Power Users"
account. You cannot use the software with a user name
belonging to the "Users" account.
For usual use of the software in the Windows® XP
Professional/Home Edition, make sure to log on Windows
as a user name belonging to the "Computer administrator"
user account. You cannot use the software with a user name
belonging to the "Users" account.
Notes
· You cannot use the software with a Macintosh machine.
·A handmade computer, a computer whose operating system
is installed or upgraded by the user, or a computer with
multi-boot operating environment are not supported.
Note on transcribing a message
When you use Dragon NaturallySpeaking® speech-recognition
software to transcribe a message, your computer must also
meet the system requirements that the Dragon
NaturallySpeaking requires. For details, see "Guide for Voice
Recognition". You cannot use the transcribing function with
the ICD-P series.
Note on sending a voice e-mail
When you use Microsoft® Outlook Express 5.0/5.5/6.0 to send
a voice e-mail of a message, your computer must also meet the
system requirements that the Outlook Express requires.
Program © 1999, 2000, 2001, 2002, 2003, 2004 Sony
Corporation
Documentation ©2004 Sony Corporation
All rights reserved. This manual or the software
described herein, in whole or in part, may not be
reproduced, translated or reduced to any machine
readable form without prior written approval from
Sony Corporation.
IN NO EVENT SHALL SONY CORPORATION BE
LIABLE FOR ANY INCIDENTAL,
CONSEQUENTIAL OR SPECIAL DAMAGES,
WHETHER BASED ON TORT, CONTRACT, OR
OTHERWISE, ARISING OUT OF OR IN
CONNECTION WITH THIS MANUAL, THE
SOFTWARE OR OTHER INFORMATION
CONTAINED HEREIN OR THE USE THEREOF.
Sony Corporation reserves the right to make any
modification to this manual or the information
contained herein at any time without notice.
The software described herein may also be governed
by the terms of a separate user license agreement.
Trademarks
· "Memory Stick" and
are trademarks of Sony
Corporation.
· "MagicGate Memory Stick" and
are trademarks
of Sony Corporation.
· "LPEC"and
are the trademarks of Sony
Corporation.
· IBM and PC/AT are registered trademarks of
International Business Machines Corporation.
· Microsoft, Windows and Outlook are trademarks of
Microsoft Corporation, registered in the U.S.A. and
other countries.
Copyright ©1995 Microsoft Corporation.
All rights reserved.
Portion Copyright ©1995 Microsoft Corporation
· Apple and Macintosh are trademarks of Apple
Computer Inc., registered in the U.S.A. and other
countries.
· Pentium is a registered trademark of Intel
Corporation.
· NaturallySpeaking, Dragon Systems are trademarks
owned by ScanSoft, Inc. and are registered in the
United States and/or other countries.
· All other trademarks and registered trademarks are
trademarks or registered trademarks of their
respective holders. Furthermore, "TM" and "®" are
not mentioned in each case in this manual.
The "Digital Voice Editor" uses software modules as
shown below:
Microsoft® DirectX® Media Runtime
©2001 Microsoft Corporation. All rights reserved.
Information
IN NO EVENT SHALL SELLER BE LIABLE FOR
ANY DIRECT, INCIDENTAL OR
CONSEQUENTIAL DAMAGES OF ANY NATURE,
OR LOSSES OR EXPENSES RESULTING FROM
ANY DEFECTIVE PRODUCT OR THE USE OF ANY
PRODUCT.
Notes
· The illustrations in this manual may differ from the actual
software.
· Explanations in this manual assume that you are familiar
with basic operations of Windows. For how to use your
computer and operating system, please refer to the
respective manuals.
· The illustrations in this manual is for Sony IC recorders
ICD-S series, ICD-ST series, ICD-SX series, ICD-MS series,
ICD-BM series, ICD-BP series, and ICD-P series.
This manual describes how to connect your Sony IC
recorder ICD-S series, ICD-ST series, ICD-SX series,
ICD-MS series, ICD-BM series, ICD-BP series, and
ICD-P series to your computer, how to install the
"Digital Voice Editor" software, and the overview of
the "Digital Voice Editor" software. Before you start,
read the operating instructions of your IC recorder.
The "Digital Voice Editor" software allows you to
transfer the messages to your display monitor, to save
them on your computer's hard disk, and to play back
and edit them.
· Transferring the messages recorded on the IC
recorder to your computer
· Saving the messages on your computer's hard disk
· Viewing, playing, or editing the messages on your
computer
· Transferring messages back to the IC recorder
· Sending a voice e-mail message using MAPI e-mail
software.
· Using the transcribing keys to play back a message
and transcribe it using a word-processor or an
editor's window.
· Transcribing your IC recorder message using
Dragon NaturallySpeaking® speech-recognition
software (Only when Dragon NaturallySpeaking
version 5.0 (or higher) Preferred or Professional
Edition is installed on your computer).
For details on each operation , refer to the online help
files.
Uninstalling the software
When you wish to uninstall the software, follow the
steps below.
1 Click [Start] and select [Programs], [Sony
Digital Voice Editor 2] and then [Uninstall].
The uninstaller starts up.
2 Follow the displayed instructions.
Note
If you wish to move the software to another drive or directory
after it is installed, you need to uninstall the software and then
reinstall it. The software does not work properly if you just
move the files.
1 Tips
· You can also start up the uninstaller by clicking [Start] and
then selecting [Settings], [Control Panel], and [Add/Remove
Programs].
· Uninstallation does not remove the message files.
Starting the "Digital Voice Editor"
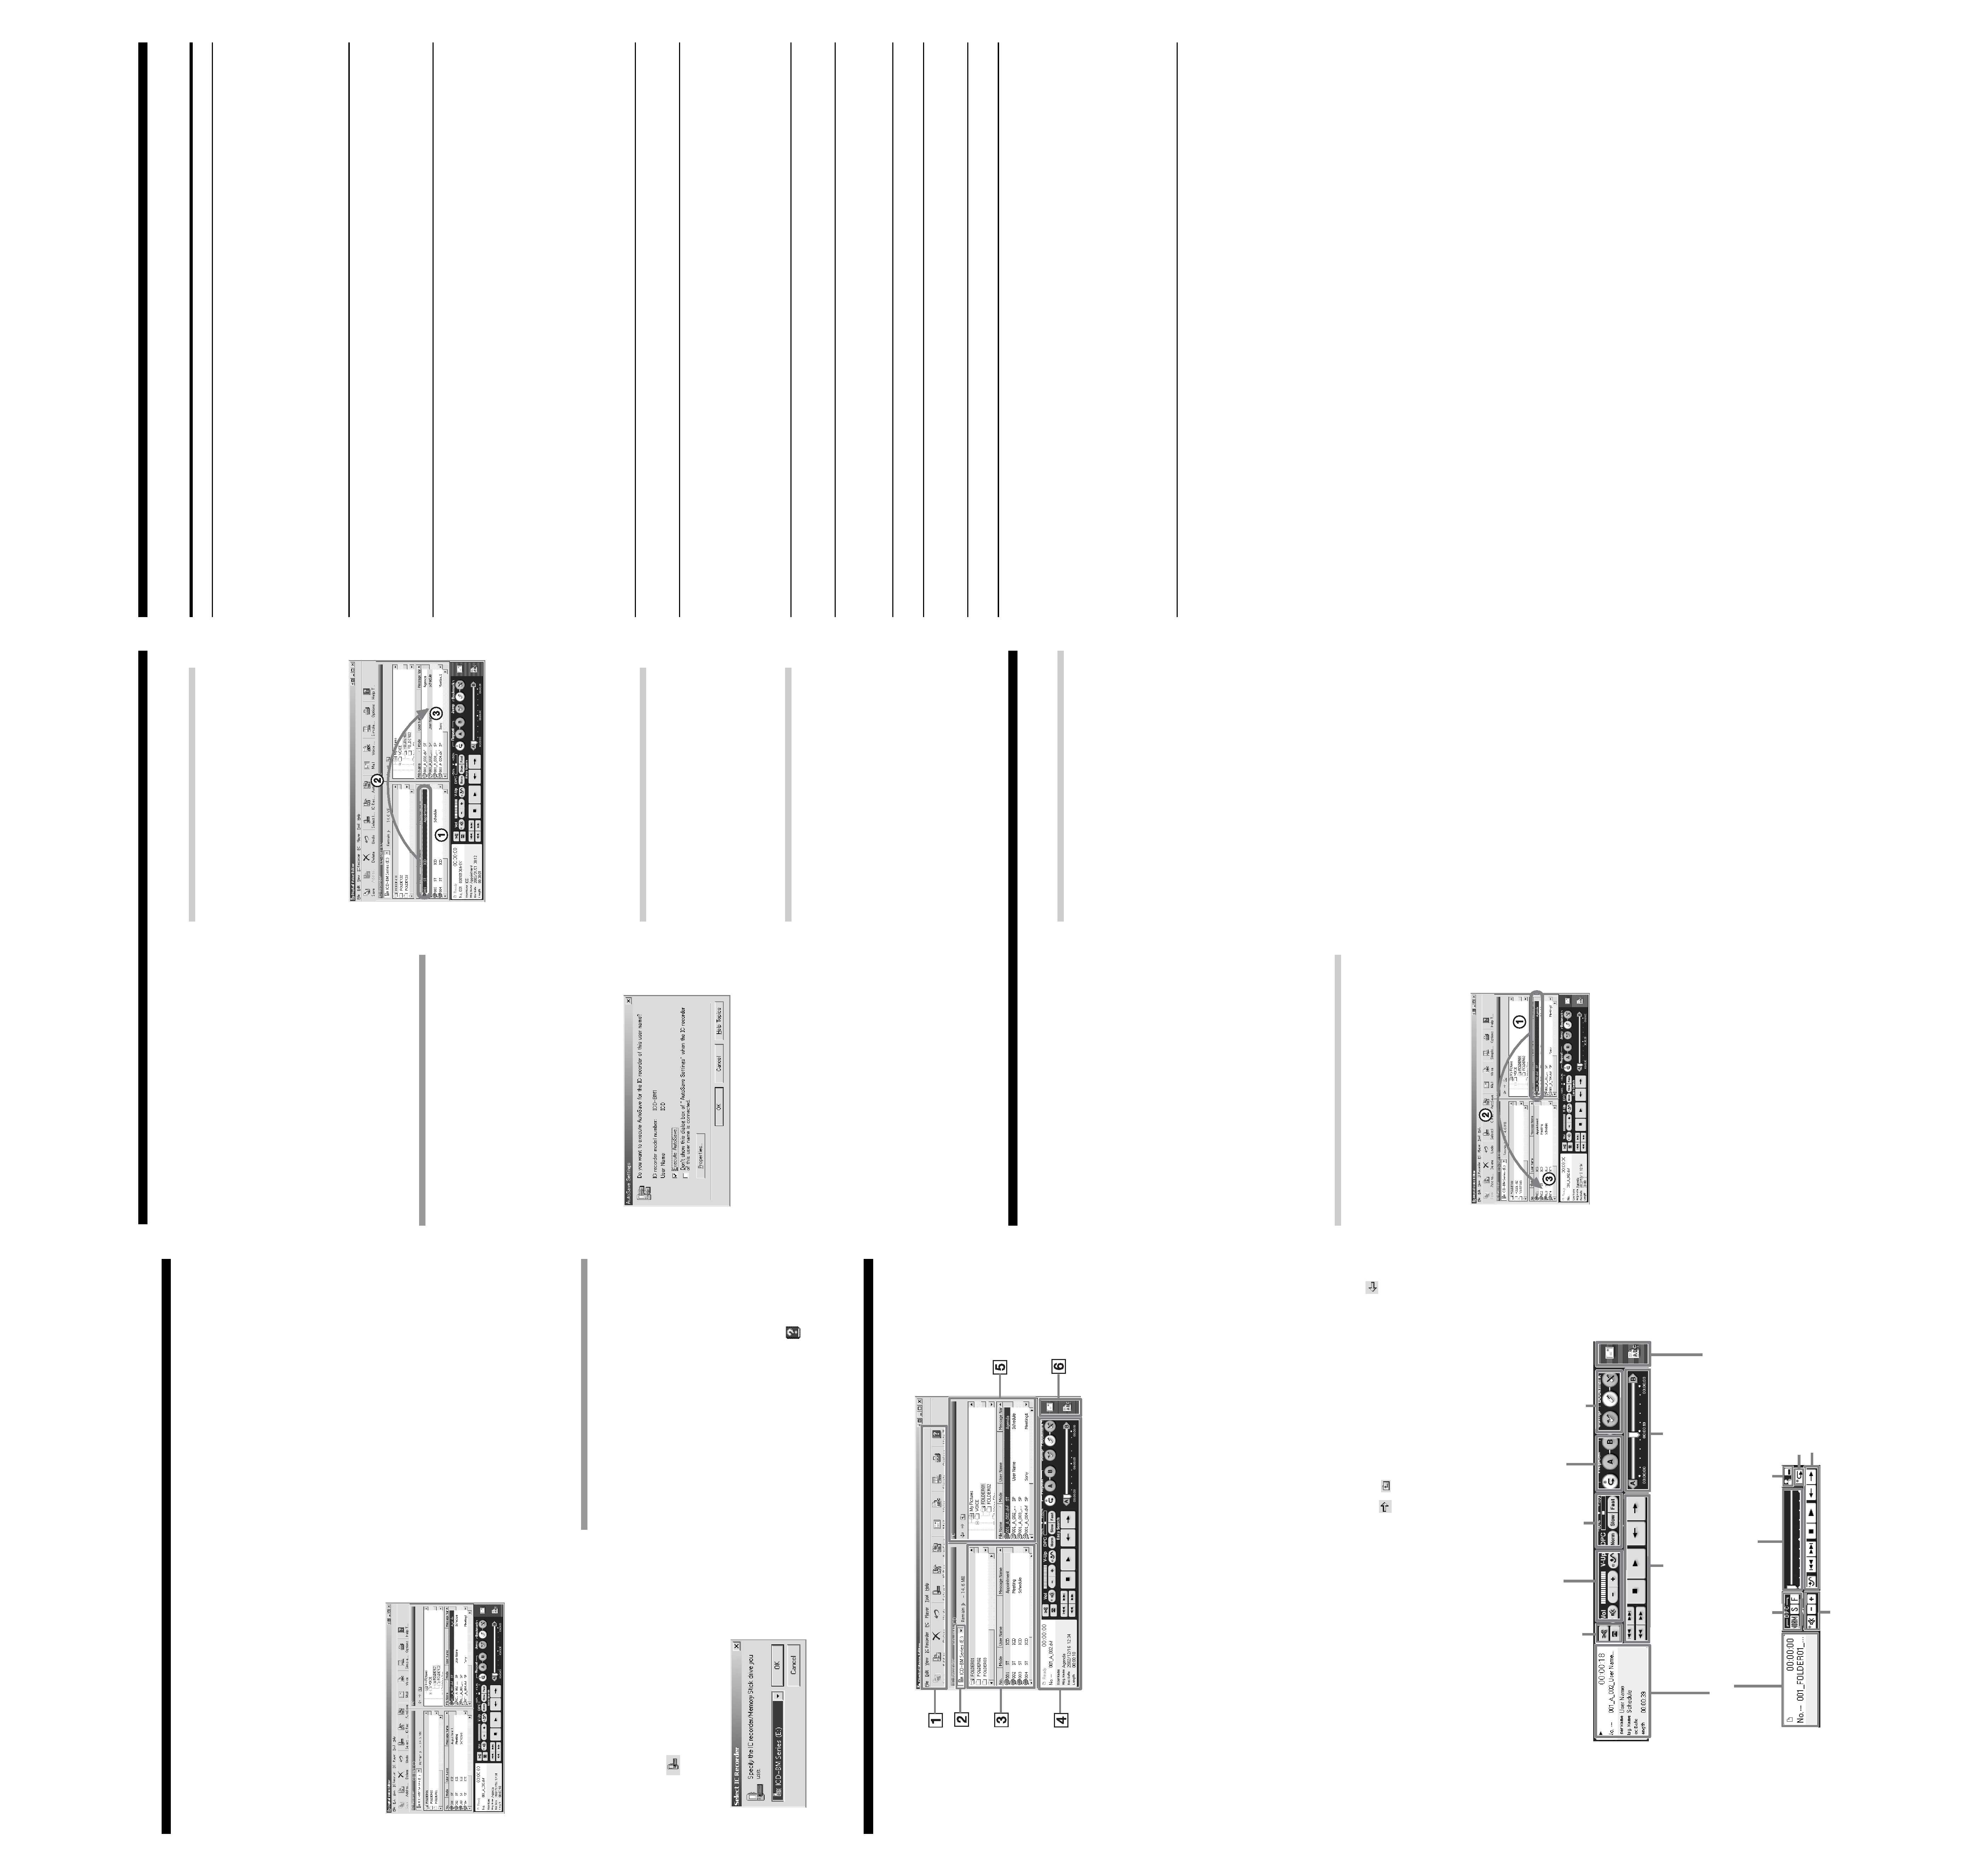
Names and Functions of the Main Window
1
Menu bar/Toolbar
You can access and execute the menu commands
from the menu bar. The toolbar contains the
buttons for common menu command tasks,
providing quick way to do tasks. For the details,
see the online help.
2
IC Recorder combo box
You can select the IC recorder connected to the
USB connector of your computer or the drive with
the "Memory Stick" inserted. In the right of the
combo box, the free memory space in the selected
IC recorder is displayed.
3
IC recorder message pane
In the folder list beneath the IC Recorder combo
box 2, the message folders in the selected IC
recorder are displayed. Click the desired folder
from the list, so that the messages in the selected
folder are displayed in the message list beneath the
folder list.
The messages are displayed with the relevant
information: message number, recording mode
(ST, SP or LP), user name, message name, recorded
date, length, priority setting, bookmark setting,
alarm setting, Codec, and file name.
Notes
· The remaining recording time displayed in the IC
recorder may differ from that displayed in the
"Digital Voice Editor", which is not malfunction.
This is because the IC recorder displays the
remaining time after subtracting the memory
amount required for its system.
· When you select the IC recorder ICD-BP/SX/ST
series, file names are displayed blank.
4
Player pane
This pane controls playback operations. The
information of the message being played back is
displayed. You can also display the simple player
mode. For details, see the online help.
5
PC message pane
In the upper folder tree pane, the drives and
folders are displayed in tree. Click the desired
drive and folder in the folder tree pane, so that the
messages in the selected folder are displayed in the
message list beneath the folder tree pane.
You can also use the folder browse buttons (
/
/
) to switch back and forth among folders or
to display a folder in a higher-level directory.
The messages are displayed with the relevant
information: file name, recording mode (ST, SP or
LP), user name, message name, recorded date,
length, priority setting, bookmark setting and
Codec.
6
Special function buttons pane
In the special function buttons pane, there are the
buttons to start the mailing software supporting
MAPI and to start the voice recognition software.
Volume adjustment buttons/V-Up button
Counter, message status and information, recording
time indication
Divide/combine buttons
Repeat play buttons
Bookmark buttons
Playback operation buttons (Cue/Review/
Skip/Backward/Stop/Play/Easy Search)
Playback Slider
Mail and voice recognition buttons
DPC buttons
Player pane
B
Using the Software
Troubleshooting
Symptom
"Digital Voice Editor" software
cannot be installed.
When you connect the IC recorder
to the USB connector of your
computer, the [Hardware
Installation] warning message
appears.
The IC recorder or "Memory Stick"
cannot be properly connected.
The IC recorder does not operate.
Messages cannot be played back./
Playback sound volume is too low.
Saved message files cannot be
played back or edited.
Counter or slider moves incorrectly.
There is noise.
Operation is slow when there are
many messages.
Display does not work during
saving, adding, or deleting of
messages.
It takes too long to convert a file
format.
The software `hangs' when "Digital
Voice Editor" software starts up.
Remedy
·The free disk or memory space on the computer is too small. Check the
hard disk and memory space.
·You are trying to install the software into the operating system that the
"Digital Voice Editor" does not support.
·In Windows® XP Professional/Home Edition, you log on as a user name
belonging to a user account with limitations. Make sure to log on as a user
name with the "Computer administrator" user account.
·In Windows® 2000 Professional, make sure to log on as the user name of
"Administrator. "
·Depending on the IC recorder you use, the message may be displayed
when you connect your IC recorder to the USB connector of your
computer for the first time in the Windows® XP Professional/Home
Edition. You may ignore the message without problem and click
[Continue Anyway] to proceed with the software installation or proceed
with using the software.
·Check that the installation of the software has been successful. Also check
the connection as follows:
Install the driver for the IC recorder you use.
When using an external USB hub, connect the IC recorder directly to the
computer.
Disconnect and then connect the cable with the IC recorder.
Connect the IC recorder to another USB connector.
Check that the IC recorder ICD-S/ICD-BM series or the "Memory Stick"
drive is properly recognized. If not, quit the software and connect the IC
recorder or the "Memory Stick", and then restart the software.
·Your computer may be in the system standby/hibernate mode. Do not let
your computer enter into the system standby/hibernate mode while being
connected to the IC recorder.
·You may format the memory of the IC recorder. Use the IC recorder
formatting function to format the memory. (The ICD-SX/ST/BP/P series
does not have the formatting function.)
·No sound board is installed.
·No speaker is built-in or connected to the computer.
·The volume of the sound is turned down.
·Turn up the volume on the computer. (Refer to the instruction manual of
the computer.)
·The volume of WAV files can be changed and saved using the "Increase
Volume" feature of the Microsoft Sound Recorder.
·You cannot play back a message whose file format the "Digital Voice
Editor" software does not support. Depending on the file format, you
cannot use part of editorial features of the software.
·This happens when you play back messages that you divided, combined,
overwrote, or added a recording. Save a message in the hard disk first,
and then add it to the IC recorder. Select the saving file format that suits
the IC recorder you use.
·When the total number of messages increases, the operation becomes
slower, regardless of the length of the recording time.
·It takes a longer time to copy or delete long messages. After completing
operations, the display works normally.
·The time required for file conversion becomes longer as the file size is
bigger.
·Do not disconnect the connector of the IC recorder while the computer is
communicating with the IC recorder. Otherwise the computer operations
become unstable or the data inside the IC recorder may be damaged.
·In Windows® XP Professional/Home Edition, make sure to log on as a
user name with the "Computer administrator" user account.
In Windows® 2000 Professional, make sure to log on as the user name of
"Administrator. "
· There may be conflict between the software and other driver or
application.
· Do not install the "Memory Stick Voice Editor" software after you
installed the "Digital Voice Editor" software. The "Digital Voice Editor"
may not operate properly.
1 Turn on your computer and start Windows.
2 Connect the IC recorder to your computer.
3 Click [Start], and select [Programs], [Sony
Digital Voice Editor 2] and then [Digital
Voice Editor 2].
The "Digital Voice Editor" Software starts up and
the main window appears.
The data in the IC recorder or the "Memory Stick"
is loaded and the message folders and message
files are displayed in the IC Recorder message
pane.
Note
If you start the "Digital Voice Editor" for the first time,
the IC recorder selection dialog box in the step 4 is
displayed.
4 When the IC recorder is disconnected or no
folders or messages are displayed in the IC
Recorder message pane, select the IC
recorder or the "Memory Stick" drive with
either of the following:
· Click the down arrow in the IC recorder
combo box.
· Click
(Select IC Recorder) on the
toolbar.
· Select [Select IC Recorder] from the [IC
Recorder] menu.
The [Select IC Recorder] dialog box is displayed.
Select the IC recorder or the "Memory Stick"
drive you use from the drop-down list and click
[OK].
The message folders of the selected IC recorder
are displayed in the folder list box.
Notes
· The drive letters and IC recorder identifications on the IC
Recorder combo box differ depending on the computer's
configurations and settings, the type of your IC recorder,
and how the "Memory Stick" is connected.
· When you specify the "Memory Stick" drive or the IC
recorder ICD-S/BM series without a VOICE folder, the
dialog box to ask you to create new message folder is
displayed. Click [Yes] to make the initial setting of the
memory and display the Digital Voice Editor main window.
If you select [Cancel], the dialog box for selecting the IC
recorder appears.
· If the IC recorder connected to your computer does not
appear on the IC Recorder combo box, check the connection.
· When you connect the Memory Stick IC recorder ICD-MS
series, the IC recorder name does not appear on the IC
Recorder combo box. Select the "Memory Stick" drive.
· The number of folders differs depending on the IC recorder
you are using.
To quit the Software
Click the [X] button on the upper right side of the
window or select [Quit] from the [File] menu.
Using Online Help Files of the
Software
For details on how to use the "Digital Voice Editor"
software, refer to the online help files.
1 Tip
For the latest information, refer to the "readme.txt"
file. To open the file, click [Start], [Programs], [Sony
Digital Voice Editor 2], and then [ReadMe].
There are three ways to open online help file:
· Click [Start], [Programs], [Sony Digital Voice Editor
2], and then [Help].
· After starting up the software, select [Help Topics]
in the [Help] menu.
· After starting up the software, click
(Help
topics) in the toolbar.
Simple player mode
Playback Slider
Playback operation buttons
(Skip/Backward/Stop/Play/Easy
Search)/V-Up button
Volume adjustment buttons
DPC buttons
Front/Back, Close buttons
Repeat play button
Saving Messages to the Computer
You can save the messages as sound files on your
computer's hard disk.
There are three ways of saving messages:
· Saving messages automatically (ICD-SX/ST/P/BM
series only)
· Saving a message by a drag-and-drop operation
· Saving by specifying the file type and file name (For
details, see the online help.)
Notes
· The following characters cannot be used in a file name: \ / :
* ? " < > |
· When a message with the same file name exists, the dialog
box appears to ask you if you wish to replace the existing
file. If you wish to replace the file, click [Yes]. If you wish to
change the file name, click [No].
· When a message is saved in the computer's hard disk, its
alarm setting will be cancelled.
Saving messages automatically
(AutoSave)(ICD-SX/ST/P/BM series only)
You can save newly-recorded messages automatically
on the computer.
To use the AutoSave function, set the IC recorder User
Name and turn the AutoSave function in the
[AutoSave] tab of the [Options] window. For the
details, see the online help.
1 Connect an IC recorder ICD-SX/ST/P/BM
series during the Digital Voice Editor in
operation.
The AutoSave Settings dialog box is displayed.
2 Check [Execute AutoSave] and then click
[OK].
The automatic saving starts.
Saving messages by a drag-and-
drop operation
1 Click to select the message you wish to
save from the IC Recorder message pane
(1).
To select multiple messages, press and hold
down the Shift key as you click the first and
last messages in a consecutive group or the
Ctrl key as you click each message separately.
2 Drag the message (2) and drop it (3) in
the PC message pane.
The message is saved in the PC message list.
Notes
· You cannot drop the message in the PC folder
list.
· The message is saved in the file format as a file
name, both specified in the [Options] window.
Saving the entire messages in a
folder at one time
Click the folder that you wish to save from
the IC Recorder folder list, drag and then
drop it in the PC message list.
You can save the entire messages in a message
folder at one time as one folder. For the details, see
the online help.
Saving all message folders at
one time
Select [Save All] from the [IC Recorder]
menu.
The dialog box used to save all the IC Recorder
messages are displayed. Specify the destination
folder and file type to save the messages. The
folder automatically named as "IC recorder model
name_IC recorder User Name_current
year_month_day", e.g. ICD-BM1_2004_07_04. or
the details, see the online help.
Adding Messages to the IC Recorder
You can add the selected message(s) in your
computer's hard disk to the IC recorder. You can add
the message(s) one by one or all messages in a folder
at one time.
The added messages can be played back on the IC
recorder.
There are two ways of adding messages:
· Adding the message(s) at the end of the specified
folder (For details, see the online help.)
· Adding the message(s) to a desired position in a
message folder by a drag-and-drop operation
· Adding the message(s) as a new folder (ICD-MS/
BM series only)
Notes
· When a message is added to the IC recorder, its alarm
setting will be cancelled.
· When the memory of the IC recorder is full or the total
number of messages in a folder exceeds 99 (99 for a
"Memory Stick"), you cannot add a message. Delete
unnecessary messages, and then add a message.
Adding messages one by one
1 Click to select the message you wish to add
in the PC message list (1).
To select multiple messages, press and hold down
the Shift key as you click the first and last
messages in a consecutive group or the Ctrl key as
you click each message separately. You can select
files of different file type together.
2 Drag the message (2) and drop it (3) at
the desired position in the IC Recorder
message list.
When you are about to drop the message, the
insertion line is displayed. The message is added
to the line.
1 Tip
If you drop the message on the IC Recorder folder list, the
messages will be added to the end of the selected folder.
Adding all messages in a folder at
one time
Click the folder that you wish to add in the PC
message list, drag and then drop it at the
desired position in the IC Recorder message list.
When you are about to drop the folder, the insertion
line is displayed. The messages in the folder are
added to the line.
1 Tip
When using an IC Recorder ICD-MS/BM series, you can add
the messages as a new folder. Drop the folder at the desired
position in the IC Recorder folder list. A insertion line is
displayed and a new folder is created in that line position. All
the messages are saved in that new folder.