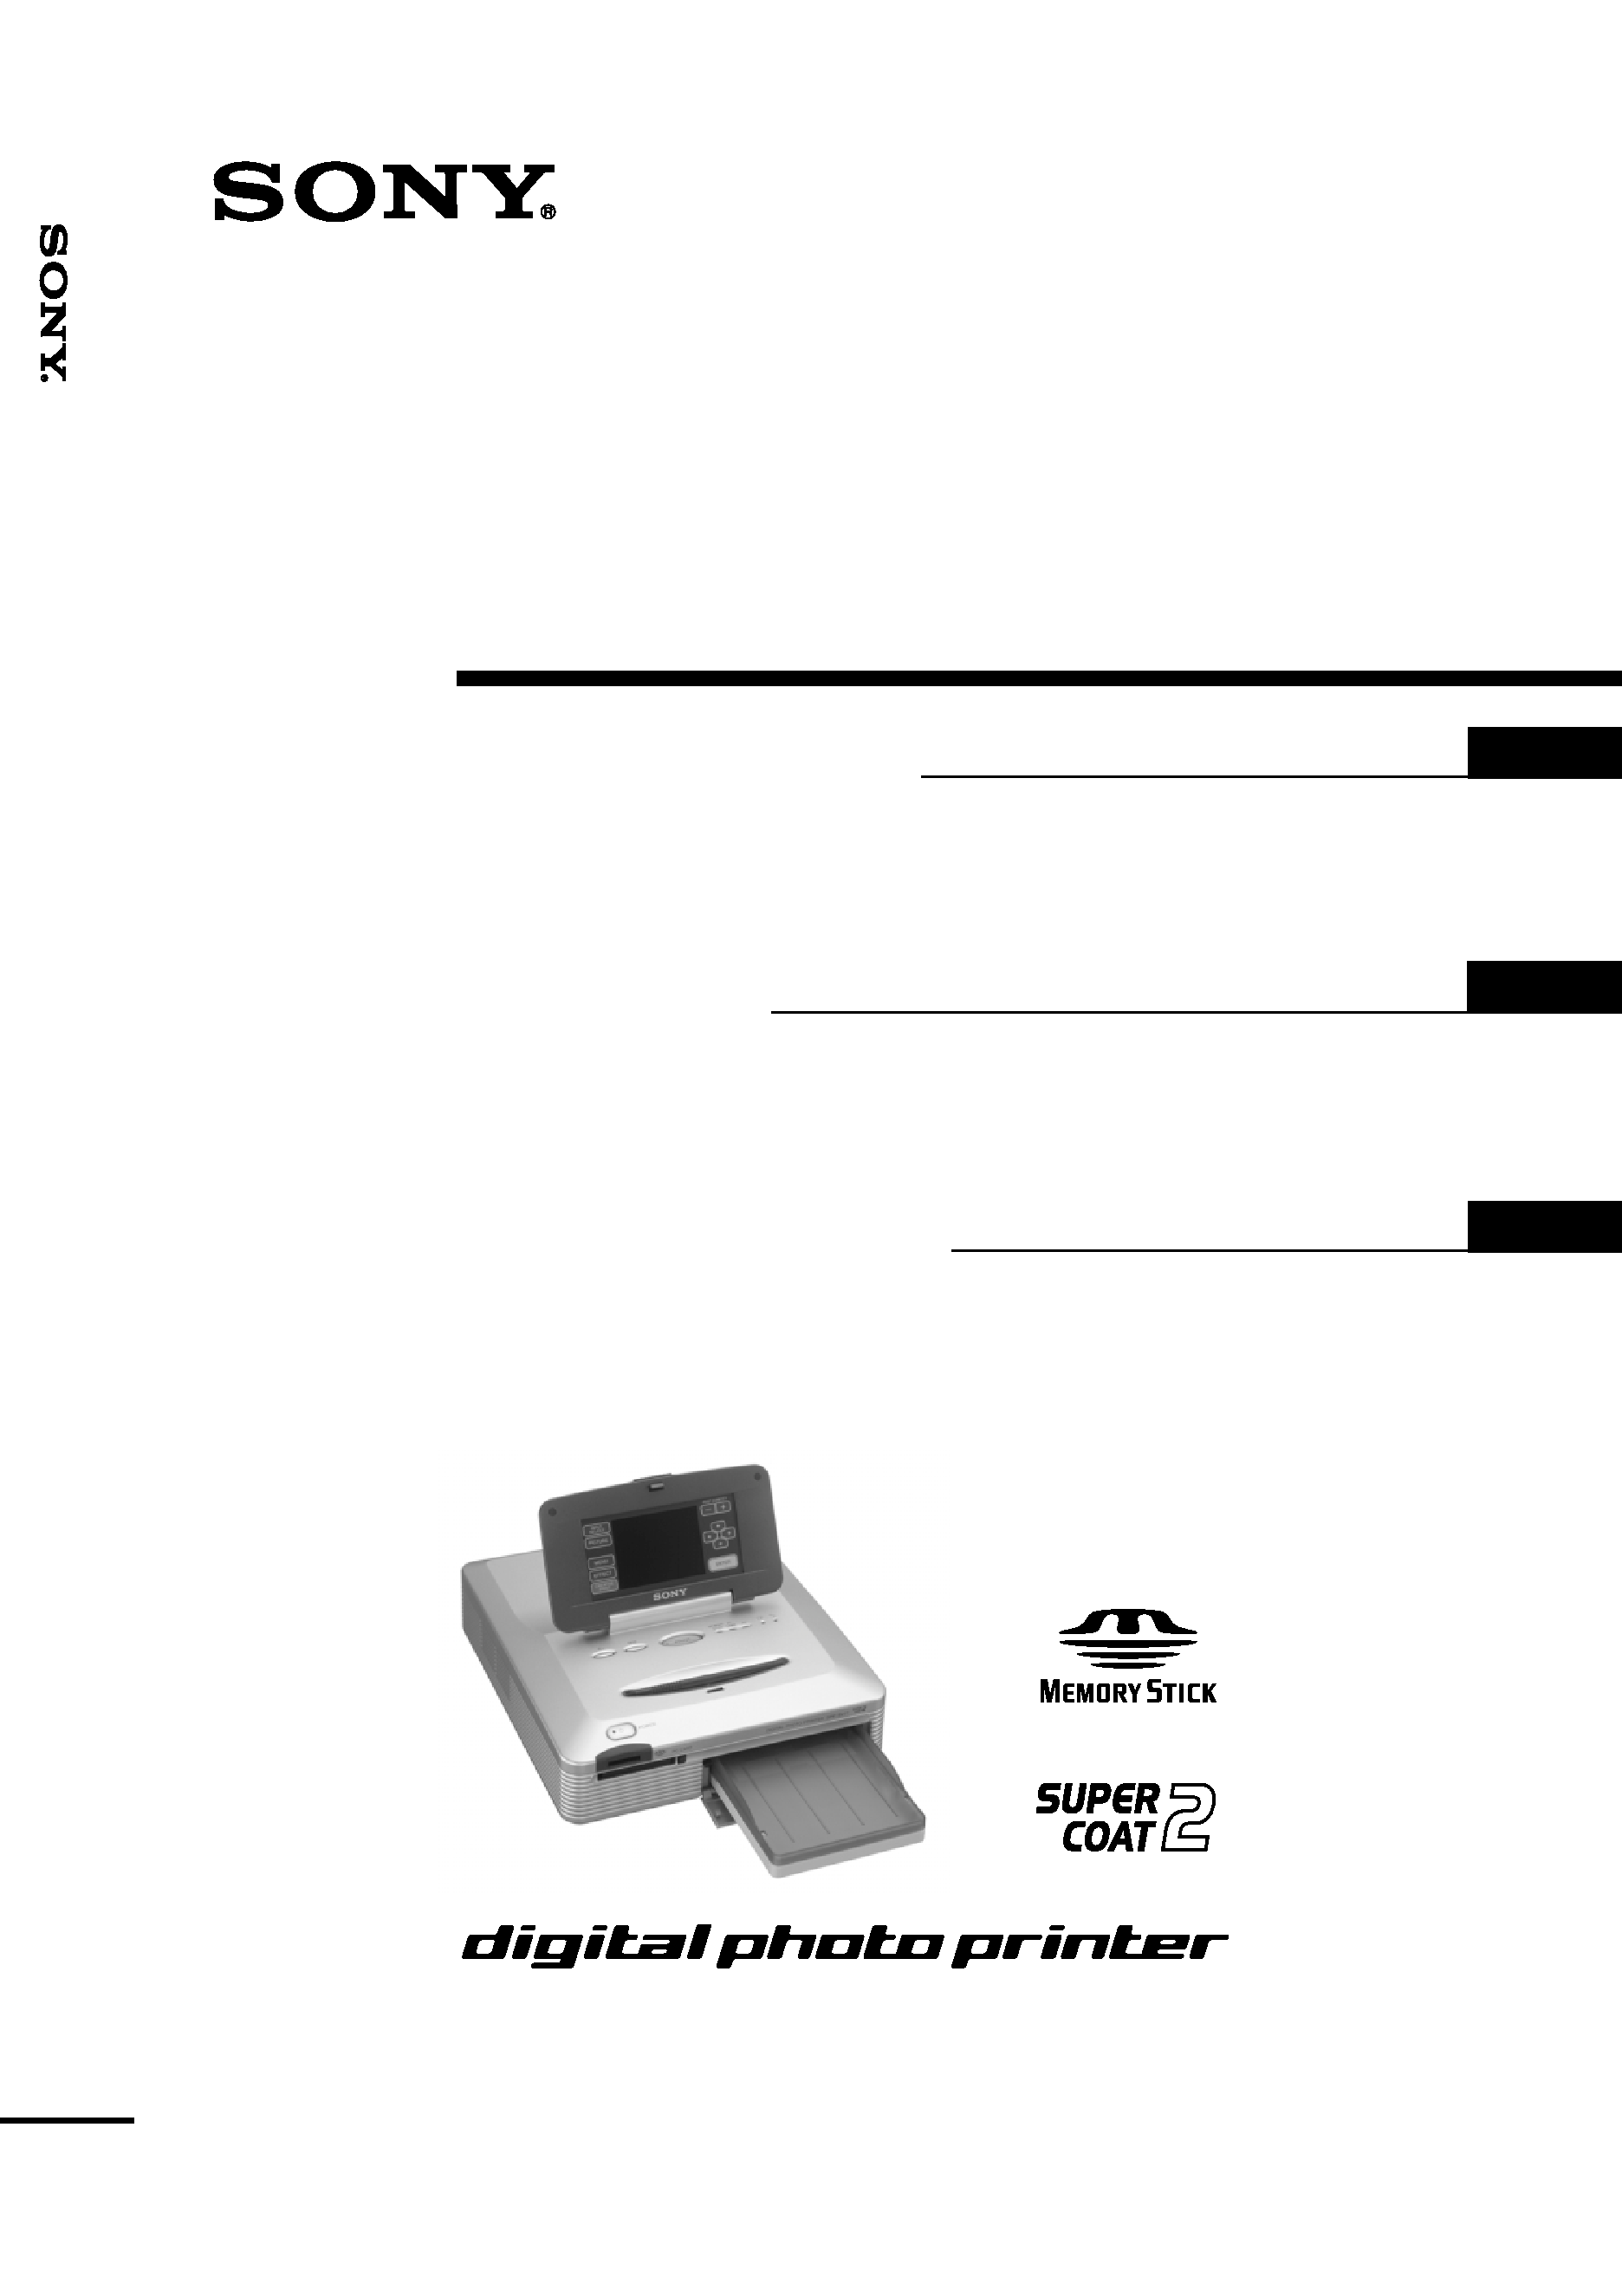
DPP-SV77
3-205-620-11(1)
2001 Sony Corporation
Digital Photo
Printer
GB
FR
Operating Instructions
Before operating this printer, please read this
manual thoroughly and retain it for future
reference.
Mode d'emploi
Avant d'utiliser cette imprimante, veuillez lire
attentivement ce manuel et le conserver pour toute
référence ultérieure.
Manual de instrucciones
Antes de utilizar esta impresora, lea este manual
atentamente y consérvelo para consultarlo en el
futuro.
Digital
Photo
Printer
DPP--SV77
ES
2 GB
WARNING
To prevent fire or shock hazard, do
not expose the unit to rain or
moisture.
To avoid electrical shock, do not
open the cabinet. Refer servicing to
qualified personnel only.
ATTENTION
Pictures and/or Sound distortion may occur if
this product is positioned in close proximity to
equipment emitting electromagnetic radiation.
Attention
Sony shall assume no responsibility for any
accidental or consequential damages or loss
of the recording contents which may be
caused by use or malfunction of the printer,
"Memory Stick" or PC card.
For the customers in the U.S.A.
WARNING
This equipment has been tested and found to
comply with the limits for a Class B digital
device, pursuant to Part 15 of the FCC Rules.
These limits are designed to provide
reasonable protection against harmful
interference in a residential installation. This
equipment generates, uses, and can radiate
radio frequency energy and, if not installed
and used in accordance with the instructions,
may cause harmful interference to radio
communications. However, there is no
guarantee that interference will not occur in a
particular installation. If this equipment does
cause harmful interference to radio or
television reception, which can be determined
by turning the equipment off and on, the user
is encouraged to try to correct the interference
by one or more of the following measures:
Reorient or relocate the receiving antenna.
Increase the separation between the
equipment and receiver.
Connect the equipment into an outlet on a
circuit different from that to which the
receiver is connected.
Consult the dealer or an experienced radio/
TV technician for help.
Owner's Record
The model and serial numbers are located
on the bottom. Record the serial number
in the space provided below. Refer to this
number whenever you call upon your
Sony dealer regarding this product.
Model No. DPP-SV77
Serial No.
If you have any questions about this product, you
may call:
Sony's Business Information Center (BIC) at 1-
800-686-SONY (7669)
or Write to: Sony Customer Information Services
Center
6900-29 Daniels Parkway, PMB 330
Fort Myerts, Florida 33912
Declaration of Conformity
Trade Name: SONY
Model No.:
DPP-SV77
Responsible Party:
Sony Electronics Inc.
Address:
1 Sony Drive, Park Ridge,
NJ 07656 U.S.A.
Telephone No.: 201-930-6972
This device complies with part 15 of the
FCC Rules. Operation is subject to the
following two conditions:
(1) this device may not cause harmful
interference, and (2) this device must
accept any interference received,
including interference that may cause
undesired operation.

3 GB
Notice for users
Program © 2001 Sony Corporation
Documentation ©2001 Sony Corporation
All rights reserved. This manual or the software
described herein, in whole or in part, may not
be reproduced, translated or reduced to any
machine readable form without prior written
approval from Sony Corporation.
IN NO EVENT SHALL SONY CORPORATION
BE LIABLE FOR ANY INCIDENTAL,
CONSEQUENTIAL OR SPECIAL DAMAGES,
WHETHER BASED ON TORT, CONTACT, OR
OTHERWISE, ARISING OUT OF OR IN
CONNECTION WITH THIS MANUAL, THE
SOFTWARE OR OTHER INFORMATION
CONTAINED HEREIN OR THE USE THEREOF.
By breaking the seal of the envelope of the CD-
ROM package, you accept all the terms and
conditions of this agreement. If you do not
accept these terms and conditions, please
return this disk envelope unopened, along with
the rest of the package, immediately to the
dealer where you obtained it.
Sony Corporation reserves the right to make
any modification to this manual or the
information contained herein at any time
without notice.
The software described herein may also be
governed by the terms of a separate user license
agreement.
User Registration
To receive customer services, complete and
return the registration card included in your
package.
Any design data such as sample pictures
provided in this software cannot be modified or
duplicated except for the purpose of personal
use. Any unauthorized duplication of this
software is prohibited under copyright law.
Please note that unauthorized duplication or
modification of others' portraits or copyrighted
work could infringe the rights reserved by right
holders.
· Microsoft, MS, MS-DOS and Windows®
are registered trademarks of Microsoft
Corporation in the United States and
other countries.
· IBM and PC/AT are registered
trademarks of International Business
Machines Corporation.
· MMX and Pentium are registered
trademarks of Intel Corporation.
· Apple, Macintosh, Power Macintosh,
and Mac OS are registered trademarks of
Apple Computer, Inc.
· "Memory Stick," "MagicGate Memory
Stick" and their logo marks are the
trademarks of Sony Corporation.
· All other companies and product names
mentioned herein may be the
trademarks or registered trademarks of
their respective companies. Furthermore,
"TM" and "®" are not mentioned in each
case in this manual.
You are cautioned that any changes or
modifications not expressly approved in this
manual could void your authority to operate
this equipment.
The shielded interface cable recommended in
this manual must be used with this
equipment in order to comply with the limits
for a digital device pursuant to Subpart B of
Part 15 of FCC Rules.
CAUTION
To prevent electric shock, match wide blade
of plug to wide slot, fully insert.
CAUTION
The nameplate is located on the bottom
enclosure.
GB

4 GB
Table of contents
Getting started
What you can do with the printer ................... 5
Unpacking the printer ..................................... 7
Identifying the parts ....................................... 8
Using the stylus and operation panel ........... 11
Opening the operation panel ................... 11
Using the stylus ....................................... 12
Setting up
1
Connecting the printer ........................... 14
Inserting a "Memory Stick" or PC card .... 14
Connecting to a television (optional) ........ 15
Connecting the AC power cord ................ 16
Connecting to a computer (optional) ....... 16
2
Preparing the printing pack .................... 18
3
Loading the print cartridge ..................... 19
4
Inserting the print paper ......................... 21
Basic printing operations
Printing selected images ............................... 23
Printing all images or DPOF preset images at
one time ................................................. 27
Advanced printing operations
Adding effects to an image .......................... 29
What you can do with the Effect menu .... 29
Changing the image size and position ..... 31
Adjusting the pictures ............................. 32
Adding a special filter to an image .......... 34
Adding drawings, stamps, or
characters (Tool) .................................... 36
What you can do with the Tool sub menu .... 36
Drawing freehand line art (
) ................ 38
Pasting stamps (
) ................................ 40
Typing characters (
) ............................ 42
Making various prints (CREATIVE PRINT) ..... 45
What you can do with the Creative Print
menu ...................................................... 45
Making a card ......................................... 47
Making a calendar .................................. 51
Making a split print ................................. 53
Making a sticker ...................................... 55
Making an index print ............................. 57
Setting up the printer (MENU) ...................... 59
What you can do with the Menu .............. 59
Changing the printer
preferences (Set Up) ................................ 60
Setting video output and LCD screen
contrast .................................................. 63
Viewing a slideshow ..................................... 64
Deleting images ............................................ 65
Printing from your computer
Using your printer with Windows computers ... 67
System requirements ............................... 67
Installing the software ............................. 68
Using the reader software ....................... 75
Printing from a software application ........ 76
Using your printer with Macintosh
computers .............................................. 78
System requirements ............................... 78
Installing the printer driver ...................... 78
Printing from a software application ........ 80
Additional information
Precautions ................................................... 82
About the "Memory Stick" and PC
card media ............................................. 84
On "Memory Stick" ................................. 84
To protect "Memory Stick" images .......... 84
Notes on use ........................................... 85
Troubleshooting ........................................... 86
If paper jams ........................................... 88
Specifications ............................................... 89
Index ............................................................ 90

5 GB
Getting
started
Getting started
What you can do with the printer
With the Digital Photo Printer DPP-SV77, you can print images stored on a
"Memory Stick" or PC card. You can also print easily from your computer.
Photo-realistic printing
With its sublimation dye transfer printing system, the printer can make
photo-realistic prints meeting a number of different requirements.
Super Coat 2 feature
The Super Coat 2 enables high durability and moisture or fingerprint
resistance, keeping your prints in good picture quality for an extended
period of time.
Easy stylus operations on the color LCD screen
With the color touch-sensitive LCD screen, you can easily perform the
operations with the touch of a stylus and preview the images to be printed.
To select an image or an item, just tap the screen lightly with the stylus
supplied with your printer. A series of screen-activated operations will
navigate you though the printing process.
To view the images on a wider screen, you can also connect your printer to
your television.
Auto Fine Print 2 function
Even a dark picture with low contrast can be adjusted and printed as a vivid
and clear picture.
Selection of print sizes and border/borderless print formats
You can select from a large, dynamic Post Card size print or an economical
Small size print. For the Post Card size print, you can also select a borderless
or border print format.
Direct printing of "Memory Stick" or PC card images
Just take a "Memory Stick" or PC card from your digital still camera and
insert it into the printer. You can immediately print any of the images in the
"Memory Stick" or PC card. You can also print all the images in a "Memory
Stick" or PC card or the images preset by a digital still camera at one time.
Selection of print finish
You can select the print finish from either glossy or texture.
Continued