6
865
Bedienungsanleitung
Instructions for use
Notice d`emploi
Istruzioni per l`uso
Instrucciones para el uso
865
865 S
e 865_511658_0605_Sp6.book Seite 1 Donnerstag, 10. November 2005 3:22 15

Bedienungsanleitung.............................................................. 3
Instructions for use ...............................................................11
Notice d'emploi ......................................................................19
Istruzioni per l'uso.................................................................27
Instrucciones para el uso......................................................35
Gebruiksaanwijzing...............................................................43
e 865_511658_0605_Sp6.book Seite 2 Donnerstag, 10. November 2005 3:22 15

11
865 /
865 S
The
865 is a fully professional vocal microphone
utilising the very best in condenser microphone
technology to achieve new standards of quality and
sound. An extended dynamic range and a super-smooth
frequency response deliver an outstanding signal quality
with excellent vocal projection and the lowest possible
distortion.
The
extended
high-frequency
response
combined with the super-cardioid pick-up pattern
enables the
865 to handle the highest vocal levels
without feedback.
The rugged metal construction protects the microphone
in the most rigorous conditions.
Due to its phantom powering capability, the
865 is
especially suitable for use with professional systems.
The
865 S variant features a silent ON/OFF switch.
e 865_511658_0605_Sp6.book Seite 11 Donnerstag, 10. November 2005 3:22 15

12
Features
Rugged metal body
Extended dynamic response with pronounced
presence and vocal "punch"
Excellent feedback rejection
Very good suppression of handling noise
Very high sound pressure handling capability
Delivery includes
865 microphone
MZQ 800 microphone clamp
Pouch
Instructions for use
Warranty Certificate
ON/OFF switch ( 856 S only)
Use the screw to lock the switch in the ON position. With
the switch set in the ON position, gently turn the screw
head 90° to lock the switch in position.
e 865_511658_0605_Sp6.book Seite 12 Donnerstag, 10. November 2005 3:22 15
13
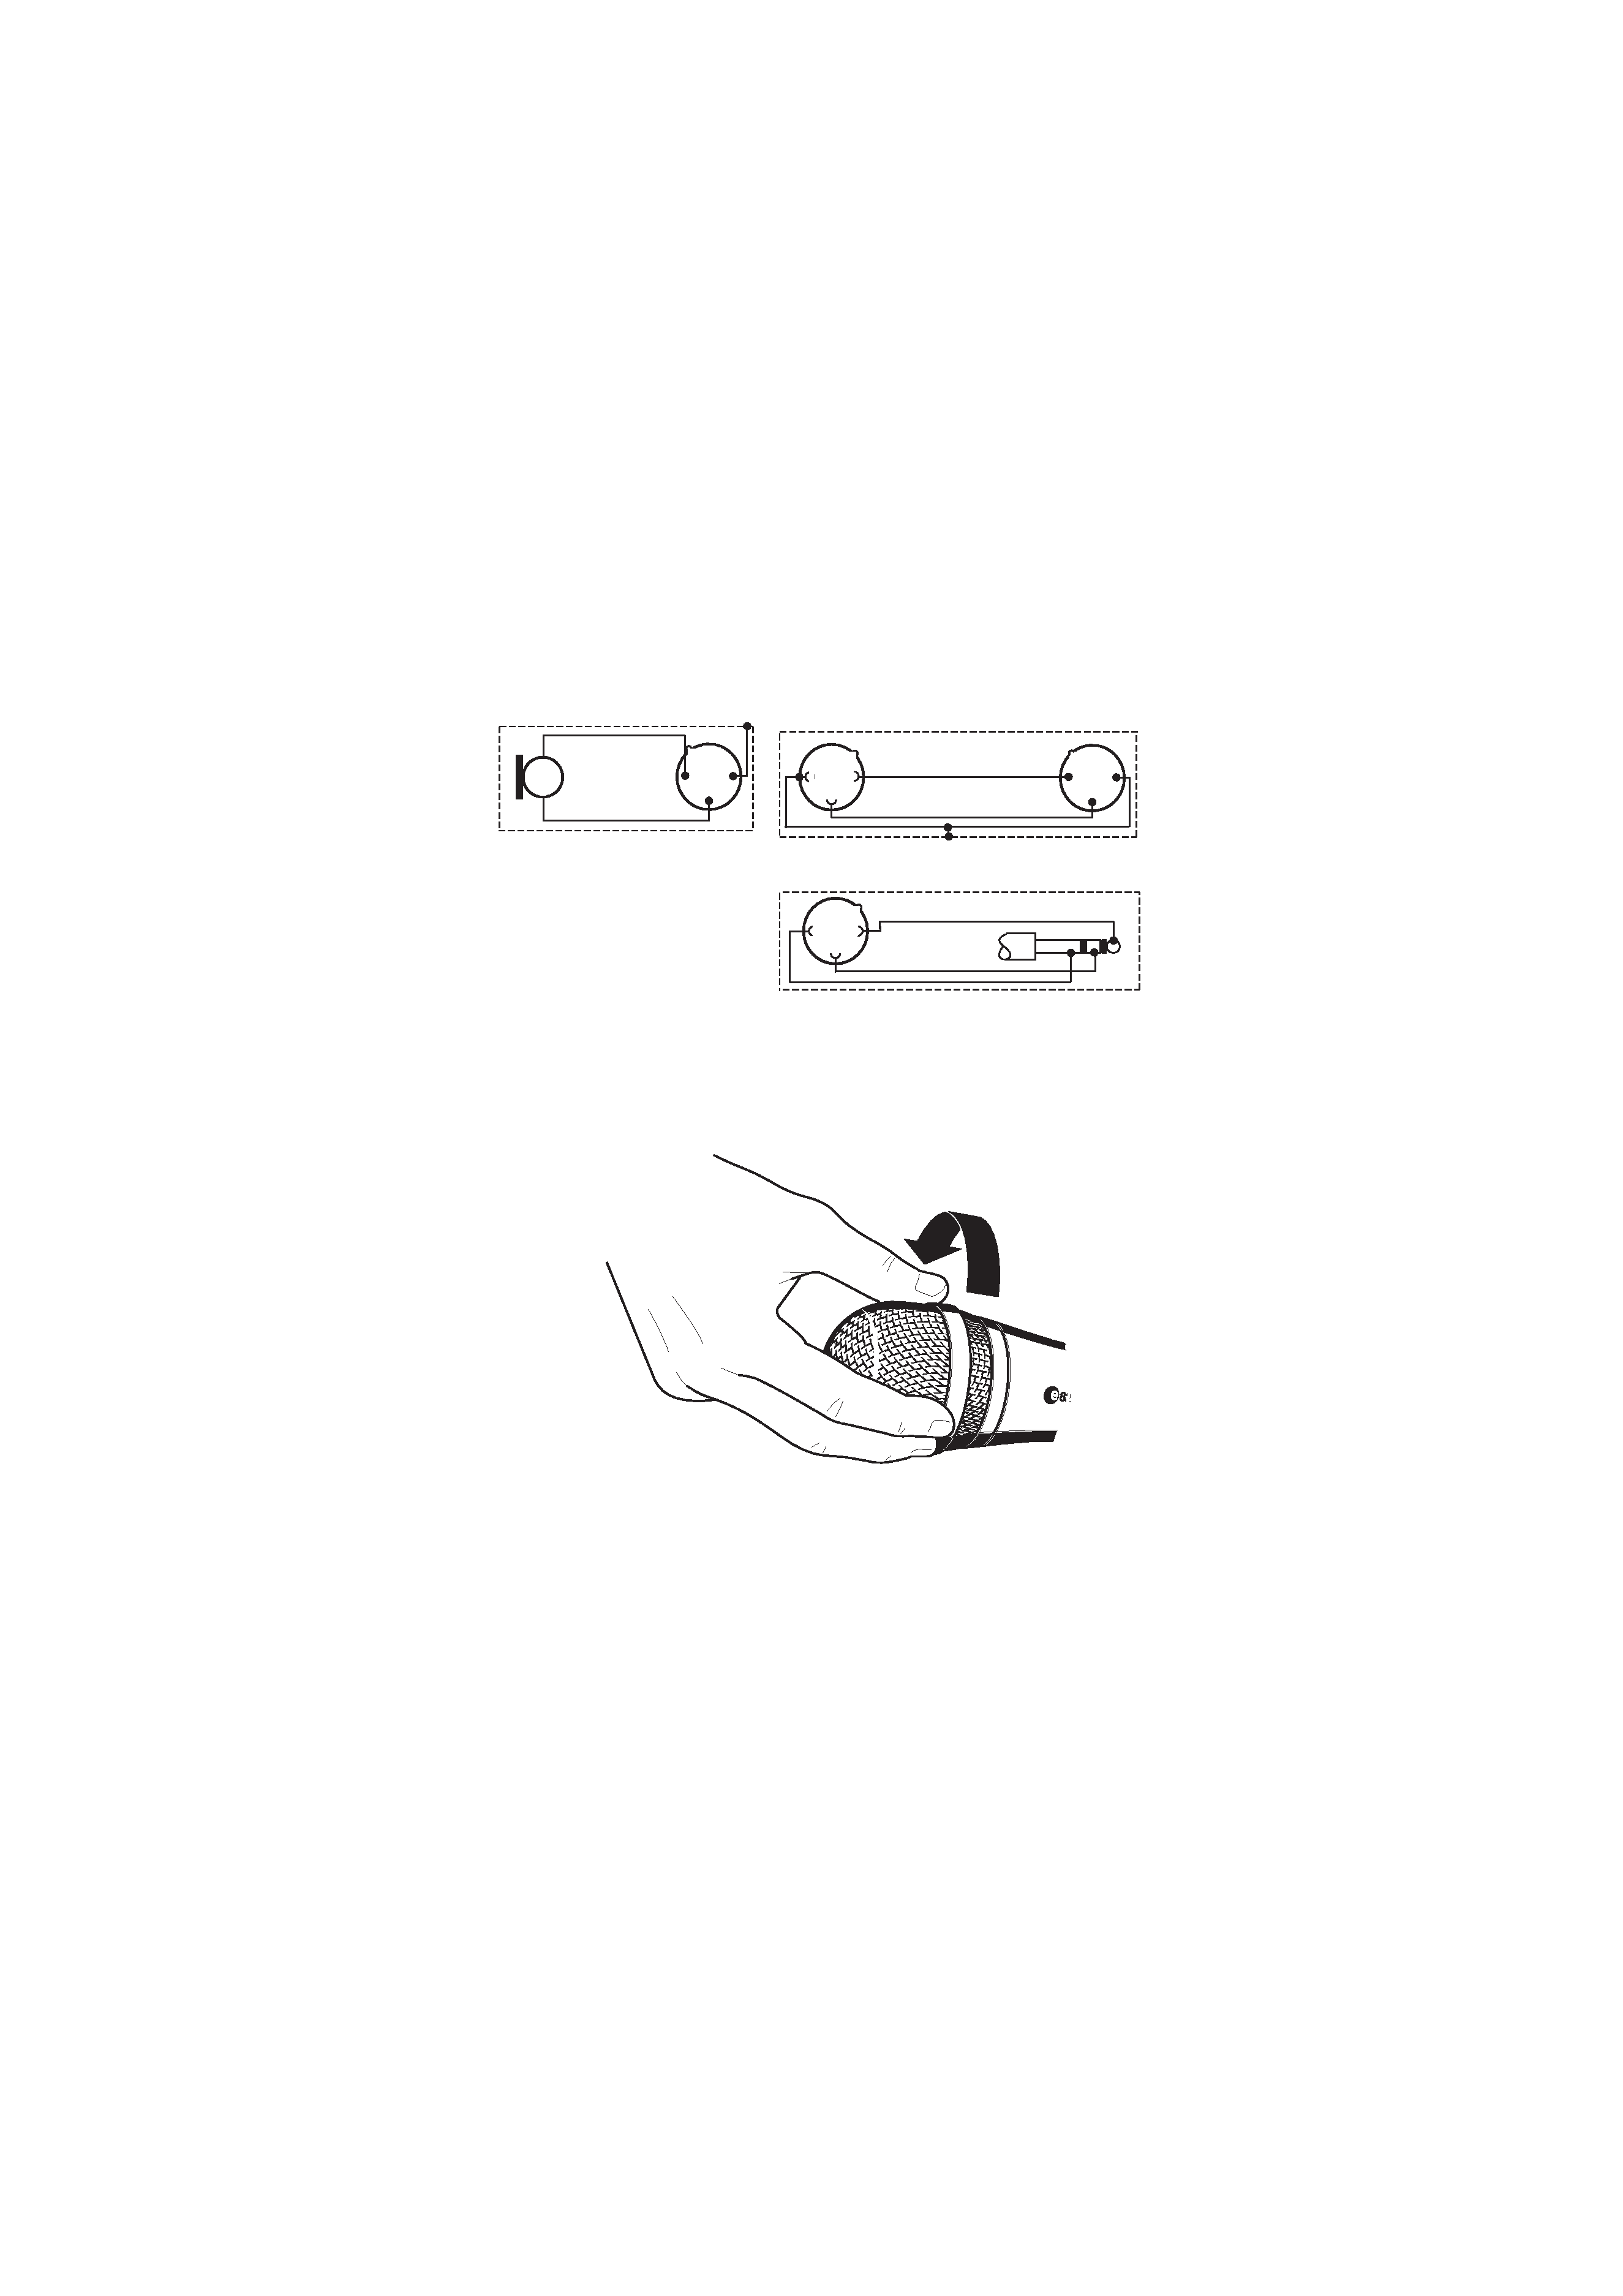
Pin assignment of XLR-3 connector
Removing the sound inlet basket
1
2
3
1
2
3
+
+
1
2
3
XLR
6,3 mm
+
+
1
2
3
XLR
+
XLR
symmetrisch
XLR
+
balanced
e 865_511658_0605_Sp6.book Seite 13 Donnerstag, 10. November 2005 3:22 15