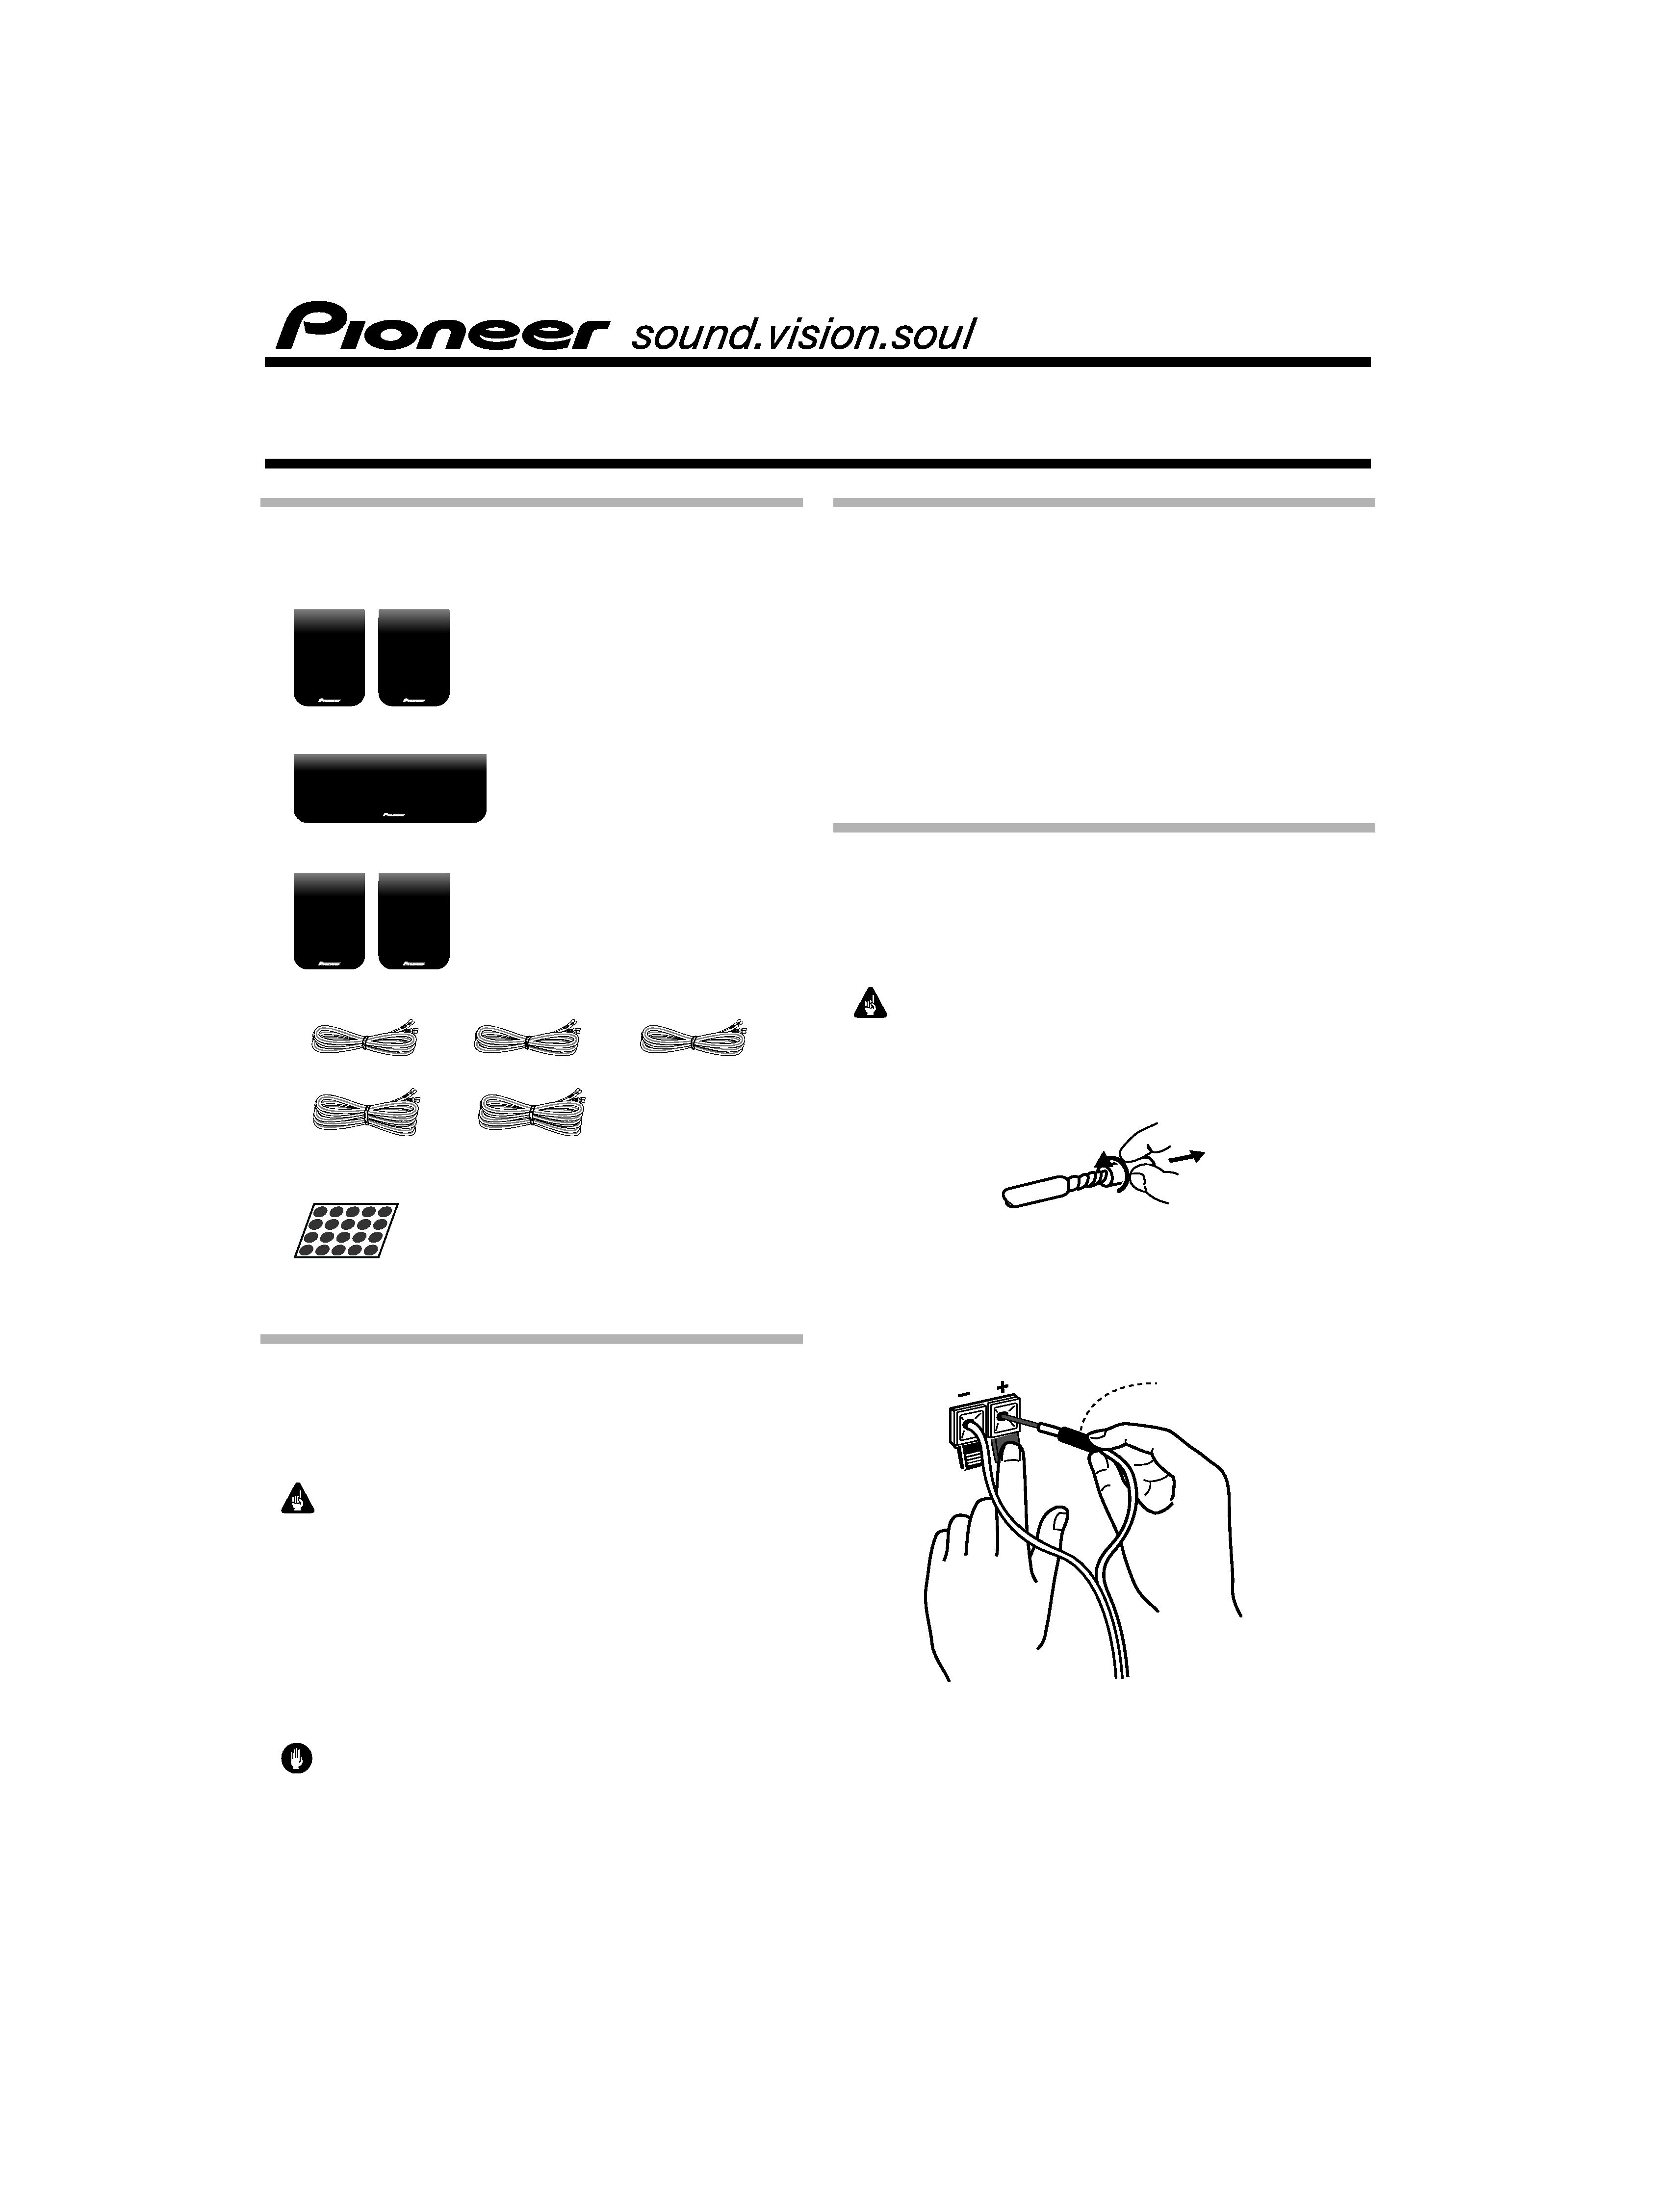
What's in the box
Check that you have all the supplied accessories before you start:
· Front speakers x 2
· Center speaker x 1
· Surround speakers x 2
· Speaker cables x 5
· Non-skid pads
· These operating instructions
Before you start
Thank you for buying this Pioneer product.
Please read through these operating instructions before installing
and using your speaker system.
Important
In order to prevent damage to the speaker system resulting from
input overload, please observe the following precautions:
· Do not supply signal to the speaker system in excess of the
maximum permissible input.
· When connecting or disconnecting cables, make sure that your
amplifier is switched off.
· Do not use excessive amplifier volume if using a tone control to
emphasize high or low frequencies.
Caution
· Do not connect the supplied speakers to any amplifier other
than the one supplied with this system. Connection to any other
amplifier may result in malfunction or fire.
· Pioneer will not be responsible for any accidents or damage that
may result from improper installation.
Making receiver settings
Before connecting the speakers, please read the Operating
Instructions supplied with your VSX-517 receiver to make the
following settings:
· Switch the speaker impedance to the 6 setting (see Switching
the speaker impedance to do this).
· Set the crossover frequency to 200 Hz (see Crossover network to
do this).
After connecting the speakers, please complete Using the Quick
Setup with the
5.1ch setting (refer to the receiver's 5 minute guide in
the supplied Operating Instructions).
Connecting the speakers
To get the best out of your speakers it is important that you connect
them properly to your amplifier or receiver. Each speaker
connection consists of a positive (+) and a negative () terminal.
These should be matched between the amplifier and the speaker.
Important
· Make sure all equipment is turned off before making any
connections.
1
Twist and pull off the protective shields on each speaker wire.
2
Attach one end of the supplied speaker cables to the rear
of each speaker.
Match the colored wire with the color-coded label (above the tabs),
then insert the colored wire into the red (+) tab and the other wire
with the black () tab.
OPERATING INSTRUCTIONS
S-STP501
SPEAKER SYSTEM
http://www.pioneerelectronics.com
Front right (Red)
Surround right (Grey)
Surround left (Blue)
Front left (White)
Center (Green)
Colored marker
red
black
01 speaker system.fm 1

3
Connect the other end of each speaker cable to your
receiver.
To connect, insert the colored wire into the matching positive
(colored) terminal and the other wire into the negative (black)
terminal as shown below. See also the Operating Instructions that
came with your receiver.
Caution
· Confirm that all bare speaker wires are twisted together and
inserted fully into the proper terminals. If a bare wire strand
touches the rear panel, a short circuit may cause the protection
function to operate, disconnecting power to the unit.
Placing the speakers
· The diagram below shows the standard speaker placement
relative to your listening position.
The following guidelines will help you to get the best performance
from your speaker system. See also the section on Connecting the
speakers in the Operating Instructions that came with your receiver.
· The distance between the front speakers should be about the
same as from your listening position to each speaker. Place
them at an equal distance either side of your TV and roughly at
ear-level (when you are seated in your usual listening position).
· You may want to angle the speakers slightly inward for better
image stability, especially for listeners who are not right in the
center.
· Placing the speakers close to the rear or side walls will enhance
the mid-bass performance, although too close (especially to a
corner) may result in boomy bass and degraded stereo image.
· The left and right surround speakers should be placed at about
ear-level. Depending on the layout of your room, the left and
right surround speakers may be mounted on the side walls.
· Install the center speaker above or below the TV so that the
sound of the center channel is localized at the TV screen.
Caution
· When installing the center speaker on top of the TV, be sure to
secure it with tape or some other suitable means. Otherwise, the
speaker may fall from the TV due to external shocks such as
earthquakes, endangering those nearby or damaging the
speaker.
· Do not install speakers near a stove or other heating appliance,
or put them in a place exposed to the sun. Such locations may
cause the cabinet to change color and the speaker system to
break down.
· The front, center and surround speakers supplied with this
system are magnetically shielded. However, depending on the
installation location, color distortion may occur if the speaker is
installed extremely close to the screen of a television set. If this
happens, turn the television set off for 15 to 30 minutes before
switching it back on. If the problem persists, place the speaker
system away from the television set.
FRONT
R
L
CENTER
SURROUND
R
L
S
P
E
A
K
E
R
S
VSX-517 receiver
color-coded
wire
Front right
(Red)
Front left
(White)
Surround left
(Blue)
Surround right
(Grey)
Center (Green)
Front left
Surround left
Listening position
Center
(Subwoofer)
Front right
Surround right
01 speaker system.fm 2

Non-skid pads
Attach the non-skid pads to the base of the speakers. Use the
supplied adhesive to attach 4 pads to the base (flat surface) of each
speaker.
Cabinet maintenance
Use a polishing cloth or dry cloth to wipe off dust and dirt.
If the cabinet is very dirty, clean with a soft cloth dipped in some
neutral cleanser diluted five or six times with water, and then wipe
again with a dry cloth. Do not use furniture wax or cleaners.
Never use thinners, benzene, insecticide sprays and other
chemicals on or near the cabinets, since these will corrode the
surfaces.
Wall mounting the speakers
Before mounting, keep in mind the following points:
· Remember that the speaker system is heavy and that its weight
could cause the wood screws to work loose, or the wall material
to fail to support it, resulting in the speaker falling. Make sure
that the wall on which you intend to mount the speakers is
strong enough to support them. Do not mount on plywood or
soft surface walls.
· Mounting screws are not supplied. Use screws that are suitable
for the wall material and that will support the weight of the
speaker.
Caution
· If you are unsure of the qualities and strength of the walls,
consult a professional for advice.
· Pioneer is not responsible for any accidents or damage that
result from improper installation.
Troubleshooting
Caution
· These speakers are equipped with a protection device to protect
the transducers from extreme conditions. Under these
conditions the protection device will activate and stop the
speaker from producing sound. If this happens turn the volume
down to resume normal speaker output.
Specifications
·
Front / Surround speakers
Enclosure . . . . . . . . . . . . . . . . . . . . . . . . . . . . . Closed-box bookshelf type
(magnetically shielded)
System. . . . . . . . . . . . . . . . . . . . . . . . . . . . 7.7 cm 1-way system Speakers
Speaker . . . . . . . . . . . . . . . . . . . . . . . . . . . . . . . . . . . . . . .7.7 cm cone type
Nominal impedance . . . . . . . . . . . . . . . . . . . . . . . . . . . . . . . . . . . . . . . 6
Frequency range. . . . . . . . . . . . . . . . . . . . . . . . . . . . . . . . . 85 Hz to 20 kHz
Dimensions. . . . . . . . . . . . . . . . . 100 mm (W) x 136 mm (H) x 80 mm (D)
Weight . . . . . . . . . . . . . . . . . . . . . . . . . . . . . . . . . . . . . . . . . . . . . . . . 0.55 kg
·
Center speaker
Enclosure . . . . . . . . . . . . . . . . . . . . . . . . . . . . . Closed-box bookshelf type
(magnetically shielded)
System. . . . . . . . . . . . . . . . . . . . . . . . . . . . . . . . . . . . .7.7 cm 1-way system
Speaker . . . . . . . . . . . . . . . . . . . . . . . . . . . . . . . . . . . . . . .7.7 cm cone type
Nominal impedance . . . . . . . . . . . . . . . . . . . . . . . . . . . . . . . . . . . . . . . 6
Frequency range. . . . . . . . . . . . . . . . . . . . . . . . . . . . . . . . . 75 Hz to 20 kHz
Dimensions. . . . . . . . . . . . . . . . . . 270 mm (W) x 96 mm (H) x 90 mm (D)
Weight . . . . . . . . . . . . . . . . . . . . . . . . . . . . . . . . . . . . . . . . . . . . . . . . 0.78 kg
Note: Specifications and design subject to possible modification
without notice due to improvements.
5 mm to 7 mm
Mounting screw
(not supplied)
5 mm
10 mm
Symptom
Possible cause
Remedy
No sound
· Bad speaker wire or
connection
· Receiver is off
· Volume control is at zero
· Connect correctly or
replace wire.
· Turn on receiver.
· Slowly turn up volume.
Sound is
distorted
· Extreme signal condition · Turn down the amplifier's
output level (volume, bass
control, bass boost) to
lower the level.
Speakers stop
producing
sound suddenly
· Extreme signal condition
for extended period of time
· Turn the volume down to
resume normal speaker
output.
01 speaker system.fm 3

Printed in
<SRD6086-A>
Published by Pioneer Corporation
Copyright ©2007 Pioneer Corporation
All rights reserved
Published by Pioneer Corporation
Copyright ©2007 Pioneer Corporation
All rights reserved
PIONEER CORPORATION
4-1, Meguro 1-Chome, Meguro-ku, Tokyo 153-8654, Japan
PIONEER ELECTRONICS (USA) INC.
P.O. BOX 1540, Long Beach, California 90801-1540, U.S.A. TEL: (800) 421-1404
PIONEER ELECTRONICS OF CANADA, INC.
300 Allstate Parkway, Markham, Ontario L3R 0P2, Canada TEL: 1-877-283-5901, 905-479-4411
PIONEER EUROPE NV
Haven 1087, Keetberglaan 1, B-9120 Melsele, Belgium TEL: 03/570.05.11
PIONEER ELECTRONICS ASIACENTRE PTE. LTD.
253 Alexandra Road, #04-01, Singapore 159936 TEL: 65-6472-7555
PIONEER ELECTRONICS AUSTRALIA PTY. LTD.
178-184 Boundary Road, Braeside, Victoria 3195, Australia, TEL: (03) 9586-6300
PIONEER ELECTRONICS DE MEXICO S.A. DE C.V.
Blvd.Manuel Avila Camacho 138 10 piso Col.Lomas de Chapultepec, Mexico,D.F. 11000 TEL: 55-9178-4270
K002_B_En
01 speaker system.fm 4