Optical Digital Reference System
Digital Integrated Amplifier
Owner's Manual
RS-A9
ENGLISH
ESPAÑOL
DEUTSCH
FRANÇAIS
ITALIANO
NEDERLANDS

1
Contents
Key Finder .................................................... 3
Head Unit (RS-D7R) ........................................ 3
Remote Control (RS-D7R) ................................ 3
Opening and Closing
the Remote Control Cover ........................ 4
-
When the Cover is Closed
-
When the Cover is Open
Before Using This Product ...................... 6
About This Product .......................................... 6
About This Manual ............................................ 6
About the Digital Network ................................ 6
System resetting ................................................ 7
-
About the System Reset button
-
Before system resetting
-
System Resetting
All Clear ............................................................ 8
-
About the All Clear button
-
Before all clearing
-
All clear
Protecting System Reset button and All Clear
button .......................................................... 9
Precaution .......................................................... 9
In Case of Trouble ............................................ 9
Audio Adjustment .................................... 10
Audio Menu .................................................... 10
-
Switching to the Audio Menu
Audio Adjustment <Main> .................... 12
Main Menu ...................................................... 12
-
Switching to the Main Menu
Balance Adjustment ........................................ 12
Bass/Treble Adjustment .................................. 13
Using the Compression .................................. 14
Adjusting the Listening Position .................... 15
-
Using the Position Selector
-
Fine Tuning the Position
-
Effective distance Adjustment
Using the Position Fine Tuning function
Source Level Adjustment ................................ 19
Audio Adjustment <Equalizer> .............. 20
About the Equalizer Menu .............................. 20
-
31 Band Graphic Equalizer
-
3 Band Parametric Equalizer
Equalizer menu ................................................ 21
-
Switching to the Equalizer Menu
Relation Between Frequency Characteristics
and Sound Quality .................................... 22
Adjusting the 31 Band Graphic Equalizer ...... 24
Adjusting the 3 Band Parametric Equalizer .... 26
-
About the adjustment using
the parametric equalizer
-
Setting the equalizer curve
The Flat function ............................................ 29
The Clear function .......................................... 30

Audio Adjustment <Network> .............. 31
What is the Multi-Amp System? .................... 31
Network Menu ................................................ 32
-
Switching to the Network Menu
Time Alignment Adjustment .......................... 33
-
Switching to the
Time Alignment Adjustment Mode
-
Measuring the Distance to be Corrected
-
Inputting the Distance to be Corrected
Filter Adjustment ............................................ 37
-
Switching to the Filter Adjustment Mode
-
Using the Mute function
-
Adjusting the Filter
Switching between Linear Phase
Characteristics/Minimum Delay Phase
Characteristics .......................................... 42
Audio Adjustment
<Memory Functions> ........................ 43
Memory Functions of
Adjusted Audio Menu .............................. 43
Switching to Memory Mode .......................... 44
-
Equalizer Menu
-
Network Menu
Storing the Adjustment Data in Memory ........ 45
Recalling Data Stored in Memory .................. 46
-
Recalling Memory Using
Forward/Reverse Order
-- Functions of Equalizer Menu --
-
Specifying the Memory Number Directly
Memory Protect function ................................ 48
Display for the Person who Set Up
the Audio Adjustments .................... 49
Inputting the Name .......................................... 49
Inputting Characters ........................................ 49
Memory Data Memo ................................ 52
Connecting the Units .............................. 55
WARNING ...................................................... 55
CAUTION ...................................................... 55
About the setting of this unit .......................... 56
-
Setting the network mode
-
Network Mode setting
Setting Example .............................................. 58
-
Example of 2-way system connection
with 1 RS-A9
-
Example of 4-way system connection
with 1 RS-A9 and 1 RS-A7
-
Example of 4-way system connection
with 1 RS-A9 and 3 RS-A7s (Full-balanced
pure digital system)
Connection Diagram ...................................... 61
Connecting the Speaker wires ........................ 62
-
Four-channel mode
-
Three-channel mode
-
Two-channel mode (Stereo)
-
Two-channel mode (Mono)
To prevent damage .......................................... 64
Connecting the Power Terminal ...................... 65
Connecting the Speaker Output Terminals .... 66
Secure the optical cable .................................. 66
Attaching the Noise Filter .............................. 67
Installation ................................................ 68
CAUTION ...................................................... 68
To prevent malfunction .................................. 68
Installing the Unit ............................................ 69
Troubleshooting ...................................... 70
Checklist .......................................................... 70
Specifications .......................................... 71
2
ENGLISH
ESPAÑOL
DEUTSCH
FRANÇAIS
ITALIANO
NEDERLANDS
3
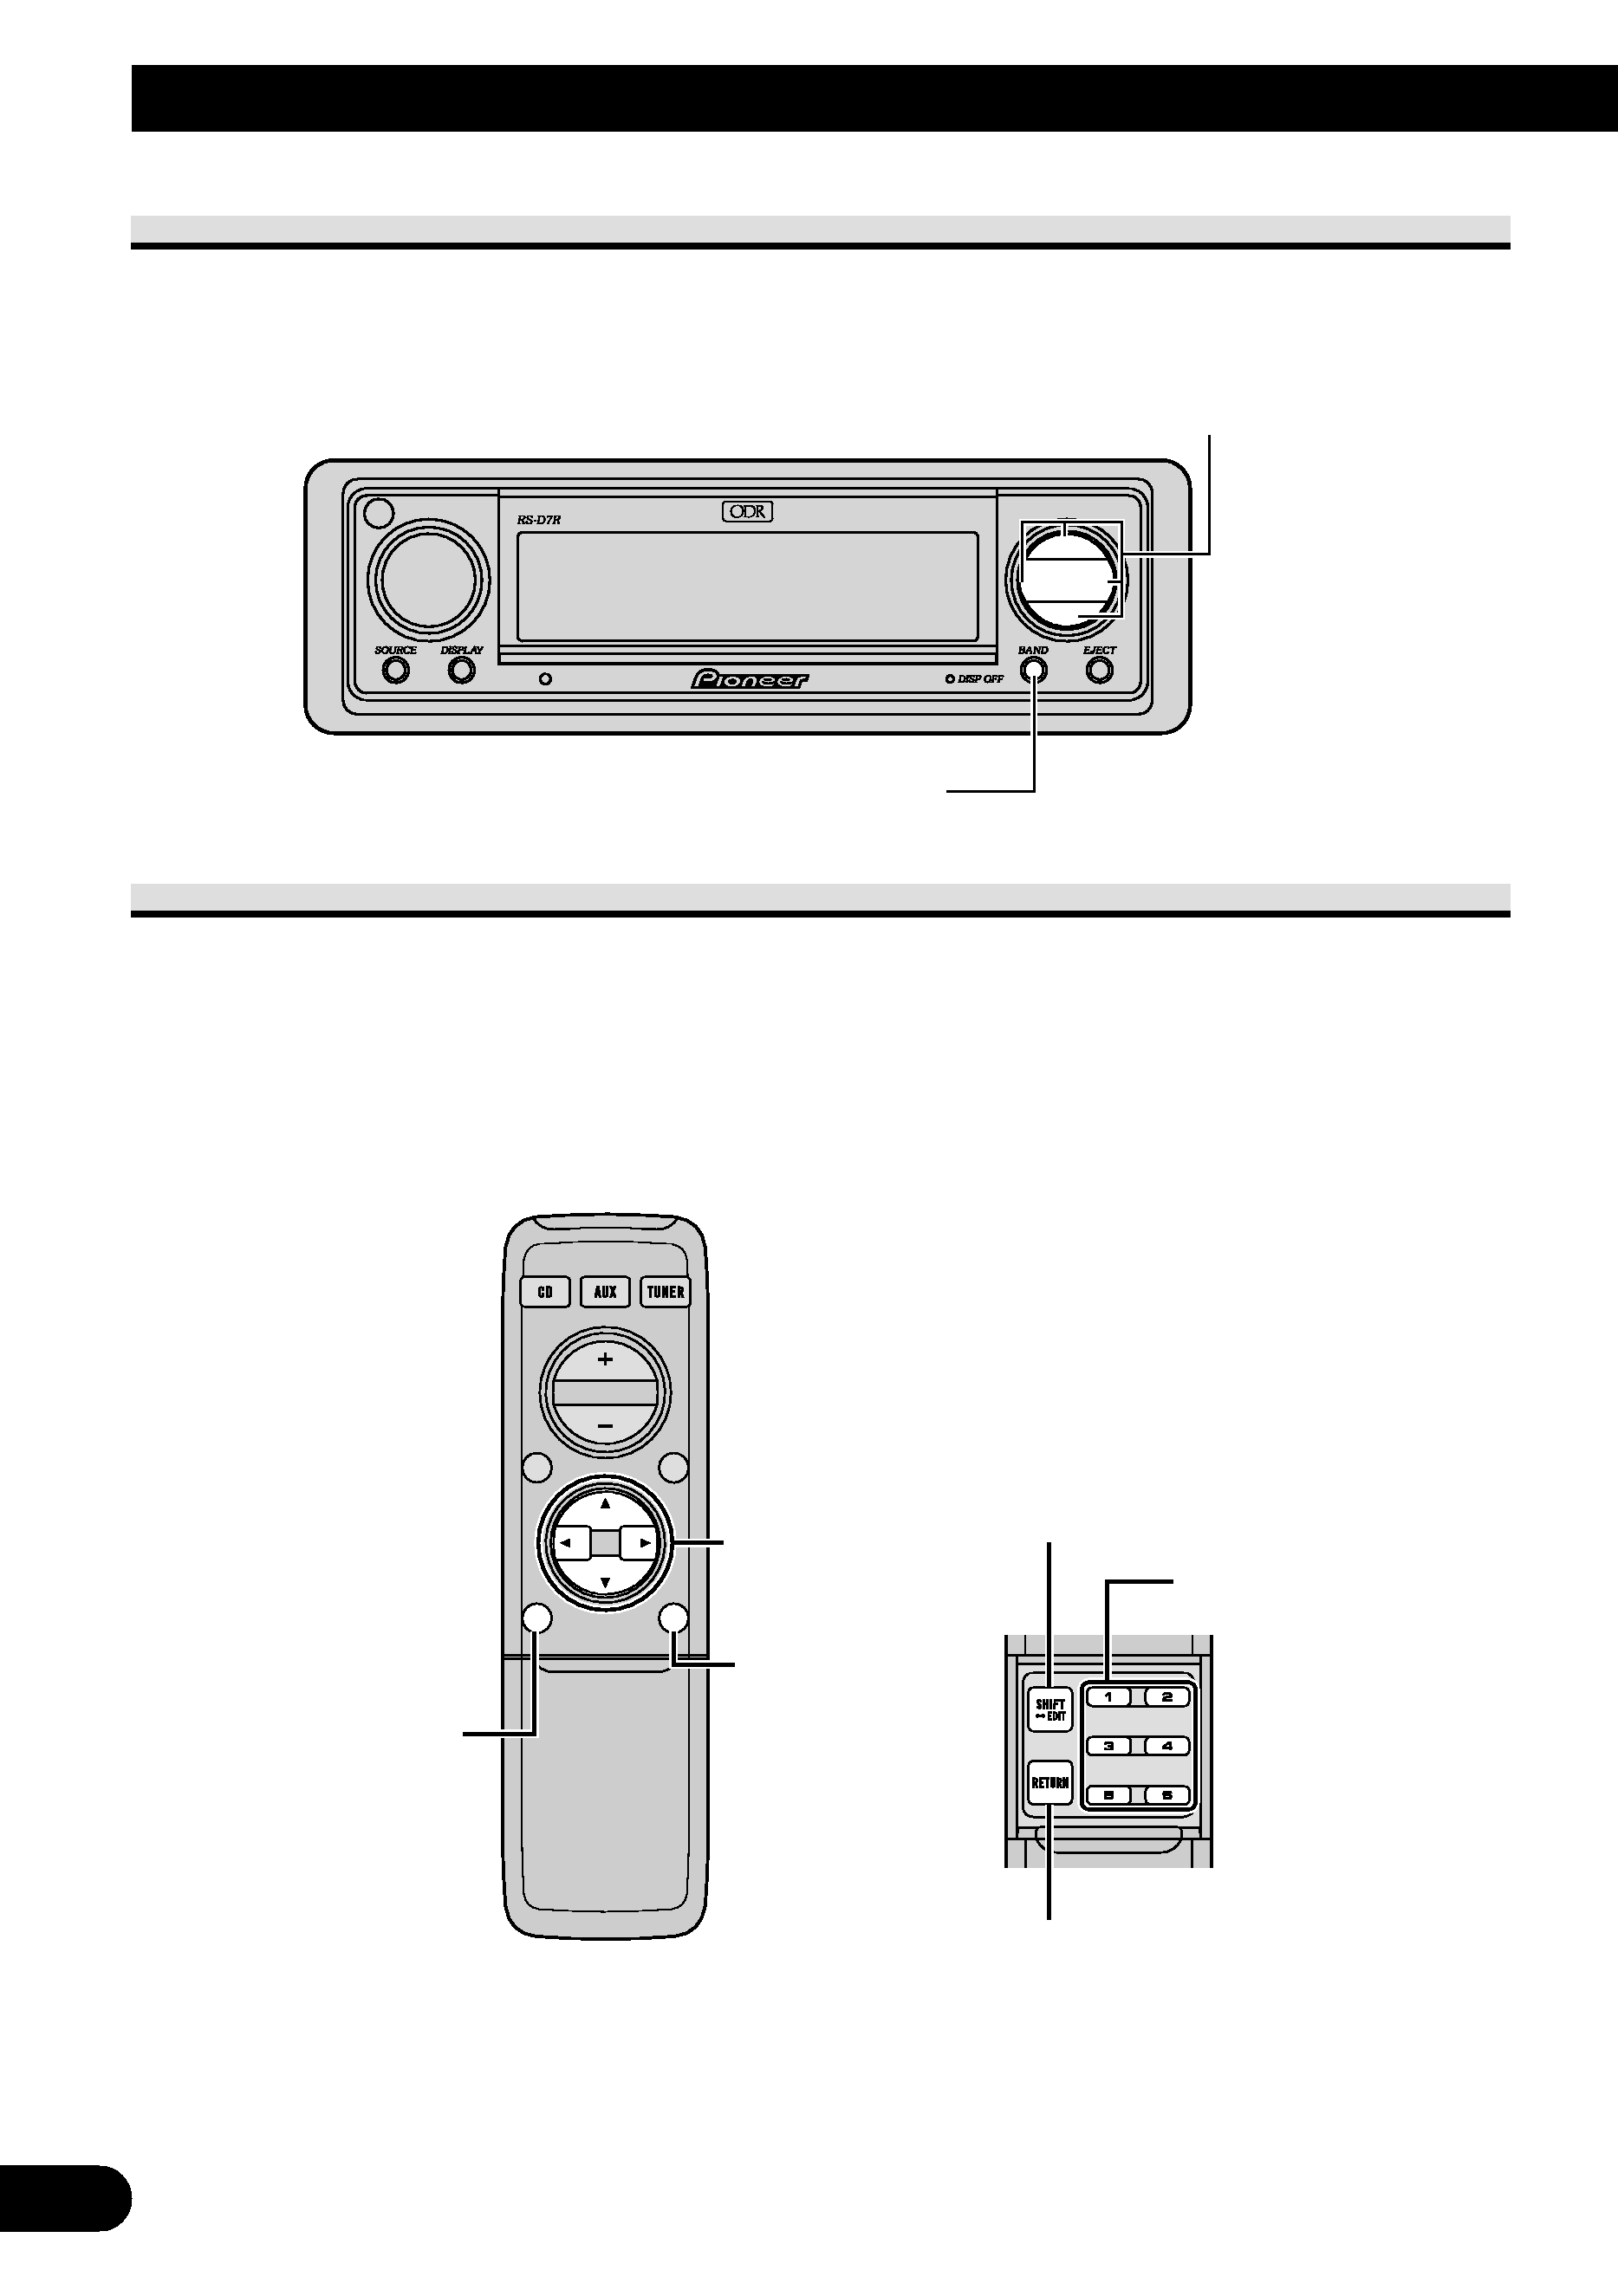
Key Finder
Head Unit (RS-D7R)
This unit can be operated with the combined Head Unit RS-D7R (sold separately).
Remote Control (RS-D7R)
Most of all functions can be operated by the remote control.
Opening the cover enables the SHIFT, RETURN and FUNCTION buttons 16 inside the
remote control. For more details, refer to the page 4.
Closed state
Open state
5//2/3 buttons
BAND button
MENU button
FUNCTION
buttons 16
RETURN button
SHIFT button
BAND button
5//2/3 buttons
These buttons can not be used in
the Audio Adjustment operation.
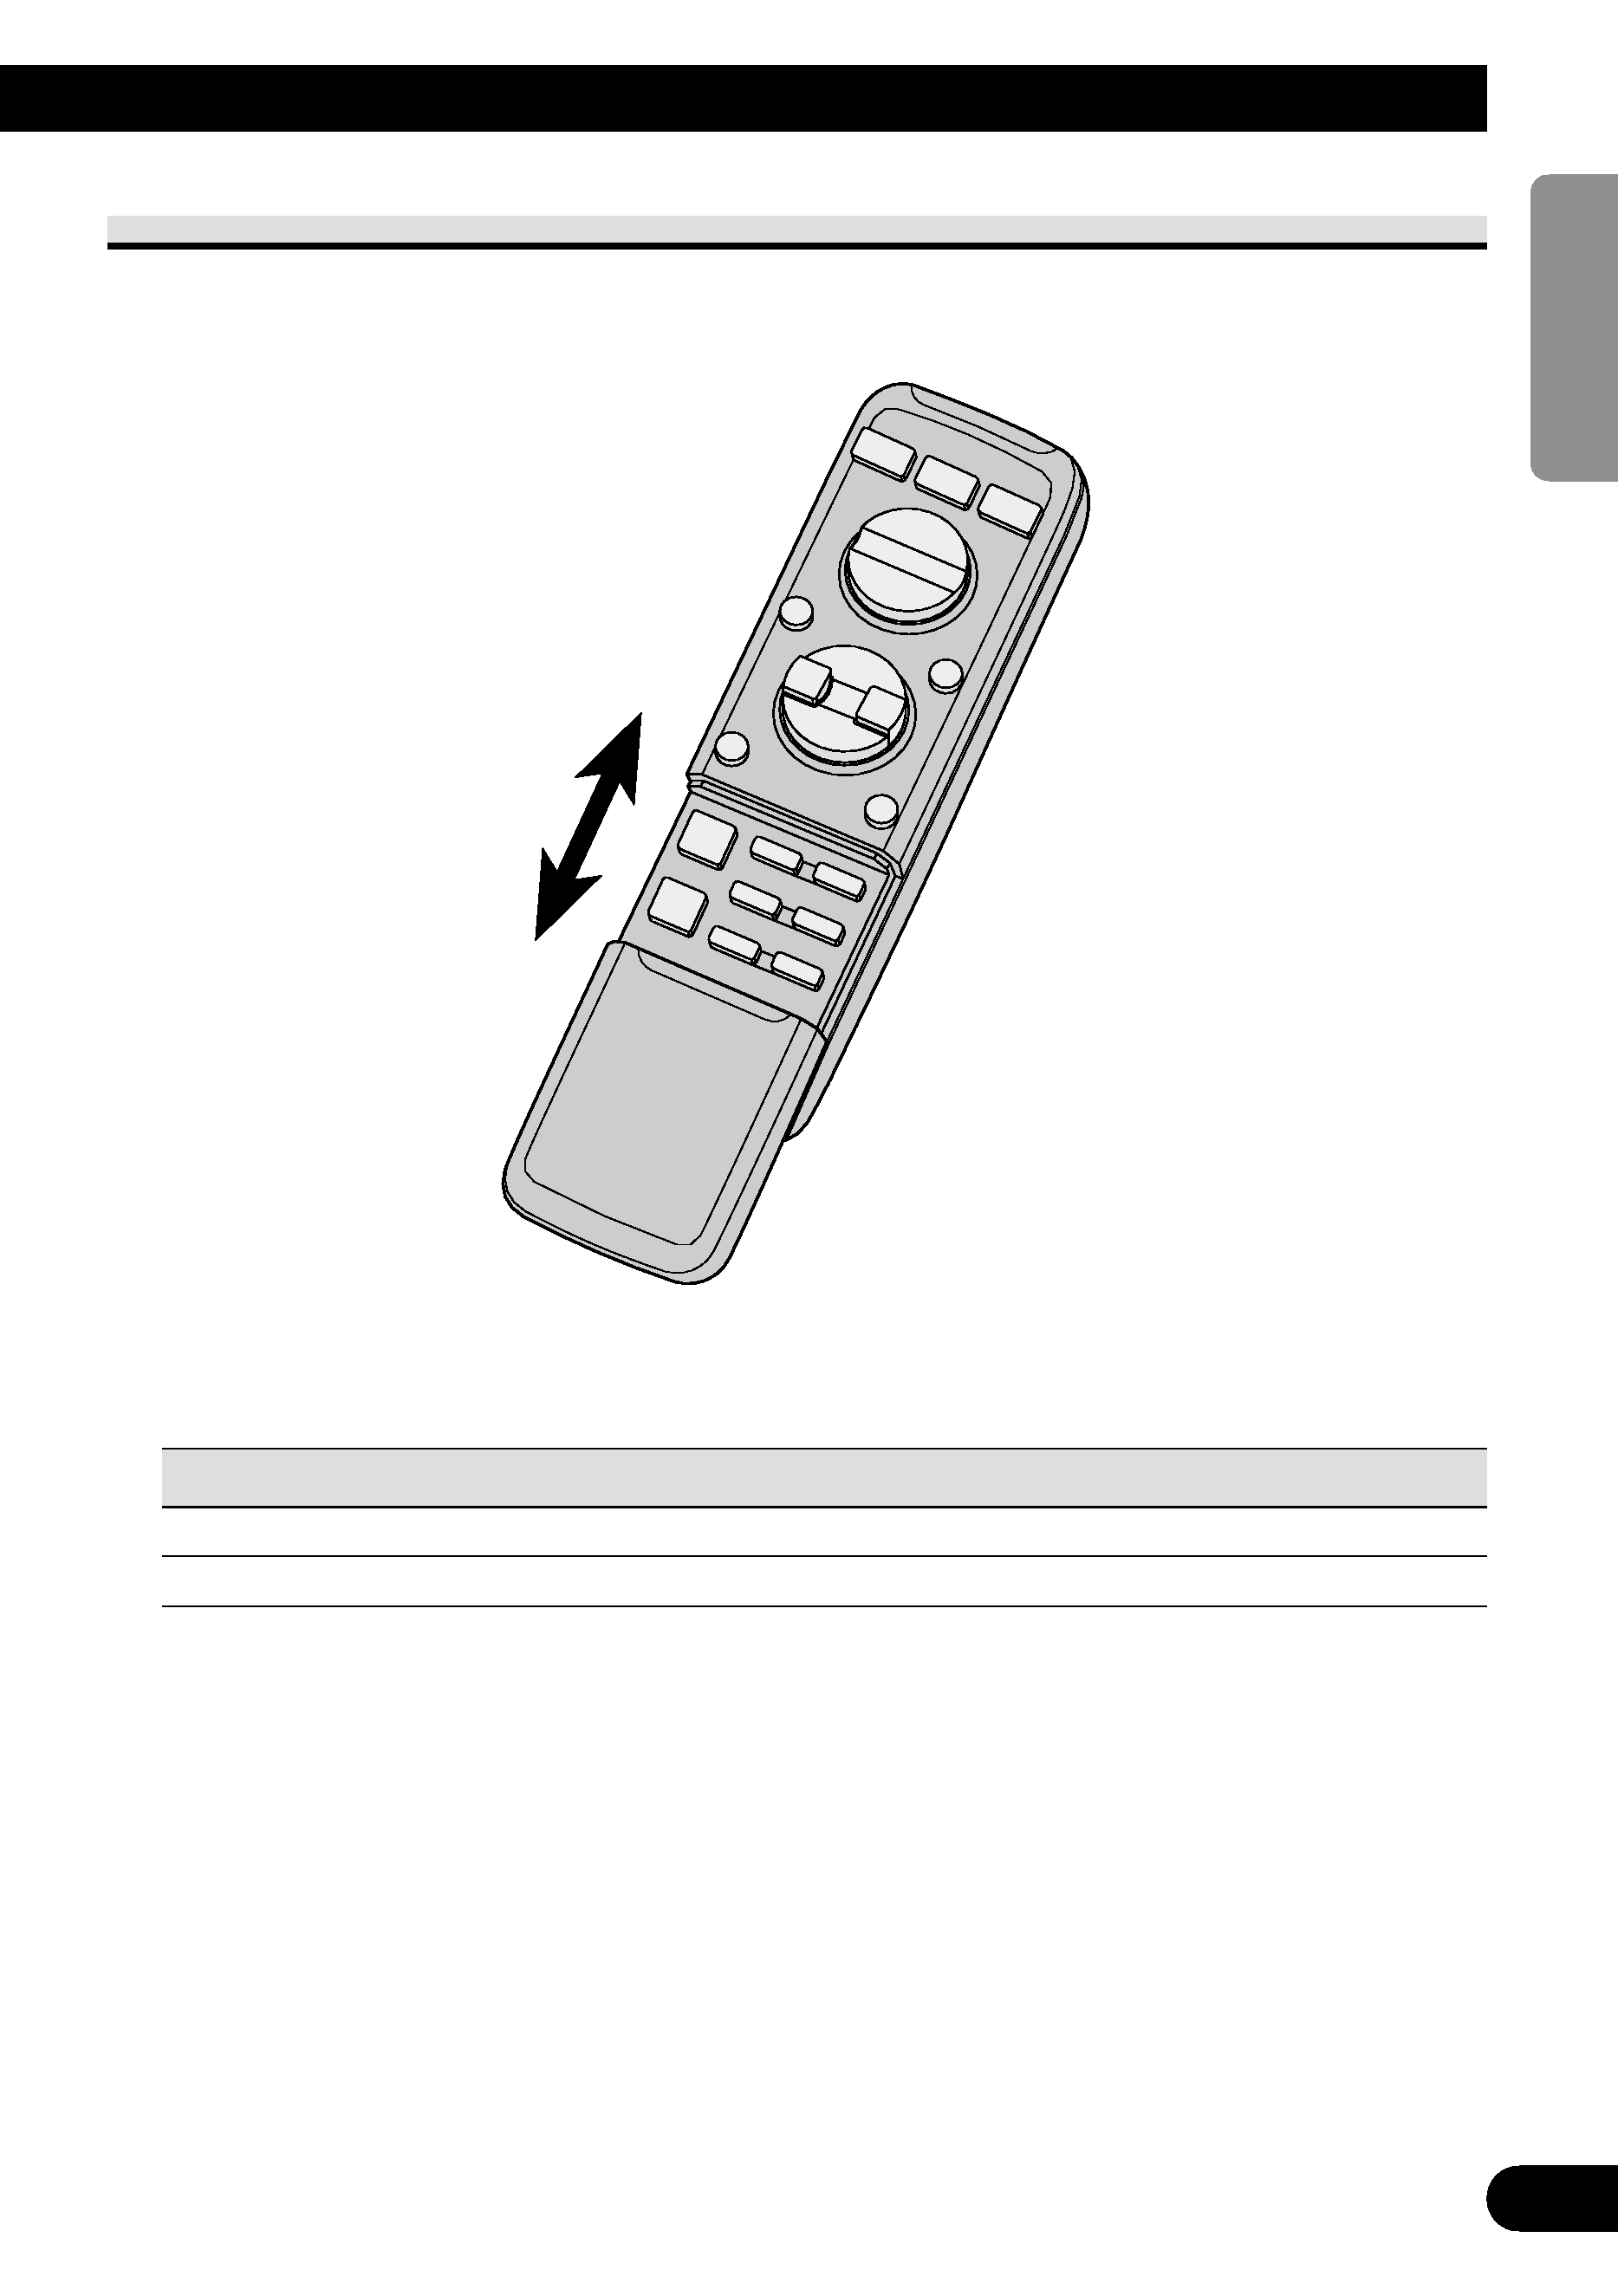
Opening and Closing the Remote Control Cover
When the remote control is opening the cover enables the SHIFT, RETURN and FUNC-
TION buttons 16 inside the unit.
Menu displays with cover open and closed in this system, the available functions and the
menu display vary depending on the condition of the remote control in use.
Remote Control
Menu display
Cover closed
Closed state
Cover open
Open State
4
ENGLISH
ESPAÑOL
DEUTSCH
FRANÇAIS
ITALIANO
NEDERLANDS