Optical Digital Reference System
Digital Amplifier
Owner's Manual
RS-A7
Mode d'emploi
ENGLISH
ESPAÑOL
DEUTSCH
FRANÇAIS
ITALIANO
NEDERLANDS
êìëëäàâ

1
Contents
Before Using this Product ........................ 2
About this Product ............................................ 2
About this Manual ............................................ 2
About the Digital Network ................................ 2
Resetting the Microprocessor ............................ 3
-
Before resetting the microprocessor
-
Resetting the microprocessor
About the setting of this unit ............................ 4
-
Setting the network mode
Protecting Reset button .................................... 5
Precaution .......................................................... 5
In Case of Trouble ............................................ 5
Connecting the Units ................................ 6
WARNING ........................................................ 6
CAUTION ........................................................ 6
Address Setting ..................................................7
Network Mode Setting ...................................... 7
Setting Example ................................................ 8
-
Example of 4-way system connection with
1 RS-A9 and 1 RS-A7
-
Example of 4-way system connection with
1 RS-A9 and 3 RS-A7s
(Full-balanced pure digital system)
Connection Diagram ...................................... 10
Connecting the Speaker Wires ........................ 11
-
Four-channel mode
-
Three-channel mode
-
Two-channel mode (Stereo)
-
Two-channel mode (Mono)
To prevent damage .......................................... 13
Connecting the Power Terminal ...................... 14
Connecting the Speaker Output Terminals .... 15
Secure the optical cable .................................. 15
Attaching the Noise Filter .............................. 16
Installation ................................................ 17
CAUTION ...................................................... 17
To prevent malfunction .................................. 17
Installing the Unit ............................................ 18
Troubleshooting ...................................... 19
Checklist .......................................................... 19
Specifications .......................................... 20

ENGLISH
ESPAÑOL
DEUTSCH
FRANÇAIS
ITALIANO
NEDERLANDS
NEDERLANDS
About This Product
This product is digital amplifier which can be operated with the combined head unit RS-
D7R (sold separately) and integrated digital amplifier RS-A9 (sold separately).
About This Manual
This product features a number of sophisticated functions ensuring superior reception and
operation. All are designed for the easiest possible use, but many are not self-explanatory.
This operation manual is intended to help you benefit fully from their potential and to
maximize your listening enjoyment.
We recommend that you familiarize yourself with the functions and their operation by
reading through the manual before you begin using this product. It is especially important
that you read and observe the "Precaution" on page 5 and in other sections.
About the Digital Network
A vehicle, unlike the home audio, imposes several constraints upon the quality of repro-
duced sound, and have the following effects:
· Reflected sounds have strong effects on direct sounds because of the confined space and
complex shape within a vehicle. This disturbs frequency characteristics and significantly
reduces sound quality.
· The orientation of the sound image becomes unnatural, because speakers may not be
installed symmetrically to left and right of the listener, or because speakers are installed
in both the front and rear.
This system is equipped with a wide variety of functions that use DSP to create the ideal
sound quality and sound image in a vehicle and overcome these constraints on reverbera-
tion.
2
Before Using This Product
3
Before Using This Product
Resetting the Microprocessor
Before resetting the microprocessor
· If this product operates incorrectly, press the reset button.
· When you press RS-A9's system reset button, also press the RESET buttons of all con-
nected digital amps.
· If this product is not connected to the power supply or ACC is set to OFF, the system is
not reset even if you press the reset button.
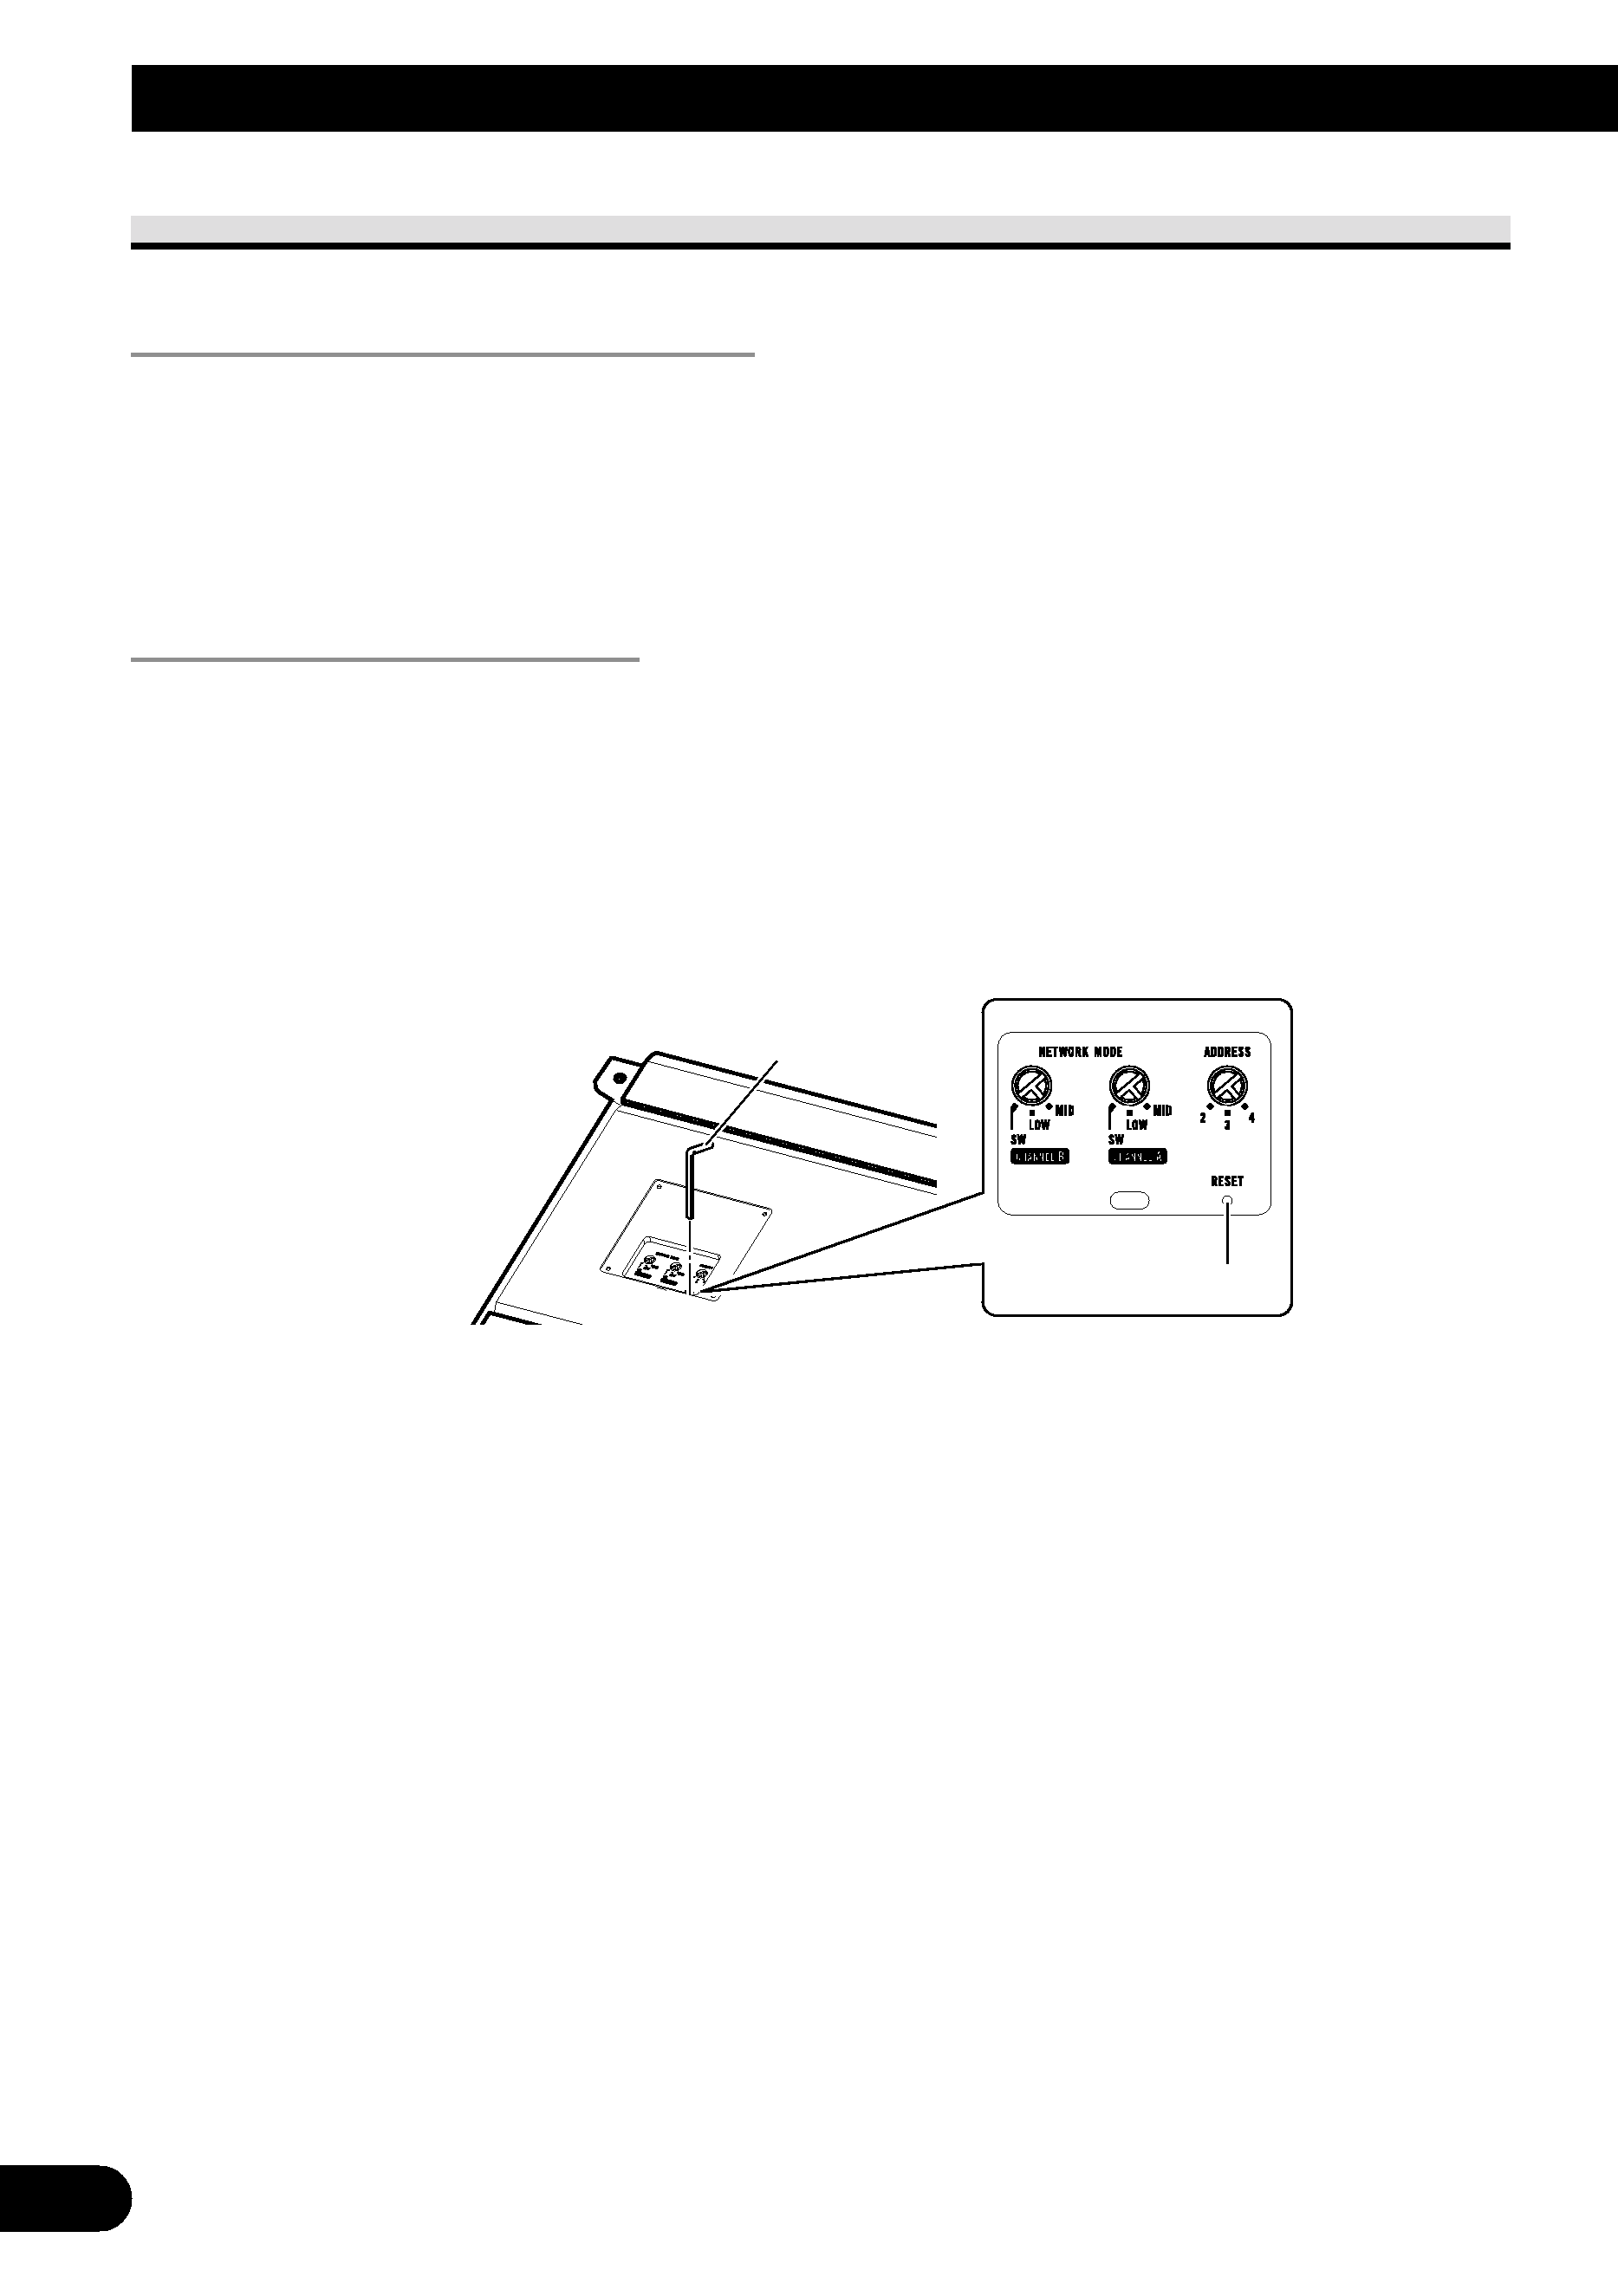
Resetting the microprocessor
If you change the network mode switch (A·B), address setting or the system, remove this
product's top cover and press the reset button using the small supplied hexagonal wrench.
Also press the reset button in the same way when you switch power to this product ON for
the first time after purchasing or if this product's built-in microcomputer operates incor-
rectly.
· Carefully store the supplied hexagonal wrench.
Reset button
Hexagonal wrench
(Small)
About the setting of this unit
This product features a network mode setting switch (A·B) and address setting switch.
Perform the appropriate settings for the application aim of the speakers connected to this
product. If these setting are performed incorrectly, this system will not operate correctly.
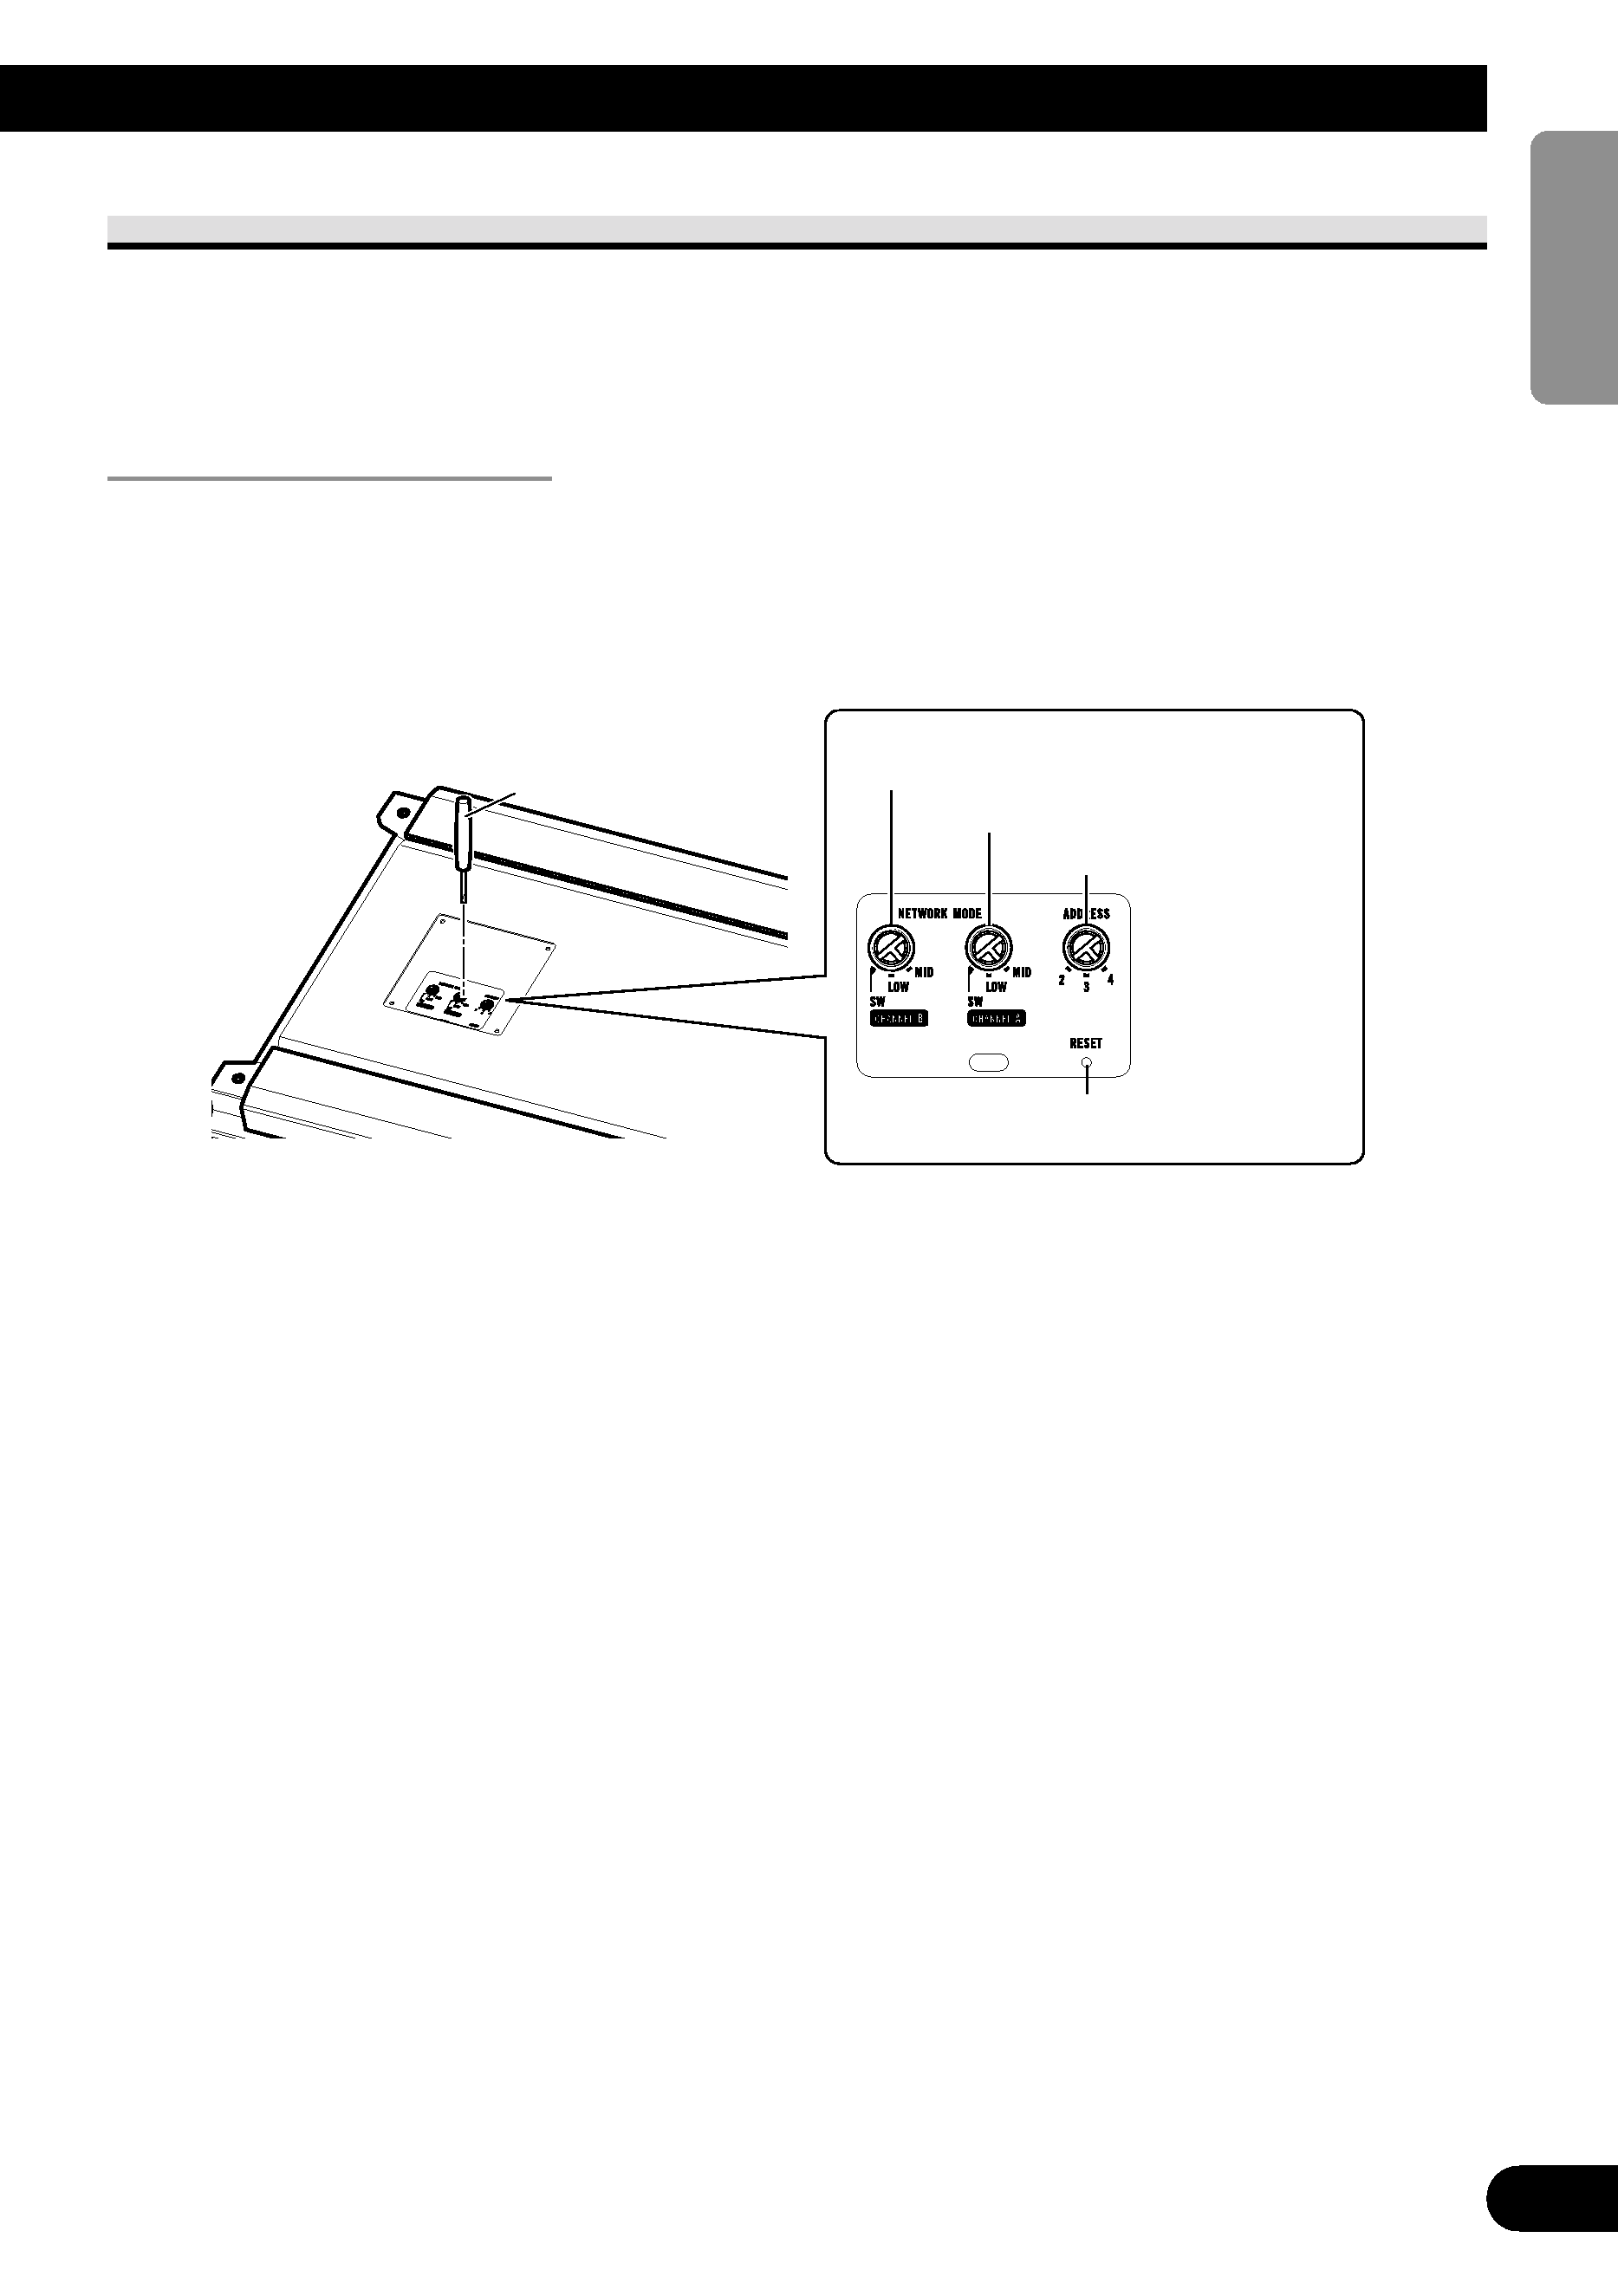
Setting the network mode
1. Switch the network mode setting switch (A·B) and address setting switch
with a screwdriver or similar implement.
Switch the network mode setting switch (A·B) and address setting switch to the appropri-
ate setting for the application aim of the connected speakers.
2. Press the reset button.
After switching the network mode setting switch (A·B) and address setting switch, when
this product's operation status is source OFF, press the reset button. If you do not press the
reset button, setting details will not change.
Note:
· If this product is not connected to the power supply or ACC is set to OFF, the system is not reset
even if you press the reset button.
Screwdriver
Reset button
Network mode setting switch (B)
Network mode setting switch (A)
Address setting switch
4
ENGLISH
ESPAÑOL
DEUTSCH
FRANÇAIS
ITALIANO
NEDERLANDS
NEDERLANDS