
Operating Instructions
COMPACT DISC REGISTRABILE
PDR-L77
ENREGISTREUR DE COMPACT DISC
CD-RECORDER
COMPACT DISC RECORDER
Mode d'emploi
Bedienungsanleitung
Istruzioni per l'uso
2
CAUTION
This product contains a laser diode of higher
class than 1. To ensure continued safety, do
not remove any covers or attempt to gain ac-
cess to the inside of the product.
Refer all servicing to qualified personnel.
The following caution label appears on your
unit.
Location: Bottom of the unit.
CLASS 1
LASER PRODUCT
WARNING: TO PREVENT FIRE OR SHOCK
HAZARD, DO NOT EXPOSE THIS APPLIANCE TO RAIN
OR MOISTURE.
THE STANDBY/ON BUTTON IS SECONDARY CON-
NECTED AND THEREFORE DOES NOT SEPARATE THE
UNIT FROM MAINS POWER IN THE STANDBY POSI-
TION.
This product complies with the Low Voltage Direc-
tive (73/23/EEC), EMC Directives (89/336/EEC, 92/31/
EEC) and CE Marking Directive (93/68/EEC).
RISK OF ELECTRIC SHOCK
DO NOT OPEN
CAUTION
ATTENTION
DANGER D'ELECTROCUTION
NE PAS OUVRIR
These labels can be found on the unit's bottom
panel.
L'étiquette suivante se trouve sur le fond de
votre appareil.
CLASS 1
LASER PRODUCT
L'INTERRUPTEUR D'ALIMENTATION (STANDBY/ON)
EST SUR UN CIRCUIT DE CONNEXION SECONDAIRE
ET PAR CONSEQUENT NE COUPE PAS L'ALIMENTATION
SECTEUR SUR LA POSITION D'ATTENTE.
ATTENTION: AFIN DE PREVENIR TOUS
RISQUES DE CHOC ELECTRIQUE OU D`INCENDIE, NE PAS
EXPOSER CET APPAREIL A L`HUMIDITE OU A LA PLUIE.
ATTENTION
Ce produit renferme une diode à laser d'une
catégorie supérieure à 1. Pour garantir une
sécurité constante, ne pas retirer les couvercles
ni essayer d'accéder à l'intérieur de l'appareil.
Pour toute réparation, s'adresser à un person-
nel qualifié.
Ce produit est conforme à la directive relative aux appareils
basse tension (73/23/CEE), aux directives relatives à la
compatibilité électromagnétique (89/336/CEE, 92/31/CEE) et
à la directive CE relative aux marquages (93/68/CEE).
Ces étiquettes se trouvent sur le fond de l'appareil.
Thank you for buying this PIONEER product.
Please read through these operating instructions so you will know
how to operate your model properly. After you have finished reading
the instructions, put them away in a safe place for future reference.
In some countries or regions, the shape of the power plug and power
outlet may sometimes differ from that shown in the explanatory
drawings. However, the method of connecting and operating the
unit is the same.
Nous vous remercions pour cet achat d'un produit Pioneer.
Nous vous demandons de lire soigneusement ce mode d'emploi ;
vous serez ainsi à même de faire fonctionner l'appareil
correctement. Après avoir bien lu le mode d'emploi, rangez-le dans
un endroit sûr pour pouvoir vous y référer ultérieurement.
Dans certains pays ou certaines régions, la forme de la fiche
d'alimentation et de la prise d'alimentation peut différer de celle
qui figure sur les schémas, mais les branchements et le
fonctionnement de l'appareil restent les mêmes.
RISK OF ELECTRIC SHOCK
DO NOT OPEN
CAUTION
IMPORTANT 1
CAUTION:
TO PREVENT THE RISK OF ELECTRIC SHOCK, DO
NOT REMOVE COVER (OR BACK).
NO USER-
SERVICEABLE PARTS INSIDE. REFER SERVICING TO
QUALIFIED SERVICE PERSONNEL.
The exclamation point within an equilateral triangle is
intended to alert the user to the presence of important
operating and maintenance (servicing) instructions in
the literature accompanying the appliance.
The lightning flash with arrowhead symbol, within an
equilateral triangle, is intended to alert the user to the
presence of uninsulated "dangerous voltage" within the
product's enclosure that may be of sufficient magnitude
to constitute a risk of electric shock to persons.

English
3
3
En
Energy-saving design
This unit has been designed to reduce energy consumption when
the power is set to off (standby) mode. Power consumption in this
mode is 0.8 W.
Contents
1 Before You Start
Checking what's in the box ..................................... 5
Putting the batteries in the remote .......................... 5
Hints on installation ................................................ 6
Maintaining your CD recorder ................................. 7
About CD, CDR and CDRW Discs ........................ 8
2 Connecting Up
Connecting to the Rest of Your System .................. 12
3 Controls and Displays
Front Panel ............................................................. 16
Remote Control ...................................................... 17
Display .................................................................... 19
4 Getting Started
Switching On, Playing a Disc ................................ 20
Selecting Tracks Directly ........................................ 23
Programming a Playlist ........................................ 23
Using the Repeat Modes ......................................... 25
Using the Random Mode ....................................... 26
Showing Disc Information .................................... 26
Fading In and Fading Out ..................................... 28
Recording CDs ........................................................ 29
Recording One Track from a Digital Source ......... 32
Recording All Tracks from a Digital Source .......... 34
Automatically Recording and Finalizing a Disc ... 36
Manually Recording a Digital Source ................... 38
Setting the Digital Recording Level ....................... 40
Recording an Analog Source ................................. 41
Using the Thru Input Mode ................................... 43
5 More Recording Features
Numbering Tracks ................................................. 44
Recording Fade Ins and Fade Outs ........................ 45
Checking What's at the End of a Disc ................... 46
Recording Blank Sections ...................................... 47
Skipping Unwanted Tracks .................................... 48
Playing a Disc with Skip IDs .................................. 50
6 Finalizing and Erasing
Finalizing a Disc .................................................... 51
Erasing a CDRW Disc .......................................... 52
7 Additional Information
Understanding Display Messages ........................... 55
Troubleshooting ..................................................... 57
Specifications ......................................................... 61

4
Fr
Conception à économique d'énergie
Cet appareil a été conçu pour réduire la consommation d'énergie
quand il est en mode d'attende. Sa consommation est alors de 0,8 W.
Sommaire
1 Avant le démarrage
Vérification du contenu de la boîte ......................... 5
Insertion des piles dans la télécommande .............. 5
Conseils pour l'installation...................................... 6
Entretien de l'enregistreur CD ................................. 7
A propos des disques CD, CD-R et CD-RW ............... 8
2 Raccordements
Raccordement au reste de votre chaîne................. 12
3 Contrôle et afficheur
Panneau avant ....................................................... 16
Télécommande ...................................................... 17
Afficheur ................................................................. 19
4 Démarrage
Mise sous tension, lecture d'un disque........................ 20
Sélection direction de plage .................................... 23
Programmation d'une liste de lecture ...................... 23
Utilisation des modes de répétition........................ 25
Utilisation du mode aléatoire ................................ 26
Affichage des informations sur le disque............... 26
Fondu à l'entrée et en sortie .................................... 28
Enregistrement de CD ............................................ 29
Enregistrement sur une piste à partir
d'une source numérique ........................................ 32
Enregistrement de toutes les plages
d'une source numérique ........................................ 34
Enregistrement et finalisation
automatiques d'un disque ................................... 36
Enregistrement manuel à partir
d'une source numérique ........................................ 38
Réglage du Niveau
d'Enregistrement numérique .............................. 40
Enregistrement d'une source analogique ............. 41
Utilisation du mode d'entrée en boucle .................... 43
5 Fonctions d'enregistrements complémentaires
Numérotation des plages ....................................... 44
Enregistrement de fondus à l'entrée et en sortie ... 45
Contrôle de la fin du disque ................................... 46
Enregistrement de sections vierges ........................ 47
Saut des plages inutiles .......................................... 48
Lecture d'un disque avec des codes de saut ........... 50
6 Finalisation et effacement
Finalisation d'un disque ........................................ 51
Effacement d'un CD-RW ........................................ 52
7 Informations complémentaires
Compréhension des messages affichés .................. 56
Dépannage ............................................................. 59
Caractéristiques techniques ................................... 61
5
1 Before You Start
1 Avant le démarrage
En/Fr
English
Français
Vérification du contenu de
la boîte
Merci d'avoir porté votre choix sur ce produit Pioneer. Avant
d'installer votre nouvel enregistreur CD, vérifiez la présence des
accessoires suivants dans la boîte.
· Cordon audio stéréo
·
Cordon de commande
(à minifiche)
· Cordon d'alimentation secteur ·
Cordon optique
· Piles sèches AA/R6P
·
Télécommande
· Adaptateur d'enregistrement
·
Mode d'emploi
analogique
·
Carte de garantie
Emploi de ce mode d'emploi
Ce mode d'emploi est prévu pour l'enregistreur CD PDR-L77. Il se
subdivise en deux sections: la première couvrant l'installation et la
seconde l'emploi de l'enregistreur. L'installation, qui commence
ici, vous indique comment placer et raccorder l'enregistreur au
reste de votre chaîne.
La seconde section du mode d'emploi, commençant à la page 16,
vous apprend comment utiliser les fonctions de l'enregistreur, allant
de la lecture de base à la finalisation d'un CD enregistrable. La
dernière partie de ce mode d'emploi comprend la liste des messages
affichés, la page de dépannage et les spécifications techniques.
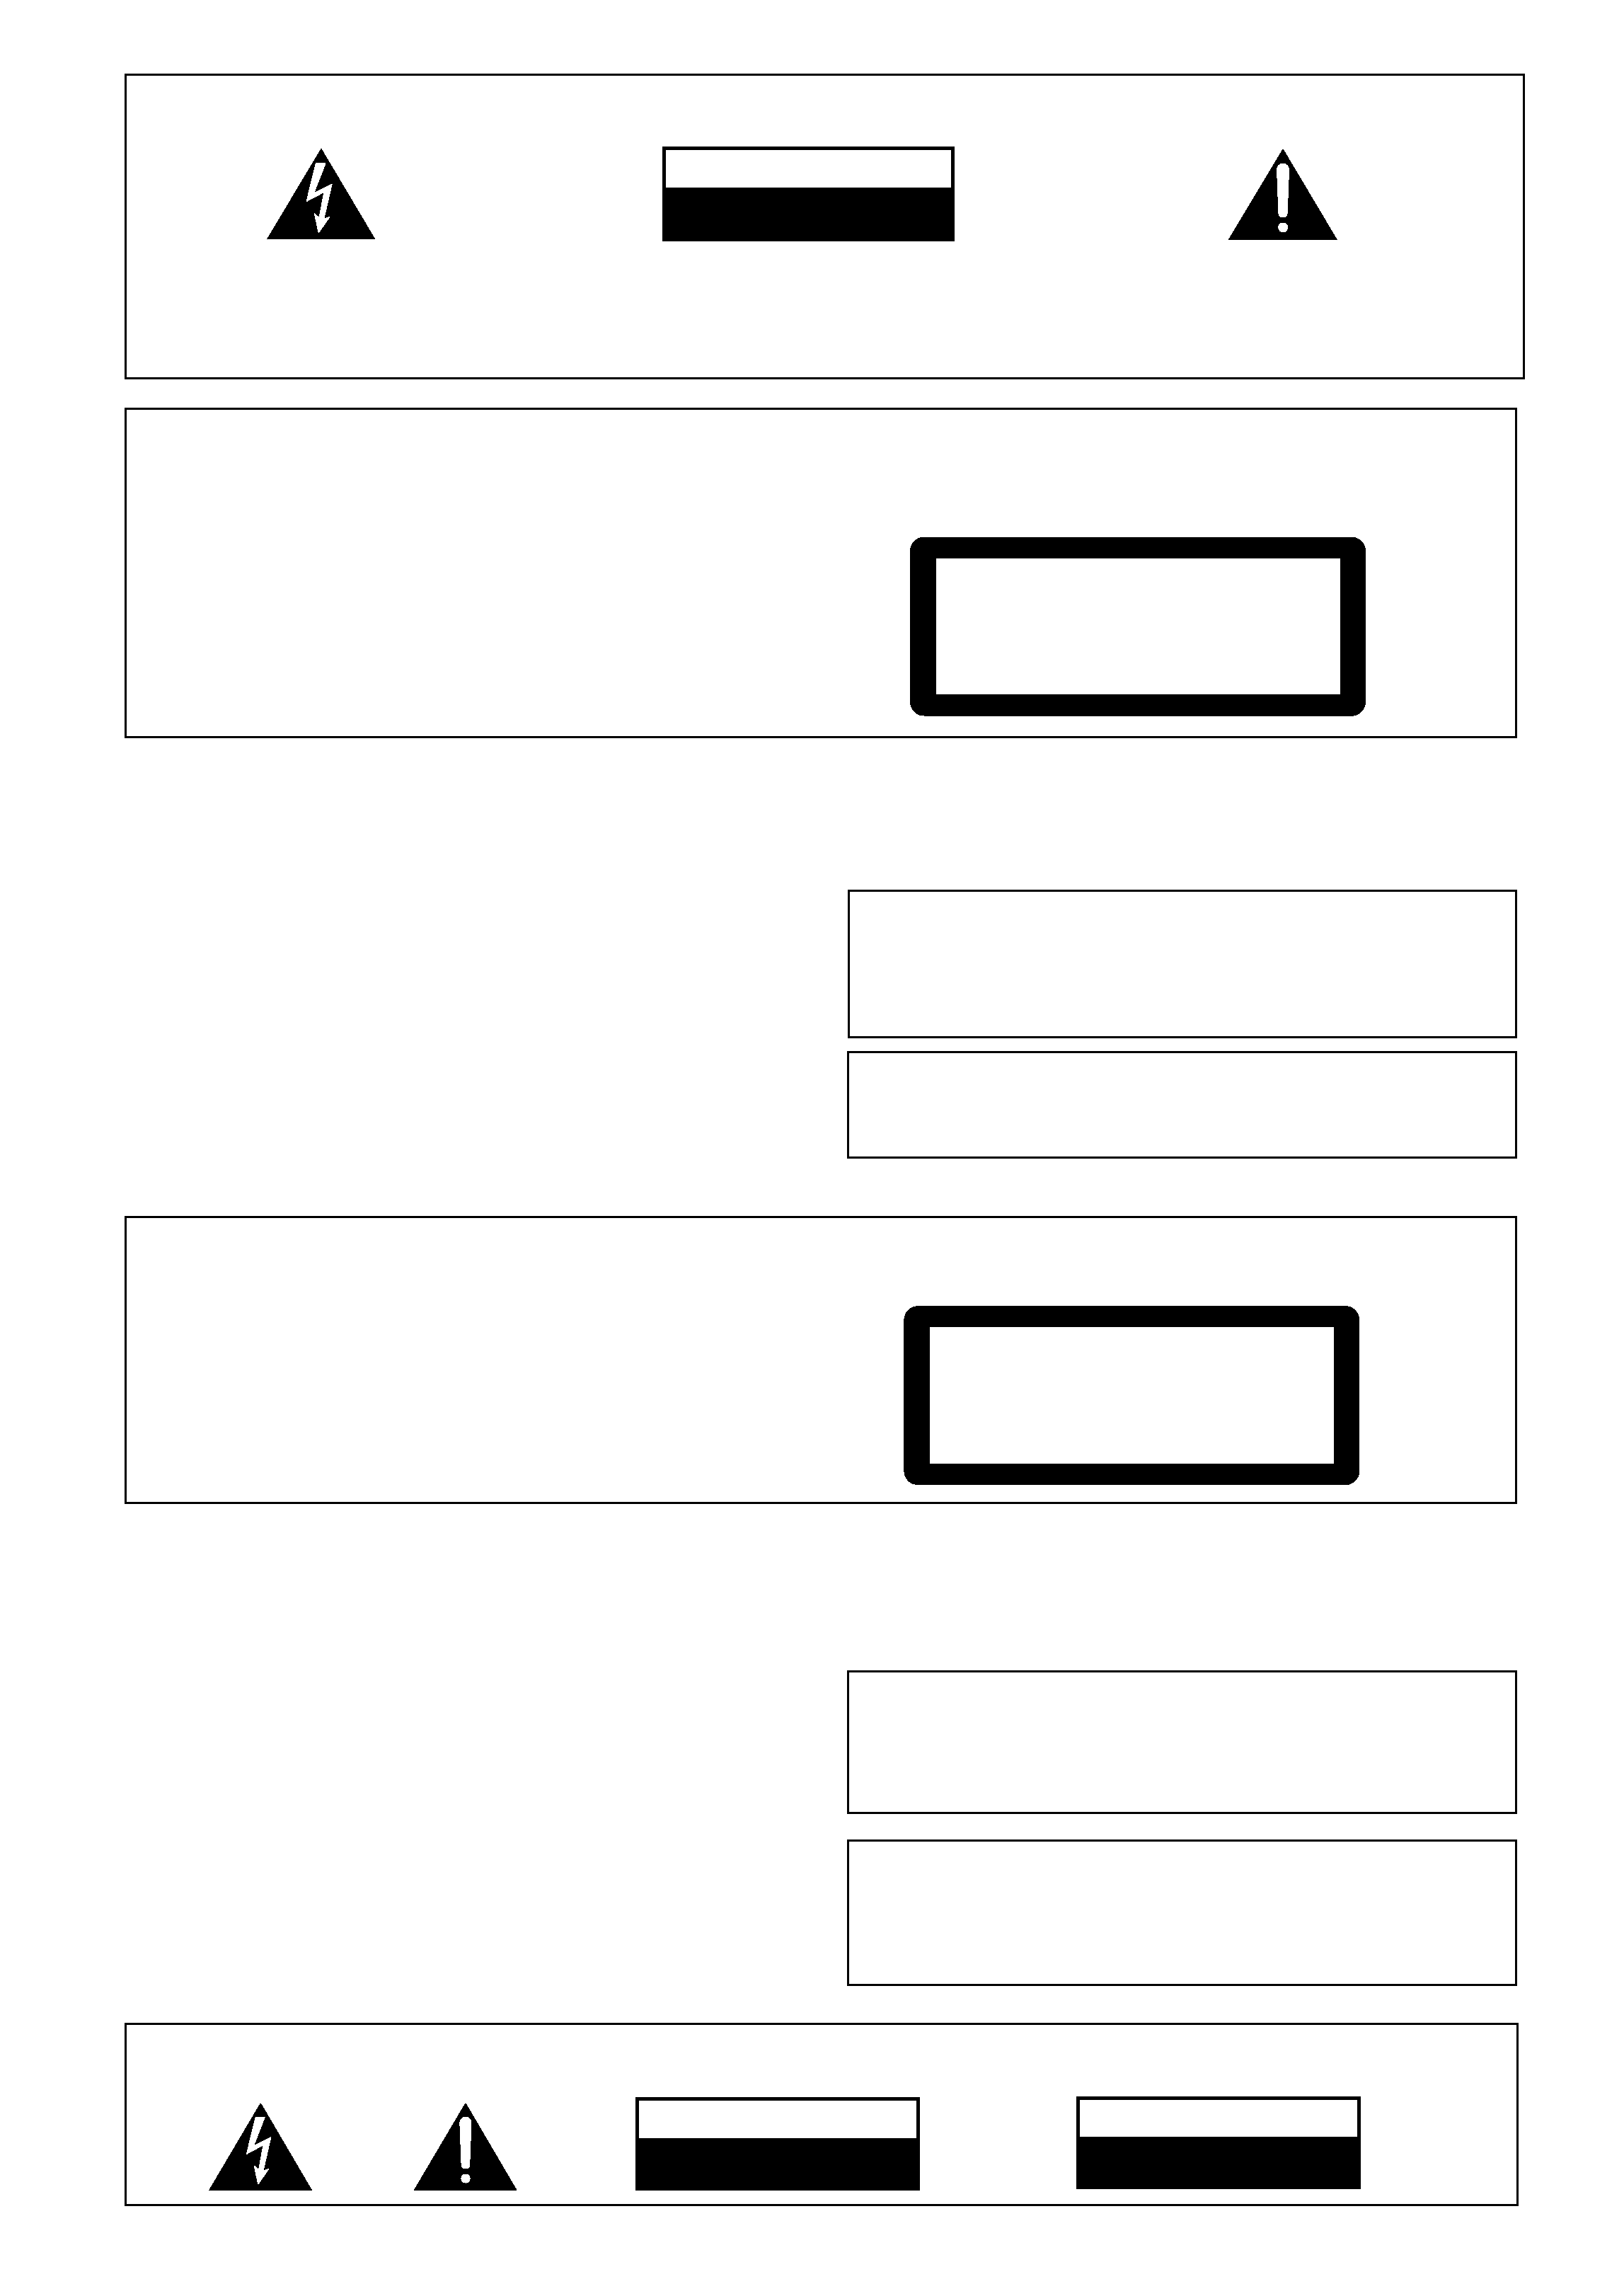
Insertion des piles dans la
télécommande
1 Retournez la télécommande, puis pressez et faites glisser le
couvercle du
logement des piles
pour le retirer.
2 Insérez les piles
fournies, en alignant
bien les polarités + et
- aux extrémités des
piles sur les marques
dans le logement.
3 Glissez le couvercle
du logement en
place. La télécommande est maintenant prête à fonctionner.
Attention!
Un emploi incorrect des piles peut se traduire par des risques, tels
que fuite ou éclatement. Respectez les consignes suivantes:
· Ne mélangez pas des piles neuve et ancienne.
· Ne combinez pas des piles de types différents -- même si
elles ont l'air similaires, des piles différentes peuvent avoir
des tensions différentes.
· Vérifiez que les pôles + et - des piles sont bien a lignés sur
les marques dans le logement.
· Retirez les piles de la télécommande si elle doit rester
inutilisée pendant un mois ou plus.
Caution!
Incorrect use of batteries can result in hazards such as leakage and
bursting. Please observe the following:
· Don't mix new and old batteries together
· Don't use different kinds of battery together--although they
may look similar, different batteries may have different
voltages.
· Make sure that the plus and minus ends of each battery
match the indications in the battery compartment.
· Remove batteries from equipment that isn't going to be used
for a month or more.
Checking what's in the box
Thank you for buying this Pioneer product. Before starting to set up
your new CD recorder, please check that you have received the
following supplied accessories:
· Stereo audio cord
· Control cord (mini-plug cord)
· AC power cord
· Optical cord
· Size AA/R6P dry cell
· Remote control unit
batteries
· Warranty card
· Analog Recording Adapter · Operating instructions
Using this manual
This manual is for the PDRL77 CD recorder. It is split into two
sections; the first covers setting up, and the second, using the
recorder. Set up, which starts here, shows you how to install and
connect up the recorder to the rest of your system.
In the second section of the manual, starting on page 16, you'll
learn how to use every feature of the recorder, from basic playback
to finalizing a recordable CD. The final part of the manual provides
a list of display messages, a troubleshooting page, and technical
specifications.
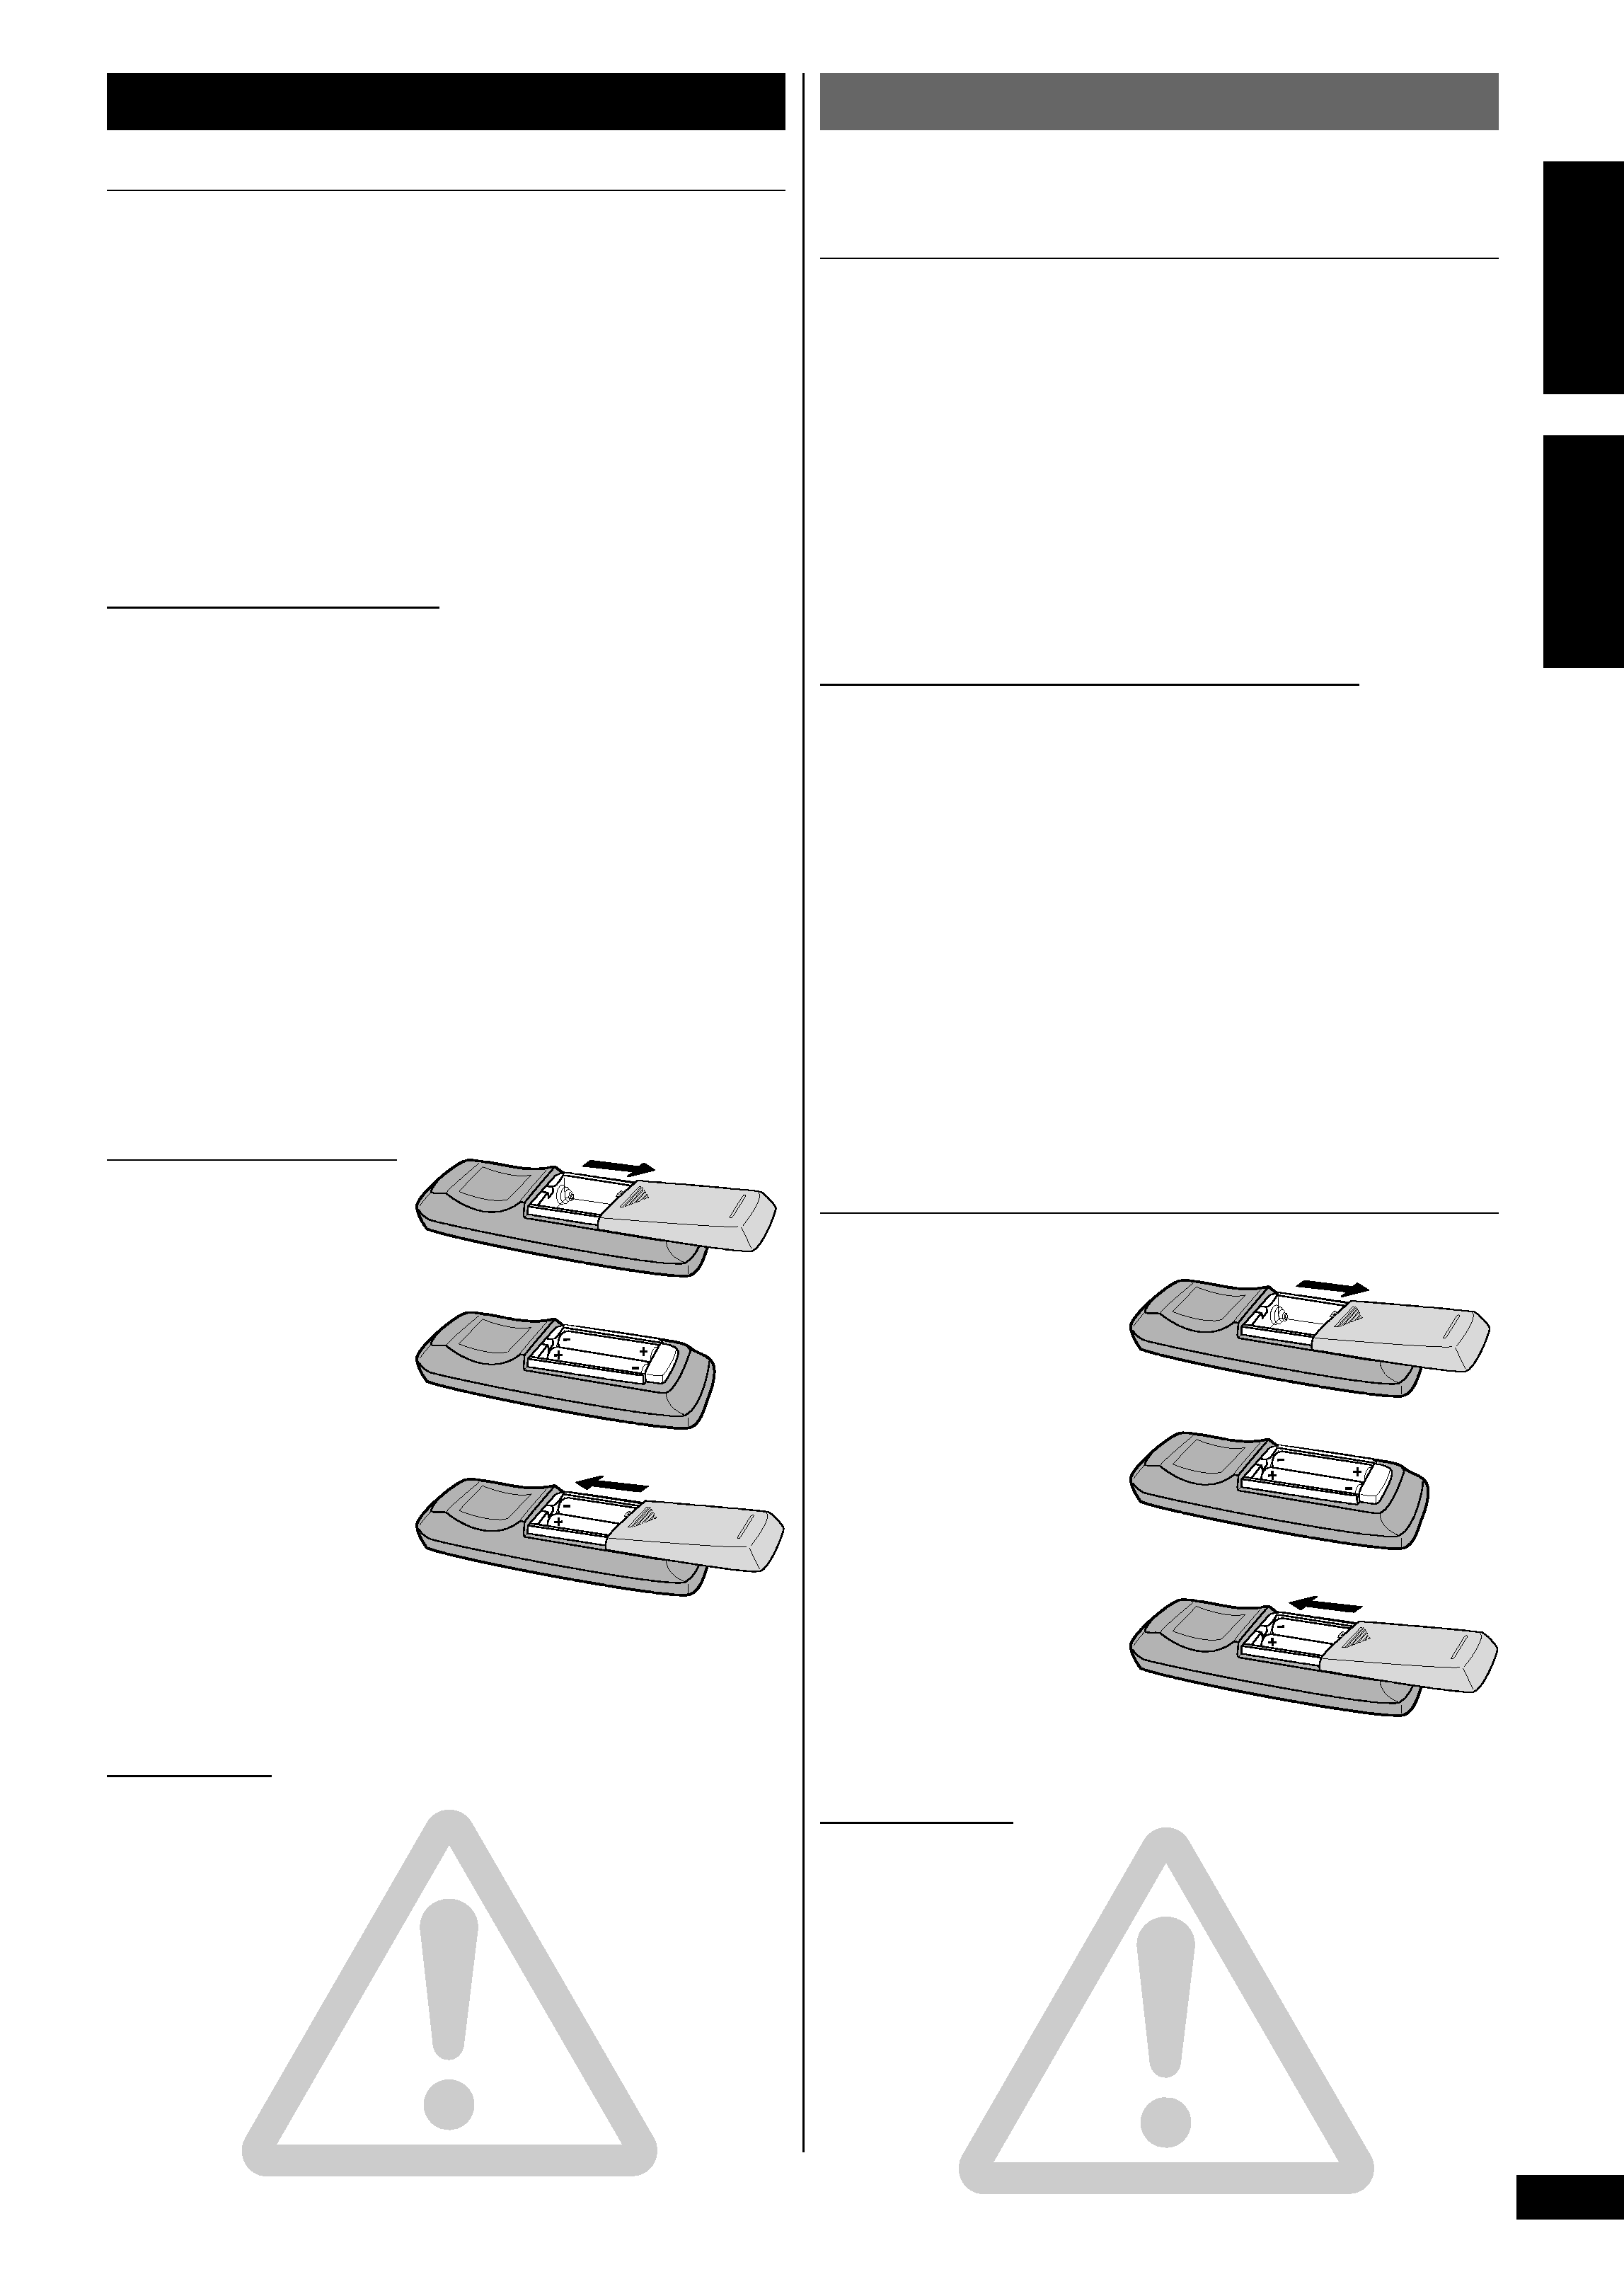
Putting the batteries in the
remote
1 Turn over the remote
control, then press
and slide the battery
compartment cover
off.
2 Put in the batteries
supplied, taking care
to match the plus
and minus ends of
each battery with the
markings inside the
compartment.
3 Slide the cover back on, and your remote is ready for use.