
Black plate (1,1)
Multi-CD control DSP High power CD Cassette player
with RDS tuner
FH-P4100R
Operation Manual
English
Italiano
Español
1
CRD3576-A
Black plate (2,1)
2
CRD3576 A
2
CRD3576-A
Thank you for buying this Pioneer product.
Please read through these operating instructions so you will know how to operate
your model properly. After you have finished reading the instructions, put them away
in a safe place for future reference.
Before You Start
About this unit 4
About this manual 4
Precautions 4
In case of trouble 4
Protecting your unit from theft 4
Removing the front panel 5
Attaching the front panel 5
Resetting the microprocessor 5
Whats What
Head unit 6
Optional remote control 7
Power ON/OFF
Turning the unit on 8
Selecting a source 8
Turning the unit off 8
Tuner
Listening to the radio 9
Introduction of advanced tuner
operation 10
Storing and recalling broadcast
frequencies 10
Tuning in strong signals 11
Storing the strongest broadcast
frequencies 11
RDS
Introduction of RDS operation 12
Switching the RDS display 13
Selecting alternative frequencies 13
Using PI Seek 13
Using Auto PI Seek for preset
stations 13
Limiting stations to regional
programming 14
Receiving traffic announcements 14
Responding to the TP alarm 15
Using PTY functions 15
Searching for a RDS station by PTY
information 15
Using news program interruption 15
Receiving PTY alarm broadcasts 16
Using radio text 16
Displaying radio text 16
Storing and recalling radio text 17
PTY list 18
Cassette Player
Playing a tape 19
Introduction of advanced cassette player
operation 21
Repeating play 21
Skipping blank tape sections 21
Using Dolby noise reduction 22
Built-in CD Player
Playing a CD 23
Introduction of advanced built-in CD player
operation 25
Repeating play 25
Playing tracks in a random order 26
Scanning tracks of a CD 26
Pausing CD playback 26
Using disc title functions 26
Entering disc titles 26
Displaying disc titles 27
Using CD TEXT functions 27
Displaying titles on CD TEXT
discs 28
Scrolling titles in the display 28
Multi-CD Player
Playing a CD 29
Introduction of advanced multi-CD player
operation 31
Repeating play 31
Playing tracks in a random order 32
Scanning CDs and tracks 32
Pausing CD playback 32
Contents
En
2

Black plate (3,1)
3
CRD3576 A
3
CRD3576-A
Using ITS playlists 33
Creating a playlist with ITS
programming 33
Playback from your ITS playlist 33
Erasing a track from your ITS
playlist 34
Erasing a CD from your ITS
playlist 34
Using disc title functions 34
Entering disc titles 34
Displaying disc titles 35
Selecting discs from the disc title
list 35
Using CD TEXT functions 36
Displaying titles on CD TEXT
discs 36
Scrolling titles in the display 36
Using compression and bass emphasis 36
50-disc multi-CD player 37
Audio Adjustments
Introduction of audio adjustments 38
Using balance adjustment 38
Adjusting loudness 39
Adjusting source levels 39
Digital Signal Processor
Using the digital signal processor 40
Using the graphic equalizer 41
Recalling equalizer curves 41
Adjusting equalizer curves 41
Adjusting 9-band graphic
equalizer 41
Using sound field control, octaver and BBE
sound 42
Recalling sound field programs 42
Adjusting BBE sound level 43
Using the position selector 43
Using subwoofer output 44
Adjusting subwoofer settings 44
Using the high pass filter 44
Initial Settings
Adjusting initial settings 45
Setting the FM tuning step 45
Switching Auto PI Seek 46
Switching the warning tone 46
Switching the auxiliary setting 46
Switching the dimmer setting 46
Switching the rear output setting 46
Selecting the digital attenuator 47
Adjusting display contrast 47
Other Functions
Introduction of other functions 48
Using the demonstration 48
Using different entertainment displays 48
Cellular telephone muting 48
Using the AUX source 49
Selecting AUX as the source 49
Setting the AUX title 49
Additional Information
Understanding built-in CD player error
messages 50
Cassette tapes 50
Cleaning the playback head 50
Music search and repeat functions during
tape playback 50
CD player and care 51
CD-R/CD-RW discs 51
Specifications 52
Contents
En
3
English
Black plate (4,1)
4CRD3576-A
About this unit
This product complies with the EMC Directives
(89/336/EEC, 92/31/EEC) and CE Marking
Directive (93/68/EEC).
The tuner frequencies on this unit are allo-
cated for use in Western Europe, Asia, the
Middle East, Africa and Oceania. Use in other
areas may result in improper reception. The
RDS function operates only in areas with FM
stations broadcasting RDS signals.
About this manual
This unit features a number of sophisticated
functions ensuring superior reception and op-
eration. All the functions have been designed
for the easiest possible use, but many are not
self-explanatory. This operation manual will
help you benefit fully from this productspo-
tential and to maximize your listening enjoy-
ment.
We recommend that you familiarize yourself
with the functions and their operation by read-
ing through the manual before you begin
using this unit. It is especially important that
you read and observe precautions on this page
and in other sections.
This manual explains head unit operation. You
can perform the same operations with the
steering remote control (sold separately).
Precautions
! A CLASS 1 LASER PRODUCT label is affixed
to the top of this unit.
CLASS 1
LASER PRODUCT
! The Pioneer CarStereo-Pass is for use only in
Germany.
! Keep this manual handy as a reference for
operating procedures and precautions.
! Always keep the volume low enough so you
can hear sounds outside of the car.
! Protect this product from moisture.
! If the battery is disconnected or discharged,
the preset memory will be erased and must be
reprogrammed.
In case of trouble
Should this product fail to operate properly,
contact your dealer or nearest authorized Pio-
neer Service Station.
Protecting your unit from
theft
The front panel can be detached from the
head unit and stored in the protective case
provided to discourage theft.
! If the front panel is not detached from the
head unit within five seconds of turning off
the ignition, a warning tone will sound.
! You can turn off the warning tone. See
Switching the warning tone on page 46.
Before You Start
01
En
4
Section
Black plate (5,1)
5
CRD3576-A
Important
! Never use force or grip the display and the
buttons tightly when removing or attaching.
! Avoid subjecting the front panel to excessive
shocks.
! Keep the front panel out of direct sunlight
and high temperatures.
Removing the front panel
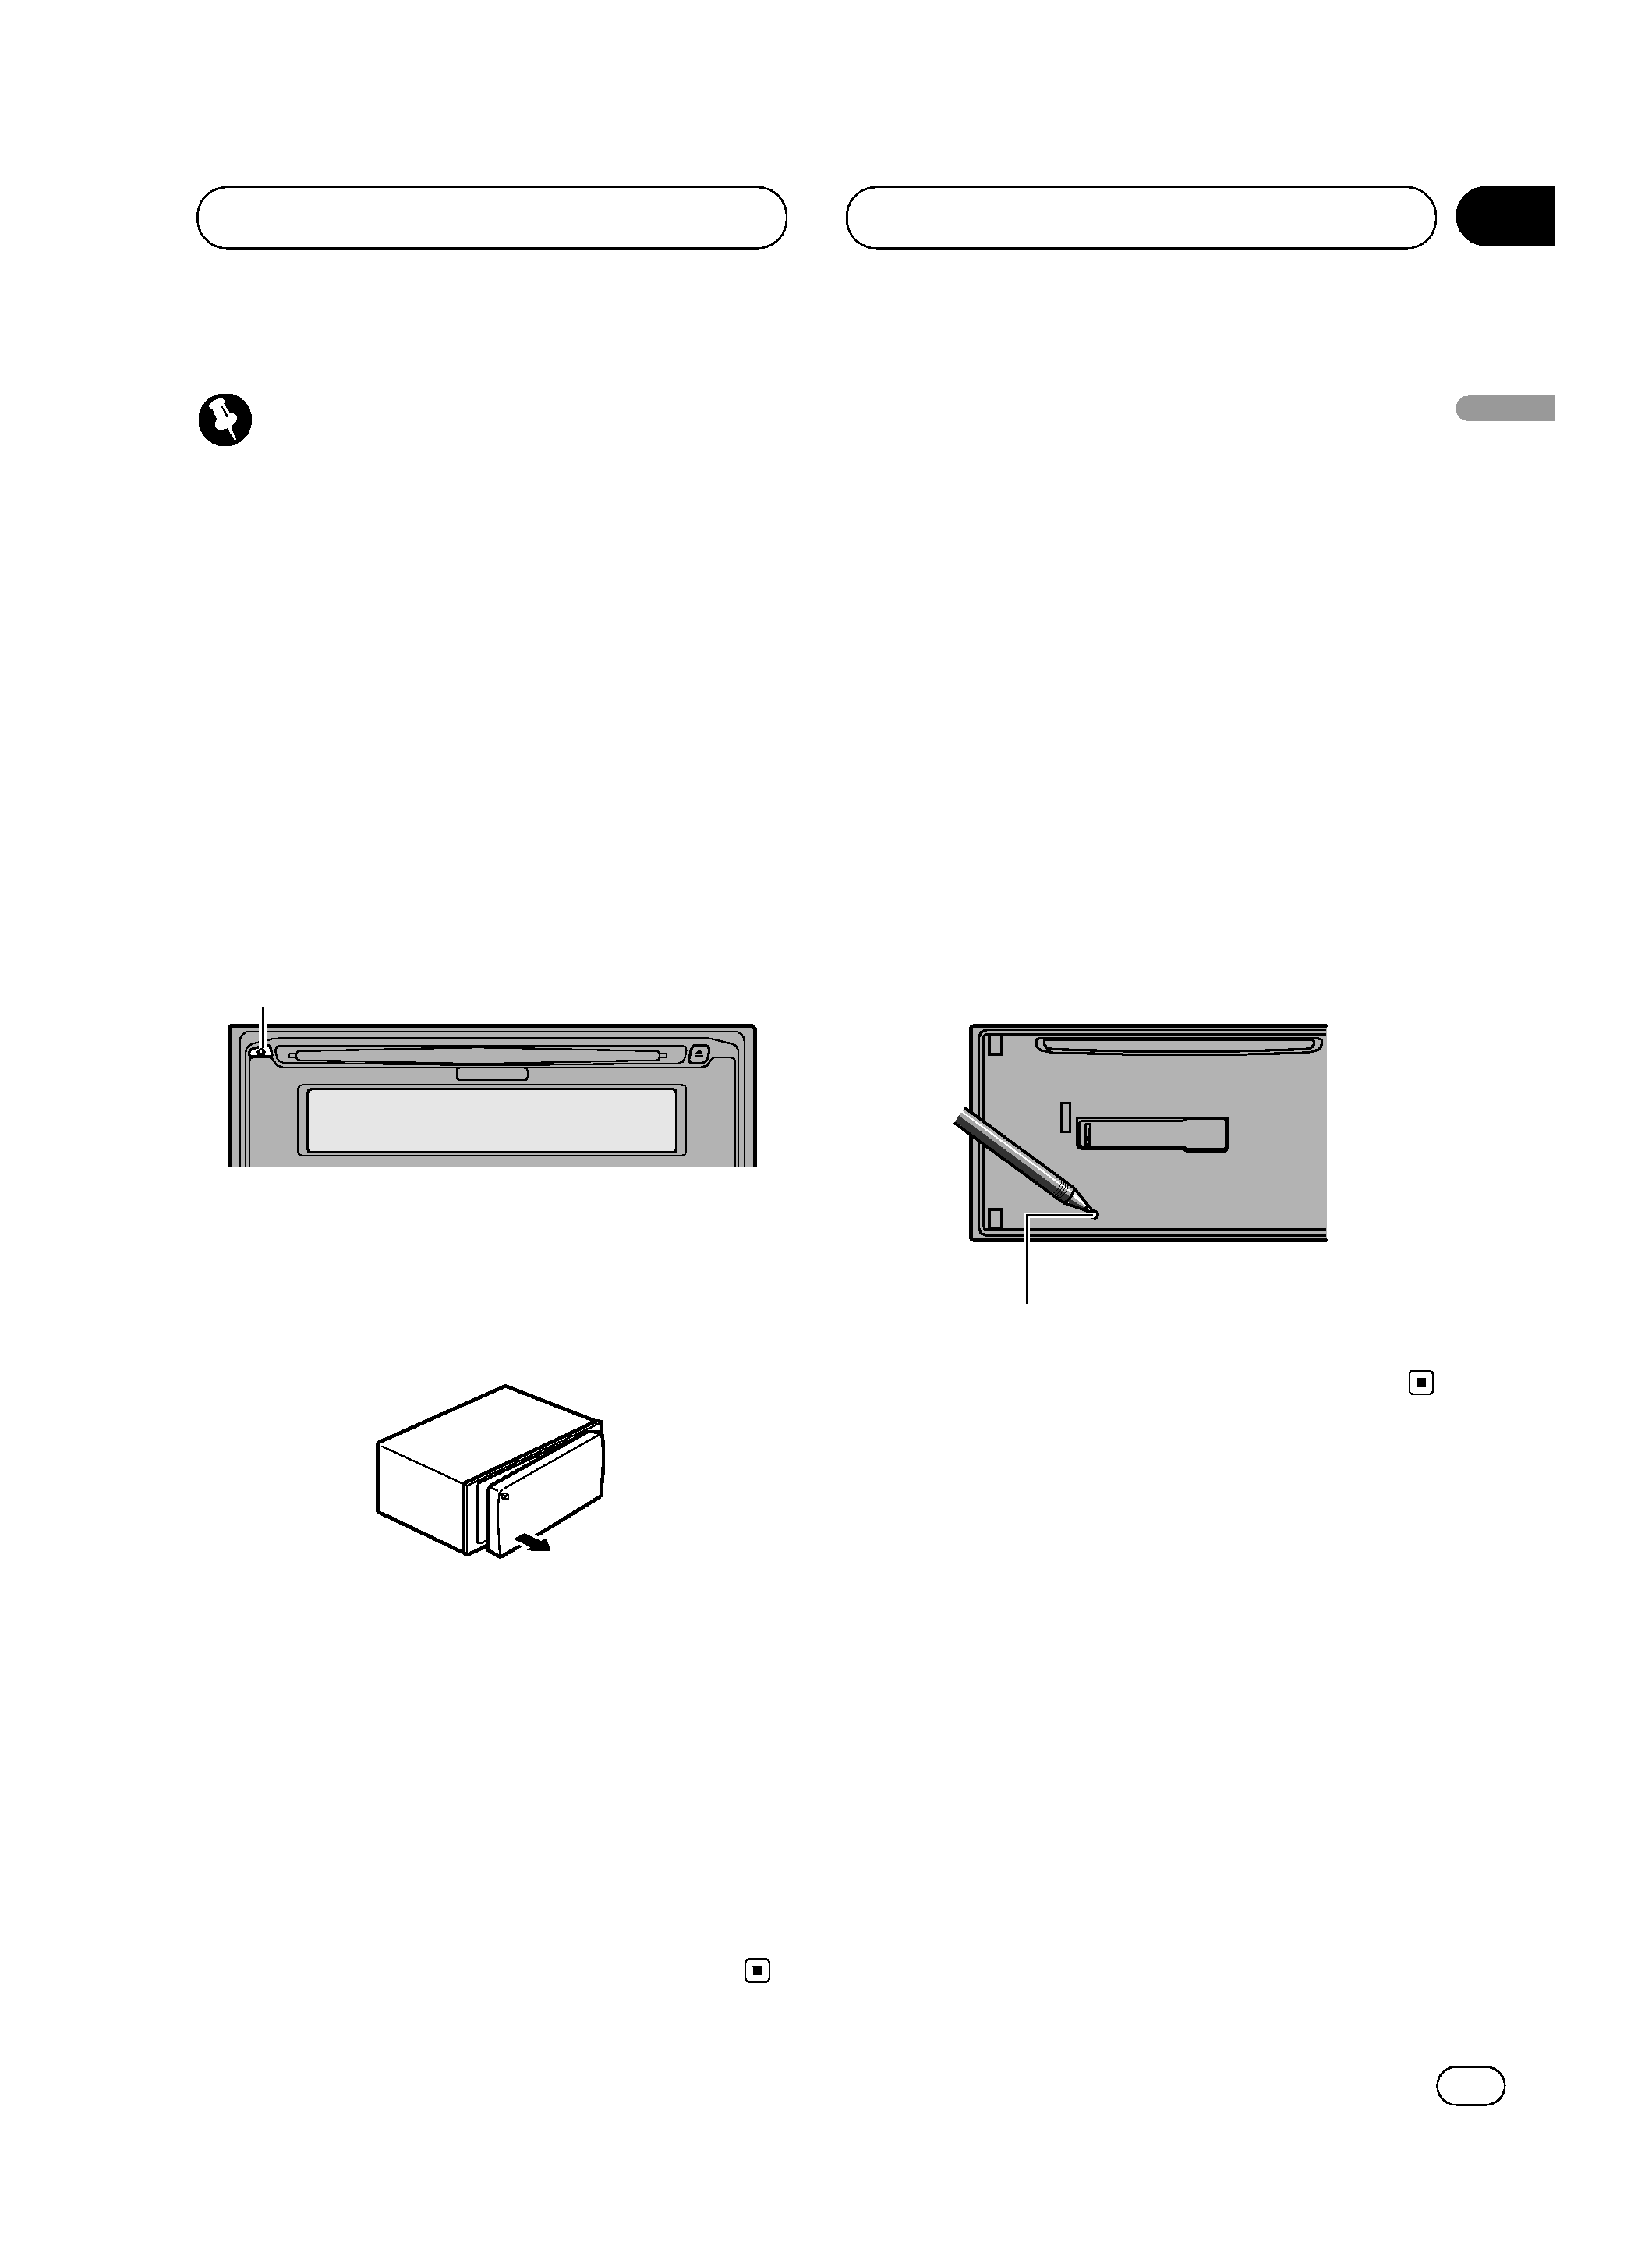
1 Press DETACH to release the front
panel.
Press DETACH and the left side of the panel is
released from the head unit.
DETACH button
2 Grab the front panel and remove.
Grab the left side of the front panel and pull
away to the right. The front panel will be de-
tached from the head unit.
3Put the front panel into the
protective case provided for safe keeping.
Attaching the front panel
1 Place the front panel flat against
the head unit.
2 Press the front panel into the face
of the head unit until it is firmly seated.
Resetting the
microprocessor
The microprocessor must be reset under the
following conditions:
! Prior to using this unit for the first time after
installation
! If the unit fails to operate properly
! When strange or incorrect messages appear
on the display
1 Remove the front panel.
See Removing the front panel on this page.
2 Press RESET on the head unit with a
pen tip or other pointed instrument.
RESET button
Before You Start
01
En
5
English
Section