
Operation Manual
Multi-channel AV processor
DEQ-P6600
English
Deutsch
Español
Thank you for buying this Pioneer product.
Please read through these operating instructions so you will know how to operate
your model properly. After you have finished reading the instructions, keep this man-
ual in a safe place for future reference.
Before You Start
About this unit 3
About this units optical input 3
Features 3
About this manual 3
Precautions 4
In case of trouble 4
Resetting the microprocessor 4
Whats What
Head unit 5
Digital Signal Processor
Introduction of DSP adjustments 6
Using the sound field control 6
Using the position selector 7
Using balance adjustment 7
Adjusting source levels 8
Using the dynamic range control 8
Using the down-mix function 8
Using the direct control 9
Using the Dolby Pro Logic B 9
Adjusting the Music mode 9
Setting the speaker setting 10
Correcting the subwoofers phase 10
Selecting a cross-over frequency 11
Adjusting the speaker output levels 11
Adjusting the speaker output levels using a
test tone 12
Using the time alignment 12
Selecting the time alignment
adjustment mode 13
Adjusting the time alignment 13
Using the equalizer 13
Recalling equalizer curves 13
Adjusting 3-band parametric
equalizer 14
Using the auto-equalizer 15
Auto TA and EQ (auto-time alignment and
auto-equalizing) 15
Before operating the auto TA and EQ
function 16
Carrying out auto TA and EQ 16
Initial Settings
Correcting distorted sound 18
Resetting the audio functions 18
Additional Information
Troubleshooting 19
Understanding auto TA and EQ error
messages 20
Terms 21
Specifications 22
Contents
En
2
About this unit
Important
! Following functions cannot be operated when
DVH-P7000R, DVH-P5000MP or AVH-
P6500DVD is connected to this unit.
Using the down-mix function
Using the Dolby Pro Logic B
Selecting the time alignment adjustment
mode
Using the auto-equalizer
Auto TA and EQ (auto-time alignment and
auto-equalizing)
Resetting the audio functions
! If DVH-P7000R, DVH-P5000MP or AVH-
P6500DVD is connected to this unit, operation
of following function is limited.
Selecting a cross-over frequency
About this units optical input
This unit provides two optical inputs, however,
units that can be connected to each input are
limited. Refer to following chart, and use the
optical inputs correctly. Otherwise, this unit
may not operate properly.
Optical 1 input
(head unit)
Optical 2 input
(DVD player)
AVH-P6600DVD
AVX-P8DVD
AVX-P7300DVD
SDV-P7
XDV-P9
XDV-P9B
AVH-P6500DVD
DVH-P5000MP
DVH-P7000R
Optical 2 input is not available.
! Only the system with AVH-P6600DVD can
use both optical 1 input and optical 2 input.
Otherwise, optical 2 input is not available.
Features
Dolby Digital/DTS compatibility
When using this unit with a Pioneer DVD
player, you can enjoy the atmosphere and exci-
tement provided by DVD movie and music
software featuring 5.1 channel recordings.
! Manufactured under license from Dolby La-
boratories. Dolby, Pro Logic, and the
double-D symbol are trademarks of Dolby
Laboratories.
! DTS and DTS Digital Surround are regis-
tered trademarks of Digital Theater Sys-
tems, Inc.
About this manual
This unit features a number of sophisticated
functions ensuring superior reception and op-
eration. All the functions have been designed
for the easiest possible use, but many are not
self-explanatory. This operation manual will
help you benefit fully from this units potential
and to maximize your listening enjoyment.
We recommend that you familiarize yourself
with the functions and their operation by read-
ing through the manual before you begin
using this unit. It is especially important that
you read and observe precautions noted on
the next page and in other sections.
Before You Start
En
3
English
Section
01
Precautions
! Keep this manual handy as a reference for
operating procedures and precautions.
! Always keep the volume low enough so
that you can hear sounds from outside the
vehicle.
! Protect this unit from moisture.
! If the battery is disconnected or dis-
charged, the preset memory will be erased
and must be reprogrammed.
In case of trouble
Should this product fail to operate properly,
contact your dealer or nearest authorized Pio-
neer Service Station.
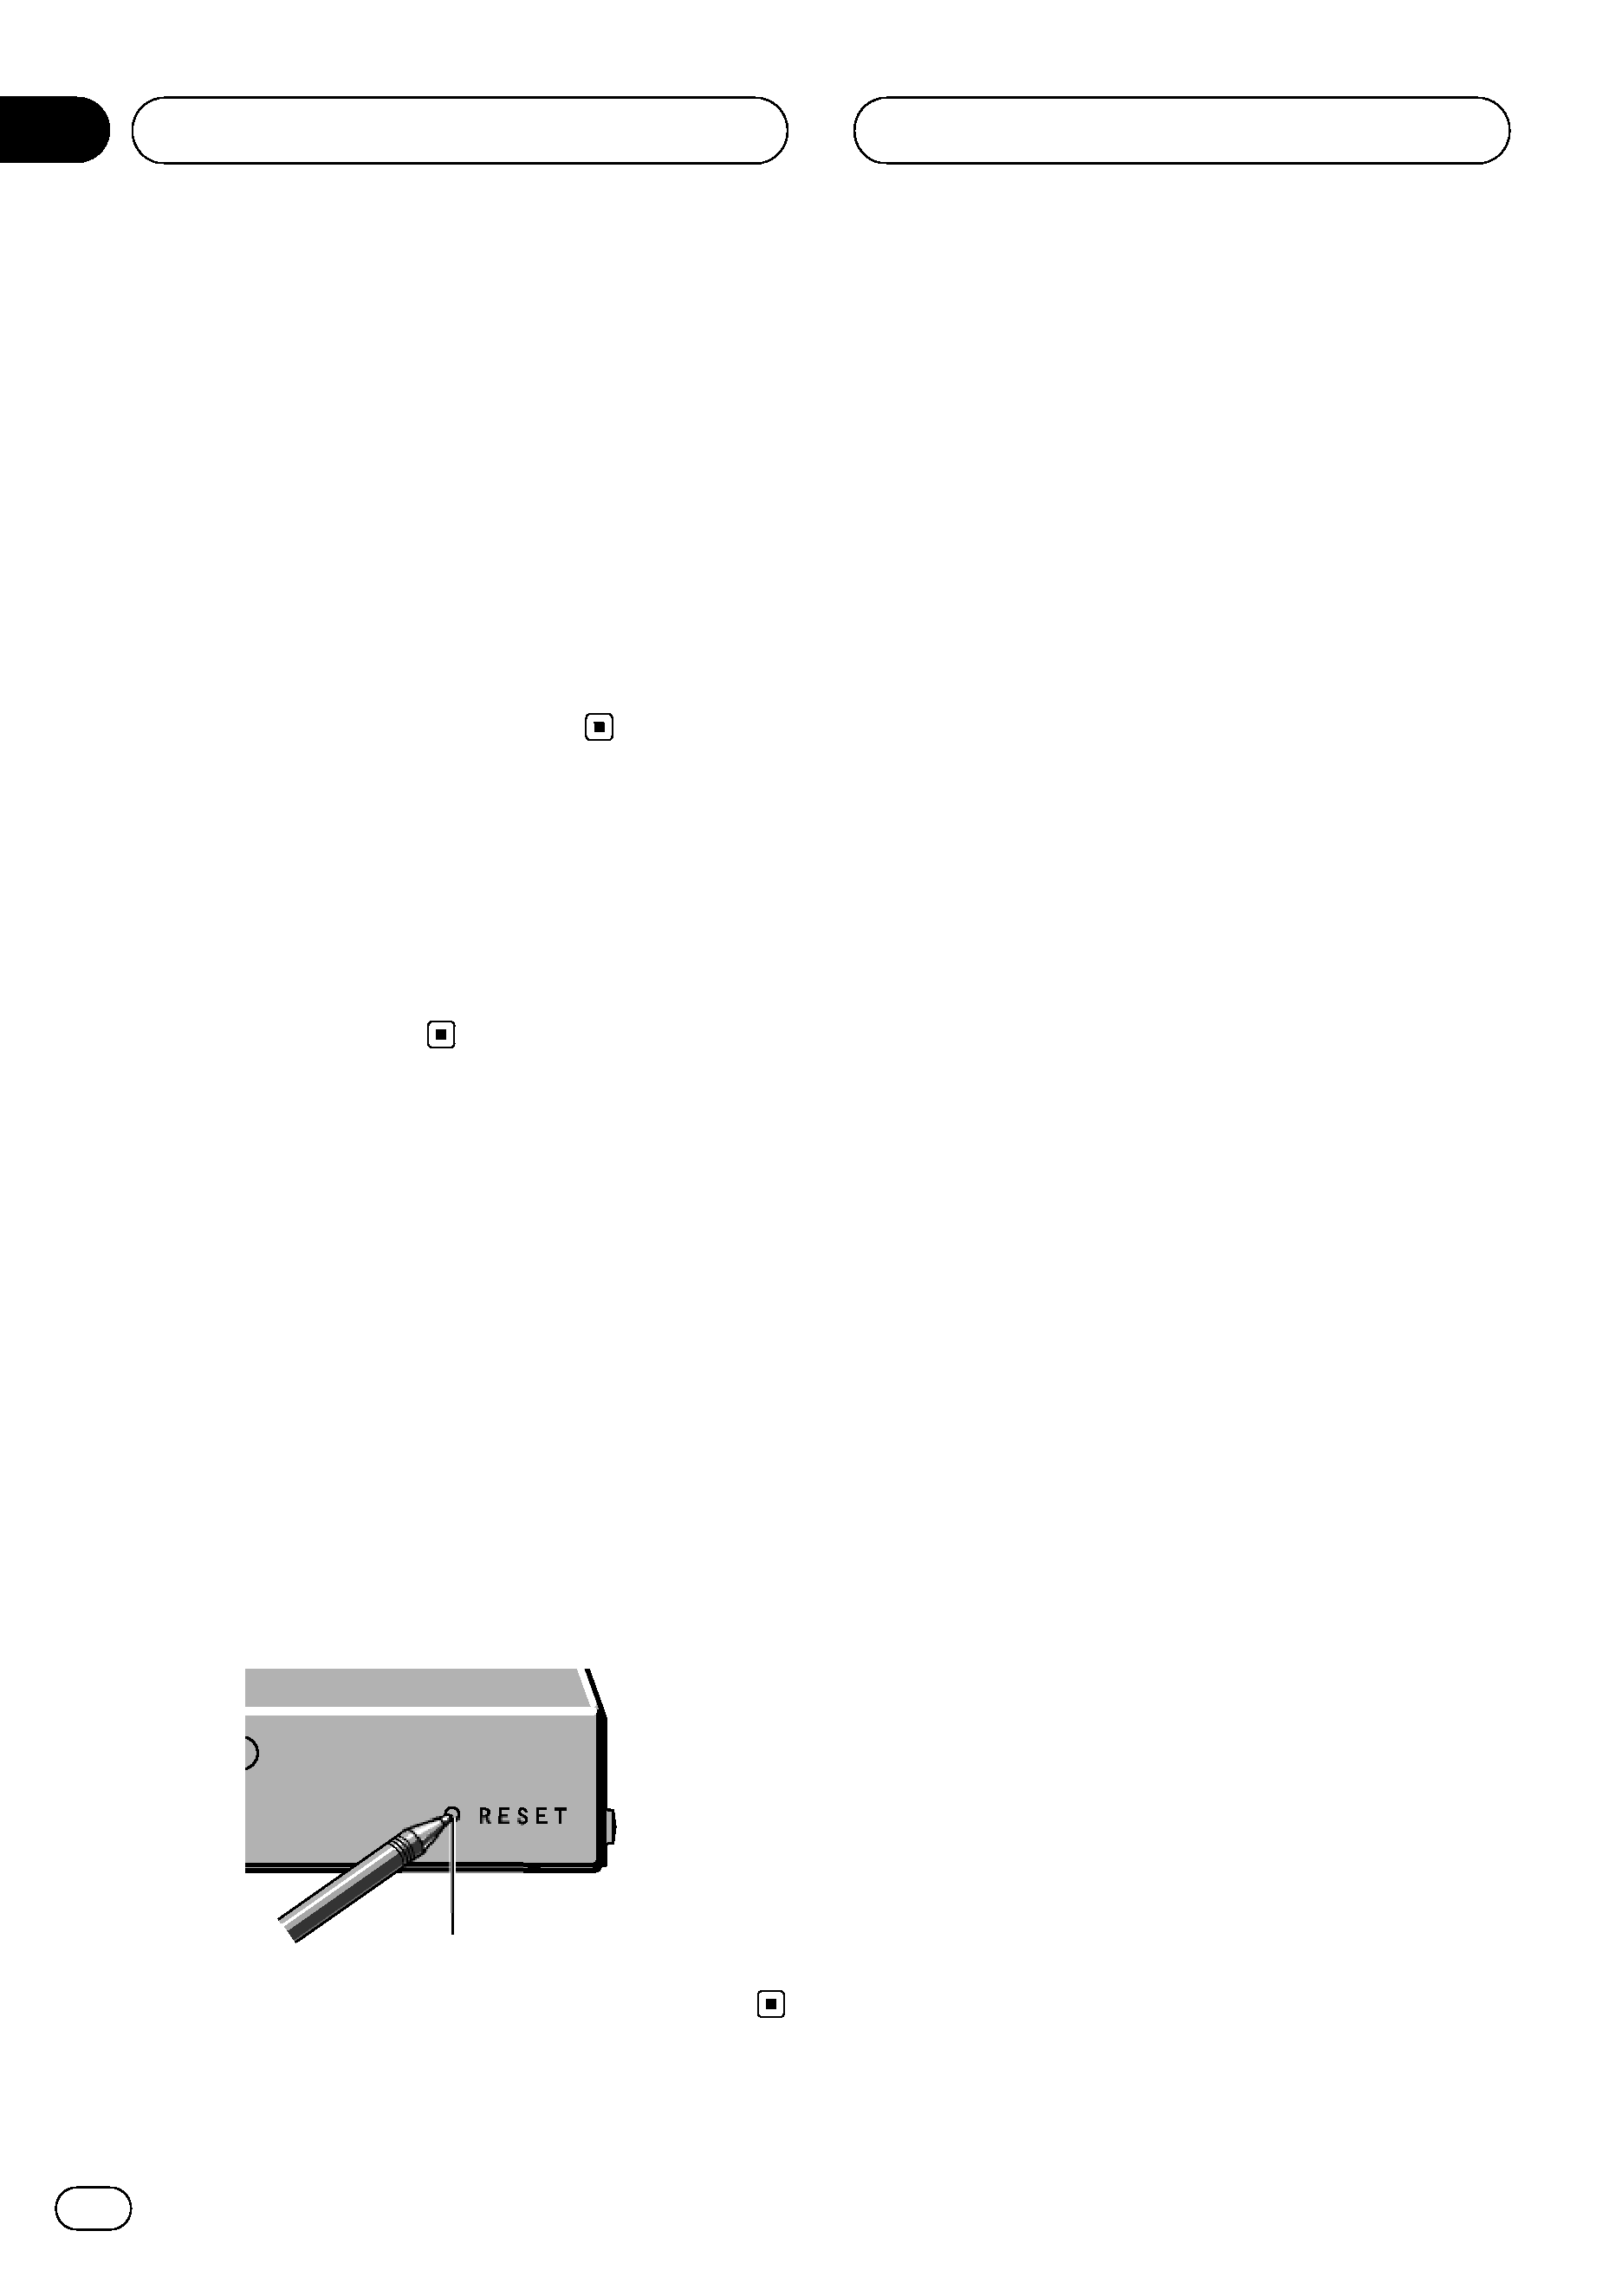
Resetting the microprocessor
The microprocessor must be reset under the
following conditions:
! Prior to using this unit for the first time
after installation
! If the unit fails to operate properly
! When strange or incorrect messages ap-
pear on the display
% Press RESET with a pen tip or other
pointed instrument.
RESET button
Before You Start
En
4
Section
01
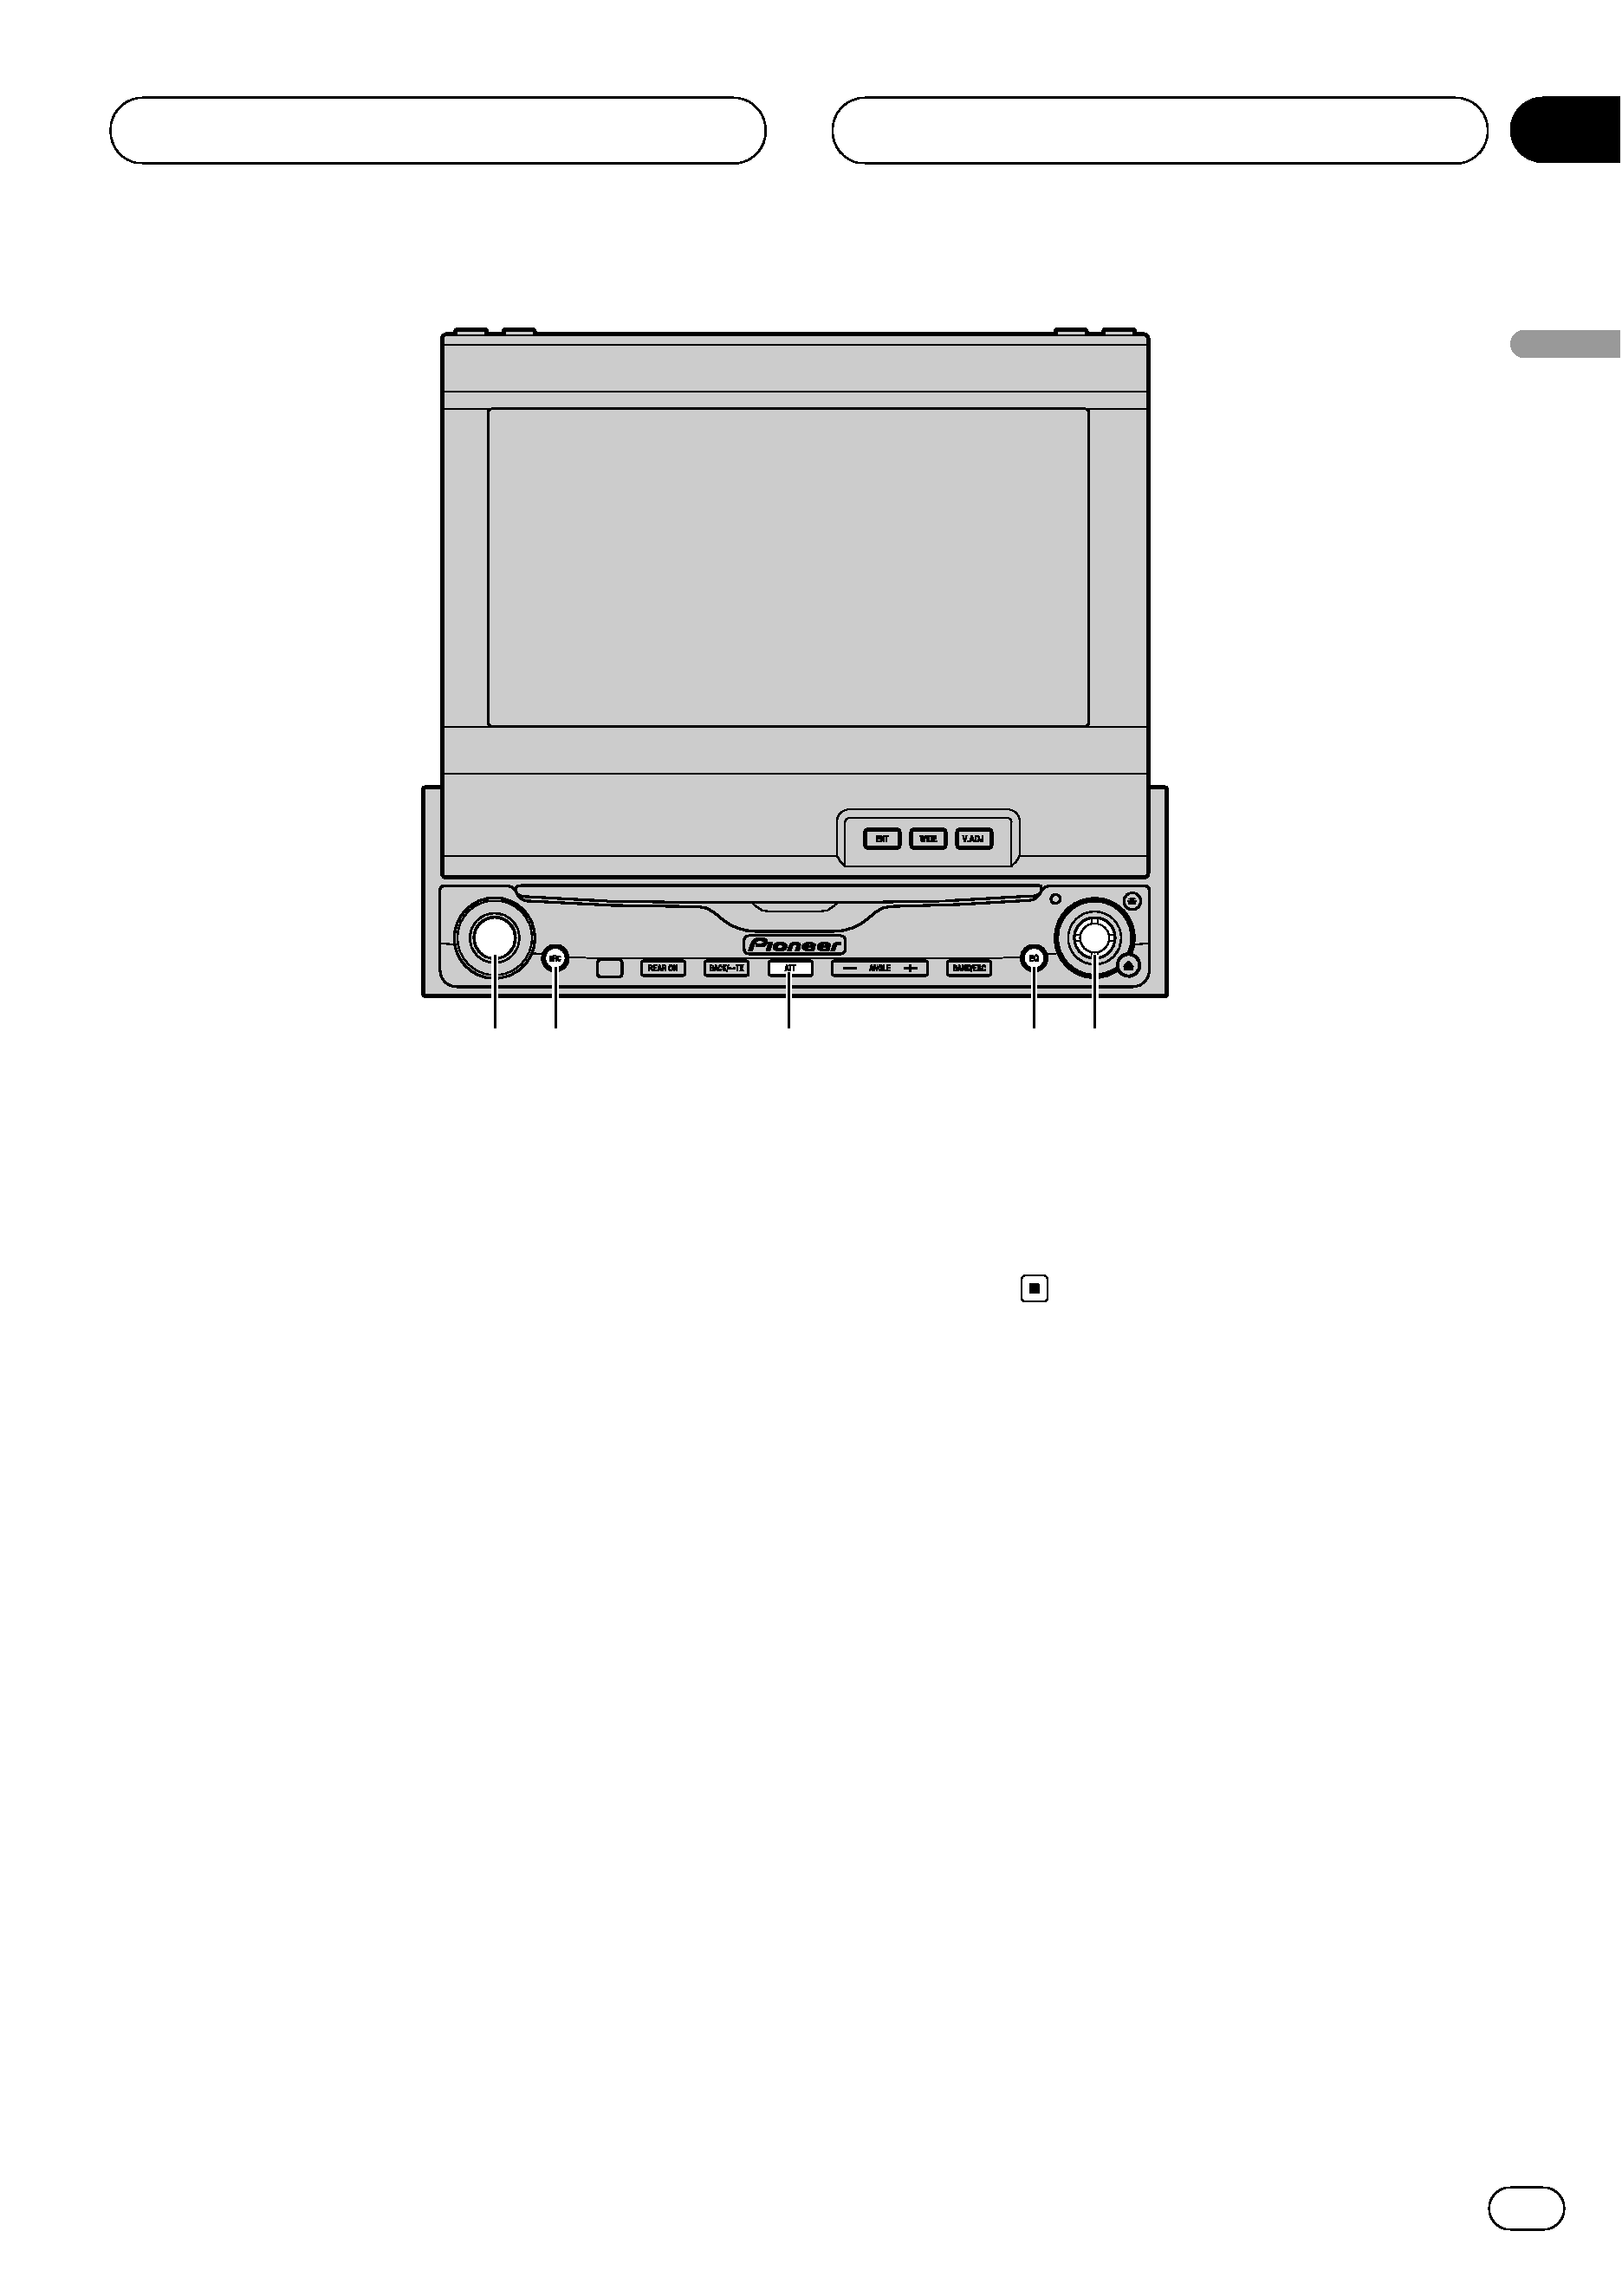
Headunit
Operate this unit with the connected head
unit. Instructions in this operation manual use
AVH-P6600DVD as an example head unit.
For more details concerning operation, please
refer to head units operation manual.
1 VOLUME
Rotate it to increase or decrease the vo-
lume.
2 SOURCE button
This unit is turned on by selecting a source.
Press to cycle through all the available
sources.
3 ATT button
Press to quickly lower the volume level, by
about 90%. Press once more to return to the
original volume level.
4 EQ button
Press to select various equalizer curves.
5 Joystick
Use to adjust the selected audio function
and turn it on or off (substitute for the touch
panel key).
5
4
1 2
3
Whats What
En
5
English
Section
02