
Operation Manual
High power CD/MP3/WMA player with FM/AM tuner
DEH-2850MP
English
E
Po
rtu
guês
(B)
Español

Thank you for buying this Pioneer product.
Please read through these operating instructions so you will know how to operate
your model properly. After you have finished reading the instructions, keep this man-
ual in a safe place for future reference.
Before You Start
About this unit 3
About this manual 3
About MP3 3
About WMA 3
Visit our website 3
Protecting your unit from theft 4
Removing the front panel 4
Attaching the front panel 4
Whats What
Head unit 5
Operating this unit
Basic Operations 6
Turning the unit on and selecting a
source 6
Adjusting the volume 6
Turning the unit off 6
Tuner 6
Listening to the radio 6
Storing and recalling broadcast
frequencies 7
Tuning in strong signals 7
Storing the strongest broadcast
frequencies 7
Built-in Player 8
Playing a disc 8
Repeating play 9
Playing tracks in random order 9
Scanning tracks or folders of a
disc 9
Pausing disc playback 9
Searching every 10 tracks in the
current disc or folder 10
Using compression and BMX 10
Displaying text information on
disc 10
Audio Adjustments 11
Introduction of audio
adjustments 11
Using balance adjustment 11
Using the equalizer 11
Adjusting equalizer curves 11
Adjusting loudness 11
Adjusting source levels 12
Initial Settings 12
Adjusting initial settings 12
Setting the clock 12
Setting the FM tuning step 13
Setting the AM tuning step 13
Additional Information
Error messages 14
Handling guideline of discs and player 14
MP3, WMA and WAV files 14
Example of a hierarchy 15
Compressed audio compatibility 15
Specifications 16
Contents
En
2

About this unit
CAUTION
! Do not allow this unit to come into contact
with liquids. Electrical shock could result.
Also, this unit damage, smoke, and overheat
could result from contact with liquids.
! Keep this manual handy as a reference for op-
erating procedures and precautions.
! Always keep the volume low enough so that
you can hear sounds from outside the vehicle.
! Protect this unit from moisture.
! If the battery is disconnected or discharged,
the preset memory will be erased and must be
reprogrammed.
! If this unit does not operate properly, contact
your dealer or nearest authorized Pioneer Ser-
vice Station.
About this manual
This unit features a number of sophisticated
functions ensuring superior reception and op-
eration. All the functions have been designed
for the easiest possible use, but many are not
self-explanatory. This operation manual will
help you benefit fully from this units potential
and to maximize your listening enjoyment.
We recommend that you familiarize yourself
with the functions and their operation by read-
ing through the manual before you begin
using this unit. It is especially important that
you read and observe WARNINGs and CAU-
TIONs in this manual.
About MP3
Supply of this product only conveys a license
for private, non-commercial use and does not
convey a license nor imply any right to use
this product in any commercial (i.e. revenue-
generating) real time broadcasting (terrestrial,
satellite, cable and/or any other media), broad-
casting/streaming via internet, intranets and/
or other networks or in other electronic con-
tent distribution systems, such as pay-audio or
audio-on-demand applications. An indepen-
dent license for such use is required. For de-
tails, please visit
http://www.mp3licensing.com.
About WMA
The Windows Media" logo printed on the box
indicates that this unit can play back WMA
data.
WMA is short for Windows Media Audio and
refers to an audio compression technology
that is developed by Microsoft Corporation.
WMA data can be encoded by using Windows
Media Player version 7 or later.
Windows Media and the Windows logo are tra-
demarks or registered trademarks of Microsoft
Corporation in the United States and/or other
countries.
Note
This unit may not operate correctly depending on
the application used to encode WMA files.
Visit our website
Visit us at the following site:
! We offer the latest information about Pio-
neer Corporation on our website.
Before You Start
En
3
English
Section
01

Protecting your unit from
theft
The front panel can be detached from the
head unit and stored in the provided protective
case to prevent theft.
Important
! Never use force or grip the display and the
buttons too tightly when removing or attach-
ing.
! Avoid subjecting the front panel to excessive
shocks.
! Keep the front panel out of direct sunlight and
high temperatures.
Removing the front panel
1 Press DETACH to release the front
panel.
Press DETACH and the right side of the panel
is released from the head unit.
2 Grab the front panel and remove.
Grab the right side of the front panel and pull
away to the left. The front panel will be de-
tached from the head unit.
3 Put the front panel into provided pro-
tective case for safe keeping.
Attaching the front panel
1 Place the front panel flat against the
head unit.
2 Press the front panel into the face of
the head unit until it is firmly seated.
Before You Start
En
4
Section
01
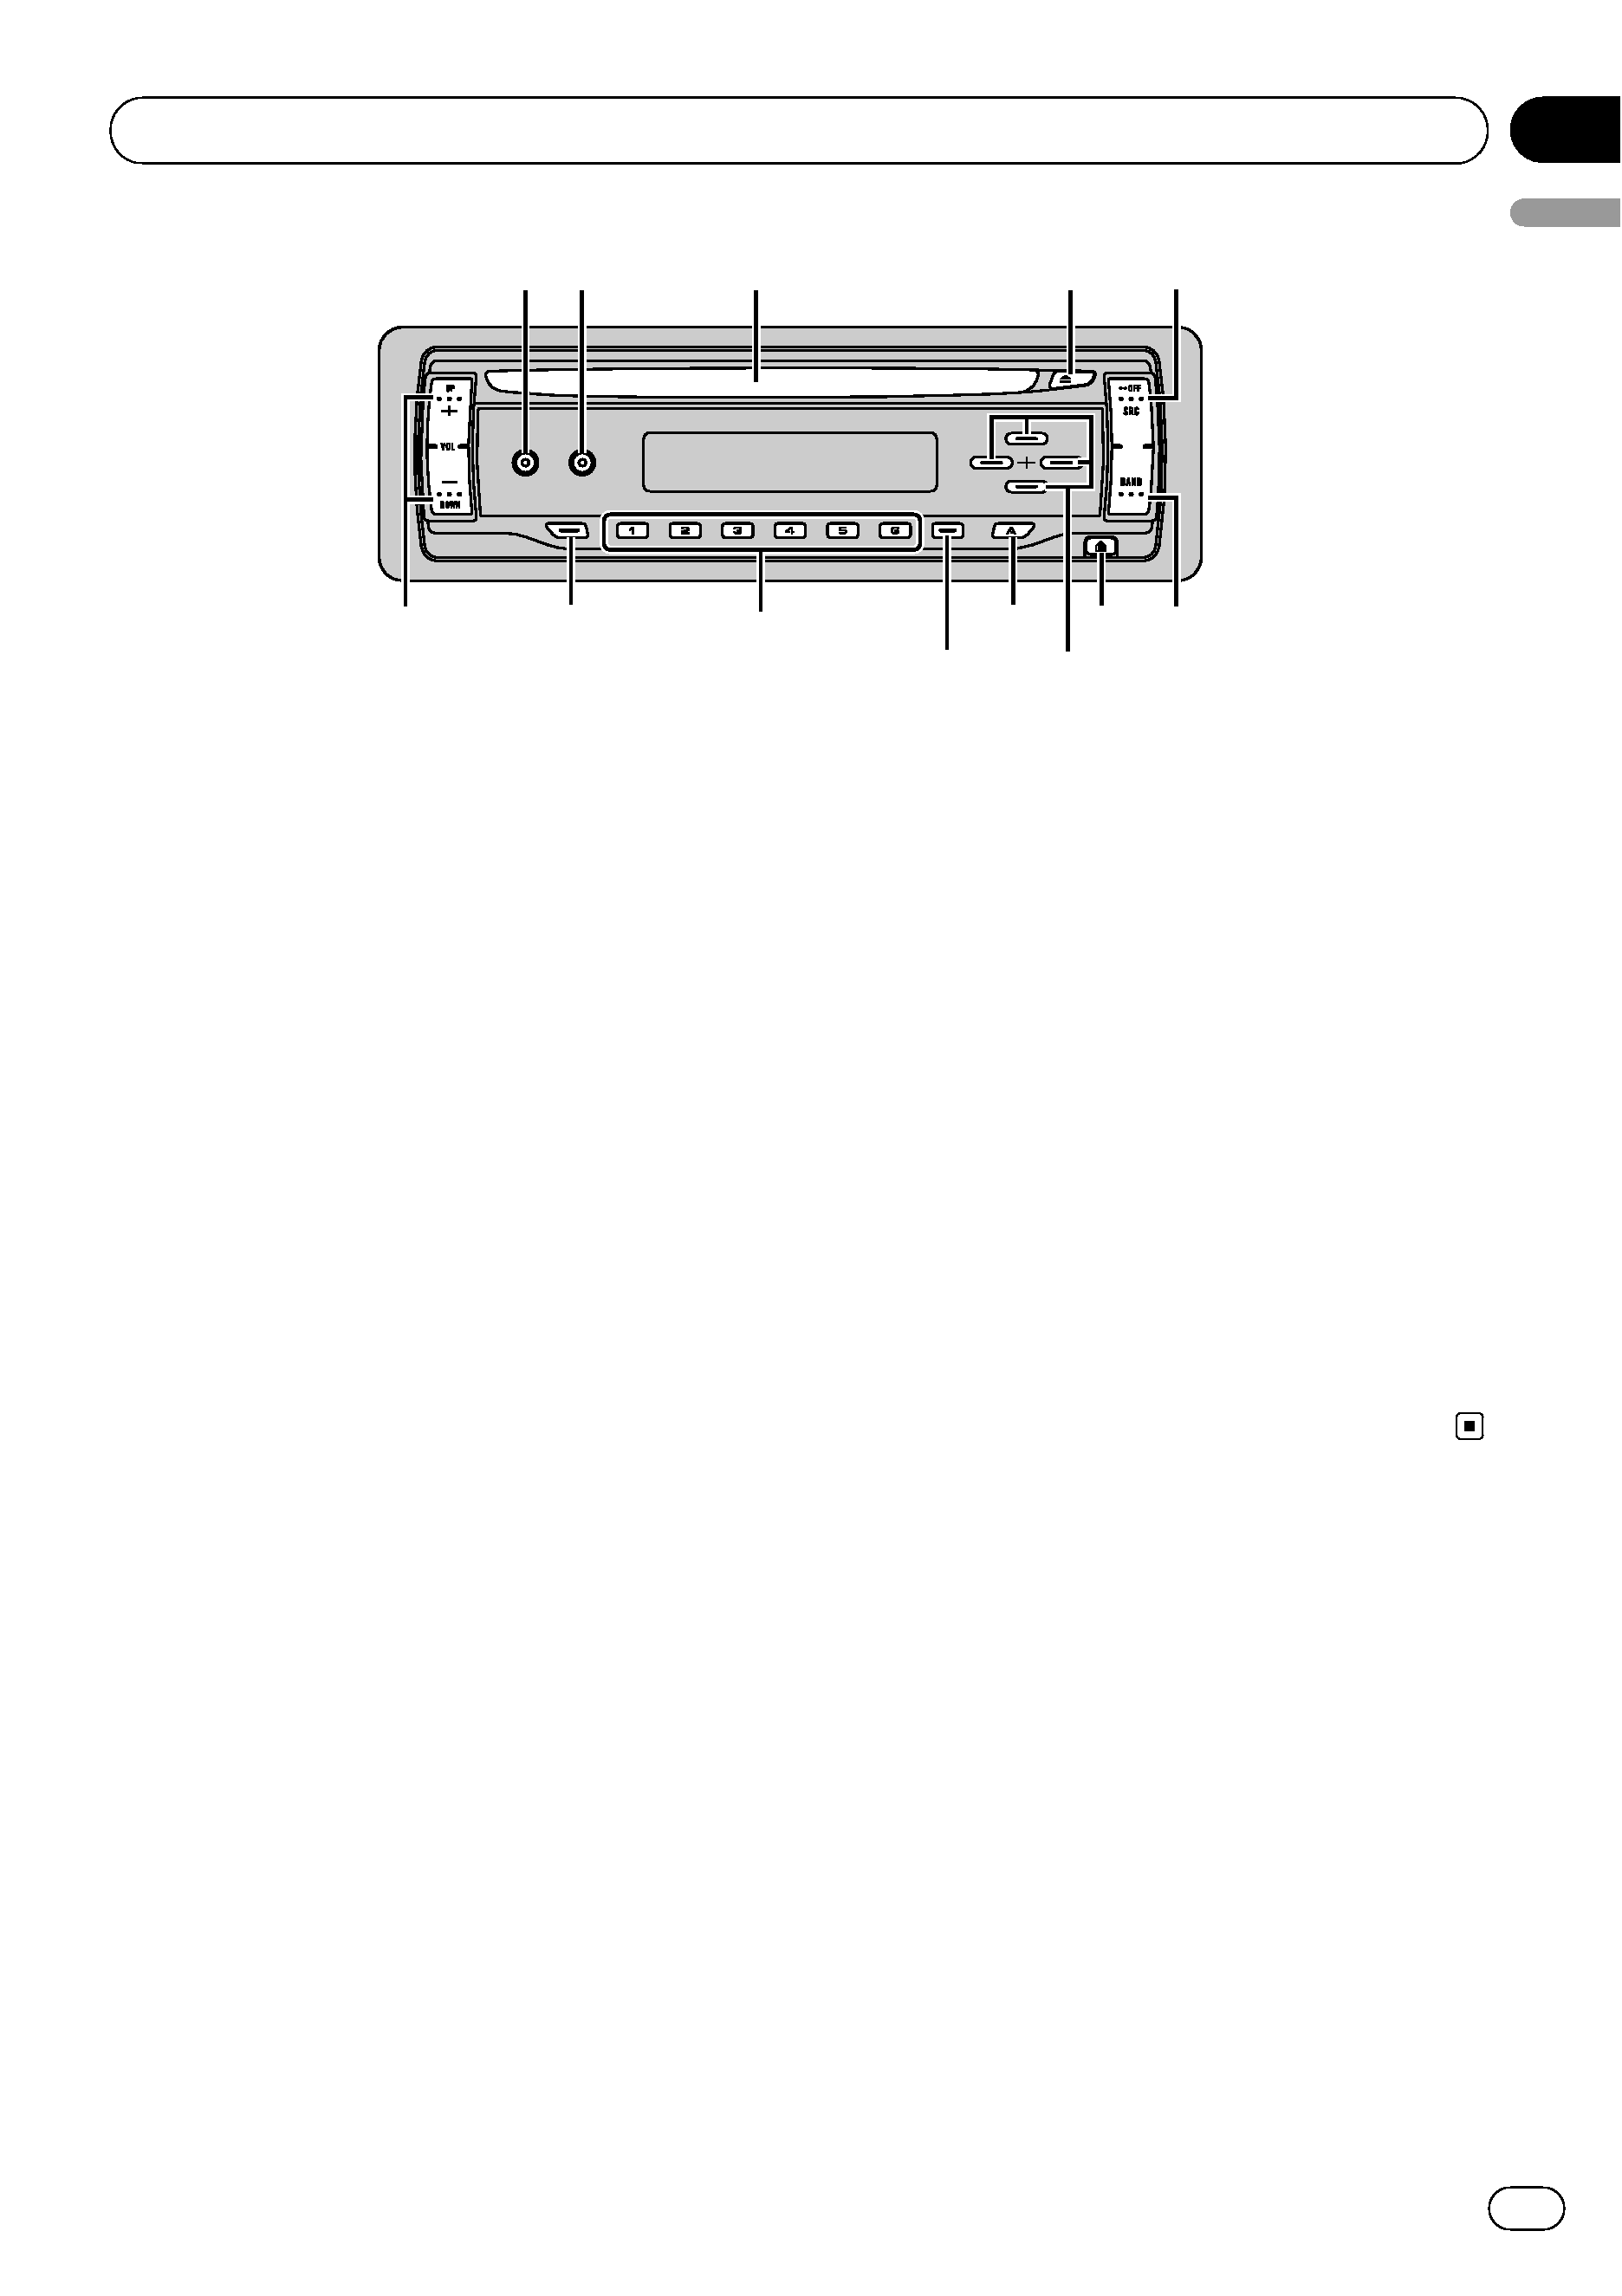
Head unit
1 EQ button
Press to select various equalizer curves.
Press and hold to turn loudness on or off.
2 DISPLAY button
Press to select different displays.
3 Disc loading slot
Insert a disc to play.
4 EJECT button
Press to eject a CD from your built-in CD
player.
5 SOURCE button
This unit is turned on by selecting a source.
Press to cycle through all the available
sources.
6 BAND button
Press to select among three FM bands and
one AM band and to cancel the control
mode of functions.
7 DETACH button
Press to remove the front panel from the
head unit.
8 a/b/c/d buttons
Press to perform manual seek tuning, fast
forward, reverse and track search controls.
Also used for controlling functions.
9 AUDIO button
Press to select various sound quality con-
trols.
a LOCAL/BSM button
Press to turn local function on or off.
Press and hold to turn BSM function on or
off.
b 16 buttons
Press for preset tuning. Also used for con-
trolling functions.
c CLOCK button
Press to change to the clock display.
d VOLUME (+/) buttons
Press to increase or decrease the volume.
3
3
3
d
d
d
1 2
4
6
6
6
5
5
5
7
7
7
8
8
9
9
9
a
a
a
b
b
b
c
c
c
Whats What
En
5
English
Section
02