NAD
523
· OWNER'S MANUAL
· MANUEL D'INSTALLATION
· BEDIENUNGSANLEITUNG
· MANUAL DEL USUARIO
· MANUALE DELLE ISTRUZIONI
· BRUKSANVISNING
· MANUAL DO PROPRIETÁRIO
GB
F
D
E
I
S
P
©
1996.
523.
NAD
ELECTRONICS
LTD
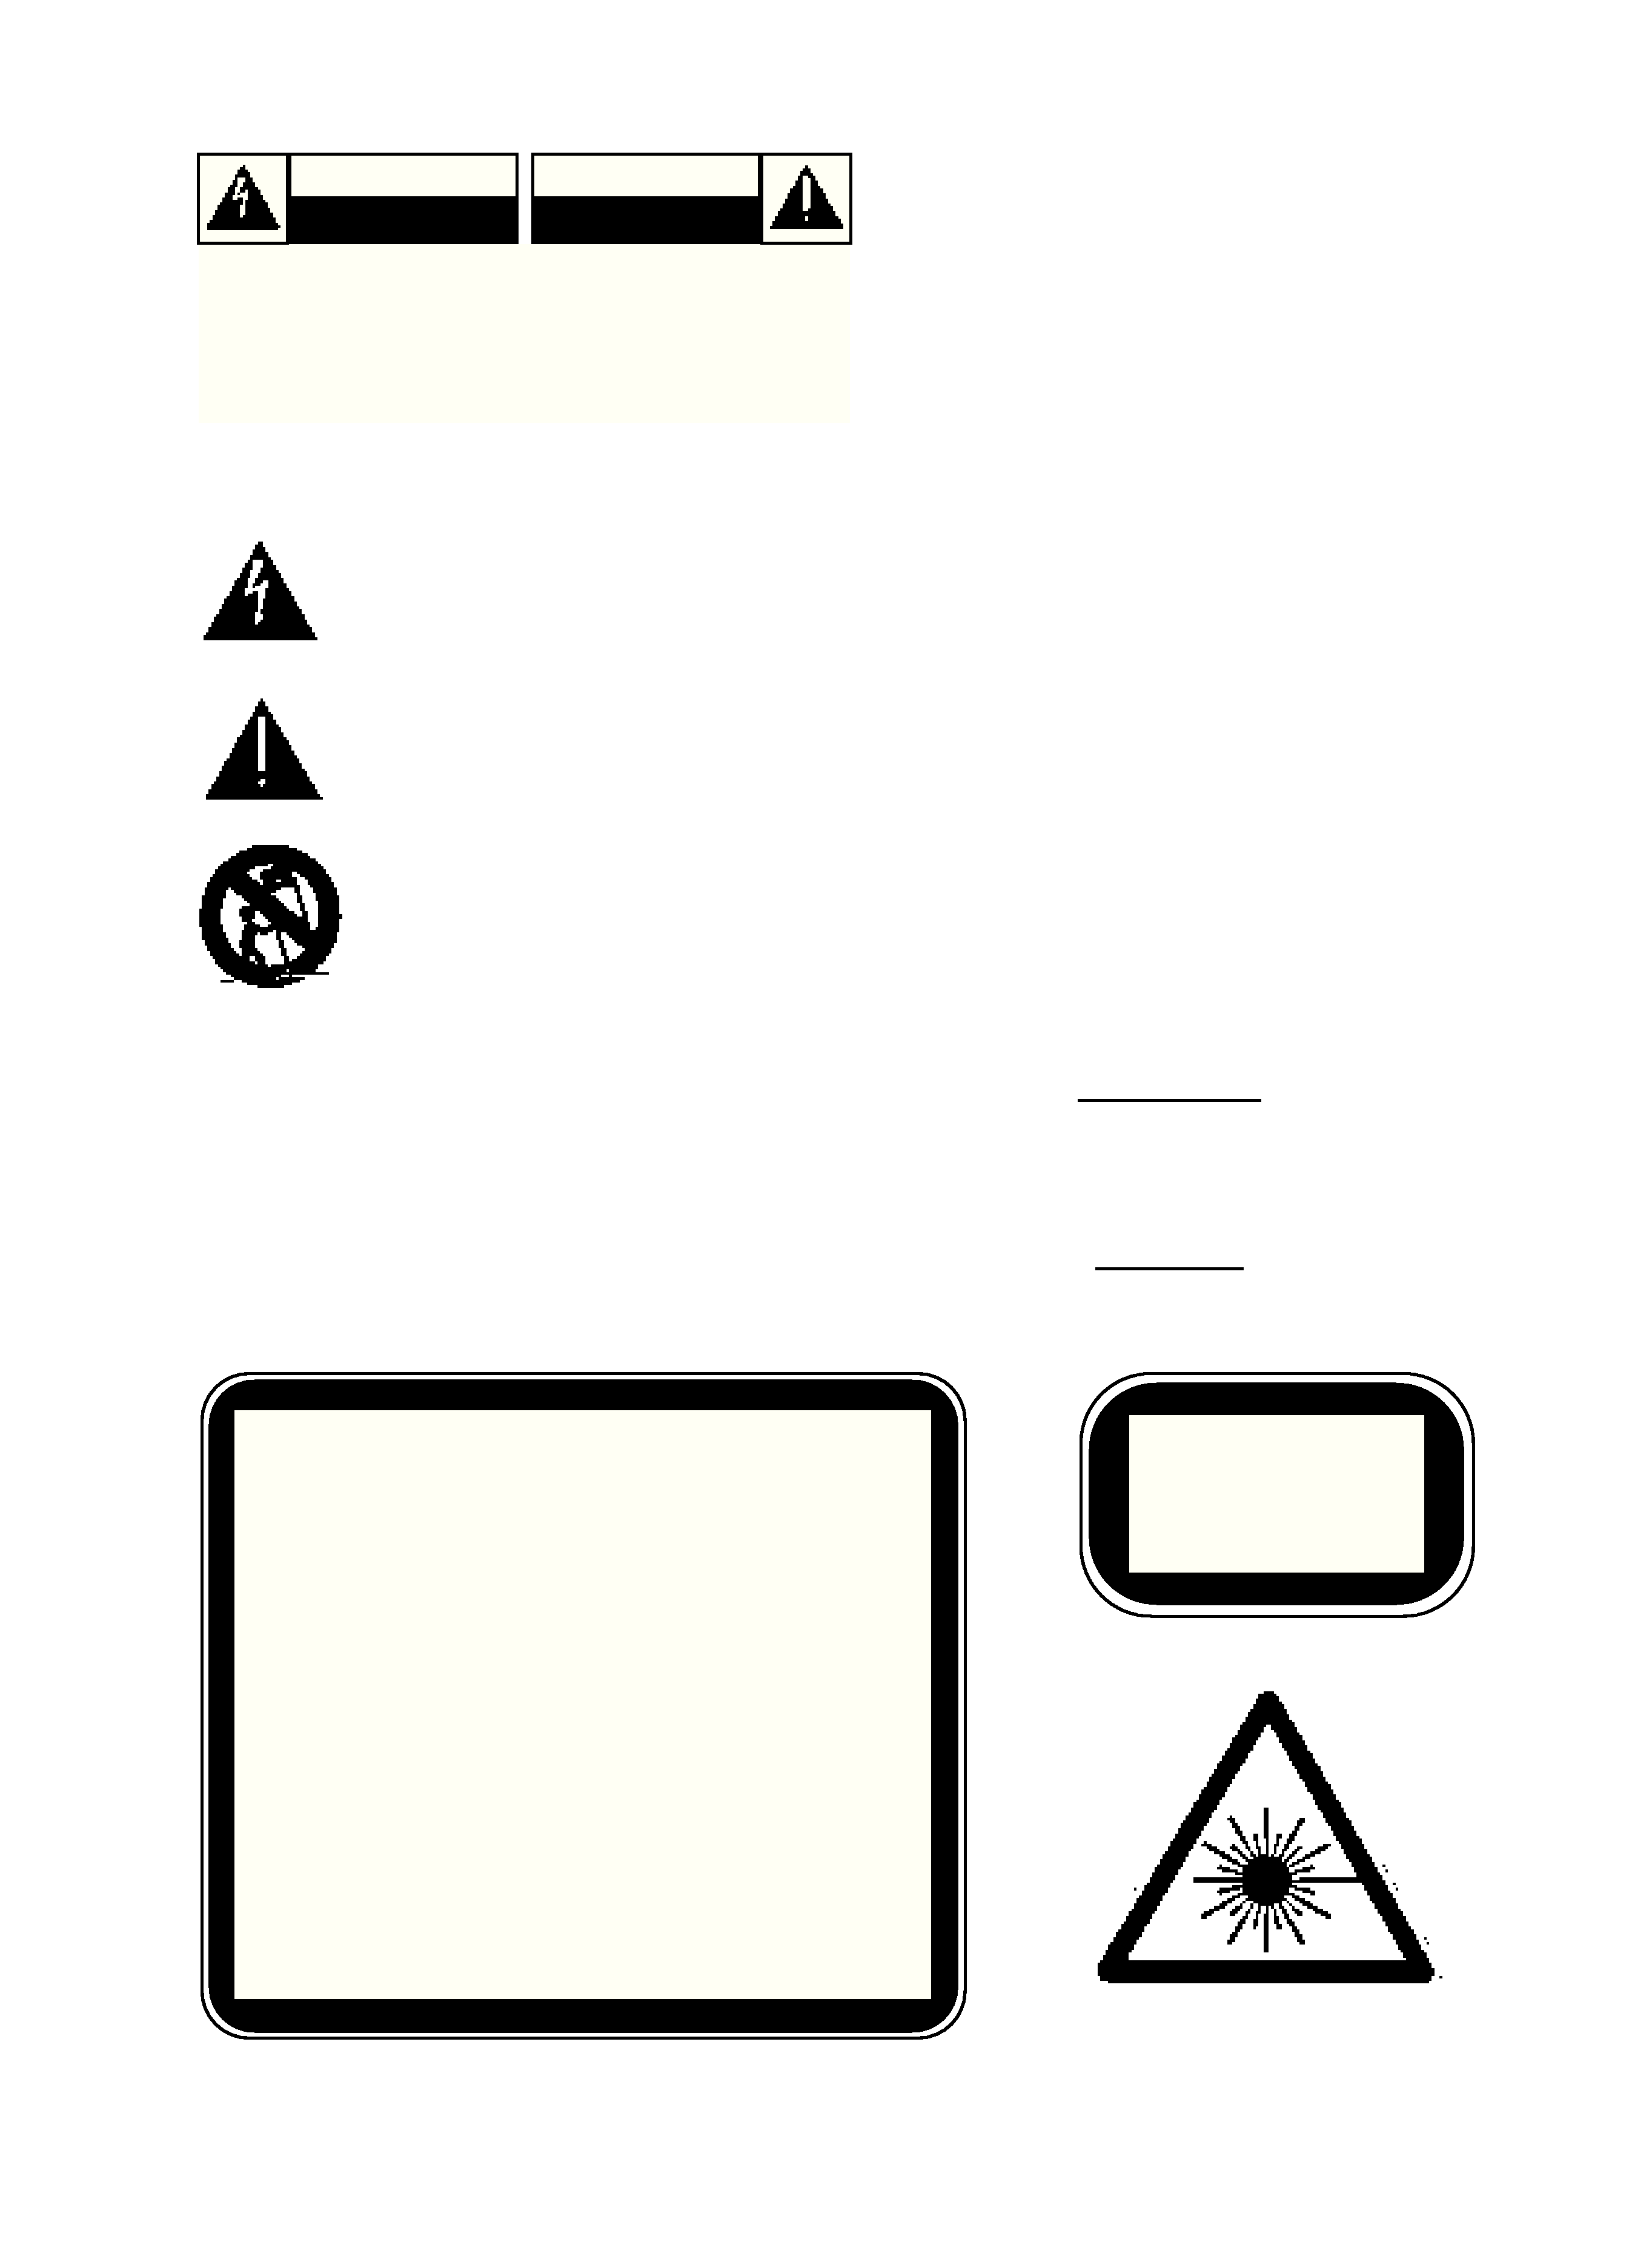
WARNING: TO REDUCE THE RISK OF FIRE OR
ELECTRIC SHOCK, DO NOT EXPOSE THIS
UNIT TO RAIN OR MOISTURE.
The lightning flash with an arrowhead symbol within an equi-
lateral triangle is intended to alert the user to the presence of
uninsulated "dangerous voltage" within the product's enclo-
sure that may be of sufficient magnitude to constitutet a
risk of electric shock to persons.
The exclamation point within an equilateral triangle is intend-
ed to alert the user to the presence of important operating
and maintenance (servicing) instructions in the literature
accompanying the product.
Do not place this unit on an unstable cart, stand or tri-
pod, bracket or table. The unit may fall, causing seri-
ous injury to a child or adult and serious damage to the
unit. Use only with a cart, stand, tripod, bracket or
table recommended by the manufacturer or sold with
the unit. Any mounting of the device on a wall or ceil-
ing should follow the maufacturer's instructions and
should use a mounting accessory recommended
by the manufacturer.
An appliance and cart combination should be moved with care. Quick
stops, excessive force and uneven surfaces may cause the appliance
and cart combination to overturn.
Read and follow all the safety and operating instructions before connect-
ing or using this unit. Retain this notice and the owner's manual for future
reference.
All warnings on the unit and in it's operating instructions should be
adhered to.
Do not use this unit near water; for example, near a bath tub, washbowl,
kitchen sink, laundry tub, in a wet basement or near a swimming pool.
The unit should be installed so that its location or position does not inter-
fere with its proper ventilation. For example, it should not be situated on
a bed, sofa, rug or similar surface that may block the ventilation open-
ings; or if placed in a built-in installation, such as a bookcase or cabinet,
that may impede the flow of air through its ventilation openings, there
should be at least 20cm (8 in.) of free space behind the appliance.
The unit should be situated from heat sources such as radiators, heat
registers, stoves or other devices (including amplifiers) that produce heat.
The unit should be connected to a power supply outlet only of the voltage
and frequency marked on its rear panel.
The power supply cord should be routed so that it is not likely to be
walked on or pinched, especially near the plug, convenience receptacles,
or where the cord exits from the unit.
Unplug the unit from the wall outlet before cleaning. Never use benzine,
thinner or other solvents for cleaning. Use only a soft damp cloth.
The power supply cord of the unit should be unplugged from the wall out-
let when it is to be unused for a long period of time or during a lightning
storm.
Care should be taken so that objects do not fall, and liquids are not
spilled into the enclosure through any openings.
This unit should be serviced by qualified service personnel when:
A. The power cord or the plug has been damaged; or
B. Objects have fallen, or liquid has been spilled into the unit; or
C. The unit has been exposed to rain or liquids of any kind; or
D. The unit does not appear to operate normally or exhibits a marked
change in performance; or
E. The device has been dropped or the enclosure damaged.
Upon completion of any servicing or repairs, request the service shop's
assurance that only Factory Authorized Replacement Parts with the
same characteristics as the original parts have been used, and that the
routine safety checks have been performed to guarantee that the equip-
ment is in safe operating condition.
REPLACEMENT WITH UNAUTHORIZED PARTS MAY RESULT IN
FIRE, ELECTRIC SHOCK OR OTHER HAZARDS.
ATTENTION
POUR EVITER LES CHOC ELECTRIQUES, INTRODUIRE LA
LAME LA PLUS LARGE DE LA FICHE DANS LA BORNE
CORRESPONDANTE DE LA PRISE ET POUSSER JUSQU'AU
FOND.
CAUTION
TO PREVENT ELECTRIC SHOCK MATCH WIDE BLADE OF
PLUG TO WIDE SLOT FULLY INSERT.
CAUTION: TO REDUCE THE RISK OF
ELECTRIC SHOCK, DO NOT REMOVE COVER
(OR BACK). NO USER SERVICEABLE PARTS
INSIDE. REFER SERVICING TO QUALIFIED
SERVICE PERSONNEL.
IMPORTANT SAFETY INSTRUCTIONS
CAUTION
RISK OF ELECTRIC
SHOCK DO NOT OPEN
ATTENTION:
RISQUE DE CHOC ELECTRIQUE
NE PAS OUVRIR
CLASS 1 LASER PRODUCT
LUOKAN 1 LASERPLAITE
KLASS 1 LASERAPPARAT
WARNING! INVISIBLE LASER RADIATION WHEN
OPEN AND INTERLOCKS DEFEATED. AVOID EXPO-
SURE TO BEAM.
VORSICHT! UNSICHTBARE LASERSTRAHLEN TRITT
AUS, WENN DECKEL GEÖFFNET UND WENN
SICHERHEITSVERRIEGELUNG ÜBERBRÜCKT IST.
NICHT DEM STRAHL AUSSETZEN.
ADVARSEL - USYNLIG LASERSTRÅLING VED
ÅBNING, NÅR SIKKERHEDSAFBRYDERE ER UDE AF
FUNKTION.UNDGÅ UDSÆTTELSE FOR STRÅLUNG.
ADVARSEL - USYNLIG LASERSTRÅLING NÅR DEK-
SEL ÅPNES OG SIKKERHEDSLÅS BRYTES. UNNGÅ
EKSPONERING FOR STRÅLEN.
VARNING - OSYNLIG LASERSTRÅLNING NÄR
DENNA DEL ÄR ÖPPNAD OCH SPÄRRAR ÄR
URKOPPLADE. STRÅLEN ÄR FARLIG.
VARO! - AVATTAESSA JA SUOJALUKITUS OHITET-
TAESSA OLET ALTTIINA NÄKYMÄTÖNNTÄ
LASERSÄTEILYLLE. ÄLÄ KATSO SÄTEESEEN.

N
AD
This unit contains a semi conductor lase system and
it classified as a "CLASS 1 LASER PRODUCT". So, to
use this model properly, read this Instrucion Manual
carefully. In case of any trouble, please contact the
store where you purchased the unit. To prevent being
exposed to the laser beam, do not try to open the
enclosure.
CAUTION: THIS PRODUCT UTILIZES A LASER.
USE OF CONTROLS OR ADJUSTMENTS OR PER-
FORMANCE OR PROCEDURES OTHER THAN
THOSE SPECIFIED HEREIN MAY RESULT IN HAZ-
ARDOUS RADIATION EXPOSURE.
FOR U.S.A. MODEL
1. The laser is covered by a housing which prevents
exposure during operation or maintenance. However,
this product is classified as a Laser Product by CDRH
(Center for Devices and Radiological Health) which is a
department of the Food and Drugs Administration.
According to their regulations 21 CFR section 1002.30,
all manufacturers who sell Laser Products must main-
tain records of written communications bwtween the
manufacturer, dealers and customers concerning radia-
tion safety. If you have any complaints about instruc-
tions or explanations affecting the use of this product,
please feel free to write to the address on the back
page of this manual. When you write to us, please
include the model number and serial number of your
unit.
2. In compliance with Federal Regulations, the certifica-
tion, identification and the period of manufacture are
indicated on the rear panel.
FCC INFORMATION FOR USER
CAUTION: Changes or modifications not expressly
approved by the manufacturer for compliance could
void the user's authority to operate.
NOTE: This equipment has been tested and found
to comply with the limits for a Class B digital device,
pursuant to Part 15 of the FCC Rules. These limits are
designed to provide reasonable protection against
harmful interference in a residential installation. This
equipment generates uses, and can radiate radio fre-
quency energy and , it not installed and used in accor-
dance with the instructions, may cause harmful interfer-
ence to radio communications. However, there is no
guarantee that interference will not occur in a particular
installation. If this equipment does cause harmful inter-
ference to radio or television reception, which can be
determined by turning the equipment off and on, the
user is encouraged to try to corect the interference by
one or more of the following measures:
· Reorient or relocate the receiving antenna.
· Increase the separation between the equipment
and receiver.
· Connect the equipment into an outlet on a cicuit dif-
ferent from that to which the receiver is connected.
· Consult the dealer or an experienced radio/TV tech-
nician for help.
FOR CANADIAN MODEL
POUR MODELE CANADIEN
THIS DIGITAL APPARATUS DOES NOT EXCEED
THE CLASS B LIMITS FOR RADIO NOISE EMISSION
FROM DIGITAL APPARATUS SET OUT IN THE
RADIO INTERFERENCE REGULATIONS OF THE
CANADIAN DEPARTMENT OF COMMUNICATIONS.
L'INTERFÉRENCE
RADIO
ÉLECTRIQUE
GÉNÉRÉE PAR CET APPAREIL NUMÉRIQUE DE
TYPE
B
NE
DÉPASSE
PAS
LES
LIMITES
ÉNONCÉES DANS LE RÉGLEMENT SUR LES PER-
TURBATIONS RADIO ÉLECTRIQUES, SECTION
APPAREIL NUMÉRIQUE, DU MINISTÈRE DES COM-
MUNICATIONS.
DO
NOT
OVERLOAD
WALL
OUTLETS,
EXTENSION CORDS OR INTEGRAL CONVENIENCE
RECEPTACLES AS THIS CAN RESULT IN A RISK
OF FIRE OR ELECTRIC SHOCK.
ADDITIONAL CAUTION:
POWER BUTTON
CAUTION: When the switch is in the off position, the
unit is still connected to the mains. Disconnect the
power cable when the unit is not to be used for some
time.
ATTENTION: Lorsque l'interrupteur est mis sur
ARRET [OFF] , l'alimentation n'est totalement coupée.
Debrancher le NAD 523 de la prise secteur lorsqu'il
doit rester inutilisé pendant une période prolongée.
ACHTUNG: Steht die Taste POWER auf OFF (Aus)
schaltet der Strom nicht vollkommen ab. Wenn Sie den
NAD 523 über einen längeren Zeitraum nicht
gebrauchen, ziehen Sie den Stecker bitte aus der
Stechdose.
PRECAUTION: La alimentación électrica no se
desconecta completamente cuando el pulsador
POWER está Off. Rogamos desconecte su NAD 523
de la toma de CA cuando no se vaya a usar durante un
largo período de tiempo.
ATTENZIONE: L'alimentazione non si spegne com-
pletamente quando si spegne il pulsante "POWER". Se
il NAD 523 non viene impiegato per parecchio tempo,
raccomandiamo allora di staccarlo dalla rete C.A.
VORSICHTIG:Om apparaten inte skall användas
under en längre tid bör nätsladden kopplas ur väggut-
taget.
PRECAUÇÀO: A electricidade nào é completamente
desligada quando o botào ELECTRICIDADE (POWER)
é mudado para a posiçào de desligado. Queira fazer o
favor de desligar o seu eqipamento NAD 523 da toma-
da CA quando o equipamento nào vai ser usado
durante períodos longos.
SPECIAL CAUTIONS
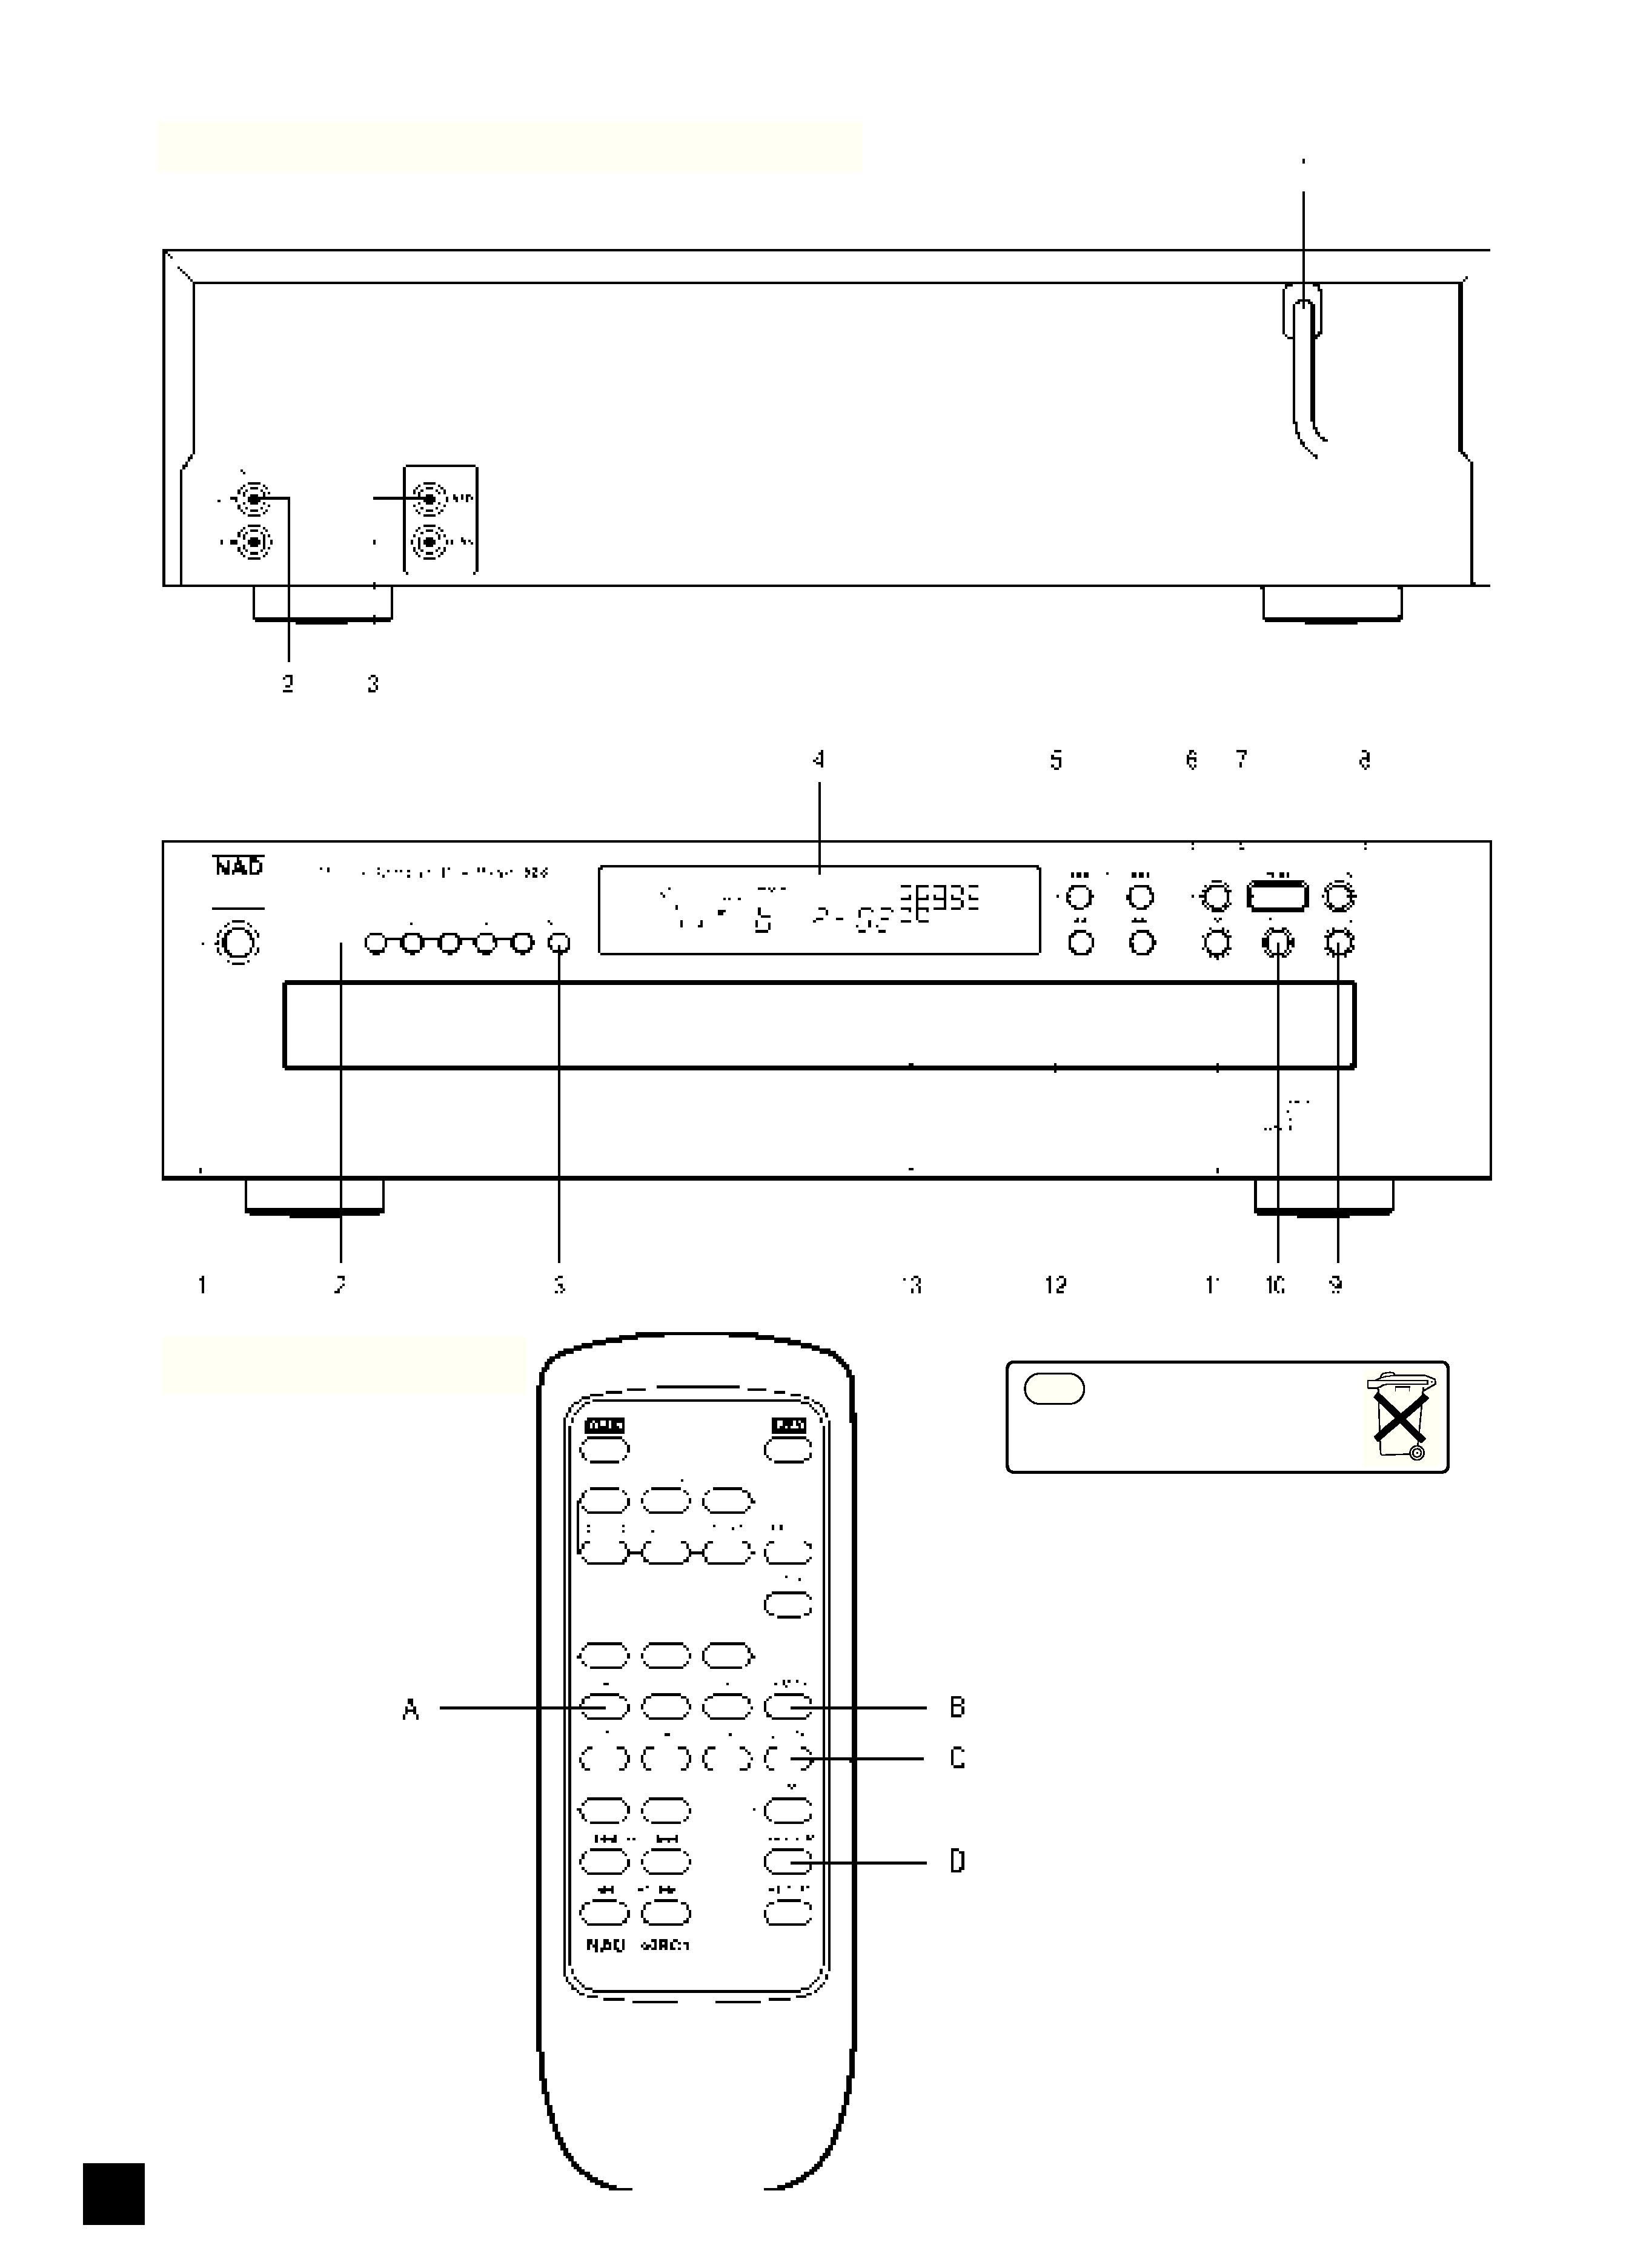
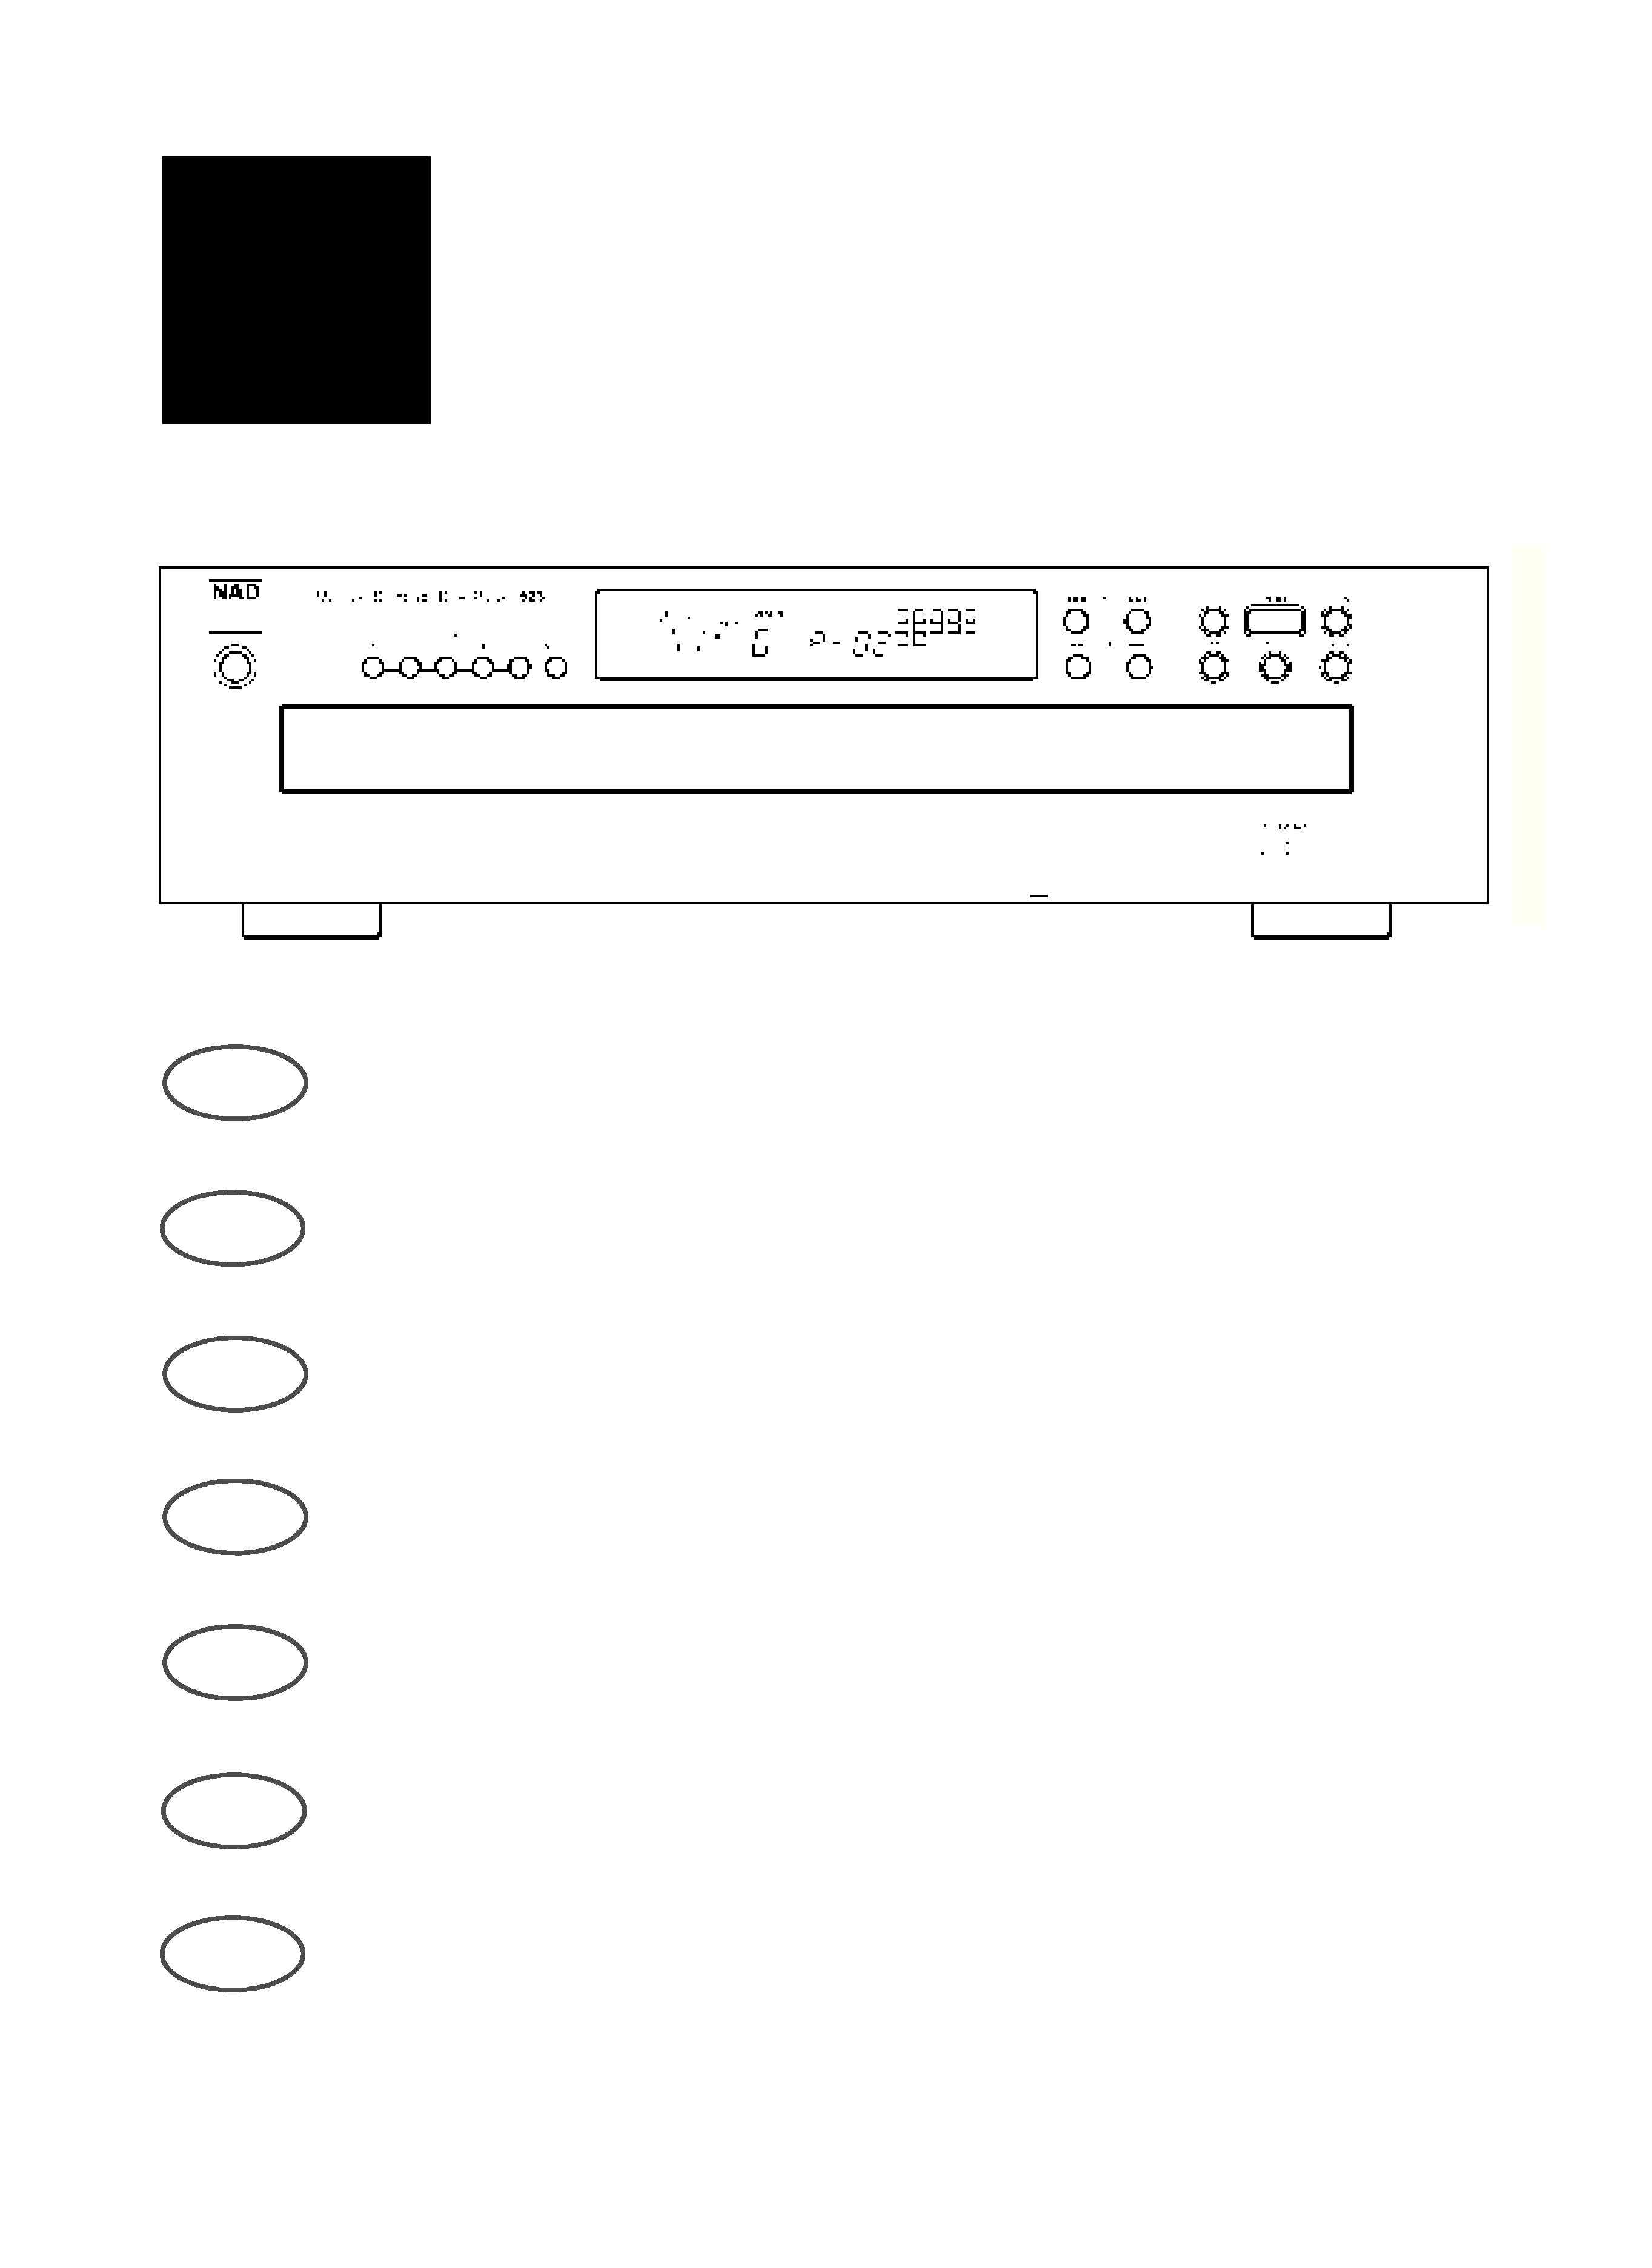
REAR PANEL CONNECTIONS - NAD 523
NAD
4
REMOTE CONTROL
Batterij niet
weggooien, maar
inleveren als KCA
NL
FRONT PANEL CONTROLS - NAD 523

NAD
5
GB
BEFORE TRANSPORTING THE UNIT.
CAUTION:
Be sure to remove all discs from the player before
moving it, even if you only plan to move it across the
room. If discs shift out of position in the carousel tray,
they could jam when the tray turns or the drawer is
opened.
A NOTE ON INSTALLATION
Install the Compact Disc player on a level, vibration-
free surface. (Severe vibration, or operation in a tilted
position, may cause the player to mis-track). The player
may be stacked with other stereo components, as long
as there is adequate ventilation around it.
If the player is placed in close proximity to a radio
tuner (AM or FM), VCR, or television set, the operation
of its digital circuits could produce static that would
interfere with reception of weak broadcast signals. If
this occurs, move the CD player away from other
devices or switch it off when listening to broadcasts.
PLAYING COMPACT DISCS - A SIMPLE
APPROACH
Numbers in brackets refer to the front panel drawing
unless stated otherwise.
1. Connect a stereo cable from the L (left) and R
(right) Line Output sockets (2 in back panel drawing) to
the corresponding CD inputs on your amplifier.
2. Plug in the AC power cord (1 in back panel draw-
ing).
3. Press the POWER button (1) to turn on the player.
4. Press the OPEN button (8) to open the disc draw-
er.
5. Place your first CD, label side up, in the carousel
tray's left-front circular recess (marked `DIRECT
PLAY'). Be certain that the disc is centred within the
recess.
6. Place your second CD in the right-front recess.
7. Press the NEXT button (3) twice to move tray loca-
tions #3 and # 4 to the front loading positions. Place
your third and fourth CDs in those recesses.
8. Press NEXT (3) to bring tray location # 5 to the
front, and insert your fifth CD.
9. Press NEXT (3) as necessary until the display indi-
cates Disc # 1.
10. Press the PLAY button (7). The drawer closes
automatically, the tray revolves to place Disc # 1 in
playing position, and the first disc begins to play.
11. When the first disc ends, the remaining discs will
automatically play in sequence.
12. At anytime you may press the SKIP > or < but-
tons (5) to select different tracks on the current disc, or
press NEXT (3) to select a different CD.
13. To hear a particular track, use the remote control
to enter the corresponding Disc Select and Track
Select buttons.
REAR PANEL CONNECTIONS
The numbers refer to the back panel drawing.
1. AC LINE CORD.
Connect this power cord to an AC mains wall outlet
or to an AC convenience outlet at the rear of your
amplifier.
2. LINE OUTPUT.
Connect a cable from these sockets to your amplifier.
Plug one end of a stereo audio cable into the Left
(upper) and Right (lower) output sockets. Connect the
other end of the cable to your stereo amplifier's match-
ing Left and Right CD inputs, or to any other "line-level"
input sockets on (such as the AUXiliary inputs).
NOTE: Do NOT connect this cable to the amplifier's
PHONO input sockets.
3. NAD LINK IN/OUT.
The NAD Link OUT connector (the upper socket)
allows remote-control commands to be relayed from
this player to other products equipped with a NAD-Link
(or compatible) input. To use this option, connect a
cable from the NAD Link OUT socket to the NAD Link
IN socket on another product.
The NAD Link IN connector (the lower socket) allows
this player to be operated by external control signals
from a multi-room controller or remote relay system.
Connect a cable from the controller to the NAD Link IN
socket. Using both IN and OUT connections, remote
control commands can be "daisy-chained" from one
product to the next.
FRONT PANEL CONTROLS
Numbers of each section or in brackets refer to the
front panel drawing unless stated otherwise.
1. POWER.
Press this button to switch on the power to the disc
player. Press again and release to switch the power off.
When the power is switched on, the carousel tray auto-
matically revolves to place disc # 1 in the play position.
2. DISC 1 to 5
Press the appropriate Disc number button to immedi-
ately access the desired disc. When one of the DISC 1
to 5 buttons is pressed with the CD drawer open, the
player will close the CD drawer and start to play the
selected disc.
3. NEXT.
Turns the carousel tray to select the next-higher disc
number. After # 5 it returns to # 1. If NEXT is pressed
with the CD drawer open whilst playing a CD, the CD
drawer will close first.
4. DISPLAY.
The display provides information about the disc
selection, playback status, about the stored program,
and about the laser's location on the disc being played.
NAD 523 COMPACT DISC CHANGER