
LZ-601
6.4-inch LCD MONITOR
INSTRUCTION MANUAL
MONITEUR LCD 6,4 pouces
MODE D'EMPLOI
© PRINTED IN JAPAN B64-2286-00 (K)(DT)
Take the time to read through this instruction manual.
Familiarity with installation and operation procedures will help
you obtain the best performance from your new monitor.
For your records
Record the serial number, found on the back of the unit, in the
spaces designated on the warranty card, and in the space provided
below. Refer to the model and serial numbers whenever you call
upon your KENWOOD dealer for information or service on the
product.
Model LZ-601 Serial number
LZ-601_K
02.12.16
1:00 PM
Page 1
2
Safety Precautions
- English
To prevent injury and/or fire, take the following precautions:
· Ensure that the unit is securely installed. Otherwise it may fly out of place during collisions
and other jolts.
· When extending the ignition or ground wires, make sure to use automotive-grade wires or
other wires with an area of 0.75mm2 (AWG18) or more to prevent wire deterioration and
damage to the wire coating.
·To prevent short circuits, never put or leave any metallic objects (e.g., coins or metal tools)
inside the unit.
· If the unit starts to emit smoke or strange smells, turn off the power immediately and
consult your Kenwood dealer
· Do not touch the liquid crystal fluid if the LCD is damaged or broken due to shock. The liquid
crystal fluid may be dangerous to your health or even fatal.
· If the liquid crystal fluid from the LCD contacts your body or clothing, wash it off with soap
immediately.
To prevent damage to the machine, take the following precautions:
· Make sure to ground the unit to a negative 12V DC power supply.
· Do not open the covers of the unit.
· Do not install the unit in a spot exposed to direct sunlight or excessive heat or humidity. Also
avoid places with too much dust or the possibility of water splashing.
· Do not subject the monitor unit to excessive shock, as it is a piece of precision equipment.
· When replacing a fuse, only use a new one with the prescribed rating. Using a fuse with the
wrong rating may cause your unit to malfunction.
·To prevent short circuits when replacing a fuse, first disconnect the wiring harness.
If you experience problems during installation, consult your Kenwood dealer.
NOTE
2CAUTION
2WARNING
This video unit is set for rear passenger use only. Use of this video unit in any front seat
and/or where it may be visible to the driver may be illegal in some states and may
cause driver distraction and accident which could injure or kill you.
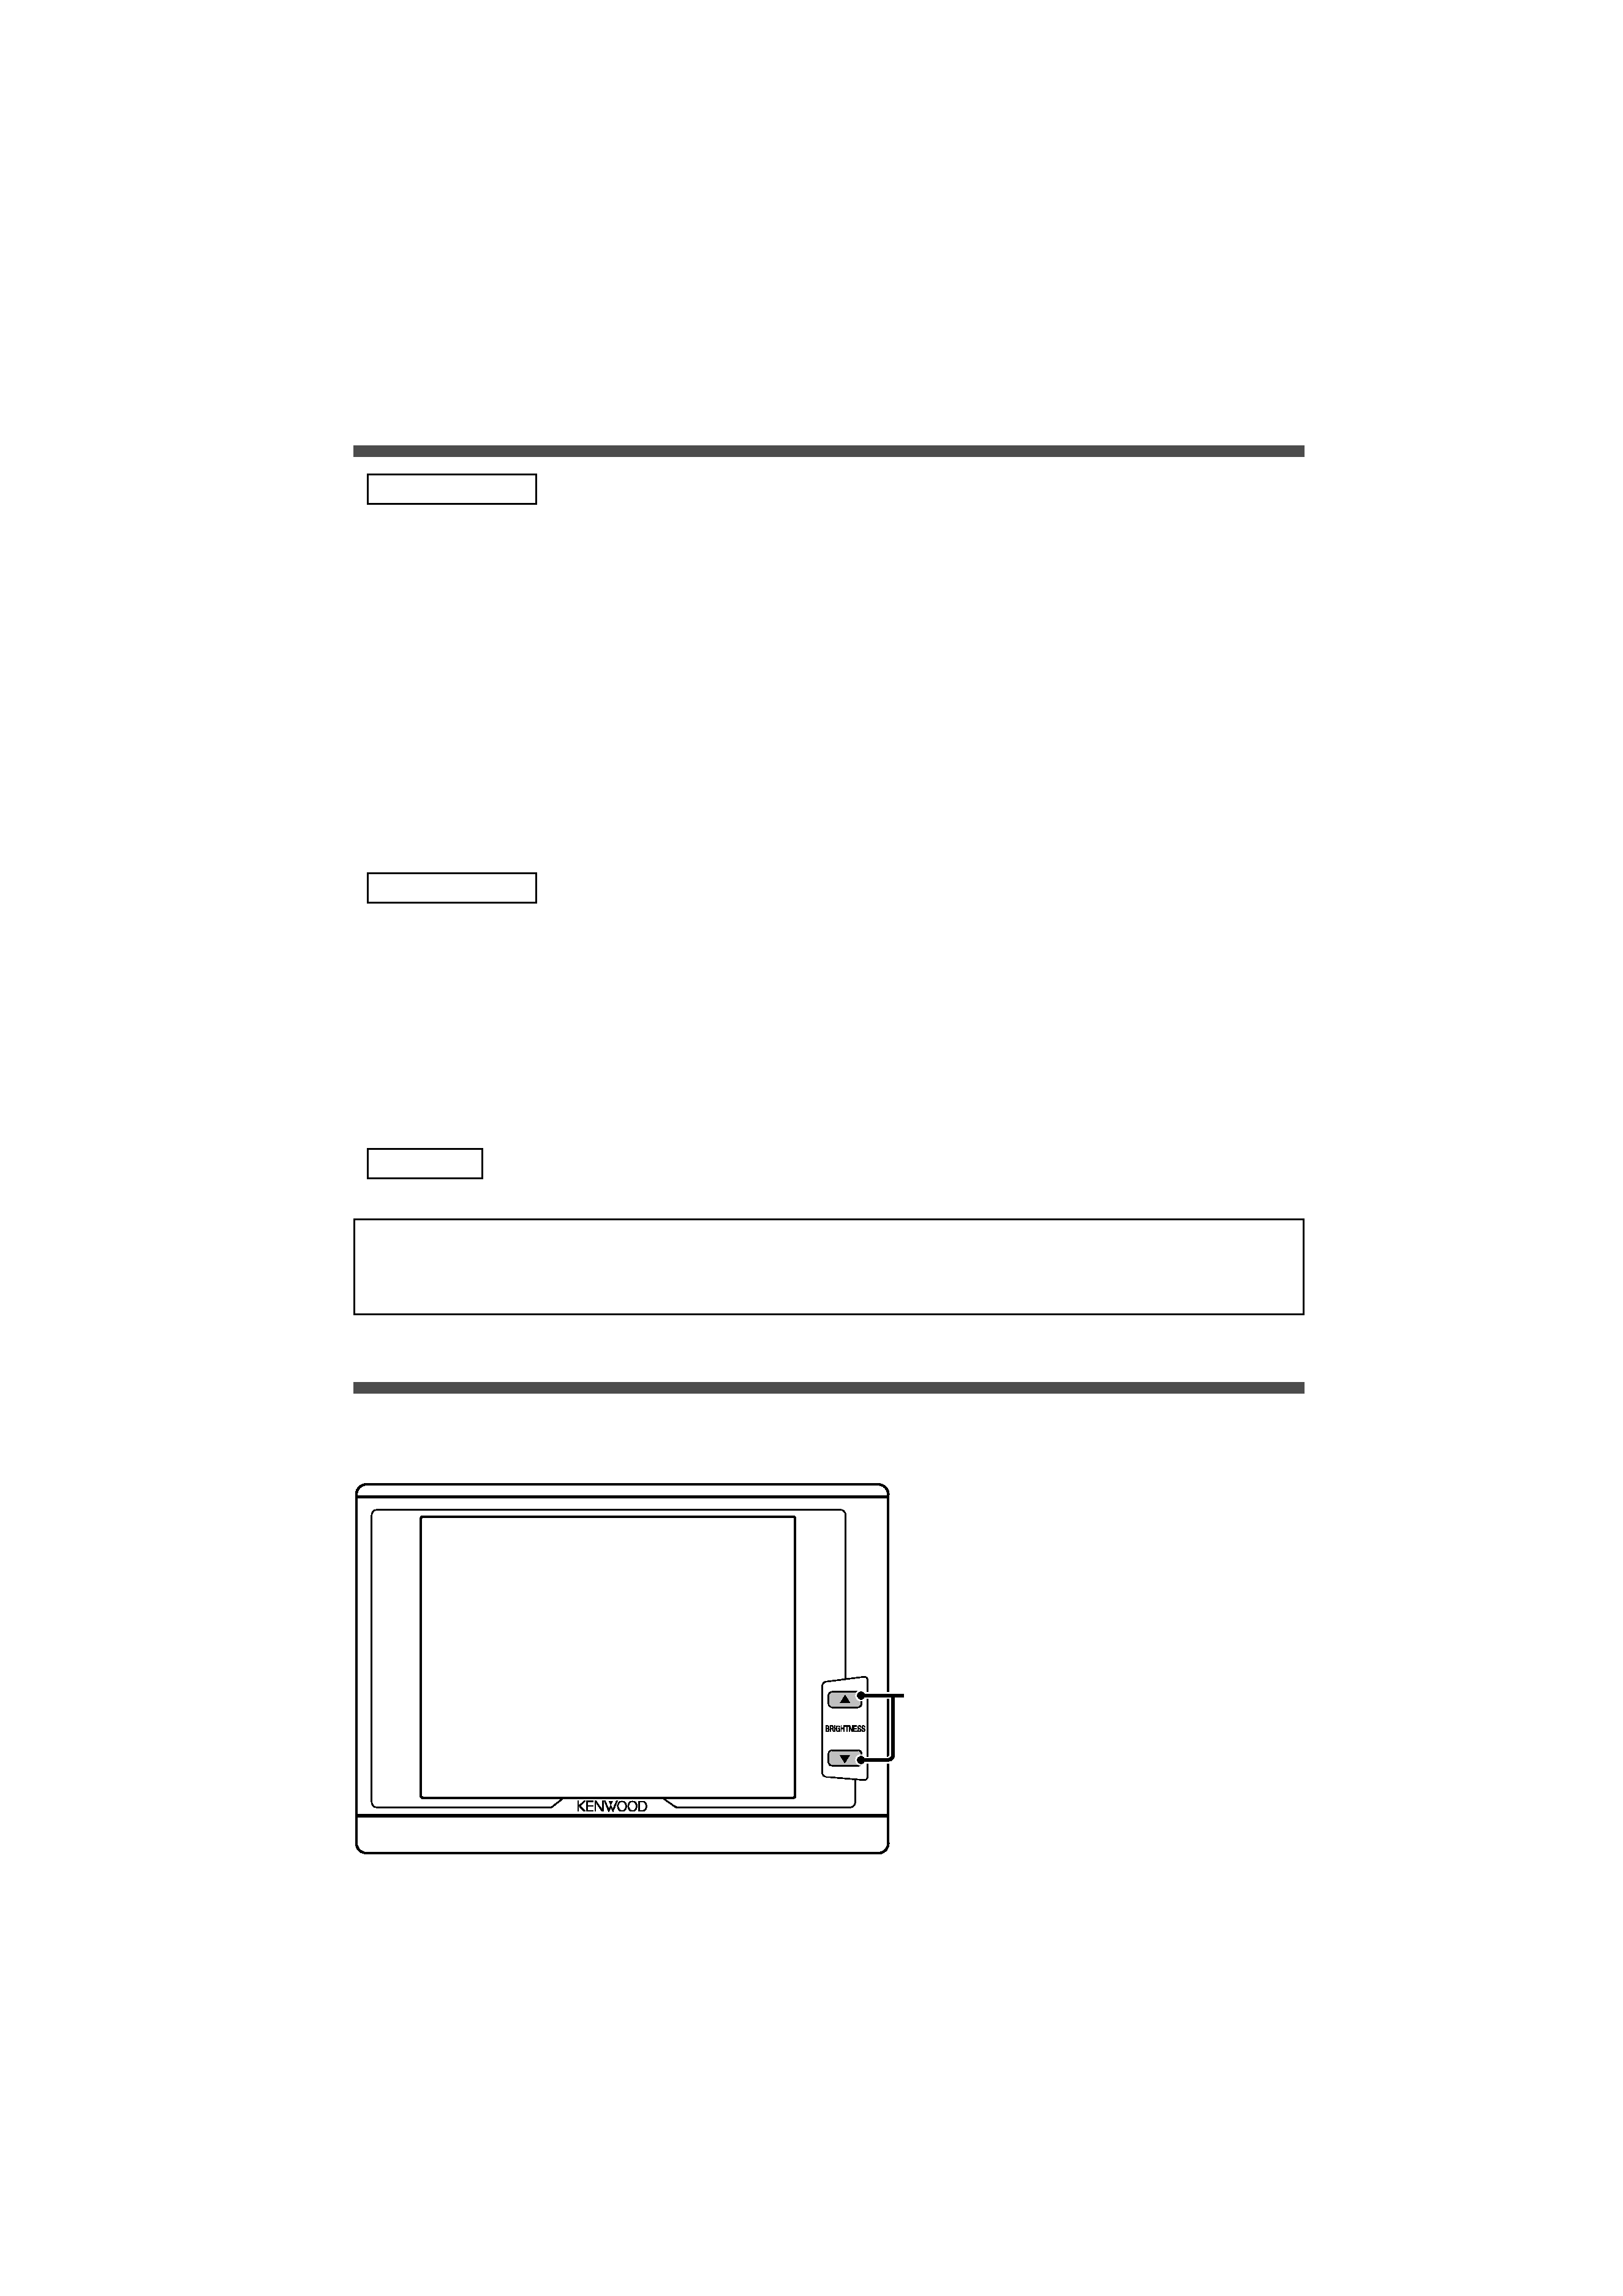
7 Press the [ 5 ] button for brighter
screen.
7 Press the [ ] button for darker
screen.
Operation
Power On
When video signal is input to the Video input terminal, this monitor is turned on.
LZ-601_K
02.12.16
1:00 PM
Page 2
3
Installation
English -
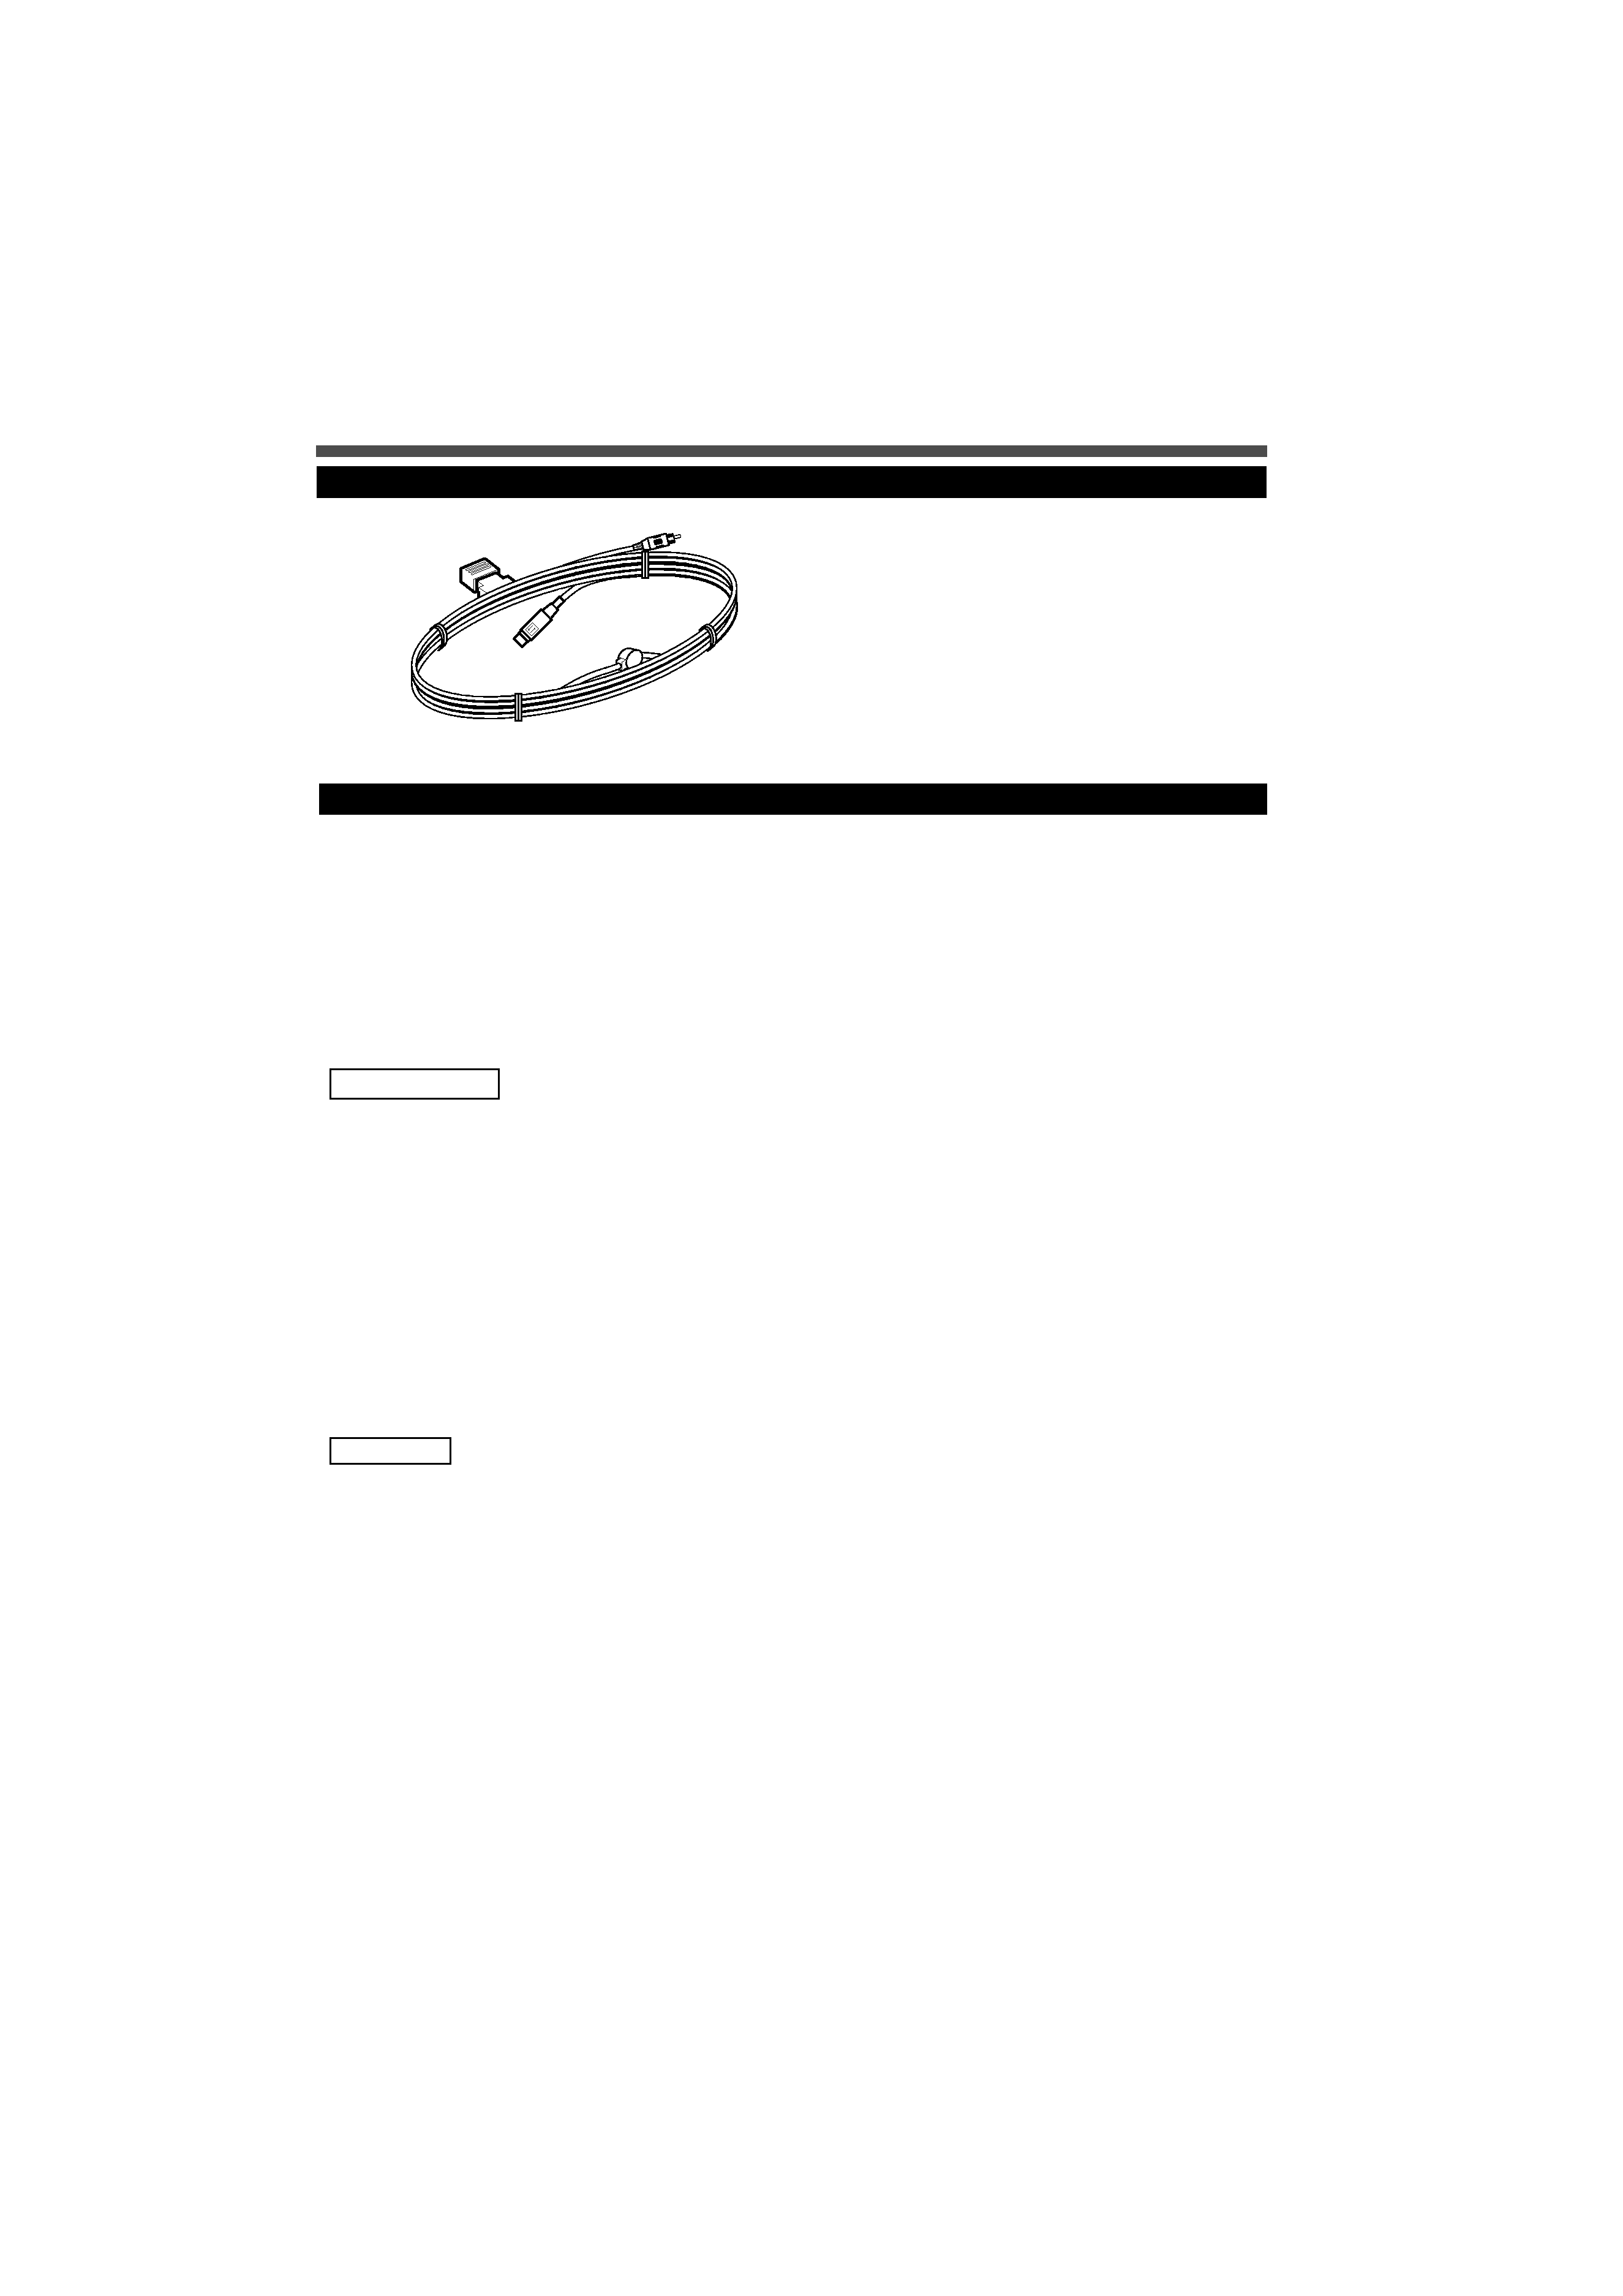
Accessorie
1
To prevent short circuits, remove the key from the ignition and disconnect the
· terminal
of the battery.
Make the proper input and output cable connections for each unit.
Connect the wiring harness cables in the following order: ground, ignition.
Connect the wiring harness connector to the unit.
Install the unit in your car.
Reconnect the
· terminal of the battery.
· This product is intended for use with 12V DC negative ground power only. Do not connect it
to any other power supply
·To prevent shorting, disconnect the battery wire from the negative terminal of the battery
during installation.
· Be sure to firmly stabilise this product. Do not install it in a location which is not stable.
· Follow the installation and wiring procedures described in this manual. Improper wiring or
modified installation can not only result in malfunction or damage to the unit but may also
result in an accident.
· Do not install the unit in the following locations.
·A location which interferes with the operation of the air bag system.
·A location subject to direct sunlight, subject to the air from the air conditioner, or subject to
moisture or high temperature.
\This may cause deformation of the monitor unit.
· If your car's ignition does not come with an ACC position, connect the ignition wires to a
power source that can be turned on and off with the ignition key. If you connect the ignition
wire to a power source that receives a constant voltage supply, as with battery wires, the
battery may die.
· If the fuse blows, first make sure that the wires have not caused a short circuit, then replace
the old fuse with one with the same rating.
· Do not let unconnected wires or terminals touch metal on the car or anything else
conducting electricity. To prevent short circuits do not remove the caps from unused
terminals or from the ends of the unconnected wires.
· After the unit is installed, check whether the brake lamps, blinkers, wipers, etc. on the car
are working properly.
· Insulate unconnected wires with vinyl tape or other similar material.
· Thoroughly wipe away oil and other dirt from the installation surface.
Please avoid installation on uneven surfaces.
2CAUTION
2WARNING
6
5
4
3
2
1
Installation Procedure
LZ-601_K
02.12.16
1:00 PM
Page 3
4
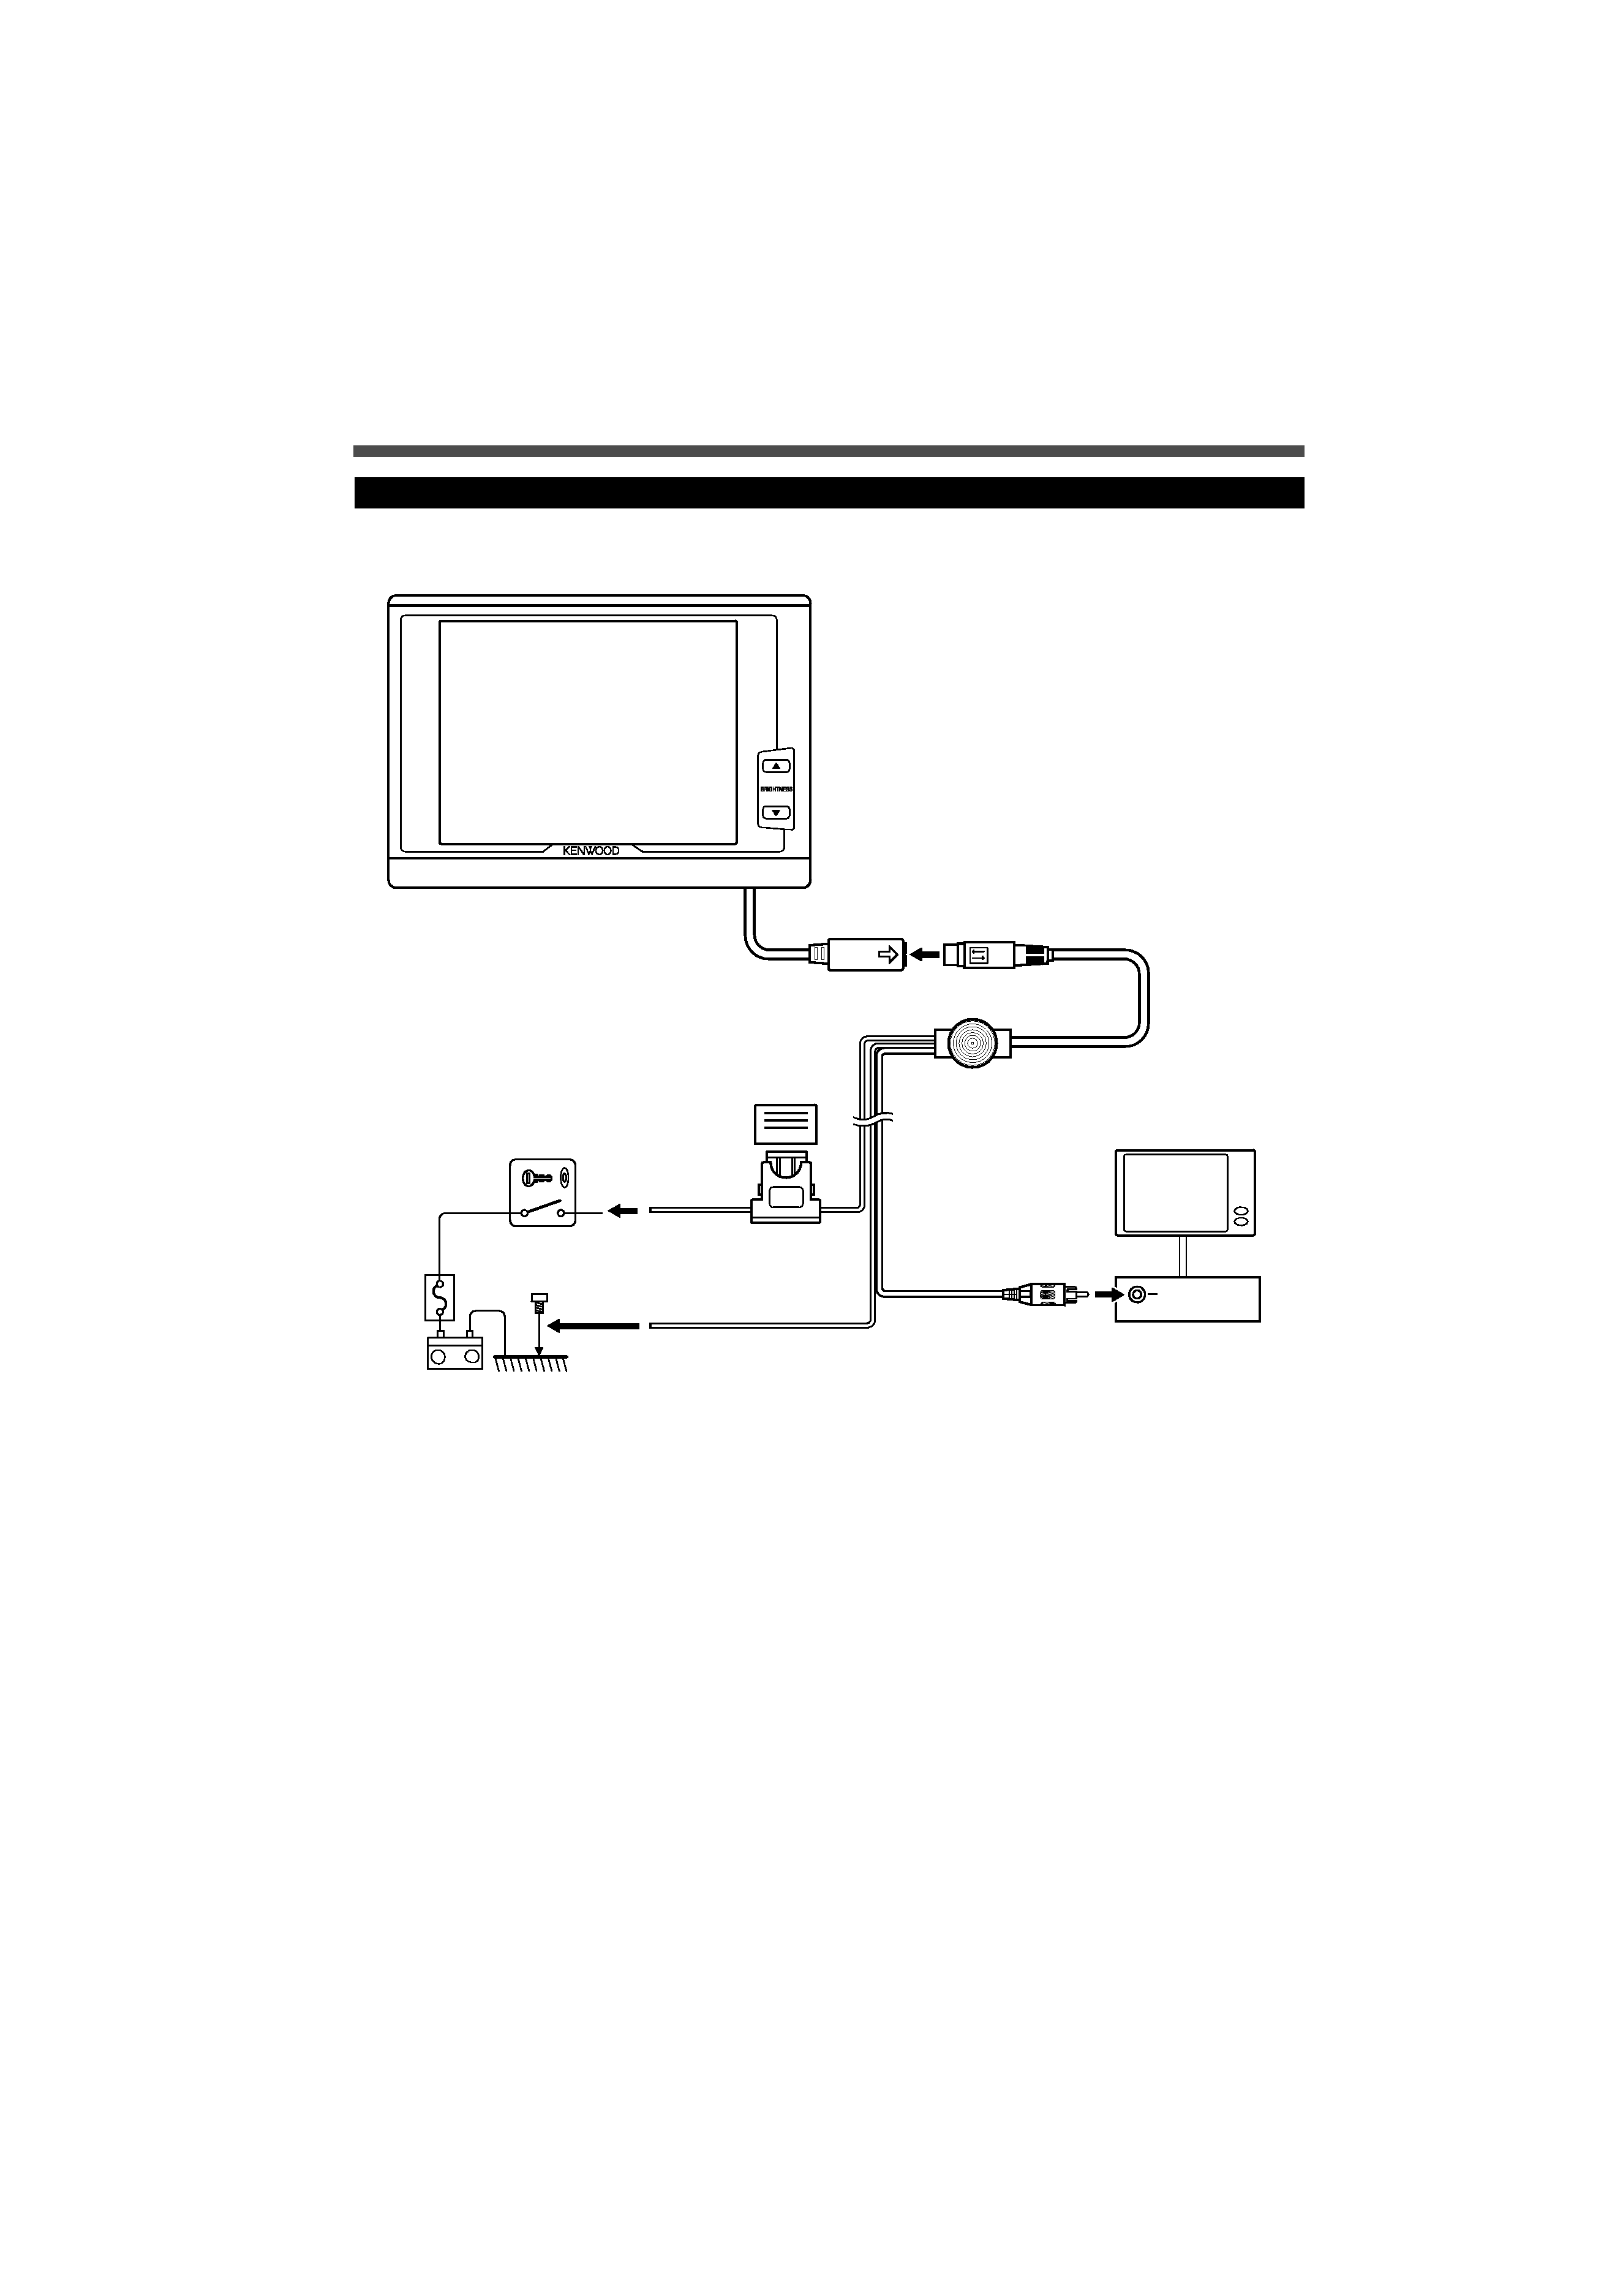
Installation
- English
Connection
+
VIDEO OUT
(3A)
Accessory 1
Ignition wire (Red)
ª12V
Ignition key switch
Car
fuse
box
(Main
fuse)
ACC
Ground wire (Black)
·
(To car chassis)
Battery
Monitor Unit
Video input
Fuse
LZ-601_K
02.12.16
1:00 PM
Page 4

What might appear to be a malfunction in your unit may just be the result of
slight misoperation or miswiring. Before calling service, first check the
following table for possible problems.
SOLUTION
POSSIBLE CAUSE
PROBLEM
The power does not turn
on.
The fuse has blown.
After checking for short circuits in the
wires, replace the fuse with one having
the same rating.
No ACC position on vehicle
ignition.
Connect the same wire to the ignition as
the battery wire.
The screen is dark.
The unit is in a location where
temperature is low.
If the temperature of the monitor unit
drops, the screen may appear darker when
power is first turned on due to the
characteristics of a liquid crystal panel.
Wait a while after turning power on for the
temperature to rise. Normal brightness will
return.
Troubleshooting Guide
Specifications
Specifications subject to change without notice.
Monitor Unit
Screen size ..............................................................................................6.4 inches (Normal)
130.8(W) x 98(H) x 162.5(Diagonal) mm
5-3/16 (W) x 3-7/8 (H)x 6-7/16 (D) inch
Display system..............................................................................Transparent TN LCD panel
Drive system ..................................................................................TFT active matrix system
Number of pixels ........................................................224,640 pixels (320 H x 234 V xRGB)
Effective pixels ..........................................................................................................99.99%
Pixel arrangement ..........................................................................RGB striped arrangement
Back lighting ..............................................................................................Cold cathode tube
Color System..........................................................................................................NTSC/PAL
Video Input Level................................................................................................1 Vp-p/ 75
General
Operating voltage ..............................................................................14.4 V DC (11 to 16 V)
Consumed Power ..........................................................9 W (6 W during normal operations)
Operational temperature range ......................................................................10°C to +60°C
Storage temperature range ............................................................................30°C to +85°C
Size ..........................................................................................188(W) x 130(H) x 31(D) mm
7-3/8(W) x 5-1/8(H) x 1-1/4(D) inch
Mass ..............................................................................................................460 g (1.0 LBS)
Although the effective pixels for the liquid crystal panel is given as 99.99% or more, 0.01% of
pixels may not light or may light incorrectly.
FCC WARNING
This equipment may generate or use radio frequency energy. Changes or modifications to this
equipment may cause harmful interference unless the modifications are expressly approved in the
instruction manual. The user could lose the authority to operate this equipment if an unauthorized
change or modification is made.
No video signal is input to the
Video input terminal.
Input the video signal.
English -
5
LZ-601_K
02.12.16
1:00 PM
Page 5