Introduction
Your Kenwood KVS speakers were
designed to meet the demands of
today's high-quality music recordings
and film soundtracks.
Your new speakers:
· Deliver wide dynamic range and
powerful bass response
· Feature quality-built acoustically-
optimized enclosures
· Are magnetically-shielded for use
in audio/video systems
· Were designed, engineered, and
assembled in the USA.
Installing the speakers isn't difficult,
but please read and follow all of the
instructions in this manual to get
maximum performance from your
new speakers. If you're also
connecting other equipment, such
as a receiver, power amplifier, or
pre-amplifier, use this manual in
combination with the materials that
came with those components.
Unpacking
Unpack your new speakers carefully
and examine them for shipping
damage. If they are damaged or fail
to operate, notify your dealer imme-
diately. If your speakers were
shipped to you directly, notify the
shipping company without delay.
Only the person or company who
originally received the unit can file a
claim against the carrier for shipping
damage. Keep the original carton
and packing materials in case you
need to transport or ship your
speakers.
About speaker wire
We ask you to buy the wire sepa-
rately, since we don't know how
much wire you will need. We
suggest that you buy wire that is at
least 18-gauge or thicker.
Remember, the smaller the number,
the thicker the wire, so 18-gauge
wire is thicker than 20-gauge wire.
Before you run out to buy speaker
wire, read the section on `Placing
the speakers' on page 3. You'll need
to know where your speakers will
go before you buy the speaker wire.
For your records
Record the serial number (found on
the back of the unit) on the
warranty card, and in the space
below. If you need to call your
dealer for information or service,
you'll need the model and serial
numbers. And be sure to save your
original receipt.
Model
Serial Number
Setting up your
Kenwood
KVS Speakers
KVS-
Please read these safety instructions
carefully. They can help prevent
electrical shock, fire, and damage to
the unit.
Safety Precautions
For all units
1 Dispose of the packaging materi-
als properly. After you take the
unit out of its shipping bag,
dispose of the bag, keeping it out
of the reach of children and
animals. Be aware that the bag
could cause suffocation.
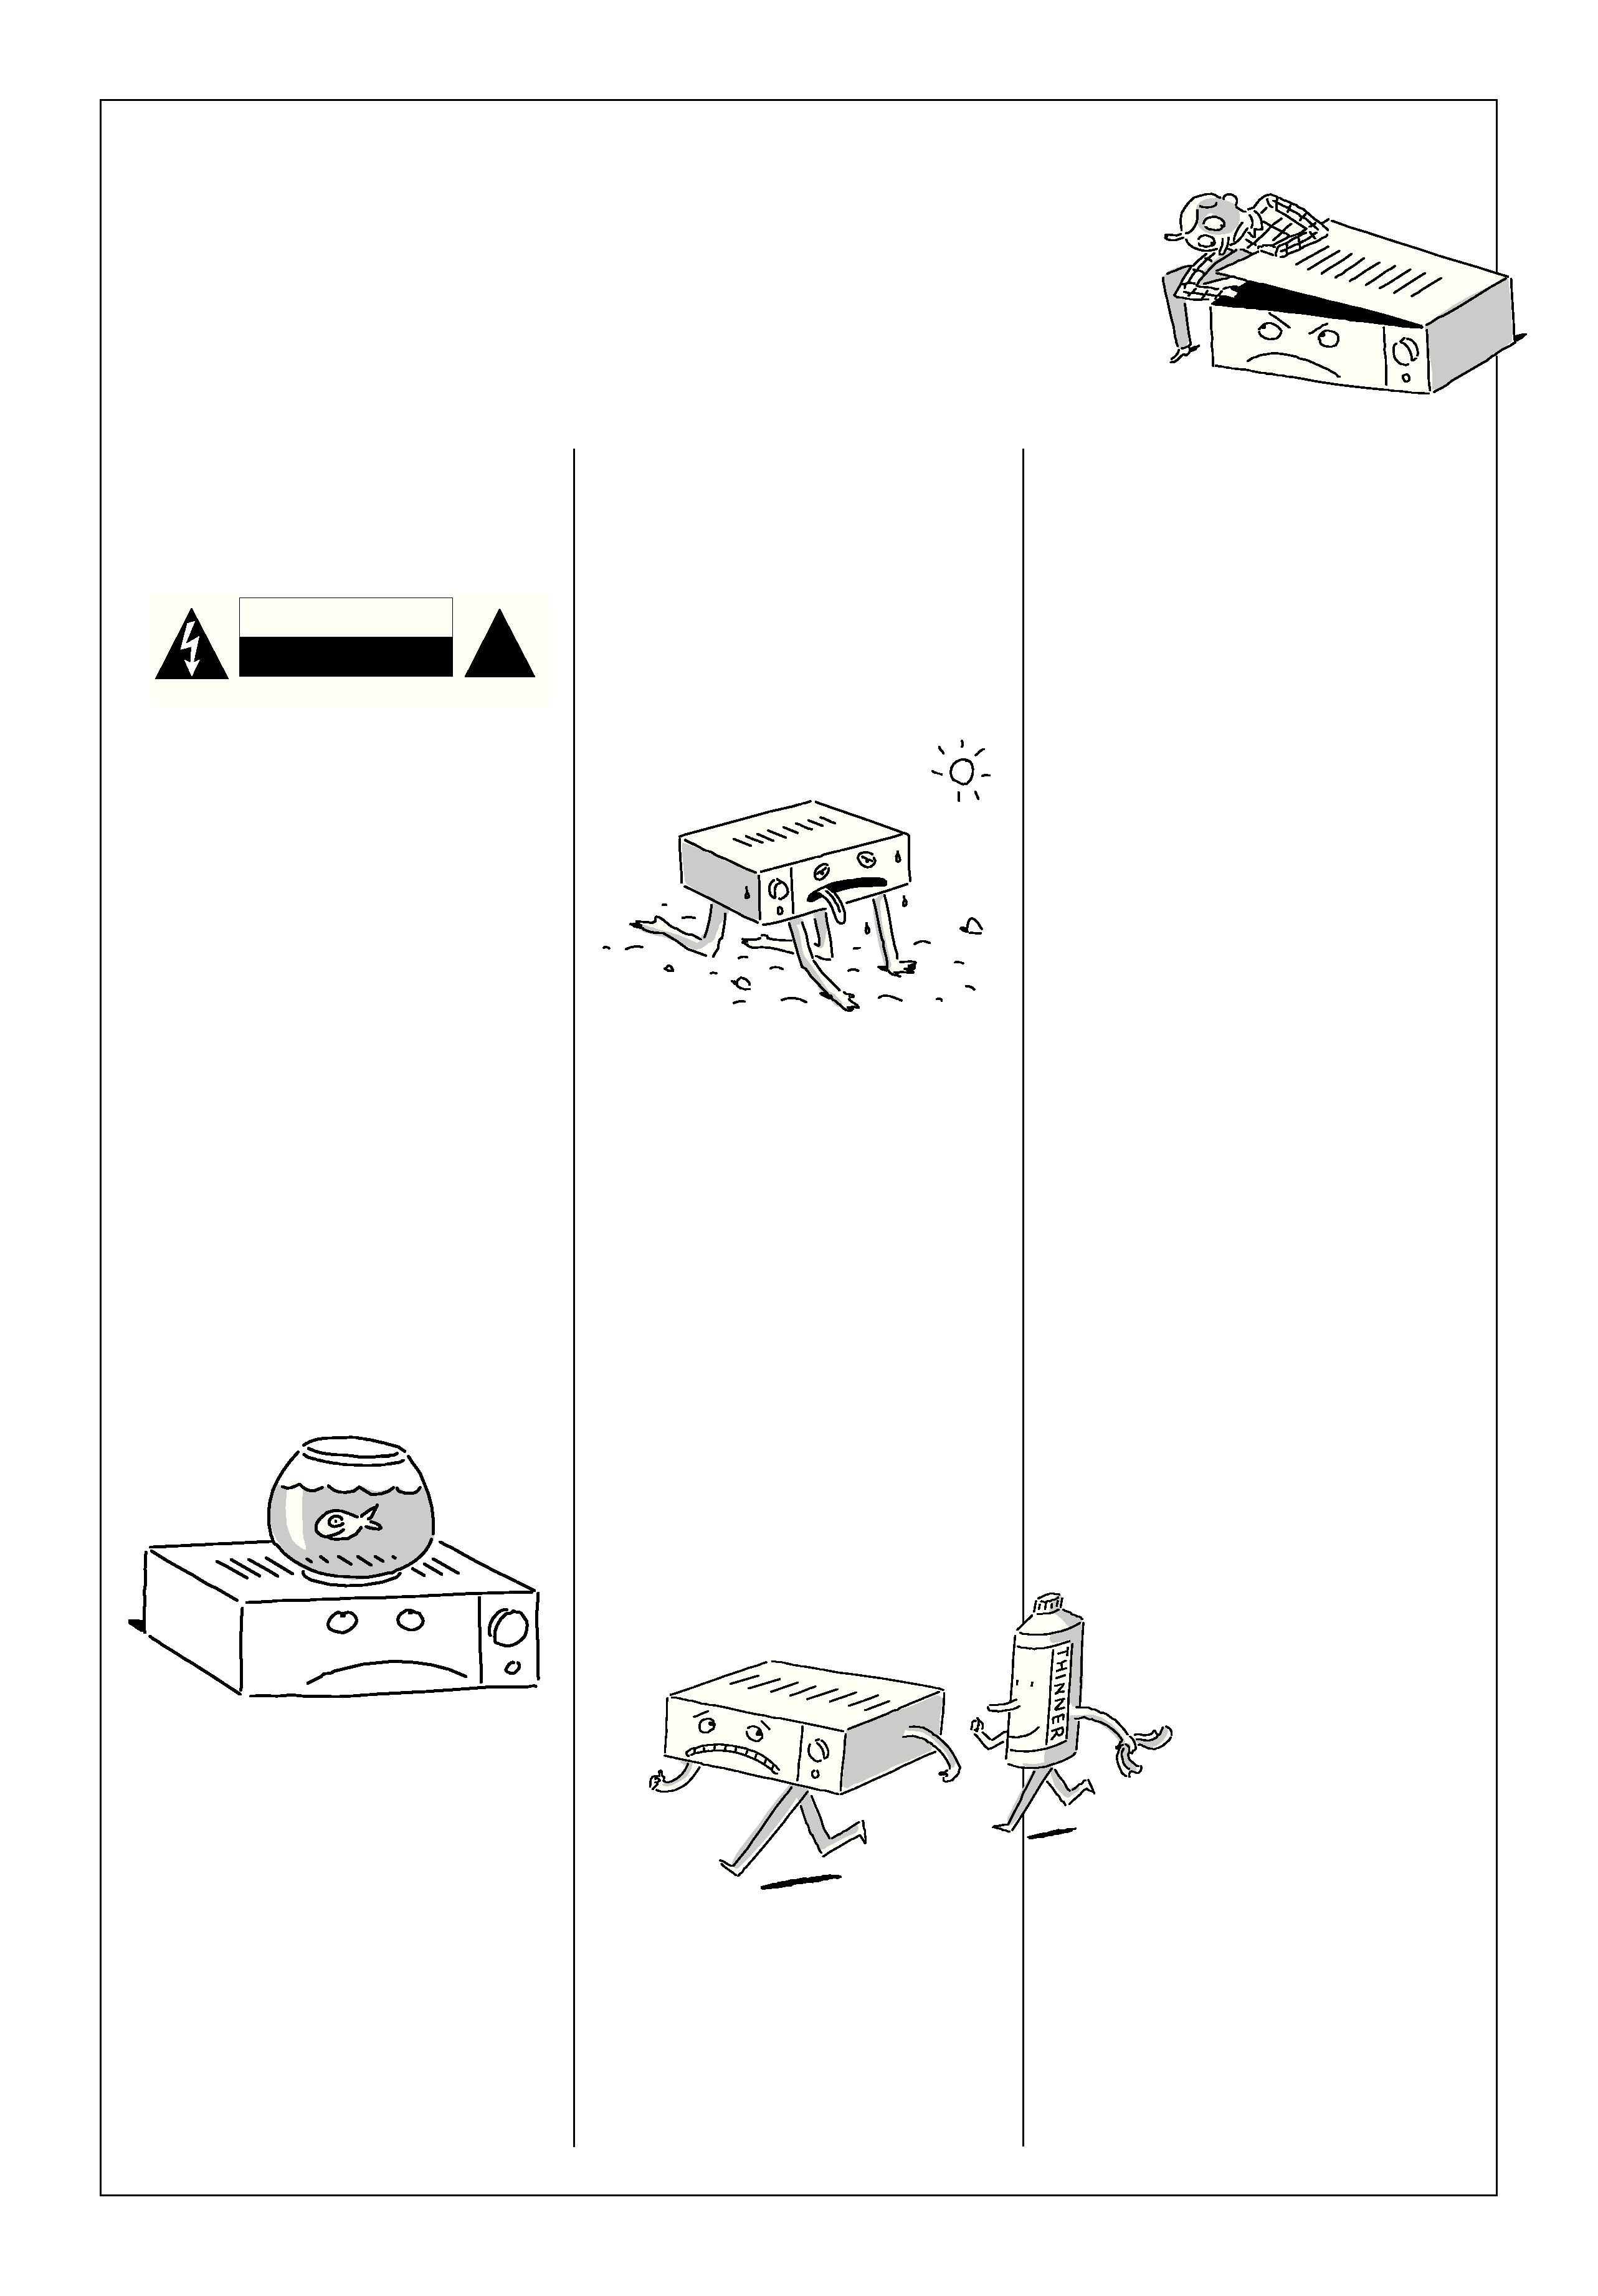
2 Protect your unit from moisture.
Don't place your unit near
water--for example, a bathtub,
kitchen sink, laundry tub, wet
basement or near a swimming
pool.
3 Keep your unit out of extreme
hot and cold. Your unit may not
work properly if it is used at
extremely low or freezing
temperatures. Don't place your
unit near radiators, heat registers,
stoves or other heat sources.
4 Don't put objects or liquids into
the unit! NEVER permit children
to put anything into the unit.
5 NEVER try to open the unit or
take it apart.
6 To clean, use a clean, dry cloth.
To avoid damage, NEVER use
volatile solvents such as alcohol,
paint thinner, gasoline, benzene,
etc. to clean the cabinet. If this is
an electrically-powered unit,
unplug it before cleaning.
7 Do NOT attempt to service this
unit. You should take the unit to
qualified service personnel for
repair when:
· Objects have fallen, or liquids
have been spilled into the unit.
· The unit has been exposed to
moisture.
· The unit doesn't appear to oper-
ate normally or exhibits a marked
change in performance.
· The unit has been dropped or
the case has been damaged.
8 To prevent distortion (and in
some cases, discoloration of TV
pictures), keep the unit away
from sources of magnetic fields,
such at TVs, radios, motorized
toys, or magnetized objects. If
the unit is magnetically-shielded
(the manual will state this), it is
not subject to these problems.
9 Do NOT place the unit on an
unstable cart, shelf, stand, tripod,
bracket, or table. if you mount
the unit, follow the instruc-
tions in the manual and, if
possible, use a mounting
bracket recom-
mended for the unit.
If you place the unit
on a moveable cart,
use caution when moving
the cart to avoid overturning it.
Safety First
2.
CAUTION
RISK OF ELECTRIC SHOCK
DO NOT OPEN
!
Placing the speakers
Finding the best locations for your
speakers before you connect them
to your amplifier will make routing
the wires easier.
Important
Please wait until you've connected
all of the cables before plugging the
amplifier into the AC wall outlet
and turning it on.
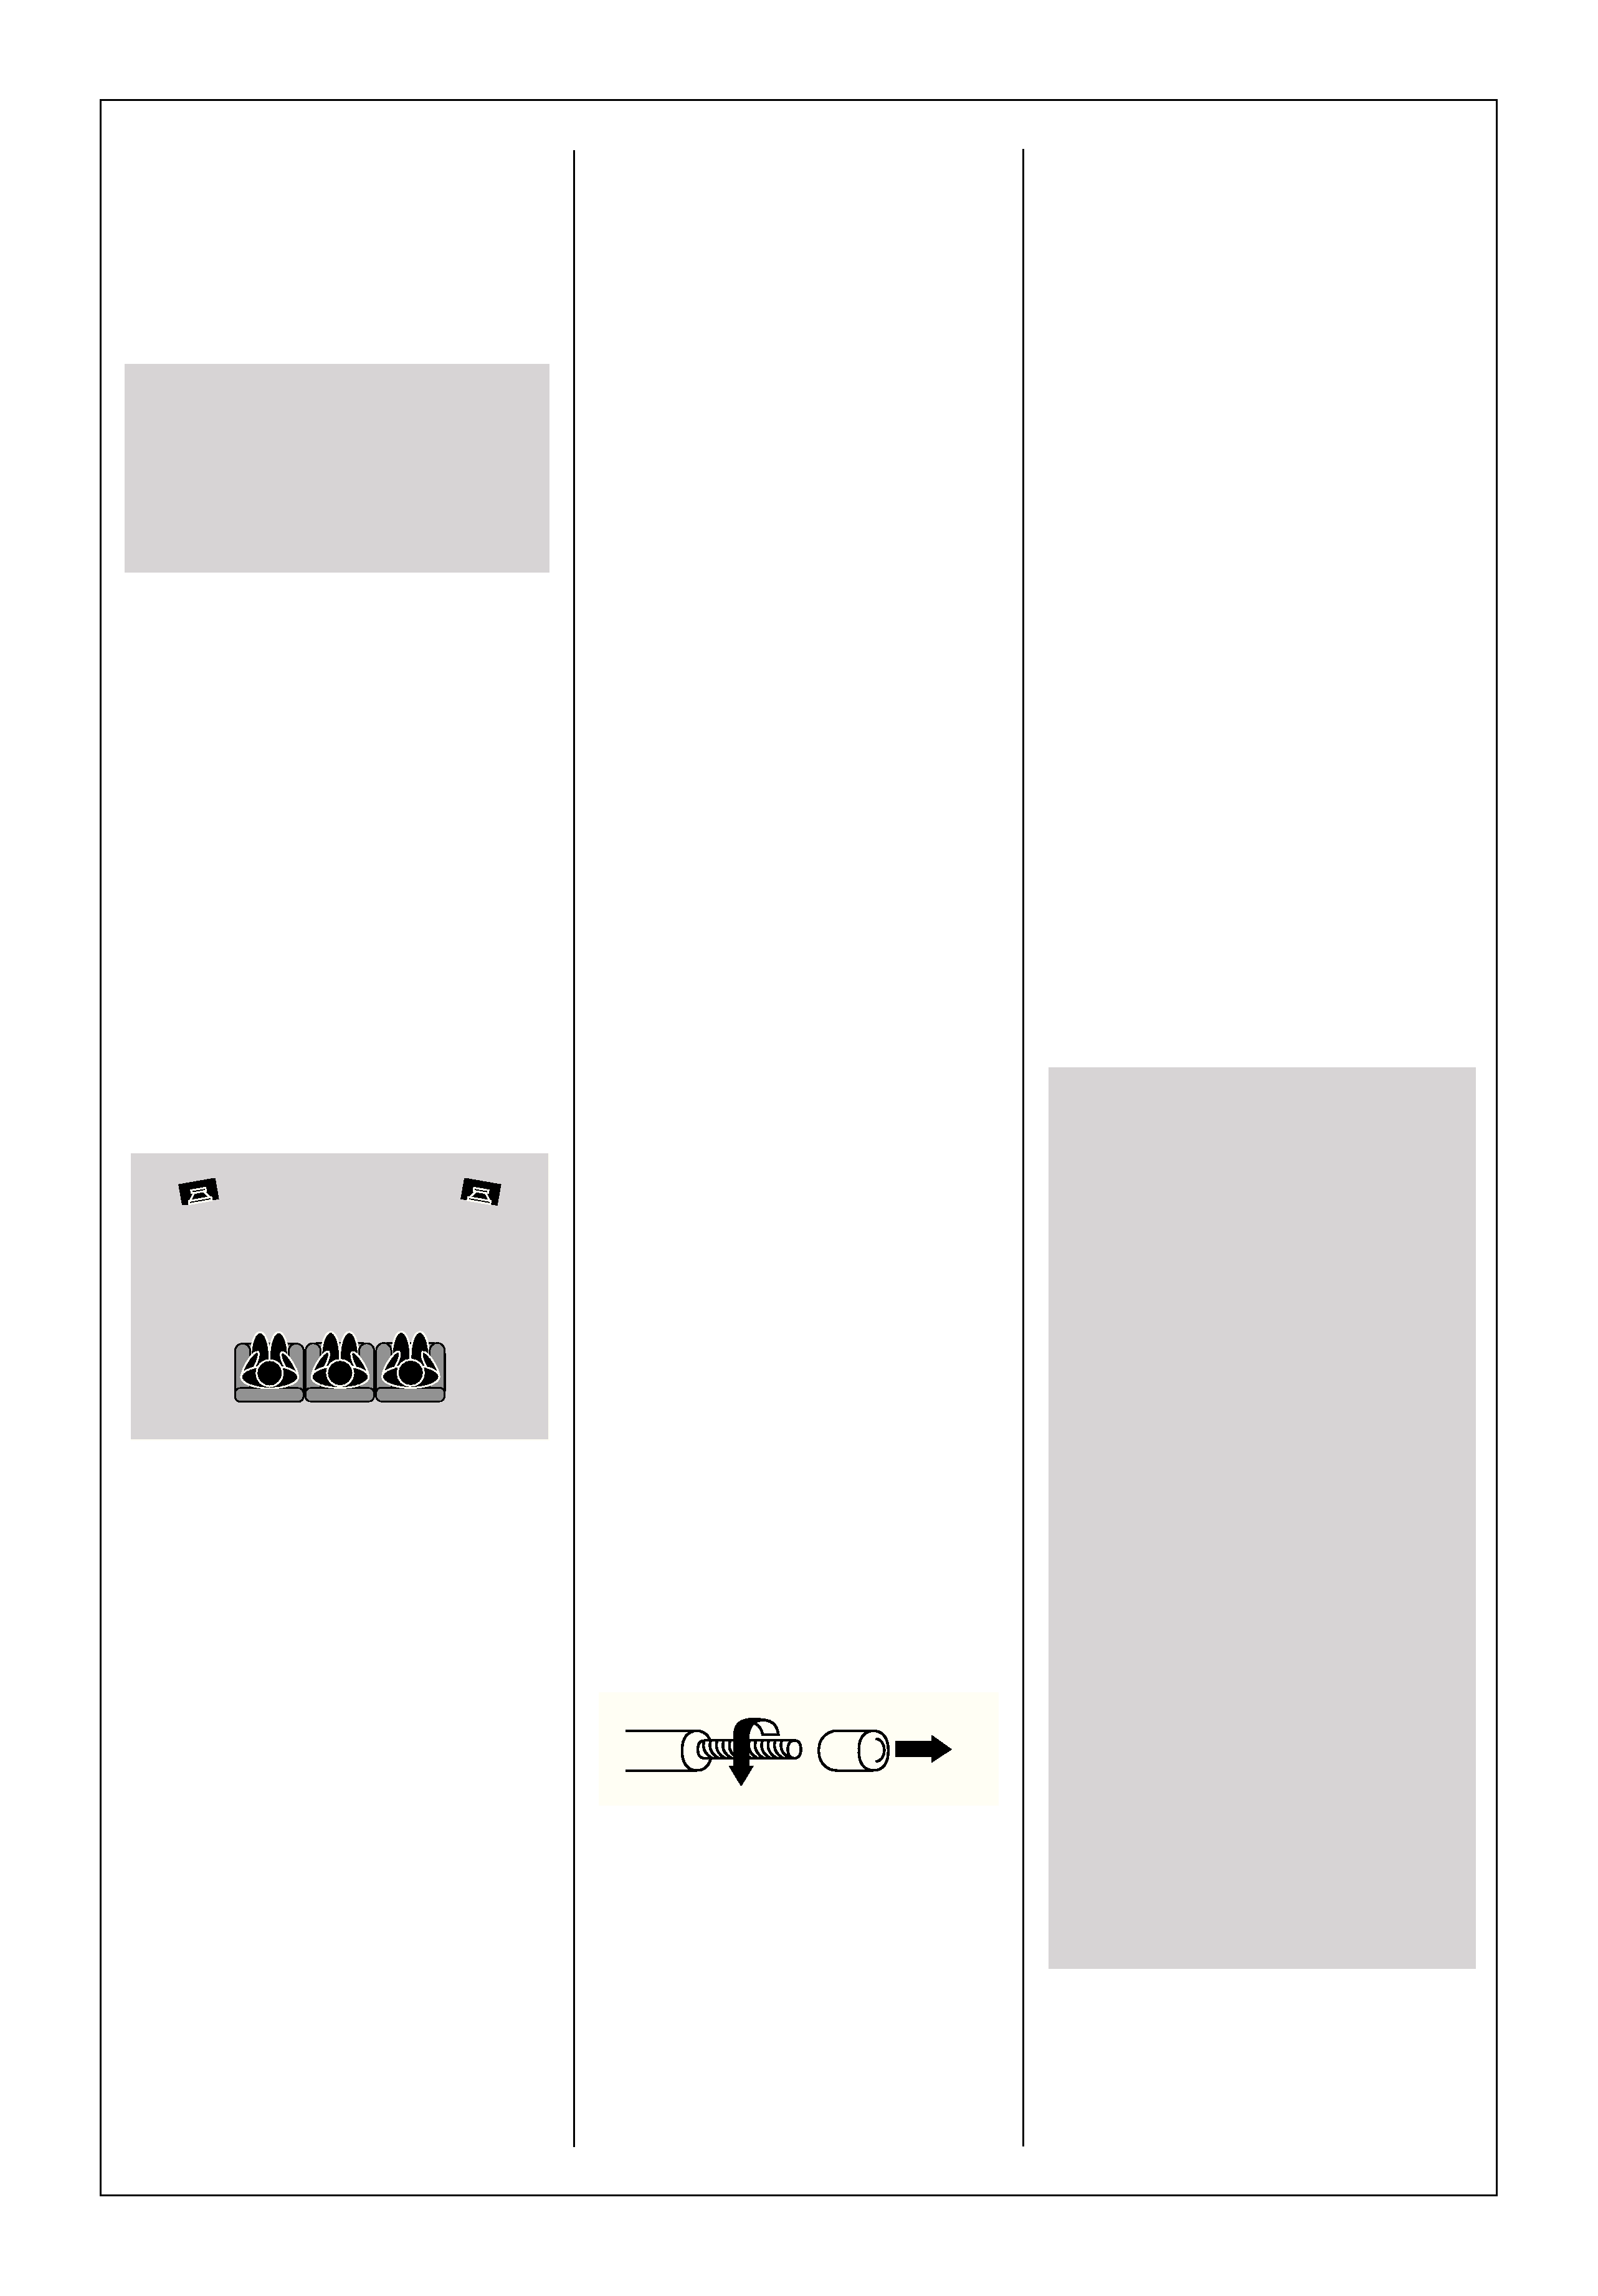
· For the best stereo effect, place
the speakers 6 ft to 12 ft apart
along the same wall, with the
main listening area midway
between the 2 speakers.
· Placing the speakers in opposite
corners of a room does not
produce a stereo effect.
· Rotate each speaker slightly
toward the center of the listening
area--this can improve the
stereo effect, especially if the
speakers are more than 8 feet
apart.
· For KVS-200 speakers, place the
speakers near seated ear level. If
you place them on shelves,
putting them near the front edge
of the shelf will help minimize
reflections that can interfere with
the sound.
· For more bass output, place the
speakers with their backs against
a wall. The increase may be very
slight or it may be more
pronounced. If the speakers
seem to make male voices sound
unnaturally heavy, or `chesty', try
moving the speakers 1 or 2 feet
away from the wall.
· Placing the speakers in corners
will provide maximum bass
output.
· Since these speakers are magnet-
ically shielded, you can place
them close to your TV without
worrying about picture discol-
oration. For best sound with
video, place the speakers
between 2 and 4 feet away from
the sides of the TV.
Preparing and
connecting the
speaker wire
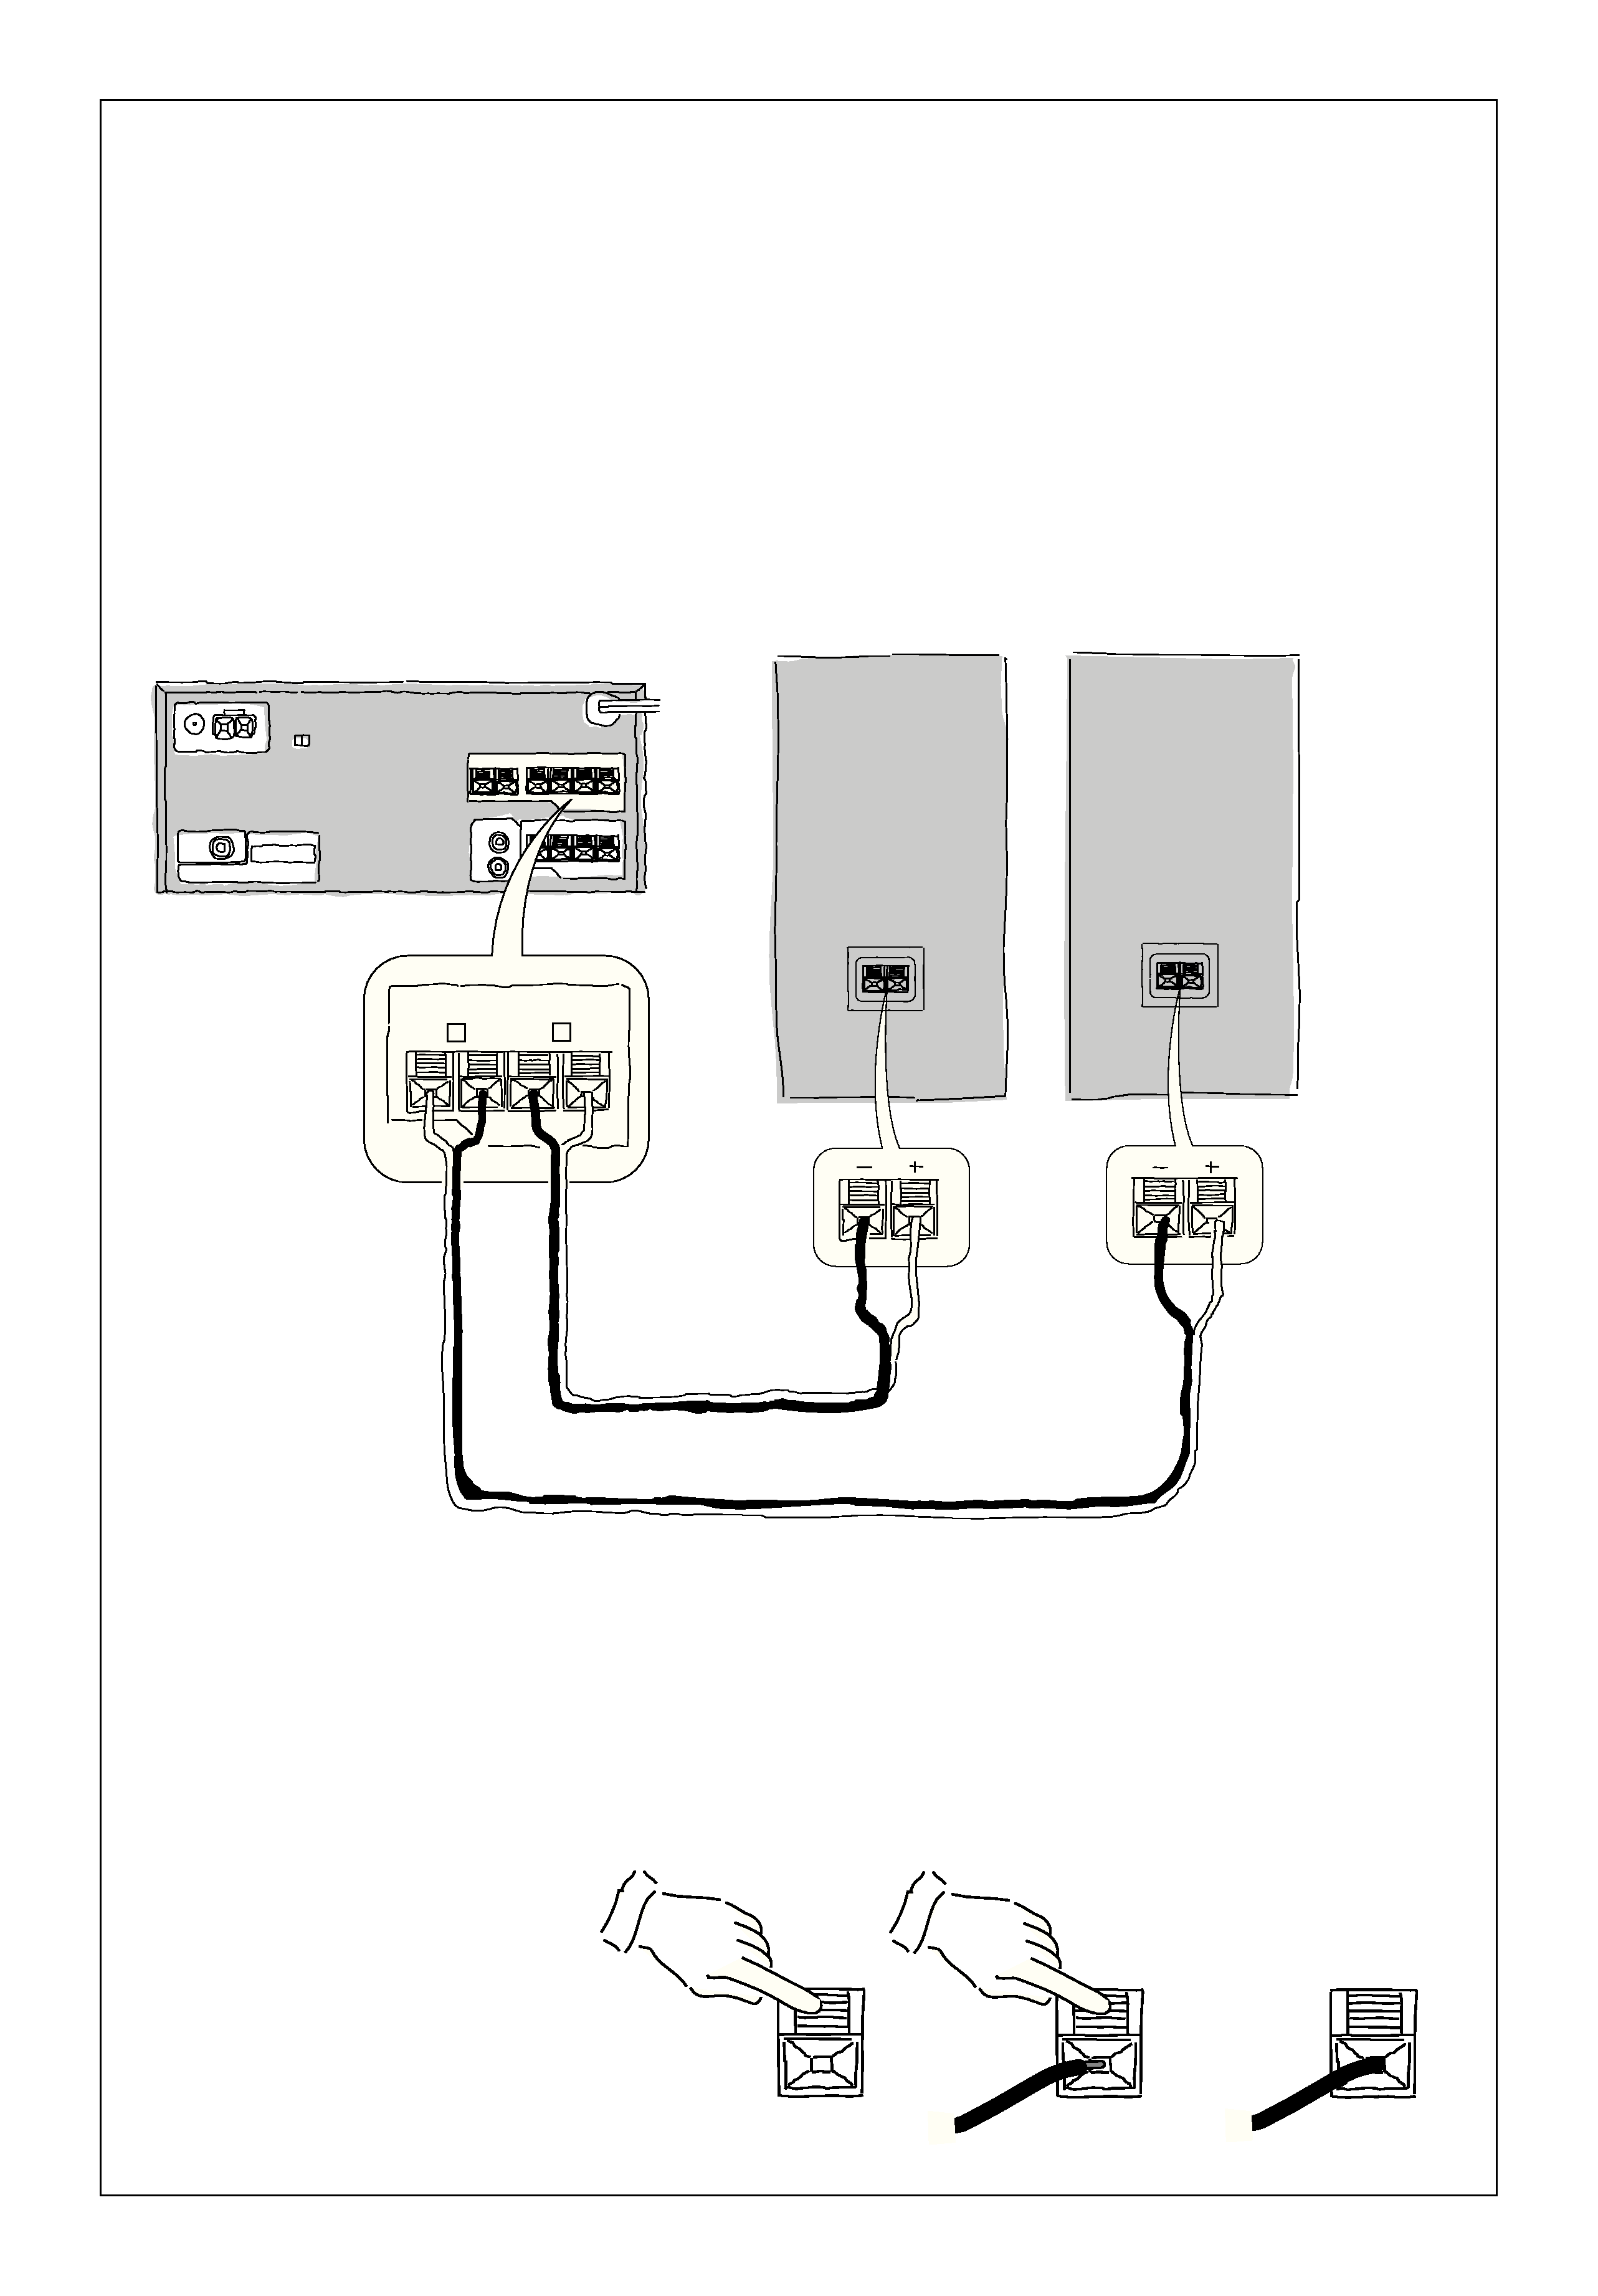
For bare wire
1 Strip 1/2" of the plastic cover
from the ends of the wire.
2 Twist the wire to get rid of the
loose strands.
3 Follow the instructions on the
next page.
For spade lugs (KVS-400 and
KVS-300)
1 Loosen the plastic caps on the
speaker connectors.
2 Insert the spade lugs around the
posts. If the lug is too narrow,
insert one prong through the
hole in the post, making sure that
the (+) and (-) prongs don't
touch each other.
3 Tighten the caps.
For banana or dual-banana
connectors (KVS-400 and
KVS-300)
1 Tighten the plastic caps on the
speaker connectors.
2 Insert the banana connectors all
the way into the holes in the
center of the caps.
Important
· Make sure your receiver or
amplifier's power cord is
unplugged from the wall outlet
before making any connec-
tions.
· Make sure you connect the
positive connections of the
speakers to the positive
connections of the receiver or
amplifier, and the negative
connections of the speakers to
the negative connections of
the receiver or amplifier. If
these connections are
mismatched, you'll get poor
bass performance and weak
sound-placement characteris-
tics.
· Check to make sure that no
strands from one terminal
touch any other terminal.
3.
Connecting your KVS-400 or
KVS-300 speakers
4.
+
L
R
+
FRONT
Receiver or amplifier
Right
speaker
Left
speaker
Connecting speaker wire:
Connecting your KVS-200
speakers
5.
+
L
R
+
FRONT
Right
Speaker
Left
Speaker
Receiver or amplifier
Connecting speaker wire: