
C B64-3808-00/00 (E)
KTC-D500E
DIGITAL TV TUNER
INSTRUCTION MANUAL
SYNTONISEUR TV NUMÉRIQUE
MODE D'EMPLOI
DIGITALER TV-TUNER
BEDIENUNGSANLEITUNG
DIGITALE TV-TUNER
GEBRUIKSAANWIJZING
SINTONIZZATORE TV DIGITALE
ISTRUZIONI PER L'USO
SINTONIZADOR DE TV DIGITAL
MANUAL DE INSTRUCCIONES
SINTONIZADOR DE TV DIGITAL
MANUAL DE INSTRUÇÕES
2
KTC-D500E
Safety precautions
3
Getting Started
5
Switching to Digital TV Screen
ÅiÇ
5
Functions During Digital TV Screen
Åi
5
Functions During Digital TV Screen
Ç
6
Touch Operation
Å
6
Contents
Displaying EPG
10
Viewing the Program Guide
10
Channel Search and Channel List
11
Searching for currently available station
(Auto Scan)
11
Manually Searching Station
(Manual Search)
11
Selecting a station from Channel List
12
Erasing Channel List
12
Setup
13
System Setup
13
Setting the Clock
14
Updating the Software
14
Restoring to Factory Default
15
Information and Conax
16
Displaying Information
16
Setting CA Control
16
Basic Operation
(When connected with DDX7029
Å)
7
Functions When Displaying the
Easy Control Panel
7
Functions While Displaying the
Control Screen
7
Basic Operation
(When connected with DDX6029
i)
8
Displaying the Easy Control Panel
8
Displaying the TV Control screen
8
Remote Control Unit
18
List of Accessories
20
Installing the Digital TV Tuner
21
Installing and Connecting the Remote
Control Receiver
22
Inserting Pay Card
23
Connection
24
Specifications
25
Basic Operation
(When connected with LZ-760R
Ç)
9
Functions While Displaying the
Control Screen
9
Notes
4

English
3
Safety precautions
2WARNING
· Mounting and wiring this product requires skills and
experience. For safety's sake, leave the mounting
and wiring work to professionals.
2CAUTION
· Make sure to ground the unit to a negative 12V DC
power supply.
· Use only the screws provided or specified for
installation. If you use wrong screws, you could
damage the unit.
· If your vehicle's ignition does not have an ACC
position, or if the ignition wire is connected to
a power source with constant voltage such as a
battery wire, the power will not be linked with the
ignition (i.e., it will not turn on and off along with
the ignition). If you want to link the unit's power
with the ignition, connect the ignition wire to a
power source that can be turned on and off with
the ignition key.
· If the fuse blows, first make sure the wires aren't
touching to cause a short circuit, then replace the
old fuse with one with the same rating.
· After the unit is installed, check whether the brake
lamps, blinkers, wipers, etc. on the car are working
properly.

4
KTC-D500E
Monitor units that can be connected to this
unit
· Å group
DNX7200
KVT-829DVD
KVT-729DVD
DDX8029
DDX7029
KOS-V500
KOS-V1000
·
i group
DDX6029
KVT-827DVD
KVT-727DVD
KVT-627DVD
DDX8027
DDX6027
KVT-M707
· Ç group
LZ-760R
·
Î group
Unit with RCA video input
How to reset your unit
· If the unit fails to operate properly, press the Reset
button.
This Product is not installed by the manufacturer
of a vehicle on the production line, nor by the
professional importer of a vehicle into an EU Member
State.
Information on Disposal of Old Electrical
and Electronic Equipment (applicable for
EU countries that have adopted separate
waste collection systems)
Products with the symbol (crossed-out
wheeled bin) cannot be disposed as
household waste.
Old electrical and electronic equipment
should be recycled at a facility capable
of handling these items and their waste
byproducts. Contact your local authority
for details in locating a recycle facility
nearest to you. Proper recycling and waste
disposal will help conserve resources whilst
preventing detrimental effects on our
health and the environment.
Notes
English
5
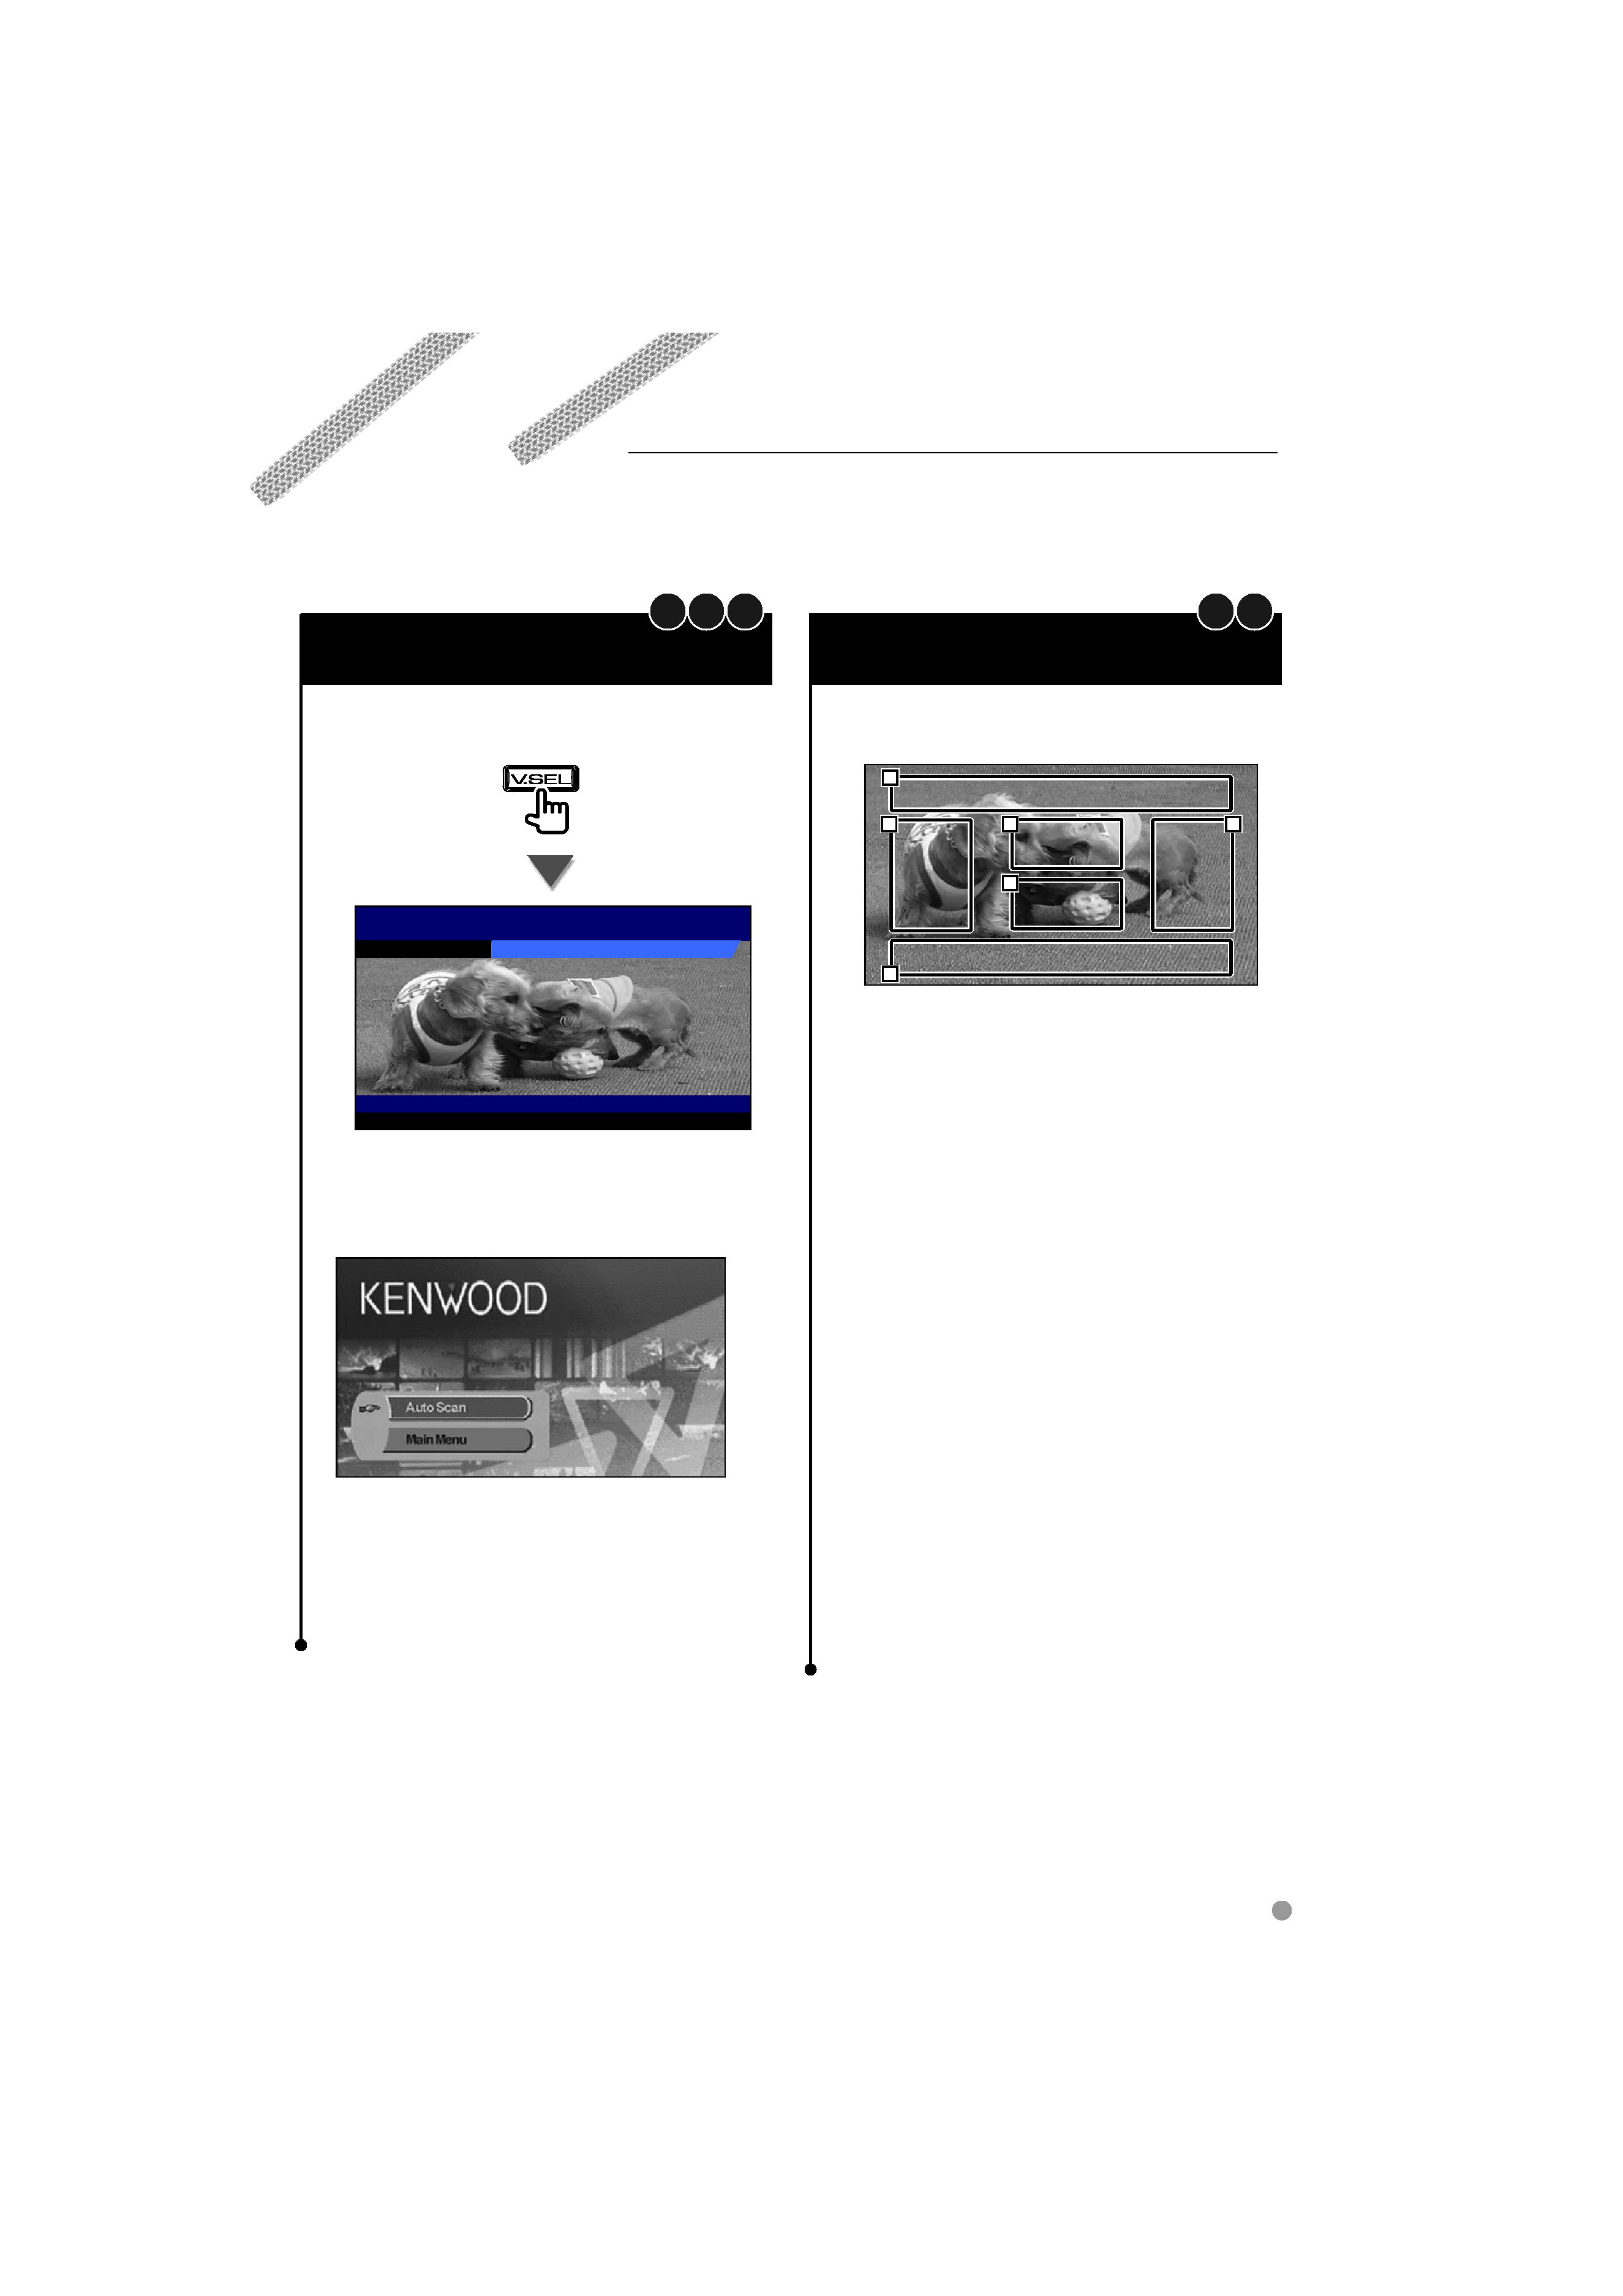
Lets view some digital broadcasts.
Switching to Digital
TV Screen
Press [V.SEL] on the monitor to switch to Digital
TV Broadcasting.
Mode : Fu l l
2ch
AV- I N
AV- OUT:
IN
AUTO1
AUTO1
AF
TV TV1
TV
TV1
2ch
Preset 3
/
· When you first switch to digital TV broadcasting, a
Welcome Menu appears and Auto Scan starts.
When Auto Scan ends normally, a Channel List
containing channels available at the current location is
created and the first channel is displayed.
· Auto Scan may have been performed already at the
dealer where the unit was installed.
· The display language can be changed (page 13).
Functions During Digital
TV Screen
Basic functions are available even when the TV
screen is displayed.
1
2
3
4
5
6
1 Picture Source Display Area
Displays the TV Status, Display Mode, and
AVOUT settings (page 13).
2 Channel Down Search Area
Searches downward and selects the
channel.
3 Channel Up Search Area
Searches upward and selects the channel.
4 Menu Control Area (Å group only)
Displays the Menu Control screen (page 11).
5 Information Display Control Area
Turns ON/OFF the display of information
in the Picture Source Display Area
1 and
Source Information Display Area
2.
6 Audio Source Information Display Area
/
· There are four ways to select the desired station.
- By searching for available station
- By selecting from EPG (Electronic Program Guide) (page
10)
- By selecting from the Channel List (page 12)
- By specifying a channel number (page 11)
· You can add the selected channel to the Channel List if it
is not already listed.
B C
A
B
A
Getting Started