
KOS-CV100
VIDEO BOX
7 page 2-5
INSTRUCTION MANUAL
BOITIER VIDEO
7 page 6-9
MODE D'EMPLOI
VIDEOBOX
7 seite 10-13
BEDIENUNGSANLEITUNG
VIDEOBOX
7 blz 14-17
GEBRUIKSAANWIJZING
BOX VIDEO
7 pagina 18-21
ISTRUZIONI PER L'USO
CAJA DE VÍDEO
7 página 22-25
MANUAL DE INSTRUCCIONES
CAIXA DE VÍDEO
7 página 26-29
MANUAL DE INSTRUÇÕES
7
7
© B64-3834-00/00 (WV)
Take the time to read through this instruction manual.
Familiarity with installation and operation procedures will help you obtain the best
performance from your new video box.
For your records
Record the serial number, found on the back of the unit, in the spaces designated on the
warranty card, and in the space provided below. Refer to the model and serial numbers
whenever you call upon your Kenwood dealer for information or service on the product.
Model KOS-CV100 Serial number
2 | English
Safety precautions
· If you experience problems during installation,
consult your Kenwood dealer.
· No image other than the navigation image is
displayed while the car is running.
· When this unit is connected, the mirror function
of the A/V controller is not available.
Information on Disposal of Old Electrical
and Electronic Equipment (applicable for
EU countries that have adopted separate
waste collection systems)
Products with the symbol (crossed-out
wheeled bin) cannot be disposed as
household waste.
Old electrical and electronic equipment
should be recycled at a facility capable
of handling these items and their
waste byproducts. Contact your local
authority for details in locating a
recycle facility nearest to you. Proper
recycling and waste disposal will help
conserve resources whilst preventing
detrimental effects on our health and the
environment.
2 WARNING
To prevent injury or fire, take the
following precautions:
· To prevent a short circuit, never put or leave any
metallic objects (such as coins or metal tools)
inside the unit.
· Mounting and wiring this product requires
skills and experience. For safety's sake, leave the
mounting and wiring work to professionals.
2 CAUTION
To prevent damage to the machine, take
the following precautions:
· Do not install the unit in a spot exposed to direct
sunlight or excessive heat or humidity. Also avoid
places with too much dust or the possibility of
water splashing.
· Do not use your own screws. Use only the screws
provided. If you use the wrong screws, you could
damage the unit.
Notes
FCC WARNING
This equipment may generate or use radio frequency energy. Changes or modifications to this equipment may cause
harmful interference unless the modifications are expressly approved in the instruction manual. The user could lose the
authority to operate this equipment if an unauthorized change or modification is made.
NOTE
This Class B digital apparatus complies with Canadian ICES-003.
English |
3
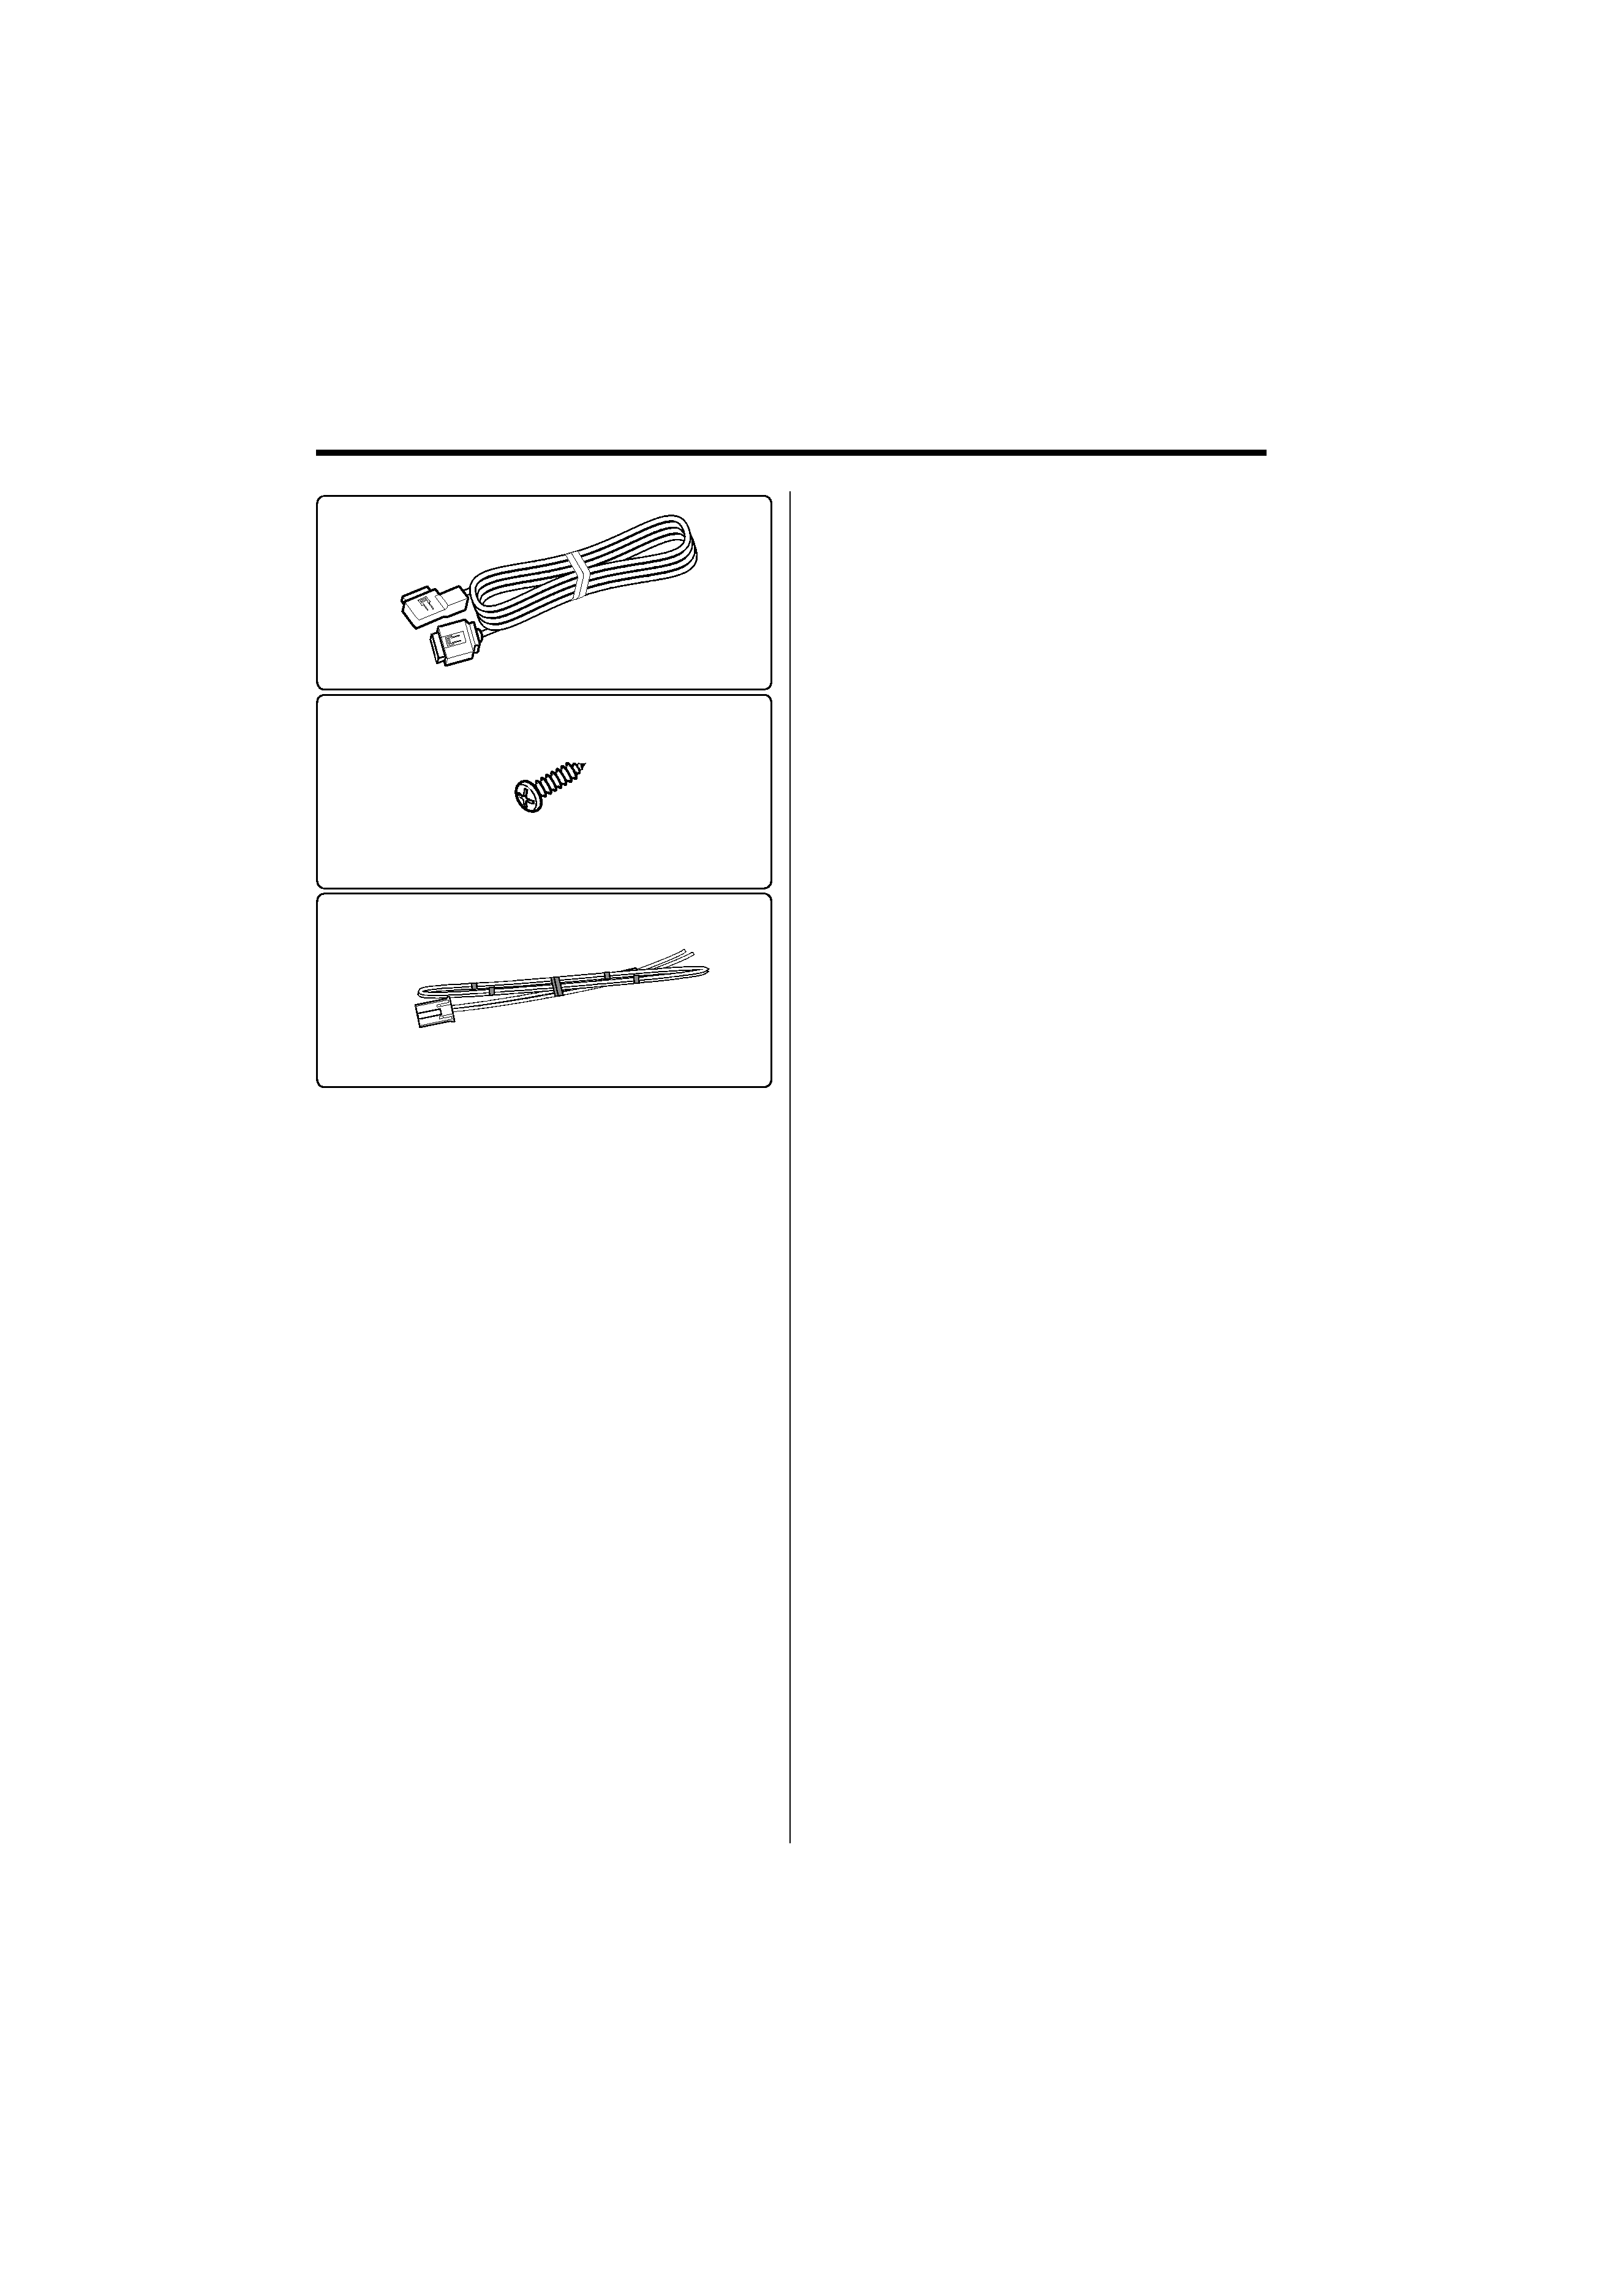
Accessories/ Installation Procedure
1
..........1
2
..........2
3
..........1
(Ø4 × 16 mm)
1. To prevent short circuits, remove the key from
the ignition and disconnect the
· terminal of
the battery.
2. Make the proper input and output cable
connections for each unit.
3. Install the unit in your car.
4. Reconnect the
· terminal of the battery.
4 | English
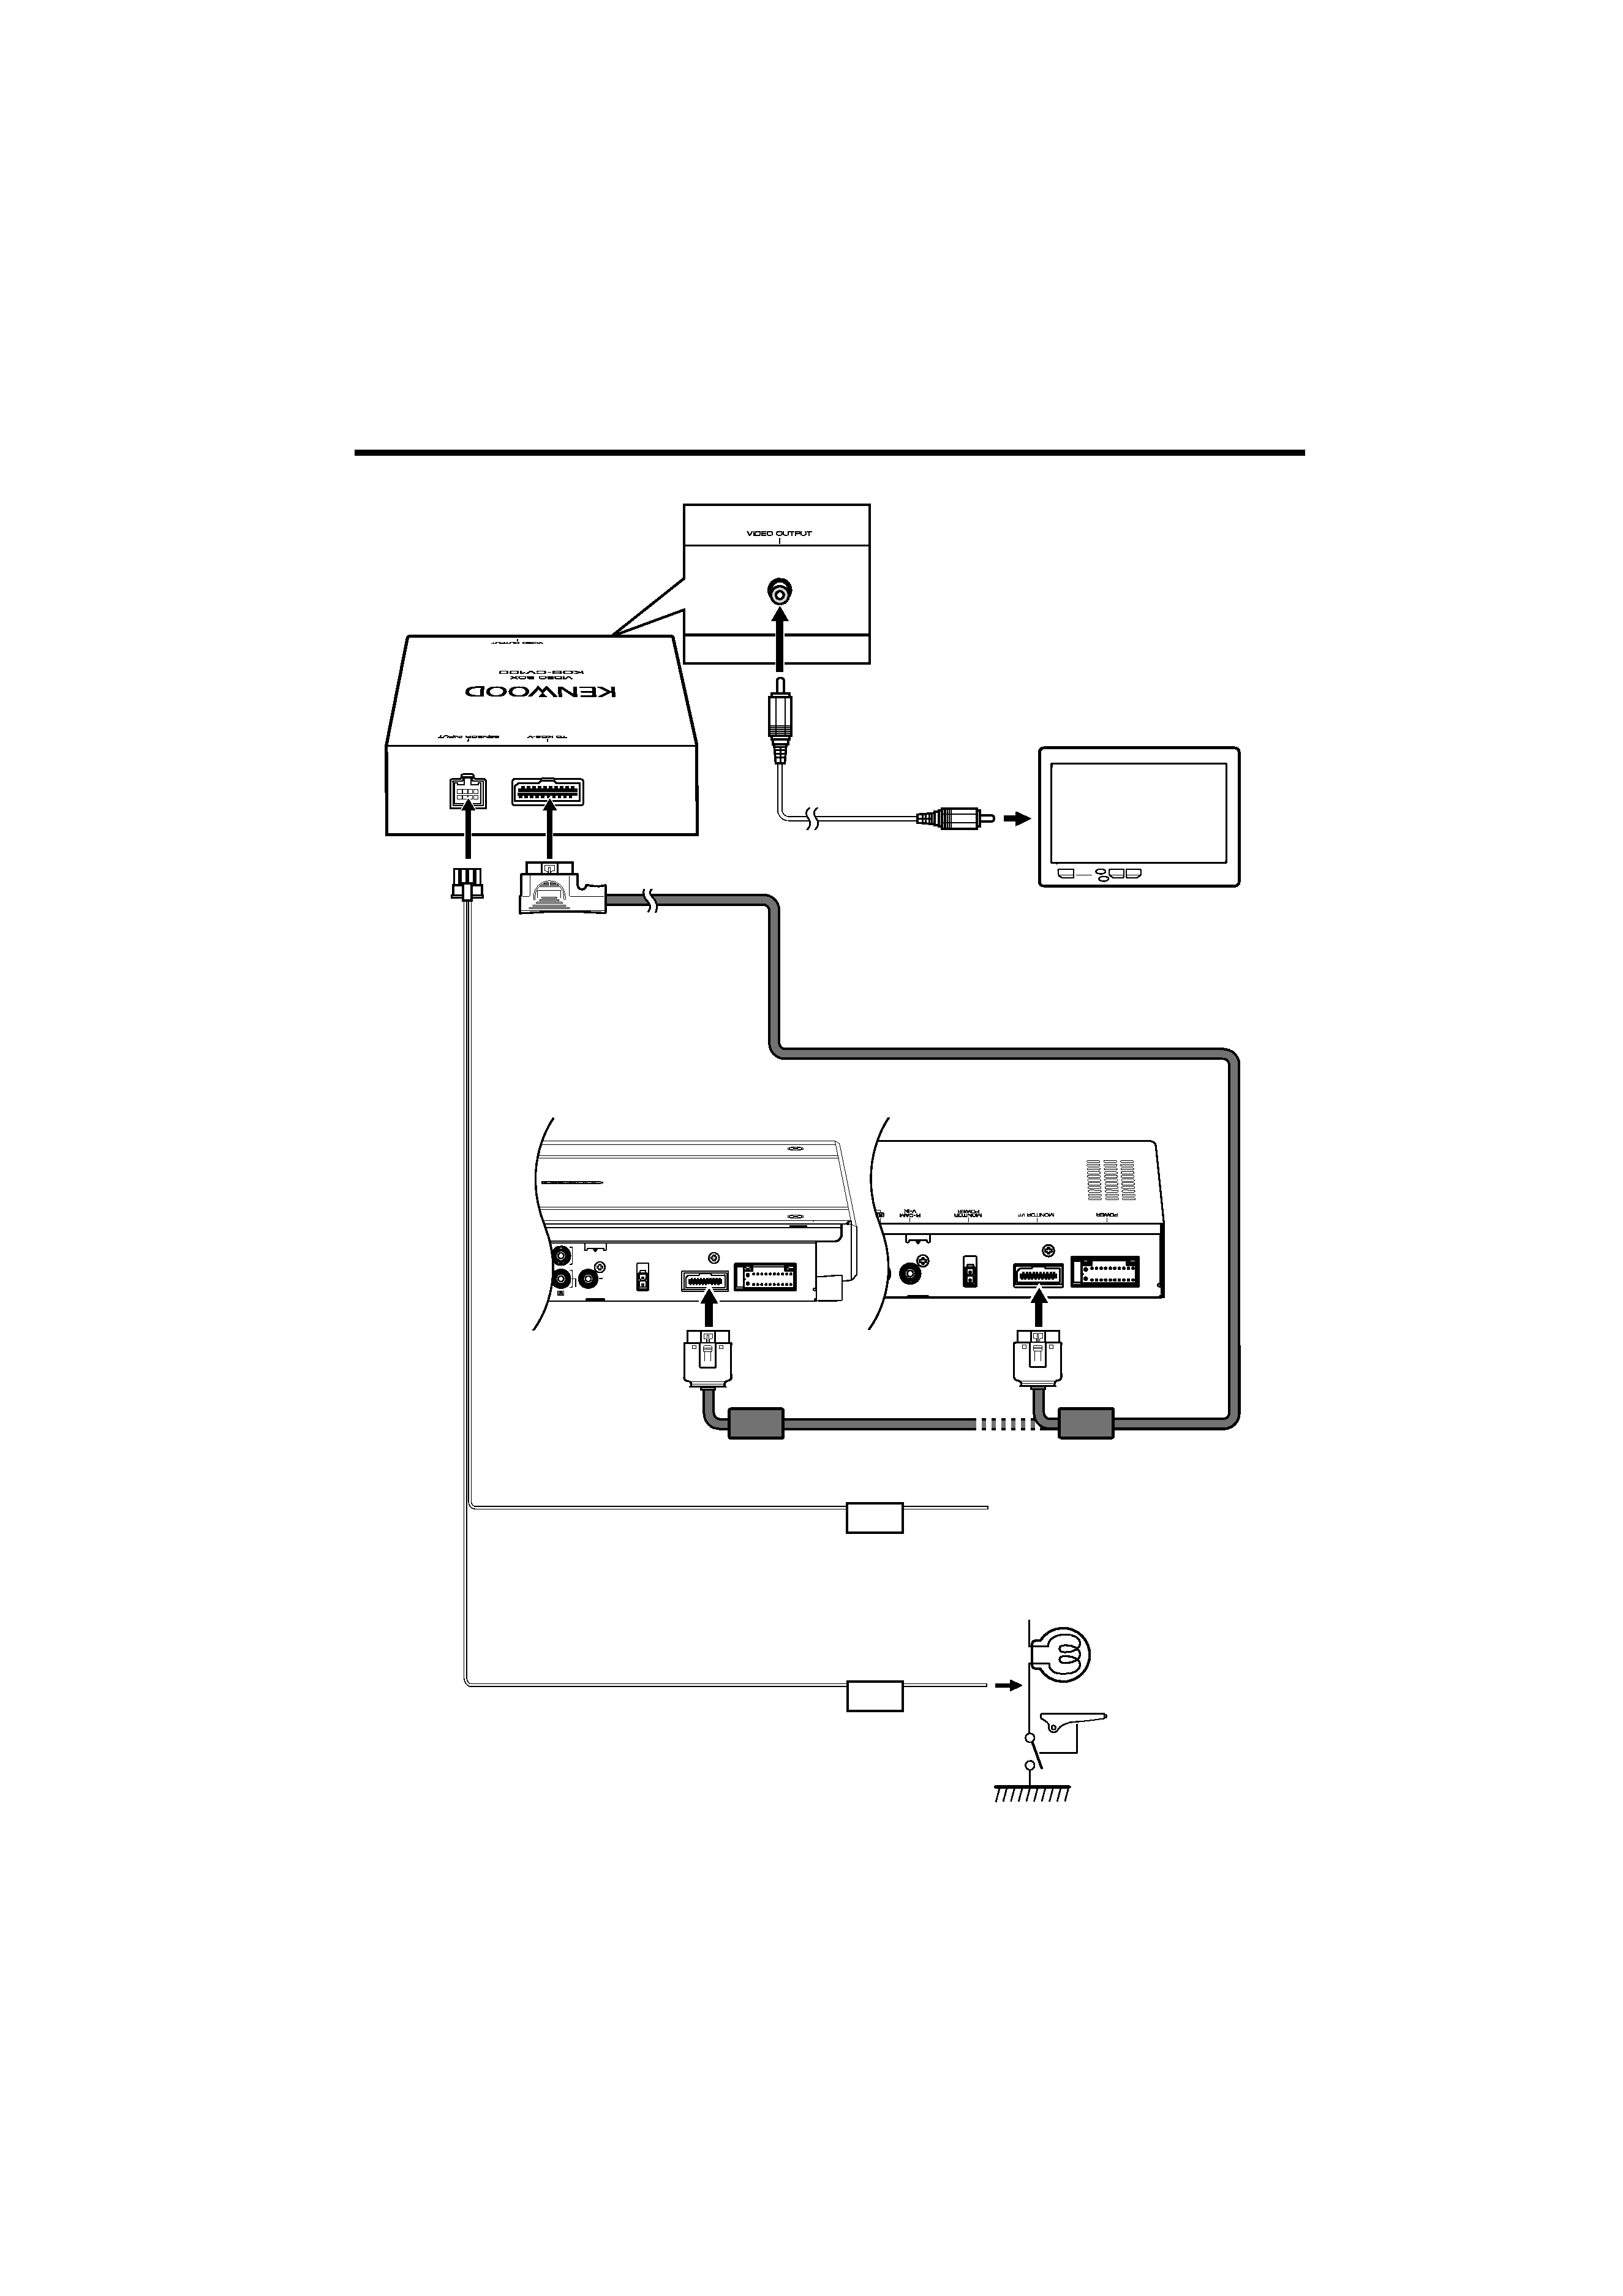
Connection
PRE
OUT
AV
IN 2
AV
IN 1
UB
REAR
FRONT
VIDEO
VIDEO
VIDEO
AV
OUT 2
AV
OUT 1
R-CAM
V-IN
MONITOR
POWER
MONITOR
I/F
POWER
PRK SW
REVERSE
L
FM/AM
ANTENNA
Accessory
1
A/V controller (Optional accessory)
(KOS-V1000/KOS-V500)
Television monitor, etc
RCA cable
(Commercially available parts)
(Commercially available parts)
Parking sensor wire (Light Green)
Connect to the vehicle's parking brake
detection switch harness using the
supplied relay connector.
Reverse sensor wire (Purple/White)
To vehicle's reverse lamp harness
/ For the sake of safety, be sure
to connect the parking sensor.
Accessory
3
/ This unit cannot be connected to
the PAL-only monitor.
Connect the monitor to the NTSC
monitor or the monitor with a
function of switching between
NTSC and PAL.
/ When using a rear view camera,
be sure to connect the reverse
sensor wire.

English |
5
Installation
Use screws (Accessory
2) to fix Video box Unit onto an audio board or another.
Accessory
2
Video Section
Video output level (RCA jack)
: 1Vp-p/75
General
Operational temperature range
: 10°C to +60°C
Storage temperature range
: 30°C to +85°C
Dimensions (W × H × D)
: 143 × 37 × 99 mm
5-5/8 × 1-7/16 × 4-7/8 inch
Weight
: 310 g (0.7 lbs)
Specifications subject to change without notice.
Specifications