US Residence Only
Register Online
Register your Kenwood product at www.Kenwoodusa.com
EXTERNAL MEDIA CONTROLLER
KOS-A300
INSTRUCTION MANUAL
© B64-4452-00/00 (KW)
Take the time to read through this instruction manual.
Familiarity with installation and operation procedures will help you obtain the best
performance from your new External Media Controller.
For your records
Record the serial number, found on the back of the unit, in the spaces designated on the
warranty card, and in the space provided below. Refer to the model and serial numbers
whenever you call upon your Kenwood dealer for information or service on the product.
Model KOS-A300 Serial number

2 | KOS-A300
Contents
Before use
3
Basic Operation
4
General functions
iPod, Zune and USB device functions
Cancel the Demonstration mode
Listen to the audio via this unit
Function Control
6
Display Settings
9
Illumination Color Selection
Display Type Selection
Text Display Selection
Auxillary Input Name Setting
iPod/ Zune/ USB device Operation
12
Music Search
Music Search for iPod
Searching for Music by Initial
Related Search
Drive Search
All Random
iPod Control by Hand Mode
Favorite Control
15
Favorite Preset Memory
Favorite Preset Recall
Favorite Preset Memory Delete
Favorite Name Setting
Input Level Adjust
16
Input Level Setting
HD Radio tuner control
17
Tuning
Auto Memory Entry
Station Preset Memory
Preset Tuning
HD Radio Tagging (iTunes Tagging)
Operation of hands-free phoning
19
Before Use
Receiving a call
During a call
Call waiting
Other functions
Making a call
Dial a number
Speed dialing (Preset dial)
Calling a number in the Phone Book
Calling a number in the call log
Make a voice dialing call
Registering to the Preset Dial Number List
Display of phone number type (category)
Bluetooth Audio Operation
22
Before Use
Basic Operation
Bluetooth Setup
23
Registering Bluetooth device
Registering Special Bluetooth device
Registering PIN Code
Downloading the Phone Book
Selecting the Bluetooth device You Wish to Connect
Deleting a Registered Bluetooth device
Displaying the Firmware Version
Adding a voice dialing command
Setting a Voice Command for Category
SMS (Short Message Service)
Downloading the SMS
Satellite Radio tuner (Optional Accessory)
control
28
Basic Operation
Category and Channel Search
Preset Memory
Preset Tuning
Channel Scan
Appendix
29
Accessories
32
Installation Procedure
33
Connecting Wires to Terminals
34
Installation
36
Installation for Hideaway Unit
Troubleshooting Guide
40
Specifications
42

English
|
3
Before use
2WARNING
To prevent injury or fire, take the following
precautions:
· To prevent a short circuit, never put or leave any
metallic objects (such as coins or metal tools) inside
the unit.
Do not use this unit before canceling
Demonstration mode!
This unit is initially set on the Demonstration mode.
When using this unit for the first time, cancel the
<Cancel the Demonstration mode> (page 5).
Cleaning the Unit
If the this unit is stained, wipe it with a dry soft cloth
such as a silicon cloth.
If the this unit is stained badly, wipe the stain off with
a cloth moistened with neutral cleaner, then wipe it
again with a clean soft dry cloth.
¤
· Applying spray cleaner directly to the unit may affect its
mechanical parts. Wiping the faceplate with a hard cloth or
using a volatile liquid such as thinner or alcohol may scratch
the surface or erase printed characters.
· If you experience problems during installation,
consult your Kenwood dealer.
· When you purchase optional accessories, check with
your Kenwood dealer to make sure that they work
with your model and in your area.
· Characters that conform to ISO 8859-1 can be
displayed.
· The illustrations of the display appearing in this
manual are examples used to explain more clearly
how the controls are used. Therefore, what appears
on the display in the illustrations may differ
from what appears on the display on the actual
equipment, and some of the illustrations on the
display may be inapplicable.
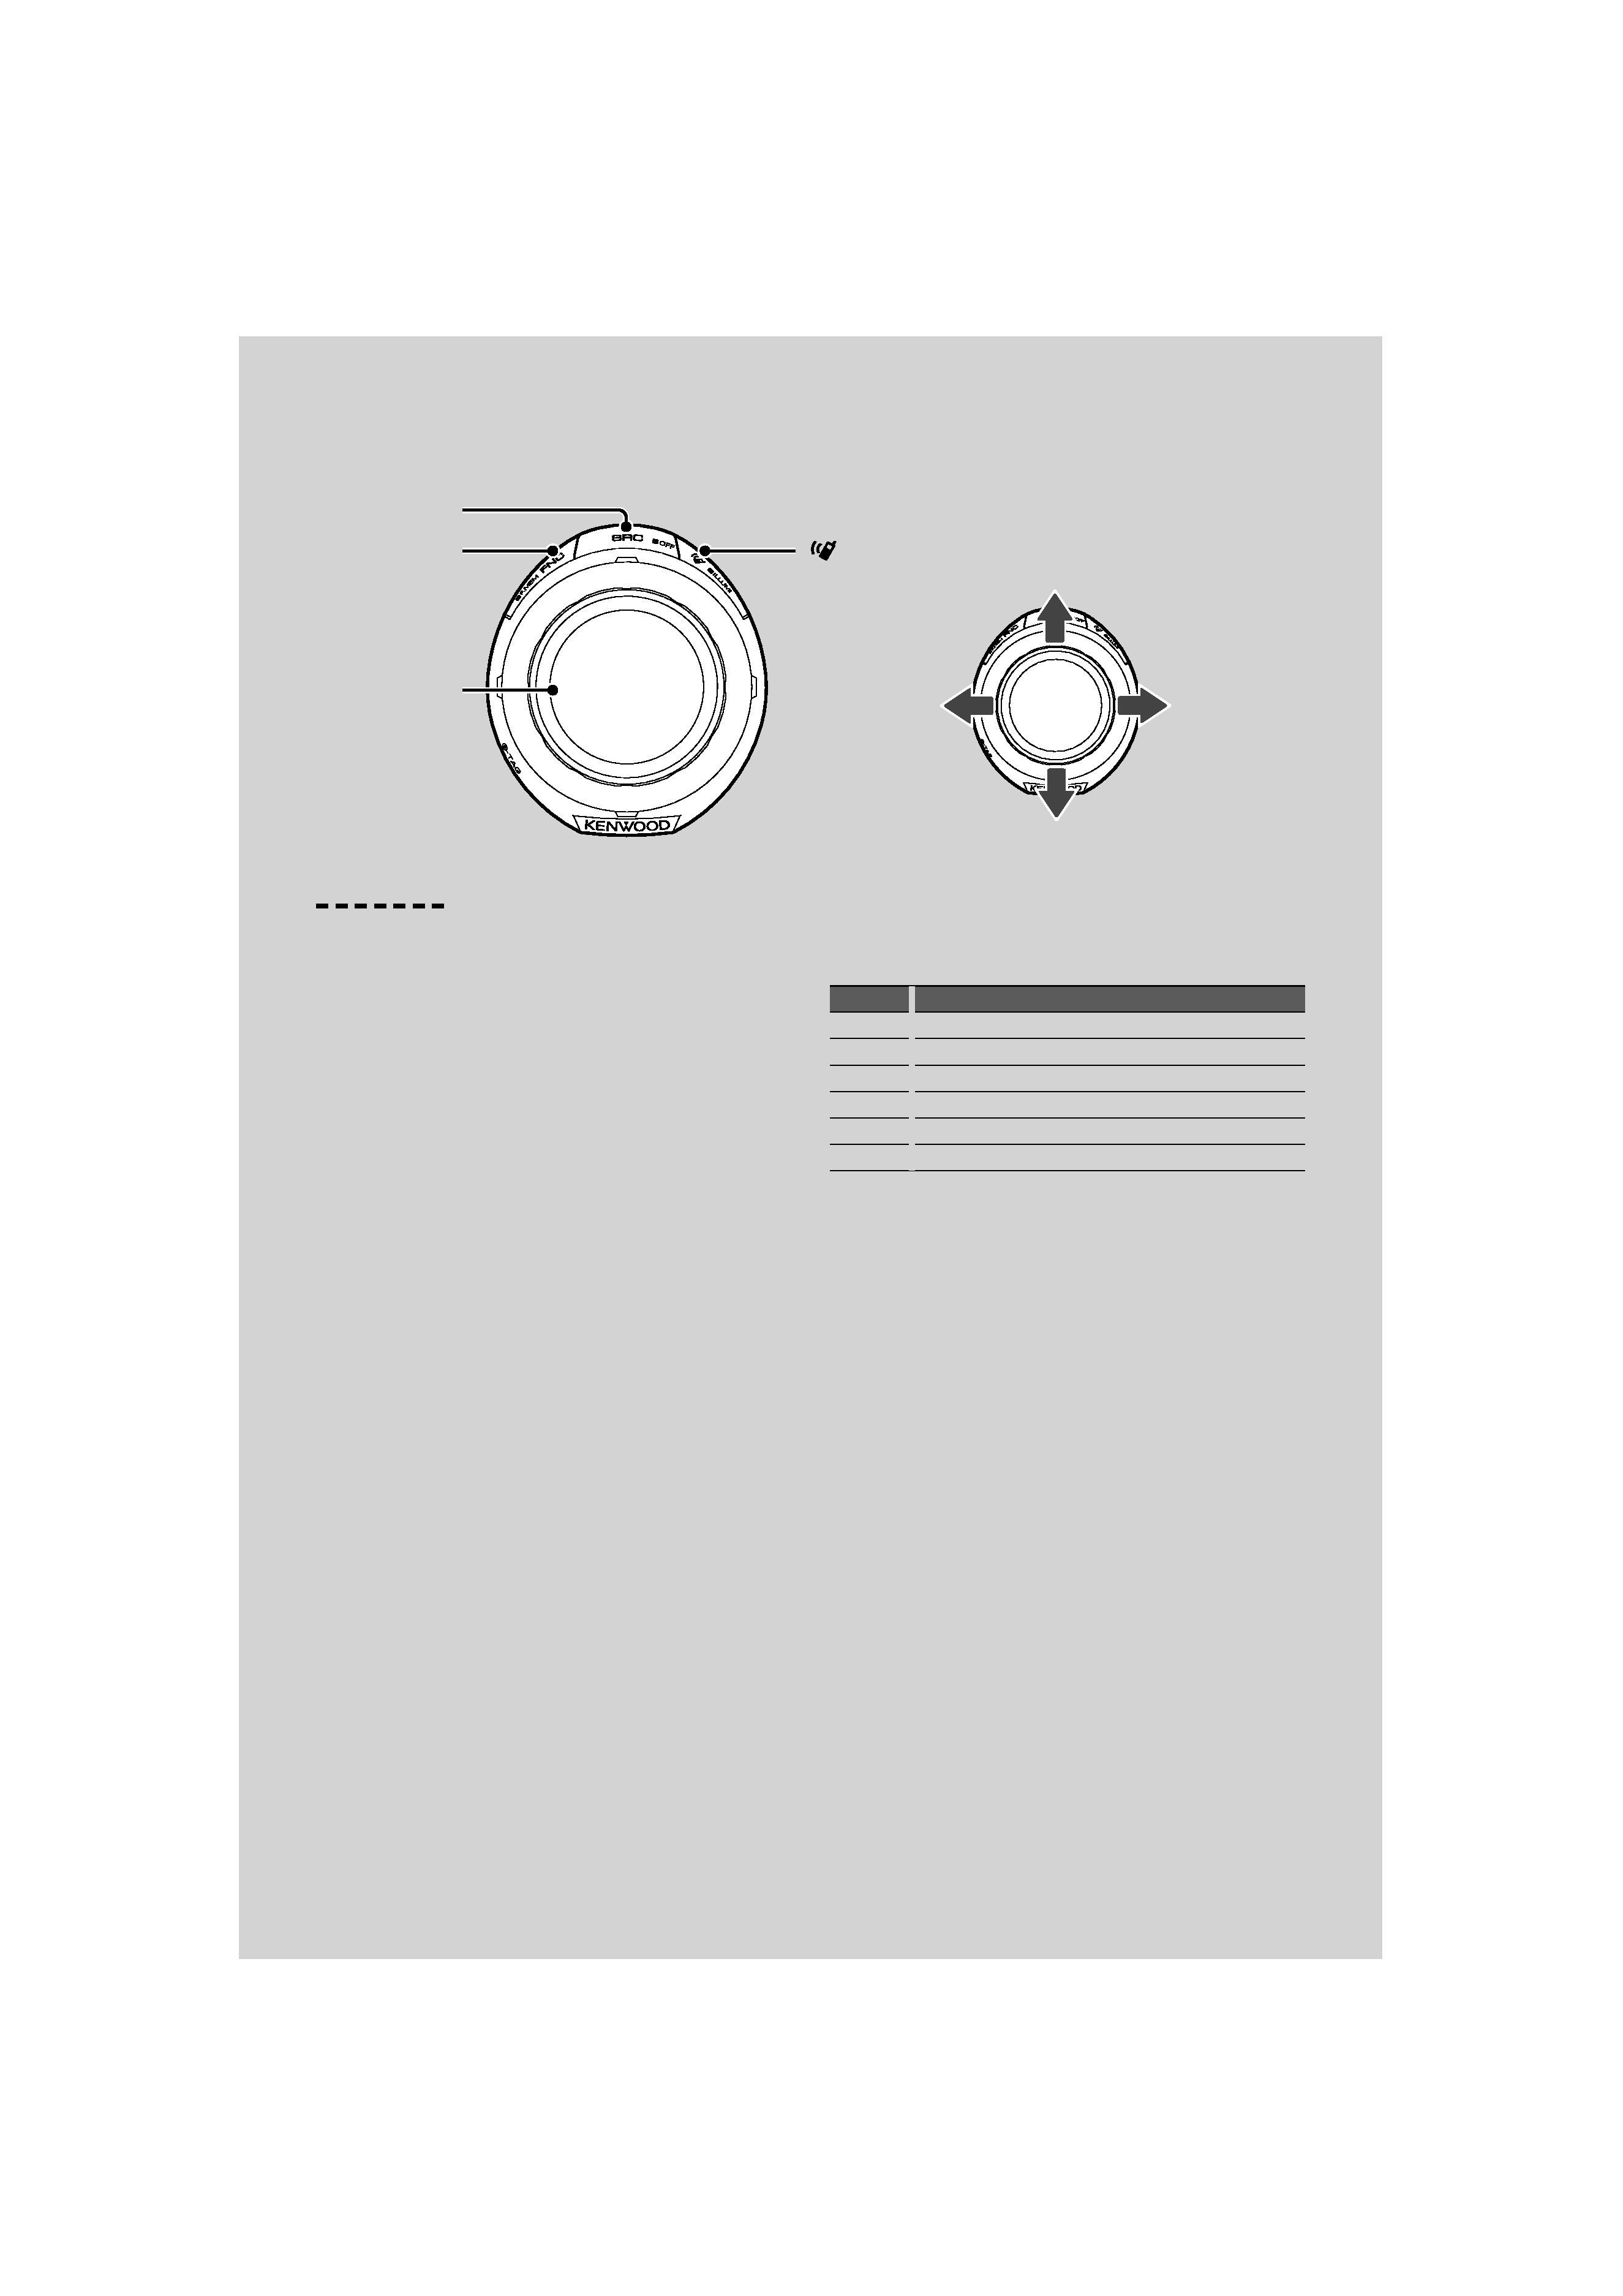
[FNC]
[
]
[SRC]
4 | KOS-A300
General functions
Power/Source Select button: [SRC]
Turns on the power.
When the power is ON, select a source.
SRC Select mode 1: Press the [SRC] button and then
turn the Control knob or push it toward up or down.
To determine the selected source, press the Control
knob.
SRC Select mode 2: Pressing this button each time
switches between sources.
Tuner ("SIRIUS", "XM" or "HD Radio") , iPod/ Zune/
USB device ("iPod", "ZUNE", or "USB"), Auxiliary input
("AUX"), and Standby ("STANDBY")
Press at least 1 second to turn off the power.
/
· The SRC Select mode can be set in "MENU"
> "SRC Select" of
<Function Control> (page 6).
· When an optional accessory is connected, the source name
for each device appears.
· When connection of the iPod or Zune is recognized, the
source display changes from "USB" to "iPod" or "ZUNE".
· For the playable audio files, and devices, refer to <About
Audio file> (page 29).
Text/Title scroll: Control knob
Scrolls the longer audio file text display when pushing
toward up for at least 2 seconds.
Function Control: [FNC]
Pressing this button allows you to set various
functions using the Control knob. Refer to <Function
Control> (page 6).
Category Function of setup item
FAV
Enters the Favorite Preset Recall mode.
MENU
Allows you to set up the environment.
RMV
Enters the USB remove mode.
SETUP
Allows you to set up the display and color.
BT
Allows you to set up the Bluetooth function.
--
Allows you to set up the each source function.
Favorite Control: [FNC]
Pressing the button for at least 1 second allows you to
register various functions. The registered function can
be executed from the list displayed by pressing this
button and then selecting "FAV". Refer to <Favorite
Control> (page 15).
When there is an incoming call, the audio system
pauses
When there is a call, "CALL" is displayed and the audio
system is paused.
When the call ends, "CALL" disappears and the audio
system comes back on.
The audio system comes back on when [SRC] is
pressed to end a call.
/
· To use the TEL Mute feature, you need to hook up the MUTE
wire to your telephone using a commercial telephone
accessory. Refer to <Connecting Wires to Terminals> (page
34).
Basic Operation
Control knob
toward left
toward right
toward down
toward up
English
|
5
Illumination Control: [
]
Hold this button and turn the Control knob to change
the display and controller illumination colors.
You can select from the 10 colors or to scan all 10
colors, each of which changes every 5 seconds.
/
· To make the display illumination color different from the
controller, set "OFF""MENU"
> "Illumi SYNC" of <Function
Control> (page 6). You can set the display illumination color
in "SETUP"
> "Color Select" (page 9) of <Function Control>
(page 6).
· Switching "Illumi SYNC" from "OFF" to "ON", does not
synchronize illumination color immediately. The next
illumination color change action activates the color
synchronize.
iPod, Zune and USB device functions
Pause and play: Control knob
Switches between pause and play each time this
button is pressed.
Music search (Function of iPod/USB device):
Control knob
Pushing left or right on the control knob forwards or
reverses the music. Holding the control knob to the
left or right fast-forwards or fast-reverses (inaudible).
Folder search (Function of iPod/USB device):
Control knob
Changes the folder containing the audio file when
pushing toward up or down.
/
· For the operation on iPod, see <Music Search for
iPod>(page 12) for quick search and control functions.
Search mode: Control knob
After turning control knob, you can quickly search
songs with the Control knob. See <Music Search>
(page 12) for details.
USB device removing
When removing the iPod/ Zune/ USB device, you
must enter the Remove mode. To enter the Remove
mode, press the [FNC] button and then select "RMV".
For details, refer to <Function Control> (page 6).
/
· The iPod/ Zune/ USB device can be removed during power
off.
C
C
C
Ca
Ca
Ca
Ca
Canc
nc lll
el ttth
h
h
he D
D
Demon tt
stra i
ti
ti
tion m d
d
d
ode
D
D
D
Do not use this unit before canceling
D
D
D
Demonstration mode.
1
1
1
1 Turn the power ON
Press the [SRC] button.
2
2
2
2 Enter Function Control mode
Press the [FNC] button.
3
3
3
3 Select the "DEMO Mode" display
Turn the Control knob.
4
4
4
4
4 Set the Demonstration mode
Press the Control knob for at least 2
seconds.
Pressing this knob for 2 seconds or longer
toggles the setting between "ON" and "OFF".
5
5
5
5 Exit Function Control mode
Press the [FNC] button twice.
L
L
L
L
Listen to the audio via this unit
Switch the source of the vehicle audio to
"AUX".