
KGC-9044
© B64-1423-00 (E) (MC)
00/2 1 99/12 11 10 9 8 7 6 5 4 3 2 1
11 BAND GRAPHIC EQUALIZER
INSTRUCTION MANUAL

Contents
-- 2 --
English
Before use
Safety precautions ..................................................................3
Buttons and Display .....................................................4
Equalizer operations
KBS (Kenwood Built-in Sound) ................................................4
Equalizer Adjustment ..............................................................5
Equalizer Curve Memory .........................................................5
Other operations
Menu System..........................................................................6
Spectrum Analyzer Display Selection .....................................7
Automatic Dimmer Function ...................................................7
Demonstration Function..........................................................7
Input Sensitivity Adjustment ...................................................7
Theft Deterrent Faceplate .......................................................8
Installation
Accessories .............................................................................9
Installation Procedure..............................................................9
Connections ..........................................................................10
Installation .......................................................................... 10
Troubleshooting guide ................................................13
Specifications ................................................................14
-- 3 --
Safety precautions
To prevent injury and/or fire, take the
following precautions:
· Insert the unit all the way until it is fully
locked in place. Otherwise it may fly out of
place during collisions and other jolts.
· When extending the battery or ground.
cables, make sure to use automotive-grade
cables or other cables with an area of
0.75mm2 (AWG18) or more to prevent wire
deterioration and damage to the cable
coating.
· To prevent short circuits, never put or leave
any metallic objects (e.g., coins or metal
tools) inside the unit.
· Make sure not to get your fingers caught
between the faceplate and the unit.
· If the unit starts to emit smoke or strange
smells, turn off the power immediately and
consult your Kenwood dealer.
· Be careful not to drop the unit or subject it to
strong shock.
The unit may break or crack because it
contains glass parts.
2WARNING
To prevent damage to the machine,
take the following precautions:
· Make sure to ground the unit to a negative
12V DC power supply.
· Do not open the top or bottom covers of the
unit.
· Do not install the unit in a spot exposed to
direct sunlight or excessive heat or humidity.
Also avoid places with too much dust or the
possibility of water splashing.
· Do not set the removed faceplate or the
faceplate case in areas exposed to direct
sunlight, excessive heat or humidity. Also
avoid places with too much dust or the
possibility of water splashing.
· Do not subject the faceplate to excessive
shock, as it is a piece of precision equipment.
· To prevent deterioration, do not touch the
terminals of the unit or faceplate with your
fingers.
· When replacing a fuse, only use a new one
with the prescribed rating. Using a fuse with
the wrong rating may cause your unit to
malfunction.
· To prevent short circuits when replacing a
fuse, first disconnect the wiring harness.
· Do not place any object between the
faceplate and the unit.
· During installation, do not use any screws
except for the ones provided. The use of
improper screws might result in damage to
the main unit.
2CAUTION
· If you experience problems during
installation, consult your Kenwood dealer.
· If the unit does not seem to be working right,
try pressing the reset button first. If that does
not solve the problem, consult your Kenwood
dealer.
Cleaning the Faceplate Terminals
If the terminals on the unit or faceplate get
dirty, wipe them with a dry, soft cloth.
Cleaning the Unit
If the front panel gets dirty, turn off the
power and wipe the panel with a dry silicon
cloth or soft cloth.
Do not wipe the panel with a stiff cloth or a
cloth dampened by volatile solvents such as
paint thinner and alcohol. They can scratch
the surface of the panel and/or cause the
indicator letters to peel off.
2CAUTION
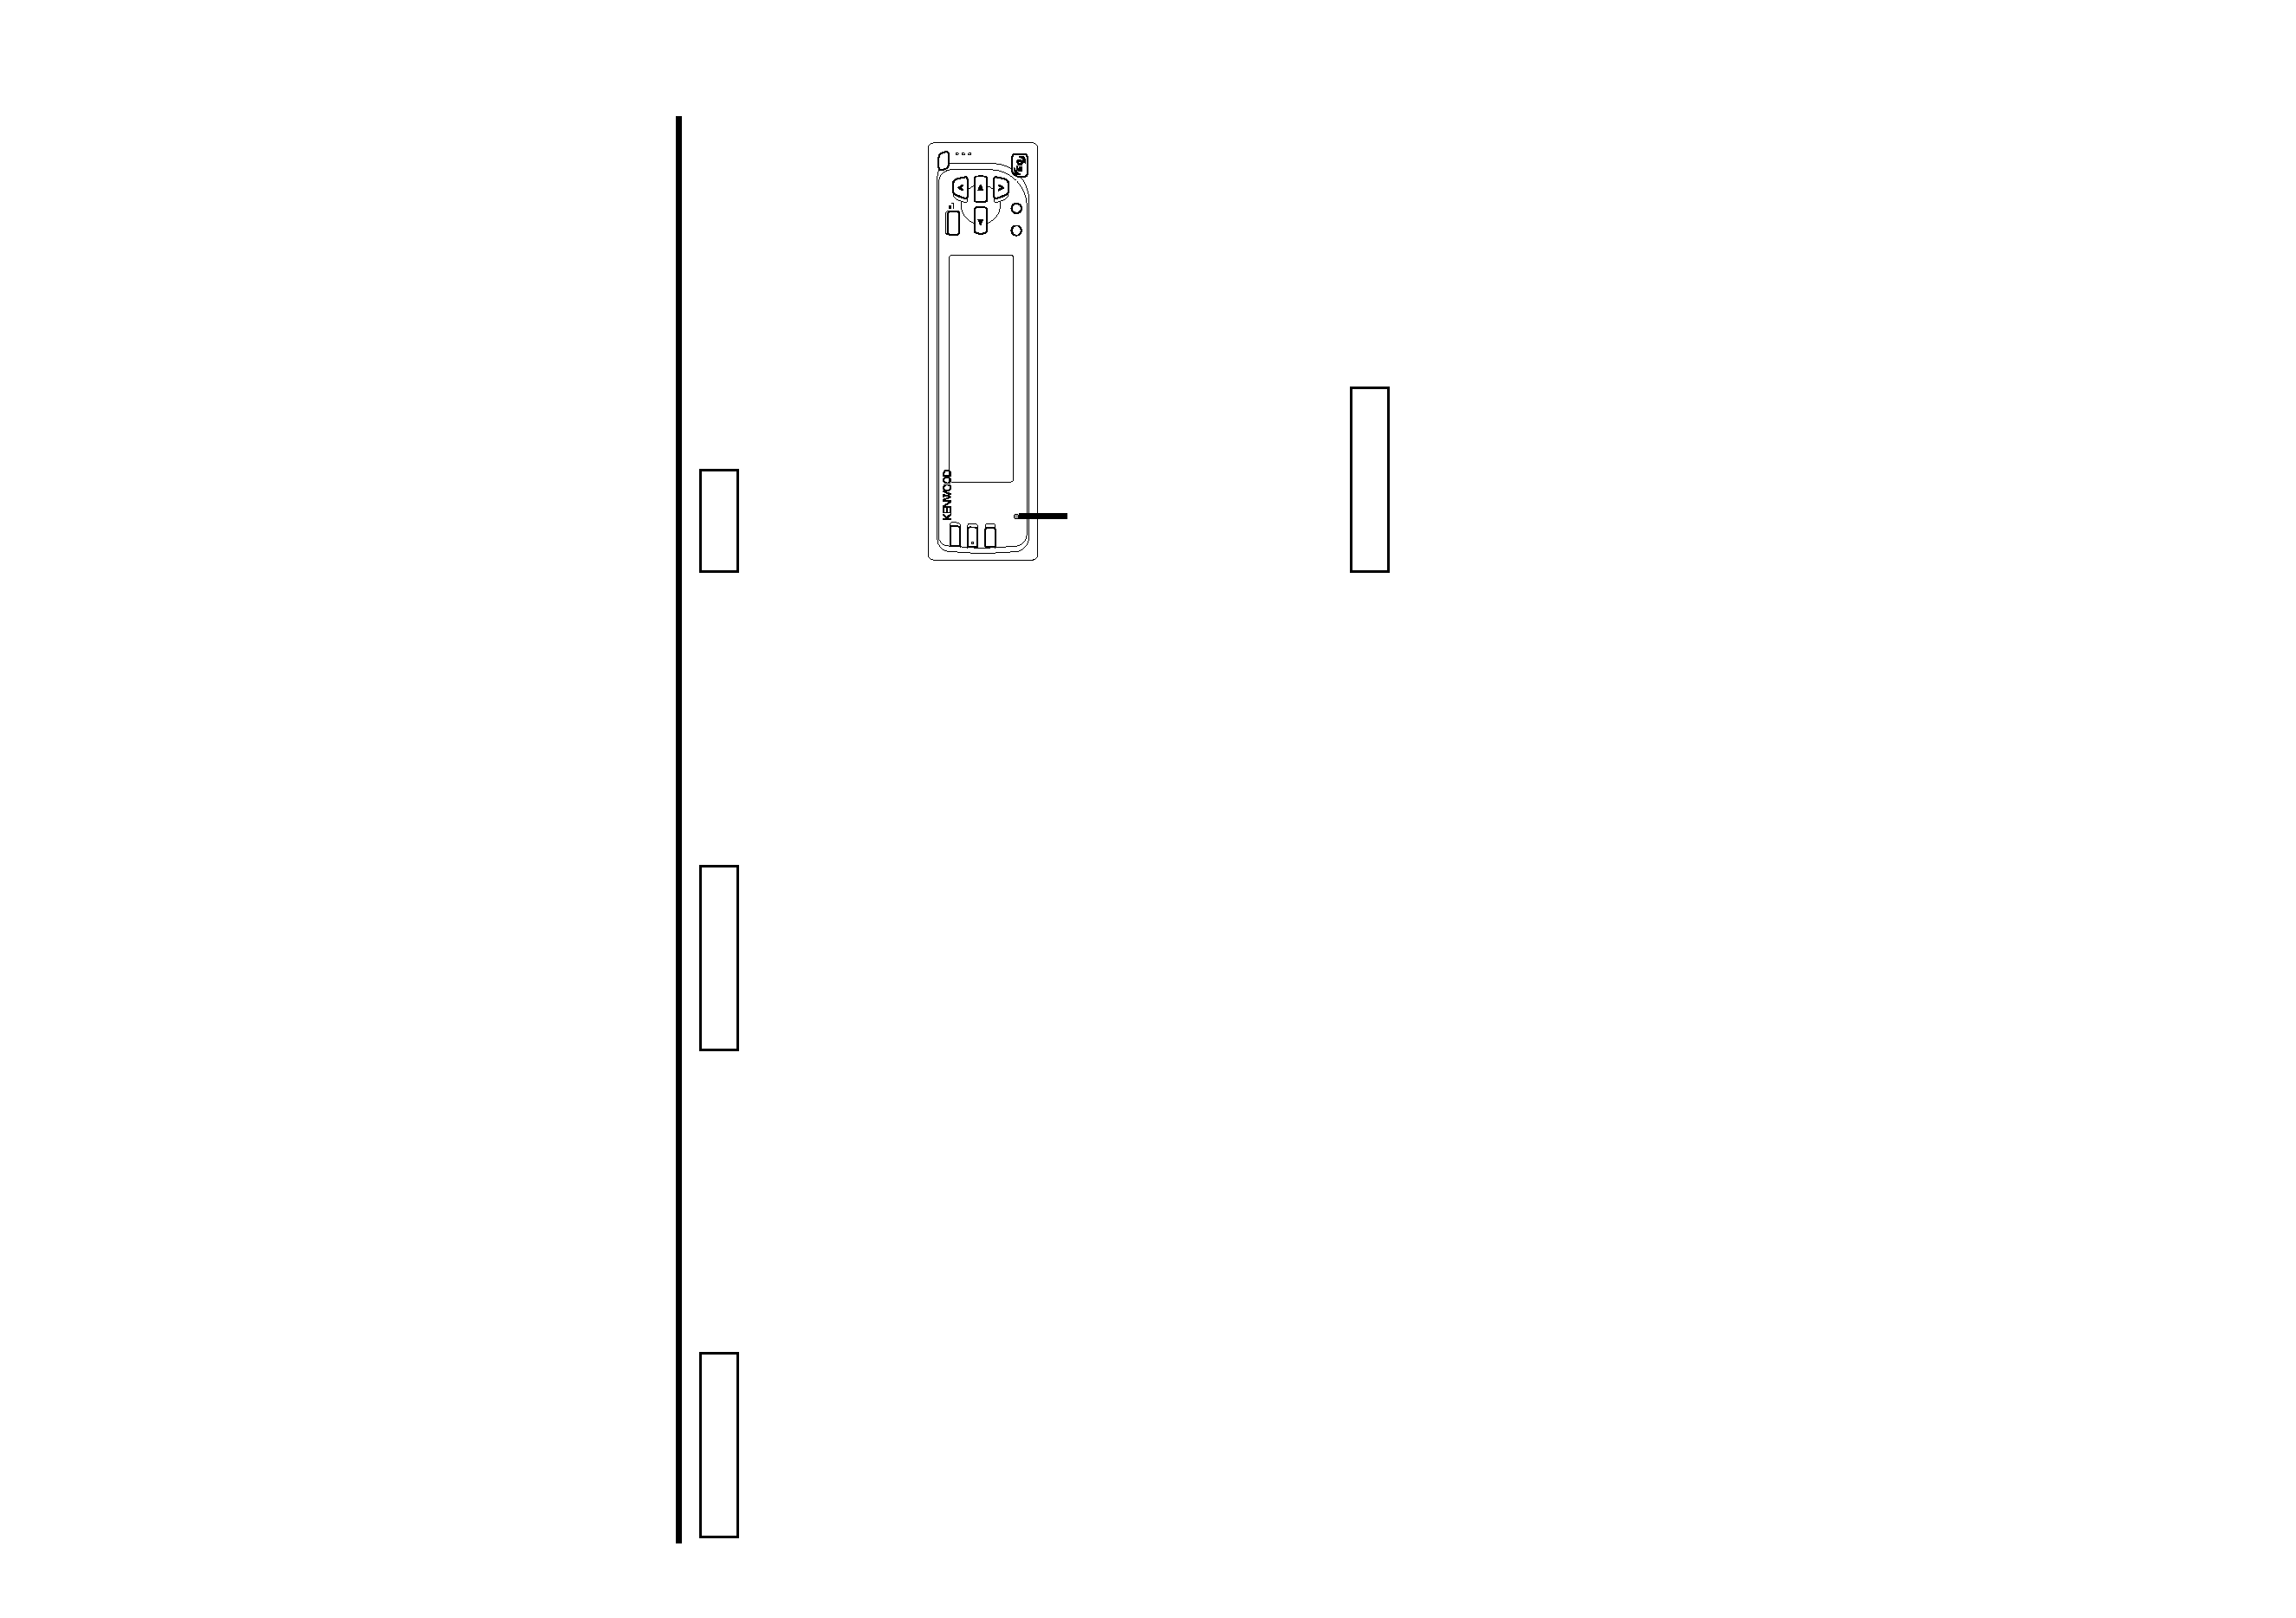
NOTE
PREOUT
4V
DISP
60
120
250
380
500
750
1k
2k
4k
8k
16k
MENU
SPEANA
KGC-9044
1
2
3
PATTERN
9
SPECTRUM
ANALYZER
SUBWOOFER LEVEL
ADJUSTABLE
GRAPHIC EQUALIZER
S.A
DEMO
Reset button
Four types of loudness levels and equalizer curves for rock,
pops, vocal, and flat music genre have been preset. You can
call up an equalizer curve for each genre at the touch of a
button.
Switching between KBS1, KBS2 and USER:
Press the EQ button.
Each time you press the EQ button, the function changes from
KBS1 to KBS2 to USER.
3 KBS1 3 KBS2 3 USER
When KBS1 or KBS2 or USER is ON, the respective KBS1 or
KBS2 or USER indicator lights.
Initially, KBS1 is turned on.
Selecting an equalizer curve preset in KBS1 or KBS2 or USER:
Press any one of buttons 1 to 3.
The selected curve is set and displayed, and the sound quality
is changed accordingly.
ROCK: For rock sounds, POPS: For pops sounds, VOCAL: For
vocal sounds, LOUD1-3: Loudness curves, PRESET1-3: User
preset curves,
Cancelling equlizer effects:
Press the EQ button for more than one second to change the
flat curves("FLAT").
NOTE
2
1
-- 4 --
English
Equalizer operations
PREOUT
4V
EQ
60
120
250
380
500
750
1k
2k
4k
8k
16k
MENU
SPEANA
KGC-9044
1
2
3
PATTERN
9
SPECTRUM
ANALYZER
SUBWOOFER LEVEL
ADJUSTABLE
GRAPHIC EQUALIZER
S.A
DEMO
2
3
u
d
#1-3
S.A
MENU
EQ
No. indicator
KBS indicator
KBS (Kenwood Built-in Sound)
"ROCK"
"POPS"
"VOCAL"
"LOUD1"
"LOUD2"
"LOUD3"
"PRESET1"
"PRESET2"
"PRESET3"
Equalizer curve /Spectrum analyzer display
USER indicator
Buttons and Display
Release button
MENU indicator
DEMO indicator
Title display
KBS / USER indicator
No. indicator
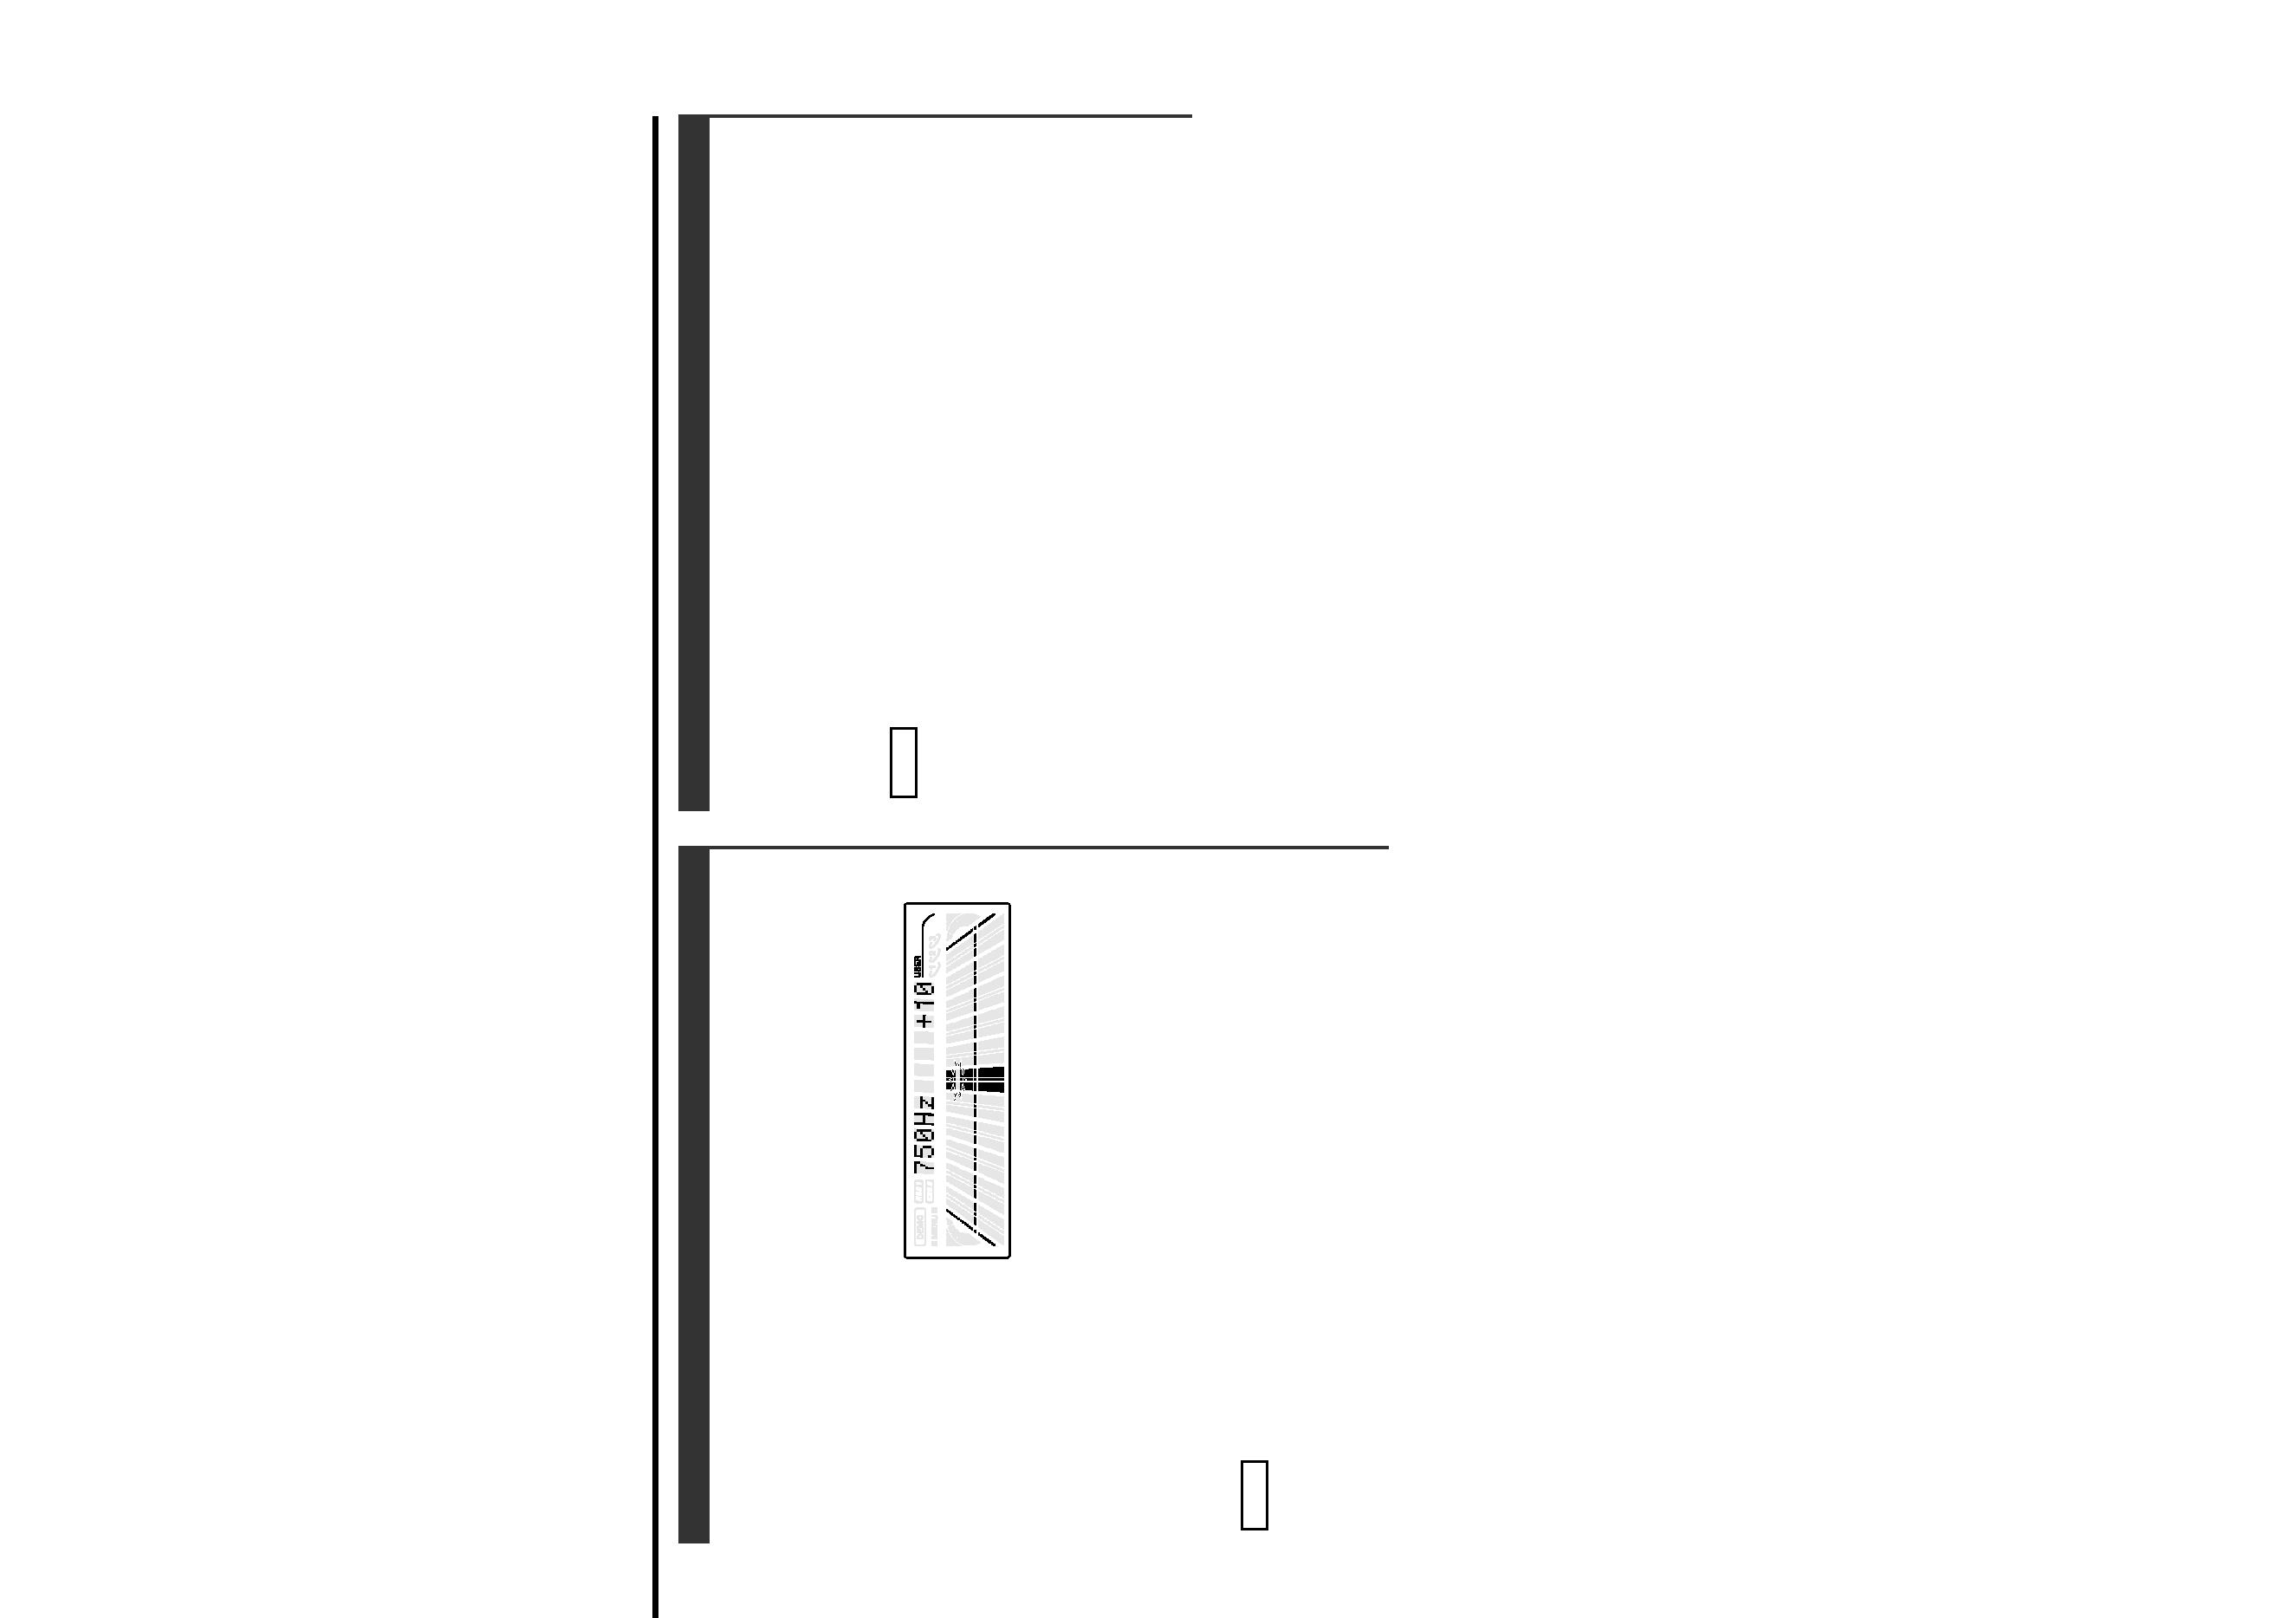
-- 5 --
You can adjust the sound level to suit your preference among
11 frequencies: 60 Hz, 120 Hz, 250 Hz, 380 Hz, 500 Hz, 750 Hz, 1
kHz, 2 kHz, 4 kHz, 8 kHz, and 16 kHz.
Selecting Band for Adjustment:
Each time you press the
2 button, the band shifts to the left
(lower frequencies), while each time you press the
3 button,
the band shifts to the right (higher frequencies).
Increasing Level:
Press the u button while the band indicator is blinking.
The level indicator goes up.
The level can be adjusted up to +12 (by two steps).
Decreasing Level:
Press the d button while the band indicator is blinking.
The level indicator goes down.
The level can be adjusted down to -12 (by two steps).
· When adjusting the equalizer level, do not adjust solely a
single band. Adjust each band to form a curve.
· Equalizer adjustment mode will be cancelled automatically if
no buttons are pressed for five seconds.
NOTE
Equalizer Adjustment
You can store four types of adjusted equalizer curves in
memory, and can call up an original equalizer curve at the
touch of a button.
To adjust the sound quality to your preference.
Hold down any one of buttons 1 to 3 for more than 2 seconds.
The adjusted equalizer curve will be stored in memory.
Up to 3 equalizer curves can be stored in memory.
Recalling Equalizer Curve from Memory:
Press the EQ button, select "USER MODE".
Press any one of buttons 1 to 3.
The equalizer curve stored by the respective button number (1
to 3) will be recalled.
The number (1 to 3) of the pressed button is displayed.
2
1
NOTE
2
1
Equalizer Curve Memory