
CD-RECEIVER
KDC-X689
INSTRUCTION MANUAL
© B64-3147-00/00 (KW)
Take the time to read through this instruction manual.
Familiarity with installation and operation procedures will help you obtain the best
performance from your new CD-receiver.
For your records
Record the serial number, found on the back of the unit, in the spaces designated on the
warranty card, and in the space provided below. Refer to the model and serial numbers
whenever you call upon your Kenwood dealer for information or service on the product.
Model KDC-X689 Serial number
US Residence Only
Register Online
Register your Kenwood product at
w w w.kenwoodusa.com

2 | English
Contents
Safety precautions
4
Notes
5
Warning
6
About CDs
7
About AAC, MP3 and WMA
8
General features
9
Power
Hiding the Control Panel
Selecting the Source
Volume
Attenuator
System Q
Speaker Setting
Audio Control
Audio Setup
Subwoofer Output
Display Setting
Text Selection for Display
Text Display Switching
Graphic part/ Spectrum Analyzer Display
Switching
Station/Disc Naming (SNPS/DNPS)
Faceplate Angle Adjustment
Theft Deterrent Faceplate
TEL Mute
Tuner features
21
Tuning
Tuning Mode
Direct Access Tuning
Station Preset Memory
Auto Memory Entry
Preset Tuning
CD/Audio file/External disc control
features
23
Playing CD & Audio file
Playing External Disc
Fast Forwarding and Reversing
Track/File Search
Disc Search/Folder Search
Direct Track/File Search
Direct Disc Search
Track/File/Disc/Folder Repeat
Scan Play
Random Play
Magazine Random Play
Disc Random Play
Folder Select
Switching the Play mode
Letter Seek
Text/Title Scroll
HD Radio control features
28
Tuning
Menu system
29
Menu System
Security Code
Touch Sensor Tone
Manual Clock Adjustment
Date Adjustment
Date Mode
Dimmer
OFF Wait Time Setting
Built-in Amp Setting
Dual Zone System Setting
B.M.S. (Bass Management System)
B.M.S. Frequency Offset
AMP Control
CRSC (Clean Reception System Circuit)
Receive mode Setting
SIRIUS ID (ESN) display
Auxiliary Input Display Setting & Station/Disc
Naming
Text Scroll
Built-in Auxiliary input Setting
CD Read Setting
Voice Index
ACDrive firmware version display
Unique ID display
Audio Preset Memory
Audio Preset Call
Demonstration mode Setting

English
|
3
The "AAC" logo is trademark of Dolby
Laboratories.
Basic Operations of remote control 36
Accessories/ Installation Procedure 39
Connecting Wires to Terminals
40
Installation
41
Removing the Unit
43
Troubleshooting Guide
44
Specifications
47
4 | English
Safety precautions
About CD players/disc changers
connected to this unit
Kenwood disc changers/ CD players released in
1998 or later can be connected to this unit.
Refer to the catalog or consult your Kenwood
dealer for connectable models of disc changers/
CD players.
Note that any Kenwood disc changers/ CD players
released in 1997 or earlier and disc changers made
by other makers cannot be connected to this unit.
Connecting unsupported disc changers/CD players
to this unit may result in damage.
Set the "O-N" Switch to the "N" position for the
applicable Kenwood disc changers/ CD players.
The functions you can use and the information
that can be displayed may differ depending on the
models being connected.
· You can damage both your unit and the CD changer if
you connect them incorrectly.
LX-bus connection
The LX AMP and the sensor unit must be connected
one at a time.
Lens Fogging
When you turn on the car heater in cold weather,
dew or condensation may form on the lens in the
CD player of the unit. Called lens fogging, this
condesnation on the lens may not allow CDs to
play. In such a situation, remove the disc and wait
for the condensation to evaporate. If the unit still
does not operate normally after a while, consult
your Kenwood dealer.
Faceplate
· Use the enclosed or dedicated faceplate. Using a
faceplate other than the specified one may cause
your unit to malfunction.
2WARNING
To prevent injury or fire, take the
following precautions:
· To prevent a short circuit, never put or leave any
metallic objects (such as coins or metal tools)
inside the unit.
2CAUTION
To prevent damage to the machine, take
the following precautions:
· Make sure to ground the unit to a negative 12V
DC power supply.
· Do not install the unit in a spot exposed to direct
sunlight or excessive heat or humidity. Also avoid
places with too much dust or the possibility of
water splashing.
· Do not place the faceplate or the faceplate case in
areas exposed to direct sunlight, excessive heat or
humidity. Also avoid places with too much dust or
the possibility of water splashing.
· To prevent deterioration, do not touch the
terminals of the unit or faceplate with your
fingers.
· Do not subject the faceplate to excessive shock,
as it is a piece of precision equipment.
· When replacing a fuse, only use a new fuse with
the prescribed rating. Using a fuse with the wrong
rating may cause your unit to malfunction.
· Do not apply excessive force to the open
faceplate or place objects on it. Doing so will
cause damage or breakdown.
· Do not use your own screws. Use only the screws
provided. If you use the wrong screws, you could
damage the unit.
Attach the panel while you are on the
vehicle
The panel lock arm appears when the panel is
removed. Therefore, the panel must be attached
while the electrical system of the car is operating.
Do Not Load 3-in. CDs in the CD slot
If you try to load a 3 in. CD with its adapter into the
unit, the adapter might separate from the CD and
damage the unit.
NOTE
This Class B digital apparatus complies with
Canadian ICES-003.
English
|
5
Notes
· If you experience problems during installation,
consult your Kenwood dealer.
· If the unit fails to operate properly, press the Reset
button to restore factory settings.
· Press the reset button if the disc auto changer fails
to operate correctly. Normal operation should be
restored.
Reset button
· We recommend the use of <Security Code>
(page 30) to prevent theft.
· The characters conforming to ISO 8859-1
character set can be displayed.
· There are places in this manual where lit
indicators are described; however, the only time
an indicator will light is in the following settings.
When Indicator is selected as mentioned in <Text
Display Switching> (page 15)
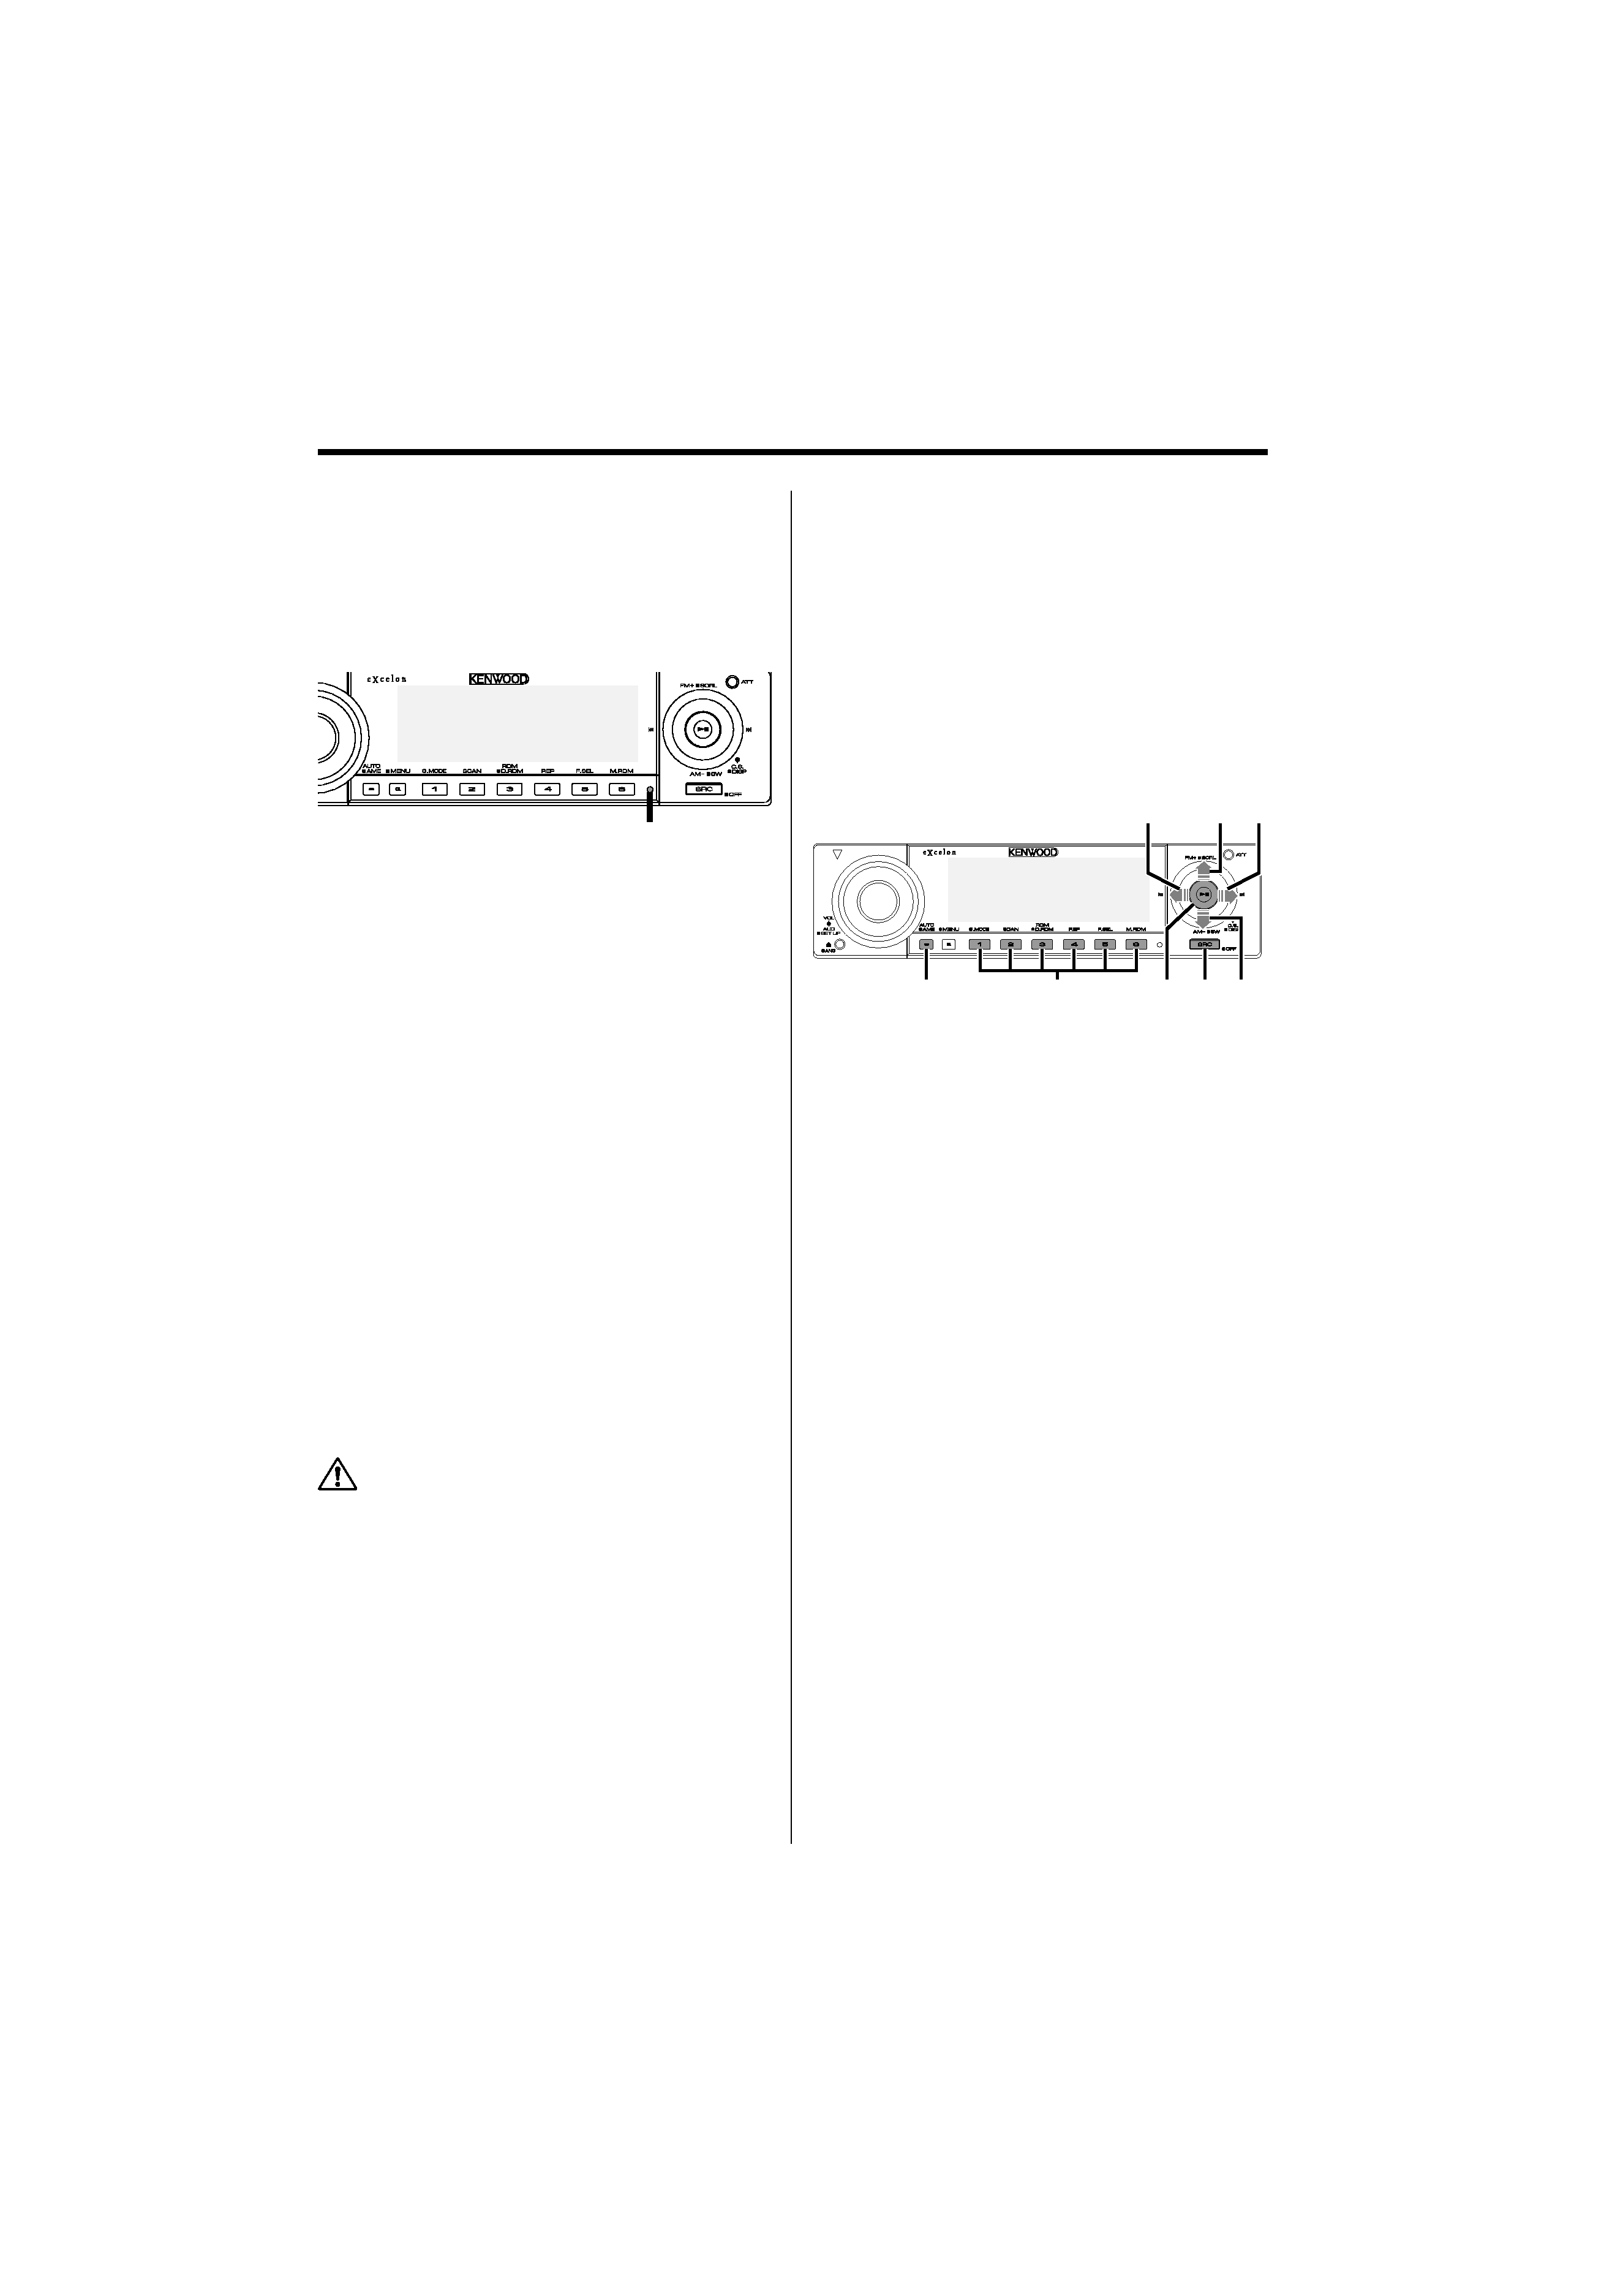
· The illustrations of the display and the panel
appearing in this manual are examples used to
explain more clearly how the controls are used.
Therefore, what appears on the display in the
illustrations may differ from what appears on the
display on the actual equipment, and some of the
illustrations on the display may be inapplicable.
Cleaning the Unit
If the faceplate of this unit is stained, wipe it with a
dry soft cloth such as a silicon cloth.
If the faceplate is stained badly, wipe the stain off
with a cloth moistened with neutral cleaner, then
wipe it again with a clean soft dry cloth.
· Applying spray cleaner directly to the unit may affect its
mechanical parts. Wiping the faceplate with a hard cloth
or using a volatile liquid such as thinner or alcohol may
scratch the surface or erases characters.
Cleaning the Faceplate Terminals
If the terminals on the unit or faceplate get dirty,
wipe them with a clean soft dry cloth.
Before using this unit for the first time
This unit is initially set on the Demonstration mode.
When using this unit for the first time, cancel the
<Demonstration mode Setting> (page 35).
About SIRIUS Satellite radio tuner
Refer to the instruction manual of SIRIUS Satellite
radio tuner KTC-SR901/SR902/SR903 (optional
accessory) when connected, for the operation
method.
· Refer to the sections of A models for operations.
SRC
AUTO
1 -- 6
38
FM/SCRL ¢
4
AM