CD-RECEIVER
KDC-W4737U
KDC-W4737UY
KDC-W4537U
KDC-W4537UY
INSTRUCTION MANUAL
© B64-3546-00/00 (EW/E2W)

2 | English
Contents
Safety precautions
3
Notes
4
General features
7
Power
Selecting the Source
Volume
Attenuator
Audio Control
Audio Setup
Speaker Setting
Subwoofer Output
Switching Display
Theft Deterrent Faceplate
TEL Mute
Tuner features
12
Tuning
Direct Access Tuning
Station Preset Memory
Auto Memory Entry
Preset Tuning
RDS features
14
Traffic Information
Radio Text Scroll
PTY (Program Type)
Program Type Preset
Changing Language for PTY Function
CD/USB device/Audio file/External disc
control features
17
Playing CD & Audio file
Playing USB (iPod) device
Drive Search
Playing External Disc
Fast Forwarding and Reversing
Music Search
Disc Search/Folder/Album Search
Direct Music Search
Direct Disc Search
Track/File/Disc/Folder Repeat
Scan Play
Random Play
Magazine Random Play
All Random Play
File select
File Select 1 mode
File Select 2 mode
Text/Title Scroll
Menu system
23
Menu System
Security Code
Touch Sensor Tone
Manual Clock Adjustment
Synchronize Clock
DSI (Disabled System Indicator)
Selectable Illumination
Display Illumination Control
Dimmer
Switching preout
Supreme Setting
News Bulletin with Timeout Setting
Local Seek
Tuning Mode
AF (Alternative Frequency)
Restricting RDS Region (Region Restrict Function)
Auto TP Seek
Monaural Reception
Auxiliary Input Display Setting
Text Scroll
Built-in Auxiliary input Setting
Power OFF Timer
CD Read Setting
Selecting Russian Characters
Firmware version display
Demonstration mode Setting
Basic Operations of remote control 30
Accessories/ Installation Procedure 32
Connecting Wires to Terminals
33
Installation/Removing the Unit
35
Troubleshooting Guide
36
Specifications
39

English |
3
Safety precautions
2WARNING
To prevent injury or fire, take the following
precautions:
· To prevent a short circuit, never put or leave any
metallic objects (such as coins or metal tools) inside
the unit.
· Do not watch or fix your eyes on the unit's display
when you are driving for any extended period.
· Mounting and wiring this product requires skills and
experience. For safety's sake, leave the mounting
and wiring work to professionals.
2CAUTION
To prevent damage to the machine, take
the following precautions:
· Make sure to ground the unit to a negative 12V DC
power supply.
· Do not install the unit in a spot exposed to direct
sunlight or excessive heat or humidity. Also avoid
places with too much dust or the possibility of
water splashing.
· Do not place the faceplate (and the faceplate case)
in areas exposed to direct sunlight, excessive heat or
humidity. Also avoid places with too much dust or
the possibility of water splashing.
· To prevent deterioration, do not touch the terminals
of the unit or faceplate with your fingers.
· Do not subject the faceplate to excessive shock, as it
is a piece of precision equipment.
· When replacing a fuse, only use a new fuse with
the prescribed rating. Using a fuse with the wrong
rating may cause your unit to malfunction.
· Use only the screws provided or specified for
installation. If you use wrong screws, you could
damage the unit.
Do Not Load 8 cm (3 in.) CDs in the CD slot
If you try to load a 8 cm (3 in.) CD with its adapter into
the unit, the adapter might separate from the CD and
damage the unit.
About CD players/disc changers connected
to this unit
Kenwood disc changers/ CD players released in 1998
or later can be connected to this unit.
Refer to the catalog or consult your Kenwood dealer
for connectable models of disc changers/ CD players.
Note that any Kenwood disc changers/ CD players
released in 1997 or earlier and disc changers made by
other makers cannot be connected to this unit.
Connecting unsupported disc changers/CD players to
this unit may result in damage.
Set the "O-N" Switch to the "N" position for the
applicable Kenwood disc changers/ CD players.
The functions you can use and the information that
can be displayed may differ depending on the models
being connected.
¤
· You can damage both your unit and the CD changer if you
connect them incorrectly.
Lens Fogging
When you turn on the car heater in cold weather,
dew or condensation may form on the lens in the
CD player of the unit. Called lens fogging, this
condensation on the lens may not allow CDs to play.
In such a situation, remove the disc and wait for the
condensation to evaporate. If the unit still does not
operate normally after a while, consult your Kenwood
dealer.
iPod is a trademark of Apple Computer, Inc.,
registered in the U.S. and other countries.
The "AAC" logo is trademark of Dolby
Laboratories.
4 | English
Notes
· If you experience problems during installation,
consult your Kenwood dealer.
· When you purchase optional accessories, check with
your Kenwood dealer to make sure that they work
with your model and in your area.
· The characters which can be displayed by this unit
are A-Z 0-9 @ " ` ` % & * + = , . / \ < > [ ] ( ) : ; ^ - { } |
~ .
· The RDS feature won't work where the service is not
supported by any broadcasting station.
· The illustrations of the display and the panel
appearing in this manual are examples used to
explain more clearly how the controls are used.
Therefore, what appears on the display in the
illustrations may differ from what appears on the
display on the actual equipment, and some of the
illustrations on the display may be inapplicable.
How to reset your unit
· If the unit fails to operate properly, press the Reset
button. The unit returns to factory settings when the
Reset button is pressed.
· Remove the USB device before pressing the Reset
button. Pressing the Reset button with the USB
device installed can damage the data contained in
the USB device. For how to remove the USB device,
refer to <Playing USB (iPod) device> (page 18).
· Press the reset button if the disc auto changer fails
to operate correctly. Normal operation should be
restored.
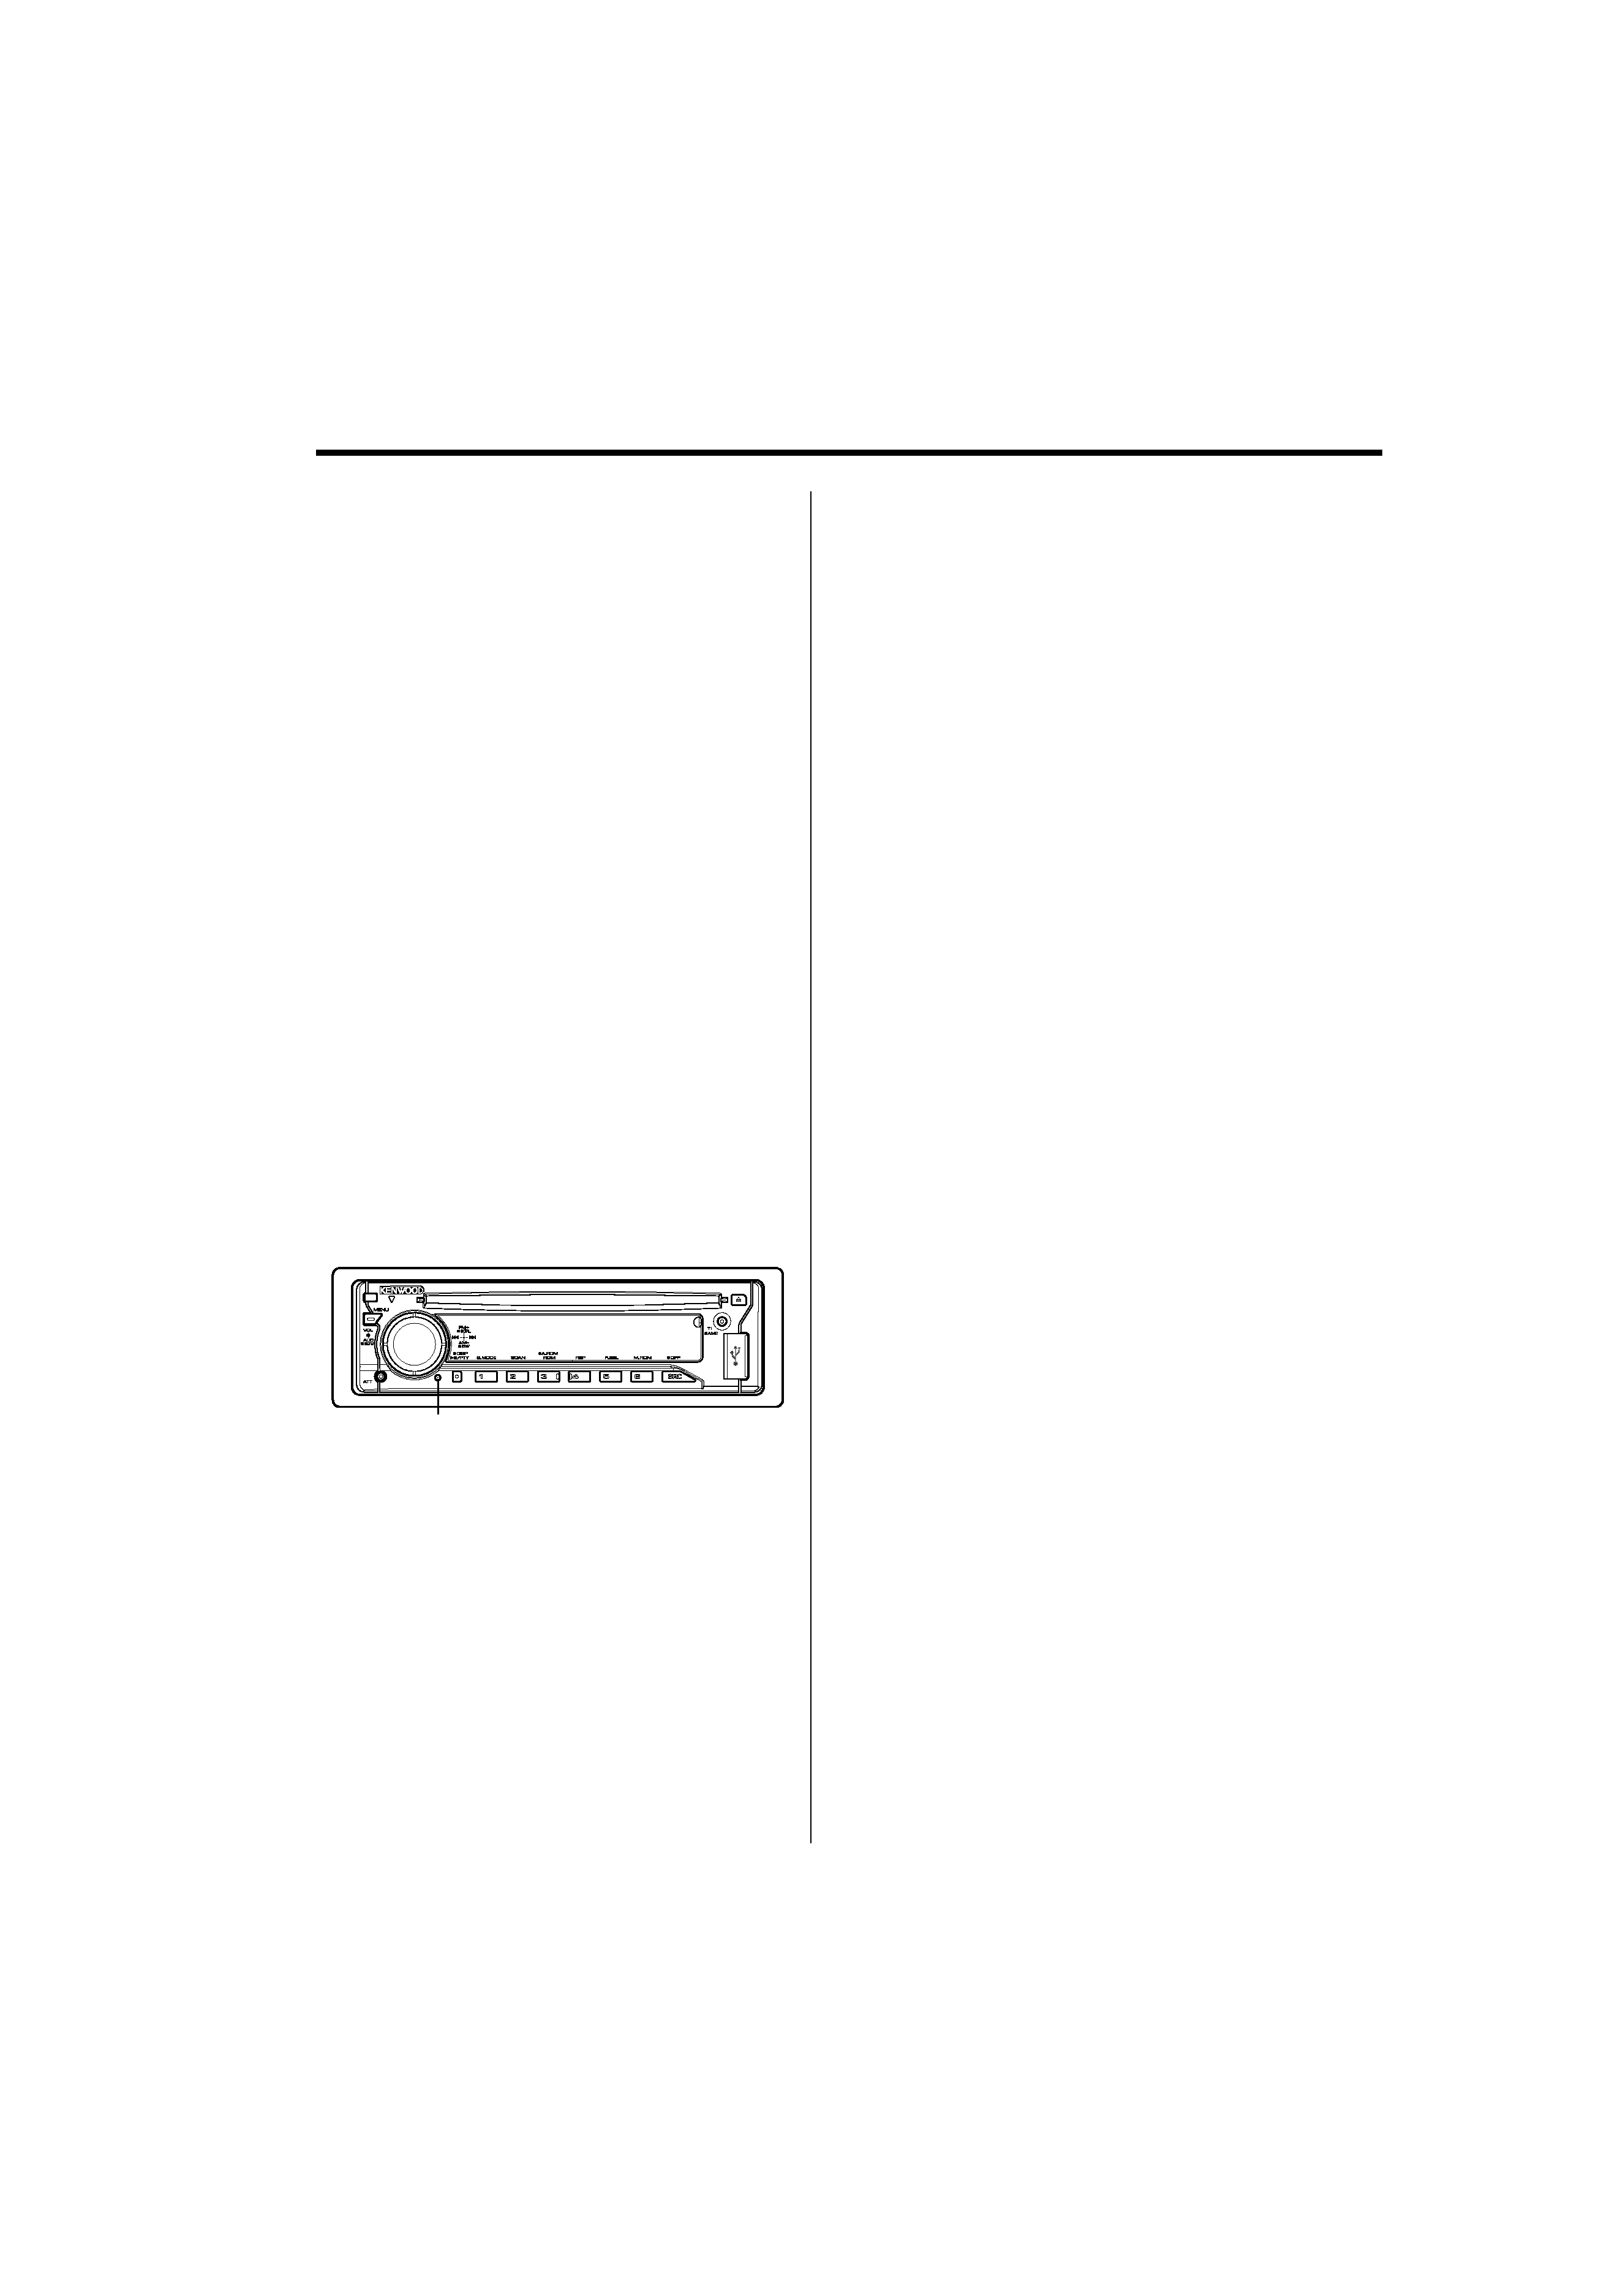
Reset button
Cleaning the Unit
If the faceplate of this unit is stained, wipe it with a
dry soft cloth such as a silicon cloth.
If the faceplate is stained badly, wipe the stain off with
a cloth moistened with neutral cleaner, then wipe it
again with a clean soft dry cloth.
¤
· Applying spray cleaner directly to the unit may affect its
mechanical parts. Wiping the faceplate with a hard cloth or
using a volatile liquid such as thinner or alcohol may scratch
the surface or erases characters.
Cleaning the Faceplate Terminals
If the terminals on the unit or faceplate get dirty, wipe
them with a clean soft dry cloth.
Before using this unit for the first time
This unit is initially set on the Demonstration mode.
When using this unit for the first time, cancel the
<Demonstration mode Setting> (page 29).
English |
5
About Audio file
· Playable Audio file
AAC-LC (.m4a), MP3 (.mp3), WMA (.wma),
WAV (.wav)
· Playable disc media
CD-R/RW/ROM
· Playable disc file format
ISO 9660 Level 1/2, Joliet, Romeo, Long file name.
· Playable USB device
USB mass storage class, iPod with KCA-iP200
· Playable USB device file system
FAT16, FAT32
Although the audio files are complied with the
standards listed above, the play maybe impossible
depending on the types or conditions of media or
device.
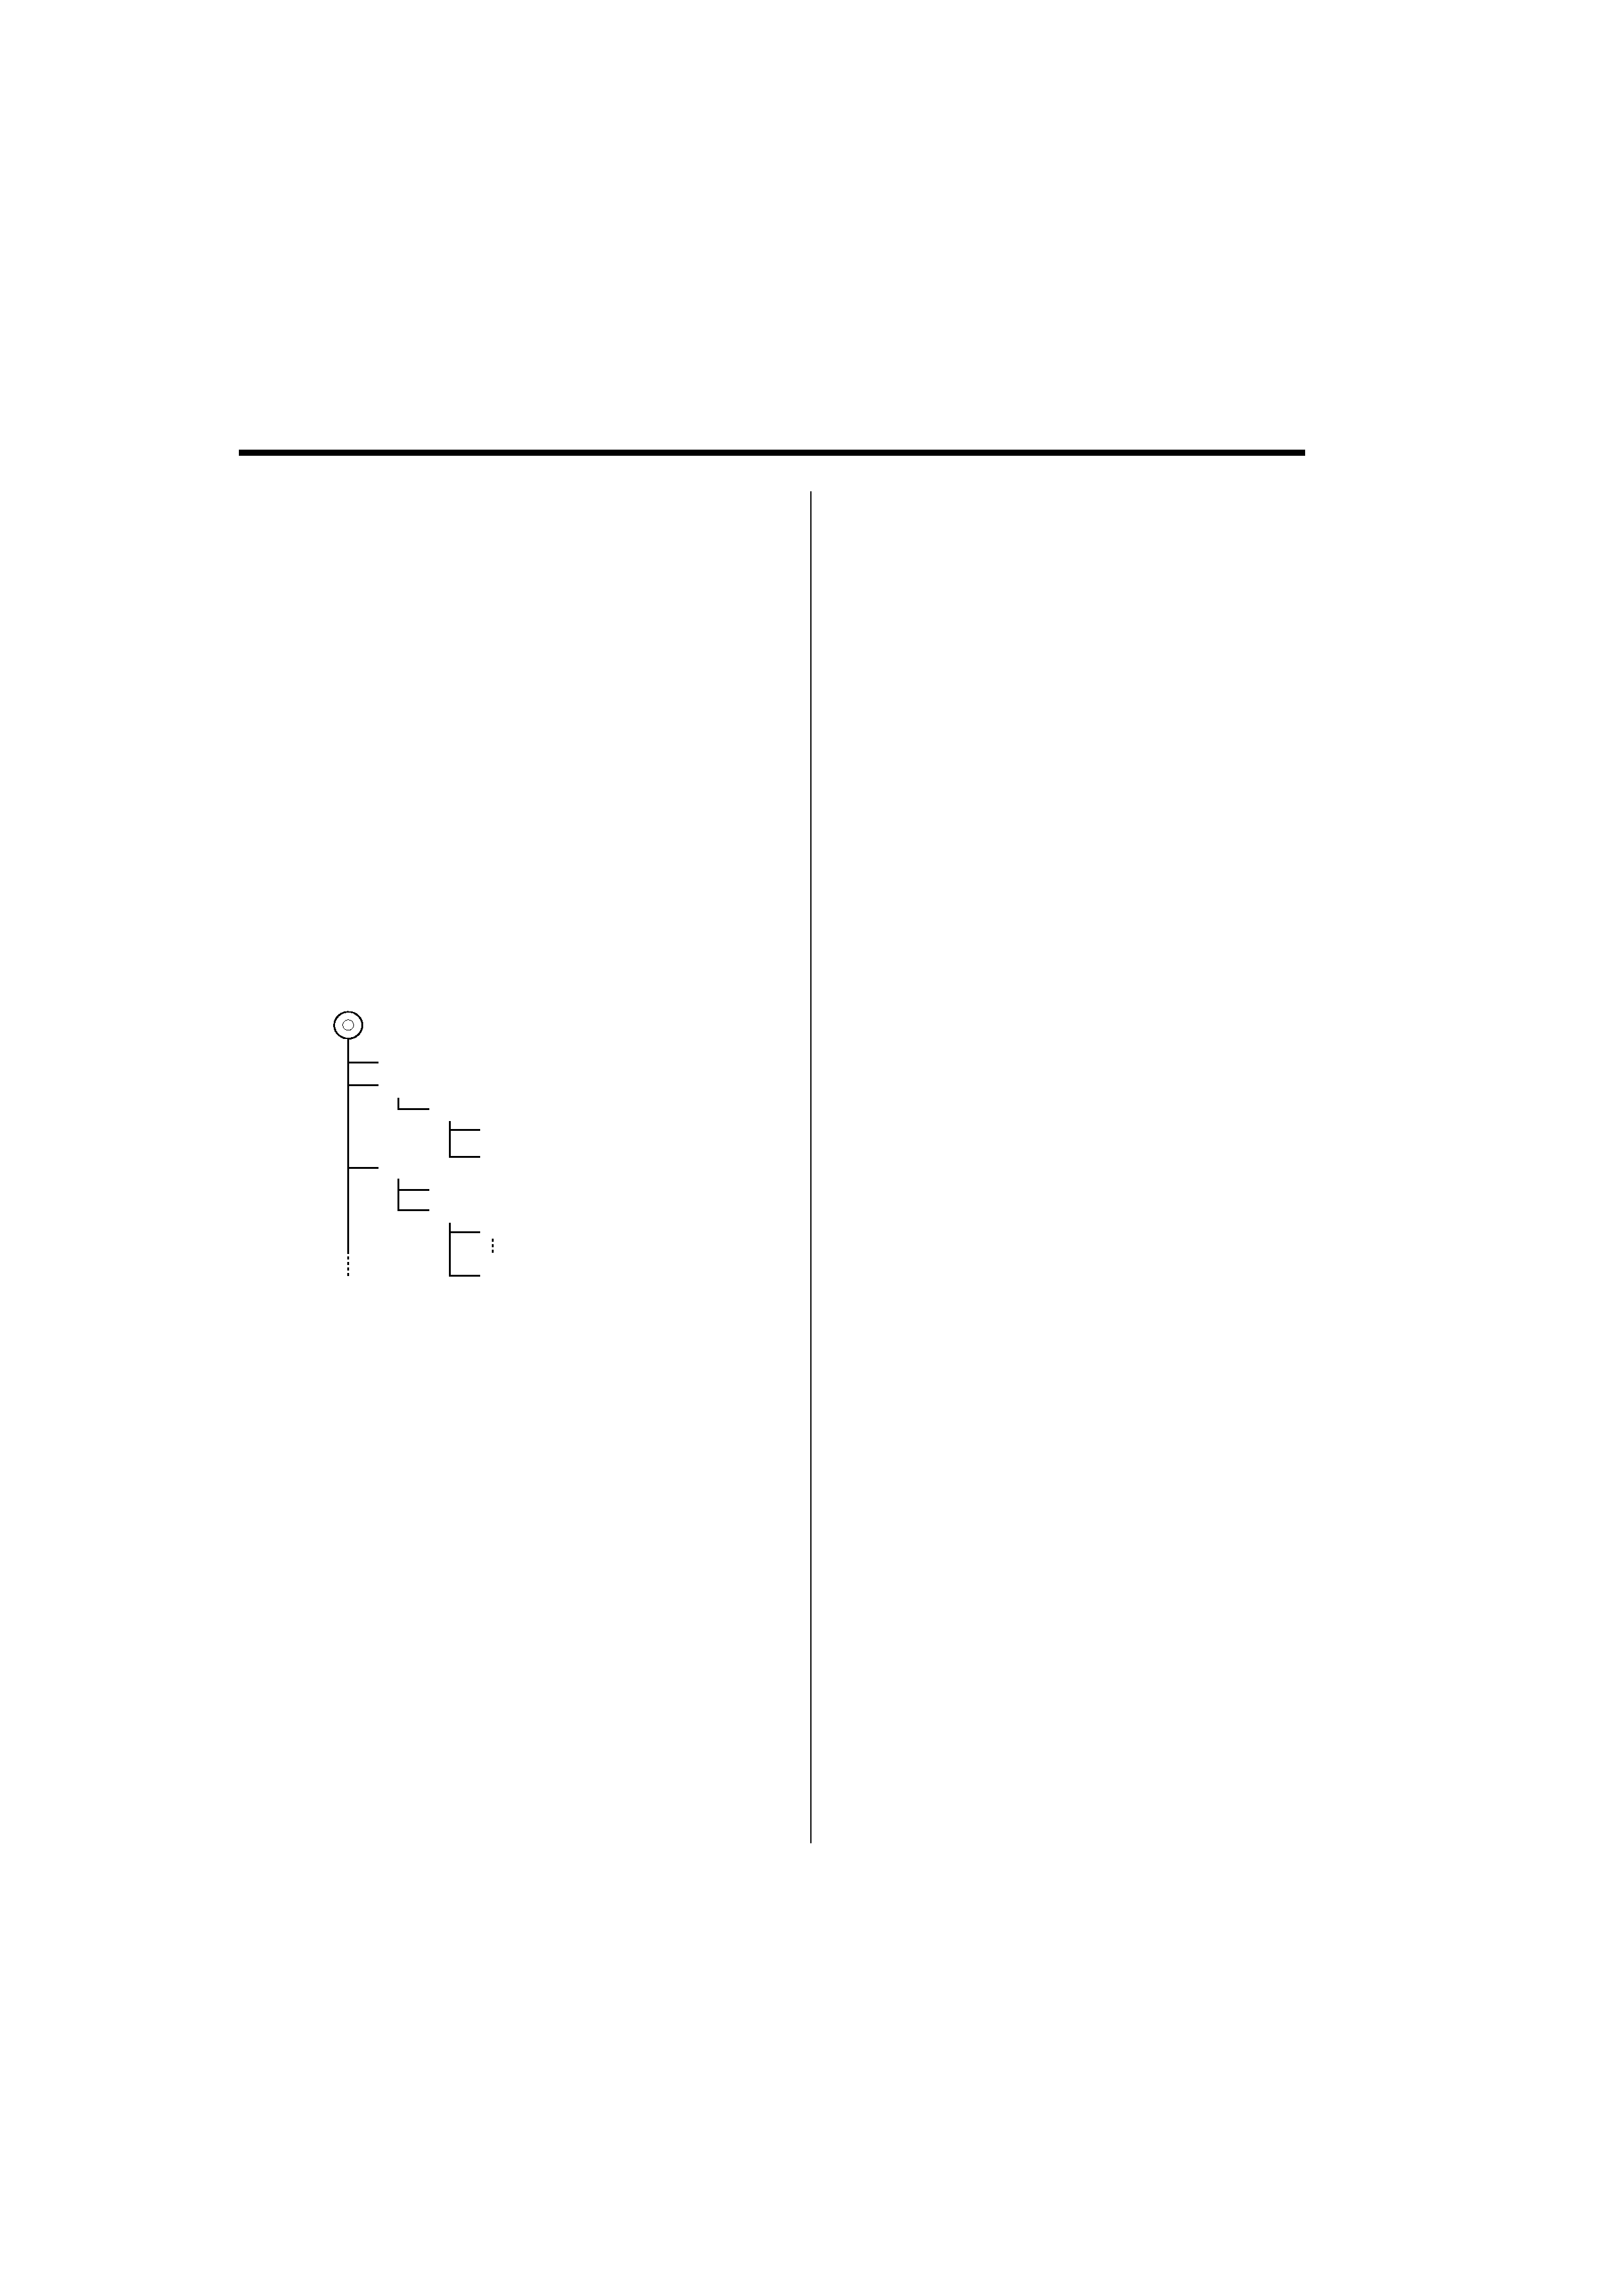
· Playing order of the Audio file
In the example of folder/file tree shown below, the
files are played in the order from
to
.
CD (
)
: Folder
: Audio fi
Folder
Audio file
An online manual about audio files is put on the
site, www.kenwood.com/audiofile/. On this online
manual, detailed information and notes which are not
written in this manual are provided. Make sure to read
through the online manual as well.
/
· In this manual, the word "USB device" is used for flash
memories and digital audio players which have USB
terminals.
· The word "iPod" appearing in this manual indicates the iPod
connected with the KCA-iP200 (optional accessory). The
iPod connected with the KCA-iP200 can be controlled from
this unit. iPods that can be connected with the KCA-iP200
are the iPod nano and the iPod with video. When an iPod
is connected using a commercially available USB cable, it is
handled as a mass-storage-class device.
· For the supported formats and types of USB device, refer to
www.kenwood.com/usb/.
About USB device
· Install the USB device in the place where it will not
prevent you from driving your vehicle properly.
· You cannot connect a USB device via a USB hub.
· Take backups of the audio files used with this unit.
The files can be erased depending on the operating
conditions of the USB device.
We shall have no compensation for any damage
arising out of erasure of the stored data.
· No USB device comes with this unit. You need to
purchase a commercially available USB device.
· Do not directly connect the USB device to the USB
connector on the panel. Connect it using a cable.
· Leave the cap on when not using an USB device.
· For how to play the audio files recorded in a USB
device, see <CD/USB device/Audio file/External disc
control features> (page 17).
· When connecting the USB device, usage of the CA-
U1EX (option) is recommended.
Normal playback is not guaranteed when a cable
other than the USB compatible cable is used.
Connecting a cable whose total length is longer
than 5 m can result in abnormal playback.
About DAB Tuner control
Refer to
A group on the Instruction manual of DAB
Tuner KTC-9090DAB (optional accessory) for the
control method of DAB Tuner function.
However, the following control methods of the
function for this unit may be differed from the
Instruction manual; therefore, refer to the following
supplemental instruction.
<Auto Ensemble Memory Entry>
1. Select the preset band for Auto Ensemble Memory
Entry.
2. Press the [AME] button for at least 2 seconds.
Open Auto Ensemble Memory Entry.
After storing in the memory finishes, the number
of the pre-set buttons and the ensemble label are
displayed.
<Searching by programme type and language>
and <Languages to be displayed> in <Programme
Type (PTY) Function>
At the operation to press [DISP] button, use [TI]
button instead.
<Automatic Switching DAB priority>
This function cannot be used.