
HM-437WM
COMPACT Hi-Fi COMPONENT SYSTEM
INSTRUCTION MANUAL
B60-5570-08 00
C (E, X)
0501
05.3.29, 5:12 PM
1
2 EN
THE EXCLAMATION POINT WITHIN AN EQUILATERAL TRIANGLE IS INTENDED TO ALERT THE USER
TO THE PRESENCE OF IMPORTANT OPERATING AND MAINTENANCE (SERVICING) INSTRUCTIONS
IN THE LITERATURE ACCOMPANYING THE APPLIANCE.
THE LIGHTNING FLASH WITH ARROWHEAD SYMBOL, WITHIN AN EQUILATERAL TRIANGLE, IS IN-
TENDED TO ALERT THE USER TO THE PRESENCE OF UNINSULATED "DANGEROUS VOLTAGE" WITHIN
THE PRODUCT'S ENCLOSURE THAT MAY BE OF SUFFICIENT MAGNITUDE TO CONSTITUTE A RISK
OF ELECTRIC SHOCK TO PERSONS.
CAUTION: TO REDUCE THE RISK OF ELECTRIC SHOCK,
DO NOT REMOVE COVER (OR BACK). NO USER-SER-
VICEABLE PARTS INSIDE. REFER SERVICING TO QUALI-
FIED SERVICE PERSONNEL.
Before applying power
Caution : Read this page carefully to ensure
safe operation.
Safety precautions
WARNING : TO PREVENT FIRE OR ELECTRIC SHOCK, DO NOT
EXPOSE THIS APPLIANCE TO RAIN OR MOISTURE.
CAUTION
RISK OF ELECTRIC SHOCK
DO NOT OPEN
Units are designed for operation as follows.
Australia ....................................... AC 240 V only
Europe .......................................... AC 230 V only
The marking of products using lasers
The marking this product has been classified as Class 1. It
means that there is no danger of hazardous radiation out-
side the product.
Location: Bottom
CLASS 1 LASER PRODUCT
LASER KLASSE 1
APPAREIL A LASER DE CLASSE 1
LUOKAN 1 LASERLAITE
KLASS 1 LASERAPPARAT
Unpacking
Unpack the unit carefully and make sure that all
accessories are present.
Antenna terminal cover ............................... (1)
Screw for antenna terminal cover ............... (1)
AM loop antenna ......................................... (1)
Remote control unit .................................... (1)
Batteries(R6/AA) .......................................... (2)
If any accessories are missing, or if the unit is
damaged of falls to operate, notify your dealer
immediately. If your unit was shipped to you di-
rectly, notify your shipper immediately.
KENWOOD recommend that you retain the origi-
nal carton and packing materials in case you need
to move or ship the unit in the future.
Keep this manual handy for future reference.
05.3.29, 5:12 PM
2

3 EN
Before applying power
Contents
Caution : Read the pages marked
carefully
to ensure safe operation.
Before applying power ................................ 2
Safety precautions ................................. 2
Unpacking ................................................... 2
Media that can be played back with
this unit .................................................. 3
Preparing the remote control ...................... 4
Connections ................................................ 4
Names and functions of parts .......................... 5
Remote control unit .................................... 5
Main unit ..................................................... 6
Basic function ................................................... 8
Demonstration mode .................................. 8
Switching the system on ............................. 8
Switching the system to standby mode ...... 8
Volume control ............................................ 8
Sound control .............................................. 8
Headphones ................................................ 8
Using the CD/MP3-CD/WMA-CD ..................... 9
Loading a disc ............................................. 9
Playing a normal disc ................................... 9
Selecting a desired track/passage ............... 9
Selecting a desired album/file
(For MP3-CD and WMA-CD only) ........... 9
Programming tracks .................................. 10
Programming files
(For MP3-CD and WMA-CD only) ......... 10
Random ...................................................... 11
Repeat ........................................................ 11
Intro scan .................................................. 12
Using the RDS/DISPLAY/DEMO button .... 12
Using the radio ............................................... 12
Tuning in radio stations ............................. 12
Storing preset ........................................... 12
Tuning to a preset radio station ................. 13
Using RDS (Radio Data System) ............... 13
Using the RDS/DISPLAY/DEMO button .... 13
Tuning by Program TYpe (PTY search) ....... 13
Using the cassette ......................................... 14
Playing a cassette tape ............................. 14
Recording on a cassette tape .................... 14
Clock/timer operation ..................................... 16
View clock ................................................. 16
Clock setting .............................................. 16
Timer setting ............................................. 16
To activate/deactivate the timer ................ 17
Sleep timer setting .................................... 17
General information ........................................ 18
Maintenance ............................................. 18
In case of difficulty ......................................... 19
Specifications ................................................. 20
Media that can be played back
with this unit
This unit is capable of playing back Audio CD and
CD-R/RW (CD-DA) discs.
This unit is capable of playing back the music files
recorded in the MP3/WMA audio compression
format on CD-R/RW discs. This unit may also be
incapable of playing certain discs depending on
their properties, recording conditions, etc.
Usable media:
CD-ROM (CD-R/CD-RW)
Usable formats:
ISO 9660 Level 1 or 2
Joliet
Files that can be played back:
MP3 files and WMA files (Version 9)
·This unit can display the ID3 Tag information
recorded in the disc.
·
Please set up the transfer bit rate setting for
the compression software when compressing
MP3 and WMA files as follows:
MP3 Files : 128kbps recommended
WMA Files : 64kbps recommended
·This unit is compatible with 32kHz, 44.1kHz
(recommended) and 48kHz sampling frequen-
cies.
·This unit can play back only the closed ses-
sions. This unit is compatible with multi-ses-
sion discs.
·The maximum numbers of folders and files in
the disc played with this unit are respectively
limited to 255 (including root folder) folders and
511 (including the number of folders) files.
·The maximum number of files per folder is lim-
ited to 510 (including the number of folders)
files.
·There are cases where it is not possible to save
folders in the desired sequence depending on
the software being used.
·
If the MP3 or WMA extension logs are added
to any files other than " .MP3" and " .WMA"
files, the equipment will assume that they can
be played back, and this will produce no sound
and skip to the next file automatically.
05.4.5, 4:21 PM
3
4 EN
Before applying power
Preparing the remote control
Insert batteries type R6/LR6 ("AA" size) into the
remote control.
Operation
When the standby indicator is lit, the power turns
ON when you press the POWER
button on the
remote control. When the power comes on, press
the button you want to operate.
Notes:
·The supplied batteries may have shorter lives than
ordinary batteries due to use during operation
checks.
·
When the remote-controllable distance gets shorter
than before, replace both batteries with new ones.
·
Placing the remote sensor in direct sunlight, or in
direct light from a high frequency fluorescent lamp
may cause a malfunction.
In such a case, change the location of the system
installation to prevent malfunction.
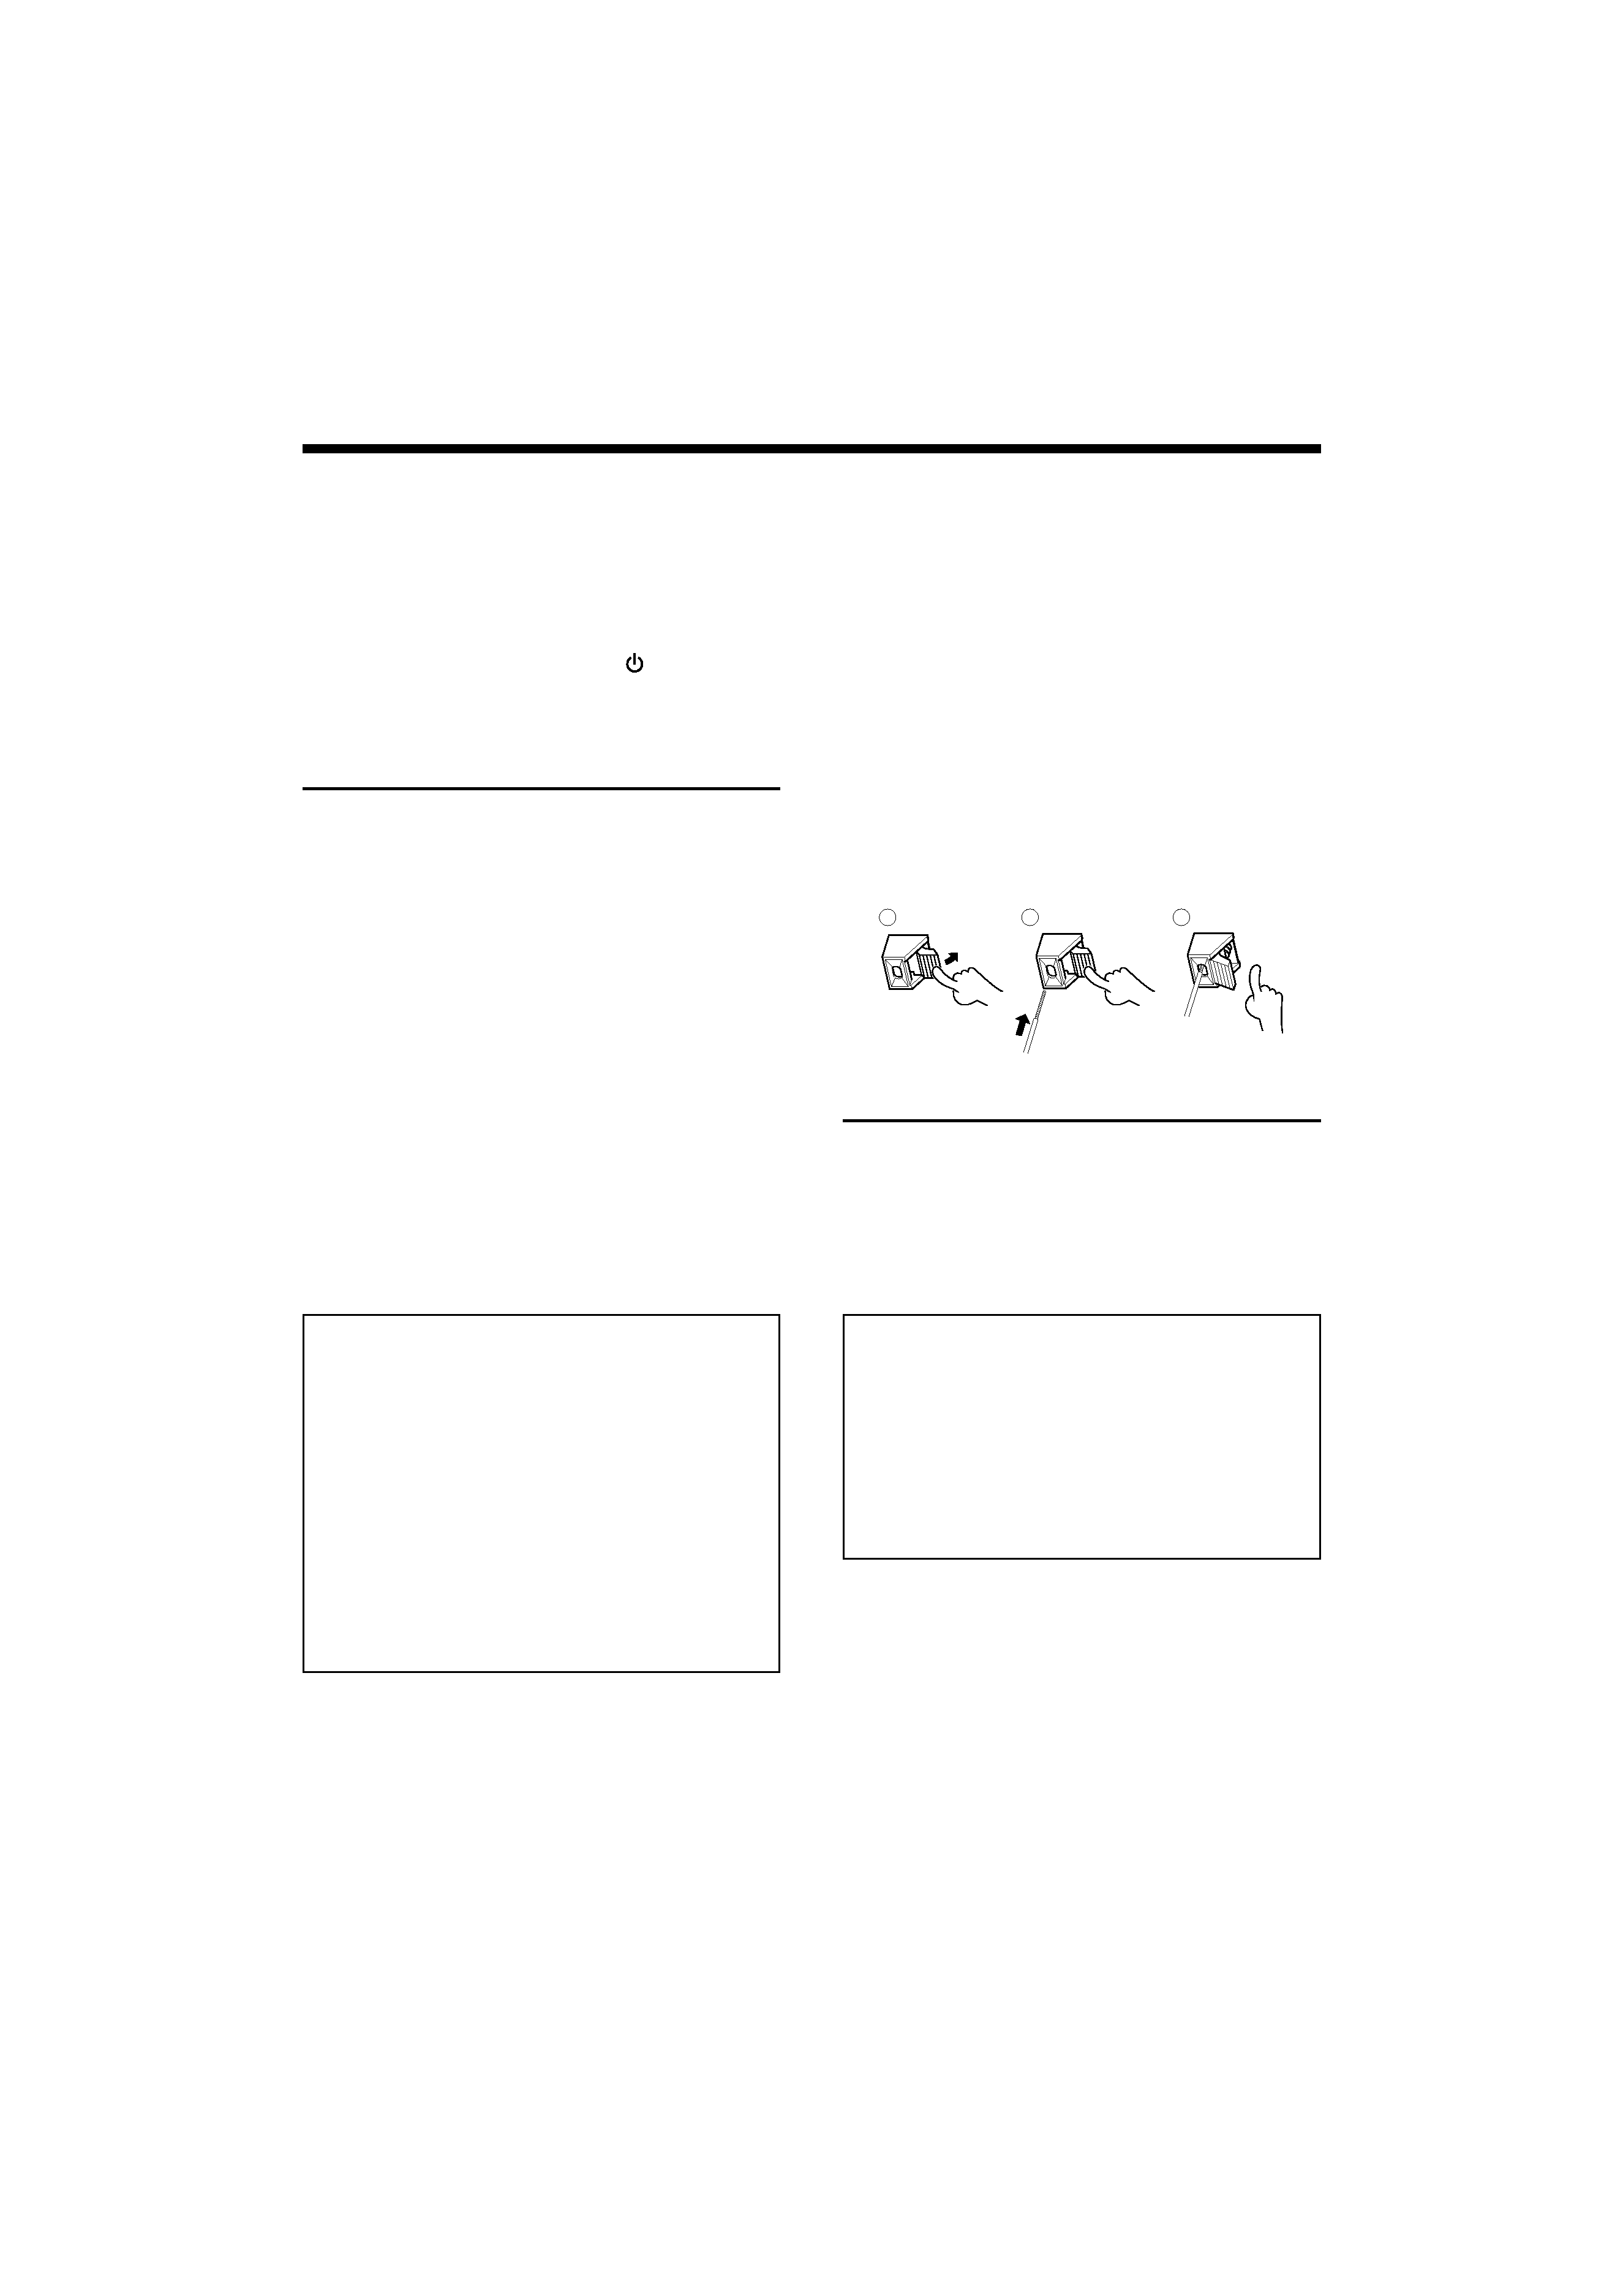
Connections
Connecting the AM antenna
Set up the AM loop antenna, and then connect it.
Speakers connection
·
Connect the right speaker to terminal marked
"R" , with the red wire to + and the black wire
to .
·
Connect the left speaker to terminal marked
"L" , with the red wire to + and the black wire
to .
·
Clip the stripped portion of the speaker wire
as shown.
1
2
3
Notes:
·For the FM antenna : Adjust the position of the FM
antenna for the best reception.
·For optimal sound performance, it is recommended
to use the supplied speakers.
·
Do not connect more than one speaker to any one
pair of +/ speaker terminal.
CAUTION
Be sure to adhere to the following, or proper
ventilation will be blocked causing damage
or fire hazard.
·
Do not place any objects impairing heat ra-
diation onto the top of the unit.
·Leave some space around the unit (from the
largest outside dimension including projec-
tion) equal to or greater than, shown below.
Top panel : 50 cm
Back panel : 10 cm
CAUTION
· Place the unit where the AC power cord can
be easily unplugged.
·The power in this unit will not be completely
cut off from the AC wall outlet when the
power switch is turned OFF. To cut off the
power completely, unplug the AC power
cord from the AC wall outlet.
05.3.29, 5:12 PM
4
5 EN
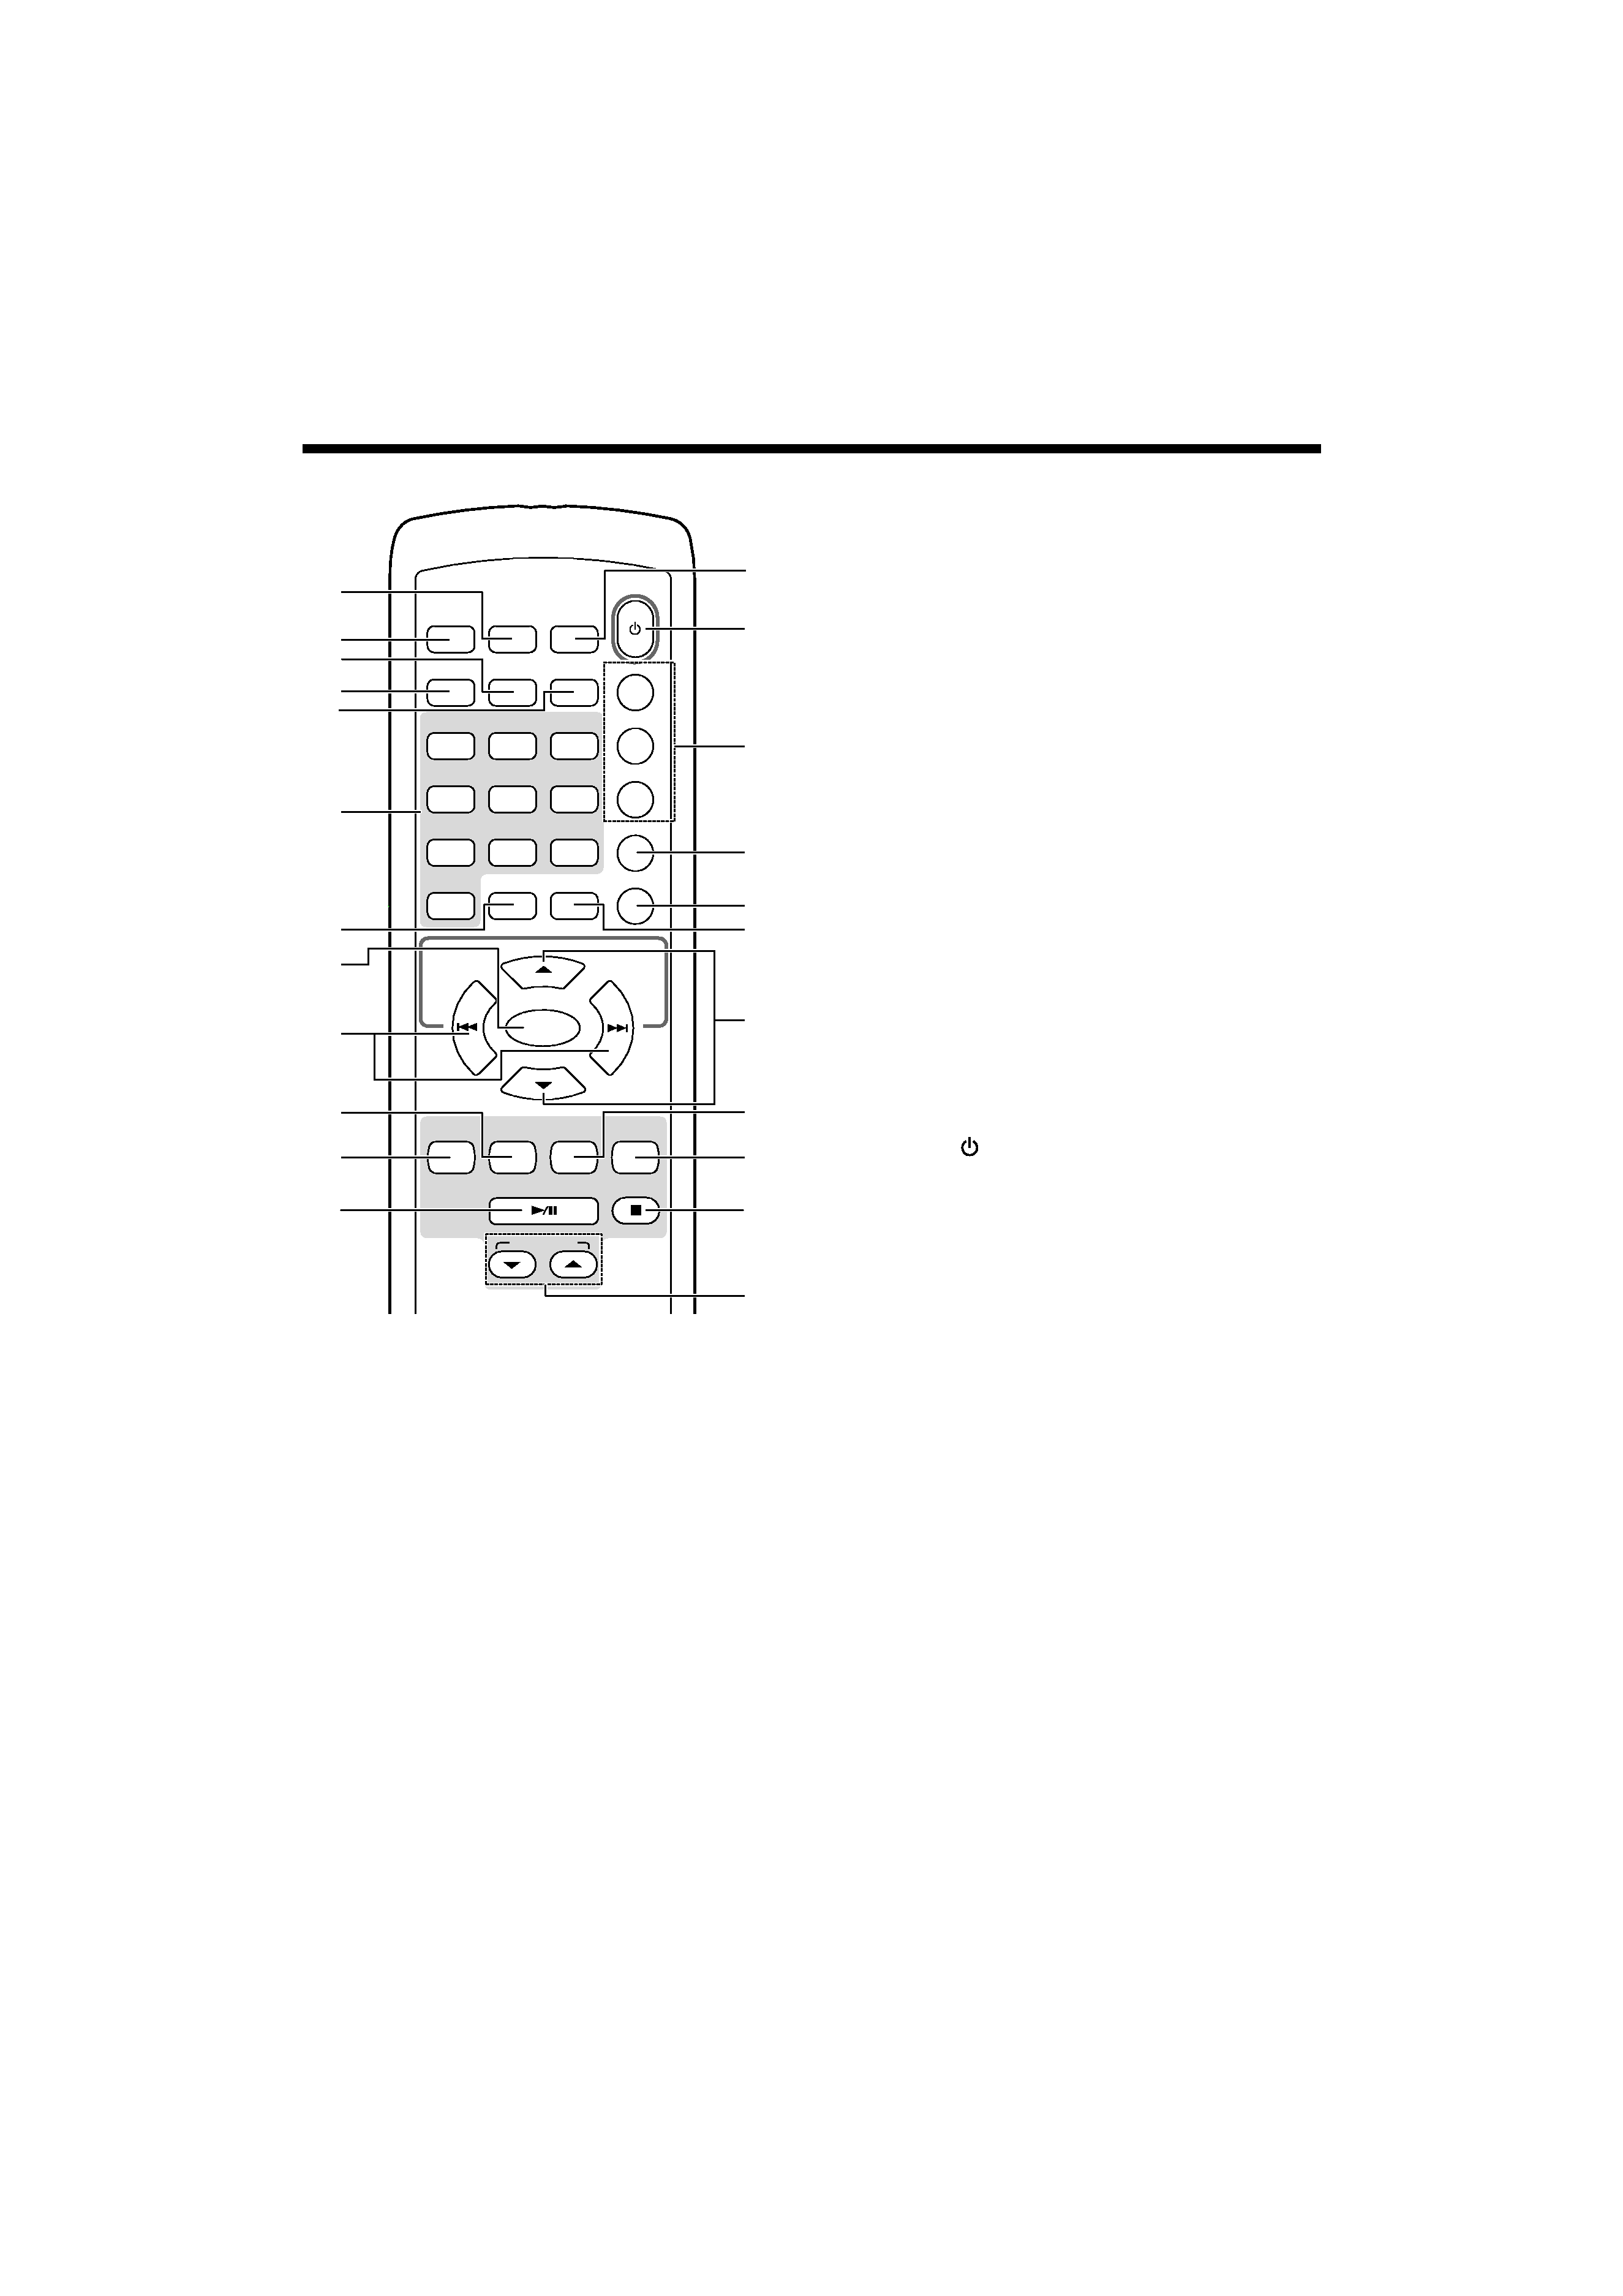
Names and functions of parts
POWER
CD
TUNER
/BAND
TAPE
SEARCH
/SKIP
/TUNING
SEARCH
/SKIP
/TUNING
TIMER SET
P.CALL +
+
REPEAT
TIMER ON/OFF
RANDOM
INTRO
SLEEP
PTY
RDS/
DISPLAY
REC
STOP
EQ/X-BASS
MUTE
1
2/ABC
3/DEF
4/GHI
FILE SEARCH
PROGRAM
5/JKL
6/MNO
7/PQRS
8/TUV
9/WXYZ
0
PLAY/PAUSE
VOLUME UP
VOLUME DOWN
ENTER
STEREO
/MONO
3
5
7
8
$
%
^
&
*
(
)
¡
TM
£
1
2
4
6
9
0
!
@
#
Remote control unit
1 RDS/DISPLAY button
To change the display for RDS; to view the cur-
rent status of the system; to change the time
display for CD; to change the information dis-
play for MP3-CD and WMA-CD.
2 PTY button
To carry out PTY search.
3 RANDOM button
To carry out random playback for CD.
4 INTRO button
To play first several seconds for each track of CD.
5 REPEAT button
To repeat one track or all tracks for CD.
6 digit (0 ~ 9/WXYZ) buttons
To select a track number for CD; to select a
preset radio station for TUNER; to enter file
names in file search mode for MP3-CD and
WMA-CD.
7 PROGRAM button
To program disc tracks for CD; to program pre-
set radio stations for TUNER; to set or reset
clock for clock; to set or reset timer for timer.
8 ENTER button
To confirm the selection in file search mode
for MP3-CD and WMA-CD.
9 SEARCH/SKIP/TUNING +/ ¢ / 4 buttons
To search forward/backward to next/previous
track for CD; to skip tracks for CD; to search
forward/backward or to skip to the next/previ-
ous album for MP3 and WMA; to fast forward
or rewind a tape; to tune to higher/lower radio
frequency or search radio stations for TUNER;
to set the hour and minutes for clock; to set
timer function for timer.
0 TAPE button
To select TAPE input or turn the system on to
TAPE input.
! TUNER/BAND button
To select TUNER input or turn the system on
to TUNER input. When in TUNER input, press
the select the waveband: FM or AM.
@ PLAY/PAUSE 6 button
To start or interrupt playback for CD.
To start playback for TAPE.
# STEREO/MONO button
To switch between stereo mode and mono
mode (on FM band only) for TUNER.
$ POWER
button
To switch the system on or to standby mode.
% Clock and timer related buttons
TIMER SET button to view the clock or set the clock.
TIMER ON/OFF button to switch the timer on/off.
SLEEP button to select the sleep time.
^ EQ/X-BASS button
To select the desired sound effect: POP, CLAS-
SIC, ROCK, JAZZ or FLAT; to switch on/off X-
BASS mode.
& MUTE button
To interrupt and resume sound reproduction.
* FILE SEARCH button
To select a desired file in an MP3 and a WMA
disc.
( VOLUME UP/DOWN 5/ buttons
To increase or decrease the volume.
) CD button
To select CD input or turn the system on to CD in-
put.
¡ REC button
To record fromTUNER or CD to a cassette tape.
TM STOP 7 button
To stop playback for CD or TAPE; to stop pro-
gramming for CD.
£ P.CALL +/ 5/ buttons
To select a preset radio stations for TUNER.
05.3.29, 5:12 PM
5