EN-1
GTM 10 FM TMC TRAFFIC RECEIVER
INSTALLATION SHEET
Due to the location of the vehicle's radio antenna, Kenwood highly recommends that the GTM 10
be installed by a professional installer. Installing the GTM 10 without the aid of a professional
installer may damage the GTM 10 and void your warranty.
The GTM 10 FM TMC Traffic Receiver installs between a vehicle's radio and its antenna cable.
Carefully read this Installation Sheet and follow the instructions to install the GTM 10 in the vehicle.
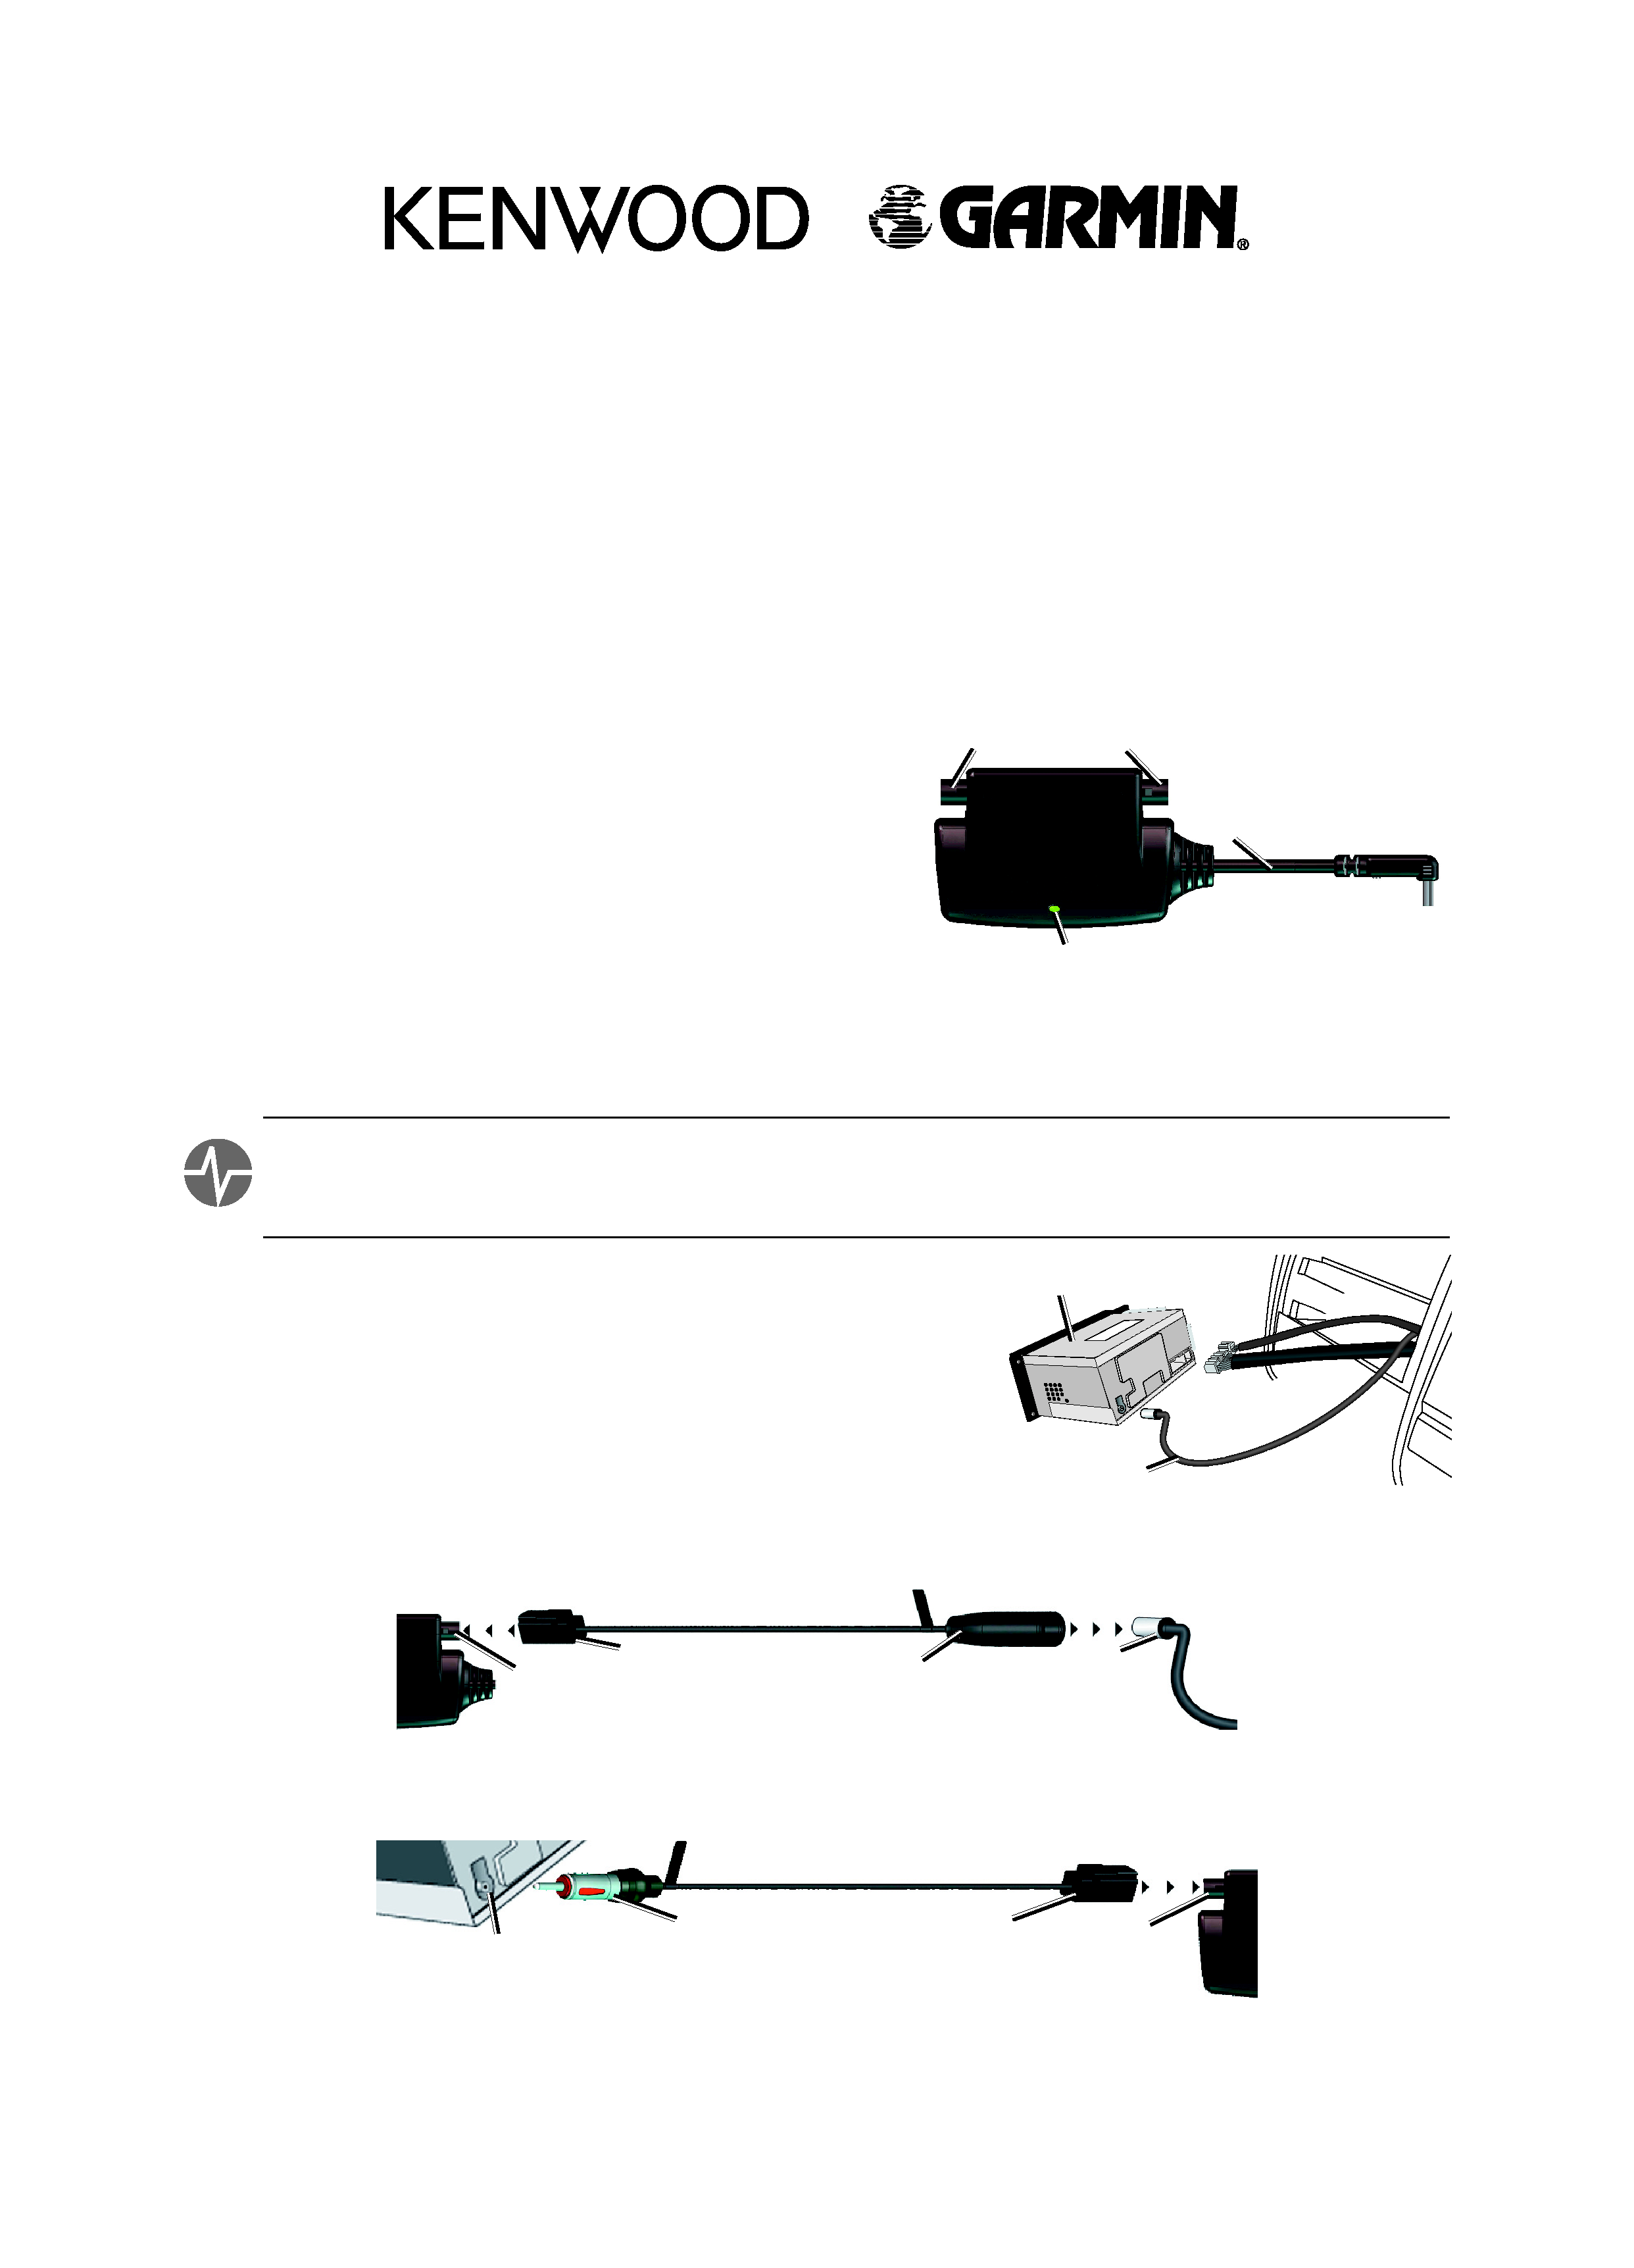
GTM 10 Overview
The GTM 10 has two cable connectors that allow it to be
installed in series between the antenna and radio. Do not
open the GTM 10 or loosen the case screws.
In: In from antenna. Connect the antenna adapter here.
Out: Out to radio. Connect the radio adapter cable here.
LED: displays the signal status.
Mini-B USB cable: 1.5-meter built-in cable to connect to a
GPS device.
Step 1: Prepare the Radio
TEST: Before installation, test the vehicle's radio to ensure that the antenna is functioning properly and the
radio can receive all normal FM signals. If the antenna functions improperly, the GTM 10 may not work
properly. Consult the owner about continuing with installation.
Remove the trim panel and other parts of the dashboard to access
the vehicle's radio antenna cable. You may need to remove the
radio as well. Detach the antenna cable.
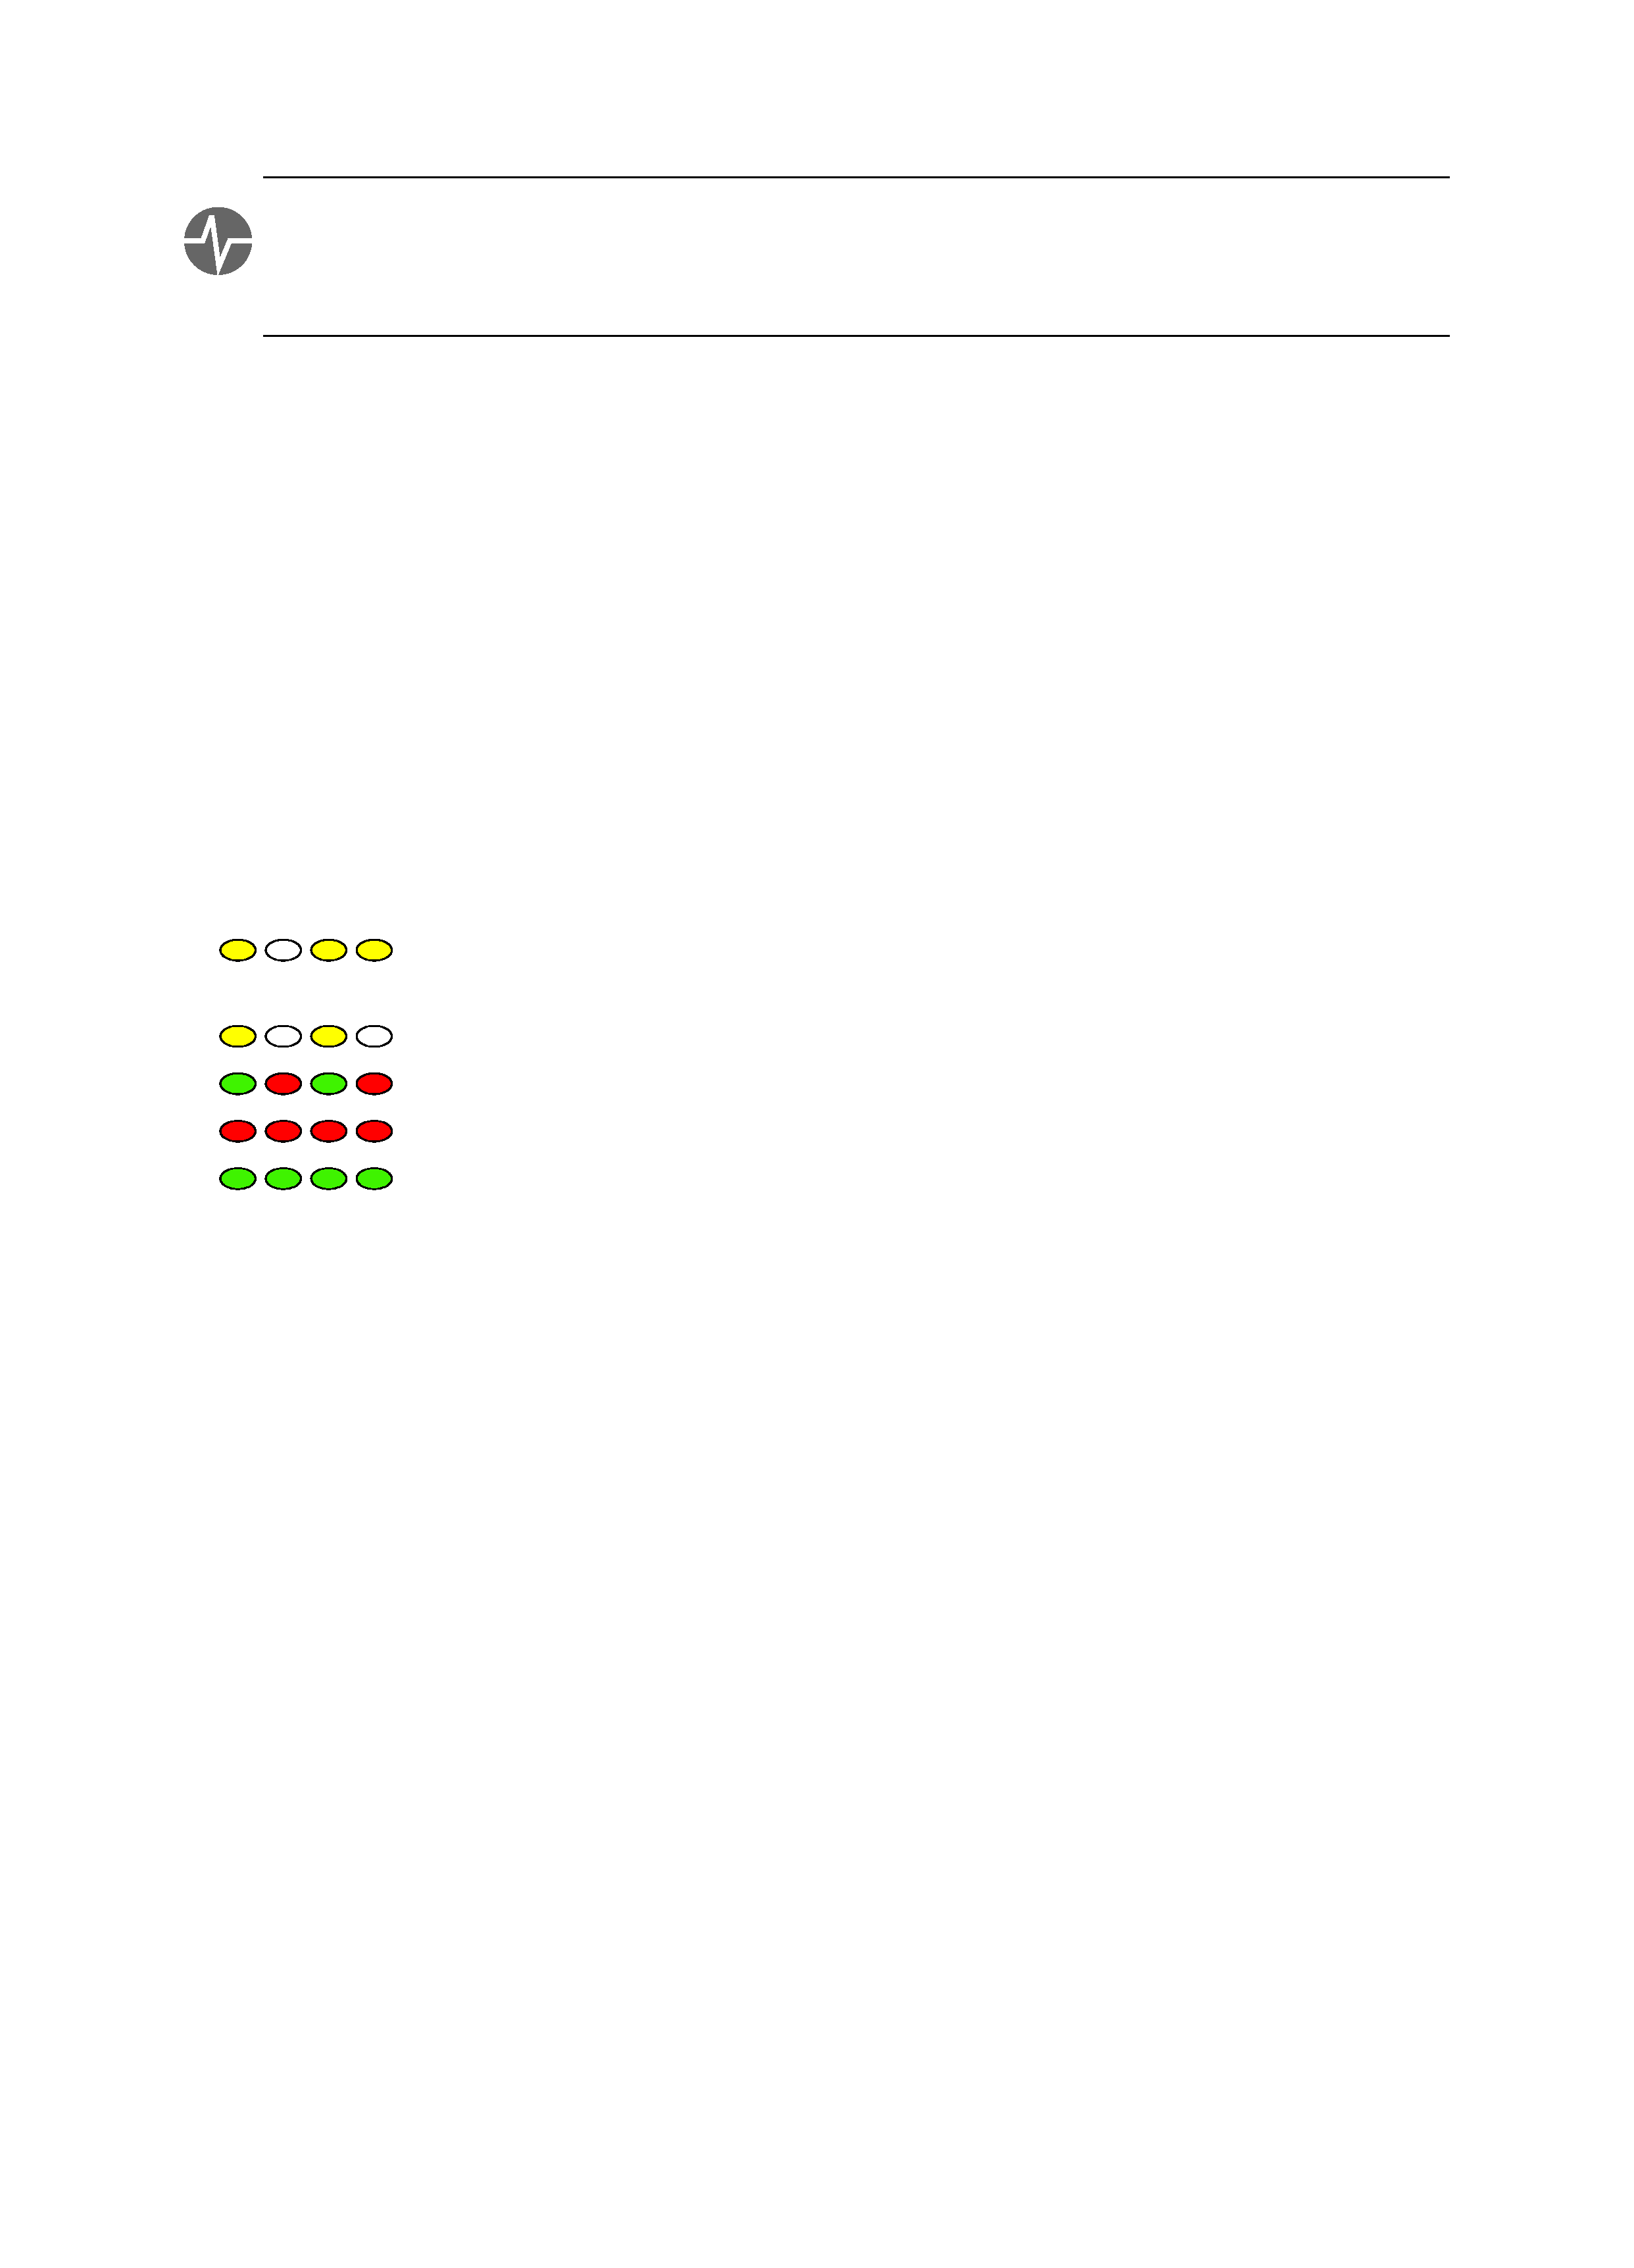
Step 2: Connect to the Radio
The GTM 10 connects in series between the antenna and radio.
1. Connect the antenna plug to the female (receptacle) adapter cable. Connect the Fakra plug to the
In
connector on the GTM 10. The Fakra plug locks firmly in place.
Fakra
connector
Female
adapter
Antenna
connector
GTM 10
In
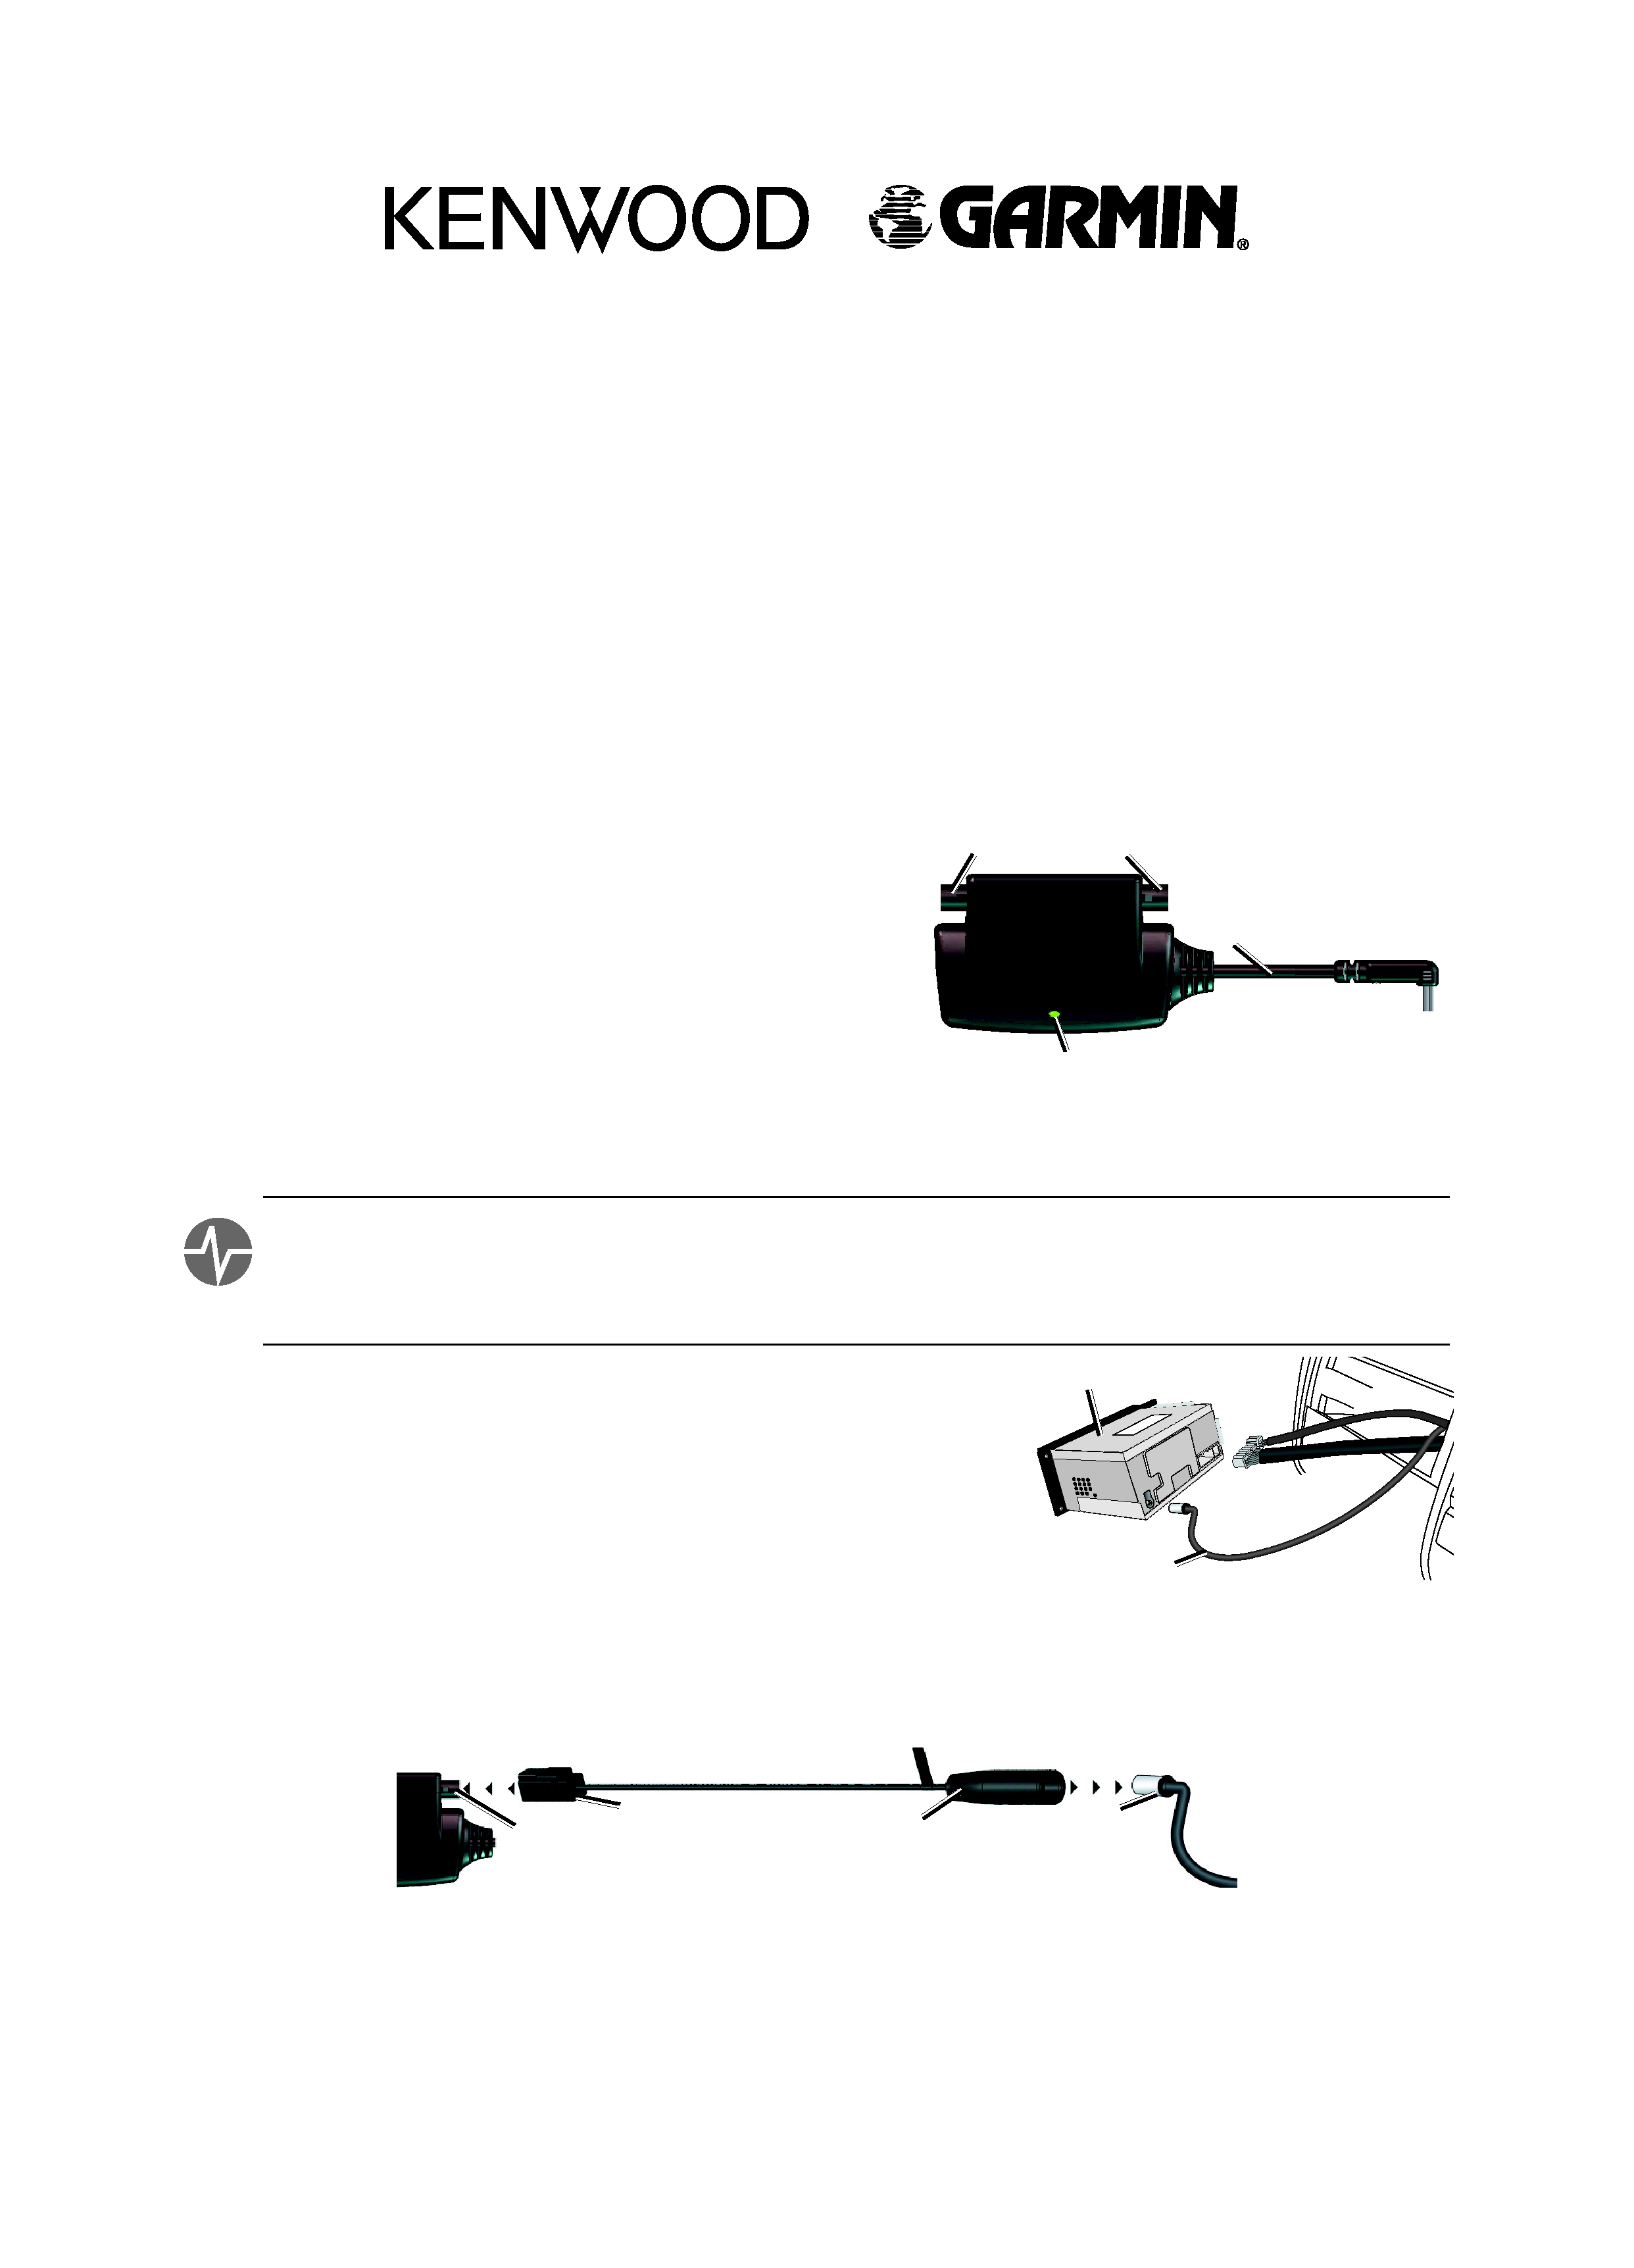
2. Connect the Fakra connector of the adapter cable to the
Out connector of the GTM 10. Connect the
male (plug) adapter cable into the radio receptacle, as shown below.
Fakra
connector
Male
adapter
Radio
receptacle
GTM 10
Out
In
Mini-B USB cable
(cord is not to scale)
Out
LED
Radio
Antenna Cable
190-00493-02_0B.indb 1
2/21/2006 10:38:40 AM
EN-2
TEST: Turn on the vehicle's radio. If sound from an FM radio station can be heard, the GTM 10 and its
cables are properly connected. If no sound is heard, the GTM 10 is not connected correctly. Check that all
cables are locked into place and free of obstructions. If the connections are secure, make sure the chosen
adapter cables are correct for the vehicle.
Step 3: Connect to the GPS Device
Route the mini-B USB cable from behind the radio on the passenger's side of the vehicle up to the GPS
device. If possible, thread the cable through an existing opening in the glove box or trim panel. Thread
enough cable through the opening to reach the GPS device. Do not cut the mini-B USB cable.
If the mini-B USB cable is not long enough to reach the GPS device, use the 2-meter extension cables
provided. Wrap the two connectors with electrical tape. Additional extensions are available for purchase
from a Garmin dealer or from the Garmin Web site at http://www.garmin.com/products/gtm10.
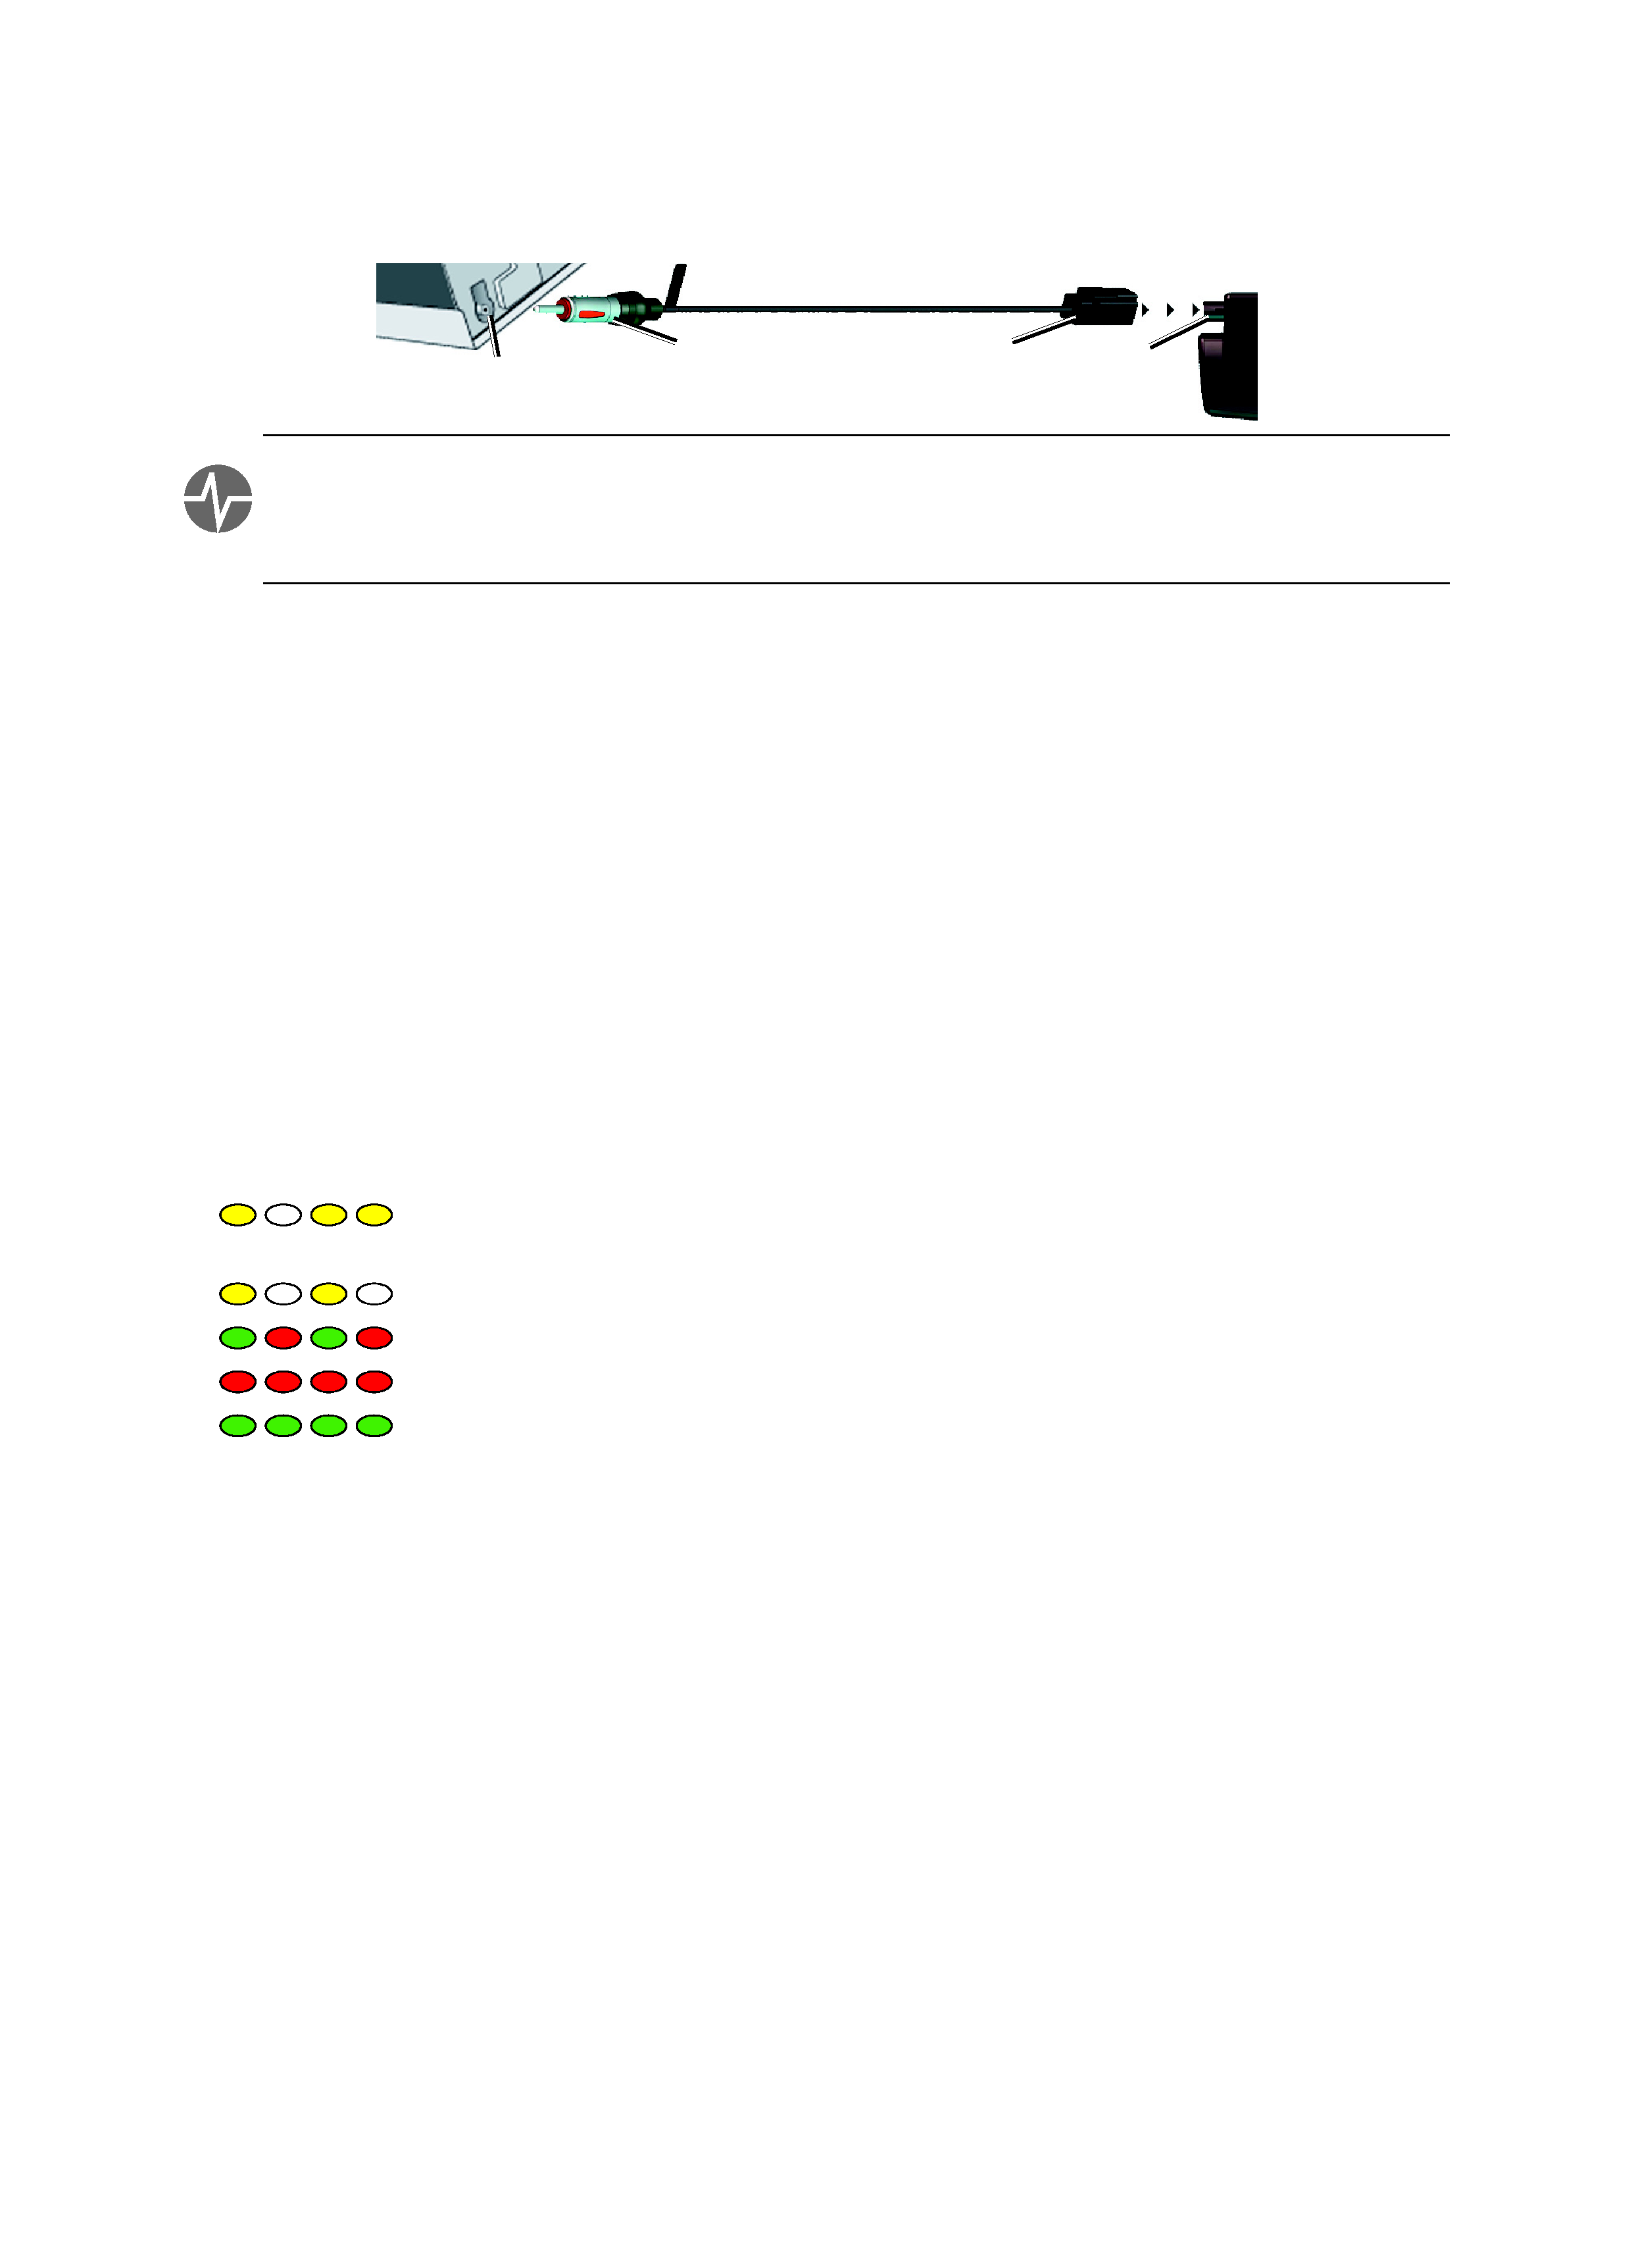
Step 4: Test the GTM 10
Test the GTM 10 for a proper installation and service reception. Connect the mini-B USB connector to
the GPS device.
· Observe the LED: Turn on the GPS device. Service reception is indicated by the solid green light,
which may take up to five minutes to appear for initial data acquisition.
Yellow dot-dash flashes: waiting for initial country code, automatically supplied by the
GPS device.
Yellow fast flashes: searching table for active entry
Red/Green flashes: scanning for new TMC FM stations
Red solid light: momentary sync loss
Green solid light: normal TMC traffic data flow. The GTM 10 must be in an area of
service and be receiving adequate signals to display a solid green light.
· Verify Signal Strength: If you are inside a building where radio signals cannot be received, you may
need to take the vehicle outside for testing.
· Verify that you are in a service area: Check for service from the pay service or free services, if
available. To view service areas, go to the Garmin Web site at http://www.garmin.com/fmtraffic.
· Check the Map: Turn on the GPS device and access a map. Check for traffic alerts and symbols on
the map. It may be easiest to browse the map of a roadway or intersection under construction or that is
known to have frequent traffic hazards. If possible, refer to the Owner's Manual.
If the above tests fail, either you are not in a service area, the purchased subscription is not activated (see
below), or the installation might be faulty.
190-00493-02_0B.indb 2
2/21/2006 10:38:40 AM

EN-3
Activating a Subscription
The GTM 10 package provides a 90 day subscription to a pay service. Your subscription activates when
the GTM 10 first receives traffic signals from the pay service. The GTM 10 can also use any free services
available.
To renew your FM subscription or purchase an additional subscription, go to Garmin's FM Traffic Web
site at http://www.garmin.com/fmtraffic. Follow the steps on the Web site to obtain a 25-character Traffic
Subscription Code. Enter the 25-character code in your GPS device. Refer to the confirmation e-mail
or Web page, or the GPS device's Owner's Manual, for specific instructions about entering the Traffic
Subscription Code.
NOTE: You do not need to activate the subscription that came with your GTM 10.
The Traffic Subscription Code cannot be reused; you must obtain a new code each time you renew your
service. The code is specific for the GTM 10 it was purchased for; it cannot be used on multiple GTM 10
devices.
Step 5: Mount the GTM 10
If possible, place the GTM 10 where the LED can be seen without dismantling the dashboard.
1. Mount the GTM 10:
· Attach with foam tape: clean and dry a flat surface behind the dashboard. Remove the backing
from the foam tape and attach the GTM 10 to the flat surface.
· Hang freely: bind up any slack cable from the mini-B USB cable with a wire tie and let the GTM 10
hang freely behind the radio.
2. Check that all cables and the GTM 10 are secure and free of obstruction.
3. Replace all parts of the dashboard to their original locations.
190-00493-02_0B.indb 3
2/21/2006 10:38:40 AM
FR-4
RÉCEPTEUR DE TRAFIC TMC FM GTM 10
FICHE D'INSTALLATION
En raison de l'emplacement de l'antenne radio du véhicule, Kenwood recommande fortement que
le récepteur GTM 10 soit installé par un installateur professionnel. L'installation du récepteur
GTM 10 sans l'aide d'un installateur professionnel risque d'endommager le récepteur GTM 10 et
d'annuler votre garantie.
Le récepteur TMC FM GTM 10 s'installe entre la radio et le câble d'antenne du véhicule. Lisez
attentivement cette fiche d'installation et suivez scrupuleusement les instructions fournies lors de
l'installation du récepteur GTM 10 à l'intérieur du véhicule.
Vue d'ensemble du récepteur GTM 10
Le récepteur GTM 10 possède deux connecteurs de câble permettant une installation en série entre
l'antenne et la radio. N'ouvrez jamais le récepteur GTM 10 et ne desserrez pas les vis du boîtier.
Entrée : entrée depuis l'antenne. Connectez l'adaptateur
d'antenne à cet endroit.
Sortie : sortie vers la radio. Connectez le câble adaptateur
radio à cet endroit.
DEL : affiche l'état du signal.
Câble mini-B USB : câble intégré 1,5 mètre aux fins de la
connexion à un appareil GPS.
Étape 1 : Préparation de la radio
TEST : Avant l'installation, testez la radio du véhicule afin de vous assurer que l'antenne fonctionne
correctement et que la radio reçoit les signaux FM standard. Si l'antenne ne fonctionne pas correctement, il
est possible que le récepteur GTM 10 ne fonctionne pas correctement. Consultez le propriétaire pour savoir
si vous devez poursuivre l'installation.
Enlevez le panneau d'aménagement intérieur et les autres pièces
du tableau de bord afin d'accéder au câble d'antenne radio du
véhicule. Il est possible que vous deviez également enlever la
radio. Débranchez le câble d'antenne.
Étape 2 : Connexion à la radio
Le récepteur GTM 10 se connecte en série entre l'antenne et la
radio.
1. Raccordezlaprisedel'antenneaucâbleadaptateurfemelle(prise)approprié.BranchezlapriseFakrasur
le connecteur d'
entrée du récepteur GTM 10. Correctement enclenchée, la prise Fakra doit se bloquer.
Connecteur Fakra
Adaptateur
femelle
Connecteur
d'antenne
Entrée du
récepteur GTM 10
Radio
Câble d'antenne
Entrée
Câble mini-B USB
(le cordon n'est pas à
l'échelle réelle)
Sortie
DEL
190-00493-02_0B.indb 4
2/21/2006 10:38:43 AM
FR-5
2. Raccordez le connecteur Fakra du câble adaptateur au connecteur de
sortie du récepteur GTM 10.
Branchez le câble adaptateur mâle (fiche) sur la prise radio, comme l'indique le schéma ci-dessous.
Connecteur
Fakra
Adaptateur
mâle
Prise
radio
Sortie du
récepteur GTM 10
TEST : allumez la radio du véhicule. Si vous entendez le son d'une station radio FM, le récepteur GTM 10
est branché correctement. Si aucun son n'est audible, le récepteur GTM 10 n'est pas branché correctement.
Vérifiez que tous les câbles sont bien serrés et qu'aucun obstacle ne gêne le passage des câbles. Si les
connexionssontsécurisées,assurez-vousquelescâblesd'adaptateurchoisisconviennentbienpourlevéhicule.
Étape 3 : Connexion à l'appareil GPS
Installez le câble mini-B USB partant derrière la radio sur le côté passager du véhicule, jusqu'à l'appareil
GPS. Si possible, faites passer le câble à travers une ouverture existante dans la boîte à gants ou le
panneau d'aménagement intérieur. Faites passer assez de câble à travers l'ouverture pour pouvoir
atteindre l'appareil GPS. Ne coupez pas le câble mini-B USB.
Si le câble mini-B USB n'est pas assez long pour atteindre l'appareil GPS, vous pouvez acheter un
câble d'extension de 2 mètres auprès d'un revendeur Garmin ou sur le site Web de Garmin : http://www.
garmin.com/products/gtm10. Recouvrez les deux connecteurs de ruban diélectrique.
Étape 4 : Test du récepteur GTM 10
Testez l'installation et la réception de service du récepteur GTM 10. Connectez le connecteur mini-B
USB à l'appareil GPS.
· Observez le voyant DEL : mettez l'appareil GPS sous tension. La réception du service est indiquée
par une lumière verte fixe. Lors de l'acquisition initiale des données, cinq minutes peuvent s'écouler
avant l'apparition de la lumière verte.
Clignotement point et trait jaune : attente de l'indicatif de pays initial, fourni
automatiquement par le service GPS.
Clignotement rapide jaune : recherche de l'entrée active dans le tableau.
Clignotement rouge/vert : recherche de nouvelles stations TMC FM.
Lumière rouge fixe : perte de synchronisation momentanée.
Lumière verte fixe : flux de données de trafic normal. Le GTM 10 doit être situé dans
une zone de couverture du service et recevoir les signaux adéquats pour que le
voyant s'illumine d'une lumière verte fixe.
· Vérification de la puissance du signal : si vous vous trouvez dans un garage dans lequel les signaux
radio sont difficilement reçus, il est possible que vous deviez sortir votre véhicule.
· Vérification de la couverture du service : vérifi ez la disponibilité du service auprès du service
payant ou des services gratuits, le cas échéant. Pour affi cher les zones de couverture du service,
visitez le site Web de Garmin à l'adresse http://www.garmin.com/fmtraffic.
· Vérification de la carte : mettez l'appareil GPS sous tension et accédez à une carte. Recherchez les
éventuelles alertes routières et les symboles sur la carte. Vous pouvez rechercher sur la carte les routes
ou intersections actuellement en travaux, ou réputées pour être fréquemment encombrées. Reportez-
vous si possible au manuel d'utilisation.
Si les tests ci-dessus échouent, il est possible que vous ne vous trouviez pas dans une zone de couverture
du service, que l'abonnement n'ait pas été activé (voir ci-dessous) ou que l'installation soit défectueuse.
190-00493-02_0B.indb 5
2/21/2006 10:38:43 AM