
GPS NAVIGATION SYSTEM
DNX5120
DNX512EX
MONITOR WITH DVD RECEIVER
DDX512
DDX5032
INSTRUCTION MANUAL
© B64-3971-00/00 (KW/K2W/RW)
Take the time to read through this instruction manual.
Familiarity with installation and operation procedures will help you obtain the best
performance from your new GPS Navigation System/DVD Receiver.
For your records
Record the serial number, found on the back of the unit, in the spaces designated on the
warranty card, and in the space provided below. Refer to the model and serial numbers
whenever you call upon your Kenwood dealer for information or service on the product.
Model DNX5120/DNX512EX/DDX512/DDX5032 Serial number
US Residence Only
Register Online
Register your Kenwood product at
w w w.Kenwoodusa.com

2
DNX5120/DNX512EX/DDX512/DDX5032
Contents
Basic Operations
10
Radio Listening
26
Functions While Displaying the Control Screen
26
Seek Mode
27
Auto Memory
28
Manual Memory
28
Radio Text
29
Set Station Name
29
Traffic Information
30
Search for Program Type
30
Video File/Picture Watching
23
Function During Playback Screen
23
Functions When Displaying the Easy Control
Panel
24
Functions While Displaying the Control Screen
24
Picture Control
25
How to read this manual
4
Before Use
6
Notes
7
Navigation Control
14
Using the Navigation System
14
Navigatoin Information Interrupt on the
Screen of Other Sources
(DNX5120/DNX512EX only)
14
Control of Other Sources While Displaying the
Navigation Screen
15
Music Disc & Audio File Listening
21
Functions While Displaying the Control Screen
21
iPod Control
31
Connecting an iPod
31
Functions When Displaying the Easy Control
Panel
31
Functions While Displaying the Control Screen
32
Watching DVD/VCD
16
Functions During the Playback Screen
16
Functions When Displaying the Easy Control
Panel
17
Functions While Displaying the Control Screen
17
DVD Disc Menu
18
VCD Zoom Control
20
USB Device Control
34
Functions When Displaying the Easy Control
Panel
34
Functions While displaying the Control Screen
34
Folder Select
36
Sirius/XM Control (North American sales
area only)
37
Functions While Displaying the Control Screen
37
Channel Search
38
Channel Memory
38
Direct Channel Search
39
Bluetooth Audio Control
40
Functions While Displaying the Control Screen
40

English
3
Setup Menu
56
Setup Menu
56
Audio Setup
56
Crossover Network Setup
57
DVD Setup
57
Language Setup
58
Parental Level Setup
59
System Setup
60
Panel Color Coordinate
61
AV Interface Setup
62
User Interface
64
Direct Source Button Setup
65
Entering Background
66
Background Delete
66
Background Select
67
Touch Panel Adjustment
67
Clock Setup
68
Monitor Setup
68
Security Code Setup
70
Deactivating Security Code
71
iPod Setup
72
Sirius Setup
72
Sirius Parental Code Setup
73
Sirius Parental Lock Setup
74
Sirius Parental Lock Channel Select
74
Bluetooth Setup
75
Registering Bluetooth Unit
76
Registering Bluetooth Unit PIN Code
77
Registering Special Bluetooth Unit
77
Bluetooth Unit Connection
78
Deleting Bluetooth Unit
78
Software Information
79
Setup Memory
80
DVD Language Codes
91
Help? Troubleshooting
92
Help? Error
94
Specifications
96
Audio Control
82
Audio Control Menu
82
Audio Control
82
Equalizer Control
83
Tone Setup
84
Zone Control
84
Muting Audio Volume upon
Reception of Phone Call
41
Muting Audio Volume upon Reception of
Phone Call
41
Character Entry
42
How to Use the Character Entry Screen
42
Screen Control
43
Screen Control
43
Hands Free Unit Control
44
Control Screen Function
44
When Received a Call
45
Calling by Entering a Phone Number
46
Quick Dialing
46
Controlling Tone-based Services
47
Calling by Phonebook
47
Making a Call Using Outgoing/Incoming Call
Records
49
Calling by Voice Recognition
50
Setting Up the Hands-Free Phone
51
Voice Recognition
52
Key Word Voice Recognition
53
Phone Number Preset
54
SMS (Short Message Service)
55
Remote Controller
86
Battery installation
86
Remote Controller mode switch
86
Common operations (AUD mode)
87
DVD/VCD/CD/Audio files (DVD mode)
88
Radio (AUD mode)
89
NAVI (NAVI mode)
90
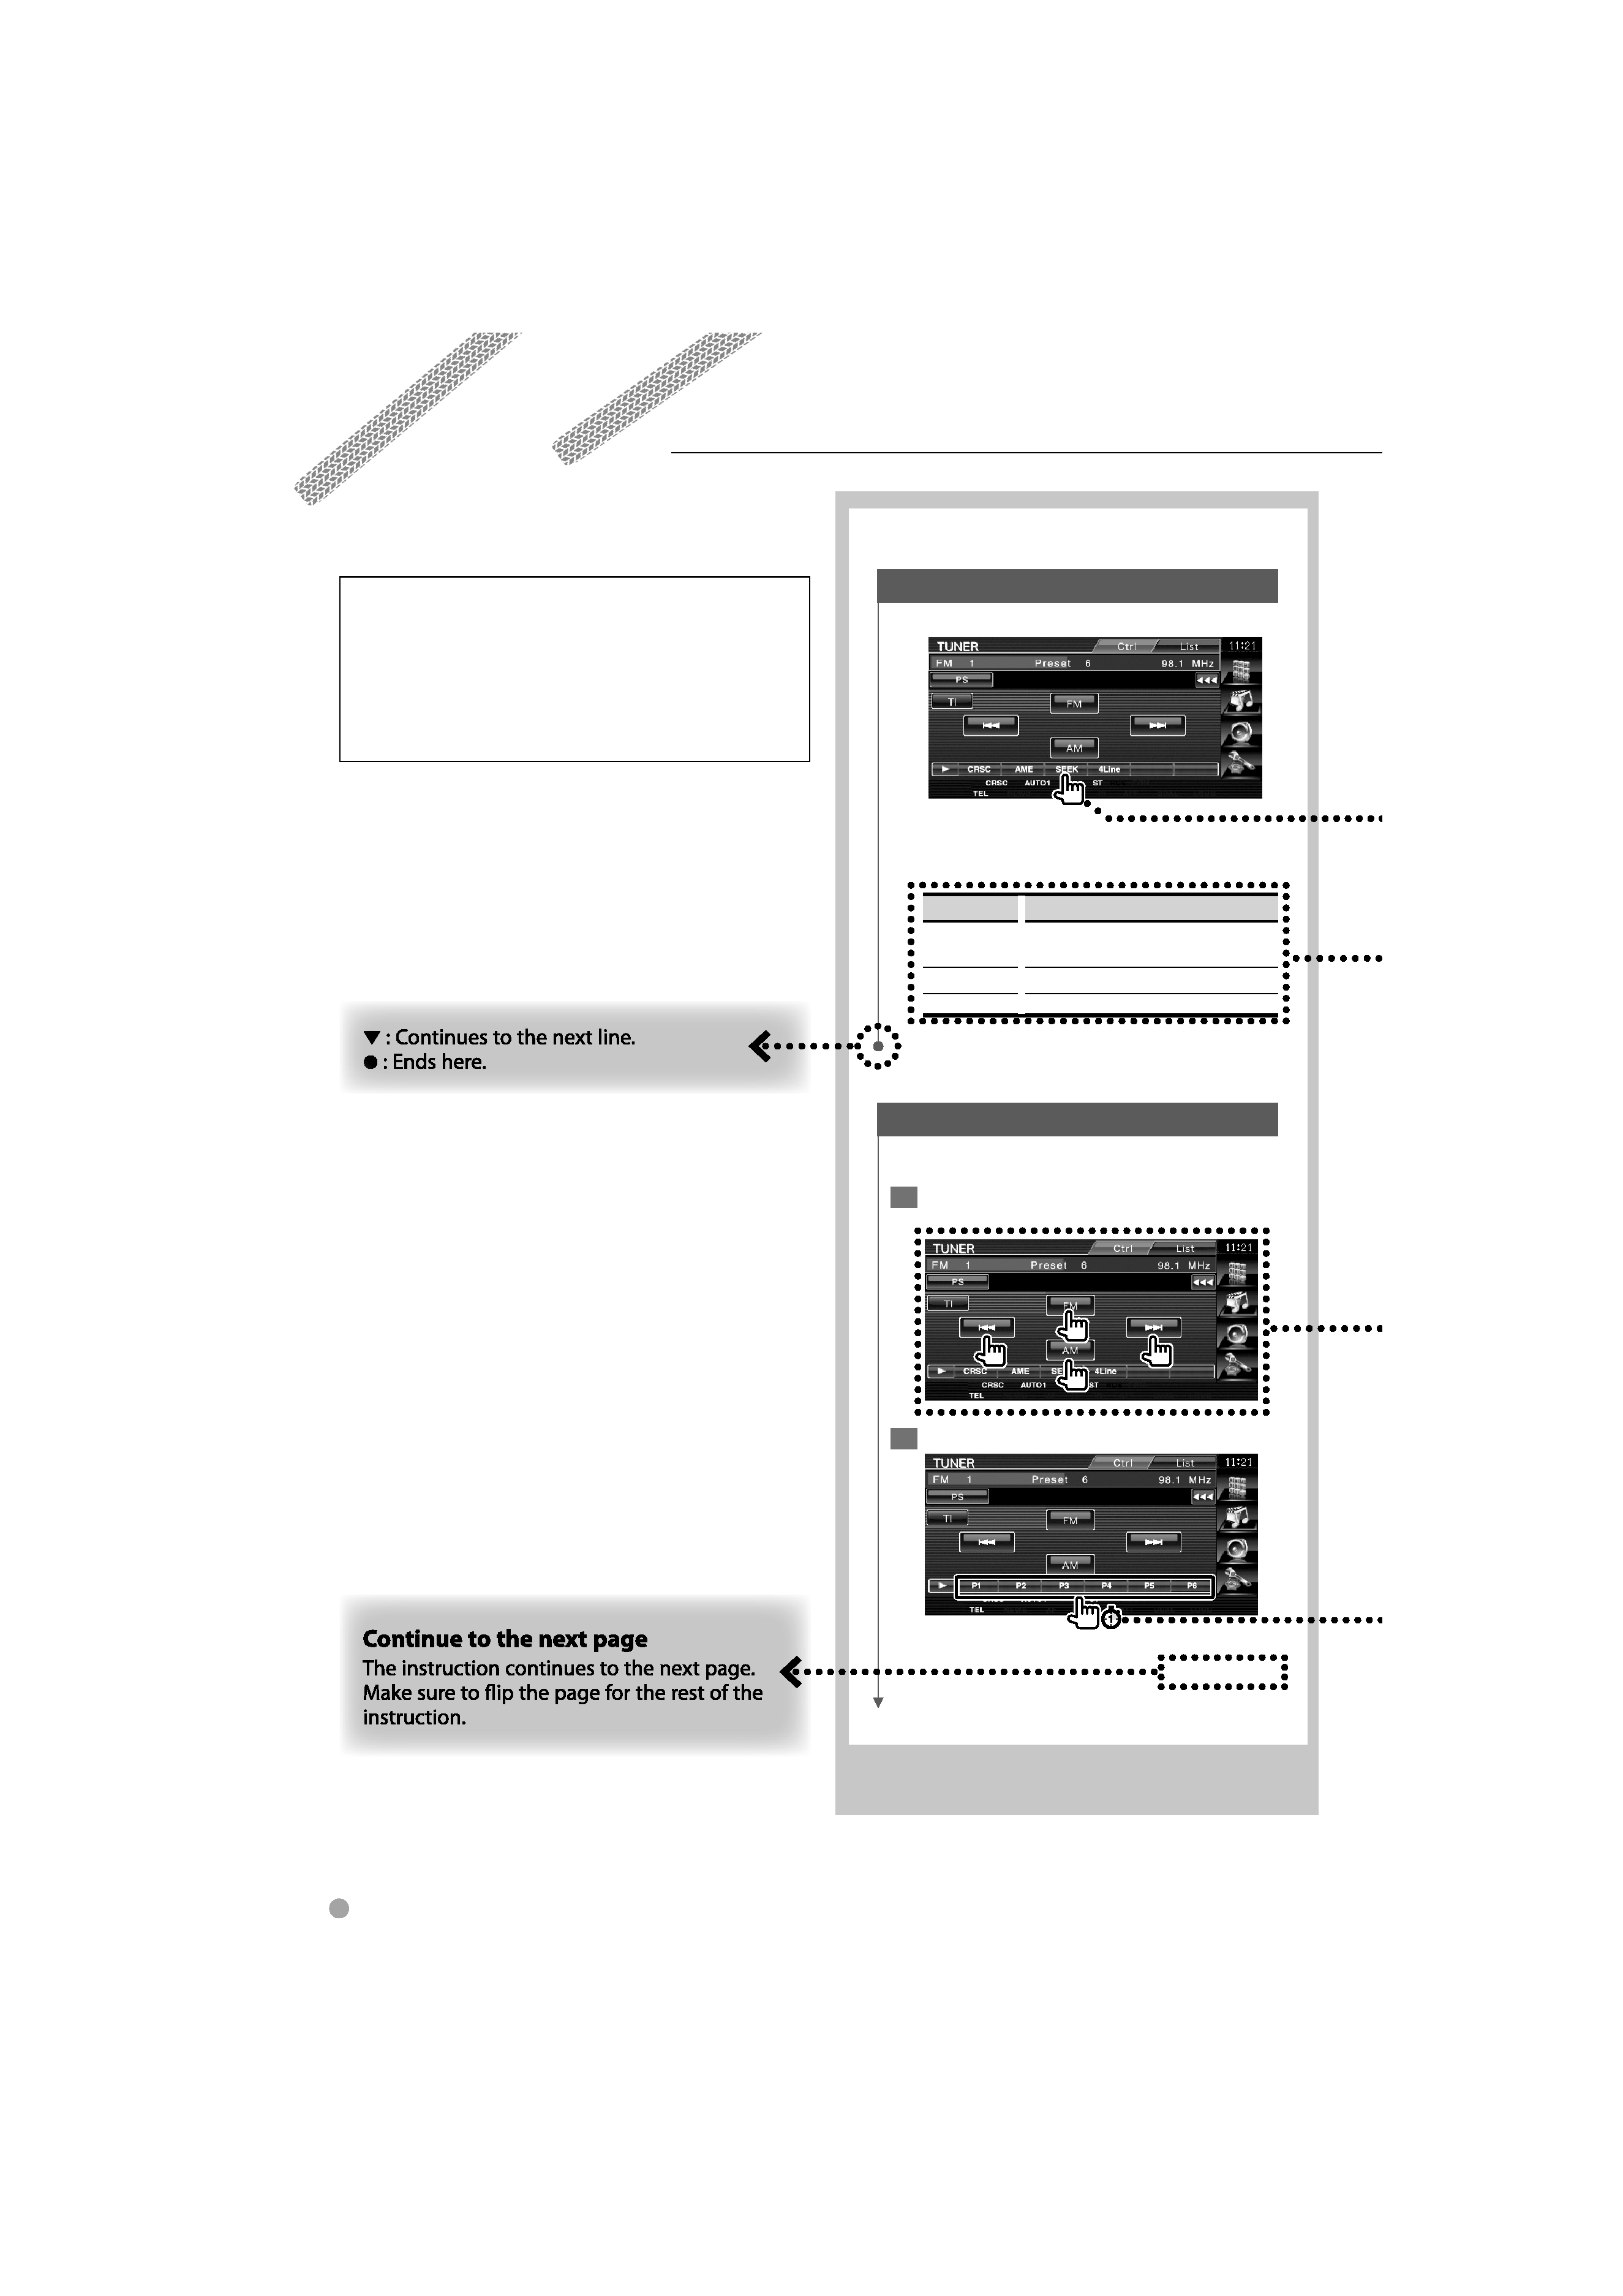
Seek Mode
Sets a station selection.
The mode is switched in following order each
time you touch the button.
Display
Setting
"AUTO1"
Tunes in a station with good reception
automatically.
"AUTO2"
Tunes in stations in memory one after another.
"MANU"
Switches to the next frequency manually.
Manual Memory
Stores the current receiving station in memory.
1 Select a station you wish to store in
memory
2 Store in memory
Next page
3
4
DNX5120/DNX512EX/DDX512/DDX5032
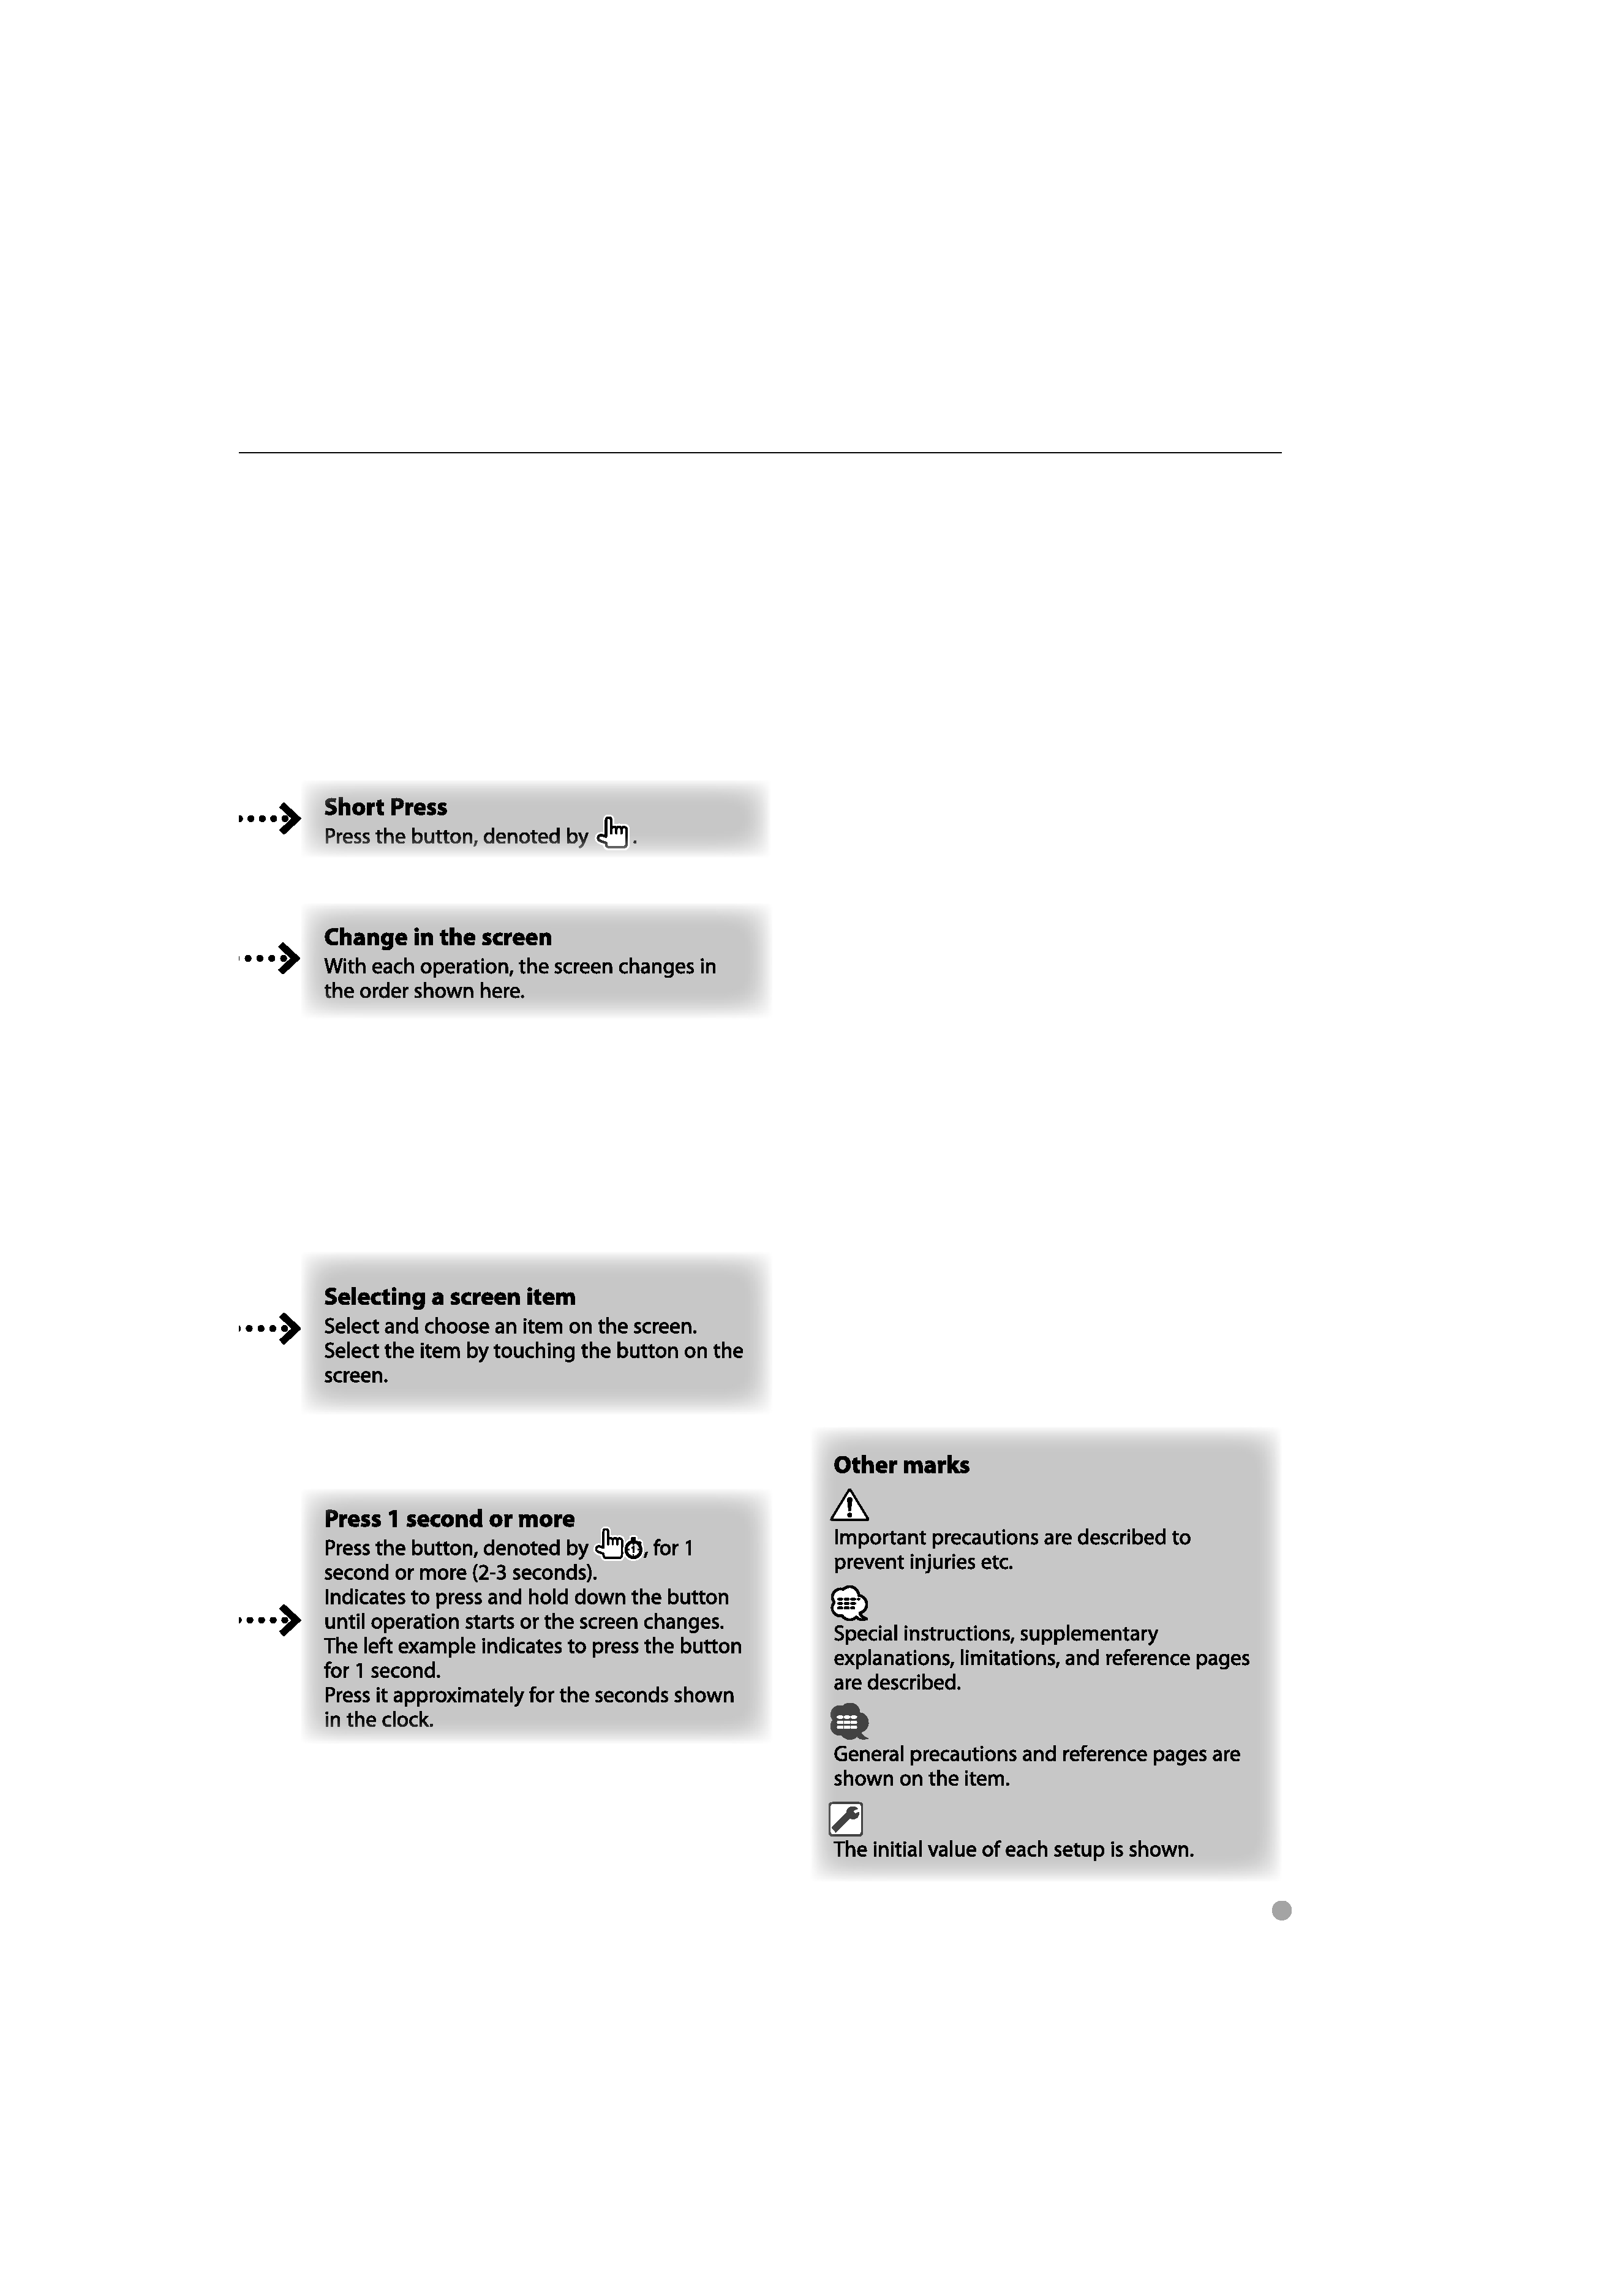
How to read this manual
This manual uses illustrations to explain its
operations.
The displays and panels shown in this manual
are examples used to provide clear explanations
of the operations.
For this reason, they may be different from the
actual displays or panels used, or some display
patterns may be different.
The above operation example with the mark
differs from the actual operation.
English
5