STANDBY/ON
STANDBY/ON
PAUSE
PLAY
STOP
SKIP
OPEN/CLOSE
38
7
0
¢
4
PROGRESSIVE
DVD AUDIO
DVD/VIDEO CD/CD
DVD AUDIO/DVD VIDEO/CD PLAYER
'9' $8',29,'(2 3/$<(5
;96$%.;96$*'
PROGRESSIVE
SCAN
S.FREQ
OPEN
/CLOSE
TV
DVD
TV
DVD
STANDBY/ON
REPEAT
123
56
89
0
+10
10
7
4
3D
PHONIC
TV/VIDEO
CANCEL
SUBTITLE
ANGLE
TV1
TV2
TV3
TV4
TV5
TV6
TV7
TV8
TV9
TV -/--
TV0
MUTING
AUDIO
VFP
DIGEST
PAGE
PREVIO
US
NEXT
CLEAR
STROBE
SLOW+
SLOW
-
TO
P
ME
NU
MEN
U
CHO
ICE
ENTER
REMOTE CONTROL
CH+
SELECT
CH-
VOL
+
VOL
-
ON
SC
REE
N
ZOOM
+
-
RETURN
4
¢
1
¡
5
5
5
7
8
3
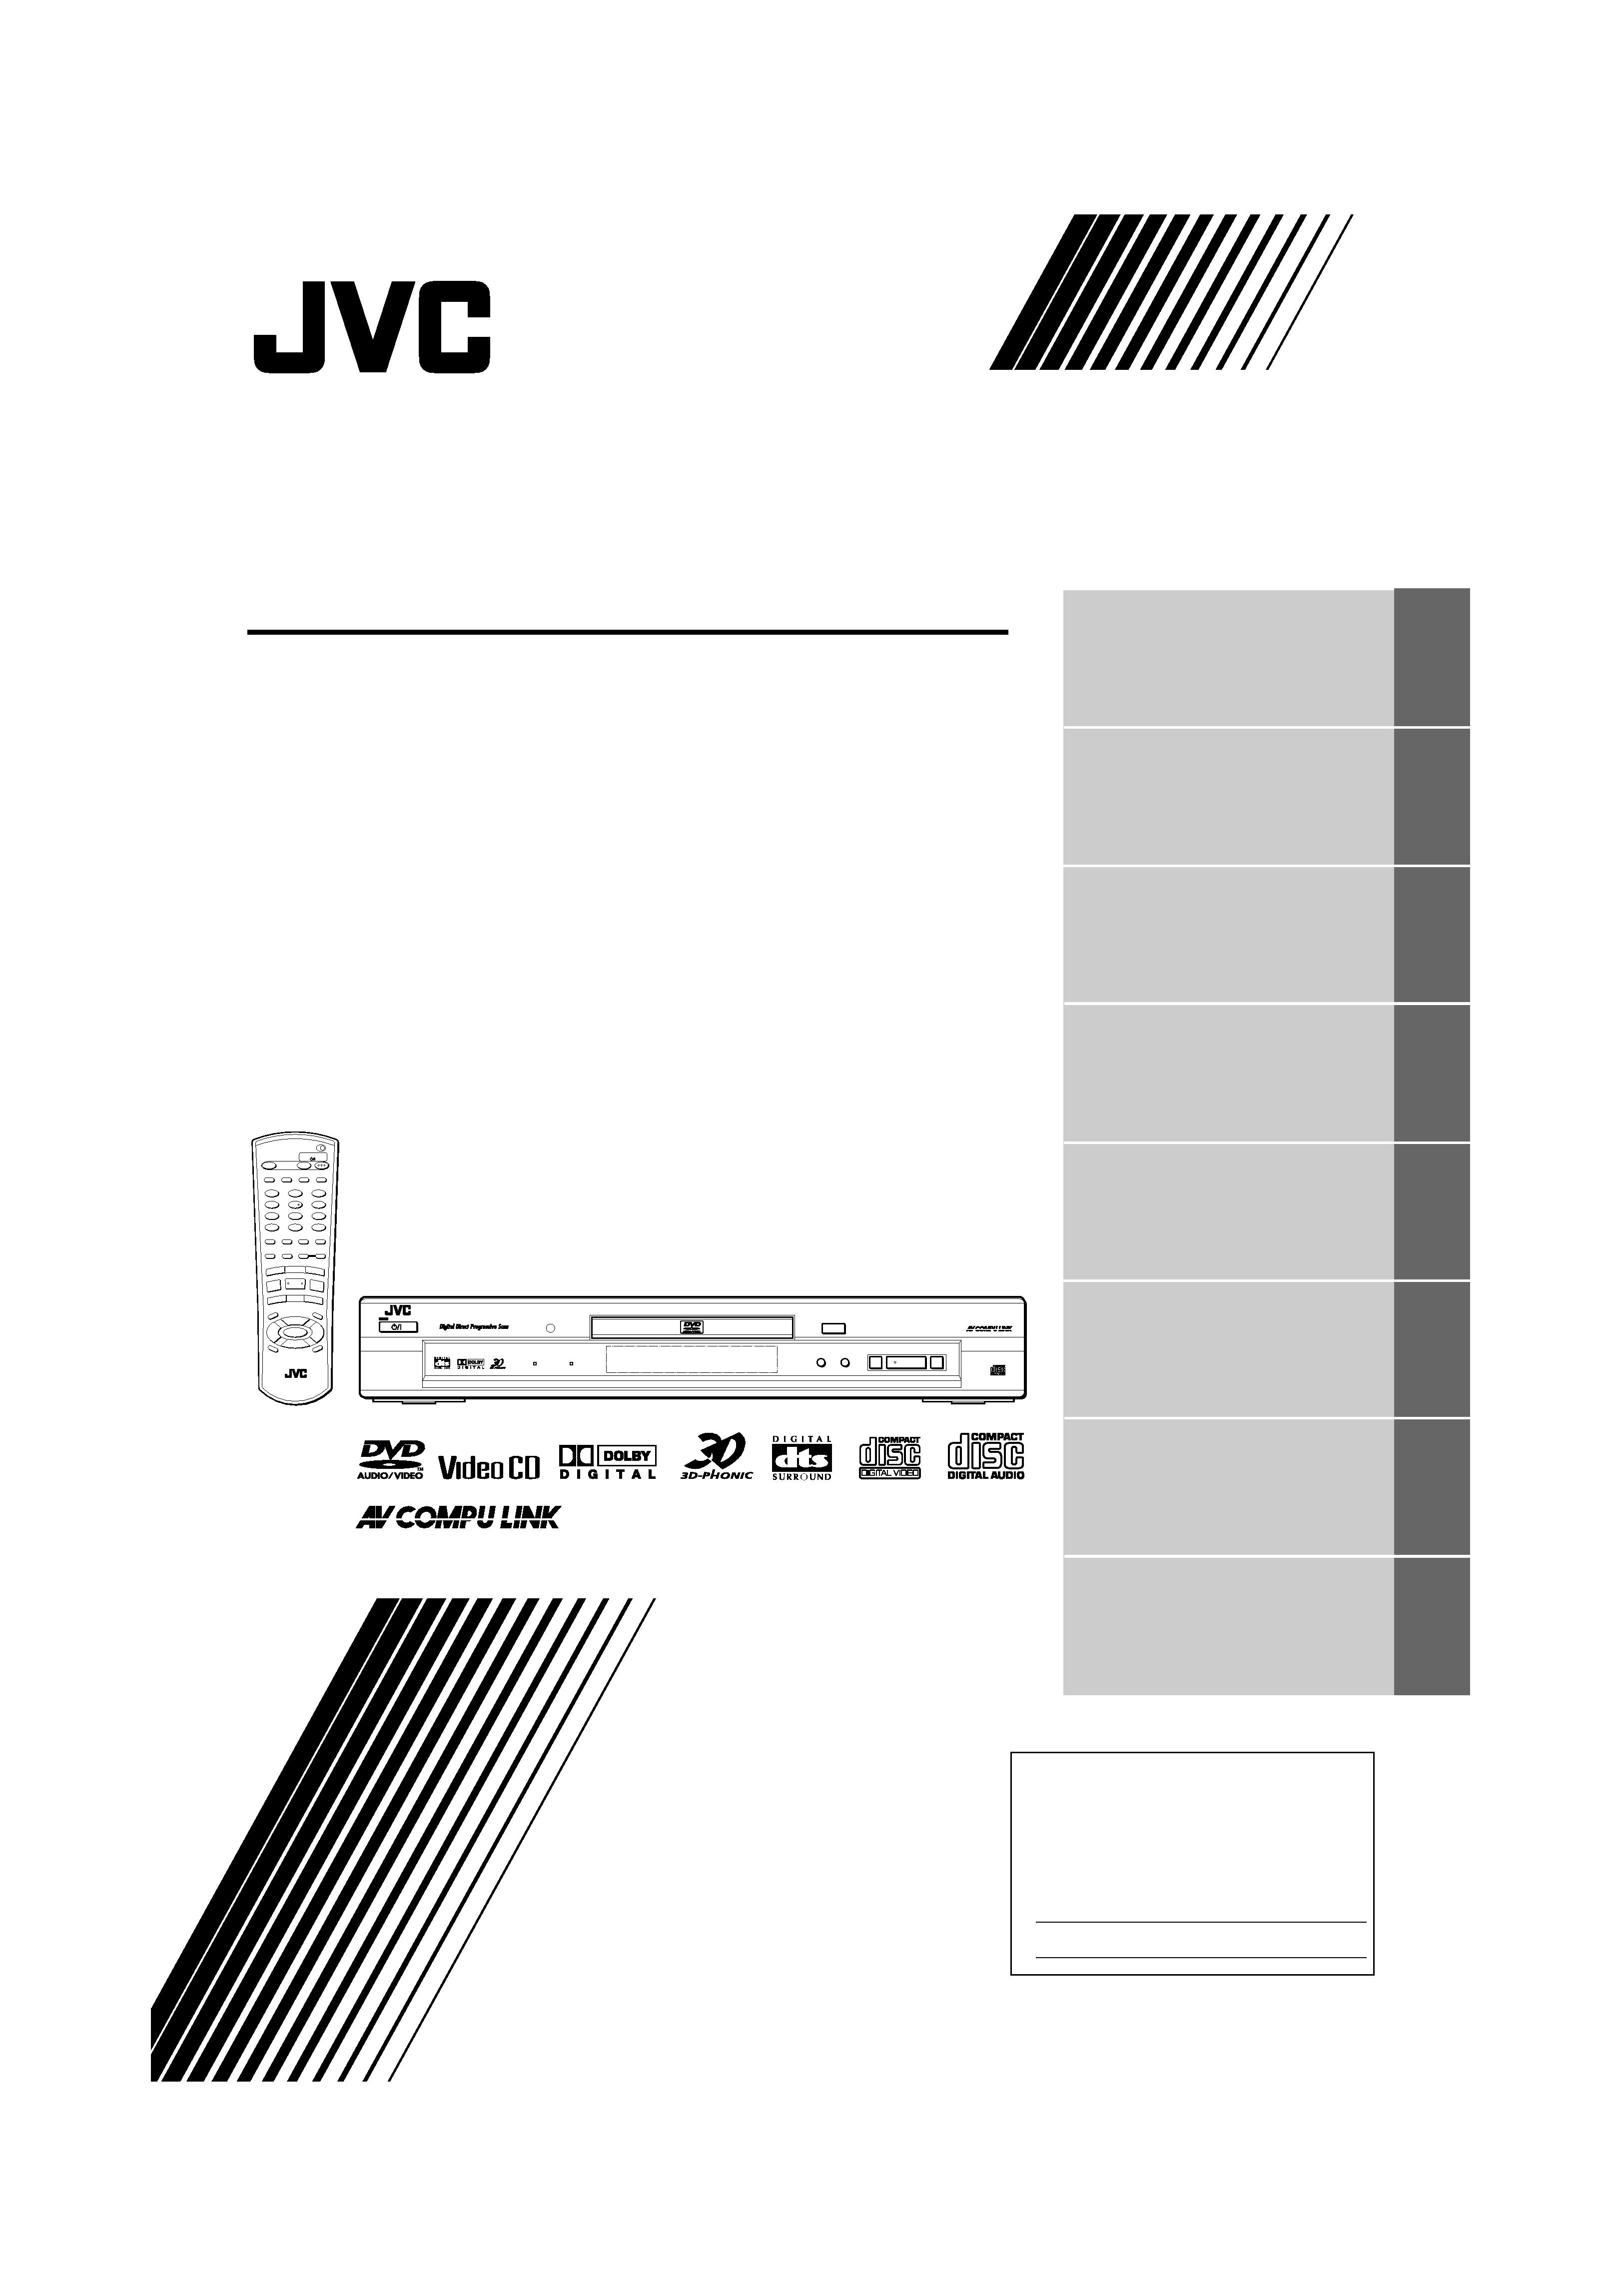
Introduction
2
Preliminary knowledge
6
Getting started
16
Basic operations
25
Advanced operations
29
MP3 disc playback
51
Initial settings
54
Additional information
64
)RU &XVWRPHU8VH
(QWHU EHORZ WKH 0RGHO 1R DQG 6HULDO 1R
ZKL.KDUH OR.DWHGRQ WKHUHDU ERWWRPRU
VLGH RI WKH .DELQHW 5HWDLQ WKLV LQIRUPDWLRQ
IRU IXWXUHUHIHUHQ.H
0RGHO 1R
6HULDO 1R
/(7&
>-8-@
,16758&7,216
6$(Q&RYHUIP 3DJH 7KXUVGD\ -XO\ 30
Warnings, Cautions and Others
Mises en garde, précautions et indications diverses
CAUTION
To reduce the risk of electrical shocks, fire, etc.:
1.
Do not remove screws, covers or cabinet.
2.
Do not expose this appliance to rain or moisture.
ATTENTION
Afin d'éviter tout risque d'électrocution, d'incendie, etc.:
1.
Ne pas enlever les vis ni les panneaux et ne pas ouvrir le
coffret de l'appareil.
2.
Ne pas exposer l'appareil à la pluie ni à l'humidité.
IMPORTANT FOR LASER PRODUCTS
IMPORTANT POUR LES PRODUITS LASER
1. CLASS 1 LASER PRODUCT
2. DANGER : Visible laser radiation when open and interlock failed
or defeated. Avoid direct exposure to beam.
3. CAUTION: Do not open the top cover. There are no user
serviceable parts inside the Unit; leave all servicing to qualified
service personnel.
1. PRODUIT LASER CLASSE 1
2. ATTENTION: Radiation laser visible quand l'appareil est ouvert
ou que le verrouillage est en panne ou désactivé. Eviter une
exposition directe au rayon.
3. ATTENTION: Ne pas ouvrir le couvercle du dessus. Il n'y a
aucune pièce utilisable à l'intérieur. Laisser à un personnel
qualifié le soin de réparer votre appareil.
CAUTION:
TO REDUCE THE RISK OF ELECTRIC SHOCK,
DO NOT REMOVE COVER (OR BACK).
NO USER SERVICEABLE PARTS INSIDE.
REFER SERVICING TO QUALIFIED SERVICE PERSONNEL.
RISK OF ELECTRIC SHOCK
DO NOT OPEN
The lightning flash with arrowhead symbol,
within an equilateral triangle is intended to
alert the user to the presence of uninsulated
"dangerous voltage" within the product's
enclosure
that
may
be
of
sufficient
magnitude to constitute a risk of electric
shock to persons.
The exclamation point within an equilateral
triangle is intended to alert the user to the
presence
of
important
operating
and
maintenance (servicing) instructions in the
literature accompanying the appliance.
CAUTION
For U.S.A.
This equipment has been tested and found to comply with the limits
for a Class B digital device, pursuant to part 15 of the FCC Rules.
These limits are designed to provide reasonable protection against
harmful interference in a residential installation.
This equipment generates, uses and can radiate radio frequency
energy and, if not installed and used in accordance with the
instructions,
may
cause
harmful
interference
to
radio
communications. However, there is no guarantee that interference
will not occur in a particular installation. If this equipment does cause
harmful interference to radio or television reception, which can be
determined by turning the equipment off and on, the user is
encouraged to try to correct the interference by one or more of the
following measures:
Reorient or relocate the receiving antenna.
Increase the separation between the equipment and receiver.
Connect the equipment into an outlet on a circuit different from that
to which the receiver is connected.
Consult the dealer or an experienced radio/TV technician for help.
WARNING: TO REDUCE THE RISK OF FIRE
OR ELECTRIC SHOCK, DO NOT EXPOSE
THIS APPLIANCE TO RAIN OR MOISTURE.
Caution -- STANDBY/ON
button!
Disconnect the mains plug to shut the power off completely (the
STANDBY/ON lamp goes off). The STANDBY/ON
button in
any position does not disconnect the mains line.
· When the unit is on standby, the STANDBY/ON lamp lights red.
· When the unit is turned on, the STANDBY/ON lamp lights green.
The power can be remote controlled.
Attention -- Commutateur STANDBY/ON
!
Déconnectez la prise d'alimentation secteur pour mettre l'appareil
complètement hors tension (le témoin STANDBY/ON
s'éteint).
L'interrupteur STANDBY/ON
, sur n'importe quelle
position, ne peut pas déconnecter l'appareil du secteur.
· Quand l'appareil est en mode de veille, le témoin STANDBY/ON
est allumé en rouge.
· Quand l'appareil est sous tension, le témoin STANDBY/ON est
allumé en vert.
L'alimentation peut être télécommandée.
For Canada/Pour le Canada
CAUTION: TO PREVENT ELECTRIC SHOCK, MATCH WIDE
BLADE OF PLUG TO WIDE SLOT, FULLY INSERT.
ATTENTION: POUR EVITER LES CHOCS ELECTRIQUES,
INTRODUIRE LA LAME LA PLUS LARGE DE LA FICHE DANS
LA BORNE CORRESPONDANTE DE LA PRISE ET POUSSER
JUSQUAU FOND.
For Canada/Pour le Canada
THIS DIGITAL APPARATUS DOES NOT EXCEED THE CLASS
B LIMITS FOR RADIO NOISE EMISSIONS FROM DIGITAL
APPARATUS AS SET OUT IN THE INTERFERENCE-
CAUSING EQUIPMENT STANDARD ENTITLED "DIGITAL
APPARATUS," ICES-003 OF THE DEPARTMENT OF
COMMUNICATIONS.
CET APPAREIL NUMERIQUE RESPECTE LES LIMITES DE
BRUITS RADIOELECTRIQUES APPLICABLES AUX
APPAREILS NUMIRIQUES DE CLASSE B PRESCRITES
DANS LA NORME SUR LE MATERIEL BROUILLEUR:
"APPAREILS NUMERIQUES", NMB-003 EDICTEE PAR LE
MINISTRE DES COMMUNICATIONS.
CAUTION:
Do not block the ventilation openings or holes.
(If the ventilation openings or holes are blocked by a newspaper
or cloth, etc., the heat may not be able to get out.)
Do not place any naked flame sources, such as lighted candles,
on the apparatus.
When discarding batteries, environmental problems must be
considered and local rules or laws governing the disposal of
these batteries must be followed strictly.
Do not use this apparatus in a bathroom or places with water.
Also do not place any containers filled with water or liquids (such
as cosmetics or medicines, flower vases, potted plants, cups,
etc.) on top of this apparatus.
ATTENTION:
Ne bloquez pas les orifices ou les trous de ventilation.
(Si les orifices ou les trous de ventilation sont bloqués par un
journal un tissu, etc., la chaleur peut ne pas être évacuée
correctement de l'appareil.)
Ne placez aucune source de flamme nue, telle qu'une bougie, sur
l'appareil.
Lors de la mise au rebut des piles, veuillez prendre en
considération les problèmes de l'environnement et suivre
strictement les règles et les lois locales sur la mise au rebut des
piles.
N'utilisez pas cet appareil dans une salle de bain ou un autre
endroit avec de l'eau. Ne placez aucun récipient contenant de
l'eau (tel que des cosmétiques ou des médicaments, un vase de
fleurs, un pot de fleurs, une tasse, etc.) sur cet appareil.
6$(QJ6DIHW\IP 3DJH 7KXUVGD\ -XO\ 30

1
English
English
Table of Contents
Introduction
Page 2
Features...............................................................................2
Supplied accessories..........................................................3
About this instruction manual ..........................................4
Notes on handling ..............................................................5
Preliminary knowledge
Page 6
Names of parts and controls .............................................6
Front panel................................................................................6
Display window........................................................................7
Rear panel.................................................................................7
Remote control unit .................................................................8
Operational Principles......................................................10
On-screen displays.................................................................10
To prevent the monitor from burning out
[SCREEN SAVER] ................................................................12
On-screen guide icons ...........................................................13
How to use numeric buttons.................................................13
About discs .......................................................................14
Playable disc types.................................................................14
Audio formats.........................................................................14
Disc structure..........................................................................15
Getting started
Page 16
Connections ......................................................................16
Before making any connections ...........................................16
To connect to a conventional TV ..........................................16
To connect to a TV with the component video
input jacks............................................................................17
To connect to an audio amplifier or receiver.......................18
To connect to an amplifier/receiver equipped with
5.1-channel inputs...............................................................19
To connect to audio equipment with a digital input ...........20
To connect the power cord ...................................................21
Using the remote control unit.........................................21
To install batteries in the remote control unit .....................21
Remote sensor .......................................................................22
To use the remote control unit for TV operation.................23
Basic operations
Page 25
Turning on/off the unit ....................................................25
Inserting and removing discs ..........................................25
Basic playback ..................................................................26
To start playback ....................................................................26
To stop playback completely ................................................26
To stop playback temporarily ...............................................26
To advance or reverse playback rapidly while
monitoring...........................................................................27
To locate the beginning of the scene or song .....................27
Resuming playback ..........................................................28
To memorize the interrupted position .................................28
To resume playback...............................................................28
Advanced operations
Page 29
Playing from a specific position on a disc......................30
To locate a desired scene from the DVD menu ...................30
To locate a desired scene from the menu of the
Video CD with PBC..............................................................30
To locate a desired selection using the numeric buttons...31
To locate a desired selection using
4 or ¢ ...................32
To specify a desired chapter/track from the on-screen
display [CHAP. SEARCH/TRACK SEARCH] .......................32
To locate a desired position in the current title or track
[TIME SEARCH] ...................................................................33
To locate a desired scene from the display [DIGEST] ........34
Special picture playback ................................................. 35
To advance a still picture
frame-by-frame ...................................................................35
To display continuous still pictures [STROBE]....................35
To playback in slow-motion [SLOW]....................................35
To zoom in/out [ZOOM].........................................................36
Changing the playback order ......................................... 37
To playback in the desired order [PROGRAM] ....................37
To playback in random order [RANDOM]............................38
Repeat playback............................................................... 39
To repeat the current selection or all tracks [REPEAT] .......39
To repeat a desired part [A-B REPEAT] ................................40
Selecting a scene angle of DVD VIDEO ......................... 41
To select a scene angle from the normal screen
[ANGLE] ...............................................................................41
To select a scene angle from the angle list display
[ANGLE] ...............................................................................42
Changing the language and sound ................................ 43
To select the subtitle language [SUBTITLE] ........................43
To change the audio language or sound [AUDIO] ..............44
Miscellaneous functions ................................................. 45
To adjust the picture character [VFP] ...................................45
To simulate surround sound [3D PHONIC] ..........................46
To check the disc time [TIME SELECT] ................................47
To select a still picture on a DVD AUDIO disc [PAGE] ........48
To playback a bonus group of a DVD AUDIO disc ..............49
Changing the brightness of the display window.................49
Checking the sampling frequency ........................................50
MP3 disc playback
Page 51
About MP3 disc................................................................ 51
Operations........................................................................ 51
Basic operations.....................................................................51
Specifying the desired Group and Track .............................52
Repeat playback .....................................................................53
Initial settings
Page 54
Selecting preferences...................................................... 54
How to set preferences..........................................................54
Language and display preference ........................................54
Audio and system preference...............................................56
Speaker setting ......................................................................59
Limiting playback by children ........................................ 61
To set Parental Lock for the first time
[PARENTAL LOCK]..............................................................61
To change the settings [PARENTAL LOCK] ........................62
To temporarily release the Parental Lock
[PARENTAL LOCK] .............................................................63
Additional information
Page 64
AV COMPU LINK remote control system...................... 64
Connection and setup............................................................64
Operation................................................................................65
Care and handling of discs.............................................. 66
Troubleshooting .............................................................. 67
Specifications................................................................... 68
Table of languages and their abbreviations.. Appendix A
Country code list for Parental Lock.................Appendix B
6$(1*ERRN 3DJH :HGQHVGD\ -XO\ 30

2
In
trod
uc
ti
on
Introduction
Features
This unit is a compatible player for DVD VIDEO, DVD AUDIO, Audio CD and Video CD discs.
7
7
7
7Progressive Scan system
Supports the Progressive scan system, as well as the
conventional (current) Interlace scan system.
* To enjoy the progressive video picture, you must
connect the unit to a television or monitor that
supports the progressive video input.
7
7
7
7Special picture playback
Provides special picture playback functions such as
Strobe, Frame-by-frame, Zoom and Slow-motion.
7
7
7
7Angle function*
You can select a desired angle from multiple camera
angles recorded on the DVD VIDEO disc.
7
7
7
7VFP (Video Fine Processor) function
You can adjust the picture character according to the
type of programming, picture tone or personal
preferences.
7
7
7
7Parental Lock*
You can restrict the playback of DVD VIDEO discs with
scenes which you do not want children to see, such as
adult or violent films.
7
7
7
7High quality digital sound
Supports audio formats for DVD AUDIO including
high sampling frequencies up to 192 kHz, the linear
PCM multichannel format, up to 24-bit resolution and
MLP, as well as the audio formats for DVD VIDEO such
as Dolby Digital 5.1 ch. and DTS.
·
DOLBY DIGITAL
A surround audio format configured with six
channels. Because the "sub-woofer" channel, one of
the six channels, is an auxiliary channel, this format is
called "5.1-channel system."
·
DTS (Digital Theater Systems)
A surround audio format configured with six (5.1)
channels which is same as Dolby Digital. Because the
compression ratio is lower than Dolby Digital, it
provides wider dynamic range and better separation.
·
MLP (Meridian Lossless Packing)
A format for DVD AUDIO with the compression ratio
of about 2:1 while allowing the PCM signal to be
completely recreated by the MLP decoder (required in
all DVD AUDIO players). It supports up to 192kHz/24-
bit.
·Linear PCM
Uncompressed digital audio, the same format used on
CDs and most studio masters.
DVD AUDIO supports up to 6 channels at sample rates
of 48/96/192 kHz (also 44.1/88.2/176.4 kHz) and sample
sizes of 16/20/24 bits, while DVD VIDEO supports
2 channels at sample rates of 48/96 kHz and sample
sizes of 16/20/24 bits.
Audio CD/Video CD is limited to 2 channels, 44.1 kHz
at 16 bits.
7
7
7
7Multichannel audio outputs
Provides the multichannel (5.1) analog audio outputs,
as well as the PCM/Bitstream digital audio outputs.
7
7
7
73D PHONIC function
You can enjoy Virtual surround sound with your
2 channel (stereo) system.
7
7
7
7Multi-language subtitles and sound*
You can select a subtitle or sound language from
those recorded on the DVD VIDEO disc.
7
7
7
7Operation from the on-screen display
User-friendly on-screen displays allow you to operate
the unit easily.
Functions with (*) mark only work on a DVD VIDEO disc
that is compatible with each function.
Picture features
Audio features
Other features
6$(1*ERRN 3DJH :HGQHVGD\ -XO\ 30
Introduction
3
In
trod
uc
tio
n
English
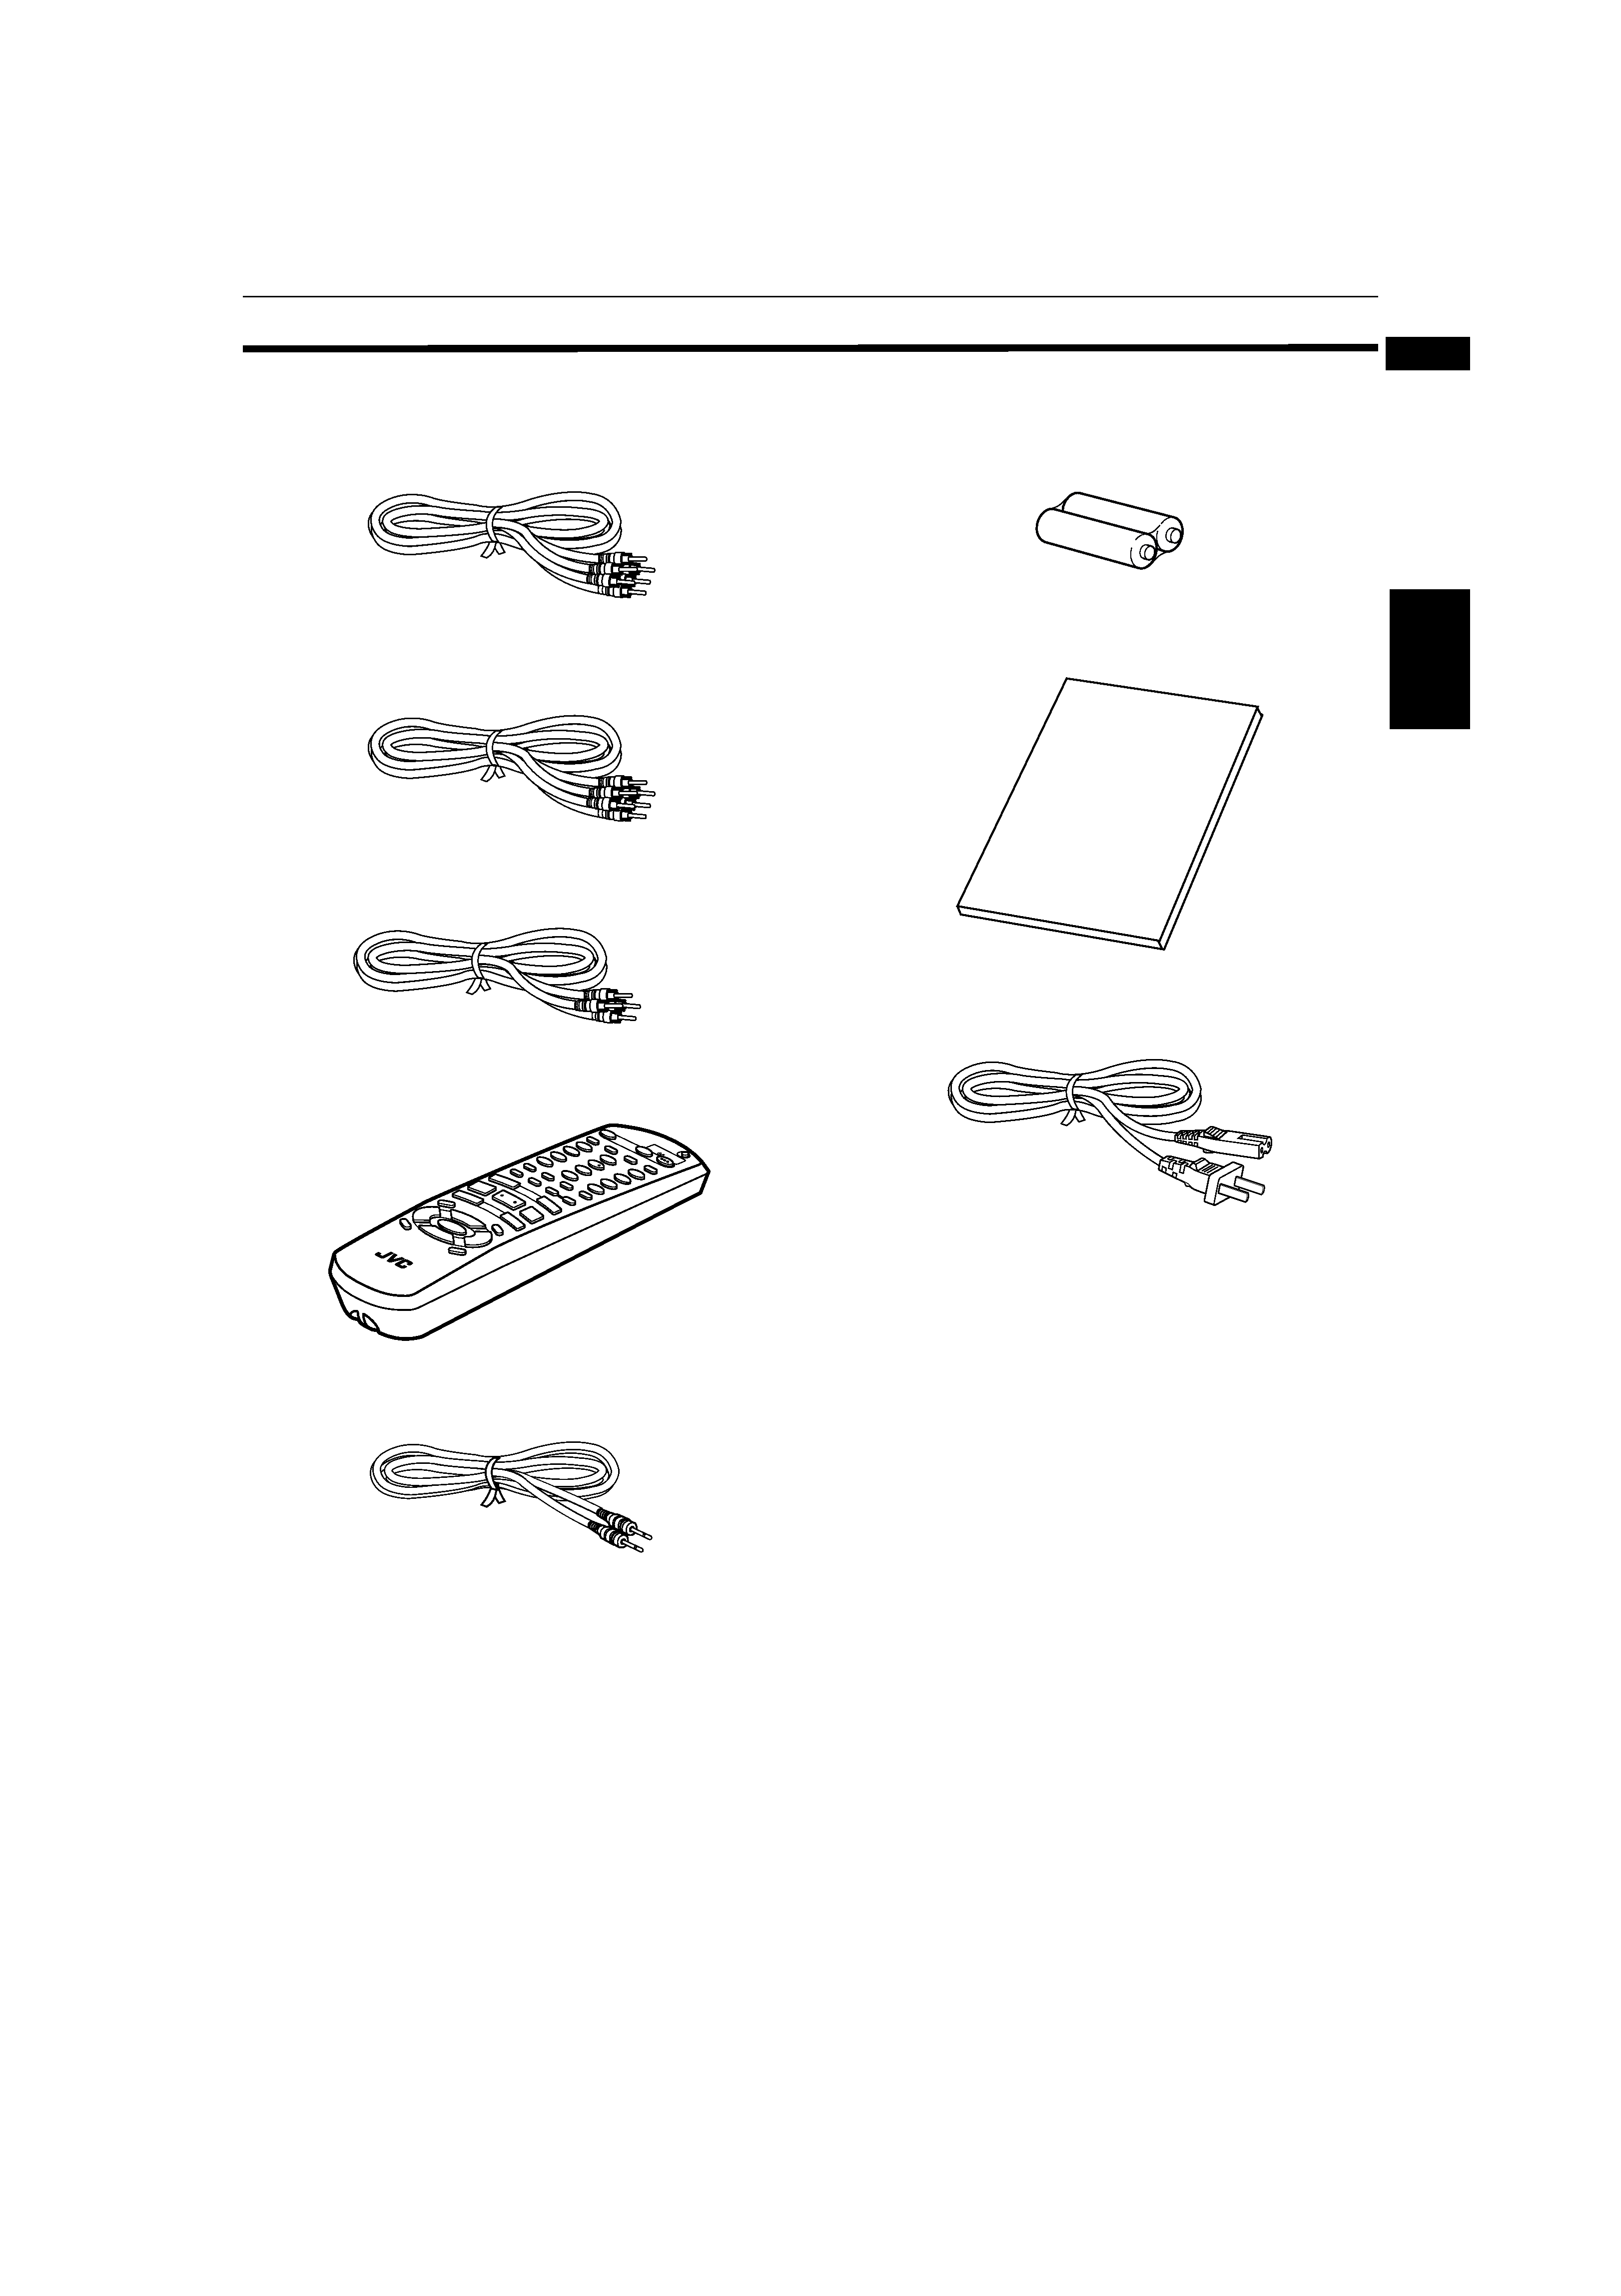
Supplied accessories
· Audio/video cable (x 1)
· Component video cable (x 1)
· Audio cable (x 2)
· Remote Control Unit (x 1)
· AV compulink cable (x 1)
· R6P(SUM-3)/AA(15F) batteries (x 2)
· Instruction manual (x 1)
· AC power cord (x 1)
S.F
RE
Q
OP
EN
/CL
OS
E
TV
DVD
REP
EAT
3D
PH
ON
IC
TV/V
IDE
O
CAN
CEL
SU
BT
ITLE
PA
GE
AN
GLE
TV1
TV2
TV3
TV4
TV
5
TV
6
TV7
TV
9
TV
-/--
TV
0
VFP
AU
DIO
PRO
GRE
SSIV
E
SCA
N
DIG
ES
T
PREVIOUS
CLEAR
STROBE
SLOW
+
SLOW
-
TITLE
MENU
CHOICE
CH+
SELE
CT
CH-
VO
L
+
VO
L
-
ON SC
REEN
+
ZO
OM
-
RETUR
N
TV
DVD
STA
NDB
Y/O
N
TV
8
NEXT
MENU
RE
MO
TE C
ON
TRO
L
1
2
3
5
6
8
9
0
+10
10
7
4
ENT
ER
4
¢
1
¡
5
5
5
7
8
3
6$(1*ERRN 3DJH :HGQHVGD\ -XO\ 30