XL-MC222BK
?????
For Customer Use:
Enter below the Model No. and Serial
No. which are located either on the rear,
bottom or side of the cabinet. Retain this
information for future reference.
Model No.
Serial No.
E30580-2620B
[J ]
COMPACT COMPONENT SYSTEM
XL-MC222BK
COMPACT DISC AUTOMATIC CHANGER
'
Enter below the Model No. and Serial No.
which are located on the rear, bottom or
side of the cabinet. Retain this information
for future reference.
INSTRUCTIONS
POWER
STANDBY
XL-MC222 COMPACT DISC AUTOMATIC CHANGER
PLAY/PAUSE
STOP/CLEAR
REPEAT
PLAY MODE
MEMORY
DISC/TRACK
EXCHANGE
RANDOM
INTRO
CALL
CANCEL
TRACK
OPEN/CLOSE
DISC
DOWN
UP
DISC EJECT
'
200
ENHANCED COMPULINK CONTROL SYSTEM
POWER
OPEN/
CLOSE
EXCHANGE
MEMORY
PROGRAM
REPEAT
ONE DISC
INTRO
TRACK
CANCEL
REMOTE CONTROL
RM-8X222U
CONTINUE
RANDOM
DISC
CALL
'
200
MC222BK/Cover&SafetyÇÃÉRÉsÅ[
97.7.15, 4:44 PM
1
XL-MC222BK
?????
WARNING AND CAUTIONS
For U.S.A.
This equipment has been tested and found to comply with the limits
for a Class B digital device, pursuant to part 15 of the FCC Rules.
These limits are designed to provide reasonable protection against
harmful interference in a residential installation.
This equipment generates, uses and can radiate radio frequency
energy and, if not installed and used in accordance with the
instructions,
may
cause
harmful
interference
to
radio
communications. However, there is no guarantee that interference
will not occur in a particular installation. If this equipment does cause
harmful interference to radio or television reception, which can be
determined by turning the equipment off and on, the user is
encouraged to try to correct the interference by one or more of the
following measures:
Reorient or relocate the receiving antenna.
Increase the separation between the equipment and receiver.
Connect the equipment into an outlet on a circuit different from that
to which the receiver is connected.
Consult the dealer or an experienced radio/TV technician for help.
CAUTION:
TO REDUCE THE RISK OF ELECTRIC SHOCK.
DO NOT REMOVE COVER (OR BACK)
NO USER SERVICEABLE PARTS INSIDE.
REFER SERVICING TO QUALIFIED SERVICE PERSONNEL.
RISK OF ELECTRIC SHOCK
DO NOT OPEN
The lightning flash with arrowhead symbol,
within an equilateral triangle is intended to
alert the user to the presence of uninsulated
"dangerous voltage" within the product's
enclosure
that
may
be
of
sufficient
magnitude to constitute a risk of electric
shock to persons.
The exclamation point within an equilateral
triangle is intended to alert the user to the
presence
of
important
operating
and
maintenance (servicing) instructions in the
literature accompanying the appliance.
CAUTION
1.
CLASS 1 LASER PRODUCT
2.
DANGER: Invisible laser radiation when open and interlock failed or
bypassed. Avoid direct exposure to beam.
3.
CAUTION: Do not open the top cover. There are no user service-
able parts inside the player; leave all servicing to qualified service
personnel.
IMPORTANT FOR LASER PRODUCTS
CAUTION
To reduce the risk of electrical shocks, fire, etc.:
1. Do not remove screws, covers or cabinet.
2. Do not expose this appliance to rain or moisture.
WARNING: TO REDUCE THE RISK OF FIRE
OR ELECTRIC SHOCK, DO NOT EXPOSE
THIS APPLIANCE TO RAIN OR MOISTURE.
Caution POWER switch!
Disconnect the mains plug to shut the power off completely. The
POWER switch in any position does not disconnect the mains line. The
power can be remote controlled.
For U.S.A.
.
The lightning flash with arrowhead symbol
within an equilateral triangle alerts the user to
the presence of uninsulated "dangerous
voltage" within the product's enclosure that
could cavse electric shock.
The exclamation mark within an equilateral
triangle alerts the user to important operating
and maintenance (servicing) instructions in the
manual for the appliance.
Connect the equipment to an outlet on a circuit different from that to
which the receiver is connected.
Consult the dealer or an experienced radio/TV technician for help.
MC222BK/Cover&SafetyÇÃÉRÉsÅ[
97.7.15, 4:44 PM
3

1
XL-MC222BK
?????
INTRODUCTION
CONTENTS
Thank you very much for purchasing the JVC product. We sincerely
hope it proves its quality and performance to your full satisfaction.
Please read the instructions contained in this manual in order to get
the most of the product's capability and performance. If there are
any questions concerning the product, please consult your JVC
dealer .
Feature of XL-MC222
This component is designed to store up to 200 compact discs, change
and play them automatically in three different playback modes.
Precautions ........................................................ 2
Installation ................................................................................. 2
Compact discs ........................................................................... 2
Operation ................................................................................... 2
Setting Up .......................................................... 2
Connecting the unit ................................................................... 2
Installing batteries in the remote control .................................. 3
Control Panel and Remote Control ................. 4
Control panel ............................................................................. 4
Display ....................................................................................... 5
Remote control .......................................................................... 5
Basic Operation................................................. 6
Turning the power on ................................................................ 6
Loading compact discs .............................................................. 6
Unloading/changing discs ......................................................... 6
Playing discs .............................................................................. 7
CONTINUE Mode Playback ........................... 8
Basic mode ................................................................................ 8
Playing discs in random order .................................................. 8
Playing a track repeatedly ......................................................... 8
Playing the beginning part of first tracks ................................. 8
ONE DISC Mode Playback ............................. 9
Basic mode ................................................................................ 9
Playing the tracks in random order ........................................... 9
Playing the disc repeatedly ....................................................... 9
Playing a track repeatedly ......................................................... 9
Playing the beginning part of all tracks .................................... 9
PROGRAM Mode Playback .......................... 10
Basic mode .............................................................................. 10
Playing program steps in random order .................................. 10
Playing the program repeatedly .............................................. 11
Playing a program step repeatedly .......................................... 11
CompuLink-3 Remote Control System ........ 11
Handling and Taking Care of Discs .............. 12
Handling compact discs .......................................................... 12
Cleaning compact discs ........................................................... 12
Storing compact discs ............................................................. 12
Specifications & Packing List ........................ 12
Troubleshooting .............................................. 13
XL-MC222/E B
97.7.15, 5:54 PM
1
2
XL-MC222BK
?????
PRECAUTIONS
SETTING UP
Installation
· Select the best location
Select a level location to install this component, where it is free
from extremes of temperature (5 to 35°C, or 41 to 95°F) and
humidity, dust, or vibration.
If noise interference is caused in receiving AM broadcast by a
tuner/receiver located nearby, relocate it or this component, or
turn off either one.
· Moving the unit
Before moving the unit, first remove all the discs. Turn the power
off, making sure the standby indicator is on. Then remove the
AC power cord from the AC outlet.
Compact discs
· Use only compact digital audio discs
Only the audio compact discs identified by
the logo shown below can be used with this
component.
Operation
· Keep the disc storage free of obstacles
Do not put anything other than discs in slots of the disc storage.
· Turn the power off if a problem occurs
If an unusual condition arises, turn the power off immediately. If
the condition persists whenever the power is turned on, consult
your JVC dealer.
· Do not pull the AC cord
Do not pull the cable when unplugging the AC cord from the
wall socket or this component -- hold and pull the plug body.
· Set the sound volume carefully
Be careful in setting the sound volume on your amplifier/receiver
when playing a CD, which has almost none of background noise
unlike analog records and tapes. Find out the right setting starting
with a low level setting. Setting the level too high and starting a
CD could damage the speakers.
· Protect the component against condensation
Condensation on the component could disrupt the proper
transmission of the disc-reading laser beam, causing noise or
malfunction. If condensation ever ensues due to excessive
humidity or sudden temperature change, leave the component
turned on for a couple of hours to dry up -- consult your JVC
dealer if this does not correct the condition.
Connecting the unit
This compact disc changer/player needs to be connected to an
amplifier/receiver for audio reproduction.
CAUTION
Do not connect the AC power cord until all other neces-
sary connections have been made.
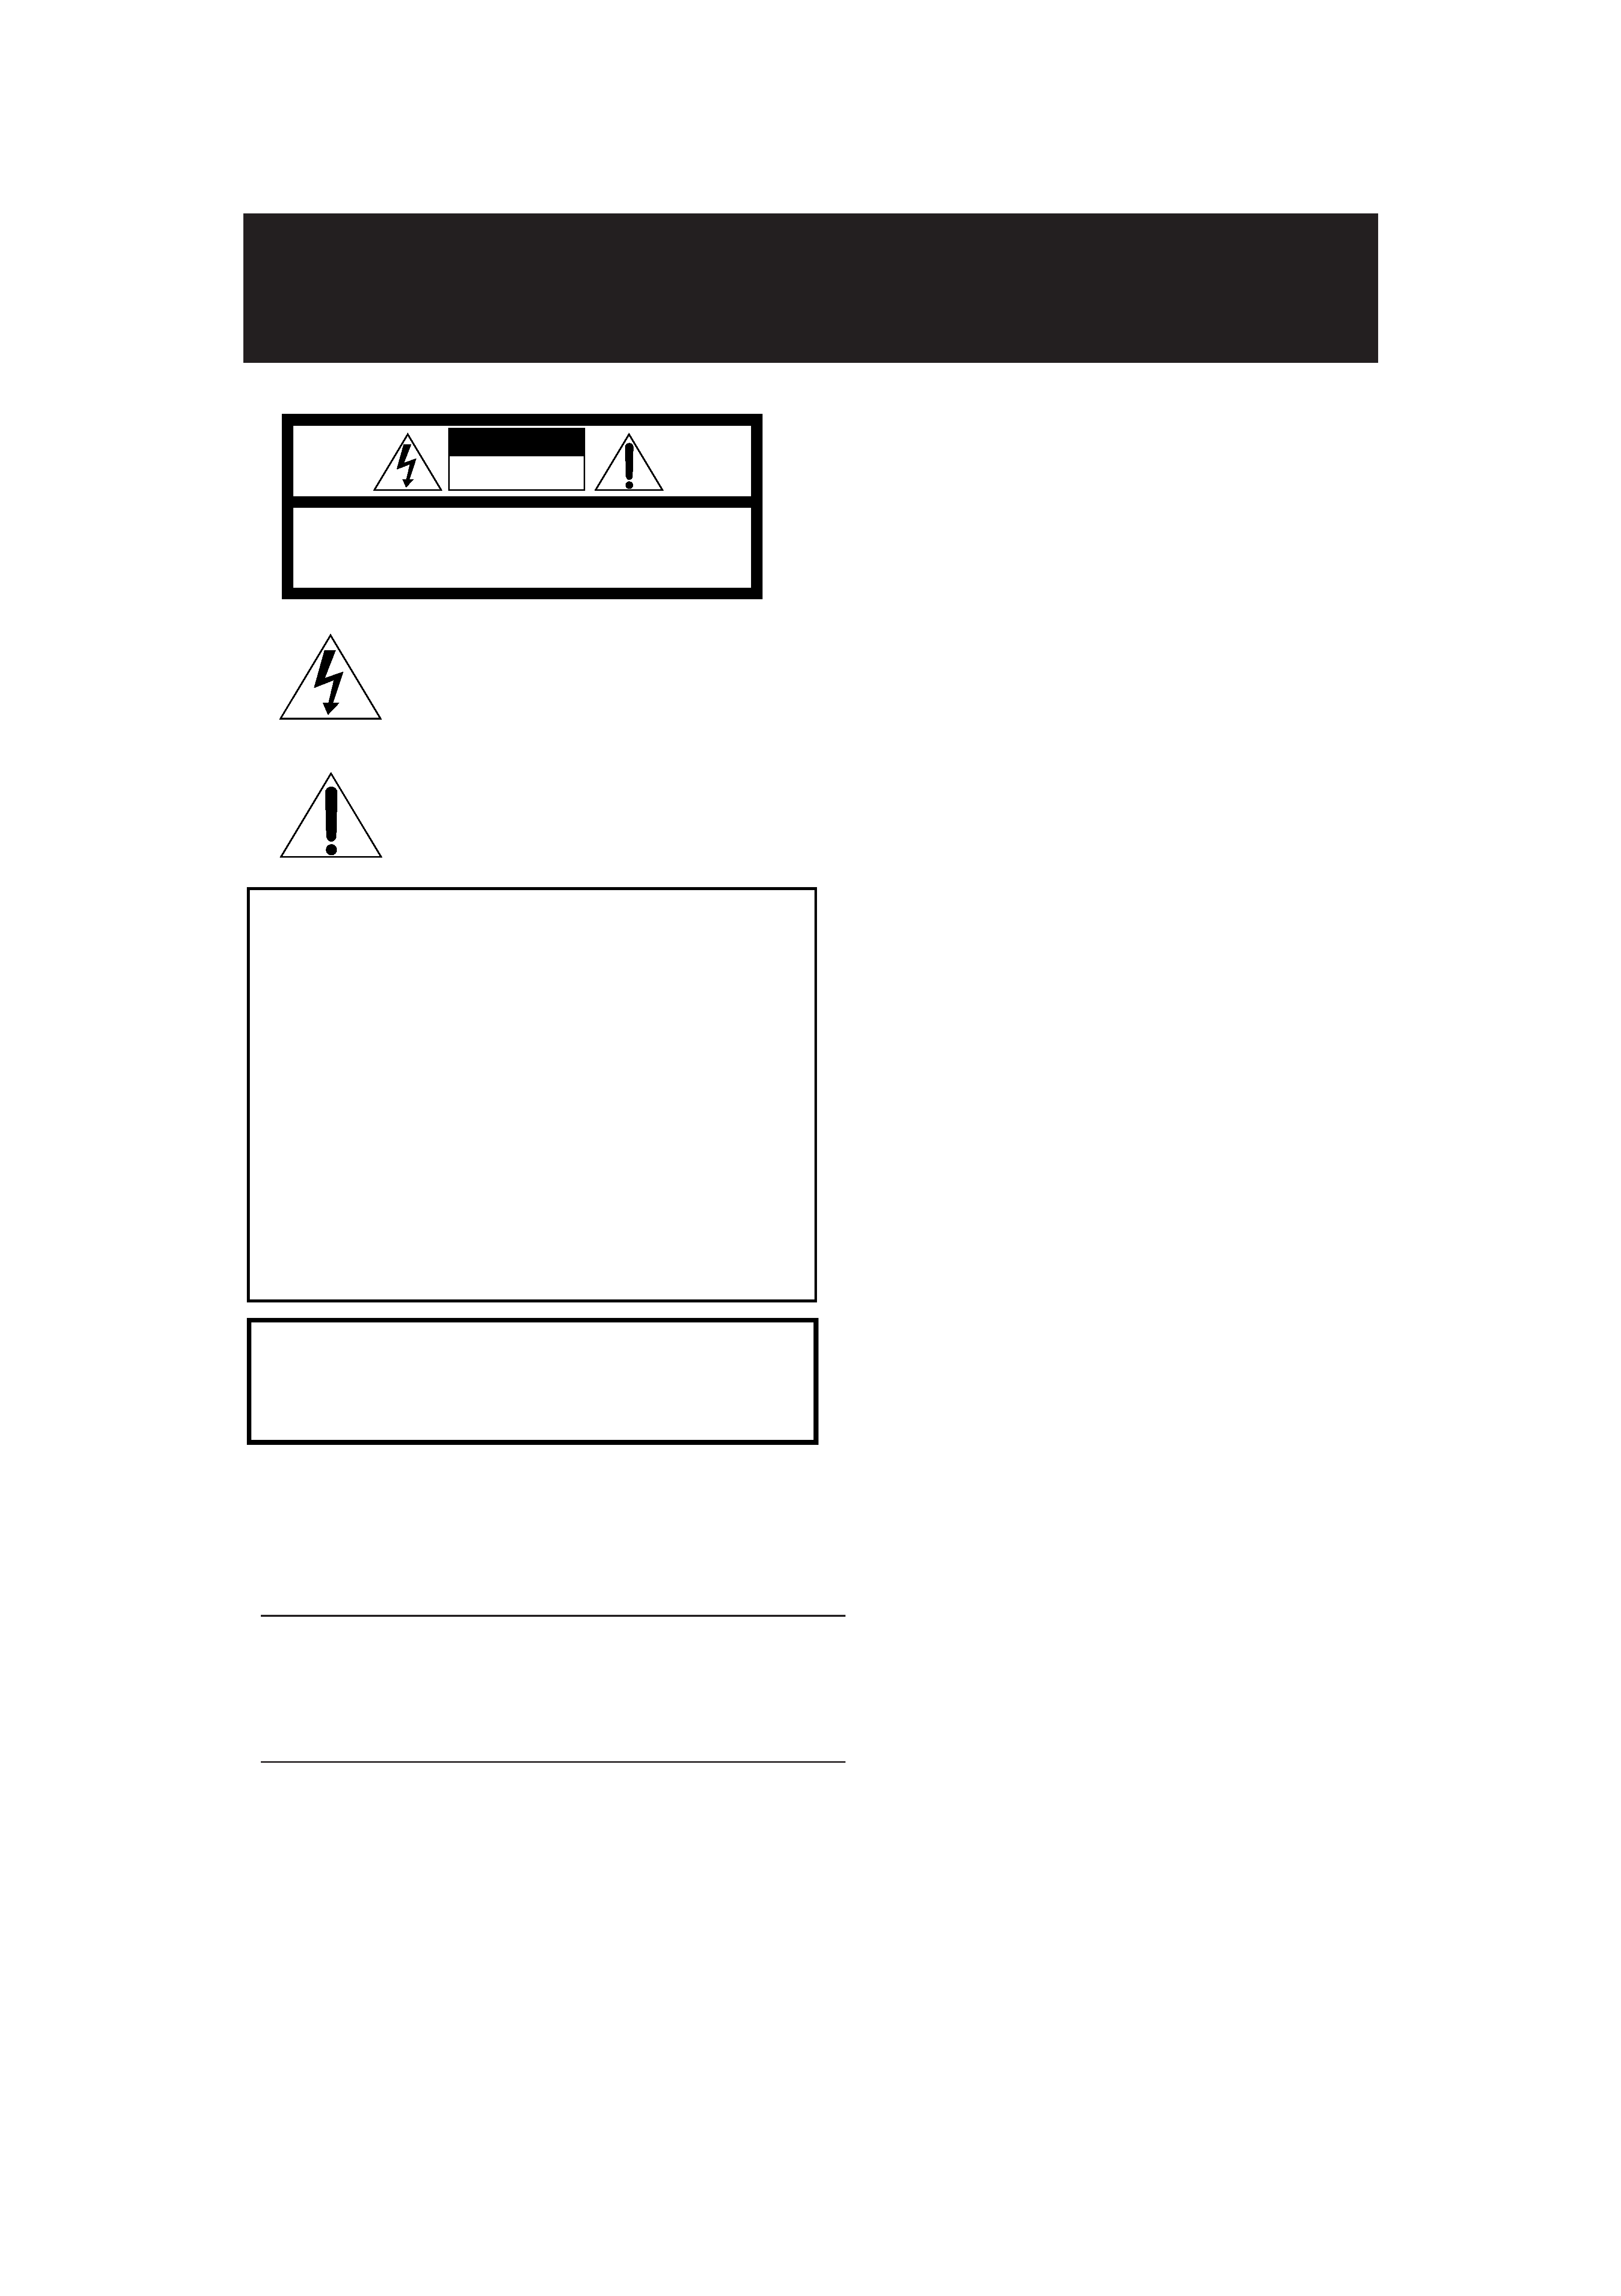
1. First connect the OUTPUT ports in the back of this unit with
the CD or AUX input ports of the amplifier/receiver using the
accessory audio cord. Be sure to insert the audio cord jacks
firmly into the proper ports matching the output and input
channels -- RIGHT to RIGHT and LEFT to LEFT.
OUTPUT
COMPULINK-3
(SYNCHRO)
RIGHT
LEFT
(Red)
(White)
To input audio jack of
the amplifier/receiver
Audio cord
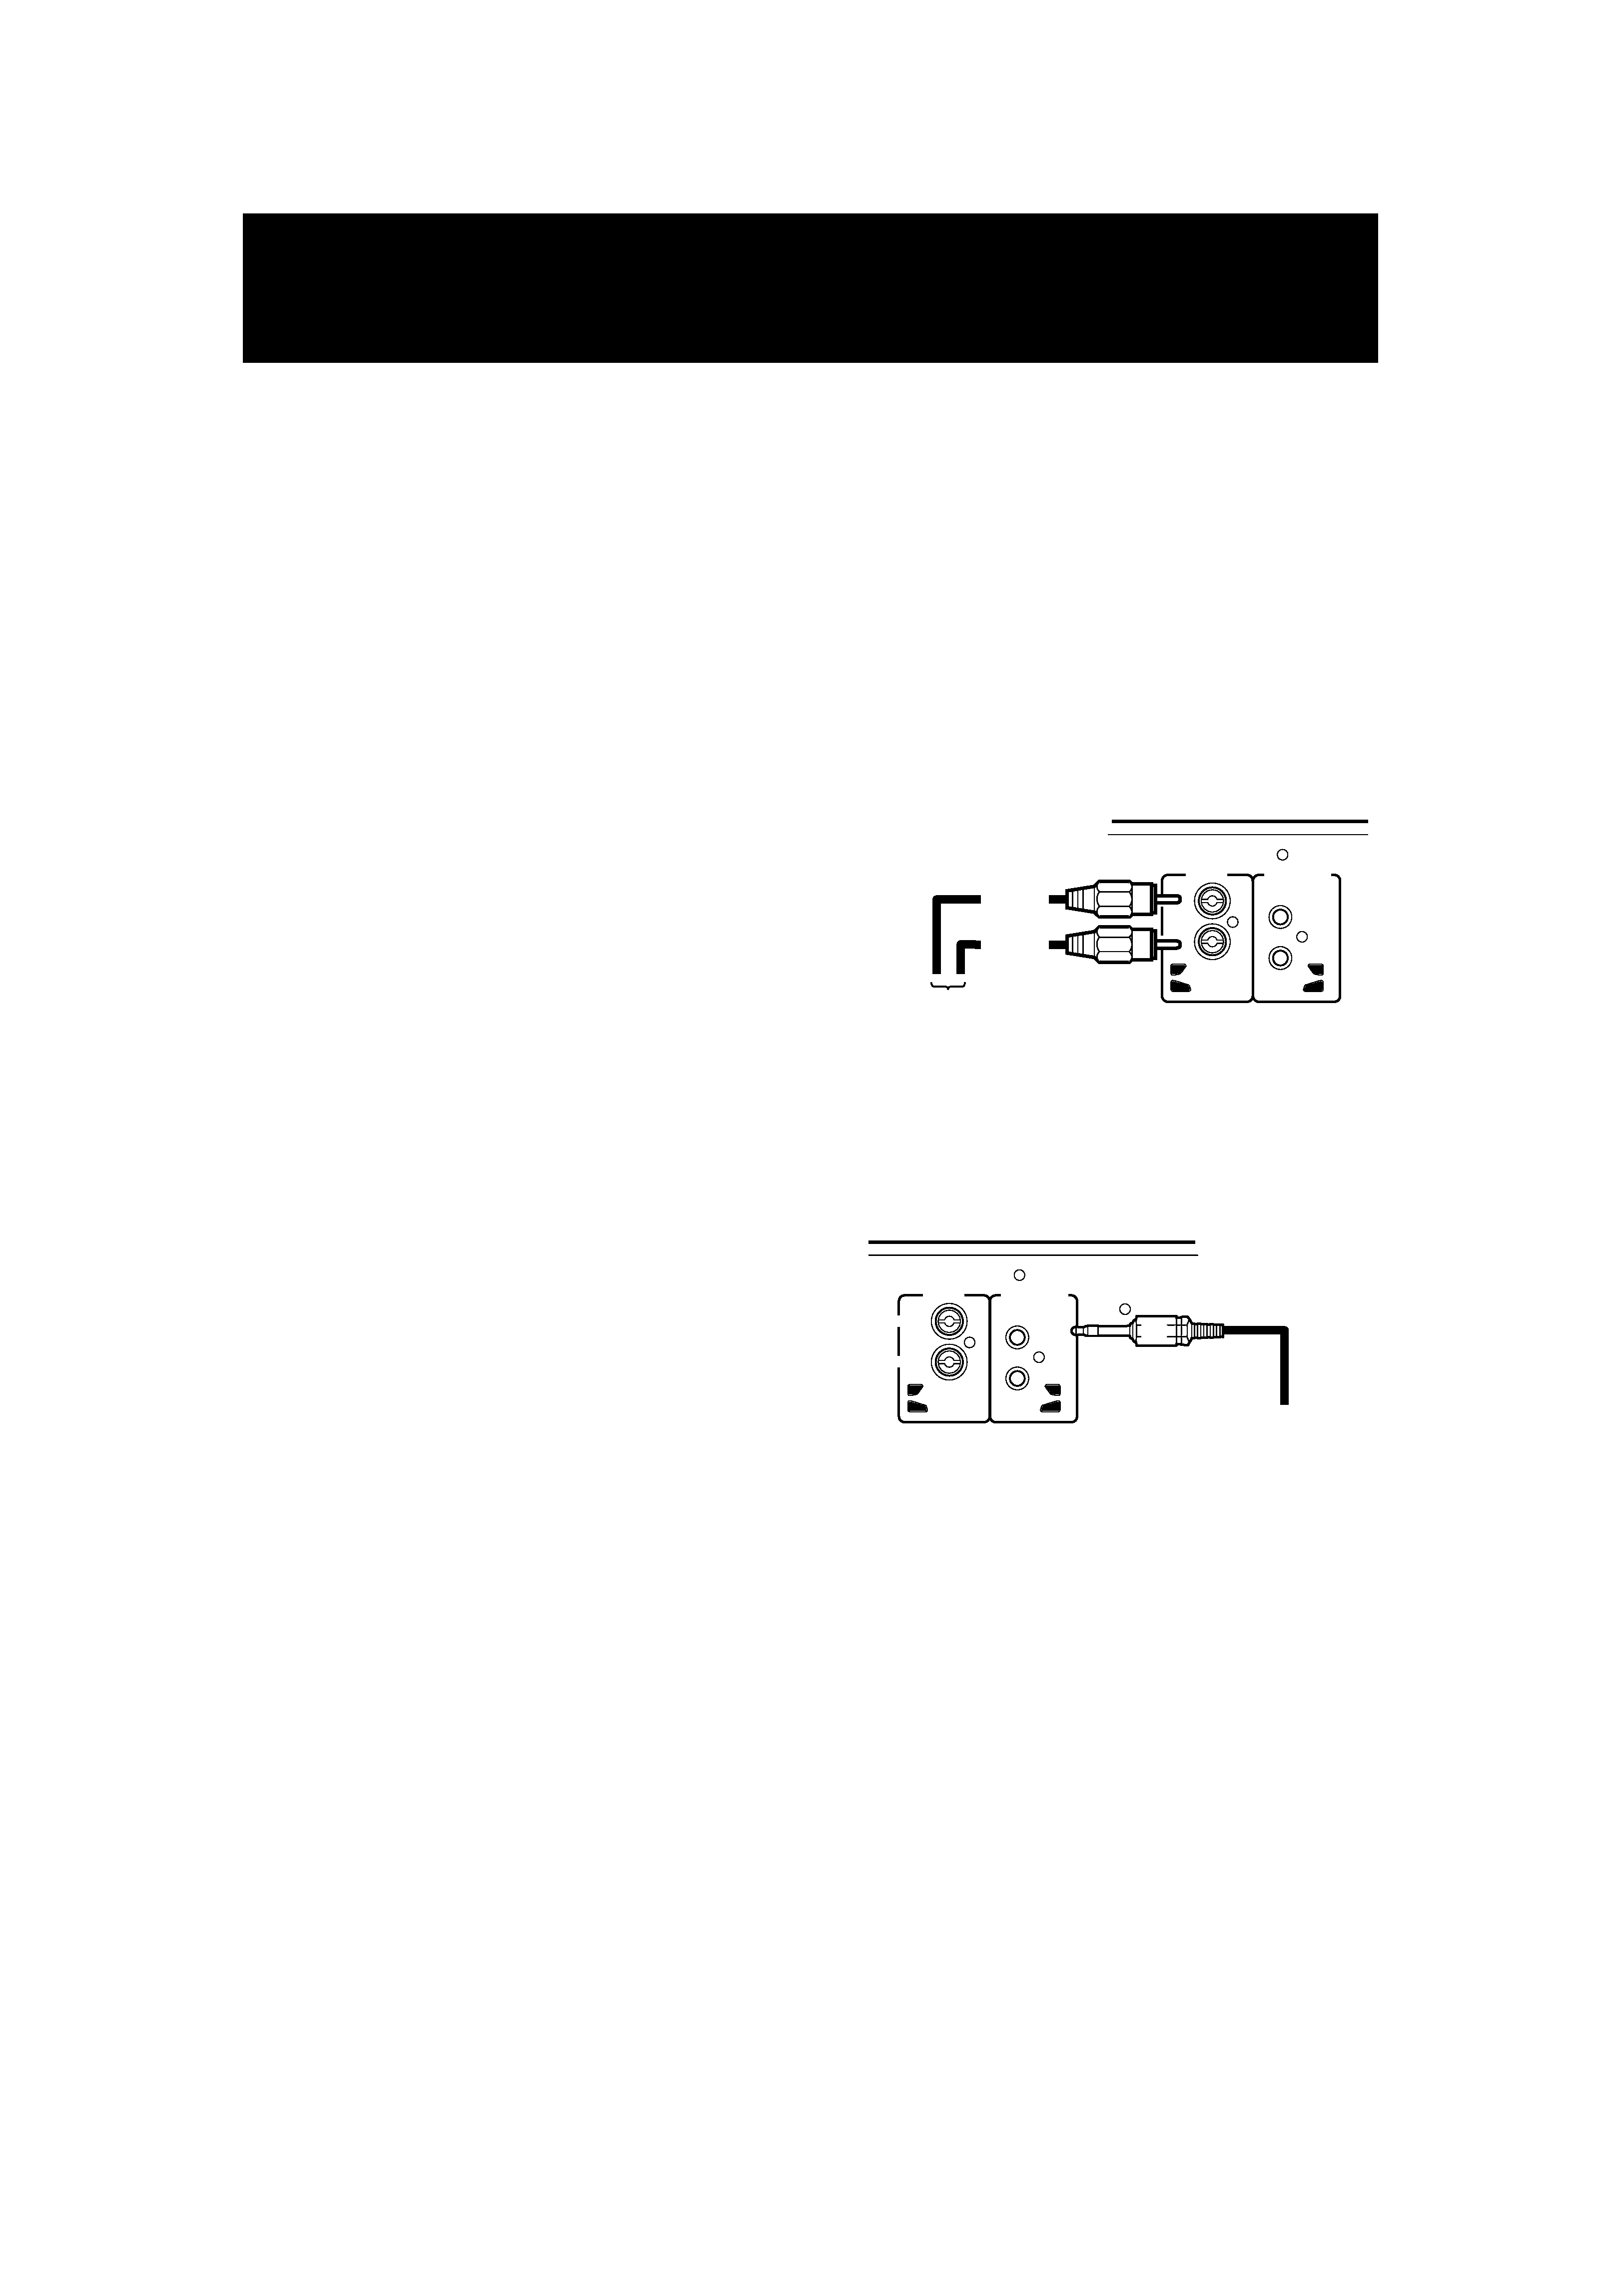
2. If you are connecting the unit to a JVC audio component and
using the CompuLink-3 remote control system, connect the units
with the accessory CompuLink cord. Either one of the
COMPULINK-3 (SYNCHRO) ports in the back of this unit
can be used.
OUTPUT
COMPULINK-3
(SYNCHRO)
RIGHT
LEFT
To CompuLink jack
CompuLink cord
When you use the system, you can remote-control this CD unit
from the connected JVC amplifier/receiver. (See Page 11 for
more information.)
NOTE: JVC components equipped with two COMPULINK-3
(SYNCHRO) ports can be connected in series; a com-
ponent with only one port may be connected at the
end of the series.
'
XL-MC222/E B
97.7.15, 5:54 PM
2

3
XL-MC222BK
?????
Installing batteries in the remote
control
1. There is a cover for the
battery compartment on
the back of the remote
control. Press the cover
down and slide it downward
to remove it.
2. Set the two accessory
batteries (1.5V, R6P, AA) in
the compartment with their
polarities in proper positions.
3. Place the cover over the
compartment, press it
down, and slide it upward
so that it firmly covers the
compartment.
CAUTION
· Install the batteries with their polarities correctly set.
· Remove the batteries if the remote control is not
going to be used for an extended period of time.
· Do not expose the remote control to heat, flame, or
direct sunlight.
Replacing the batteries
The service life of batteries normally lasts for about one year though
it is dependent on the use of the remote control (it is shortened in
low temperatures, too). Replace the batteries any time if the
controllable range is reduced (max. range: 7 meters or 23 feet and
30 degrees away from the component).
CAUTION
· Be sure to replace them with the correct batteries (1.5V,
R6P, AA).
· Do not use new and old batteries in combination.
3. Connect the accessory AC power cord into the socket in the
back of this unit. Then insert the cord plugs into an AC outlet.
(Do not connect the power cord to a switched AC outlet of a
component if the CompuLink system is used.)
AC POWER CORD
Wall outlet
AC power cord
XL-MC222/E B
97.7.15, 5:54 PM
3