XL-FZ700BK
COMPACT DISC AUTOMATIC CHANGER
PROGRAM CANCEL
CALL
RANDOM
23
4
1
67
8
5
10
+10
9
REPEAT
OPEN/
CLOSE STANDBY/ON
RM-SXLFZ700J
REMOTE CONTROL
DISC 1
DISC 2
DISC 3
DISC 4
DISC 5
DISC 6
DISC 7
DISCSKIP
STANDBY
STANDBY/ON
PAUSE
PLAY
STOP
OPEN/CLOSE
SKIP
XL-FZ700 COMPACT DISC AUTOMATIC CHANGER
DISC 1
DISC 2
DISC 3
DISC 4
DISC 5
DISC 6
DISC 7
PLAY & EXCHANGE
7-DISC
EXCHANGE/DISC SKIP
CD-R/RW PLAYBACK
1BIT P.E.M D.D.CONVERTER
Introduction
2
Before using for the first time
5
Basic operations
7
Various playback patterns
11
General informations
13
For Customer Use:
Enter below the Model No. and Serial No.
which are located on the rear, bottom or
side of the cabinet. Retain this information
for future reference.
Model No.
Serial No.
LVT0863-003A
[UJ]
INSTRUCTIONS
XL-FZ 700BK(UJ).book Page 1 Friday, April 19, 2002 6:05 PM
Warnings, Cautions and Others
CAUTION
To reduce the risk of electrical shocks, fire, etc.:
1.
Do not remove screws, covers or cabinet.
2.
Do not expose this appliance to rain or moisture.
Caution
STANDBY/ON button!
Disconnect the mains plug to shut the power off completely. The
STANDBY/ON button in any position does not disconnect the
mains line. The power can be remote controlled.
CAUTION
· Do not block the ventilation openings or holes.
(If the ventilation openings or holes are blocked by a newspaper
or cloth, etc., the heat may not be able to get out.)
· Do not place any naked flame sources, such as lighted candles,
on the apparatus.
· When discarding batteries, environmental problems must be
consid-ered and local rules or laws governing the disposal of
these batteries must be followed strictly.
· Do not expose this apparatus to rain, moisture, dripping or
splashing and that no objects filled with liquids, such as vases,
shall be placed on the apparatus.
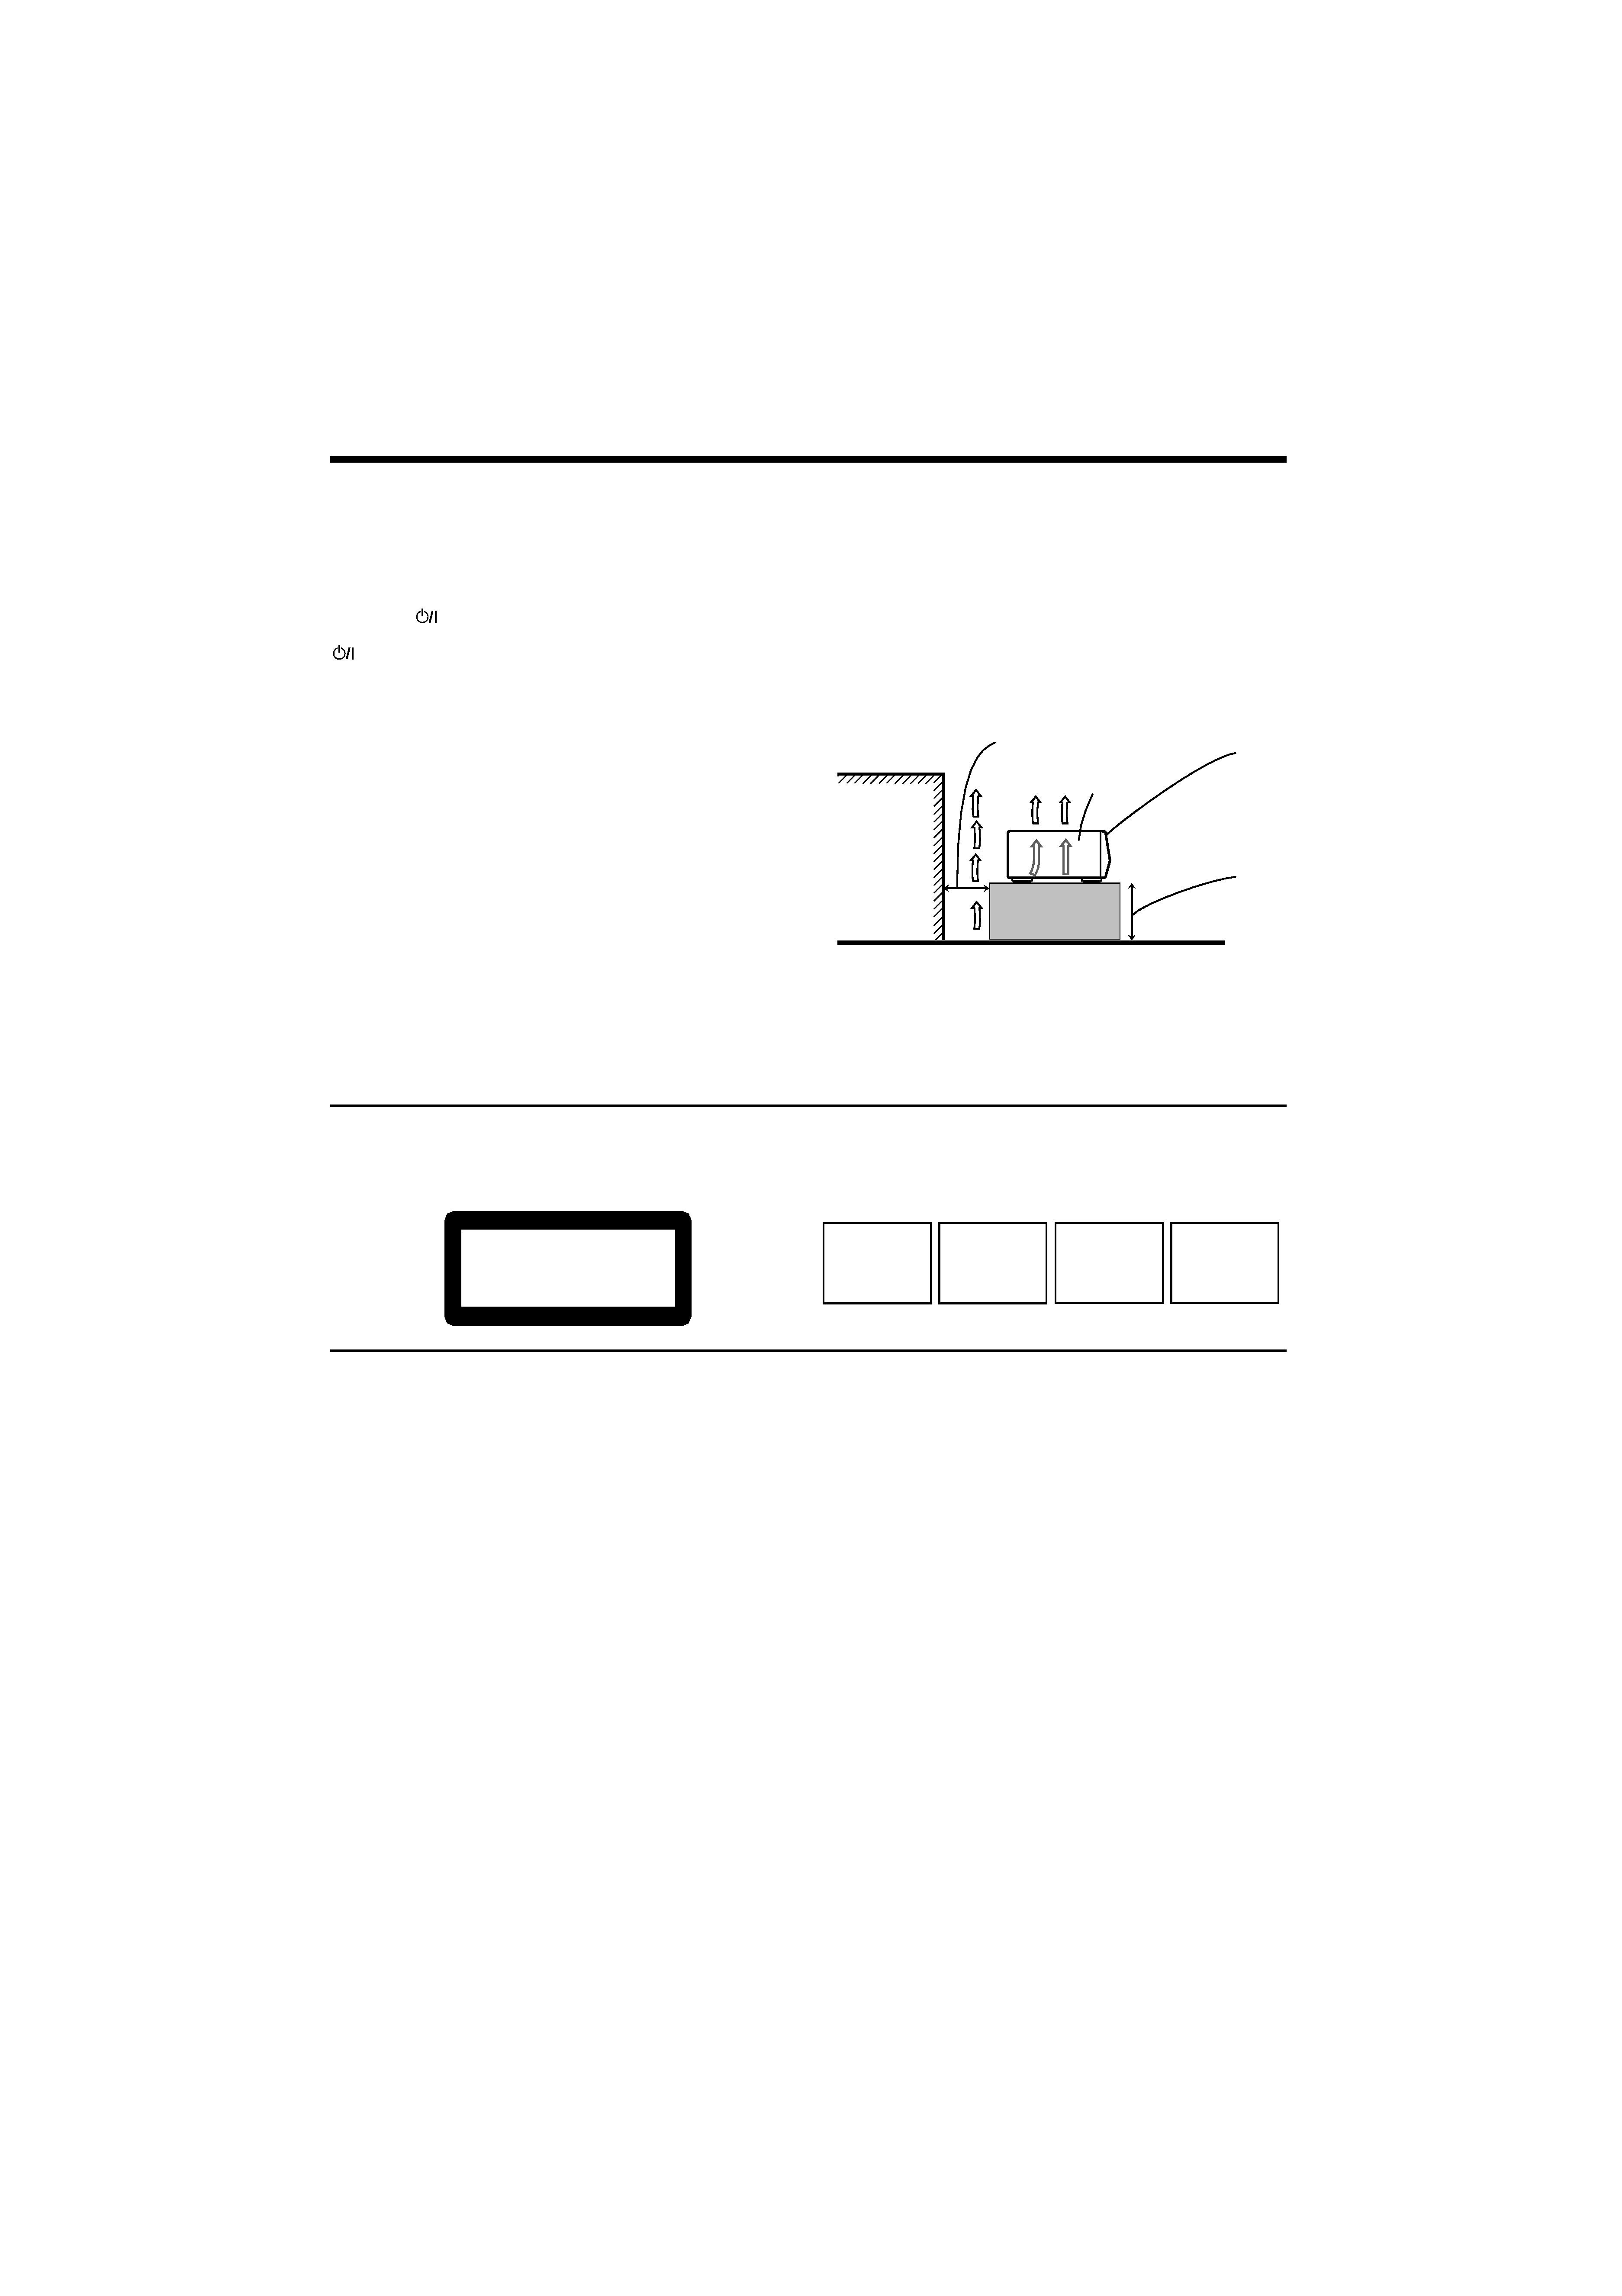
Caution: Proper Ventilation
To avoide risk of electric shock and fire and to protect from
damage.
Locate the apparatus as follows:
Front:
No obstructions and open spacing.
Sides:
No obstructions in 3 cm from the sides.
Top:
No obstructions in 5 cm from the top.
Back:
No obstructions in 15 cm from the back
Bottom:
No obstructions, place on the level surface.
IMPORTANT FOR LASER PRODUCTS
REPRODUCTION OF LABELS
1 CLASSIFICATION LABEL, PLACED ON REAR ENCLOSURE
2 WARNING LABEL, PLACED INSIDE THE UNIT
1. CLASS 1 LASER PRODUCT
2. CAUTION: Visible and invisible laser radiation when open and
interlock failed or defeated. Avoid direct exposure to beam.
3. CAUTION: Do not open the top cover. There are no user
serviceable parts inside the Unit; leave all servicing to qualified
service personnel.
Spacing 15 cm or more
Wall or
obstructions
Stand height
5 cm or more
Front
XL-FZ700BK
Floor
CLASS
1
LASER
PRODUCT
CAUTION: Invisible laser
radiation when open and
interlock failed or defeated.
AVOID DIRECT EXPOSURE
TO BEAM.
(e)
ADVARSEL: Usynlig laser-
stråling ved åbning, når
sikkerhedsafbrydere er ude
af funktion. Undgå udsæt-
telse for stråling
(d)
VARNING: Osynlig laser-
strålning när denna del är
öppnad och spärren är
urkopplad.
Betrakta
ej
strålen.
(s)
VARO: Avattaessa ja suo-
jalukitus ohitettaessa olet
alttiina
näkymättömälle
lasersäteilylle. Älä katso
säteeseen.
(f)
XL-FZ 700BK(UJ).book Page 1 Friday, April 19, 2002 6:05 PM

1
English
English
We would like to thank you for purchasing one of our
JVC products.
Before connecting this unit to the wall outlet, please read
the instructions carefully to ensure that you obtain the
best possible performance.
If you have any questions, please consult your JVC
dealer.
Table of Contents
Introduction
Page 2
Precautions......................................................................... 2
About this manual ............................................................. 2
Names of buttons .............................................................. 3
Main unit...................................................................................3
Remote control unit .................................................................4
Display window........................................................................4
Before using for the first time
Page 5
Installing the unit............................................................... 5
Connecting to the Analog Output Jacks ......................... 5
Connecting to the Digital Output Jack............................ 5
Supplying the power......................................................... 5
To connect the AC power cord of the main unit ...................5
To install the batteries in the remote control unit.................6
COMPU LINK connection .................................................. 6
Basic operations
Page 7
Basic functions for disc playback .................................... 7
Turning on the power of this unit...........................................7
Remote control operation .......................................................7
Inserting and removing discs .................................................7
Playing a disc ...........................................................................8
Stopping playback ...................................................................8
Locating a point to start playback .................................. 9
Skipping to a desired disc during playback (DISC SKIP) ......9
Changing to a desired disc during playback DISC (1-7) .......9
Skipping to a desired track during playback .........................9
Searching for a desired section ..............................................9
Specifying a desired track in stop mode..............................10
Changing discs during playback (EXCHANGE)............. 10
Playing tracks in a order of disc/track number............. 10
Various playback patterns
Page 11
Playing tracks in a desired order (Program Play) ......... 11
Playing tracks in a random order (Random Play) ......... 12
Playing repeatedly (Repeat Play) ................................... 12
Repeating all the tracks of a disc ..........................................12
Repeating one track ...............................................................12
General informations
Page 13
COMPU LINK remote control system ............................ 13
Care and handling............................................................ 14
Troubleshooting .............................................................. 15
Specifications................................................................... 15
XL-FZ 700BK(UJ).book Page 1 Friday, April 19, 2002 6:05 PM
2
Intr
oduction
Introduction
Precautions
Load compact discs only
Never insert anything other than compact discs into any
part of the player.
If a problem persists
If something goes wrong, turn off the power
immediately. If the same problem reoccurs when the
power is turned on once more, turn off the power again
and consult your JVC dealer.
Handling the power cord
When unplugging from the wall socket, always pull the
plug body, never the power cable.
Volume settings
A CD player has almost zero background noise. Because
of this, the technique of listening to the background level
and then setting the volume before the music starts, as
used with analog turntables or tape decks, cannot be
used. If you raise the volume level too high, speaker
damage may result.
Condensation
The CD player uses optical components. If it is moved
from a cold location to a warm one, or is used in a room
subject to excessive humidity or where a fire has just
been lit, condensation could form on the optical
components.
This may prevent the laser beam from being properly
transmitted and thus causes noise or even a
malfunction.
If condensation has formed and the CD player does not
function correctly, we recommend that you leave it
turned on for an hour or two. If at the end of this time the
CD player still does not function properly, please consult
your JVC dealer.
Using compact discs
Compact discs are made of plastic and can easily be
damaged. If the disc is dirty, scratched, warped or
otherwise damaged, the digital information may not be
picked up correctly.
Applicable discs
This unit can only be used with compact discs bearing
the marks below. Never use discs of other types.
CD-R and CD-RW discs recorded with the Audio CD format
can be played back, though some may not be played back
because of the disc characteristics or recording condition.
About this manual
This manual covers the operating instructions for the
compact disc automatic changer XL-FZ700BK.
This manual is organized as follows:
The first part, "Introduction", gives you the precautions
when using this unit, and shows you the names of
buttons on the main unit and the remote control unit.
The second part, "Before using for the first time", tells
you what kind of operations you should do before
playing discs. This part describes where to place the unit
for best results, how to install batteries in the remote
control unit and how to connect this unit to the amplifier/
receiver and other components.
The third part, "Basic operations", describes how to load
discs, and convenient basic functions for playing discs.
The fourth part, "Various playback patterns", describes
various functions for playing discs.
The fifth part, "General informations", describes the
COMPU LINK remote control system which facilitates
various operations between JVC components, and
explains how to take care of discs.
This part also includes "Troubleshooting", which tells
you how to check the unit when a malfunction occurs,
and the technical informations regarding this unit.
Transporting the unit
When carrying this unit, it is best to avoid either
tilting or turning it upside-down. When you cannot
avoid doing so, please remove the discs first.
NOTE
·
CD-R and CD-RW discs must be finalized.
Recordable
ReWritable
XL-FZ 700BK(UJ).book Page 2 Friday, April 19, 2002 6:05 PM
Introduction
3
Intro
duction
English
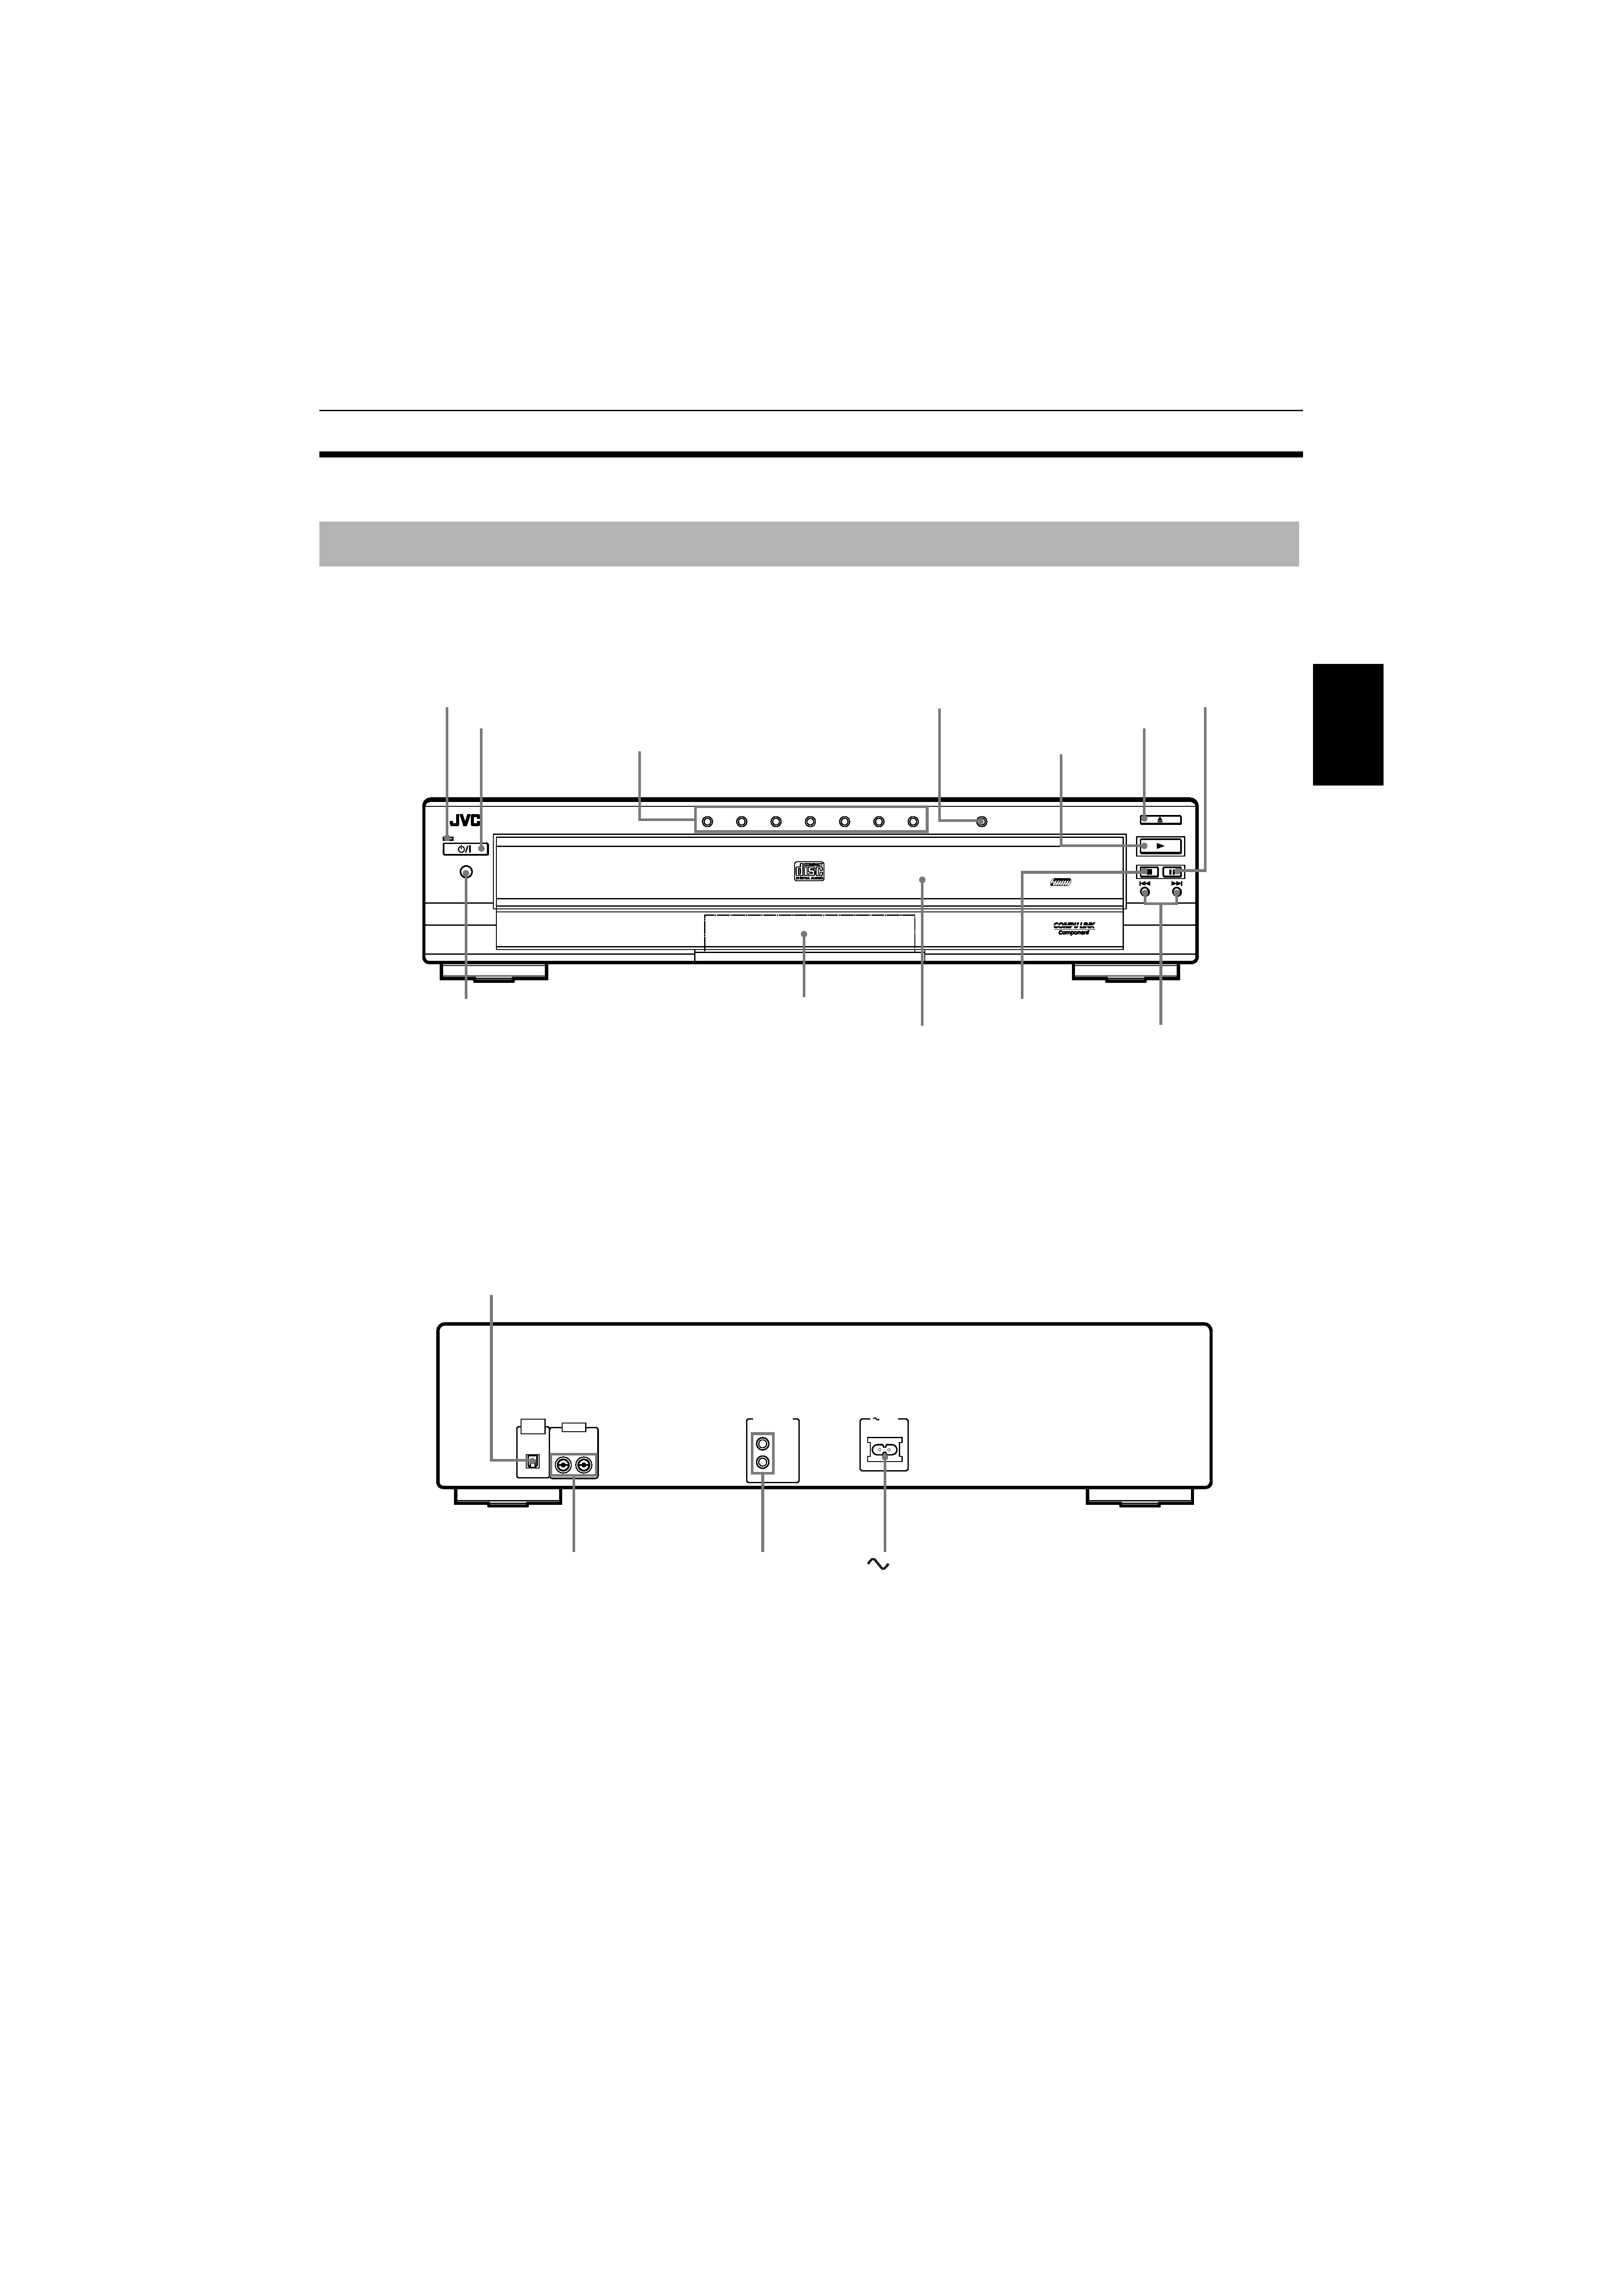
Names of buttons
Main unit
STANDBY
STANDBY/ON
PAUSE
PLAY
STOP
OPEN/CLOSE
SKIP
XL-FZ700 COMPACT DISC AUTOMATIC CHANGER
DISC 1
DISC 2
DISC 3
DISC 4
DISC 5
DISC 6
DISC 7
PLAY & EXCHANGE
7-DISC
EXCHANGE/DISC SKIP
CD-R/RW PLAYBACK
1BIT P.E.M D.D.CONVERTER
RIGHT LEFT
OUTPUT
(SYNCHRO)
COMPU LINK - 3
DIGITAL
OUT
OPTICAL
AC IN
AC IN
%
%
%
% STANDBY/ON button
Display window
DISC (1-7) buttons
remote sensor
STANDBY indicator
COMPU LINK-3
(SYNCHRO) jacks
0
0
0
0 OPEN/CLOSE button
OUTPUT (RIGHT/LEFT) jacks
DIGITAL OUT OPTICAL jack
AC IN connector
4
4
4
4/¢
¢
¢
¢ SKIP buttons
7
7
7
7 STOP button
3
3
3
3 PLAY button
8
8
8
8 PAUSE button
Carousel
EXCHANGE/DISC SKIP button
XL-FZ 700BK(UJ).book Page 3 Friday, April 19, 2002 6:05 PM