MICRO COMPONENT SYSTEM
SISTEMAS DE MICROCOMPONENTES
SISTEMA DE MICRO COMPONENTES
UX-P400
--Consists of CA-UXP400 and SP-UXP400
--
Se compone de CA-UXP400 y SP-UXP400
--
Composto por CA-UXP400 e SP-UXP400
INSTRUCTIONS
MANUAL DE INSTRUCCIONES
INSTRUÇÕES
GVT0128-002A
[UW]
English
English
Español
Português
G-1
Warnings, Cautions and Others
Avisos, precauciones y otras notas
Advertências, precauções e outras notas
CAUTION--STANDBY/ON
button!
Disconnect the mains plug to shut the power off completely (all lamps and indications go off).
The STANDBY/ON
button in any position does not disconnect the mains line.
· When the unit is on standby, the STANDBY/ON lamp lights in red.
· When the unit is turned on, the STANDBY/ON lamp lights in green.
The power can be remote controlled.
PRECAUCIÓN--Botón STANDBY/ON
Desconecte el enchufe tomacorriente para desconectar la alimentación completamente (se
apagan todas las lámparas e indicaciones). Ninguna posición del botón STANDBY/ON
conseguirá desconectar la red de alimentación eléctrica.
· Cuando la unidad está en espera, la lámpara STANDBY/ON se enciende en rojo.
· Cuando la unidad está encendida, la lámpara STANDBY/ON se enciende en verde.
La alimentación puede controlarse mediante control remoto.
CUIDADO--botão STANDBY/ON
!
Desligue a ficha da tomada da parede para desligar completamente a alimentação (todas as
luzes e indicadores apagam-se). O botão STANDBY/ON
, quer esteja premido ou solto,
não desliga a alimentação principal.
· Quando a unidade estiver em standby, a luz STANDBY/ON fica vermelha.
· Quando a unidade estiver ligada, a luz STANDBY/ON fica verde.
A alimentação pode ser controlada à distância.
G-2
CAUTION
To reduce the risk of electrical shocks, fire, etc.:
1. Do not remove screws, covers or cabinet.
2. Do not expose this appliance to rain or moisture.
PRECAUCIÓN
Para reducir riesgos de choques eléctricos, incendio, etc.:
1. No extraiga los tornillos, los cubiertas ni la caja.
2. No exponga este aparato a la lluvia o a la humedad.
PRECAUÇÃO
Para reduzir riscos de choques elétricos, incêndio, etc.:
1. Não remova parafusos e tampas ou desmonte a caixa.
2. Não exponha este aparelho à chuva nem à umidade.
CAUTION
· Do not block the ventilation openings or holes.
(If the ventilation openings or holes are blocked by a
newspaper or cloth, etc., the heat may not be able to get
out.)
· Do not place any naked flame sources, such as lighted
candles, on the apparatus.
· When discarding batteries, environmental problems must
be considered and local rules or laws governing the
disposal of these batteries must be followed strictly.
· Do not expose this apparatus to rain, moisture, dripping or
splashing and that no objects filled with liquids, such as
vases, shall be placed on the apparatus.
PRECAUCIÓN
· No obstruya las rendijas o los orificios de ventilación.
(Si las rendijas o los orificios de ventilación quedan
tapados con un periódico, un trozo de tela, etc., no se
podrá disipar el calor).
· No ponga sobre el aparato ninguna llama al descubierto,
como velas encendidas.
· Cuando tenga que descartar las pilas, tenga en cuenta los
problemas ambientales y observe estrictamente los
reglamentos o las leyes locales sobre disposición de las
pilas.
· No exponga este aparato a la lluvia, humedad, goteos o
salpicaduras. Tampoco ponga recipientes conteniendo
líquidos, como floreros, encima del aparato.
PRECAUÇÃO
· Não obstrua as aberturas e orifícios de ventilação.
(Se os orifícios ou aberturas de ventilação estiverem
obstruídos por qualquer papel ou tecido, não haverá
circulação do ar quente.)
· Não coloque nenhum objeto com chamas, como velas
acesas, sobre o aparelho.
· Ao descartar as baterias, leve em consideração os
problemas que possam ser causados ao meio ambiente e
os regulamentos e leis locais e governamentais sobre
recolhimento dessas baterias devem ser rigorosamente
seguidos.
· Não exponha este aparelho à chuva, umidade, pingos ou
esguichos de água, nem coloque em cima do mesmo
qualquer tipo de recipiente que contenha líquidos, como
por exemplo vasos.
G-3
IMPORTANT FOR LASER PRODUCTS
1. CLASS 1 LASER PRODUCT
2. CAUTION: Do not open the top cover. There are no user serviceable parts inside the unit; leave all servicing to qualified service
personnel.
3. CAUTION: Visible and invisible laser radiation when open and interlock failed or defeated. Avoid direct exposure to beam.
4. REPRODUCTION OF LABEL: CAUTION LABEL, PLACED INSIDE THE UNIT.
IMPORTANTE PARA PRODUCTOS LÁSER
1. PRODUCTO LÁSER CLASE 1
2. PRECAUCIÓN: No abra la tapa superior. En el interior de la unidad no hay piezas que pueda reparar el usuario; encargue el
servicio a personal técnico cualificado.
3. PRECAUCIÓN: Radiación láser visible e invisible en caso de apertura o con interbloqueo averiado o defectuoso. Evite la
exposición directa a los haces.
4. REPRODUCCIÓN DE LA ETIQUETA: ETIQUETA DE PRECAUCIÓN, COLOCADA EN EL INTERIOR DE LA UNIDAD.
PARA PRODUTOS LASER, IMPORTANTE
1. PRODUTO LASER DE CLASSE 1
2. PRECAUÇÃO: não abrir a cobertura superior. Dentro da unidade não existem partes cuja manutenção tenha de ser feita pelo
usuário; deixe qualquer manutenção a cargo do pessoal de serviço qualificado.
3. PRECAUÇÃO: radiação laser visível e invisível quando se abre e com a conexão interna em falha ou frustrada. Evite a
exposição direta ao raio.
4. REPRODUÇÃO DE ETIQUETA: ETIQUETA DE AVISO SITUADA NO INTERIOR DA UNIDADE.
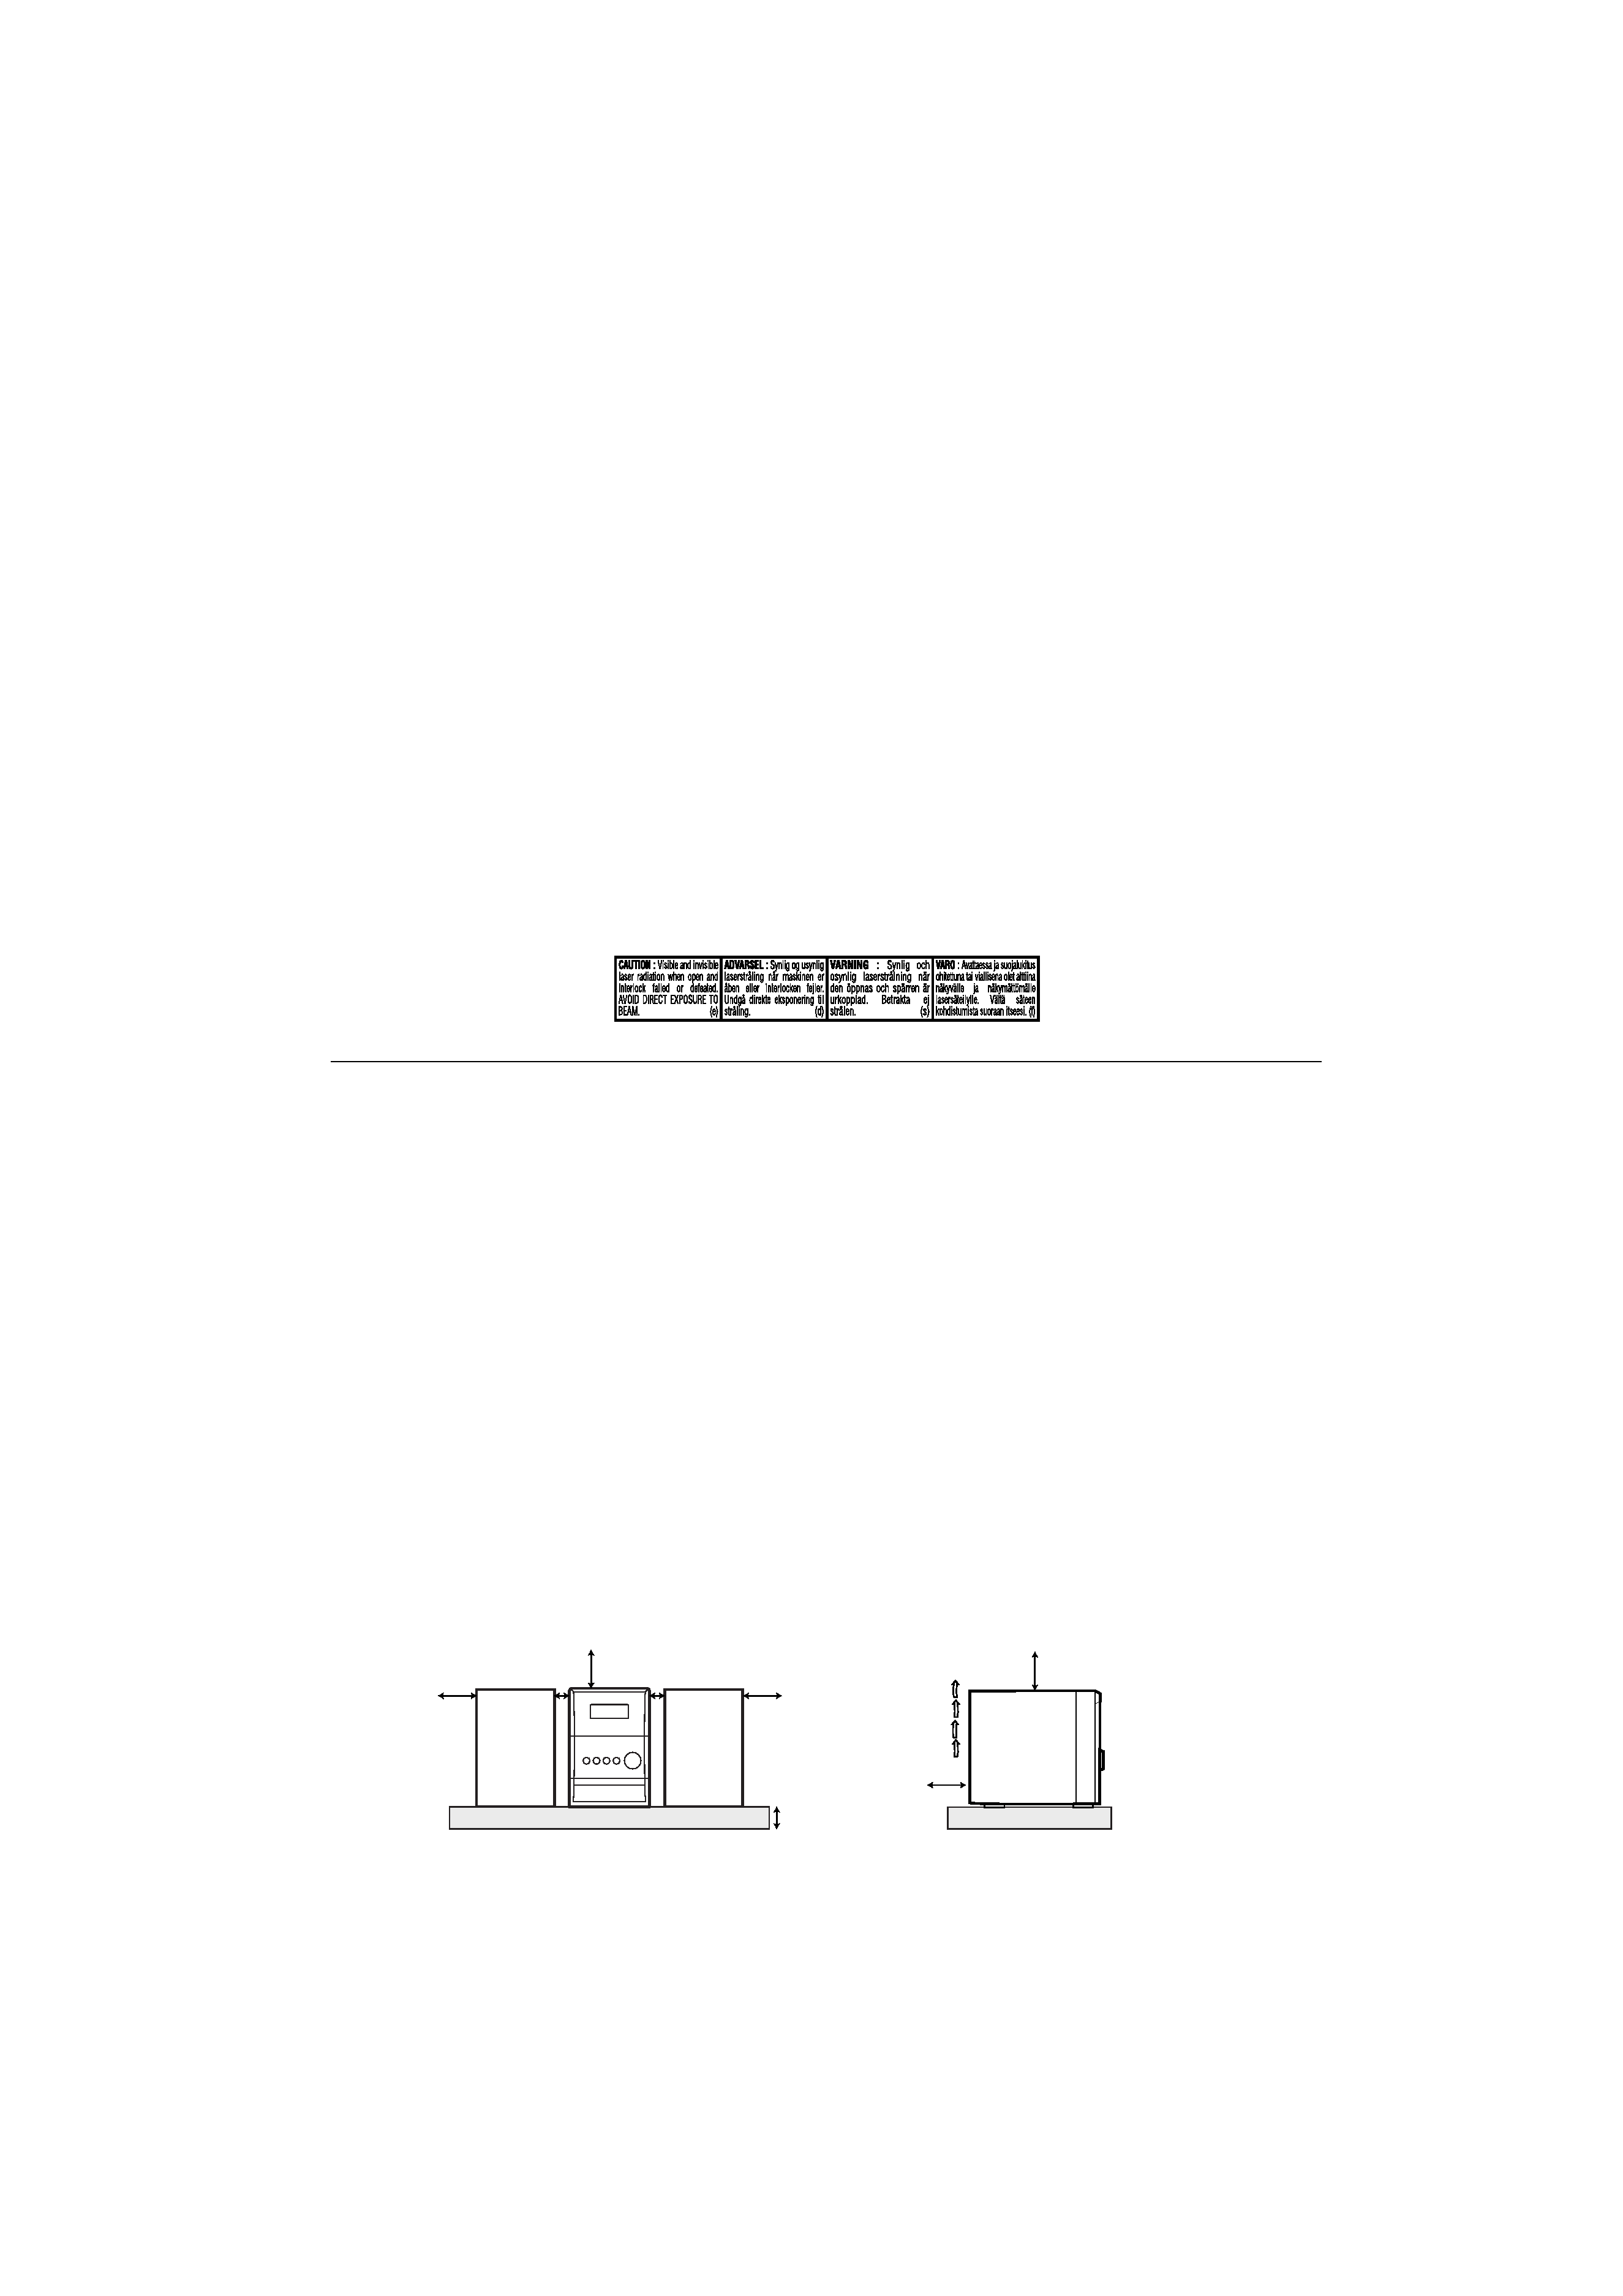
Caution: Proper Ventilation
To avoid risk of electric shock and fire, and to prevent damage, locate the apparatus as follows:
1. Front: No obstructions and open spacing.
2. Sides/Top/Back: No obstructions should be placed in the areas shown by the dimensions below.
3. Bottom: Place on the level surface. Maintain an adequate air path for ventilation by placing on a stand with a height of 10 cm or
more.
Precaución: Ventilación correcta
Para evitar el riesgo de descargas eléctricas e incendio y prevenir posibles daños, instale el equipo en un lugar que
cumpla los siguientes requisitos:
1. Parte frontal: Sin obstrucciones, espacio abierto.
2. Lados/parte superior/parte posterior: No debe haber ninguna obstrucción en las áreas mostradas por las
3. Parte inferior: Sitúe el equipo sobre una superficie nivelada. Mantenga un espacio adecuado para permitir el paso del aire y
una correcta ventilación, situando el equipo sobre un soporte de 10 o más cm de allura.
Precaução: Ventilação adequada
Para evitar riscos de choques elétricos e incêndios, e prevenir avarias, instale o aparelho como segue:
1. Parte frontal: Sem obstruções e espaços abertos.
2. Partes laterais/tampa/posterior: Nenhuma obstrução deverá ser colocada entre as áreas cujas dimensões são indicadas
abaixo.
3. Parte inferior: Instale-o sobre uma superfície plana. Deverá ser mantido espaço suficiente para a ventilação se este for instalado
numa posição que tenha uma altura de 10 cm ou mais.
10 cm
15 cm
1 cm
15 cm
15 cm
1 cm
15 cm
15 cm
CA-UXP400
CA-UXP400
SP-UXP400
SP-UXP400

1
English
Contents
Introduction........................................................ 2
Precautions..........................................................................2
How to Read This Manual ..................................................2
Getting Started ................................................... 3
Step 1: Unpack....................................................................3
Step 2: Prepare the Remote Control ...................................3
Step 3: Hook Up ................................................................ 4
Before Operating the System ............................ 7
Daily Operations--Playback............................. 8
Listening to the Radio.........................................................9
Playing Back a Disc..........................................................10
Playing Back a Tape .........................................................11
Daily Operations--Sound &Other
Adjustments...................................................... 12
Adjusting the Volume.......................................................12
Adjusting the Sound .........................................................12
Changing the Display Brightness ....................................13
Setting the Clock...............................................................13
Turning Off the Power Automatically ..............................13
Advanced Disc Operations .............................. 14
Programming the Playing Order--Program Play .............14
Playing at Random--Random Play ..................................15
Playing Repeatedly--Repeat Play ....................................16
Prohibiting Disc Ejection--Child Lock............................16
Advanced Tape Operations............................. 17
Recording on a Tape .........................................................17
Synchronized Disc Recording ..........................................18
Timer Operations............................................. 19
Setting the Timer ..............................................................19
Additional Information ................................... 22
Learning More about This System ...................................22
Troubleshooting ................................................................23
Maintenance......................................................................23
Specifications....................................................................24
Parts Index ........................................................................24