LVT0875-004B
[UW,UY]
MASTER VOLUME
DVD/SUPER VCD/VCD/CD
INPUT ATT.
REC MODE
INPUT
ANALOG/DIGITAL
COMPACT
SUPER VIDEO
SETTING
ADJUST
MEMORY
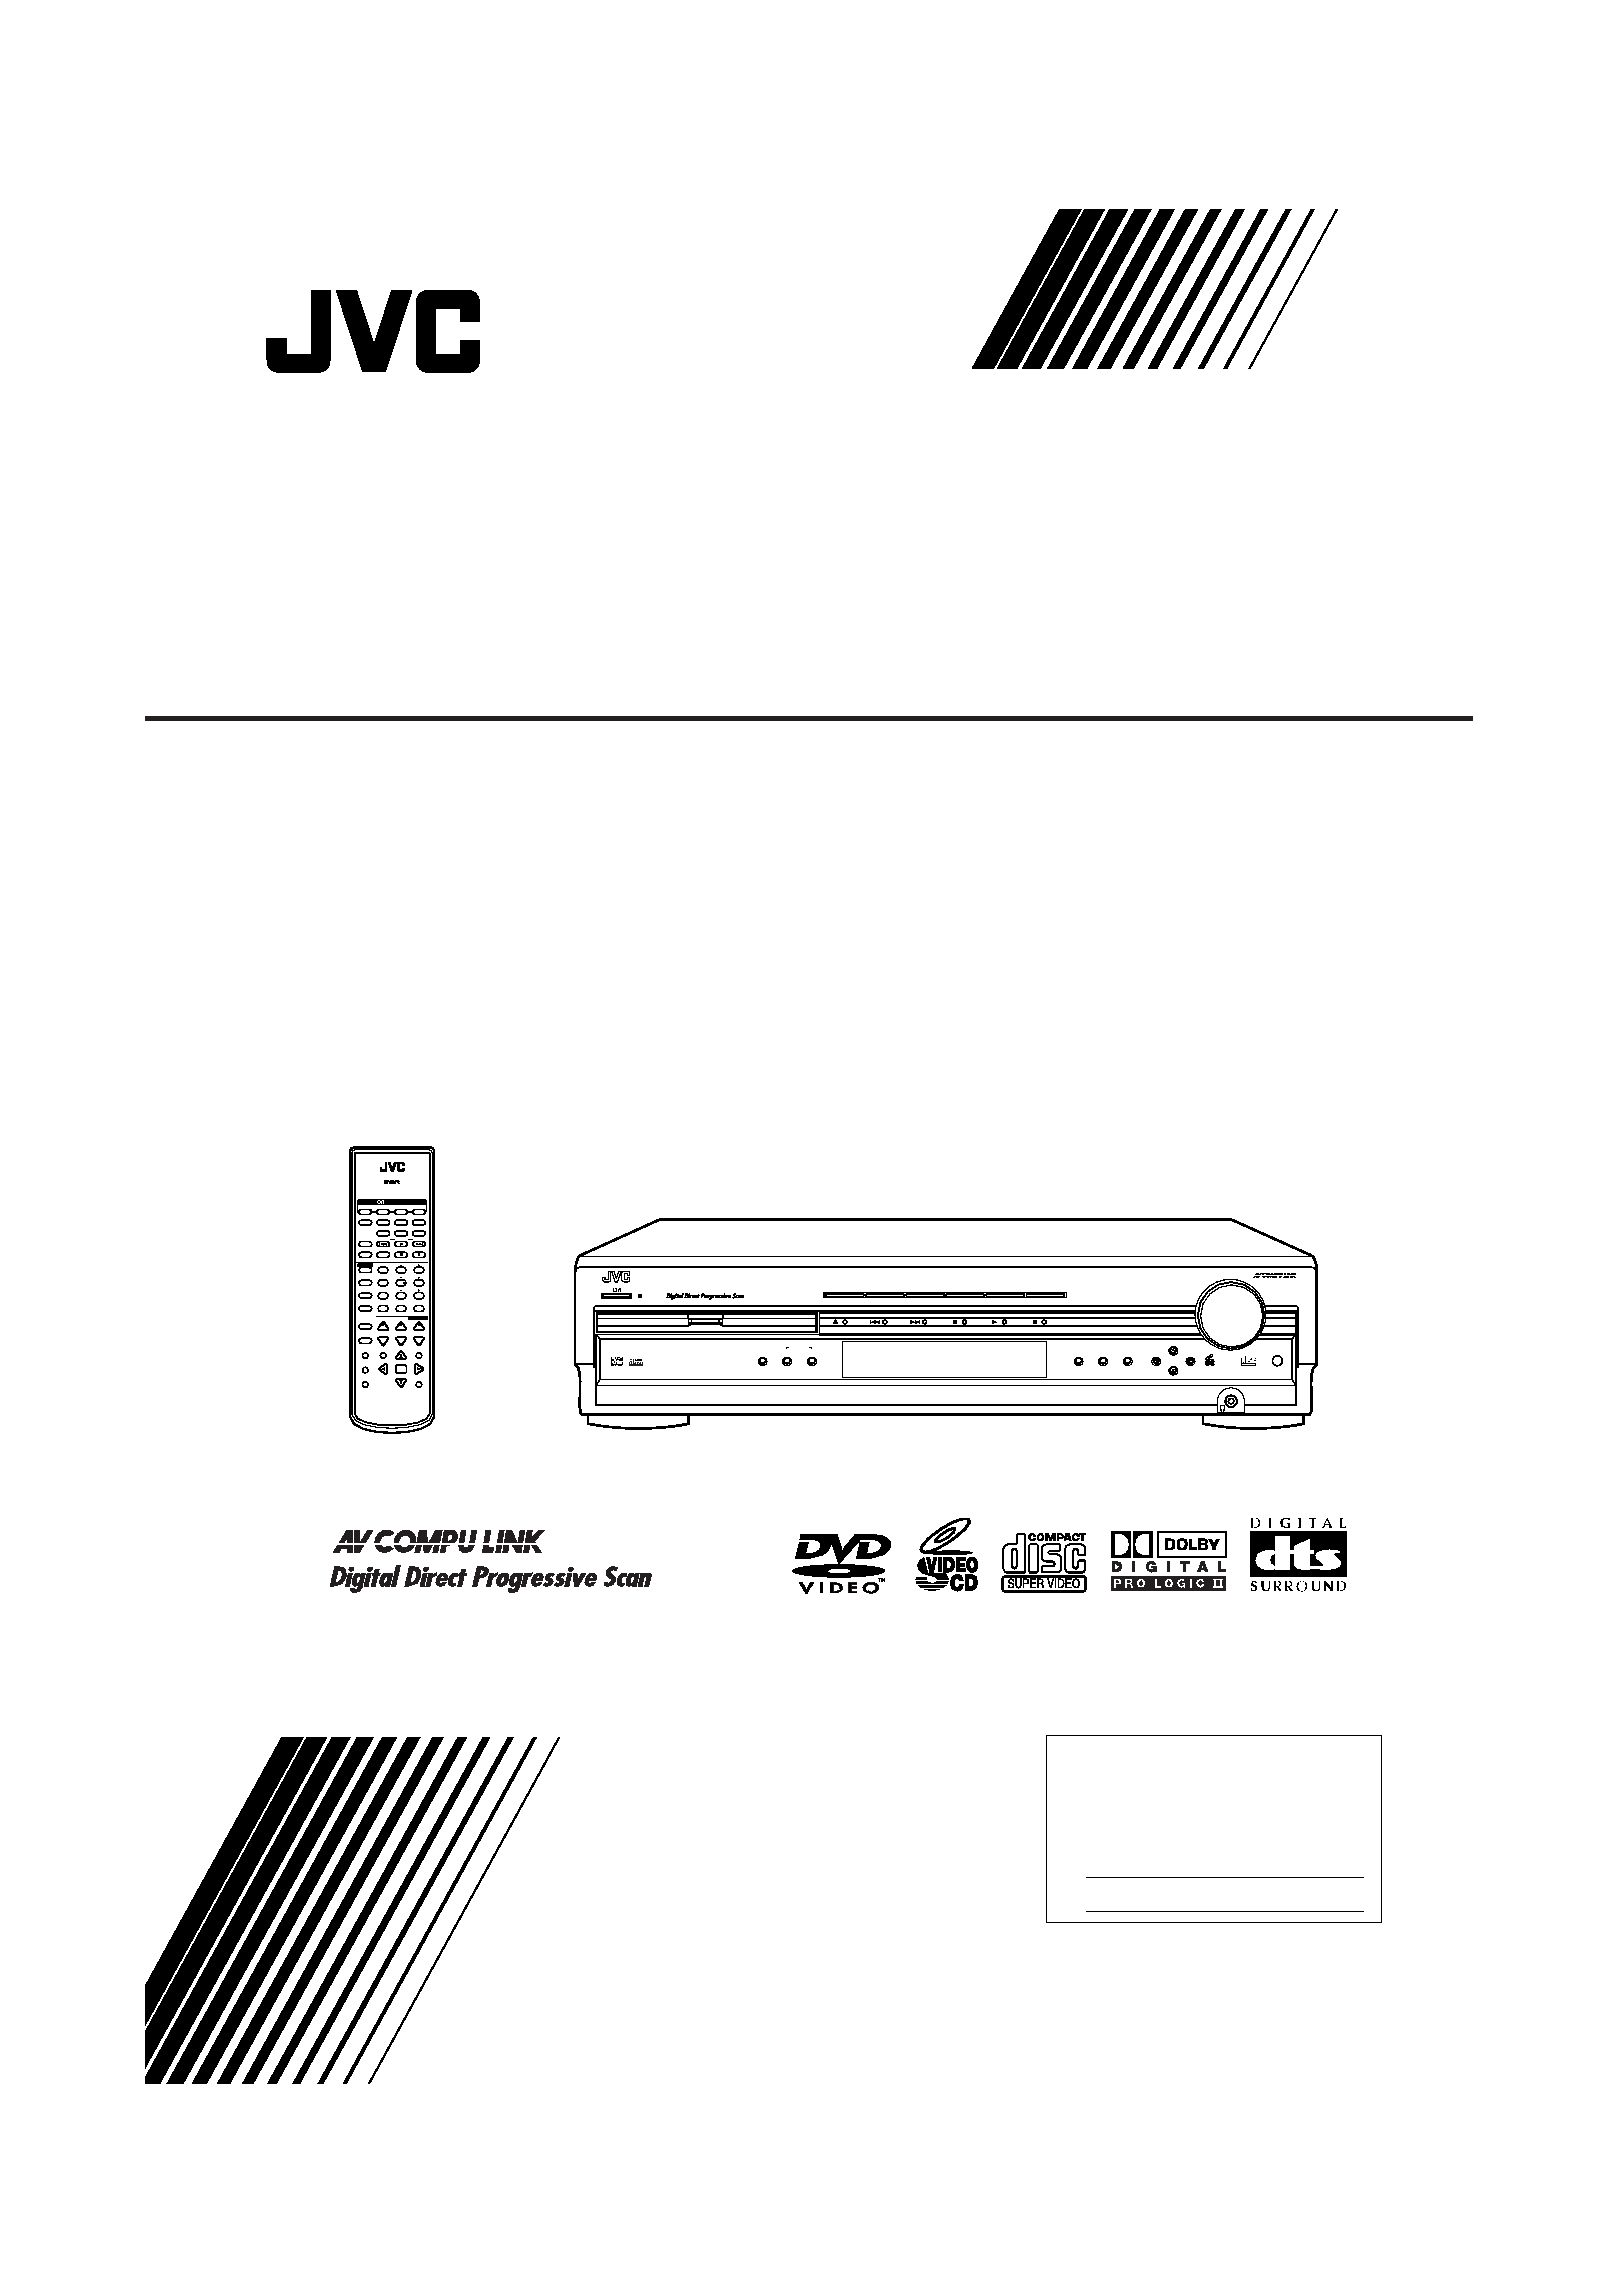
RX-DV3 HOME CINEMA DVD/CD CONTROL CENTER
ON/OFF
SURROUND
MODE
FM/AM
TAPE/CDR
SOURCE NAME
TV
VCR
DBS
DVD
CONTROL
STANDBY
STANDBY/ON
+
+
23
1
56
4
89
7
VFP
10/0
+10
100+
TV RETURN
VCR
DBS
DVD
TV/VIDEO
REW/
(
TUNING
9/FF
REPEAT
SLEEP
VCR
DBS
TV
AUDIO
TAPE
TV
CDR
FM/AM
FM MODE
STROBE
EFFECT
TV/DBS CH +
ANALOG
/DIGITAL
TEST
AUDIO
INPUT
SUBTITLE
CHOICE
ENTER
ON SCREEN
ANGLE
ZOOM
DIGEST TOP MENU
MENU
RETURN
SURR ON/OFF
SURR MODE
DIMMER
MUTING
TV VOL
VOLUME
SUBWOOFER +
HOME CINEMA
DVD/CD CONTROL CENTER
SOUND
STANDBY/ON
CENTER
REAR·L
REAR·R
REMOTE CONTROL RM-SRXDV3U
PROGRESSIVE
RX-DV3SL
HOME CINEMA DVD/CD CONTROL CENTER
CENTRO DE CONTROL DE CINE EN CASA CON REPRODUCTOR DE DVD/CD
CENTRO DE CONTROLE DE CD/DVD DE HOME CINEMA
INSTRUCTIONS
MANUAL DE INSTRUCCIONES
INSTRUÇÕES
For Customer Use:
Enter below the Model No. and Serial
No. which are located either on the rear,
bottom or side of the cabinet. Retain this
information for future reference.
Model No.
Serial No.
RX-DV3SL[UWUY]cover_ff.pm5
02.8.22, 9:13 PM
1

G-1
Warnings, Cautions and Others
Avisos, precauciones y otras notas
Advertêcias, precauções e outras notas
Caution
STANDBY/ON button!
Disconnect the mains plug to shut the power off completely. The
STANDBY/ON
button in any position does not disconnect the
mains line. The power can be remote controlled.
PrecauciónBotón
STANDBY/ON!
Para desactivar la alimentación completamente, desenchufe el
cable de alimentación de CA.
La línea de la red no se desconecta en ninguna de las posiciones
del botón
STANDBY/ON.
La alimentación puede ser controlada a distancia.
PrecauçãoBotão STANDBY/ON
!
Desconectar o cabo de alimentação para desligar a alimentação por
completo. Qualquer que seja a posição de ajuste do
botão
STANDBY/ON, a alimentação não é completamente
cortada. A alimentação pode ser controlada remotamente.
CAUTION
To reduce the risk of electrical shocks, fire, etc.:
1.
Do not remove screws, covers or cabinet.
2.
Do not expose this appliance to rain or moisture.
PRECAUCIÓN
Para reducir el riesgo de descargas eléctricas, fuego, etc.:
1.
No quitar los tomillos, tapas o caja.
2.
No exponer el aparato a la lluvia ni a la húmedad.
ATENÇÃO
Para reduzir riscos de choques eléctricos, incêndio, etc.:
1.
Não retire parafusos nem desmonte as tampas ou o
gabinete.
2.
Não exponha este aparelho à chuva nem à umidade.
CAUTION
· Do not block the ventilation openings or holes.
(If the ventilation openings or holes are blocked by a newspaper or cloth, etc., the heat may not be able to get
out.)
· Do not place any naked flame sources, such as lighted candles, on the apparatus.
· When discarding batteries, environmental problems must be considered and local rules or laws governing the
disposal of these batteries must be followed strictly.
· Do not expose this apparatus to rain, moisture, dripping or splashing and that no objects filled with liquids,
such as vases, shall be placed on the apparatus.
PRECAUCIÓN
· No obstruya las rendijas o los orificios de ventilación.
(Si las rendijas o los orificios de ventilación quedan tapados con un periódico, un trozo de tela, etc., no se
podrá disipar el calor).
· No ponga sobre el aparato ninguna llama al descubierto, como velas encendidas.
· Cuando tenga que descartar las pilas, tenga en cuenta los problemas ambientales y observe estrictamente los
reglamentos o las leyes locales sobre disposición de las pilas.
· No exponga este aparato a la lluvia, humedad, goteos o salpicaduras. Tampoco ponga recipientes conteniendo
líquidos, como floreros, encima del aparato.
PRECAUÇÃO
· Não obstrua as aberturas e orifícios de ventilação. (Se os orifícios ou aberturas de ventilação estiverem
obstruídos por qualquer papel ou tecido, não haverá circulação do ar quente.)
· Não coloque nenhum objeto com chamas, como velas acesas, sobre o aparelho.
· Ao descartar as baterias, leve em consideração os problemas que possam ser causados ao meio ambiente e
os regulamentos e leis locais e governamentais sobre recolhimento dessas baterias devem ser rigorosamente
seguidos.
· Não exponha este aparelho à chuva, umidade, pingos ou esguichos de água, nem coloque em cima do
mesmo qualquer tipo de recipiente que contenha líquidos, como por exemplo vasos.
RX-DV3SL[UWUY]safety_f.pm5
02.6.19, 2:37 PM
1

G-2
English
Espa
ñ
ol
Portugu
ê
s
IMPORTANT FOR LASER PRODUCTS/IMPORTANTE PARA LOS PRODUCTOS LÁSER/IMPORTANTE
PARA PRODUCTOS LASER
REPRODUCTION OF LABELS/REPRODUCCIÓN DE ETIQUETAS/REPRODUÇÃO, DE ETIQUETAS
1 CLASSIFICATION LABEL, PLACED ON EXTERIOR SURFACE
1 ETIQUETA DE CLASIFICACION, PROVISTA SOBRE LA
SUPERFICIE EXTERIOR
1 ETIQUETA DE CLASSIFICACAO, COLOCADA EM
SUPERFICIE EXTERNA
2 WARNING LABEL, PLACED INSIDE THE UNIT
2 ETIQUETA DE ADVERTENCIA, PEGADA EN EL INTERIOR
DE LA UNIDAD
2 ETIQUETA DE ADVERTÊNCIA LOCALIZADA NA PARTE
INTERNA DA UNIDADE
1. CLASS 1 LASER PRODUCT
2. CAUTION: Visible and invisible laser radiation when open and interlock failed or defeated. Avoid
direct exposure to beam.
3. CAUTION: Do not open the top cover. There are no user serviceable parts inside the Unit; leave all
serv-icing to qualified service personnel.
1. PRODUCT LASER CLASE 1
2. PRECAUCIÓN: Radiación láser visible e invisible al abrir, o al fallar o ignorar los cierres de
seguridad. Evite la exposición directa a los haces.
3. PRECAUCIÓN: No abra la tapa superior. En el interior de la unidad no existen piezas reparables
por el usuario; deje todo servicio técnico en manos de personal calificado.
1. PRODUCTO LASER CLASSE 1
2. PRECAUÇÃO: Radiação laser visível e invisível quando aberto e bloqueio falhou ou avariou. Evite
exposinao direta ao feixe dos raios.
3. PRECAUÇÃO: Não abra a caixa do aparelho. Não existem peças reparáveis pelo usuário na parte
interna da unidade. Solicite assistência técnica somente a pessoal técnico qualificado.
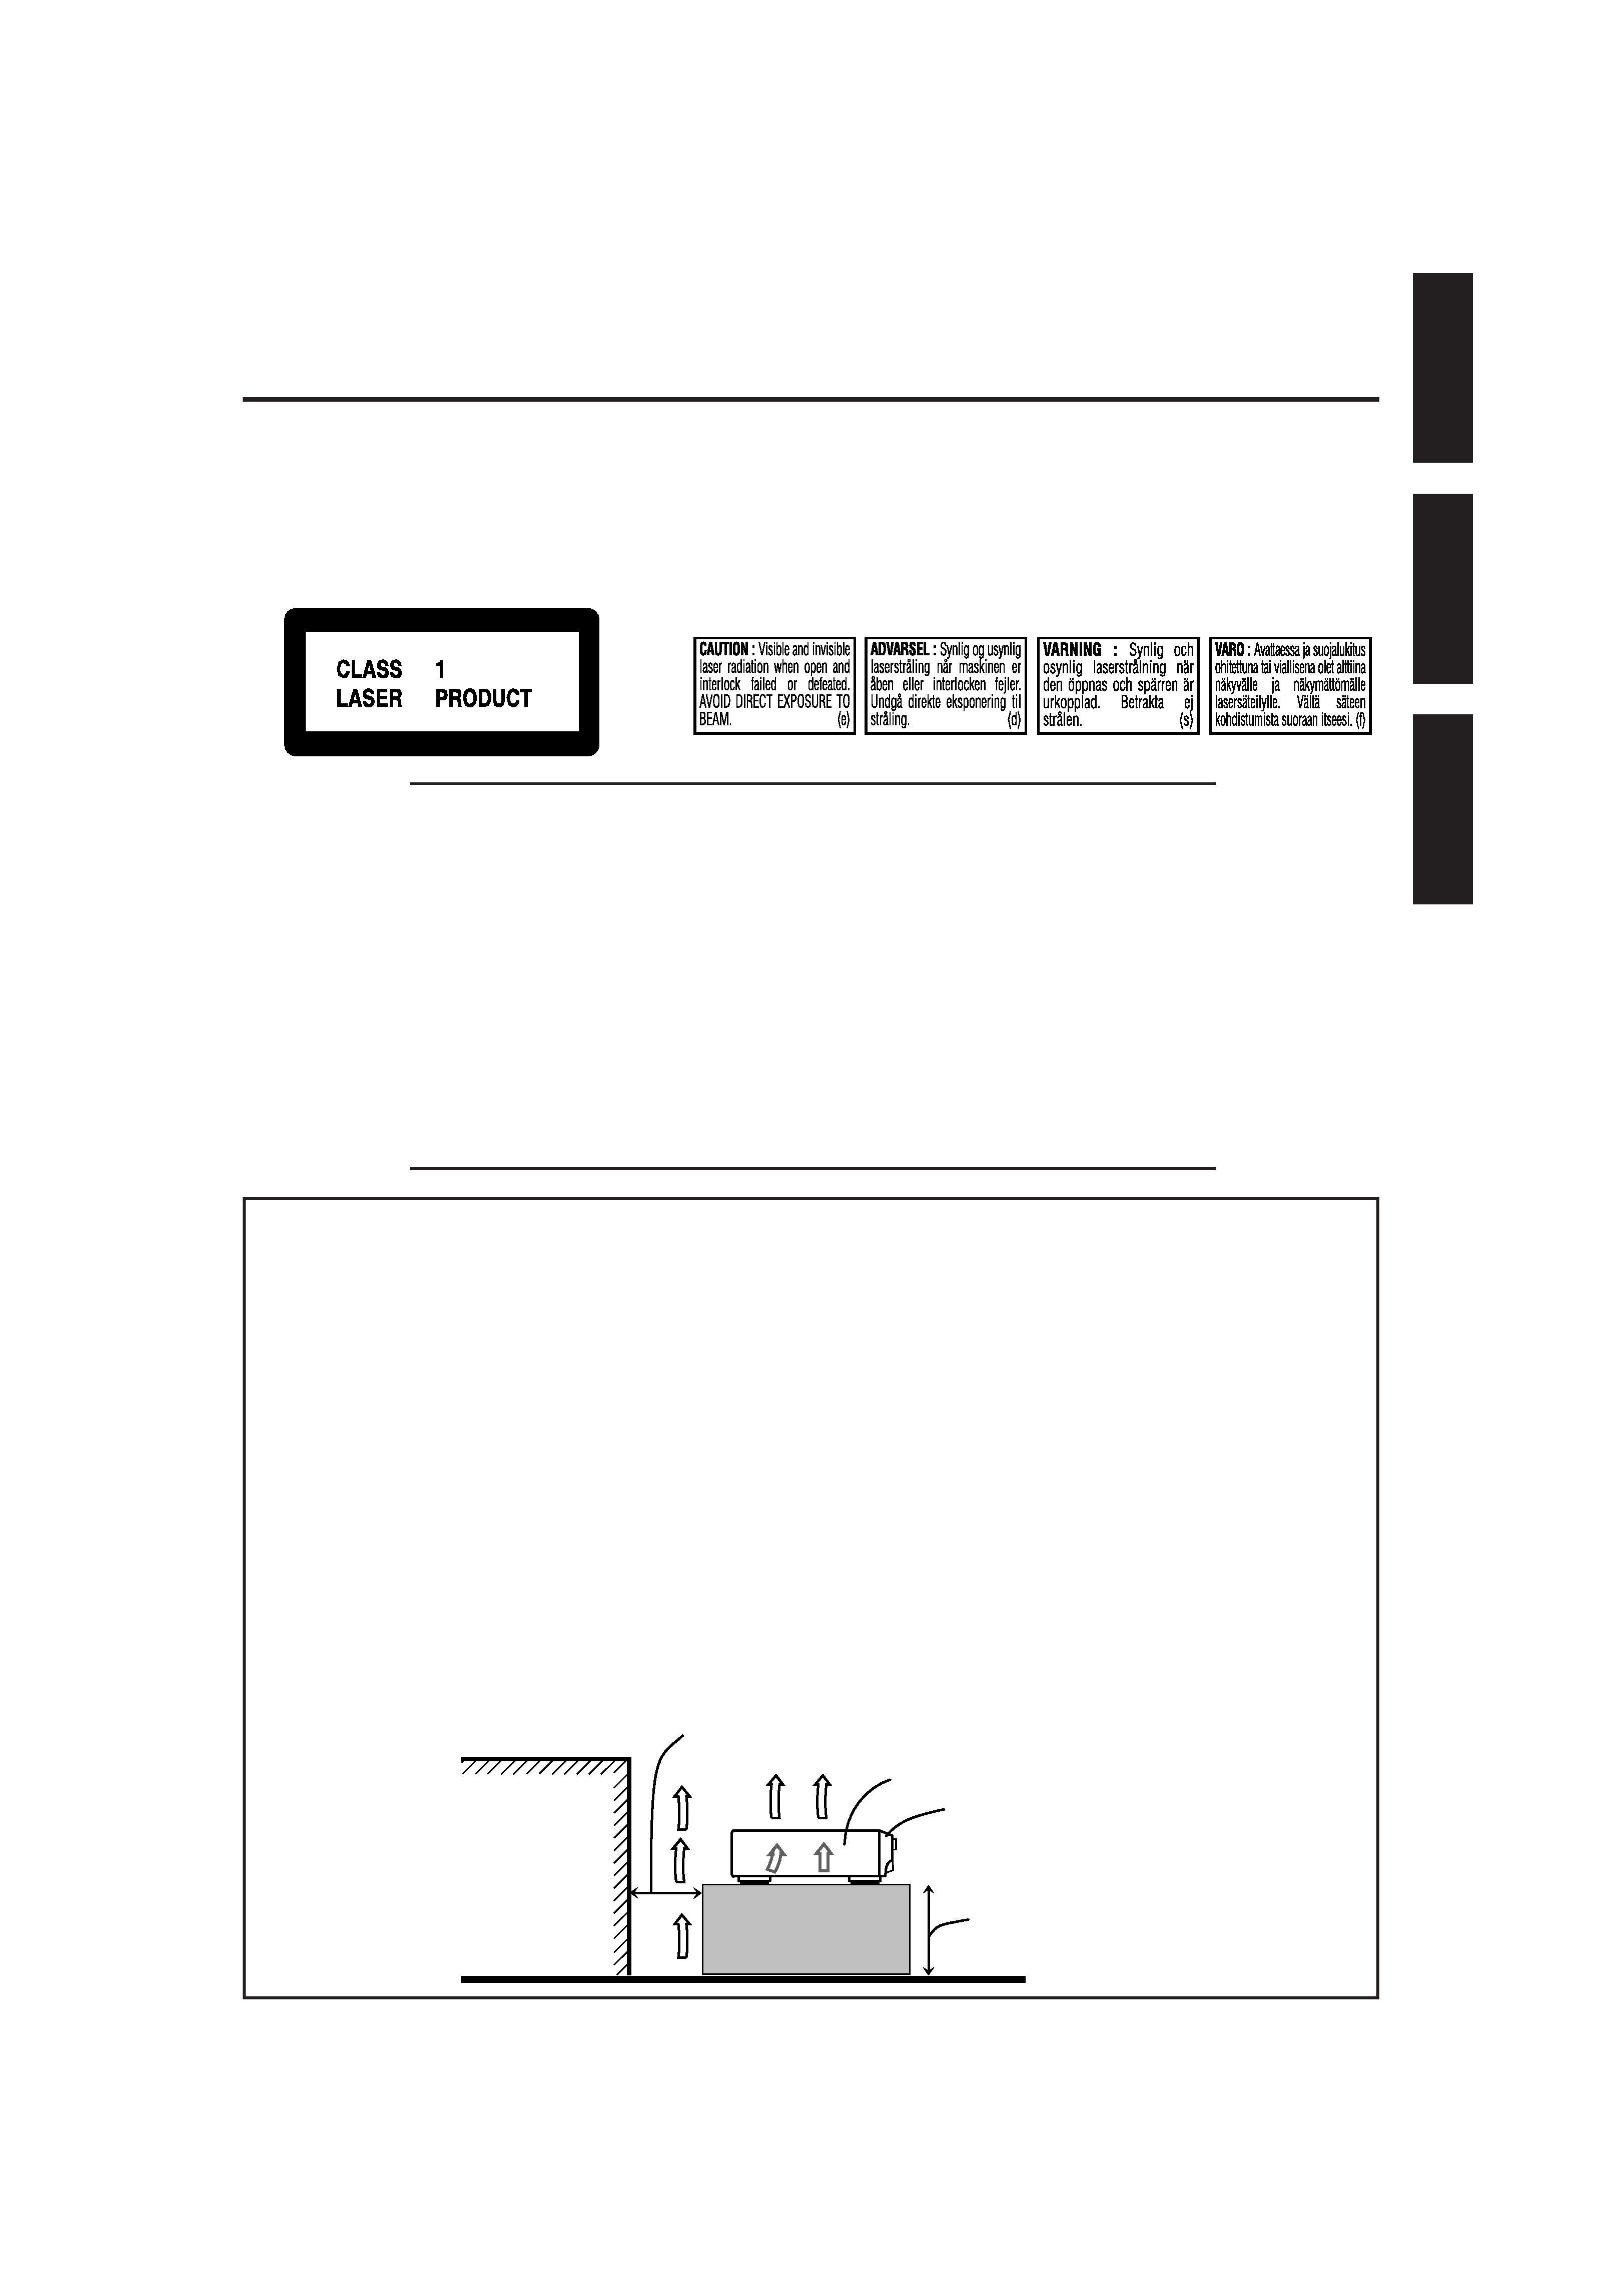
Spacing 15 cm or more/Espacio de 15 cm o más/Espaço de 15 cm ou mais
RX-DV3SL
Front/Frente/
Frente
Wall or obstructions/
Pared u obstrucciones/
Parede ou obstáculo
Stand height 15 cm or more/
Allura del soporte 15 cm o más/
Base com altura de 15 cm ou mais
Floor/Piso/Piso
Caution: Proper Ventilation
To avoide risk of electric shock and fire and to protect from damage.
Locate the apparatus as follows:
Front:
No obstructions open spacing.
Sides:
No obstructions in 10 cm from the sides.
Top:
No obstructions in 10 cm from the top.
Back:
No obstructions in 15 cm from the back
Bottom:
No obstructions, place on the level surface.
In addition, maintain the best possible air circulation as illustrated.
Precaución: Ventilación Adecuada
Para evitar el riesgo de choque eléctrico e incendio y para proteger el
aparato contra daños.
Ubique el aparato de la siguiente manera:
Frente:
Espacio abierto sin obstrucciones
Lados:
10 cm sin obstrucciones a los lados
Parte superior: 10 cm sin obstrucciones en la parte superior
Parte trasera:
15 cm sin obstrucciones en la parte trasera
Fondo:
Sin obstrucciones, colóquelo sobre una superficie
nivelada
Además, mantenga la mejor circulación de aire posible como se ilustra.
Precaução: ventilação apropriada
Para prevenir o risco de choque elétrico ou incêndio e para proteger
o aparelho contra danos.
Localize-o da seguinte maneira:
Frente:
Espaço aberto, sem obstruções
Lados:
Espaço de 10 cm sem obstruções nos lados
Topo:
Espaço de 10 cm sem obstruções acima
Atrás:
Espaço de 15 cm sem obstruções atrás
Parte inferior:
Sem obstruções. Coloque o aparelho em superfície
nivelada.
Mantenha, além disso, a maior circulação de ar possível, como indica
a ilustração.
RX-DV3SL[UWUY]safety_f.pm5
02.6.19, 2:37 PM
2

1
English
Table of Contents
Parts Identification ...................................... 2
Front Panel ................................................................................. 2
Remote Control .......................................................................... 3
Getting Started ........................................... 4
Before Installation ...................................................................... 4
Checking the Supplied Accessories ........................................... 4
Adjusting the Voltage Selector ................................................... 4
Putting Batteries in the Remote Control .................................... 4
Connecting the FM and AM Antennas ....................................... 5
Connecting the Speakers ............................................................ 6
Connecting Audio/Video Components ....................................... 7
7 About connecting cords ...................................................... 7
7 Setting the color system ...................................................... 7
7 TV connection .................................................................... 8
7 VCR connection ................................................................. 9
7 DBS tuner connection ......................................................... 9
7 Cassette deck/CD recorder connection ............................. 10
7 Digital connection............................................................. 10
Basic Operations ....................................... 11
1 Turn On the Power ............................................................... 11
2 Select the Source to Play ..................................................... 11
3 Adjust the Volume ................................................................ 11
Turning Off the Sounds Temporarily ....................................... 12
Turning Off the Power with the Sleep Timer ........................... 12
Changing the Display Brightness ............................................. 12
Changing the Source Name ...................................................... 12
Selecting the Analog or Digital Input Mode ............................ 13
Changing the Digital Input Mode Manually ............................ 13
Attenuating the Input Signal .................................................... 14
Changing the Scanning Mode .................................................. 14
Activating the Recording Mode ............................................... 14
Basic DVD Player Operations ...................... 15
1 Open the Disc Tray .............................................................. 15
2 Load a Disc .......................................................................... 15
3 Start Playback ...................................................................... 15
4 Adjust the Volume ................................................................ 16
5 Activate Realistic Sound Field ............................................. 16
6 Select Surround Mode ......................................................... 16
7 Stop Playback ...................................................................... 16
8 Turn Off the Power (into Standby) ...................................... 16
Tuner Operations ....................................... 17
Setting the AM Tuner Interval Spacing .................................... 17
Tuning into Stations Manually ................................................. 17
Using Preset Tuning ................................................................. 17
Selecting the FM Reception Mode ........................................... 18
Basic Settings ........................................... 19
Operation Buttons .................................................................... 19
Operating Procedure ................................................................. 19
7 Speaker information--"SUBWFR," "FRNT SP,"
"CNTR SP," and "REAR SP" ........................................... 20
7 Speaker distance
--"FRNT D," "CNTR D," and "REAR D" ...................... 20
7 Crossover frequency--"CROSS" ..................................... 21
7 Low frequency effect attenuator--"LFE" ........................ 21
7 Dynamic range compression--"D.COMP" ...................... 21
7 Digital input (DIGITAL IN) terminals--"DGT" ............. 21
7 Auto surround--"AUTO SR" ........................................... 22
7 Video output mode--"VOUT" ......................................... 22
Sound Adjustments .................................... 23
Operation Buttons .................................................................... 23
Operating Procedure ................................................................. 23
7 Front speaker output balance--"BAL"............................. 24
7 Tone--"BASS" and "TREBLE" ...................................... 24
7 Speaker output levels--"SUBWFR," "CENTER,"
"REAR L," and "REAR R" .............................................. 24
7 DAP effect level--"EFFECT" .......................................... 24
Creating Realistic Sound Fields ................... 25
Activating Surround Mode ........................................................ 27
Selecting Surround Modes ........................................................ 27
Adjusting Surround Mode Using Remote Control ................... 28
DVD Player Operations .............................. 29
Disc Information ....................................................................... 29
Using the On-screen Bar .......................................................... 31
Basic Operation through the On-screen Bar ............................ 32
Changing the Time Indication .................................................. 32
Locating a Desired Scene from the Disc Menu ....................... 33
Selecting a View Angle--ANGLE ........................................... 34
Changing the Languages--SUBTITLE and AUDIO ............... 35
Playing from a Specified Position on a Disc ............................ 37
7 Locating a desired chapter--Chapter Search ................... 37
7 Locating a desired position--Time Search....................... 37
7 Locating a desired scene--DIGEST................................. 38
Special Picture Playback .......................................................... 39
7 Frame-by-frame playback................................................. 39
7 Showing continuous still pictures--STROBE .................. 39
7 Playing back in slow-motion ............................................ 39
7 Zooming in--ZOOM ........................................................ 39
7 Changing the VFP setting--VFP ...................................... 40
Program Playback and Random Playback ............................... 41
Repeat Playback ....................................................................... 42
MP3 Disc Playback .................................... 43
Basic Operations ...................................................................... 43
Operations through the MP3 CONTROL Screen .................... 44
Repeat Playback ....................................................................... 44
JPEG Disc Playback ................................... 45
Slide-show Playback ................................................................ 45
Operations through the JPEG CONTROL Screen ................... 46
Repeat Playback ....................................................................... 46
Choice Menu Operations ............................. 47
Operation Buttons .................................................................... 47
Configuration of Choice Menu ................................................ 47
Operating Procedure ................................................................. 48
7 LANGUAGE menu .......................................................... 49
7 PICTURE menu ................................................................ 49
7 AUDIO menu .................................................................... 50
· Language code list ......................................................... 50
7 SPK. SETTING menu ...................................................... 51
7 OTHERS menu ................................................................. 52
Restricting Playback by Parental Lock .................................... 53
7 Setting Parental Lock ........................................................ 53
7 Changing the setting of Parental Lock ............................. 54
7 Releasing Parental Lock temporarily................................ 54
· Country/Area codes list for Parental Lock ..................... 55
Glossary for DVD Player ............................. 56
AV COMPU LINK Remote Control System .... 57
Operating JVC's Audio/Video Components ........ 59
Operating Audio Components .................................................. 59
Operating Video Components .................................................. 60
Operating Other Manufacturers' Equipment ..... 61
Changing the Preset Signal Codes ........................................... 61
Maintenance ............................................. 64
Troubleshooting ......................................... 65
Specifications ............................................ 68
EN01_10RX-DV3SL[UWUY]3.pm5
02.6.10, 13:31
1

2
English
Parts Identification
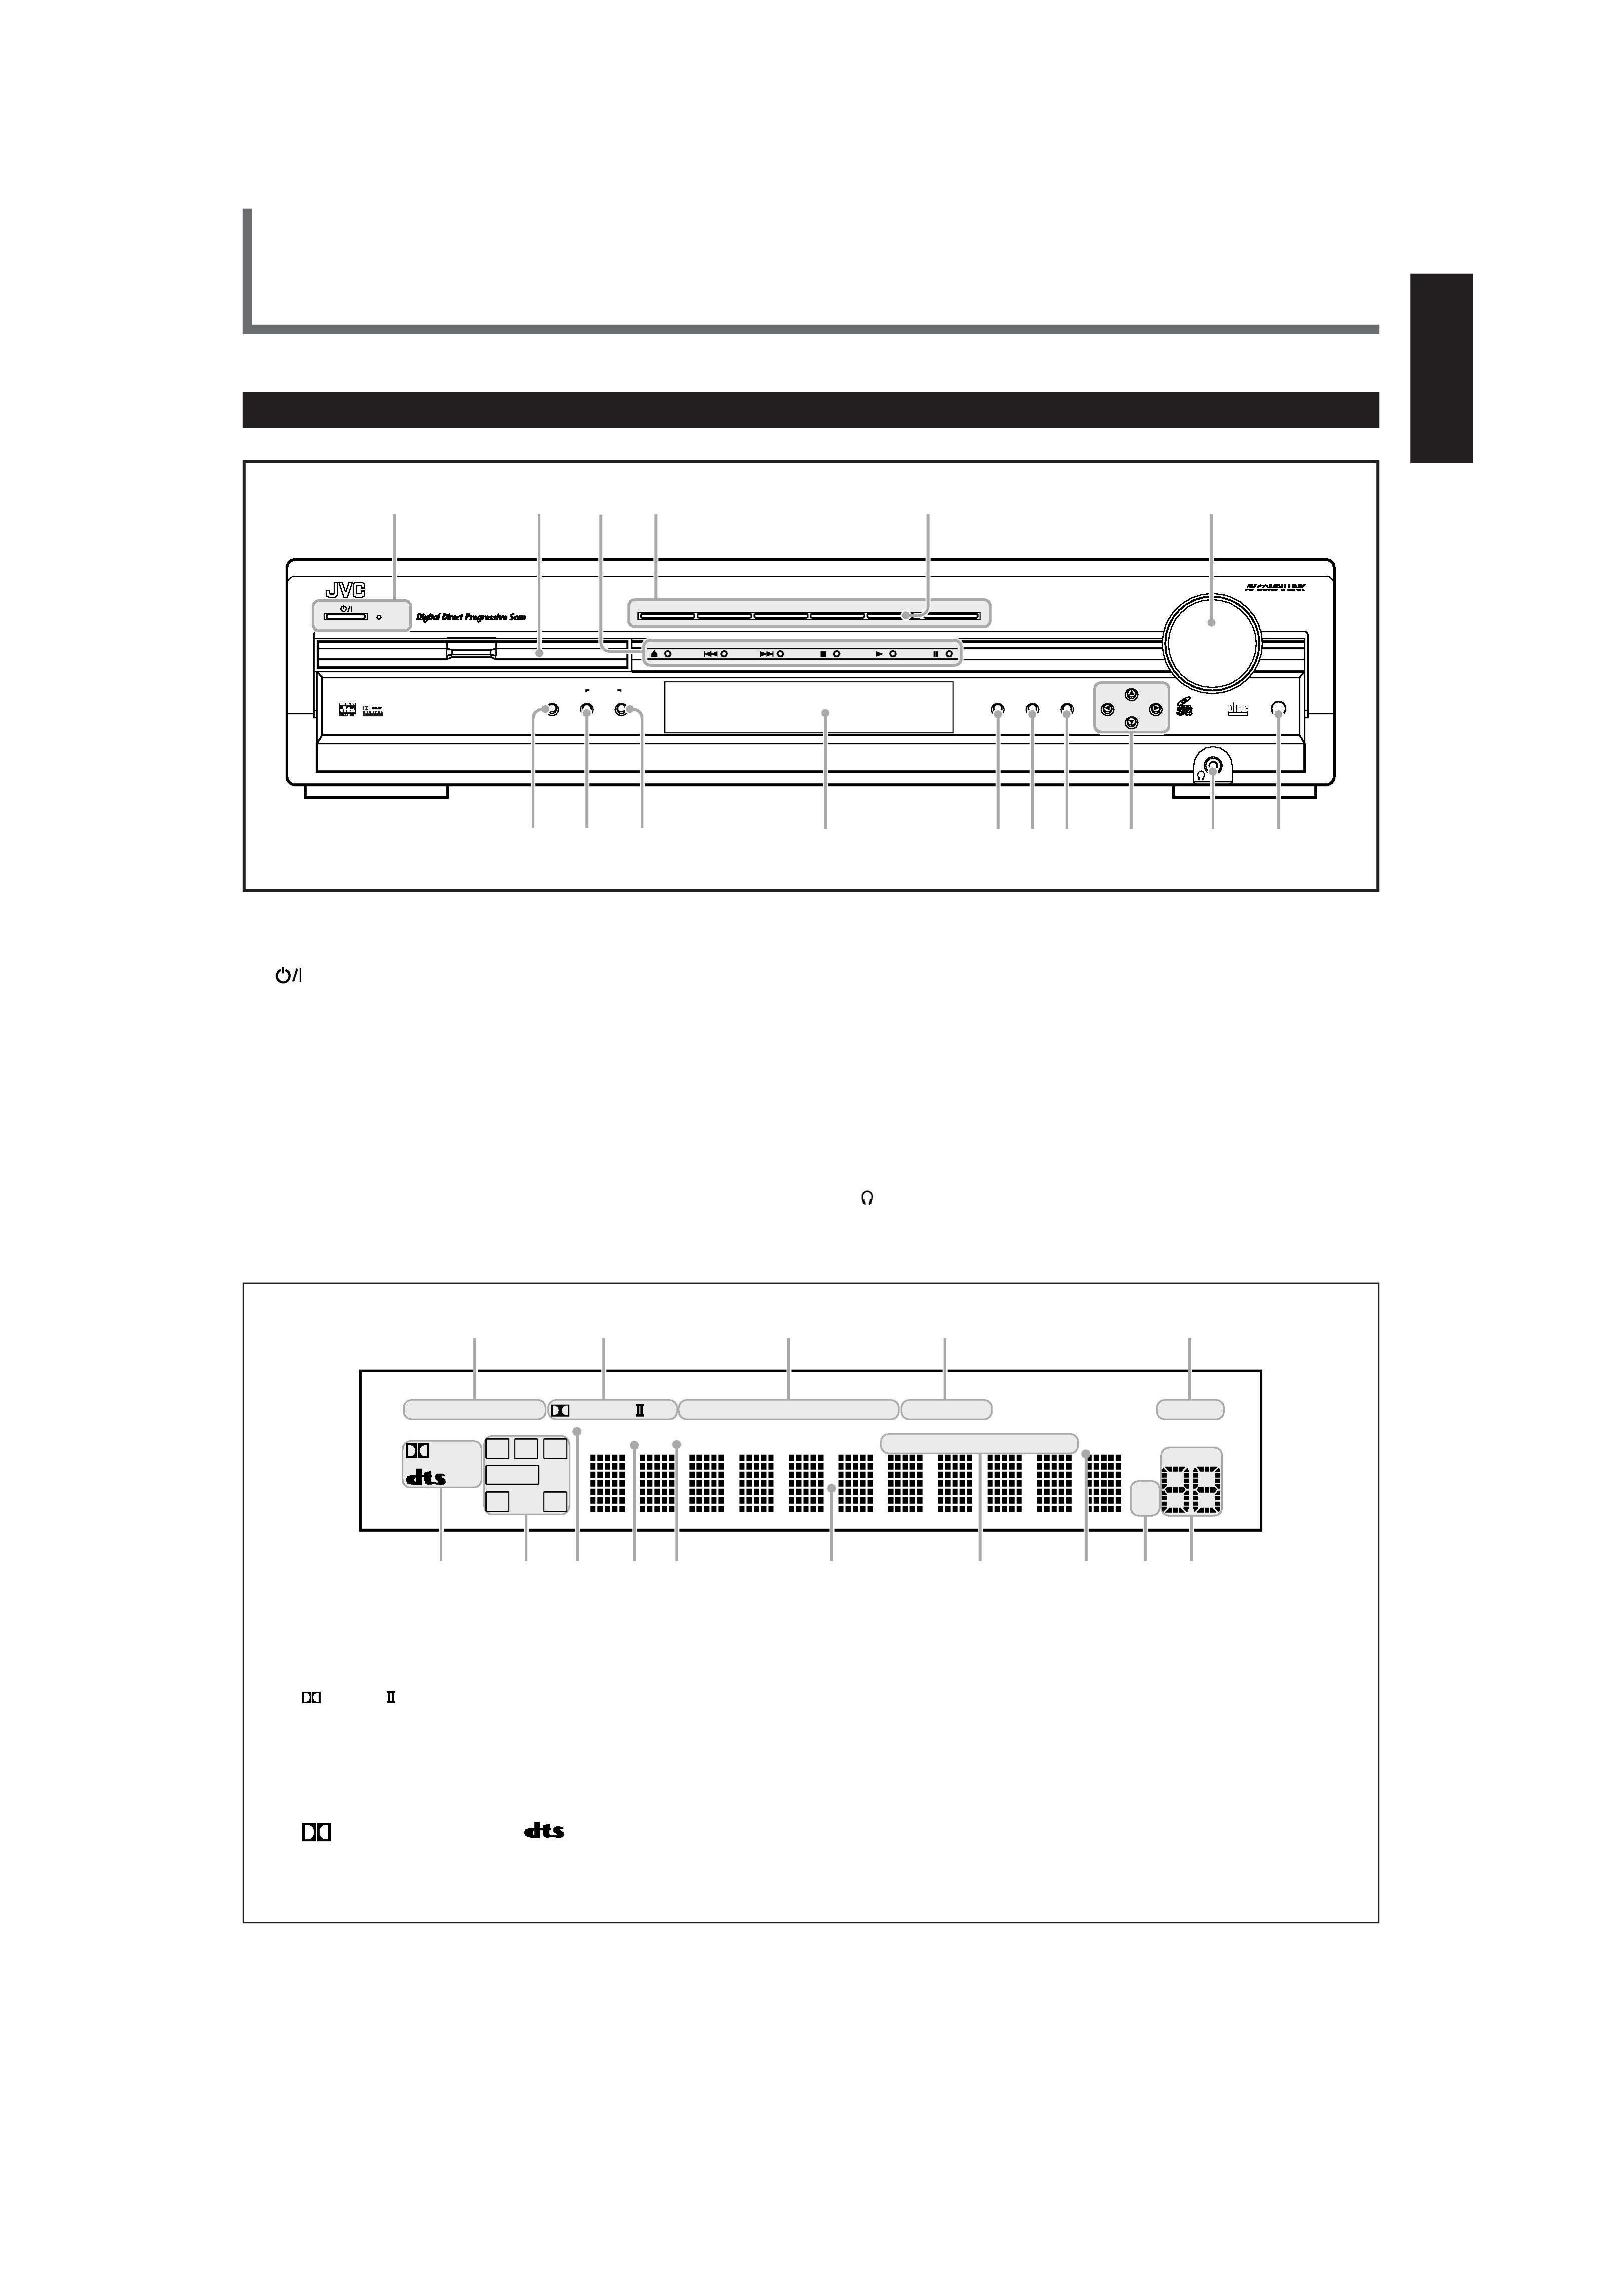
Front Panel
See pages in the parentheses for details.
1
STANDBY/ON button and STANDBY lamp (11)
2 Disc tray and illumination lamp (15)
3 DVD player operation buttons
0 (open/close), 4 (reverse skip), ¢ (forward skip),
7 (stop), 3 (play), 8 (pause)
4 Source selecting buttons (11, 13)
· DVD, DBS, VCR, TV, TAPE/CDR, FM/AM
5 SOURCE NAME button (12)
6 MASTER VOLUME control (11, 16)
7 INPUT ANALOG/DIGITAL button (13)
INPUT ATT. (Attenuator) button (14)
8 SURROUND ON/OFF button (16, 27)
9 SURROUND MODE button (16, 27)
REC MODE button (14)
p Display
· For details, see "Display" below.
q SETTING button (19 22)
w ADJUST button (23, 24)
e MEMORY button (17)
r CONTROL
5//2/3 buttons (17 24)
t
(phones) jack (11)
y Remote sensor
Display
MASTER VOLUME
DVD/SUPER VCD/VCD/CD
INPUT ATT.
INPUT
ANALOG/DIGITAL
COMPACT
SUPER VIDEO
SETTING
ADJUST
MEMORY
RX-DV3 HOME CINEMA DVD/CD CONTROL CENTER
ON/OFF
SURROUND
MODE
FM/AM
TAPE/CDR
SOURCE NAME
TV
VCR
DBS
DVD
CONTROL
STANDBY
STANDBY/ON
12
3
6
7p
w e
r
t
y
q
REC MODE
8
9
4
5
AUTO SURROUND
12
3
4
5
ANALOG DIGITAL AUTO
PRO LOGIC
DSP PROGRAM REPEAT
RANDOM
1A-B
PROGRESSIVE
INPUT ATT
LS
RS
S
LFE
LCR
SUBWFR
VOLUME
RESUME
SPK.
kHz
MHz
TUNED STEREO AUTO MUTING SLEEP
67
9
8-
=
~
!
@
0
DIGITAL
1 Input mode indicators (13)
· ANALOG, DIGITAL AUTO
2 Surround mode indicators (25, 26)
·
PRO LOGIC
, DSP
3 Play mode indicators (41, 42, 44, 46)
· PROGRAM, REPEAT 1A-B, RANDOM
4 PROGRESSIVE indicator (14)
5 INPUT ATT indicator (14)
6 Sound signal indicators (13)
·
DIGITAL (Dolby Digital),
(DTS Digital Surround)
7 Signal and speaker indicators (27)
· L, C, R, SUBWFR (Subwoofer), LFE (Low Frequency Effect), LS,
S, RS
8 Surround indicators (27)
· AUTO SURROUND, SURROUND
9 RESUME indicator (16)
0 SPK. (speaker) indicator (11)
- Main display
= Tuner mode indicators (17, 18)
· TUNED, STEREO, AUTO MUTING
~ SLEEP indicator (12)
! Frequency unit indicators
· MHz (for FM station), kHz (for AM station)
@ VOLUME indication
EN01_10RX-DV3SL[UWUY]3.pm5
02.6.10, 13:31
2
