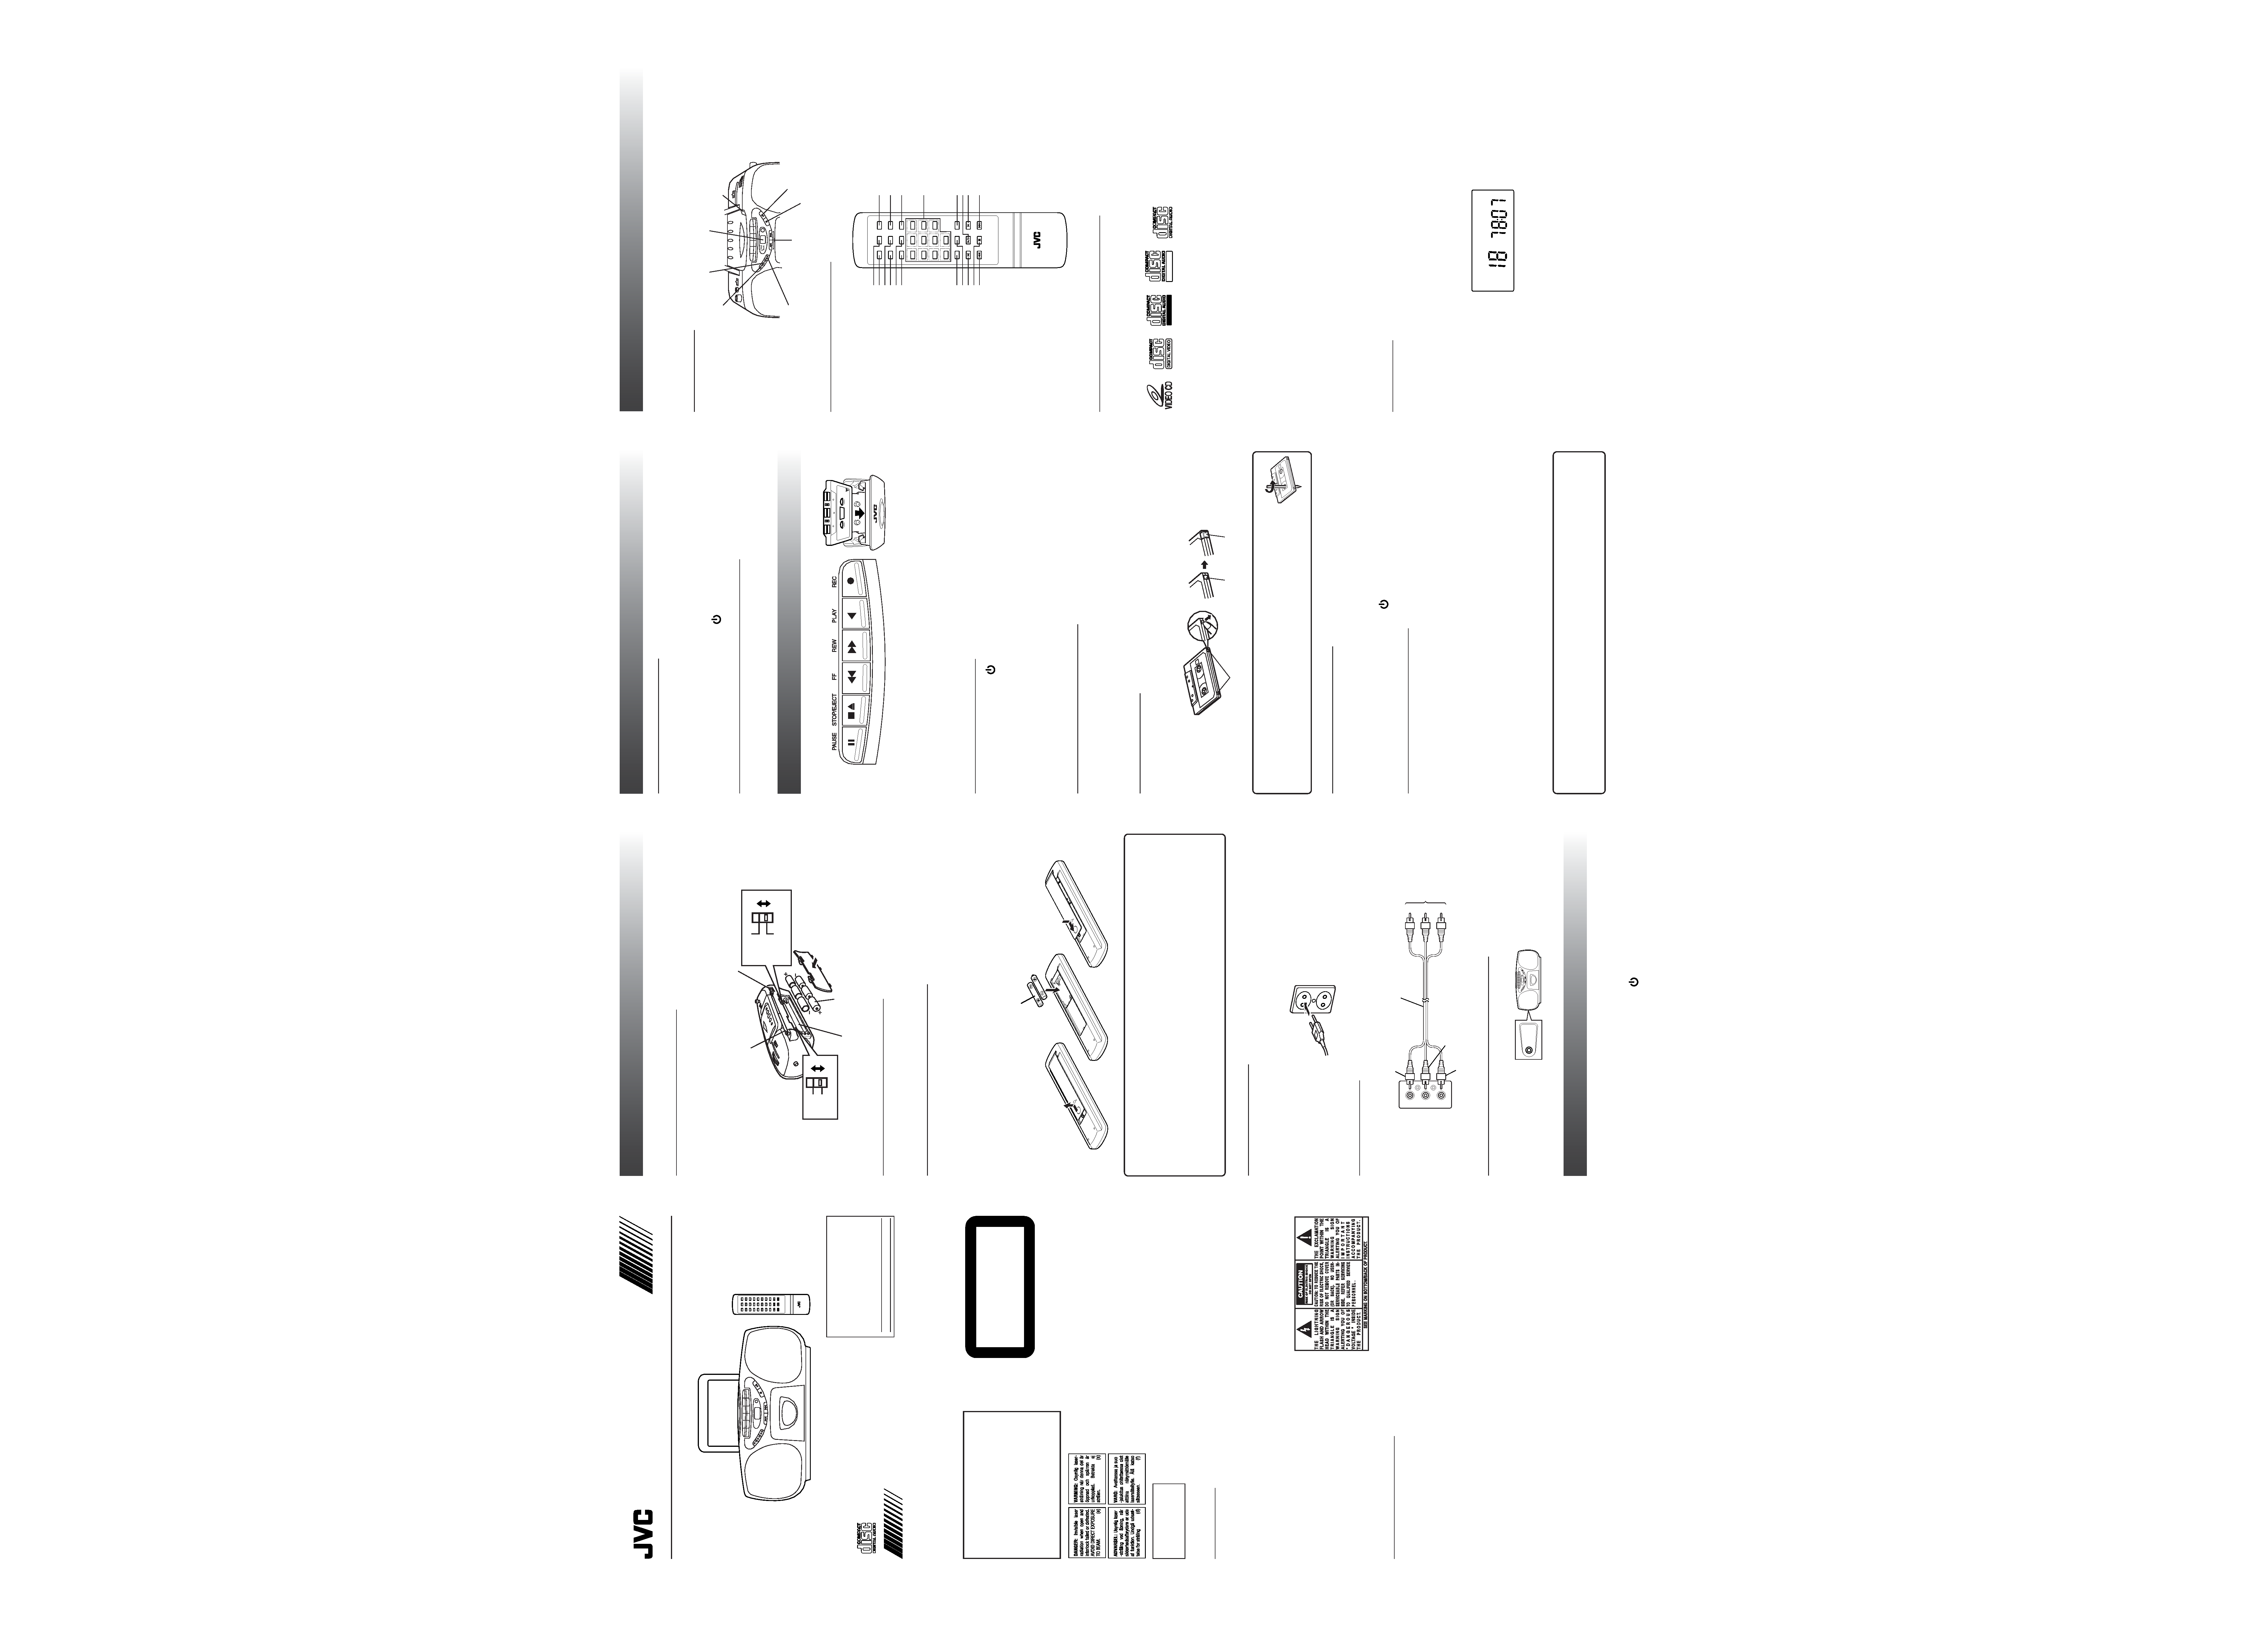
USING THE RADIO
TUNING IN RADIO STATIONS
Move the FUNCTION switch to RADIO to turn the radio on.
· Set BAND to FM, SW or MW.
· Tune in desired station by turning the TUNING dial.
In SW reception, you can finely tune in desired station by turning the FINE TUNE knob on the right side
of the unit.
· To turn off the radio, move FUNCTION switch to
TAPE.
HANDLING ANTENNAS FOR BETTER RECEPTION
The MW antenna is built in, so adjusting the position of the unit may help MW reception. The FM/SW rod
antenna on the back of the unit can be extended and rotated for better FM/SW reception.
USING THE TAPE DECK
| Forward direction
REC
¶ Press to record from the radio or CD/VCD player.
PLAY
2 Press to play the cassette tape.
REW
¡ From stop or play mode, press to rewind the tape toward the beginning.
FF
1 From stop or play mode, press to advance the tape toward the end.
STOP/EJECT
70 Press to stop the cassette tape, or to open the cassette compartment door when no
buttons are pressed down.
PAUSE
8 Press to interrupt playback or recording. Pressing it again will resume playback or recording.
PLAYING A CASSETTE TAPE
1.
Move the FUNCTION switch to
TAPE.
2.
Press STOP/EJECT
70 to open the cassette compartment door.
3.
Insert a cassette tape into the compartment with the open edge facing up. Tape travels from the right
to the left.
4.
Close the door securely.
5.
Press REW
¡ or FF 1 to move the tape to the desired starting point, if necessary.
6.
Press PLAY
2 to start playing the tape. The cassette tape plays until it reaches the end of the side,
then it automatically stops.
RECORDING ON A CASSETTE TAPE
You can record from the radio or the CD/VCD player. For best recording, use the type I tape (normal bias
tape).
· It may be unlawful to record or play back copyrighted material without the consent of the copyright
owner.
ERASE PROTECTION
When you record on new material, the cassette deck records over whatever is on a tape. To protect a tape
from accidental erasure, break off one or both plastic tabs (one for each tape side) on the top of the
cassette tape. If you decide later to record on the tape, seal the hole with a piece of cellophane tape.
RECORDING FROM THE RADIO
1.
Insert a blank cassette tape.
2.
Move the FUNCTION switch to RADIO and tune in desired station.
3.
Press REC
¶ to start recording. REC ¶ and PLAY 2 lock down.
4.
Press STOP/EJECT
70 to end recording.
5.
To turn off the radio, slide the FUNCTION switch to
TAPE.
SYNCHRO RECORDING FROM CDs
1.
Move the FUNCTION switch to CD/VCD.
2.
Insert a blank cassette tape.
3.
Insert the CD you want to record. If you need, program the CD tracks.
· When you record from video CD with PBC, press PBC on the remote control unit to turn off "PBC"
indicator on the display (PBC OFF). Then, press STOP
7 to stop the video CD.
4.
Press REC
¶.
The CD is automatically played and recorded onto the tape.
5.
To stop at any position during recording, press STOP/EJECT
70.
To Record from the Desired Track:
In step 4 above, skip the CD track with the SKIP/SEARCH
4, ¢ on the unit, or the
w, or the number buttons on the remote control unit, and then immediately press REC ¶.
Note: About 5 seconds after the TRACK selection, the display returns to the TOC display.
Tape
Tabs
Hole
CAUTION:
A little bit of slack in your tapes can cause scratches on the tape, or worse yet, the
tape could break. If you notice some slack in the tape use a pencil to tighten it up
before you insert in.
PRECAUTIONS
· Never open the cabinet under any circumstances. Never operate this product with the cabinet re-
moved. Any repairs of internal adjustments should be made only by a trained service technician.
· Do not touch the system with wet hands. If any liquid enters the cabinet, take the system to a trained
service technician for inspection.
SUPPLIED ACCESSORIES
Remote control unit ..... 1 pc.
Power cord* ................ 1 pc.
Audio/Video cord* ....... 1 pc.
* Accommodated in the battery compartment.
Thank you for purchasing this JVC product. Please read the instructions carefully before starting operation
to be sure to obtain optimum performance and a longer service life from the system.
WARNING LABEL,
PLACED INSIDE
THE UNIT
CAUTION!
THIS PRODUCT UTILIZES A LASER.
USE OF CONTROLS OR ADJUST-
MENTS OR PERFORMANCE OF PRO-
CEDURES
OTHER
THAN
THOSE
SPECIFIED HEREIN MAY RESULT IN
HAZARDOUS
RADIATION
EXPO-
SURE.
1.
CLASS 1 LASER PRODUCT
2.
DANGER: Invisible laser radiation when
open and interlock failed or defeated.
Avoid direct exposure to beam.
3.
CAUTION: Do not open the top cover.
There are no user serviceable parts in-
side the Unit; leave all servicing to quali-
fied service personnel.
CLASS
1
LASER
PRODUCT
WARNING:
TO REDUCE THE RISK OF FIRE OR ELECTRIC
SHOCK, DO NOT EXPOSE THIS APPLIANCE TO
RAIN OR MOISTURE.
INSTRUCTIONS
For Customer Use :
Enter below the Model No. and Serial No.
which are located either on the rear, bottom
or side of the player. Retain this information
for future reference.
Model No.
Serial No.
LVT0933-001B [U]
88-00075-00
CD PORTABLE SYSTEM
RC-BX75VSL/RC-BX75VWT
RM-SRCBX75VWT REMOTE CONTROL
FIRST THINGS
This portable system operates on battery or AC power.
SETTING THE VOLTAGE SELECTOR
To avoid damaging the unit, select the voltage range before plugging the power cord into the unit. Open
the battery compartment cover on the back of the unit by pressing down the two tabs and pulling out the
cover. Select the voltage range for your area with the VOLTAGE SELECTOR inside the battery compart-
ment by using a screwdriver or similar.
VOLTAGE SELECTOR
110V-127V
220V-230V
NTSC/PAL SWITCH
PAL
NTSC
SETTING THE TV SYSTEM SELECTOR
Open the battery compartment cover and set the TV system selector to PAL or NTSC according to the TV
system you use.
INSERTING BATTERIES (NOT SUPPLIED)
Insert 6 batteries R20/D (13F) and you can take your system just about anywhere. Open the battery
compartment cover and insert batteries as shown.
Note: The battery power will be switched off when you plugged the power cord into the AC
power jack on the unit.
Inserting Batteries into the Remote Control Unit:
Match the polarity (+ and ) of the batteries.
SUPPLYING AC POWER
Plug the power cord into the AC power jack on the back of the unit, and into an AC power outlet.
Note: To switch off the system completely, unplug the power cord.
CONNECTING TO TV
Connect the system to your TV or VCR's video/audio inputs to enjoy video images recorded on a VCD.
AUDIO
OUT
RL
VIDEO
OUT
CONNECTING HEADPHONES (NOT SUPPLIED)
Connect headphones to the 3.5mm stereo headphone socket at the left side of the unit.
PHONES
GENERAL CONTROLS
FUNCTION Switch Move the switch to select the system function - RADIO, TAPE or CD/VCD.
VOLUME Turn the volume knob to increase or decrease the volume level.
S-BASS Turn on S-BASS by pressing button down for enhanced bass effect. Turn off S-BASS (up
position) for normal bass sound.
POWER OFF (standby) Move the FUNCTION switch to
TAPE position. Be sure no cassette buttons
are pressed down.
CAUTION:
To avoid battery leakage or explosion, handle batteries properly.
· If you're not going to use your system for a month or more, remove the batteries from the battery
compartment.
· Dispose of batteries in the proper manner, according to federal, state, and local regulations.
· Do not mix with different battery types or with new and old ones, or do not attempt to charge a
battery not intended to be recharged.
· Discard leaky batteries immediately. Leaking batteries can cause skin burns or other personal
injury.
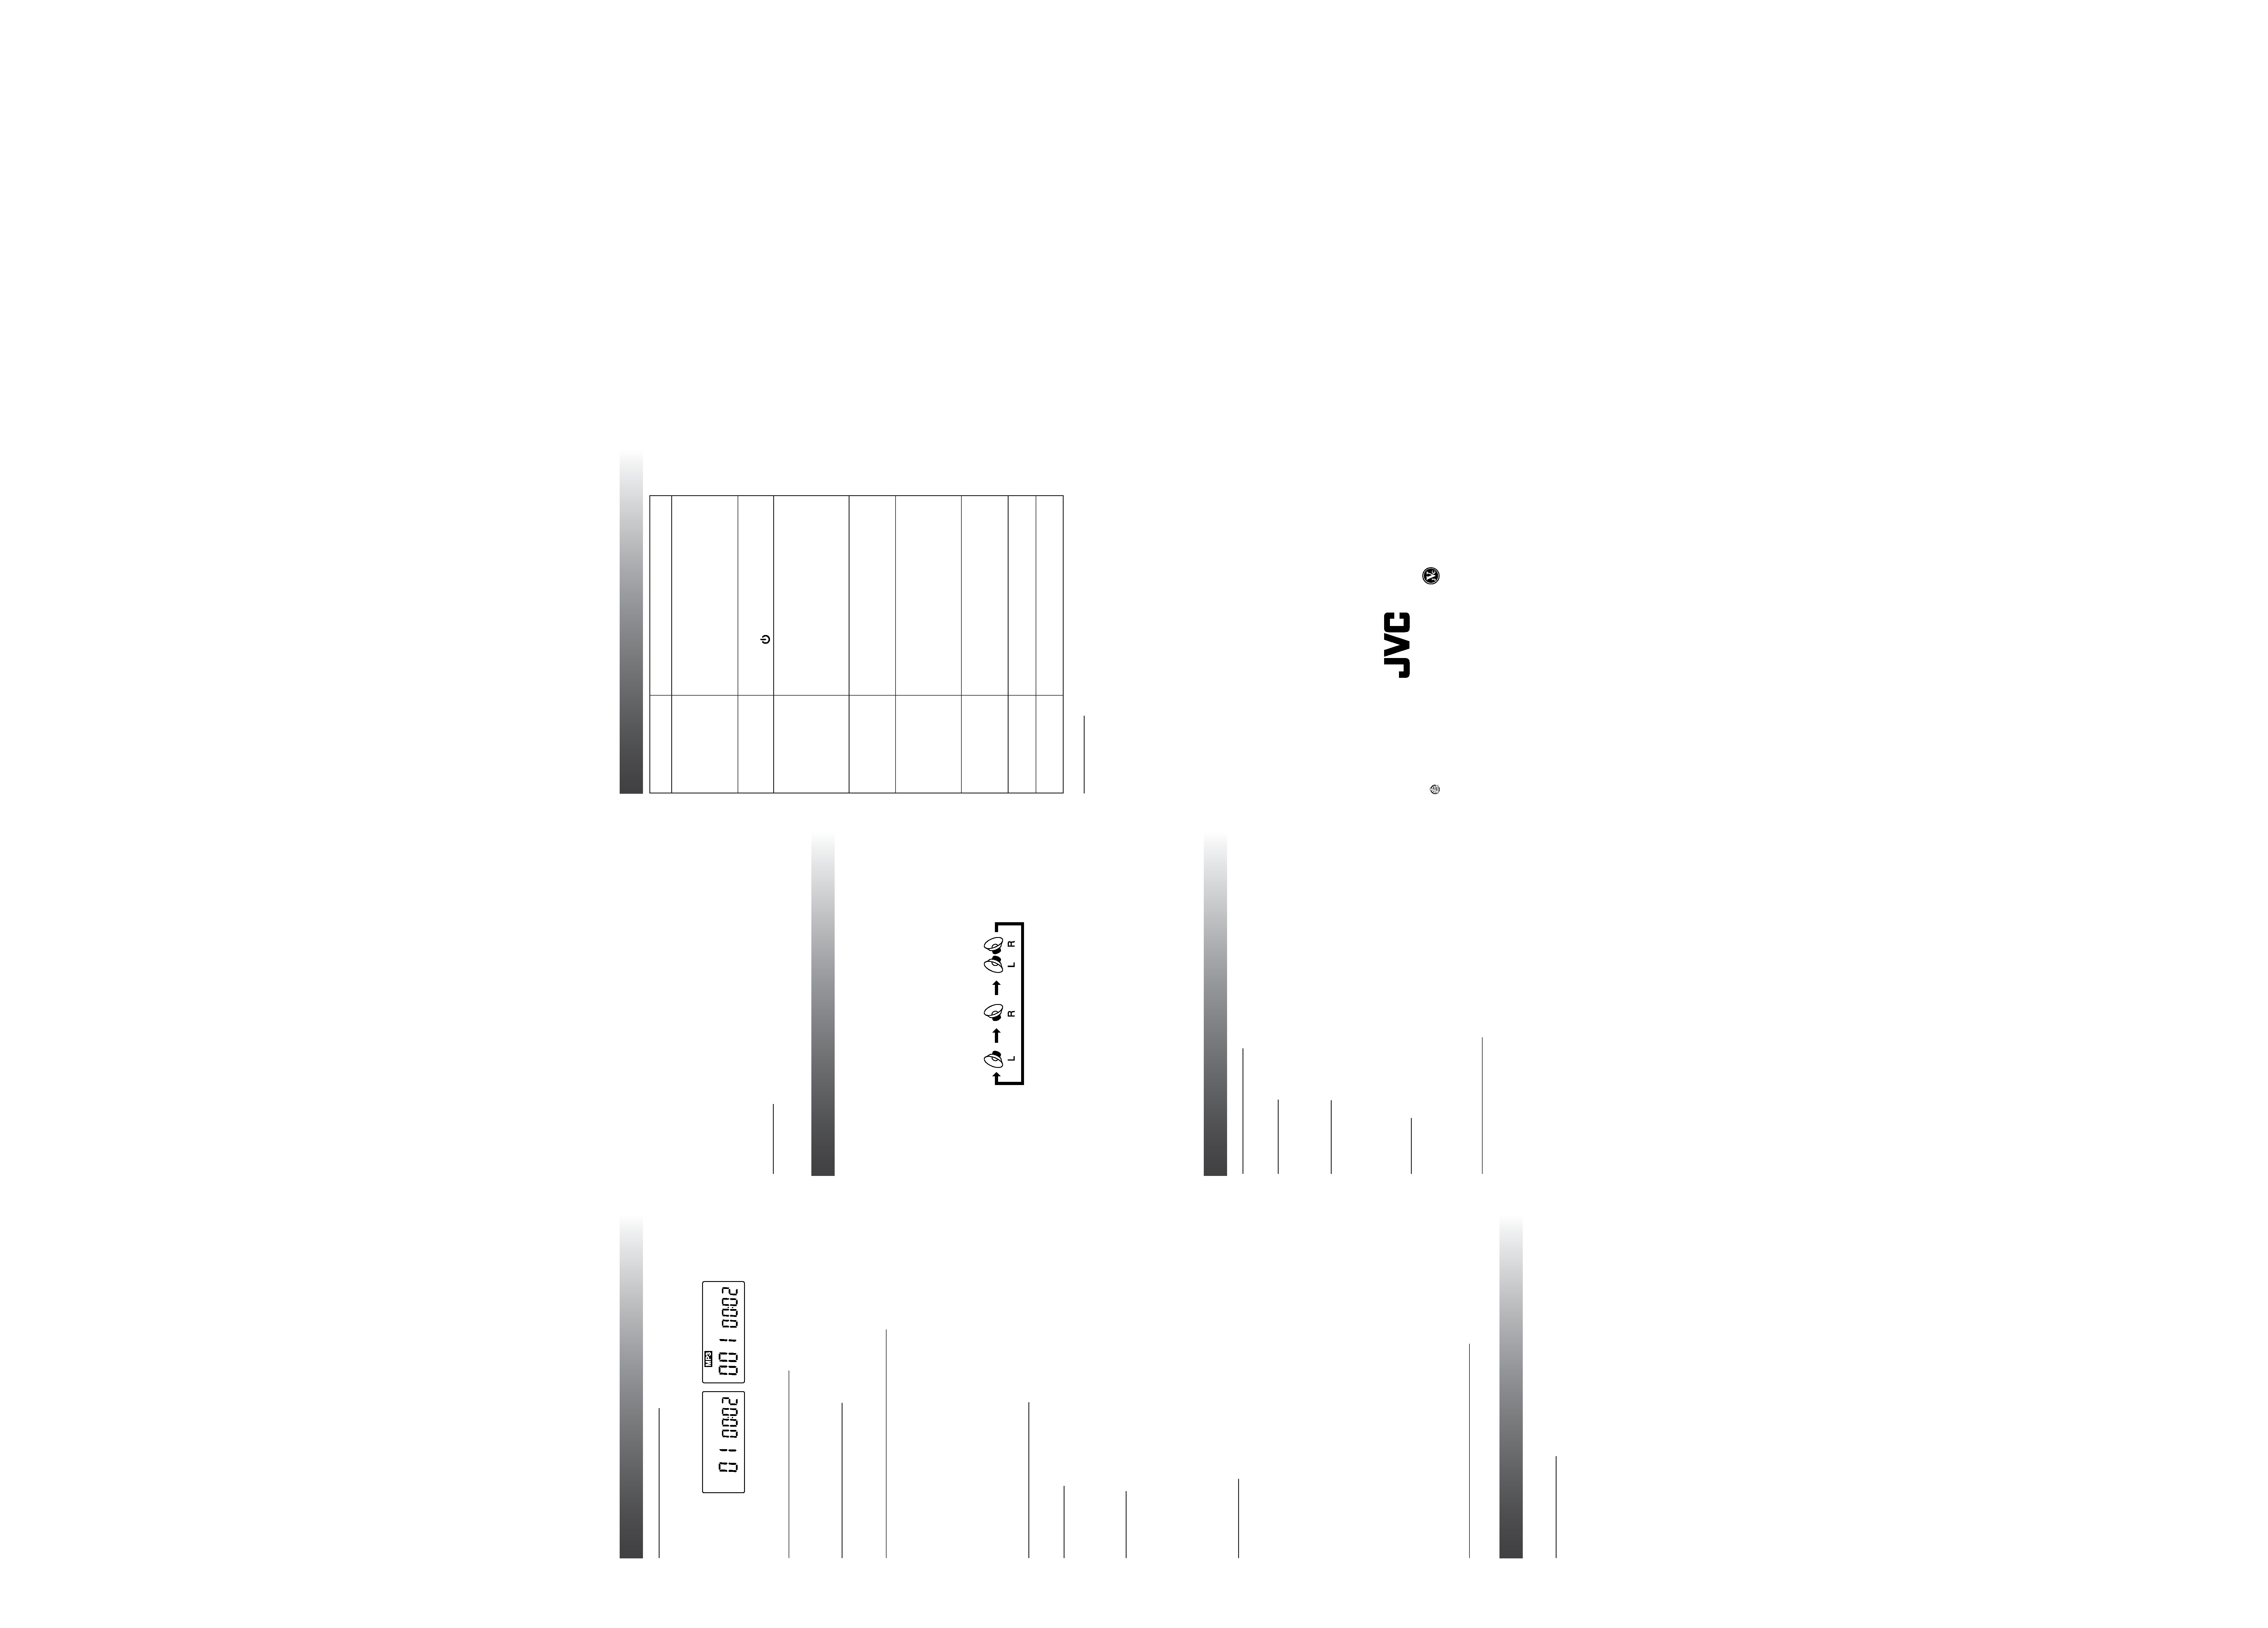
White
Audio/Video cord
Yellow
Red
to TV
Antenna
AC power jack
Battery Compartment
R20/D (13F)
R03 (UM-4)/AAA (24F)
BEFORE USING THE CD/VCD PLAYER
The display and the remote control unit are effective only for the CD/VCD player. The detailed operations
for the normal CDs (audio CDs and MP3 CDs) and the video CDs are separately explained in "USING
THE CD PLAYER" and "USING THE VCD PLAYER".
UNIT'S BUTTONS
REMOTE CONTROL'S BUTTONS
RM-SRCBX75VWT REMOTE CONTROL
PBC
OSD
SLOW
RETURN
RANDOM
L/R
VIEW
GOTO
PROG
REPEAT
REPEAT
A - B
ALBUM
-
PLAY
TITLE
-
ALBUM
+
TITLE
+
STOP
0
+10
RESUME
789
456
123
THINGS TO KNOW BEFORE PLAYING CDs
Playable CDs:
Only CDs bearing these marks can be used with this system.
Recordable
ReWritable
On MP3 CD Format:
· Disc format should be set to ISO 9660.
· Multisession recording is not supported.
· The disc must be finalized.
· Files other than MP3 (.MP3) are ignored.
Button Expression:
Description of the unit's buttons is omitted since it is the same as that of the remote control unit's buttons
except the following buttons:
Track selection:
Remote control
w/
Unit SKIP/SEARCH
4/¢
Search Play:
Remote control
4/¢
Unit Pressing & holding SKIP/SEARCH
4/¢
· When any unacceptable button operation is made, "Err (Error)" will appear on the display.
Using the Number Buttons:
To specify the track number, press the number buttons as follows:
For track number 5, press 5.
For track number 10, press +10 and then 0.
For track number 25, press +10 twice and then 5.
LOADING A CD
1.
Move the FUNCTION switch to CD/VCD. "NO DISC" appears if no CD is loaded.
2.
Press CD OPEN
0 to open the CD door.
3.
Place a CD into the tray with the label facing up.
4.
Close the CD door. "READING" appears for a few seconds.
For audio CD/VCD: The total number of tracks and the playing time of the disc appear. For video CD,
"VCD" and VCD version ("2.0") indicators will light on the display.
For MP3 CD:
The total album number and the total track number of the disc briefly appears,
and then changes to the first album and track numbers. Also, the "MP3" indicator
appears on the display.
5.
To remove the CD, press CD OPEN
0, grasp the CD by its edges, and carefully take it off.
Note: When operating an MP3 CD, it may take time until the CD responds to the button com-
mand.
When the unit is connected to the TV, the disc information on MP3 appears on the TV.
TIPS:
· To temporarily pause the recording, press PAUSE
8 on the cassette deck. Press PAUSE 8 again
to resume recording. Note that using STOP/EJECT
70 instead of PAUSE 8 for this purpose is
not recommended as the recorded sound may be distorted.
SKIP/SEARCH
4, ¢
REPEAT
RANDOM
PROG.
DISPLAY
PLAY/PAUSE
6
STOP
7
CD OPEN
0
RETURN
PBC
RANDOM
OSD
L/R
SLOW
A-B REPEAT
PLAY
6
ALBUM +
TITLE +
¢
PROG.
REPEAT
ALBUM
w
STOP
7
TITLE
4
VIEW
RESUME
GO TO
NUMBER BUTTONS (0-9, +10)
RC-BX75V(En).p65
9/19/02, 9:49 AM
2
USINGTHE CD PLAYER (FOR AUDIO CD/MP3 CD)
PLAYING AN AUDIO CD/MP3 CD
Press
6 to play all the tracks in order starting with Track 1. The current track number and elapsed
playing time appear on the display.
To stop playing the CD, press STOP
7.
To pause, press
6. The playing time blinks. To cancel pause, press 6 again.
SELECTING A TRACK (AUDIO CD ONLY)
During playback, press
4/¢ on the unit or w/ on the remote control, to skip to the previous/next
track or press the number button to specify the tack number. Then the selected track starts playing.
· You can also select a track in stop mode.
SEARCH PLAY (AUDIO CD ONLY)
During playback, press and hold
4/¢ to move backwards/forward through a track at high speed.You
can quickly find a particular passage in the current track.
SELECTING AN ALBUM AND TRACK (MP3 ONLY)
When the TV is connected the disc imformation is displayed on the TV. While viewing this, you can select an
album or a track.
Selecting an Album (MP3 Only):
1.
In stop mode or during playback, press ALBUM /+ to select a desired album number. (e.g. "A02
(album number 2) T001" on the display)
2.
Press
6 to start playback the track number 1 of selected album.
Selecting a Track (MP3 Only):
1.
After selecting the album, press TITLE /+ to skip to the previous/next track in the current album. (e.g.
"A02 T015 (track number 15 in the album number 2)" on the display)
· You can select a desired track with the number button. In this case, playback automatically starts.
2.
Press
6 to start playback the selected track.
RESUME PLAY (AUDIO CD ONLY)
Press RESUME. Then playback starts from the position where you have stopped.
RANDOM PLAY
In stop mode, press RANDOM. The "RANDOM" indicator lights on the display and playback starts in
random order. Random play continues until you stop the CD.
You can also enter the random play mode during playback. To exit the random play mode, press RAN-
DOM once again or press
7. Note that the RANDOM operation is ignored in program play mode.
REPEAT PLAY
During playback, press REPEAT. Each time you press it, the display changes as follows and each repeat
play takes place.
"REPEAT (for 1 track repeat)"
\ "REPEAT GROUP (for all tracks in the current album: MP3 only)" \
"REPEAT ALL (for all tracks)"
\ (back to the beginning)
(On the TV, "REPEAT ALB" is displayed instead of "REPEAT GROUP".)
The repeat mode can be mixed with the other modes as follows:
Mode
REPEAT
REPEAT ALL
REPEAT GROUP (MP3 only)
Play
Current 1 track
All tracks
All tracks in the current album
Program
Current 1 track
All programmed tracks
--
PROGRAM PLAY
You can program the playing order of the tracks up to 20 for an audio CD/video CD and 99 for a MP3 CD.
For Audio CD (and VCD):
1.
In stop mode, press PROG. The "PROG." indicator blinks on the display.
2.
Select a desired track with
w/ or number button, and then press PROG. again. "P01 (program
number 1)" and "Txx (programmed track number)" appear. The "PROG." indicator stays lit.
3.
Repeat 1 and 2 to program other tracks , the number of programs increases. Then press
6 to start
program play.
To confirm the program, press
7 to return to stop mode and then press w/.
To clear the program, press
7 in stop mode. "CLr PrOG" appears and the "PROG." indicator goes out. Opening
the CD door also clears the program.
To skip to the track during playback, press
w/.
· When you program the VCD with PBC, be sure that "PBC" indicator goes out on the display (PBC OFF).
For MP3 CD:
1.
In stop mode, press PROG. The "PROG." indicator blinks on the display.
2.
Select a desired album with ALBUM +/. (e.g. "A02 T001")
3.
Select a desired track in the selected album with TITLE /+ or number button. (e.g. "A02 T015")
4.
Press PROG. again. The "PROG." indicator stays lit.
5.
Repeat 1 to 4 to program other tracks, the number of programs increases. Then press
6 to start
program play.
How to confirm and clear the program is the same as for the audio CD.
OTHER OPERATIONS FOR AUDIO CD/MP3 CD
Refer to "VARIOUS FUNCTIONS".
USING THE VCD PLAYER
Be sure that the system is connected to the TV.
PLAYING A VIDEO CD
Playing a Video CD with PBC (For VCD Version 2.0 Only):
The system provides a PBC (Playback Control) function which utilizes a procedure (menu selection)
programmed in the video CD.
1.
Insert a video CD with PBC. The "PBC" indicator lights on the display. The menu screen appears on
the TV.
2.
Press
w/ to move through the previous/next menu page, and specify the item (track) in the menu
with the number button. Then, the selected track is played.
· Once the video CD with PBC has stopped, the "PBC" indicator goes out. (Pressing PBC replays the
video CD.)
To stop playing the video CD, press
7.
To pause the picture, press
6. To cancel pause, press 6 again.
To return to the menu page at any time, press RETURN.
To select the desired track, press the number button.
To select the previous/next track, press
w/.
To search-play at high speed during playback, press
4/¢. Each time you press it, the playback
speed changes. During search play, no sound comes out.
Playing a Video CD without using PBC (PBC OFF):
1.
Insert a video CD with PBC. The menu screen appears on the TV.
2.
Press PBC to turn off PBC. After a while, the "PBC" indicator goes out and the video CD is played
sequentially from the first track. During playback, you can stop, pause, skip, or search-play in the
same manner as for the audio CD.
Playing a Video CD without PBC:
You can play the video CD in the same manner as for the audio CD.
RESUME PLAY
Press RESUME. Then playback starts from the position where you have stopped. When a video CD with
the PBC function is used with the PBC ON, the resume play does not work.
VARIOUS FUNCTIONS (USE REMOTE CONTROL)
OSD (On screen display): [VCD/Audio CD]
You can view operational information on TV. Each time you press OSD, OSD function turns on and off.
VIEW (Viewing up to 9 pictures): [VCD]
Press VIEW. The picture page showing up to 9 tracks is displayed on the TV, and the first 20 seconds of
each track is played sequentially. To view the previous/next picture page, press
w/. To normally play
the track being briefly played, press
6. To normally play a desired track in the picture page, select the
track number with the number button.
SLOW (Playback speed reduction): [VCD]
During playback, press SLOW. Each time you press it, playback speed changes to 1/2, 1/4,
1/8 and "PLAY (normal speed)". During slow playback, no sound comes out.
L/R (Channel selection): [VCD]
Each time you press L/R, the channel output changes in the order of "MONO Left", "MONO Right" and
"STEREO".
GO TO (Starting playback from the designated time): [VCD/Audio CD]
1.
Press GO TO. Then "--:-- (-- min. -- sec.)" appears on the display and on the TV.
2.
Enter the time you want to start playback with the number button. Then playback automatically starts
from that position. When a video CD with the PBC function is used with the PBC ON, this function
dose not work.
A-B REPEAT (Repeating section A-B): [VCD/Audio CD]
You can repeatedly play a certain passage or scene by specifying the points A and B.
1.
During playback, press A-B REPEAT at the start point you want to repeat. "A
\" appears on the
display.
2.
Press A-B REPEAT at the end point. "A
\B" appears on the display and the section A-B is repeatedly
played.
To exit A-B repeat playback, press A-B REPEAT once again. "A
\B" disappears and normal playback
takes place. A-B repeat playback also exits if the track selection operation is made.
· You may use A-B repeat playback over 2 or more tracks.
Note: For the button operations of RESUME, PROGRAM, REPEAT and RANDOM, see "US-
ING THE CD PLAYER (FOR AUDIO CD/MP3 CD)".
CARE AND MAINTENANCE
CLEANING THE EXTERIOR
· Disconnect the system from AC power before cleaning the exterior of the unit with a soft dust cloth.
HANDLING CDs
· Do not touch the signal surfaces. Hold by the edges, or by one edge and the hole.
· Do not affix labels or adhesive tape to the label surfaces. Also, do not scratch or damage the label.
· Discs rotate at high speed inside the player. Do not use damaged (cracked or warped) discs.
CLEANING CDs
· Dirty discs can cause poor sound quality. Always keep discs clean by wiping them gently with a soft
cloth from the inner edge toward the outer perimeter.
· If a disc becomes dirty, wet a soft cloth in water, wring it out well, wipe the dirt away gently, and then
remove any water drops with a dry cloth.
· Do not use record cleaning sprays or antistatic agents on discs. Also, never clean discs with benzene,
thinner, or other volatile solvents which may cause damage to the disc surface.
TAPE CARE
· Don't expose cassette tapes to sunlight or store in hot places. High temperatures may warp the shell or
damage the tape itself.
· Keep cassette tapes in their boxes when not in use.
· Cassette tapes can be erased by magnetic fields produced by magnets, electric motors, electrical trans-
formers, and other devices. Keep tapes away from magnets and magnetic fields.
CLEANING THE TAPE HEADS
Iron oxide particles from the magnetic tape can build up on the parts that come in contact with the tape.
These deposits can cause incomplete erasure, muffled playback sound, and might prevent automatic
stop.
To clean a cassette deck, open the compartment door, push the PLAY button and gently clean the heads,
capstan, and pinch wheel with a head cleaner.
Always unplug the power cord before cleaning, and allow 30 minutes drying time when using a liquid
cleaner.
Clean heads after every 25 hours of use.
· Demagnetize the head occasionally with a head demagnetizing cassette (available from many audio
equipment stores).
· Never use any metal objects on or near the tape heads.
· Do not allow any cleaning material to fall into the tape assembly.
AUDIO CD
MP3 CD
TROUBLESHOOTING TIPS
Problem
Solution
· Make sure power cord is securely plugged into
the AC power outlet (or that the batteries are
fresh).
· Unplug the unit for a moment, and then plug it
back in.
· Check the outlet by plugging in another device.
· Adjust volume setting.
· Make sure you've selected the correct function:
CD/VCD,
TAPE, or RADIO.
· Adjust the FM/SW rod antenna for better FM/SW
reception.
· Adjust the FINE TUNE knob for SW reception.
· Rotate the unit to achieve better MW reception.
· Try turning off electrical appliances near the unit,
such as hair dryers, vacuum cleaners, or
fluorescent lights.
· Make sure the tray contains a CD.
· Make sure the CD's label is facing up.
· Make sure that Pause mode is not activated.
· Make sure CD function is selected.
· Clean the CD (as explained in "Care and
Maintenance").
· Check CD for warping, scratches, or other
damage.
· Check for vibration or shock that may affect the
unit; move system if necessary.
· Inspect the recording head and clean it if
necessary.
· Demagnetize recording head (as explained in
"Care and Maintenance").
· Audio/video cord is not connected to TV.
· Select the correct TV system.
· Replace the batteries.
System doesn't turn
on.
No sound
Poor radio reception
CD doesn't play
CD sound skips
Distorted or noisy
recordings
No video or video
image distorted on TV
Remote control does
not work.
SPECIFICATIONS
Amplifier :
Output Power
1 W x 2 (at 10 % THD)
Speaker Impedance
8 ohm (8.5 cm x 2)
Phones
15 mW/ch output into 32 ohms
Impedance 16 ohms - 1kohms
CD
:
Sampling Frequency
44.1 kHz
D/A Converter
1 bit linear
Frequency Response
100 Hz - 20 kHz
Dynamic Range
70 dB (min)
Harmonic Distortion
1.5 % (max)
Channel Separation
40 dB (min)
Signal-to-Noise ratio
50 dB (min)
Number of programmable
20 (audio CD/VCD), 99 (MP3 CD)
tracks
MPEG 1
VCD version 2.0
MPEG 1 layer 3 (MP3-CD) MPEG AUDIO
MP3-CD bit rate
32 - 256 kbps
Radio :
Tuning Range
FM 88 MHz - 108 MHz, MW 530 kHz - 1600 kHz,
SW 6 MHz-17 MHz
Antenna
FM/SW Rod Antenna, MW Ferrite Bar Antenna
Cassette :
Tape Speed
4.75 cm/sec
Wow & Flutter
0.35 % WTD
Recording System
AC Bias
Erase System
Magnetic Erase
S/N
35 dB (min)
Track System
4 track, 2 channel, stereo
Frequency Range
125 Hz - 6300 Hz
(Normal)
General :
Power Supply
110V-127V/220V-230V, 50 Hz/60 Hz
DC 9 V, R20/D (13F) or equivalent size battery x 6
Power Consumption
15 W (power on), 3W (Standby)
Unit Dimension
403(W) x 169(H) x 237(D) mm
Mass
3.3 kg (without batteries)
EN
Printed in China
0902HMOCREORI
VICTOR COMPANY OF JAPAN, LIMITED
RC-BX75V(En).p65
9/19/02, 11:05 AM
3