
For Customer Use:
Enter below the Model No. and Serial No.
which are located either on the rear, bot-
tom or side of the cabinet. Retain this
information for future reference.
Model No.
Serial No.
INSTRUCTIONS
MANUAL DE INSTRUCCIONES
INSTRUÇÕES
LVT0860-008C
44-1108-1
[UW]
COMPACT COMPONENT SYSTEM
SISTEMAS DE COMPONENTES COMPACTOS
SISTEMA DE COMPONENTES COMPACTOS
MX-K30/MX-K10
Consists of CA-MXK30 and SP-MXK30
Consists of CA-MXK10 and SP-MXK10
Consiste de CA-MXK30, y SP-MXK30
Consiste de CA-MXK10, y SP-MXK10
Consiste em CA-MXK30, e SP-MXK30
Consiste em CA-MXK10, e SP-MXK10
CD-R/RW PLAYBACK
3-CD
PLAY & EXCHANGE
ACTIVE
BASS EX.
CLOCK
/TIMER
COMPU PLAY CONTROL
EJECT
EJECT
REC / PLAY
B
CD SYNCHRO RECORDING
PLAY
A
FULL - LOGIC CONTROL
AUX
CD
TAPE
FM
/ AM
TAPE
A / B
CD
3
CD
2
CD
1
COMPACT
COMPONENT
SYSTEM
MX-K30
1 BIT DUAL D/A
CONVERTER
PROGRAM
SOUND
MODE
REPEAT
PANDOM
PRESET
TUNING
STANDBY/ON
STANDBY
CANCEL
PHONES
REC START
/ STOP
CD
REC START
DUBBING
SET
/ DEMO
V
O
L
U
M
E
DISC
SKIP
R
O
C
K
I
CLASS C
P
O
P
FM MODE
FM /AM
AUX
SLEEP
STANDBY/ON
CD
1
CD
2
CD
3
SOUND
MODE
ACTIVE
BASS EX.
KARAOKE
ECHO
FADE
MUTING
VOLUME
PROGRAM
/RANDOM
REPEAT
TAPE
A/B
TAPE
CD
MIC
MIN
MAX
MIC LEVEL
CD-R/RW PLAYBACK
3-CD
PLAY & EXCHANGE
ACTIVE
BASS EX.
CLOCK
/TIMER
EJECT
EJECT
REC / PLAY
B
CD SYNCHRO RECORDING
PLAY
A
FULL - LOGIC CONTROL
AUX
CD
TAPE
FM
/ AM
TAPE
A / B
CD
3
CD
2
CD
1
COMPACT
COMPONENT
SYSTEM
MX-K10
1 BIT DUAL D/A
CONVERTER
PROGRAM
SOUND
MODE
REPEAT
PANDOM
PRESET
TUNING
STANDBY/ON
STANDBY
CANCEL
PHONES
MIC
MIN
MAX
MIC LEVEL
REC START
/ STOP
CD
REC START
DUBBING
SET
/ DEMO
V
O
L
U
M
E
DISC
SKIP
R
O
C
K
I
CLASS C
P
O
P
FM MODE
FM /AM
AUX
SLEEP
STANDBY/ON
CD
1
CD
2
CD
3
SOUND
MODE
ACTIVE
BASS EX.
FADE
MUTING
VOLUME
PROGRAM
/RANDOM
REPEAT
TAPE
A/B
TAPE
CD
KARAOKE
ECHO
COMPU PLAY CONTROL
CA-MXK30
CA-MXK10
SP-MXK30
SP-MXK10
SP-MXK30
SP-MXK10
Cover.fm Page 1 Friday, May 24, 2002 3:14 PM
G-1
Warnings, Cautions and Others
Avisos, precauciones y otras notas
Advertências, precauções e outras notas
CAUTION
To reduce the risk of electrical shocks, fire, etc.:
1.
Do not remove screws, covers or cabinet.
2.
Do not expose this appliance to rain or moisture.
PRECAUCIÓN
Para reducir riesgos de choques eléctricos, incendio, etc.:
1.
No extraiga los tornillos, los cubiertas ni la caja.
2.
No exponga este aparato a la lluvia o a la humedad.
PRECAUÇÃO
Para reduzir riscos de choques elétricos, incêndio, etc.:
1.
Não remova parafusos e tampas ou desmonte a caixa.
2.
Não exponha este aparelho à chuva nem à umidade.
Caution
% switch!
Disconnect the mains plug to shut the power off completely. The
%
switch in any position does not disconnect the mains line. The power
can be remote controlled.
Precaución Interruptor
% !
Desconectar el cable de alimentación para desactivar la alimentación
totalmente. Cualquier que sea la posición de ajuste del interruptor
%,
la alimentación no es cortada completamente. La alimentación puede
ser controlada remotamente.
Precaução Interruptor
% !
Desconectar o cabo de alimentação para desligar a alimentação por
completo. Qualquer que seja a posição de ajuste do interruptor
%, a
alimentação não é completamente cortada. A alimentação pode ser
controlada remotamente.
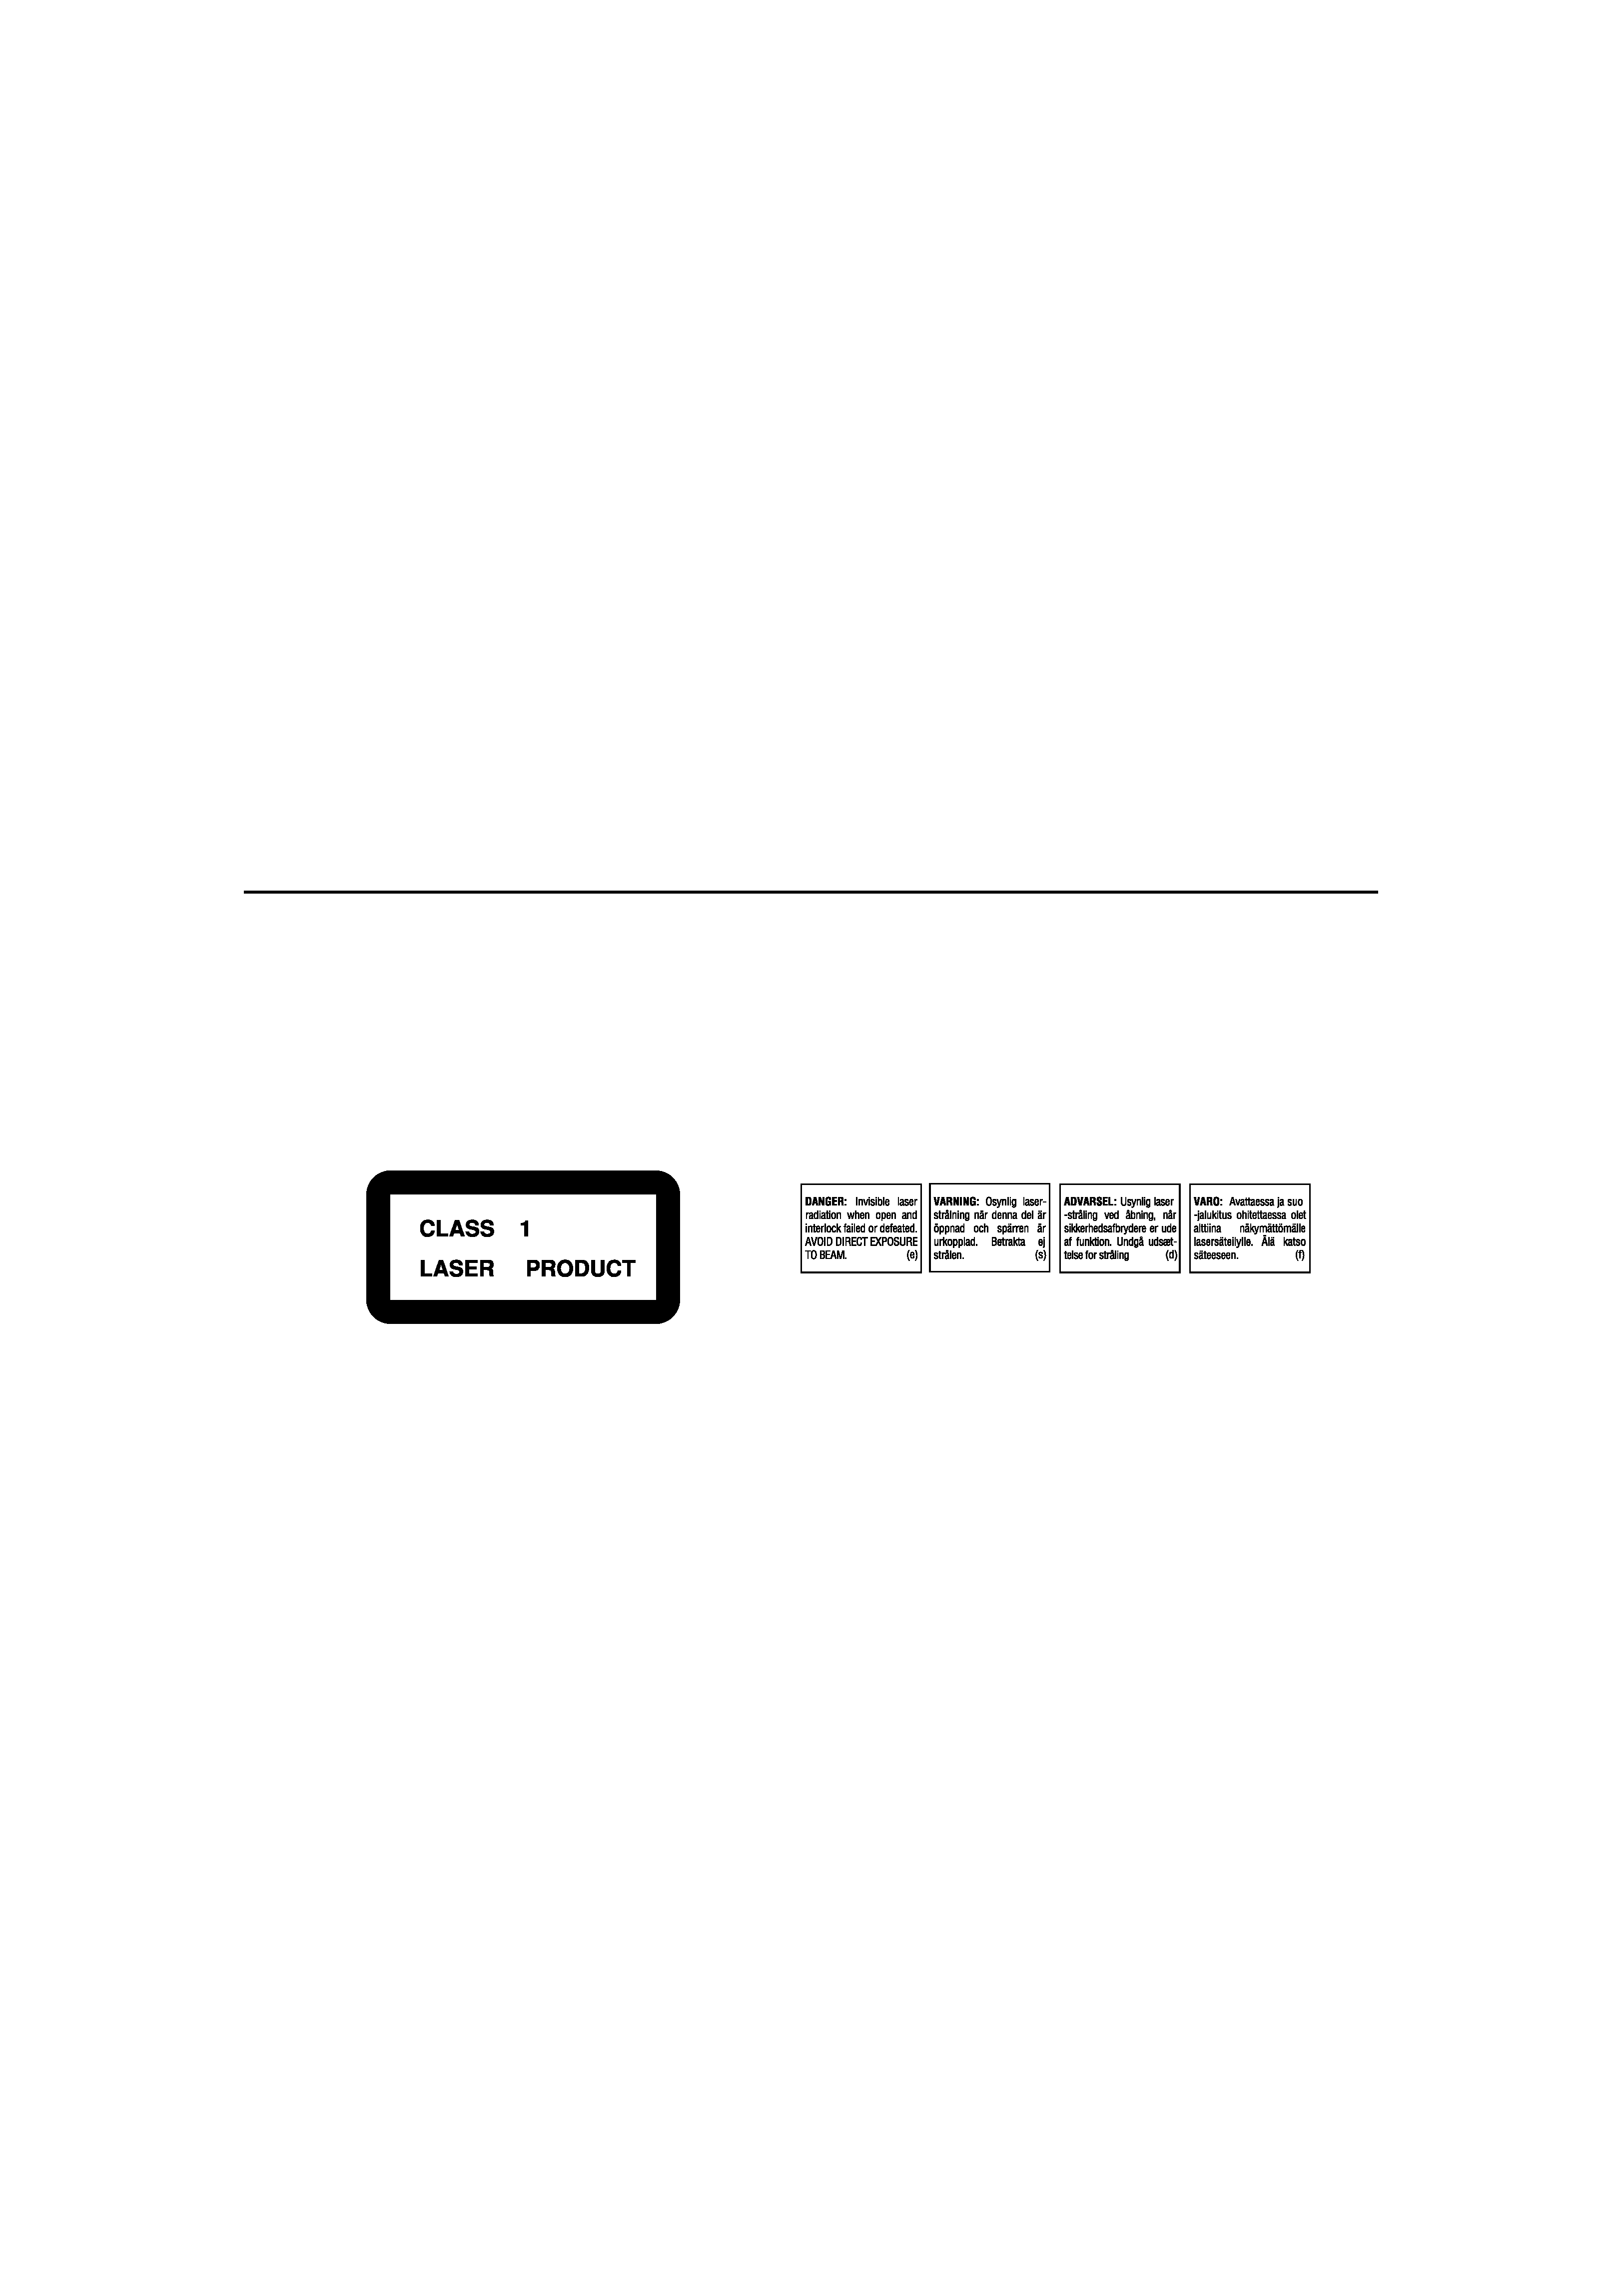
IMPORTANT FOR LASER PRODUCTS / IMPORTANTE PARA PRODUCTOS LÁSER /
IMPOTANTE PARA PRODUTOS LASER
REPRODUCTION OF LABELS / REPRODUCCIÓN DE ETIQUETAS/ REPRODUÇÃO DE ETIQUETAS
1 CLASSIFICATION LABEL, PLACED ON EXTERIOR SURFACE
1 ETIQUETA DE CLASIFICACION, PROVISTA SOBRE LA SUPER-
FICIE EXTERIOR
1 ETIQUETA DE CLASSIFICAÇÃO LOCALIZADA NA PARTE POS-
TERIOR DA CAIXA DO APARELHO.
2 WARNING LABEL, PLACED INSIDE THE UNIT
2 ETIQUETA DE ADVERTENCIA, PEGADA EN EL INTERIOR DE
LA UNIDAD
2 ETIQUETA DE ADVERTÊNCIA LOCALIZADA NA PARTE
INTERNA DA UNIDADE.
CLASS 1 LASER PRODUCT
DANGER
1. Invisible laser radiation when open and interlock failed or defeated.
Avoid direct exposure to beam.
CAUTION
1.
Do not open the top cover. There are no user serviceable parts
inside the unit; leave all servicing to qualified service personnel.
2.
Use of controls, adjustments or performance of procedures other
than those specified herein may result in hazardous radiation
exposure.
PRODUCTO LASER CLASE 1
PELIGRO:
1.
En el interior hay radiación láser invisible. Evite el contacto directo
con el haz.
PERCAUCIÓN:
1.
No abra la tapa superior. En el interior de la unidad no existen pie-
zas reparables por el usuario; deje todo servicio técnico en manos
de personal calificado.
2.
El uso de controles, ajustes o la realización de procedimientos dis-
tintos a los especificados en este documento podrá resultar en
una peligrosa exposición a radiación.
PRODUTO LASER CLASSE 1
PERIGO:
1.
O laser emite uma rediação invisível que é perigosa, caso o
aparelho esteja aberto e a trava inoperante ou danificada. Evite
exposição direta ao feixe dos raios.
CUIDADO:
1.
Não abra a caixa do aparelho. Não existem peças reparáveis pelo
usuário na parte interna da unidade. Solicite assistência técnica
somente a pessoal técnico qualificado.
2.
A utilização de controlos, ajustes ou efectuar procedimentos difer-
entes dos aqui especificados pode resultar numa exposição a
radiação perigosa.
MX-K30&K10[UW].book Page 1
Tuesday, March 19, 2002 11:22 AM
G-2
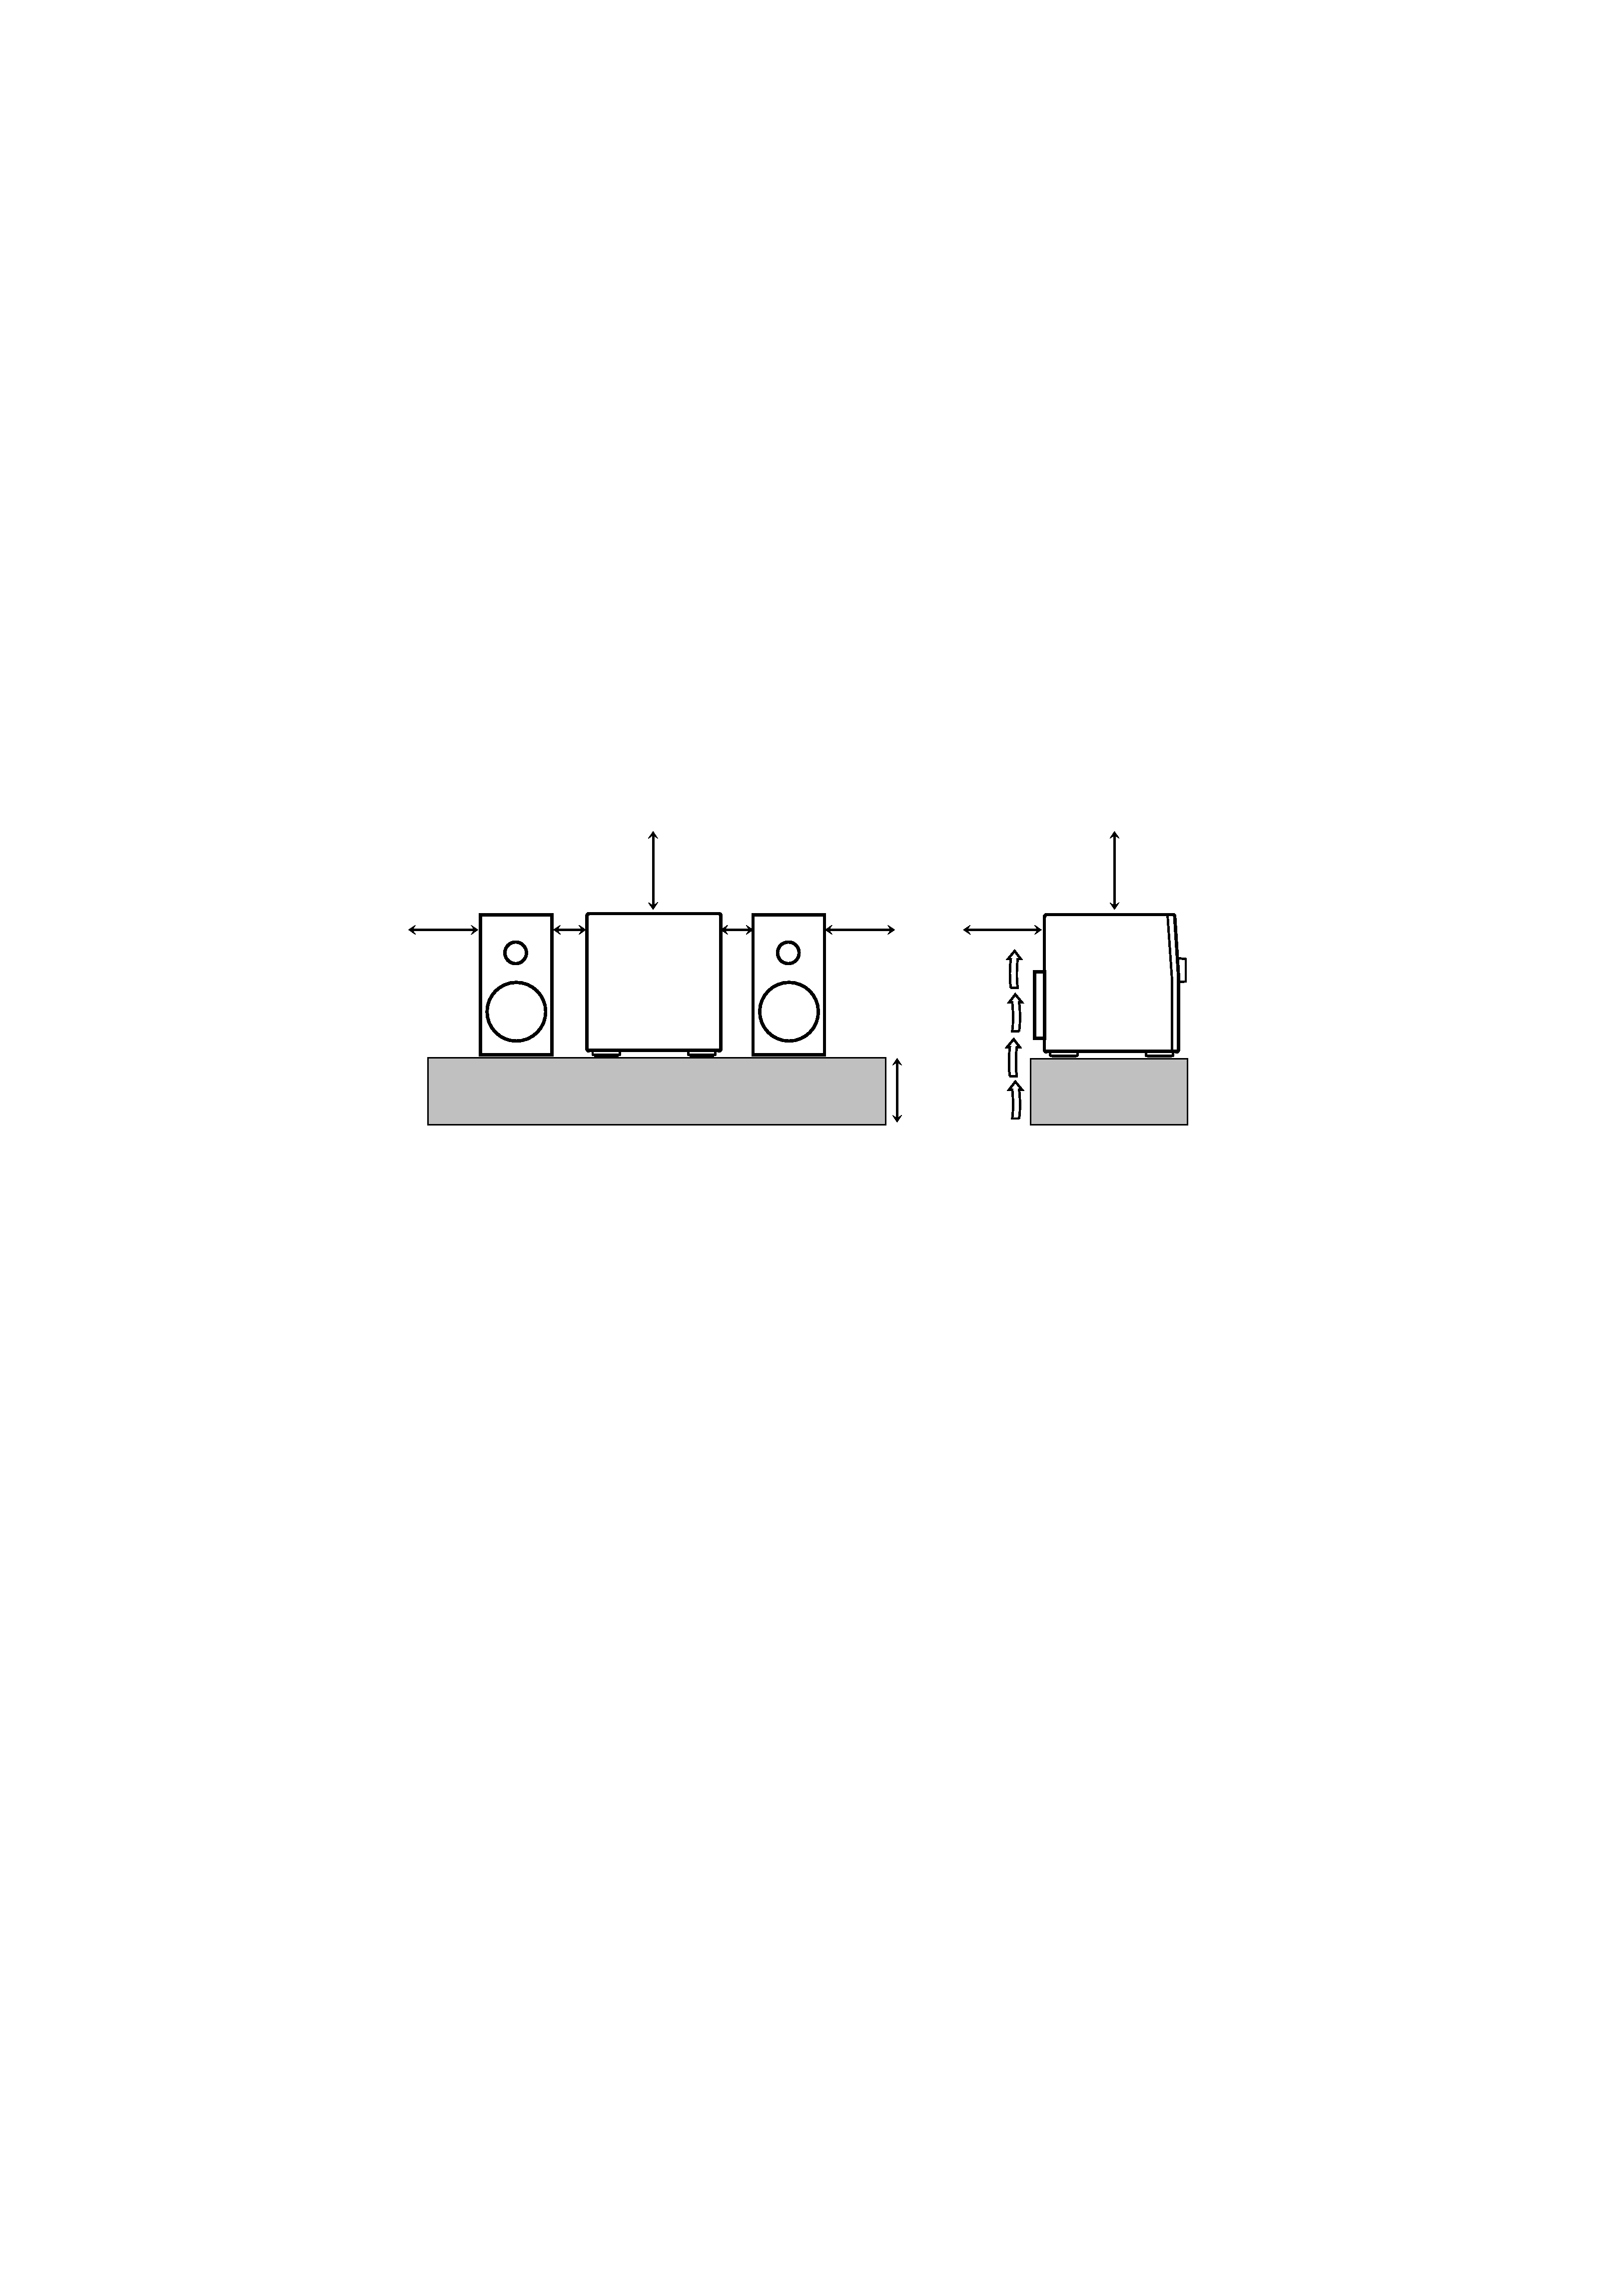
Caution: Proper Ventilation
To avoid risk of electric shock and fire, and to prevent damage, locate the apparatus as follows:
1 Front:
No obstructions and open spacing.
2 Sides/ Top/ Back: No obstructions should be placed in the areas shown by the dimensions below.
3 Bottom:
Place on the level surface. Maintain an adequate air path for ventilation by placing on a stand with a height of 10 cm or more.
Precaución: el aparato debe estar bien ventilado
Para evitar posibles riesgos de descargas eléctricas e incendios y prevenir cualquier posible daño, coloque el aparato del modo siguiente:
1 Parte delantera:
No ponga nada delante, deje el espacio libre.
2 Laterales/ parte superior/
No se debería colocar nada en las áreas y las distancias que se detallan a continuación.
parte trasera:
3 Parte inferior:
Coloque el aparato sobre una superficie recta. Debe haber buena circulación de aire; para ello, coloque el
aparato sobre una base a una altura mínima de 10 cm.
Precaução: Ventilação adequada
Para evitar riscos de choques elétricos e incêndios, e prevenir avarias, instale o aparelho como segue:
1 Parte frontal:
Sem obstruções e espaços abertos.
2 Partes laterais/ tampa/ posterior: Nenhuma obstrução deverá ser colocada entre as áreas cujas dimensões são indicadasabaixo.
3 Parte inferior:
Instale-o sobre uma superfície plana. Deverá ser mantido espaço suficiente para a ventilação se este for
instalado numa posição que tenha uma altura de 10 cm ou mais.
CAUTION
1.
Do not block the ventilation openings or holes.
(If the ventilation openings or holes are blocked by a newspaper or
cloth, etc., the heat may not be able to get out.)
2.
Do not place any naked flame sources, such as lighted candles,
on the apparatus.
3.
When discarding batteries, environmental problems must be con-
sidered and local rules or laws governing the disposal of these
batteries must be followed strictly.
4.
Do not expose this apparatus to rain, moisture, dripping or splash-
ing and that no objects filled with liquids, such as vases, shall be
placed on the apparatus.
PRECAUCION!
1.
No obstruya las rendijas o los orificios de ventilación.
(Si las rendijas o los orificios de ventilación quedan tapados con
un periódico, un trozo de tela, etc., no se podrá disipar el calor).
2.
No ponga sobre el aparato ninguna llama al descubierto, como
velas encendidas.
3.
Cuando tenga que descartar las pilas, tenga en cuenta los proble-
mas ambientales y observe estrictamente los reglamentos o las
leyes locales sobre disposición de las pilas.
4.
No exponga este aparato a la lluvia, humedad, goteos o salpica-
duras. Tampoco ponga recipientes conteniendo làqquidos, como
floreros, encima del aparato.
CUIDADO
1.
Não tape as aberturas ou os orifícios de ventilação.
(Se tapar as aberturas ou orifícios de ventilação com um jornal,
um pano, etc., o calor não sai).
2.
Não coloque objectos com chama, como velas acesas, em cima
do aparelho.
3.
Quando se desfizer das baterias, deve ter em consideração os
problemas ambientais e respeitar integralmente os regulamentos
e leis locais relativos à forma de deitar fora as baterias.
4.
N'exposez pas cet appareil àj la pluie, àj l'humiditàm, àj un
àmgouttement ou àj des àmclaboussures et ne placez pas des
objets remplis de liquide, tels qu'un vase, sur l'appareil.
Front view
Vista frontal
Visão frontal
Side view
Vista lateral
Visão lateral
15cm
10cm
15cm
15cm
15cm
1cm
1cm
15cm
CA-MXK30/
CA-MXK10
CA-MXK30/
CA-MXK10
MX-K30&K10[UW].book Page 2
Tuesday, March 19, 2002 11:22 AM

1
Eng
lish
Introduction
Thank you for purchasing the JVC Compact Component System.
We hope it will be a valued addition to your home, giving you years of enjoyment.
Be sure to read this instruction manual carefully before operating your new stereo system.
In it you will find all the information you need to set up and use the system.
If you have a query that is not answered by the manual, please contact your dealer.
Features
Here are some of the things that make your System both powerful and simple to use.
The controls and operations have been redesigned to make them very easy to use, freeing you to just enjoy the
music.
· With JVC's COMPU PLAY you can turn on the System and automatically start the Radio, Cassette Deck, or
CD Player with a single touch.
The great SEA (Sound Effect Amplifier) effects Rock, Pop and Classics are provided.
The Active Bass EX. (Extension) circuitry faithfully reproduces low frequency sounds.
A 45-station preset capability (30 FM and 15 AM) in addition to auto-seek and manual tuning.
CD changer function can operate 3 discs.
· Discs can be changed during play using the Carrousel tray (rotational tray).
· Continuous, random or program play of 3 discs.
Two Decks enabling tape dubbing.
You can use conventional tapes and CDs for Karaoke with the voice masking system. With an optional microphone, you can replace the
lead singer's voice on your favorite songs with your own.
· Digital Echo applied to your voice through the microphone gives you a professional sound.
Timer functions; Daily Timer, REC (Recording) Timer, and Sleep Timer.
You can connect various external units, such as an MD recorder.
The CD Player can play back a CD-R and CD-RW.
How This Manual Is Organized
· Basic information that is the same for many different functions - e.g. setting the volume - is given in the section "Basic Operations",
and not repeated under each function.
· The names of buttons/controls and display messages are written in all capital letters: e.g. FM/AM, "NO DISC".
· If the button names on the Unit and the Remote Control are the same, the description on where the button is used will be omitted.
· System functions are written with an initial capital letter only: e.g. Normal Play.
Use the table of contents to look up specific information you require.
We have enjoyed making this manual for you, and hope it serves you in enjoying the many features built into your System.
IMPORTANT CAUTIONS
1 Installation of the System
· Select a place which is level, dry and neither too hot nor too cold. (Between 5°C and 35°C or 41°F and 95°F.)
· Leave sufficient distance between the System and a TV.
· Do not use the System in a place subject to vibrations.
2 Power cord
· Do not handle the power cord with wet hands!
· Some power is always consumed as long as the power cord is connected to the wall outlet.
· When unplugging the System from the wall outlet, always pull the plug, not the power cord.
3 Malfunctions, etc.
· There are no user serviceable parts inside. In case of system failure, unplug the power cord and consult your dealer.
· Do not insert any metallic object into the System.
MX-K30&K10[UW].book Page 1
Tuesday, March 19, 2002 11:22 AM

2
Eng
lish
Table of Contents
Introduction ...................................................................................................................1
Features.................................................................................................................................................... 1
How This Manual Is Organized............................................................................................................... 1
IMPORTANT CAUTIONS..................................................................................................................... 1
Table of Contents ..........................................................................................................2
Getting Started ..............................................................................................................3
Accessories .............................................................................................................................................. 3
Set the VOLTAGE SELECTOR Switch .................................................................................................3
How To Put Batteries In the Remote Control.......................................................................................... 3
Using the Remote Control ....................................................................................................................... 4
Connecting the FM Antenna.................................................................................................................... 4
Connecting the AM Antenna ................................................................................................................... 5
Connecting the Speakers ......................................................................................................................... 5
Connecting External Equipment.............................................................................................................. 6
Connecting to the Wall Outlet ................................................................................................................. 6
DEMO Mode ........................................................................................................................................... 6
COMPU Play ........................................................................................................................................... 6
Basic Operations ...........................................................................................................7
Turning the Power On and Off ................................................................................................................ 7
Adjusting the Volume.............................................................................................................................. 7
Fade-out Muting (FADE MUTING) ....................................................................................................... 8
Reinforcing the Bass Sound (ACTIVE BASS EX.)................................................................................ 8
Selecting the Sound Mode (SOUND MODE)......................................................................................... 8
Entering the Number with the Remote Control (Numeric Keys) ............................................................ 8
Using the Tuner .............................................................................................................9
Tuning In a Station .................................................................................................................................. 9
Presetting Stations ................................................................................................................................. 10
To Change the FM Reception Mode ..................................................................................................... 10
Using the CD Player ....................................................................................................11
To Load CDs ......................................................................................................................................... 12
To Unload CDs ...................................................................................................................................... 12
Basics of Using the CD Player-Normal Play......................................................................................... 13
Programming the Playing Order of the Tracks...................................................................................... 14
Random Play.......................................................................................................................................... 15
Repeating Tracks ................................................................................................................................... 15
Tray Lock Function ............................................................................................................................... 15
Using the Cassette Deck (Listening to a Tape) ........................................................16
Playing a Tape ....................................................................................................................................... 16
Using the Cassette Deck (Recording) ......................................................................17
Standard Recording ............................................................................................................................... 18
CD Synchro Recording.......................................................................................................................... 18
Tape to Tape Recording (DUBBING)................................................................................................... 18
Using an External Equipment ....................................................................................19
Listening to the External Equipment ..................................................................................................... 19
Using the Timers .........................................................................................................20
Setting the Clock ................................................................................................................................... 20
Setting the Daily Timer ......................................................................................................................... 21
Setting the REC (Recording) Timer ...................................................................................................... 22
Setting the SLEEP Timer ...................................................................................................................... 24
Timer Priority ........................................................................................................................................ 24
Using the Microphone.................................................................................................25
Singing Along with Karaoke ................................................................................................................. 25
Microphone Mixing ............................................................................................................................... 26
Playing the Microphone Sound through the Speakers........................................................................... 26
Care And Maintenance................................................................................................27
Troubleshooting ..........................................................................................................28
Specifications ..............................................................................................................28
MX-K30&K10[UW].book Page 2
Tuesday, March 19, 2002 11:22 AM