LVT1248-002A
[US]
LS-M1
SPEAKER STAND
INSTRUCTIONS
English
English
cover_LS-M1[US].p65
04.10.28, 6:58 PM
3
English
2
Thank you for purchasing a JVC product.
Before you begin using it, please read the instructions carefully.
Warnings, Cautions and Others
Warning
Observe the following carefully before installation;
otherwise, the speaker may fall over, causing damage or
injury.
Do not install the speaker stand on an uneven surface
or in a place subject to vibration.
Do not lean against the speaker stand. Especially pay
attention to children not to do so.
Fasten all the screws firmly when assembling the
speaker stand, and check its tightness afterwards
regularly.
Do not install any overweight equipment (over 10 kg)
on the speaker stand.
7 Precautions
· For safety use
Do not climb or hang on to the speaker stand.
Attach the speaker firmly to the speaker stand.
· For installation
While installing the speaker on the stand, do not drop it from
the stand. Pay attention not to damage the speaker cabinet.
To obtain the best bass sound quality, install the speaker
stand on the flat floor.
· For daily use
Wipe with a dry, soft cloth if the speaker stand should
become dirty. If very dirty, wipe with a cloth applied a small
amount of water or neutral detergent, then wipe with a dry
cloth.
Do not use chemicals such as benzine and thinner for
cleaning the speaker stand; otherwise, the speaker stand
may deteriorate or its paint may come off.
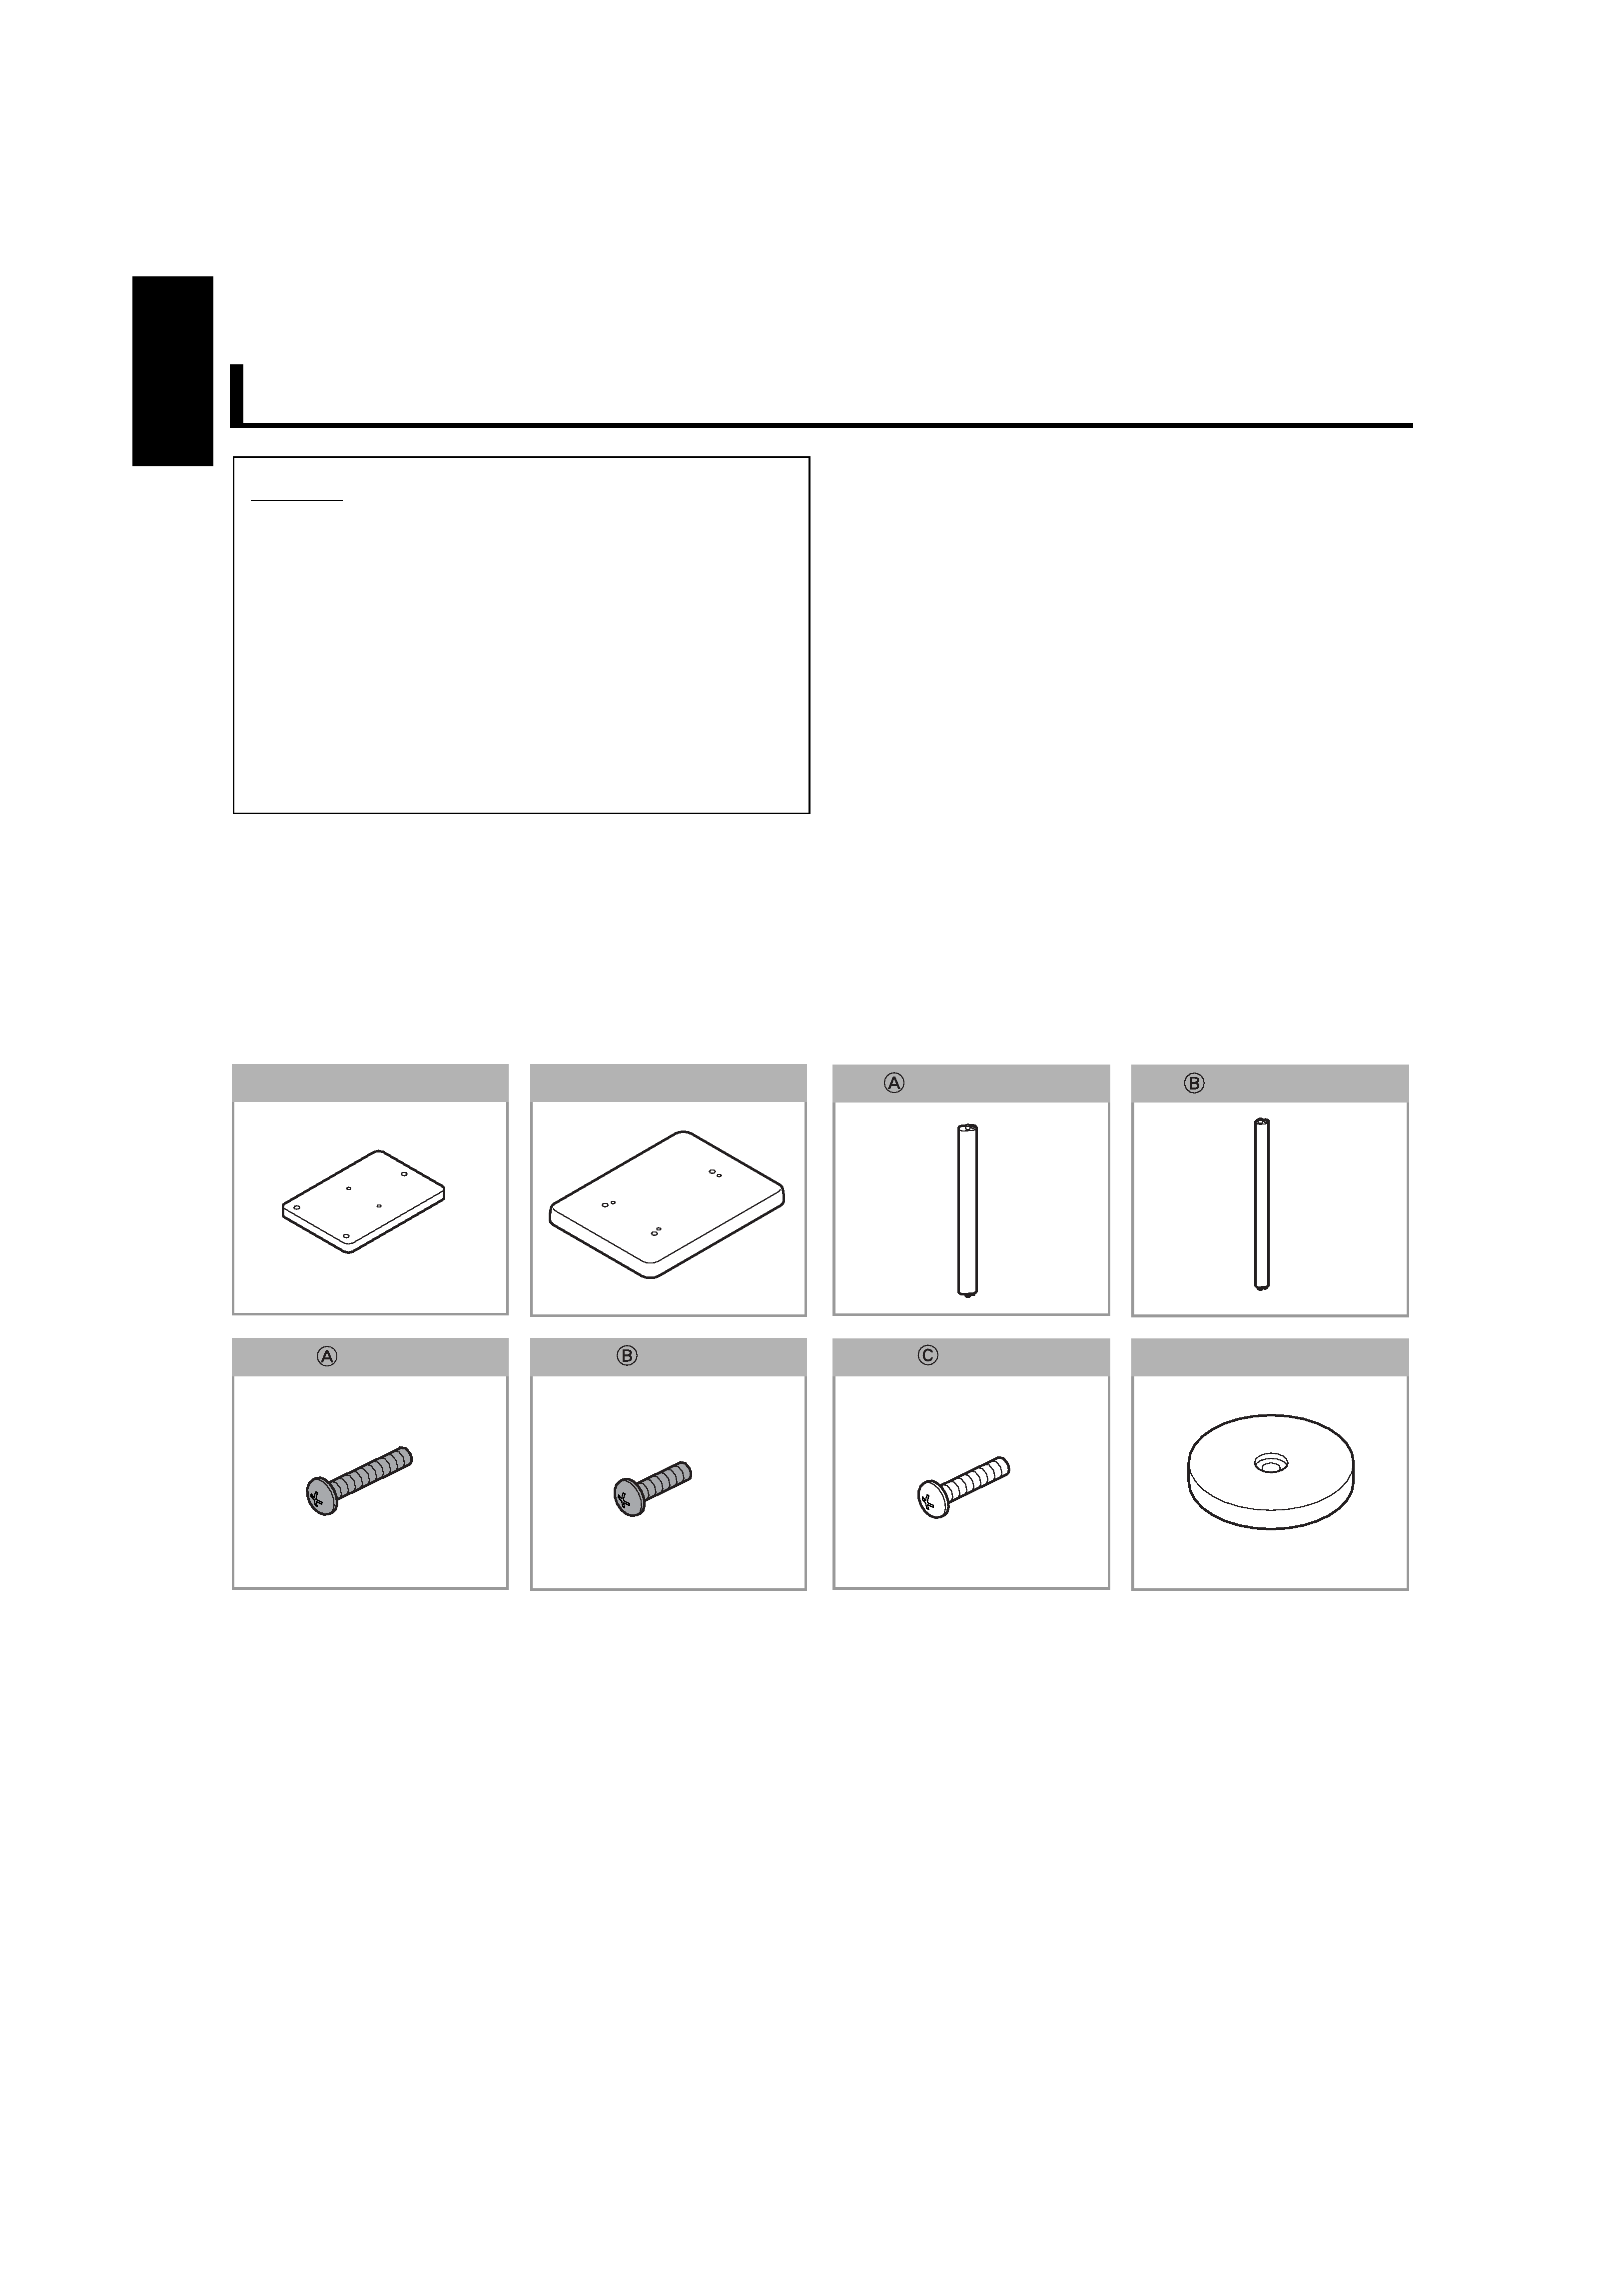
7 Checking the supplied parts
Check to be sure you have the following supplied parts.
The quantity of piece supplied is for one pair of speaker stands.
If any item is missing, contact your dealer immediately.
Screws
------------------- 6
Top plate --------------------- 2
Bottom plate --------------- 2
Screws
------------------- 6
(Black: M6 x 30 mm)
(Black: M6 x 16 mm)
Screws
------------------- 4
Leg
------------------------ 4
Leg holder ------------------ 6
(thick)
(thin)
(Silver: M5 x 28 mm)
Leg
------------------------ 2
EN_LS-M1[US]4.p65
04.11.4, 4:57 PM
2

English
3
Before assembling--
· Prepare a Phillips screwdriver.
· Place a large, thick cloth on the floor where you assemble the
speaker stand to protect the floor and the speaker stand.
7 Assembling the speaker stand
· Tighten the screws firmly so that no space is left between
the legs and plates.
1 Fix the top plate.
· Align the projection of the legs to the holes of the top plate
correctly, then attach them with three of the supplied
screws B (M6 x 16 mm).
* The side without spacer should face outside.
2 Fix the bottom plate and leg holders.
· Align the projection of the legs to the holes of the bottom
plate correctly, then attach them with three of the supplied
screws A (M6 x 30 mm).
3 Finally tighten screws A and B fully.
· Tighten them firmly and fully so that no space is left between
the legs and plates.
7 Attach the speaker on the stand
1 Locate the speaker properly by aligning both screw holes
of the speaker and the speaker stand.
· Do not install the speaker stand on an uneven surface or in
a place subject to vibration.
· Do not install any overweight equipment (over 10 kg) on the
speaker stand.
2 Fix the speaker with the supplied screws C (M5 x 28 mm).
· Do not overtighten the screws, but firmly enough to prevent
the speakers from being shaky.
Assembly
Installing Speaker
Leg B (thin)
Screws A
(M6 x 30 mm)
Spacer
Bottom plate
Leg A (thick)
Spacer
Leg holder
Thick cloth
(not supplied)
Screw C (M5 x 28 mm)
Spacer
Screws B
(M6 x 16 mm)
Top plate
Leg B (thin)
Leg A (thick)
330
260
632
585
15
30
2
Unit: mm
Design and specifications subject to change without notice.
Mass:
5.3 kg each
Maximum load:
10 kg
Dimensions:
See the diagram.
Specifications
EN_LS-M1[US]4.p65
04.11.4, 4:57 PM
3

1104NSMMDWHCE
LS-M1
SPEAKER
ST
AND
EN, CS, CT
© 2004 Victor Company of Japan, Limited
cover_LS-M1[US].p65
04.11.2, 9:05 PM
2