KY-F550
KY-F550
COLOUR
VIDEO
CAMERA
INSTRUCTION MANUAL
BEDIENUNGSANLEITUNG
MODE D'EMPLOI
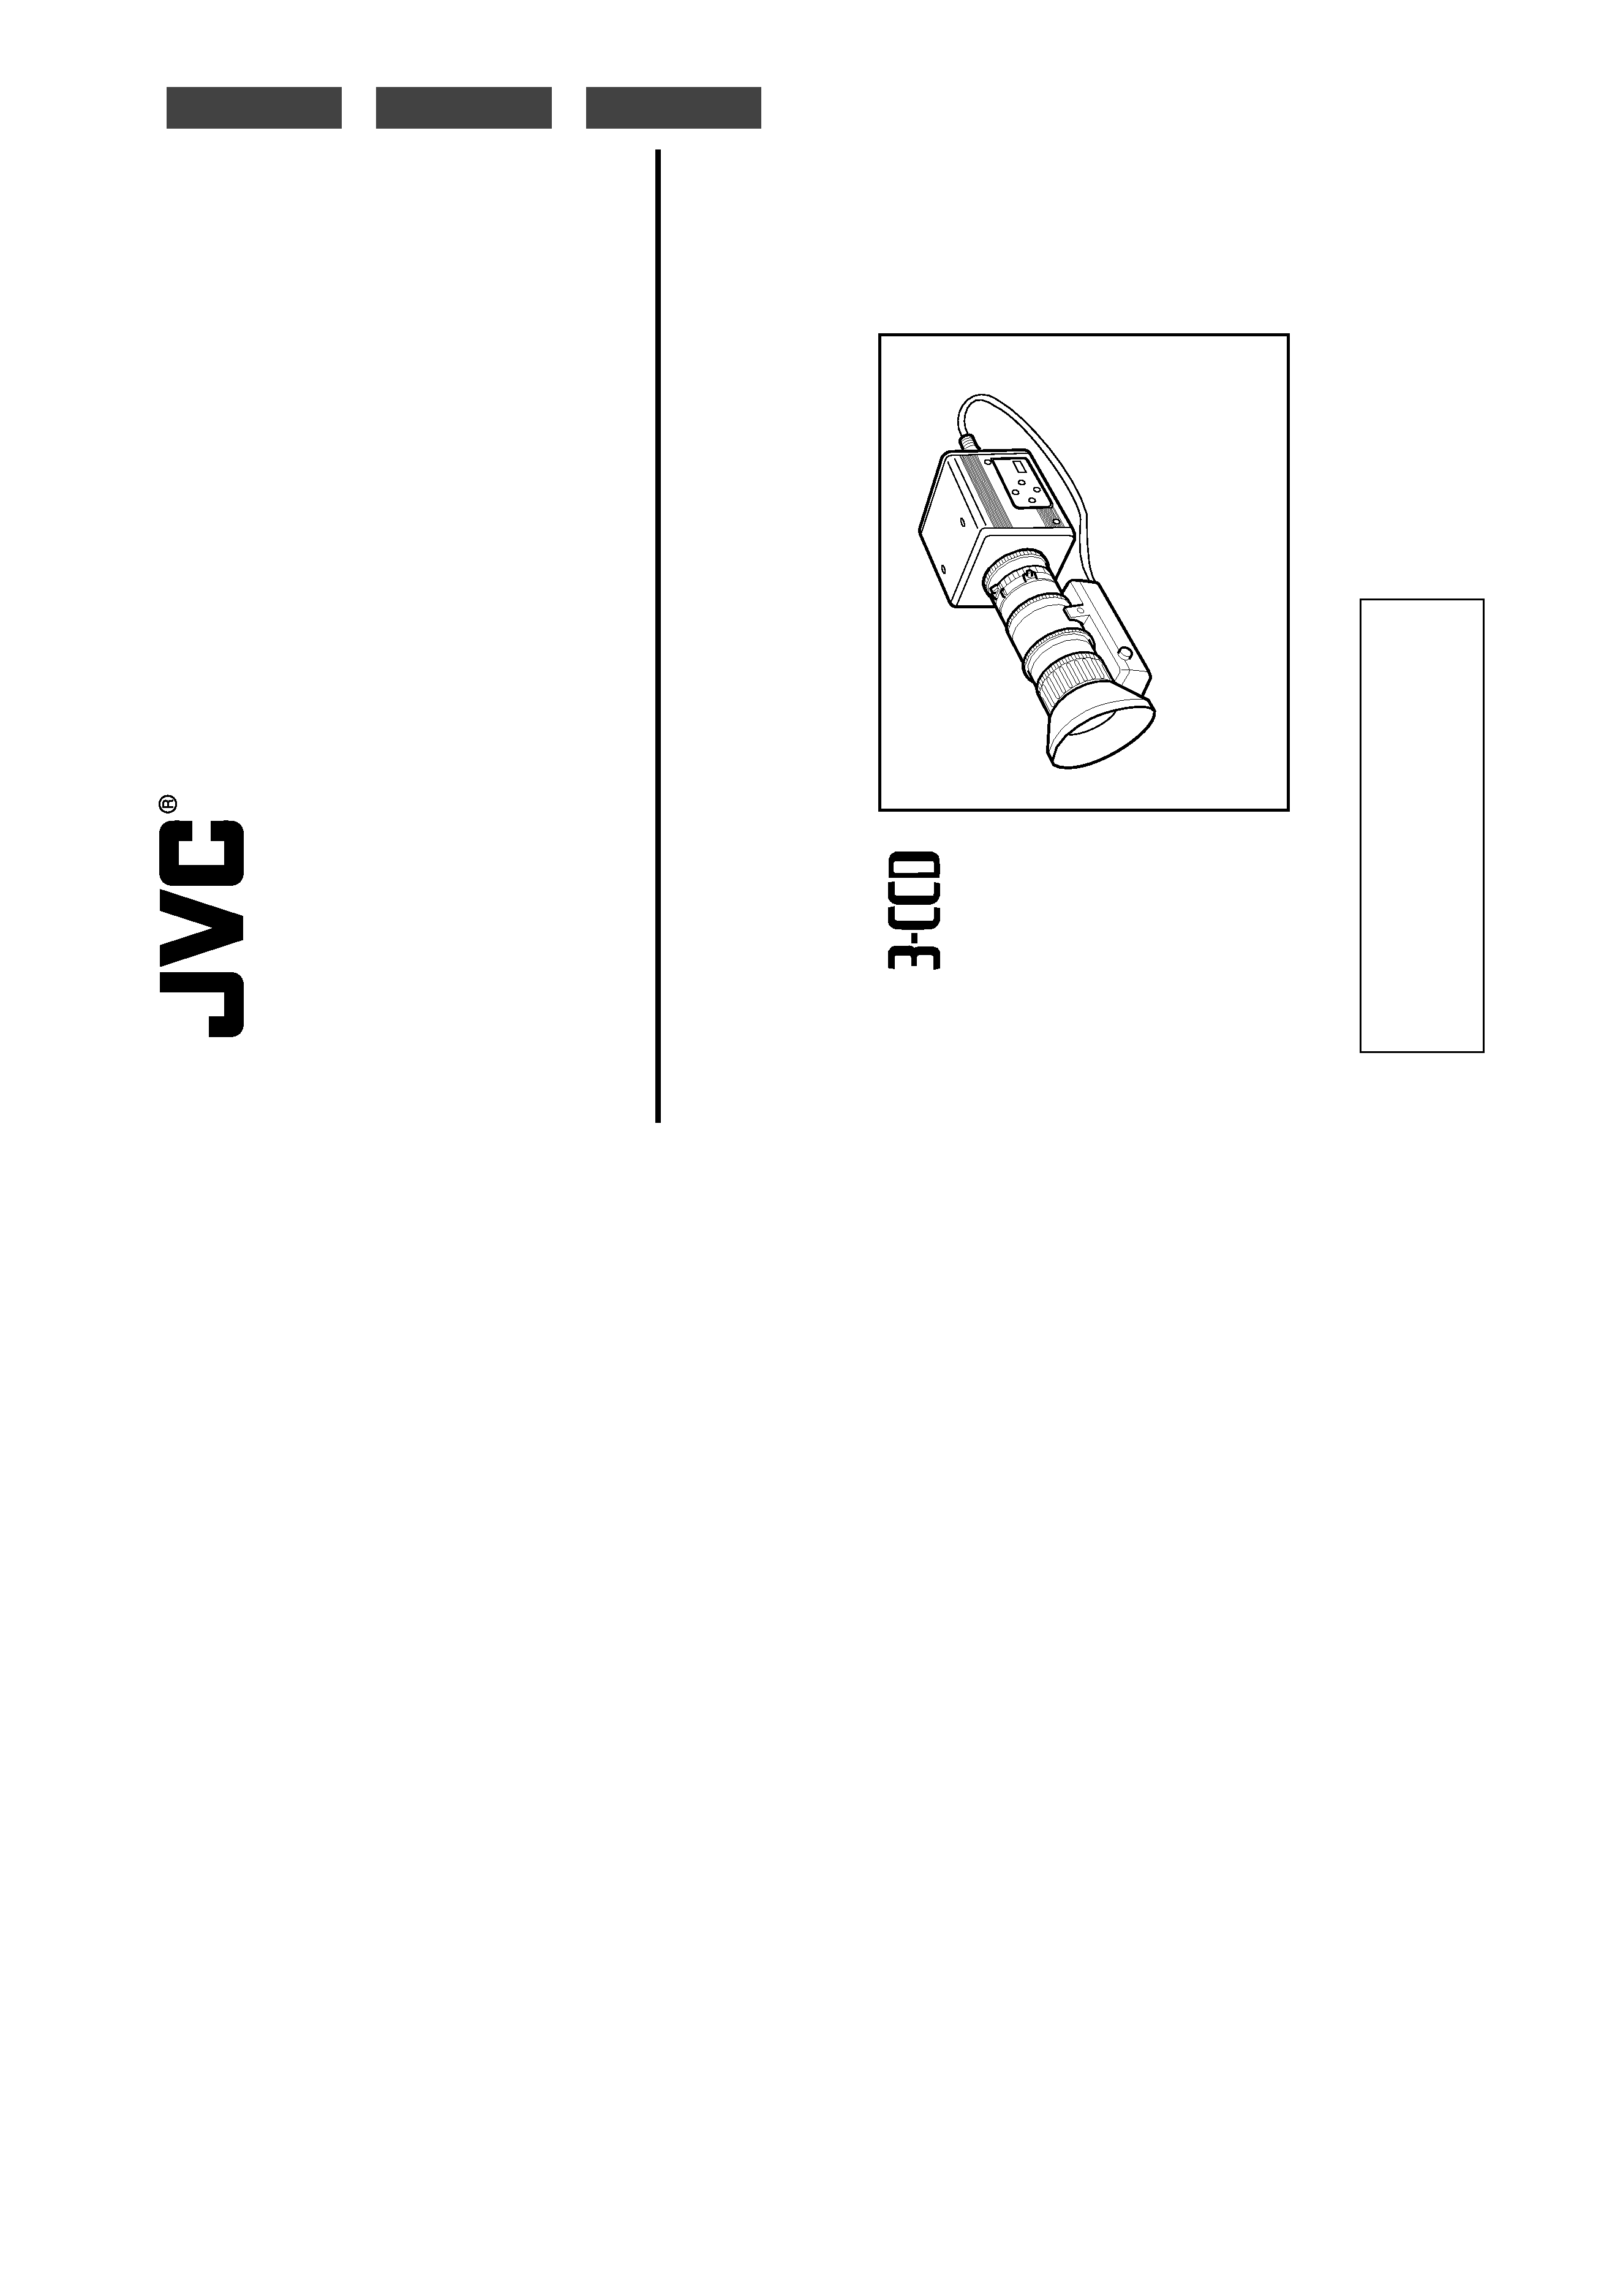
*Illustration with optional lens attachment.
*Illustration mit montiertem optionalem Objektiv.
*Illustration avec objectif optionnel.
COLOUR VIDEO CAMERA
FARBVIDEOKAMERA
APPAREIL VIDEO EN COULEURS
English
Français
Deutsch
Thank you for purchasing this JVC product.
Before operating this unit, please read the
instructions carefully to ensure the best
possible performance.
Printed in Japan
LWT0159-001A
is a registered trademark in Japan, the U.S.A., the U.K. and many other countries.
®
®
LWT0159-001A
is a registered trademark owned by Victor Company of Japan, Limited.
© 2004 Victor Company of Japan, Limited

Français
Port
Cable
Length
VIDEO OUT
Exclusive Cable
5 meters
RGB,Y/C,SYNC OUT
Exclusive Cable
2 meters
LENS
Exclusive Cable
0.4 meters
TRIGGER
Exclusive Cable
5 meters
REMOTE
Exclusive Cable
5 meters
DV
Exclusive Cable
4.5 meters
DC IN
Exclusive Cable
2 meters
Thank you for purchasing the JVC KY-F550 Colour Video Camera.
These instructions are for KY-F550E.
These instructions are given in three languages: English from page E-2 to E-51
German from page G-2 to G-51
French from page F-2 to F-51
This apparatus is designed for rack mounting or is used close to other apparatus.
In order to keep the best performance and furthermore for electromagnetic compatibility we
recommend to use cables not exceeding the following lengths:
This equipment is in conformity with the provisions and protection requirements of the corre-
sponding European Directives. This equipment is designed for professional video appliances
and can be used in the following environments:
5
Residential (including both of the location type class 1 and 2 found in IEC 1000-2-5)
5
Commercial and light industrial (including, for example, theatres)
5
Urban outdoors (based on the definition of location type class 6 in IEC 1000-2-5)
SAFETY PRECAUTIONS
Caution:
5
Where there are strong electromagnetic waves or magnetism, for example near a radio or TV
transmitter, transformer, motor, etc., the picture and sound may be disturbed. In such a case,
please keep the apparatus away from the sources of the disturbance.
E-2
Schéma dimmensionnel (unité: mm)
Les spécifications et le design du produit peuvent être modifiés sans préavis à des fins d'amélioration.
Caractéristiques techniques (suite)
SYNC ON G
: Pendant la sortie RGB, il est possible de choisir de superposer le
signal SYNC sur G.
Sortie DSUB
: Signal RGB, Y/C (avec commutateur à fonctions au choix)
Équilibre des blancs
: AUTO1, AUTO2, FAW, MANUAL, PRESET
Plage compatible: 2300 K - 10000 K
Port DV
: IEEE1394 6 connecteur à broche (un câble avec verrou peut être
utilisé)
Plage de température pendant utilisation : 5 °C á 40 °C (humidité de 80 % ou moins)
Température admissible en stockage : 20 °C á 60 °C
Taux d'humidité admissible en stockage : 85 % ou moins
Tension de l'alimentation entrée
: CC 12 V (lors de l'utilisation de AA-P700)
DC 8 V - DC 33 V (lors de l'utilisation d'un câble IEEE 1394)
Consommation électrique
: 12 V
0,7 A
Dimensions
: (W) 67,5 mm x (H) 64 mm x (D) 80,5 mm
(N'inclut pas le port)
Masse
: 380 g (l'unité seule)
Accessoires
: Cordon d'alimentation (8P, 2 m) x 1
Support de montage pour l'appareil x 1
Vis de fixation de support de montate pour la caméra (M2,6 x 6
mm) x 2
Filtre à pince x 2
Pince à fil x 2
Manuel d'instruction x 1
WILL RESULT.
LENS
SC45550-011
PROTRUDES MORE THAN
ATTACH A LENS WHICH
NEVER
MAX4mm
4mm SEVERE DAMAGE
WARNING:
BARS
MENU
SET
1 234
AW
80
93,6
0,5
66
67,5
64
F-51
E-3
English
WARNING:
TO REDUCE THE RISK OF FIRE OR
ELECTRIC SHOCK, DO NOT EXPOSE
THIS APPLIANCE TO RAIN OR
MOISTURE.
This unit should be used with 12 V DC
only.
CAUTION:
To prevent electric shocks and fire
hazards, do NOT use any other power
source.
CAUTION
To prevent electric shock, do not open the
cabinet. No user serviceable parts inside. Refer
servicing to qualified service personnel.
Note:
The rating plate (serial number plate) is on the
bottom of the unit.
SAFETY PRECAUTIONS

E-4
Contents
1. Getting Started
Features ............................................................................................................................................... 6
Points to Note During Use .................................................................................................................... 7
Part Names and Functions ................................................................................................................... 8
Description of Terminals ..................................................................................................................... 12
2. Preparation Before Shooting
Connecting Through Digital Output .................................................................................................... 14
Connecting Through Analogue Output ............................................................................................... 16
Mounting the Lens .............................................................................................................................. 17
Connecting the Power Supply ............................................................................................................ 18
Mounting the Camera ......................................................................................................................... 19
Precautions to Prevent Camera From Falling .................................................................................... 20
3. Setting and Adjustment During Shooting
External Monitor Adjustment .............................................................................................................. 21
White Balance Adjustment ................................................................................................................. 22
White Shading Adjustment ................................................................................................................. 24
4. Various Modes of Shooting
Shooting the Computer Monitor .......................................................................................................... 26
Output of Negative Image ................................................................................................................... 27
White Spot Correction ........................................................................................................................ 28

English
E-5
English
5. Setting Via the Menu Screen
Flow of Menu Screens ........................................................................................................................ 30
Setting Procedures ............................................................................................................................. 32
"EXPOSURE" Screen ......................................................................................................................... 33
"ADVANCED EXPOSURE" Screen .................................................................................................... 35
"WHITE BALANCE" Screen ................................................................................................................ 36
"PROCESS (1/2)" Screen ................................................................................................................... 38
"PROCESS (2/2)" Screen ................................................................................................................... 40
"SYSTEM" Screen .............................................................................................................................. 41
"MATRIX ADJUST" Screen ................................................................................................................ 42
"CAPTURE" Screen ............................................................................................................................ 43
"FILE MANAGE" Screen ..................................................................................................................... 44
6. Others
Connecting the Remote Control Unit .................................................................................................. 46
Connecting the IEEE 1394 Cable ....................................................................................................... 48
Connecting the analogue output (D-SUB) Cable ................................................................................ 48
Technical Information ......................................................................................................................... 49
Specifications ..................................................................................................................................... 50
Notations and Symbols Used in This Manual
Caution
Note
Precautions during operation are stated.
Restrictions of functions and specifications are stated for reference purposes.
Indicates the page and item to refer to.
All product names in this manual are trademarks or registered trademarks of their respective companies.
Marks such as TM, ® and © are not used in this manual.