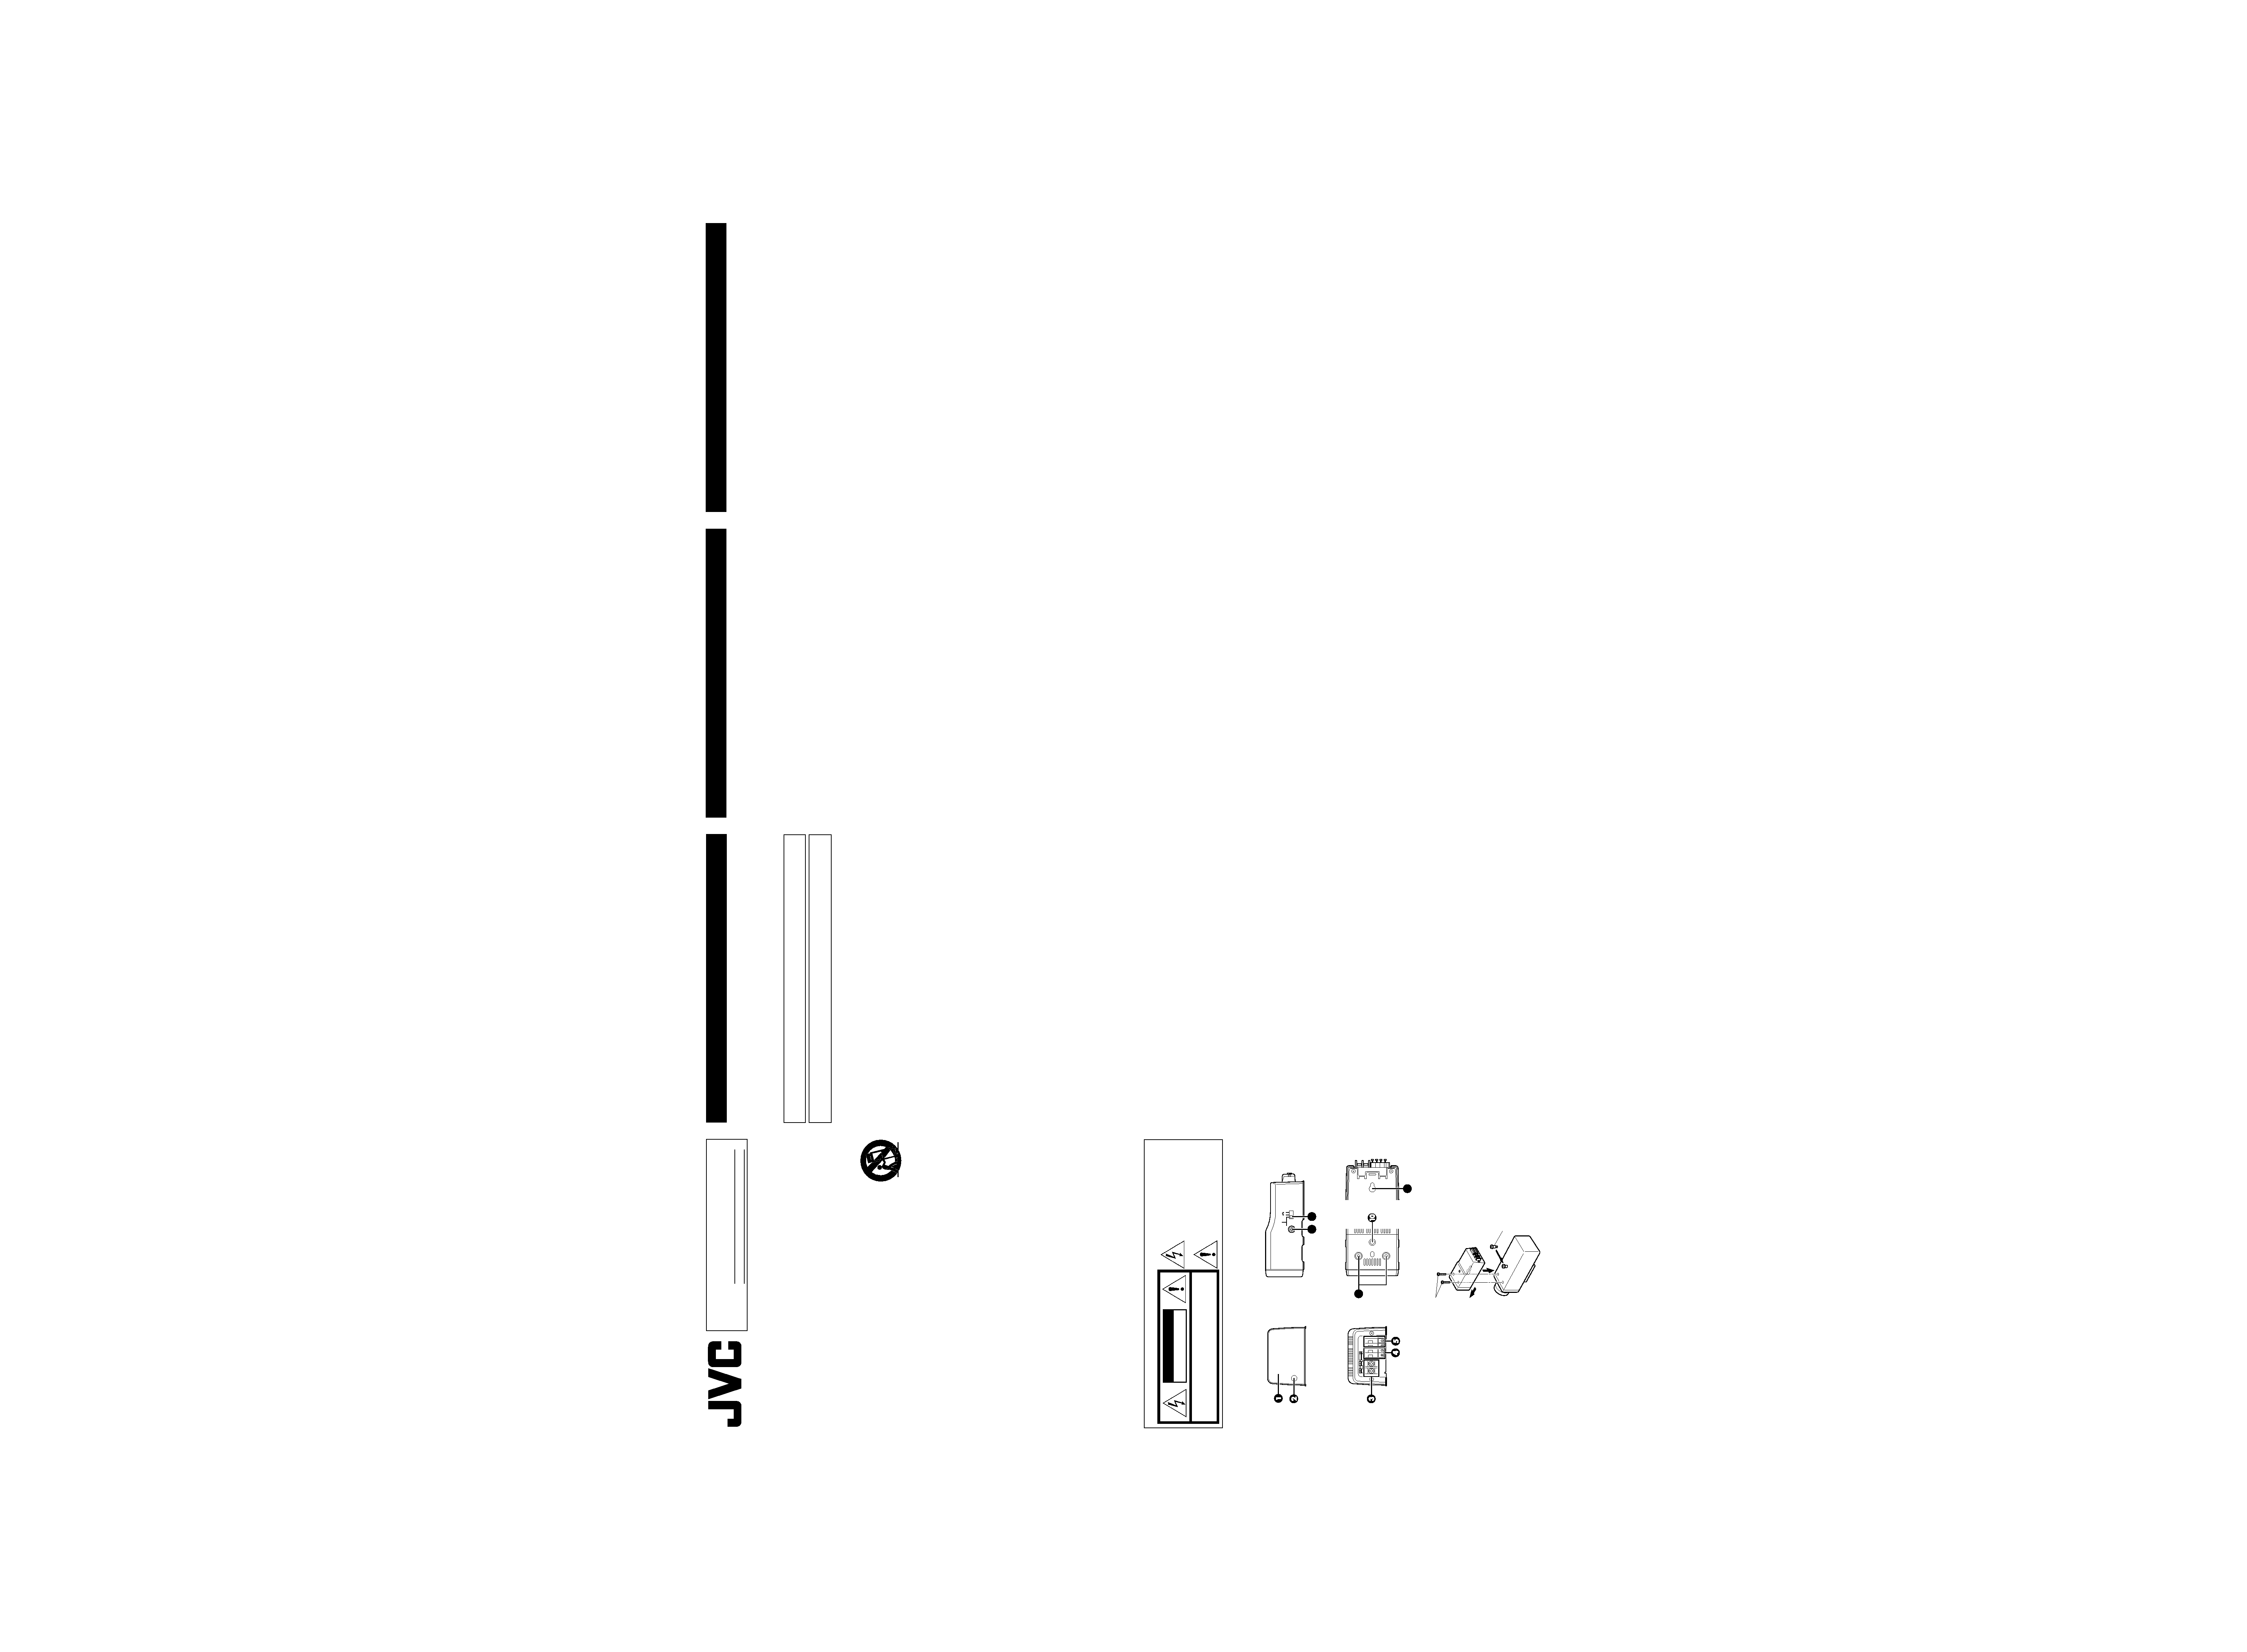
INFRAROTLEUCHTE
DEUTSCHE ANLEITUNG
Wir bedanken uns für den Kauf dieser JVC Infrarotleuchte.
Bitte lesen Sie diese Anleitung vor der Ingebrauchnahme sorgfältig, um alle Möglichkeiten dieser
Infrarotleuchte einwandfrei nutzen zu können. Bewahren Sie diese Anleitung zur zukünftigen
Bezugnahme auf.
WARNUNG:
ZUR VERHÜTUNG VON FEUER ODER ELEKTRISCHEM SCHLAG DIESES GERÄT NICHT
REGEN ODER FEUCHTIGKEIT AUSSETZEN.
Sicherheitshinweise vor dem Gebrauch
· Diese Einheit darf ausschließlich in Verbindung mit einer spezifisch geeigneten Kamera verwendet
werden.
· Die Einheit darf nicht an Orten installiert werden, die Nässe oder Feuchtigkeit ausgesetzt sind.
Hinweise zur Verwendung:
· Geeignete Kameras: TK-C1460, TK-C1460B
· Beachten Sie bitte auch unbedingt die Vorsichtsmaßregeln, die in der Bedienungsanleitung der
zur verwendenden Kamera enthalten sind.
· Der Kabelstopper am Klemmenblock kann sich manchmal lösen. Nehmen Sie sich deshalb
ausreichend Zeit, um das Kabelsicher zu befestigen.
· Zum Säubern einen weichen Lappen benutzen.
Niemals Verdünner oder Reinigungsbenzin verwenden.
Diese können die Oberfläche beschädigen oder verfärben.
Bei starker Verschmutzung kann eine neutrale Seifenlösung mit Wasser verwendet werden,
danach gut trocken wischen.
· Wo radioaktive und Röntgenstrahlen auftreten oder korrosives Gas vorhanden ist.
· Schalten Sie zum Einsparen von Energie die Stromversorgung des Systems aus, wenn das
System nicht verwendet wird.
Besonderheiten
· KA-R60 verfügt über einen Lichtsensor, um die Infrarotlampe bei geringer Umgebungshelligkeit
zu aktivieren.
· Bei Aktivierung der Infrarotlampe schaltet KA-R60 das Kamerasignal vom Farb- auf den
Schwarzweißmodus um, so dass selbst bei ca. 0 Lux noch Kamerabilder geliefert werden.
Bedienungselemente
1 Infrarotlampe
Gibt Infrarotlicht ab.
2 Lichtsensor
Dient zur Messung der Umgebungshelligkeit.
3 DC 12 V, AC 24 V Stromversorgungsanschluss
Hier können 12 V Gleichstrom oder 24 V Wechselstrom angelegt werden.
4 EXT e/EXT d Eingang für externe Steuereinheit.
Hier kann ein externes Steuersignal angelegt werden.
5 IR-C e/IR-C d Ausgang für Statussignal
Hier wird das Statussignal (Lampe eingeschaltet (ON) oder ausgeschaltet (OFF)) abgegeben.
6 AUTO/MANUAL Schalter für den Aktivierungsmodus der Infrarotlampe
AUTO
:Die Infrarotlampe wird automatisch, in Abhängigkeit von der
Umgebungshelligkeit, ein- und ausgeschaltet.
MANUAL ON
: Die Infrarotlampe ist stets eingeschaltet.
MANUAL OFF : Die Infrarotlampe ist ausgeschaltet.
(Grundeinstellung ab Werk: AUTO)
7 SENS Ansprechpegelpotentiometer
Dient zur Einstellung des Helligkeitsansprechpegels. (Grundeinstellung ab Werk: Ca. 2 Lux)
8 Kameraverbindungsöffnung
Dient zur Anbringung von KA-R60 an einer Kamera
Die mitgelieferte "Montageschraube" an der Kamera festschrauben und dann in die Öffnung
einsetzen.
9 Kamerabefestigungsschraubgewinde
Dienen zur Befestigung von KA-R60 an einer Kamera
Die beiden mitgelieferten "Kamerabefestigungsschrauben" (2,6 mm Durchmesser, 18 mm lang)
verwenden, um KA-R60 mit einer Kamera zu verschrauben.
0 I Gewinde (1/4-20UNC) für Kamerabefestigungsschraube
Dient zur Befestigung von KA-R60 an einer festen oder drehbaren Halterung.
Anbringen von KA-R60 an der Kamera
1. Die mitgelieferte "Kameramontageschraube" an der Kameraoberseite anbringen.
2. DiezuvorinSchritt1beschriebene"Kameramontageschraube"anderKameraverbindungsöffnunganbringen.
3. KA-R60 in Pfeilrichtung schieben.
4. Um KA-R60 fest mit der Kamera zu verschrauben, die beiden mitgelieferten
Kamerabefestigungsschrauben (2,6 mm Durchmesser, 18 mm lang) an der Oberseite von
KA-R60 anbringen.
Anschlüsse
Kamera, Monitor etc. wie im Anschlussdiagramm gezeigt anschließen.
Die Anschlüsse für EXT wie erforderlich herstellen.
Angaben zu den an der Kamera befindlichen Anschlüssen finden Sie in der zur Kamera gehörigen
Bedienungsanleitung.
Vorsichtsmaßregeln
· Beim Anschluss an eine Stromquelle mit 12 V Gleichstrom unbedingt auf die korrekte Polung
("+" und "-") achten.
· Niemals gleichzeitig eine Gleichstromquelle (12 V DC) und Wechselstromquelle (24 V AC)
gleichzeitig verwenden (anschließen).
Kameraeinstellungen
Vor dem ersten Gebrauch einer geeigneten Kamera ist keine gesonderte Kameraeinstellung erforderlich.
Beziehen Sie sich auf die zur verwendeten Kamera gehörige Bedienungsanleitung.
1. Schalten Sie AA-P700 oder TK-A241 und den Monitor ein.
·Vergewissern Sie sich, dass auf dem Monitorbildschirm das Kamerasignal angezeigt wird.
2. Drücken Sie die MENU-Taste.
· Das Hauptmenü (MENU) wird geöffnet.
3. Setzen Sie mit 9 oder 8 den Cursor auf "ALC SETTINGS.." und drücken Sie dann die SET-Taste.
· Das Menü "ALC SETTINGS" wird angezeigt.
4. Setzen Sie mit 9 oder 8 den Cursor auf "B&W/COLOR MODE" und drücken Sie dann die SET-Taste.
· Das Menü "B&W/COLOR MODE" wird angezeigt.
5. Wählen Sie mit 9 oder 8 den Eintrag "B&W".
6. Wählen Sie mit ; oder : den Eintrag "AUX" und nehmen Sie die Einstellung vor.
7. Nach vollständig durchgeführter Einstellung drücken Sie die MENU-Taste dreimal.
· Es erfolgt erneut die normale Bildsignalwiedergabe.
IMPORTANT SAFEGUARDS
1. Read all of these instructions.
2. Save these instructions for later use.
3. All warnings on the product and in the operating instructions should be adhered to.
4. Unplug this appliance system from the wall outlet before cleaning. Do not use liquid cleaners or aerosol cleaners.
Use a damp cloth for cleaning.
5. Do not use attachments not recommended by the appliance manufacturer as they may cause hazards.
6. Do not use this appliance near water - for example, near a bathtub, washbowl, kitchen sink, or laundry tub, in a wet
basement, or near a swimming pool, etc.
7. Do not place this appliance on an unstable cart, stand, or table. The appliance may fall,
causing serious injury to a child or adult, and serious damage to the appliance may fall,
causing serious injury to a child or adult, and serious damage to the appliance.
Use only with a cart or stand recommended by the manufacturer, or sold with the appliance.
Wall or shelf mounting should follow the manufacturer's instructions, and should use a mounting
kit approved by the manufacturer.
An appliance and cart combination should be moved with care. Quick stops, excessive force,
and uneven surfaces may cause the appliance and cart combination to overturn.
8. Slots and openings in the cabinet and the back or bottom are provided for ventilation, and to
insure reliable operation of the appliance and to protect it from overheating, these openings
must not be blocked or covered. The openings should never be blocked by placing the appliance on a bed, sofa,
rug, or other similar surface. This appliance should never be placed near or over a radiator or heat register. This
appliance should not be placed in a built-in installation such as a bookcase unless proper ventilation is provided.
9. This appliance should be operated only from the type of power source indicated on the marking label. If you are
not sure of the type of power supplied to your home, consult your dealer or local power company. For appliance
designed to operate from battery power, refer to the operating instructions.
10. This appliance system is equipped with a 3-wire grounding type plug (a plug having a third (grounding) pin). This
plug will only fit into a grounding-type power outlet. This is a safety feature. If you are unable to insert the plug into
the outlet, contact your electrician to replace your obsolete outlet. Do not defeat the safety purpose of the grounding
plug.
11. For added protection for this product during a lightning storm, or when it is left unattended and unused for long
periods of time, unplug it from the wall outlet and disconnect the antenna or cable system. This will prevent
damage to the product due to lightning and power-line surges.
12. Do not allow anything to rest on the power cord. Do not locate this appliance where the cord will be abused by
persons walking on it.
13. Follow all warnings and instructions marked on the appliance.
14. Do not overload wall outlets and extension cords as this can result in fire or electric shock.
15. Never push objects of any kind into his appliance through cabinet slots as they mat touch dangerous voltage
points or short out parts that could result in a fire or electric shock. Never spill liquid of any kind on the appliance.
16. Do not attempt to service this appliance yourself as opening or removing covers may expose you to dangerous
voltage or other hazards. Refer all servicing to qualified service personnel.
17. Unplug his appliance from the wall outlet and refer servicing to qualified service personnel under following conditions:
a. When the power cord or plug is damaged or frayed.
b. If liquid has been spilled into the appliance.
c. If the appliance has been exposed to rain or water.
d. If the appliance does not operate normally by following the operating instructions. Adjust only those controls that
are covered by the operating instructions as improper adjustment of other controls may result in damage and
will often require extensive work by a qualified technician to restore the appliance to normal operation.
e. If the appliance has been dropped or the cabinet has been damaged.
f. When the appliance exhibits a distinct change in performance - this indicates a need for service.
18. When replacement parts are required, be sure the service technician has used replacement parts specified by the
manufacturer that have the same characteristics as the original part. Unauthorized substitutions may result in fire,
electric shock, or other hazards.
19. Upon completion of any service or repairs to this appliance, ask the service technician to perform routine safety
checks to determine that the appliance is in safe operating condition.
KA-R60
These instructions are for KA-R60.
Information for USA
This device complies with Part 15 of the FCC Rules.
Changes or modifications not approved by JVC could void the user's authority to operate the equipment.
For Customer Use:
Enter below the Serial No. which is located on the body.
Retain this information for future reference.
Model No.
Serial No.
®
The lightning flash with arrowhead symbol,
within an equi-lateral triangle, is intended to
alert the user to the presence of uninsulated
"dangerous voltage" within the product's en-
closure that may be of sufficient magnitude
to constitute a risk of electric shock to per-
sons.
The exclamation point within an equilateral tri-
angle is intended to alert the user to the pres-
ence of important operating and maintenance
(servicing) instructions in the literature ac-
companying the appliance.
For USA and CANADA
CAUTION: TO REDUCE THE RISK OF ELECTRIC SHOCK.
DO NOT REMOVE COVER (OR BACK).
NO USER SERVICEABLE PARTS INSIDE.
REFER SERVICING TO QUALIFIED SERVICE PERSONNEL.
CAUTION
RISK OF ELECTRIC SHOCK
DO NOT OPEN
INFORMATION (FOR CANADA) RENSEIGNEMENT (POUR LE CANADA)
This Class [B] digital apparatus complies with Canadian ICES-003.
Cet appareil numérique de la classe [B] est conforme à la norme NMB-003 du Canada.
PORTABLE CART WARNING
(symbol provided by RETAC)
S3125A
INFRARED ILLUMINATOR
English Instructions
Thank you for purchasing the JVC Infrared Illuminatior.
To obtain the best results from your new Infrared Illuminatior, read these instructions carefully
before use; retain the manual for future reference.
WARNING:
TO PREVENT FIRE OR SHOCK HAZARD, DO NOT EXPOSETHIS UNITTO RAIN OR MOISTURE.
Precautions before use
· This unit cannot be used in combination with a camera other than a specified one.
Remarks of Usage
% Applicable cameras: TK-C1460, TK-C1460B
% Be careful to follow the cautions that are described in the INSTRUCTIONS manual provided
with a particular camera.
% The cable stopper on the terminal block can come off sometimes. Therefore, be sure to take
enough time and fix the cable securely.
% Wipe the unit with a soft cloth.
Do not wipe it with thinner or benzene as it may melt or tarnish the unit surface.For stubborn
stains, use water-diluted neutral detergent and then wipe it dry.
% Places that generate X-ray radiation or corrosive gases.
% To save energy, when it is not being used turn the system's power off.
Features
% A built-in illumination sensor, KA-R60 enables the illumination of the IR light at low surrounding
brightness.
% The KA-R60 switches the images from color to B&W automatically when the unit begins to
illuminate. This makes it possible to shoot a picture at about 0 lx.
Controls
1 IR illuminator
Emits the IR light.
2 Illumination sensor
Detects the value of the surrounding brightness.
3 12 V DC, 24 V AC Input power supply terminal
Inputs a 12 V DC or 24 V AC power supply.
4 EXT e/EXT d external control input terminals
Inputs the external control signal.
5 IR-C e/IR-C d control signal output terminals
Outputs either the illumination ON or illumination OFF status signal.
6 AUTO/MANUAL illumination mode switch
AUTO
: Sets whether the IR light is started or stopped automatically according to the
surrounding brightness.
MANUAL-ON
: The unit is always illuminated.
MANUAL-OFF : The unit is not illuminated.
(Default setting : AUTO)
7 SENS control potentiometer
Adjusts the detection level of the illumination sensor.
(Default setting: Approx. 2 lx)
8 Camera connection hole
To connect the KA-R60 to a camera
Attach the provided "assembly screw" to the camera, and then insert it in the hole.
9 Camera mount holes
To mount the KA-R60 to a camera
Attach the two provided "camera mount screws" (diameter 2.6 mm, length 18 mm) to mount the
KA-R60 to a camera.
0 Camera mount screw hole (1/4-20UNC)
To mount the KA-R60 to a fixing attachment or turntable
Installing the KA-R60 to the camera
1. Attach the provided "assembly screw" to the top of the camera.
2. Connect the "assembly screw" described above (procedure 1) to the camera connection hole.
3. Slide the KA-R60 in the direction of the arrow.
4. In order to clamp both the unit and the camera together, attach the two provided camera
mount screws (diameter 2.6 mm, length 18 mm) at the top of the KA-R60.
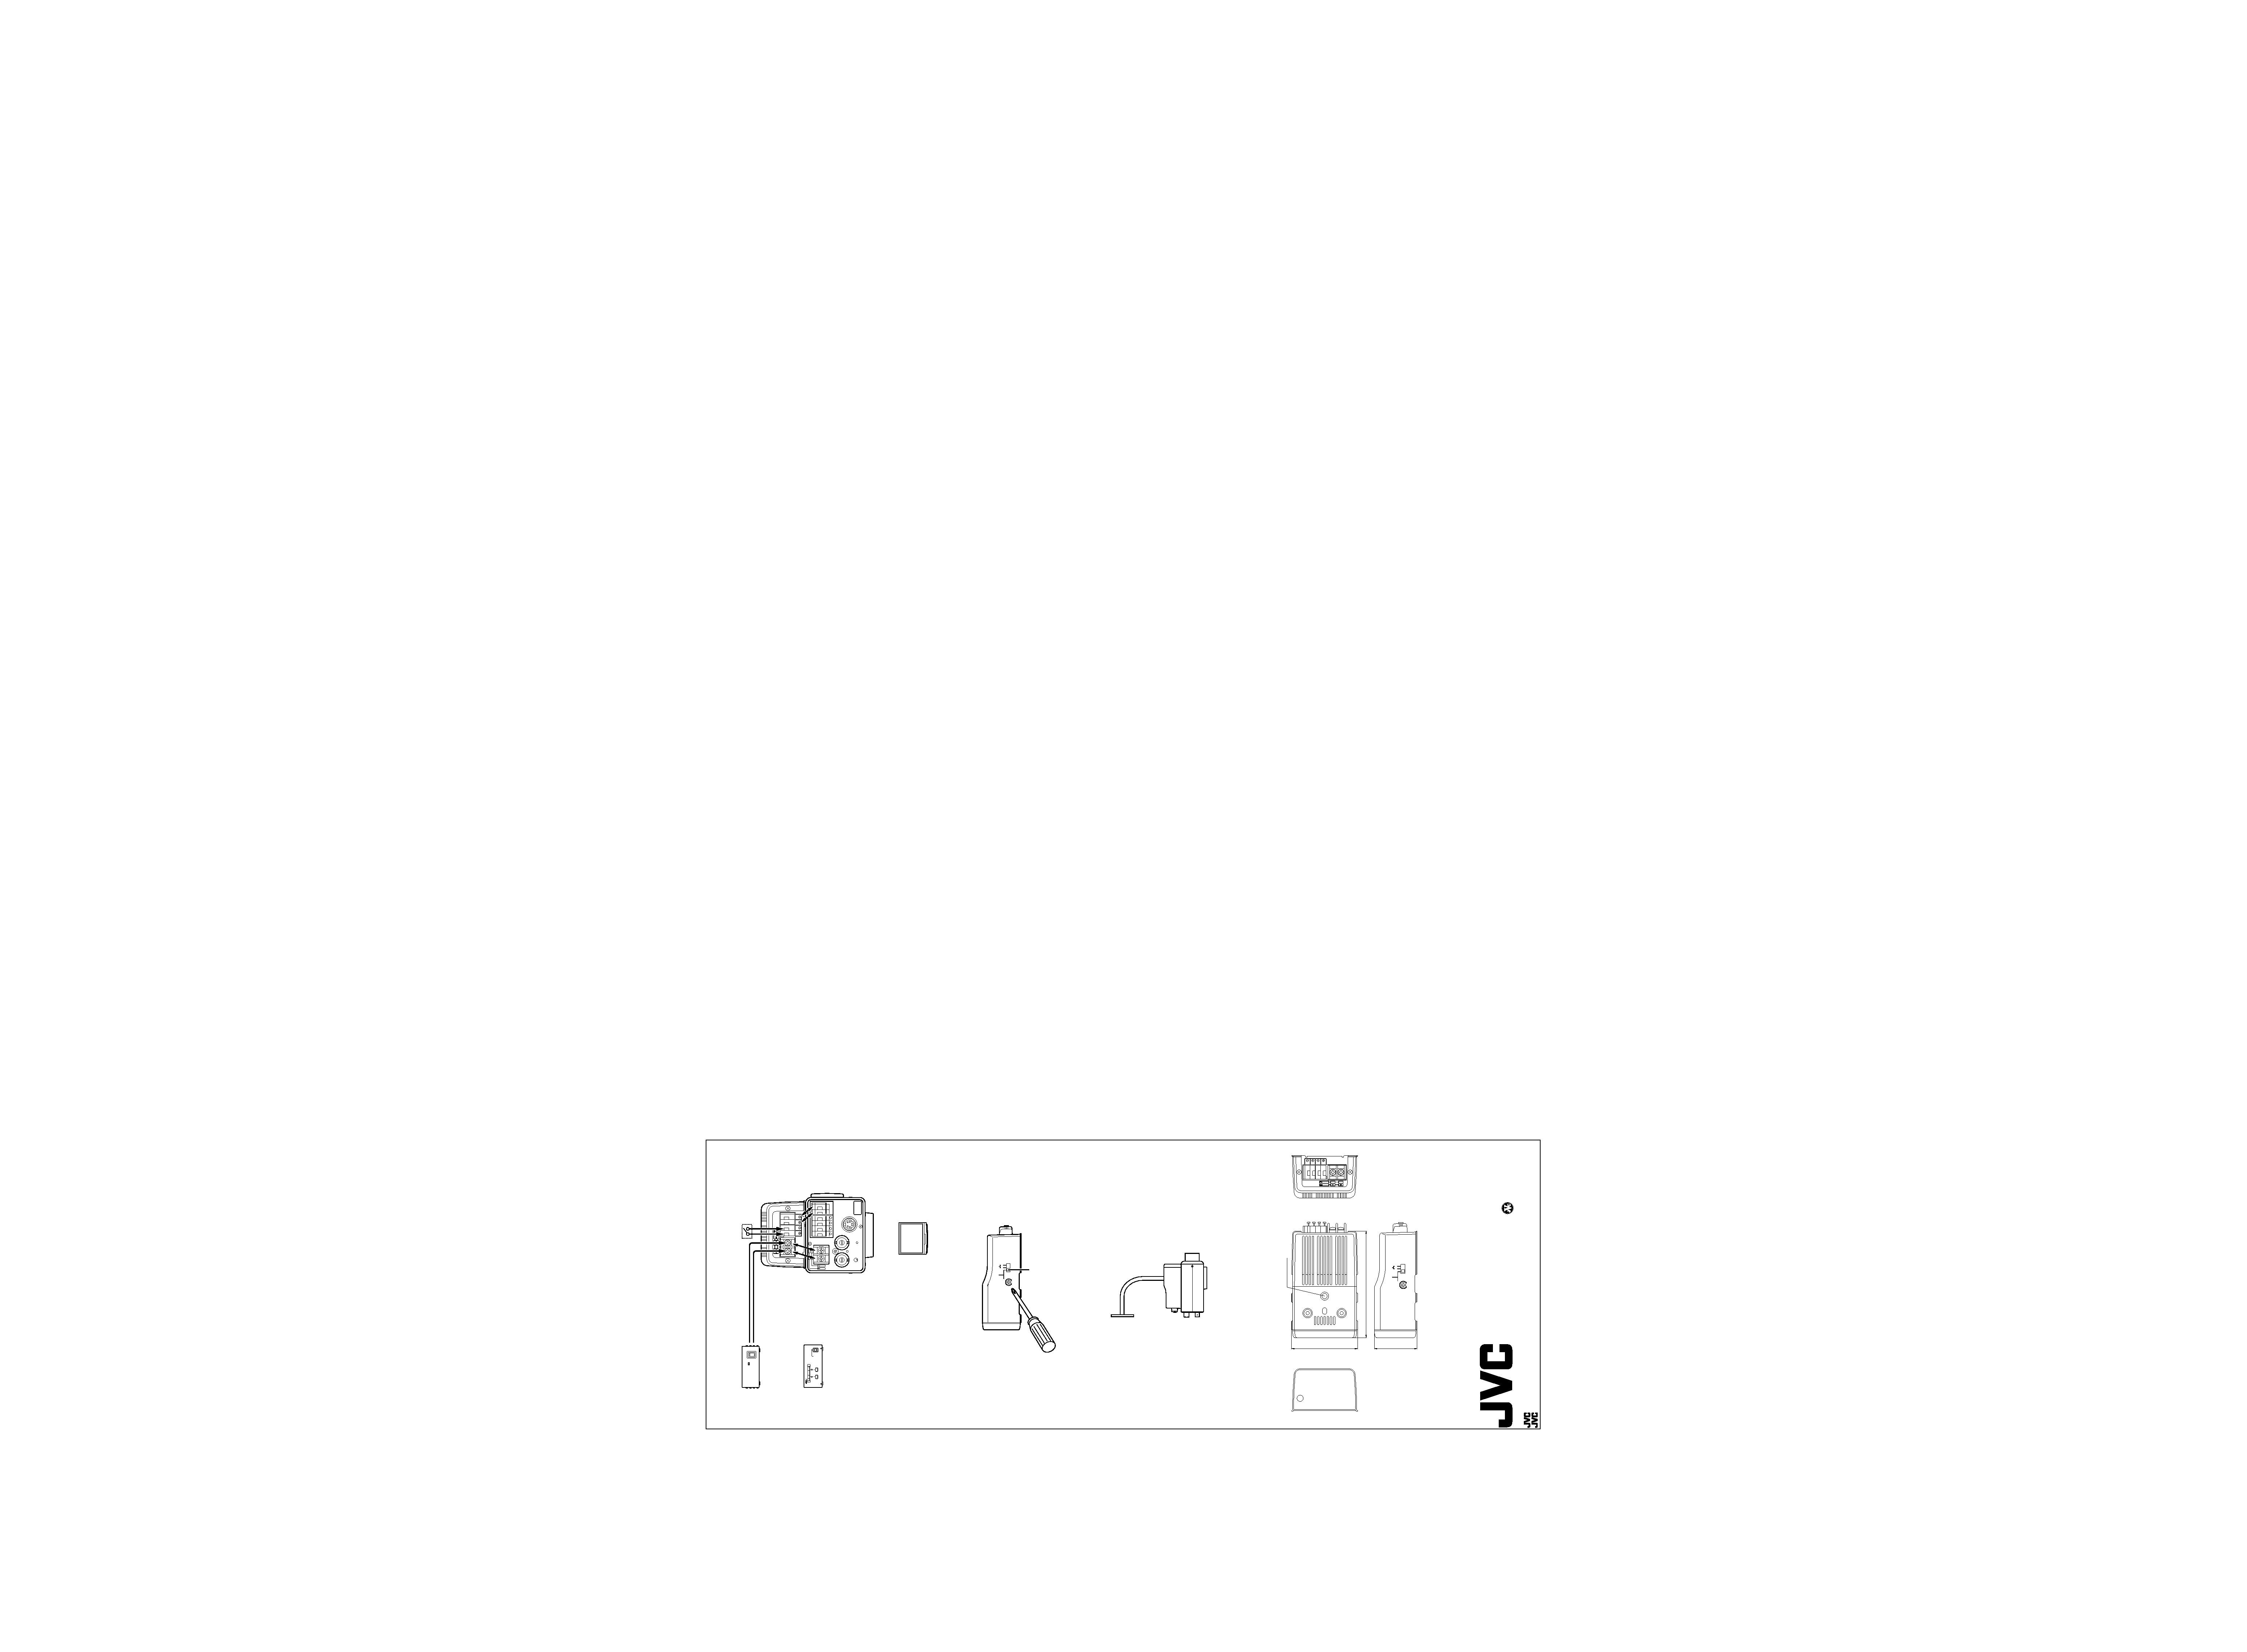
Connection
Connect the camera and video monitor, etc. as shown in the connection diagram.
Connect the EXT terminals as required.
For a description of the terminals on the camera, refer to the relevant instruction manual provided
with the camera.
Cautions
· When plugging into a 12 V DC power supply, make sure that the "+" and "-" connections are
correctly plugged.
·Never switch on (plug in) the 12 V DC power supply and the 24 V AC power supply at the same time.
Camera Setup
No special camera setup is required when an applicable camera is used for the first time.
Refer to the instruction manual of your camera.
1. Turn on the AA-P700 or TK-A241 and the video monitor.
· Make sure that the video monitor shows an image from the camera.
2. Press the MENU button.
· The main MENU screen is displayed.
3. Press 9 or 8 to select the "ALC SETTINGS.." and then press the "SET" button.
· The "ALC SETTINGS" screen is displayed.
4. Press 9 or 8 to select the "B&W/COLOR MODE" and then press the "SET" button.
· "B&W/COLOR MODE" is displayed.
5. Press 9 or 8 to select the "B&W".
6. Press ; or : to select "AUX" and set.
7. When the settings are completed, press the MENU button thrice.
· The normal screen will reappear.
A
B
C
A
ILLUMINATEUR INFRAROUGE
MODE D'EMPLOI FRANÇAIS
Merci d'avoir choisi l'illuminateur infrarouge JVC.
Pour obtenir les meilleurs résultats de ce nouvel illuminateur infrarouge, lire attentivement ces
instructions avant l'utilisation. Les conserver pour toute référence ultérieure.
AVERTISSEMENT :
POUR ÉVITER TOUT RISQUE DE CHOC ÉLECTRIQUE, NE PAS EXPOSER CET APPAREIL À
LA PLUIE NI À L'HUMIDITÉ.
Précautions avant l'utilisation
· Cet appareil ne peut pas être utilisé en combinaison avec une caméra autre que celle spécifiée.
· Ne pas installer cet appareil à un emplacement exposé à la pluie ou à l'humidité.
Remarques sur l'emploi
· Caméras applicables: TK-C1460, TK-C1460B
· Bien suivre les précautions indiquées dans le mode d'emploi fourni avec la caméra concernée.
· Il peut arriver que la butée du câble du bloc de connexion se déconnecte. Bien prendre le temps
de vérifier si le câble est raccordé correctement, et corriger le cas échéant.
· Essuyer l'appareil avec un chiffon doux.
N'utiliser ni diluant ni benzol: cela risque d'en ternir la finition.
Si un nettoyage profond est nécessaire, essuyer avec un chiffon imbibé d'un produit détergent
neutre dilué dans l'eau, puis l'essuyer avec un chiffon sec.
· Dans un endroit exposé aux rayons X et au gaz produit par la décomposition des déchets.
· Pour économiser l'énergie, bien éteindre le système lorsqu'on ne s'en sert pas.
Caractéristiques
· Avec son capteur d'illumination intégré, le KA-R60 permet l'illumination par lampe IR à faibles
niveaux de luminosité ambiante.
· Le KA-R60 commute automatiquement les images de couleur à B&W quand l'illumination
commence. Cela permet de filmer à environ 0 lux.
Commandes
1 Illuminateur IR
Emet une lumière IR.
2 Capteur d'illumination
Détecte la valeur de luminosité ambiante.
3 Borne d'alimentation d'entrée 12 V CC, 24 V CA
Entre un courant 12 V CC ou 24 V CA.
4 Bornes d'entrée de commande extérieure EXT e/EXT d
Entrent le signal de contrôle extérieur.
5 Bornes de sortie du signal de contrôle IR-C e/IR-C d
Fournissent le signal d'état d'illumination ON ou OFF.
6 Commutateur de mode d'illumination AUTO/MANUAL
AUTO
: Règle si l'éclairage IR doit être démarré ou arrêté automatiquement selon la
luminosité environnante.
MANUAL-ON
: L'appareil est toujours illuminé.
MANUAL-OFF : L'appareil n'est pas illuminé.
(Réglage par défaut: AUTO)
7 Potentiomètre de contrôle SENS
Ajuste le niveau de détection du capteur d'illumination.
(Réglage par défaut: Env. 2 lux)
8 Trou de connexion de caméra
Pour connecter le KA-R60 à une caméra
Fixer la "vis d'assemblage" fournie à la caméra, puis l'insérer dans le trou.
9 Trous pour montage sur caméra
Pour monter le KA-R60 sur une caméra
Fixer les deux "vis de montage sur caméra" (diamètre 2,6 mm, longueur 18 mm) fournies pour
monter le KA-R60 sur une caméra.
0 Trou à vis de montage sur caméra (1/4-20UNC)
Pour monter le KA-R60 sur un accessoire de fixation ou une platine.
Installation du KA-R60 sur une caméra
1. Fixer la "vis d'assemblage" fournie sur le dessus de la caméra.
2. Raccorder la "vis d'assemblage" décrite ci-dessus (procédure 1) au trou de connexion de
caméra.
3. Glisser le KA-R60 dans le sens de la flèche.
4. Pour pincer ensemble l'illuminateur et la caméra, fixer les deux vis de montage sur caméra
fournies (diamètre 2,6 mm, longueur 18 mm) sur le dessus du KA-R60.
Connexion
Connecter la caméra et le moniteur vidéo etc. comme indiqué sur le diagramme de connexion.
Raccorder les bornes EXT comme requis.
Pour la description des bornes de la caméra, voir le mode d'emploi fourni avec la caméra.
Précautions
· En débranchant l'alimentation 12 V CC, vérifier que les connexions "+" et "-" sont faites
correctement.
· Ne jamais mettre l'alimentation 12 V CC sous tension (la brancher) et l'alimentation 24 V CA en
même temps.
Réglage de la caméra
Aucun réglage spécial de la caméra n'est requis quand une caméra applicable est utilisée pour la
première fois.
Consulter le mode d'emploi de la caméra.
1. Mettre sous tension le AA-P700 ou TK-A241 et le moniteur vidéo.
· Vérifier que le moniteur vidéo montre une image de la caméra.
2. Appuyer sur le bouton MENU.
· L'écran principal MENU s'affiche.
3. Appuyer sur 9 ou 8 pour sélectionner "ALC SETTINGS..", puis sur le bouton "SET".
· L'écran "ALC SETTINGS" s'affiche.
4. Appuyer sur 9 ou 8 pour sélectionner "B&W/COLOR MODE", puis sur le bouton "SET".
· L'écran "B&W/COLOR MODE" s'affiche.
5. Appuyer sur 9 ou 8 pour sélectionner "B&W".
6. Appuyer sur ; ou : pour sélectionner "AUX" et régler.
7. Les réglages terminés, appuyer trois fois sur le bouton MENU.
· L'écran normal réapparaît.
A
B
C
B
SENS
AUTO MANUAL
OFF ON
LH
12
AC 24V
DC 12V
EXT EXT IR-C IR-C
CLASS 2 ONLY For USA
ISOLATED POWER ONLY
For EUROPE
9
8
7
6
Front view
Vorderansicht
Vue avant
Rear view
Rückansicht
Vue arrière
Side view
Seitenansicht
Vue latérale
Top view
Draufsicht
Vue du dessus
Bottom view
Unteransicht
Vue du dessous
4.
2.
1.
3.
KA-R60
Camera mount screw
Kamerabefestigungsschraube
Vis de montage sur caméra
Assembly screw
Montageschraube
Vis d'assemblage
A
B
C
Setup for the KA-R60
1. AUTO/MANUAL illumination mode switch selection
Set the AUTO/MANUAL illumination mode switch to the desired mode.
AUTO
: This unit starts and stops the IR light automatically according to the
surrounding brightness.
MANUAL ON
: The unit is always illuminated.
MANUAL OFF : The unit is not illuminated.
Note
When an external control signal is input to the EXT terminal of the KA-R60, the IR light will be
illuminated regardless of the setting of the illumination mode selection.
2. SENS control
Adjusts the detection level of the surrounding brightness at the point that the illumination mode
switches ON or OFF automatically.
· The potentiometer has been set to start illuminating the IR light at about 2 lx.
Adjust the SENS control by turning the potentiometer counterclockwise to illuminate the IR
light at a lower surrounding brightness or clockwise to illuminate it at a higher surrounding
brightness.
· Cover the illumination sensor with a black cloth, etc. and make sure that the images are
switched from color to B&W when the unit begins to illuminate.
<Example of SENSE control adjustment>
While looking at an image, adjust the ND filter at the front of the camera lens. ND filters may be
adjusted as required until the monitor screen brightness attains the requisite level and the KA-
R60 starts to illuminate.
Place all of the ND filters that are set in front of the lens at the front of the illumination sensor
and then adjust the sensor control of the KA-R60 to illuminate the IR light with reference to this
condition.
Installation on a ceiling or wall
· When installing this unit on a wall or ceiling, attach the fixing bracket to the "camera mount
screw hole" on the top of the unit.
· For the attachment method of the fixing bracket and the camera drop-prevention wire, please
refer to the relevant instruction manual for the camera.
In case of problems...
1. The unit does not start to illuminate even though the AUTO/MANUAL illumination mode switch
is set to MANUAL ON.
A Check if the power supply to the KA-R60 is connected properly.
2. The unit is not illuminated if the AUTO/MANUAL illumination mode switch is set to AUTO.
A Adjust the SENS control potentiometer.
3. The unit is illuminated but the camera images are not switched to B&W.
A · Check the connection between the IR-C terminal of the unit and the Aux control input of
the camera.
· Open the "B&W COLOR MODE" menu on the camera and check that the setting for
B&W is set to "AUX".
· Set the AUTO/MANUAL illumination mode switch either to MANUAL ON or MANUAL OFF,
and confirm that the camera images are switched between B&W and Color accordingly.
CAUTION
When the camera is installed near a nightlight, the light may enter the illumination sensor of the
unit causing it to sense brightness and thus prevent normal illumination. In this case, change the
position of the camera or the shooting object relative to the position of the nightlight.
Specifications
Applicable camera
: TK-C1460, TK-C1460B
Peak wavelength
: 880 nm
Illumination range
: Approx. 10 meters long.
Area: Width 6 meters, height 4 meters.
External control input
: Grounded input
IR-CTL output
: Illumination ON (Grounded output)
Illumination OFF (High impedance)
Ambient temperature
: -10°C to 50°C (Specified)
0°C to 40°C (Recommended)
Power supply
: 24 V AC or 12 V DC, 50 Hz/60 Hz
Current consumption
: 150 mA (Illumination ON)
Weight
: Approx. 200
Accessories
: Assembly screw
x 1
Camera mount screws
x 2
Instructions
x 1
Dimensions (Unit: mm)
(Design and specifications are subject to change without notice.)
LWT0099
©2002 VICTOR COMPANY OF JAPAN, LIMITED
® is a Registered Trademark owned by VICTOR COMPANY OF JAPAN, LTD.
® is a Registrated Trademark in Japan,the U.S.A., the U.K. and many other countries.
®
D
F
E
[: mm]
VICTOR COMPANY OF JAPAN, LIMITED
SENS
AUTO MANUAL
OFF ON
LH
1.
2.
SENS
AUTO MANUAL
OFF ON
LH
12
AC
24V
DC
12V
EXT
EXT
IR-C
IR-C
CLASS
2
ONL
Y
For
USA
ISOLA
TED
PO
WER
ONL
Y
For
EUR
OPE
1/4-20 UNC
62
40
100
D
E
F
C
12
AC 24V
DC 12V
EXT EXT IR-C IR-C
CLASS 2 ONLY For USA
ISOLATED POWER ONLY
For EUROPE
I
O
POWER
OFF
IN
OFF
OUTPUT3
OUTPUT2
IN
OUTPUT1
TK-A241 POWER SUPPLY UNIT
POWER
AC ADAPTOR AA-P70
(12 V DC)
24 V AC or 12 V DC
24 V AC oder 12 V DC
24 V CA ou 12 V CC
(24 V AC)
AA-P700
TK-A241
TK-C1460
EXT.
ON/OFF SW
Monitor (optional)
Monitor (optionales)
Moniteur (option)
VIDEO
INPUT
Or
Oder
Ou
DC12V
A
C24V
Y/C OUT
SYNC IN
POWER
VIDEO OUT
SEE INST-
RUCTION
MANUAL
+
-
12
CLASS
2
ONL
Y(U
TYPE)
ISOLA
TED
PO
WER
ONL
Y
(E
TYPE)
TX
+ TX- RX+ RX- AUX GND
A
B
CD
Einstellungen an KA-R60
1. AUTO/MANUAL Wahl des Aktivierungsmodus
Stellen Sie den AUTO/MANUAL-Schalter auf die gewünschte Position.
AUTO
: Die Lampe wird automatisch, in Abhängigkeit von der Umgebungshelligkeit,
ein- und ausgeschaltet.
MANUAL ON
: Die Lampe ist stets eingeschaltet.
MANUAL OFF : Die Lampe ist ausgeschaltet.
Hinweis
Liegt am EXT-Eingang von KA-R60 ein externes Steuersignal an, erfolgt die Ein- und
Ausschaltung der Infrarotlampe unabhängig von der Einstellung des Aktivierungsmodus-
Schalters.
2. SENS-Potentiometer
Dient zur Einstellung des Helligkeitsansprechpegels (Umgebungshelligkeit), bei dem die Lampe
aktiviert/deaktiviert wird.
·Ab Werk ist der Ansprechpegel auf ca. 2 Lux eingestellt.
Den Potentiometer gegen den Uhrzeigersinn/im Uhrzeigersinn drehen, wenn die Infrarotlampe
bei geringerer Umgebungshelligkeit/bei höherer Umgebungshelligkeit aktiviert werden soll.
·l Den Lichtsensor mit einem schwarzen Tuch etc. abdecken und überprüfen, ob das Bildsignal
bei Erreichen des Ansprechpegels (bei dem die Lampe aktiviert wird) vom Farb- auf den
Schwarzweißmodus wechselt.
<Einstellungsbeispiel für SENSE-Potentiometer>
Das Kamerasignal überwachen und dann das ND-Filter am Kameraobjektiv anbringen. ND-
Filter beeinflussen den Helligkeitspegel für das auf dem Monitorbildschirm angezeigte
Kamerasignal. Dies muss bei der Einstellung des Ansprechpegels von KA-R60 berücksichtigt
werden.
Die für das Kameraobjektiv vorgesehenen ND-Filter vor den Lichtsensor halten und dann den
Ansprechpegel von KA-R60 einstellen, so dass dieser auf den für das Kameraobjektiv geltenden
Helligkeitspegel abgestimmt ist.
Anbringen an einer Wand oder Decke
· Wenn diese Einheit an einer Wand oder Decke befestigt werden soll, muss die Kamerahalterung
am Gewinde für Kamerabefestigungsschraube, das sich an der Oberseite der Einheit befindet,
angebracht werden.
·Angaben zum Anbringen der Halterung oder des Sicherungsdrahtes finden Sie in der zur Kamera
gehörigen Bedienungsanleitung.
Bei Betriebsstörungen...
1. Die Lampe arbeitet nicht, obwohl der AUTO/MANUAL-Schalter auf MANUAL ON gestellt ist:
A Überprüfen, ob die Stromquelle einwandfrei an KA-R60 angeschlossen ist.
2. Die Lampe arbeitet nicht, obwohl der AUTO/MANUAL-Schalter auf AUTO gestellt ist.
A Mit dem SENS-Potentiometer den Ansprechpegel variieren.
3. Die Lampe ist aktiviert, die Kamerabilder werden jedoch nicht als Schwarzweißsignal abgegeben.
A · Die Anschlussverbindung zwischen IR-C an dieser Einheit und dem AUX-Steuereingang
der Kamera überprüfen.
· Das Kameramenü "B&W COLOR MODE" öffnen und überprüfen, ob für B&W der
Einstellstatus "AUX" gilt.
· Den AUTO/MANUAL-Schalter entweder auf MANUAL ON oder MANUAL OFF stellen und
überprüfen, ob das Kamerasignal entsprechend zwischen dem Farb- und
Schwarzweißmodus wechselt.
VORSICHT
Wenn die Kamera so installiert wird, dass das von einer Nachtbeleuchtung ausgehende Licht auf
den Lichtsensor der Einheit einwirken kann, wird die normale Funktion der Lampe ggf. be- oder
verhindert. In diesem Fall die Position der Nachtbeleuchtung, der Kamera oder des zu
überwachenden Objekts ändern.
Technische Daten
Geeignete Kamera
: TK-C1460, TK-C1460B
Spitzenwellenlänge
: 880 nm
Ausleuchtungsbereich
: Ca. 10 Meter weit.
Fläche: Breite 6 Meter, Höhe 4 Meter.
Externes Steuersignal
: Eingang an Masse
IR CTL-Ausgang
: Lampe ein (ON) (Ausgang an Masse),
Lampe aus (OFF) (hohe Impedanz)
Umgebungstemperatur
: -10°C to 50°C (ausgewiesen),
0°C to 40°C (empfohlen)
Stromversorgung
: 24 V Wechselstrom oder 12 V Gleichstrom, 50 Hz/60 Hz
Leistungsaufnahme
: 150 mA (Lampe ein (ON))
Gewicht
: Ca. 200
Zubehör
: Kameramontageschraube
x 1
Kamerabefestigungsschraube x 2
Anleitung
x 1
ABMESSUNGEN (Einheit: mm)
(Änderungen von Entwurf und technischen Daten bleiben jederzeit vorbehalten.)
D
E
F
Réglage pour le KA-R60
1. Réglage du sélecteur de mode d'illumination AUTO/MANUAL
Régler le sélecteur de mode d'illumination AUTO/MANUAL selon le mode souhaité.
AUTO
: L'appareil émet et arrête automatiquement la lumière IR selon la luminosité
ambiante.
MANUAL ON
: L'appareil est toujours illuminé.
MANUAL OFF : L'appareil n'est pas illuminé.
Remarque
Quand un signal de contrôle extérieur est entré à la borne EXT du KA-R60, la lumière IR est
émise indépendamment du réglage de sélection du mode d'illumination.
2. Commande SENS
Ajuste le niveau de détection de la luminosité ambiante au point où le mode d'illumination
commute automatiquement à ON ou OFF.
· Le potentiomètre est réglé pour démarrer l'émission de la lumière IR à environ 2 lux.
Ajuster la commande SENS en tournant le potentiomètre dans le sens contraire des aiguilles
d'une montre pour émettre la lumière IR à luminosité ambiante faible, ou dans le sens des
aiguilles d'une montre pour l'émettre à une luminosité ambiante plus élevée.
· Couvrir le capteur d'illumination avec un tissu noir etc. et vérifier que les images sont commutés
de la couleur à B&W quand l'appareil commence à illuminer.
<Exemple d'ajustement de la commande SENS>
En regardant une image, ajuster le filtre ND à l'avant de l'objectif de la caméra. Des filtres ND
peuvent être ajustés comme requis jusqu'à ce que la luminosité de l'écran du moniteur atteigne
le niveau requis et que le KA-R60 commence à illuminer.
Placer tous les filtres ND montés à l'avant de l'objectif sur l'avant du capteur d'illumination,
puis ajuster la commande de capteur du KA-R60 pour émettre une lumière IR en référence à
cette situation.
Installation sur un plafond ou un mur
· A l'installation de cet appareil sur un mur ou un plafond, fixer l'étrier de fixation au "trou à vis de
montage sur caméra" sur le dessus de l'appareil.
· Pour la méthode de fixation de l'étrier de fixation et du fil antichute de la caméra, consulter le
mode d'emploi de la caméra concernée.
En cas de problème ...
1. L'appareil ne commence pas à illuminer bien que le commutateur d'illumination AUTO/MANUAL
soit réglé à MANUAL ON.
A Vérifier si l'alimentation du KA-R60 est connectée correctement.
2. L'appareil n'est pas illuminé si le commutateur d'illumination AUTO/MANUAL est réglé à AUTO.
A Ajuster le potentiomètre de la commande SENS.
3. L'appareil est illuminé quand la caméra n'est pas commutée à B&W.
A · Vérifier la connexion entre la borne IR-C de l'appareil et l'entrée de contrôle AUX de la
caméra.
· Ouvrir le menu "B&W/COLOR MODE" sur la caméra et vérifier que le réglage pour B&W
est "AUX".
· Régler le commutateur de mode d'illumination AUTO/MANUAL à MANUAL ON ou MANUAL
OFF, et confirmer que les images de la caméra sont commutées entre B&W et Color en
conséquence.
ATTENTION
Quand la caméra est installée près d'un éclairage de nuit, la lumière peut entrer dans le capteur
d'illumination de l'appareil provoquant une détection de luminosité et empêchant ainsi l'illumination
normale. Dans ce cas, changer la position de la caméra ou de l'objet à prendre par rapport à la
position de l'éclairage de nuit.
Spécifications
Caméra applicable
: TK-C1460, TK-C1460B
Longueur d'onde de crête
: 880 nm
Portée d'illumination
:Env. 10 m de longueur
Surface: largeur 6 mètres, hauteur 4 mètres
Entrée de commande extérieure : Entrée mise à la terre
Sortie IR-CTL
: Illumination ON (sortie mise à la terre)
Illumination OFF (haute impédance)
Température ambiante
: -10 à +50°C (spécifiée)
0 à 40°C (recommandée)
Alimentation
: 24 V CA ou 12 V CC, 50 Hz/60 Hz
Consommation
: 150 mA (Illumination ON)
Poids
:Env. 200
Accessoires
: Vis d'assemblage
x 1
Vis de montage sur caméra
x 2
Mode d'emploi
x 1
Dimensions (Unité: mm)
(Conception et spécifications sujettes à modification sans préavis.)
D
E
F