E-2
Thank you for purchasing this product.
(These instrustions are for KA-DV300U)
Before beginning to operate this unit, please read the instruction manual carefully in order
to make sure that the best possible performance is obtained.
WARNING:
TO REDUCE THE RISK OF FIRE OR
ELECTRIC SHOCK, DO NOT EXPOSE
THIS APPLIANCE TO RAIN OR
MOISTURE.
AVERTISSEMENT:
POUR
EVITER
LES
RISQUES
D'INCENDIE OU D'ELECTRO-CUTION,
NE PAS EXPOSER L'APPAREIL A
L'HUMIDITE OU A LA PLUIE.
Due to design modifications, data given in this
instruction book are subject to possible change
without prior notice.
Safety Precautions
POWER SYSTEM
Connection of POWER supply
The power for the network pack is supplied through
the camera that is connected to the network pack.
This equipment is in conformity with the provisions and protection requirements of the correspond-
ing European Directives. This equipment is designed for professional video appliances and can be
used in the following environments:
· residential area (in houses) or rural area
· commercial and light industry; e.g. offices or theatres
· urban outdoors
In order to keep the best performance and furthermore for electromagnetic compatibility. Use the
PC Card which acquired a CE mark.
Caution
Where there are strong electromagnetic waves or magnetism, for example near a radio or TV
transmitter, transformer, motor, etc., the picture may be disturbed. In such case, please keep the
apparatus away from the sources of the disturbance.
English
Deutsch
Fran
ç
ais
KA-DV300
INSTRUCTIONS
BEDIENUNGSANLEITUNG
MANUEL D'INSTRUCTIONS
NETWORK PACK STARTUP GUIDE
NETZWERKPACK BEDIENUNGSLEITFADEN
BACK DE RESEAU GUIDE DE DEMARRAGE
LWT0026
For Customer Use:
Enter below the Serial No. which is
located on the body. Retain this
information for future reference.
Model No.
KA-DV300
Serial No.
This instruction book is made from
100% recycled paper.
E-3
English
Network Pack
KA-DV300
Adapter for encoding/decoding
video/audio data by connecting
to GY-DV300.
Setting of the KA-DV300 is performed on the menu screen of the GY-DV300 camcorder.
For details on the setting methods, please see the Network Pack User's Guide (pdf) included
on the provided CD-ROM.
CD-ROM\ENU\Network Pack User's Guide (pdf)
When the Streamproducer program included on the provided CD-ROM is installed, the Net-
work Pack User's Guide (pdf) is automatically installed on the PC and added to the Start
menu.
[Start/Programs/KA-DV300U/User's Guide]
The Adobe Acrobat Reader is required to view PDF files.
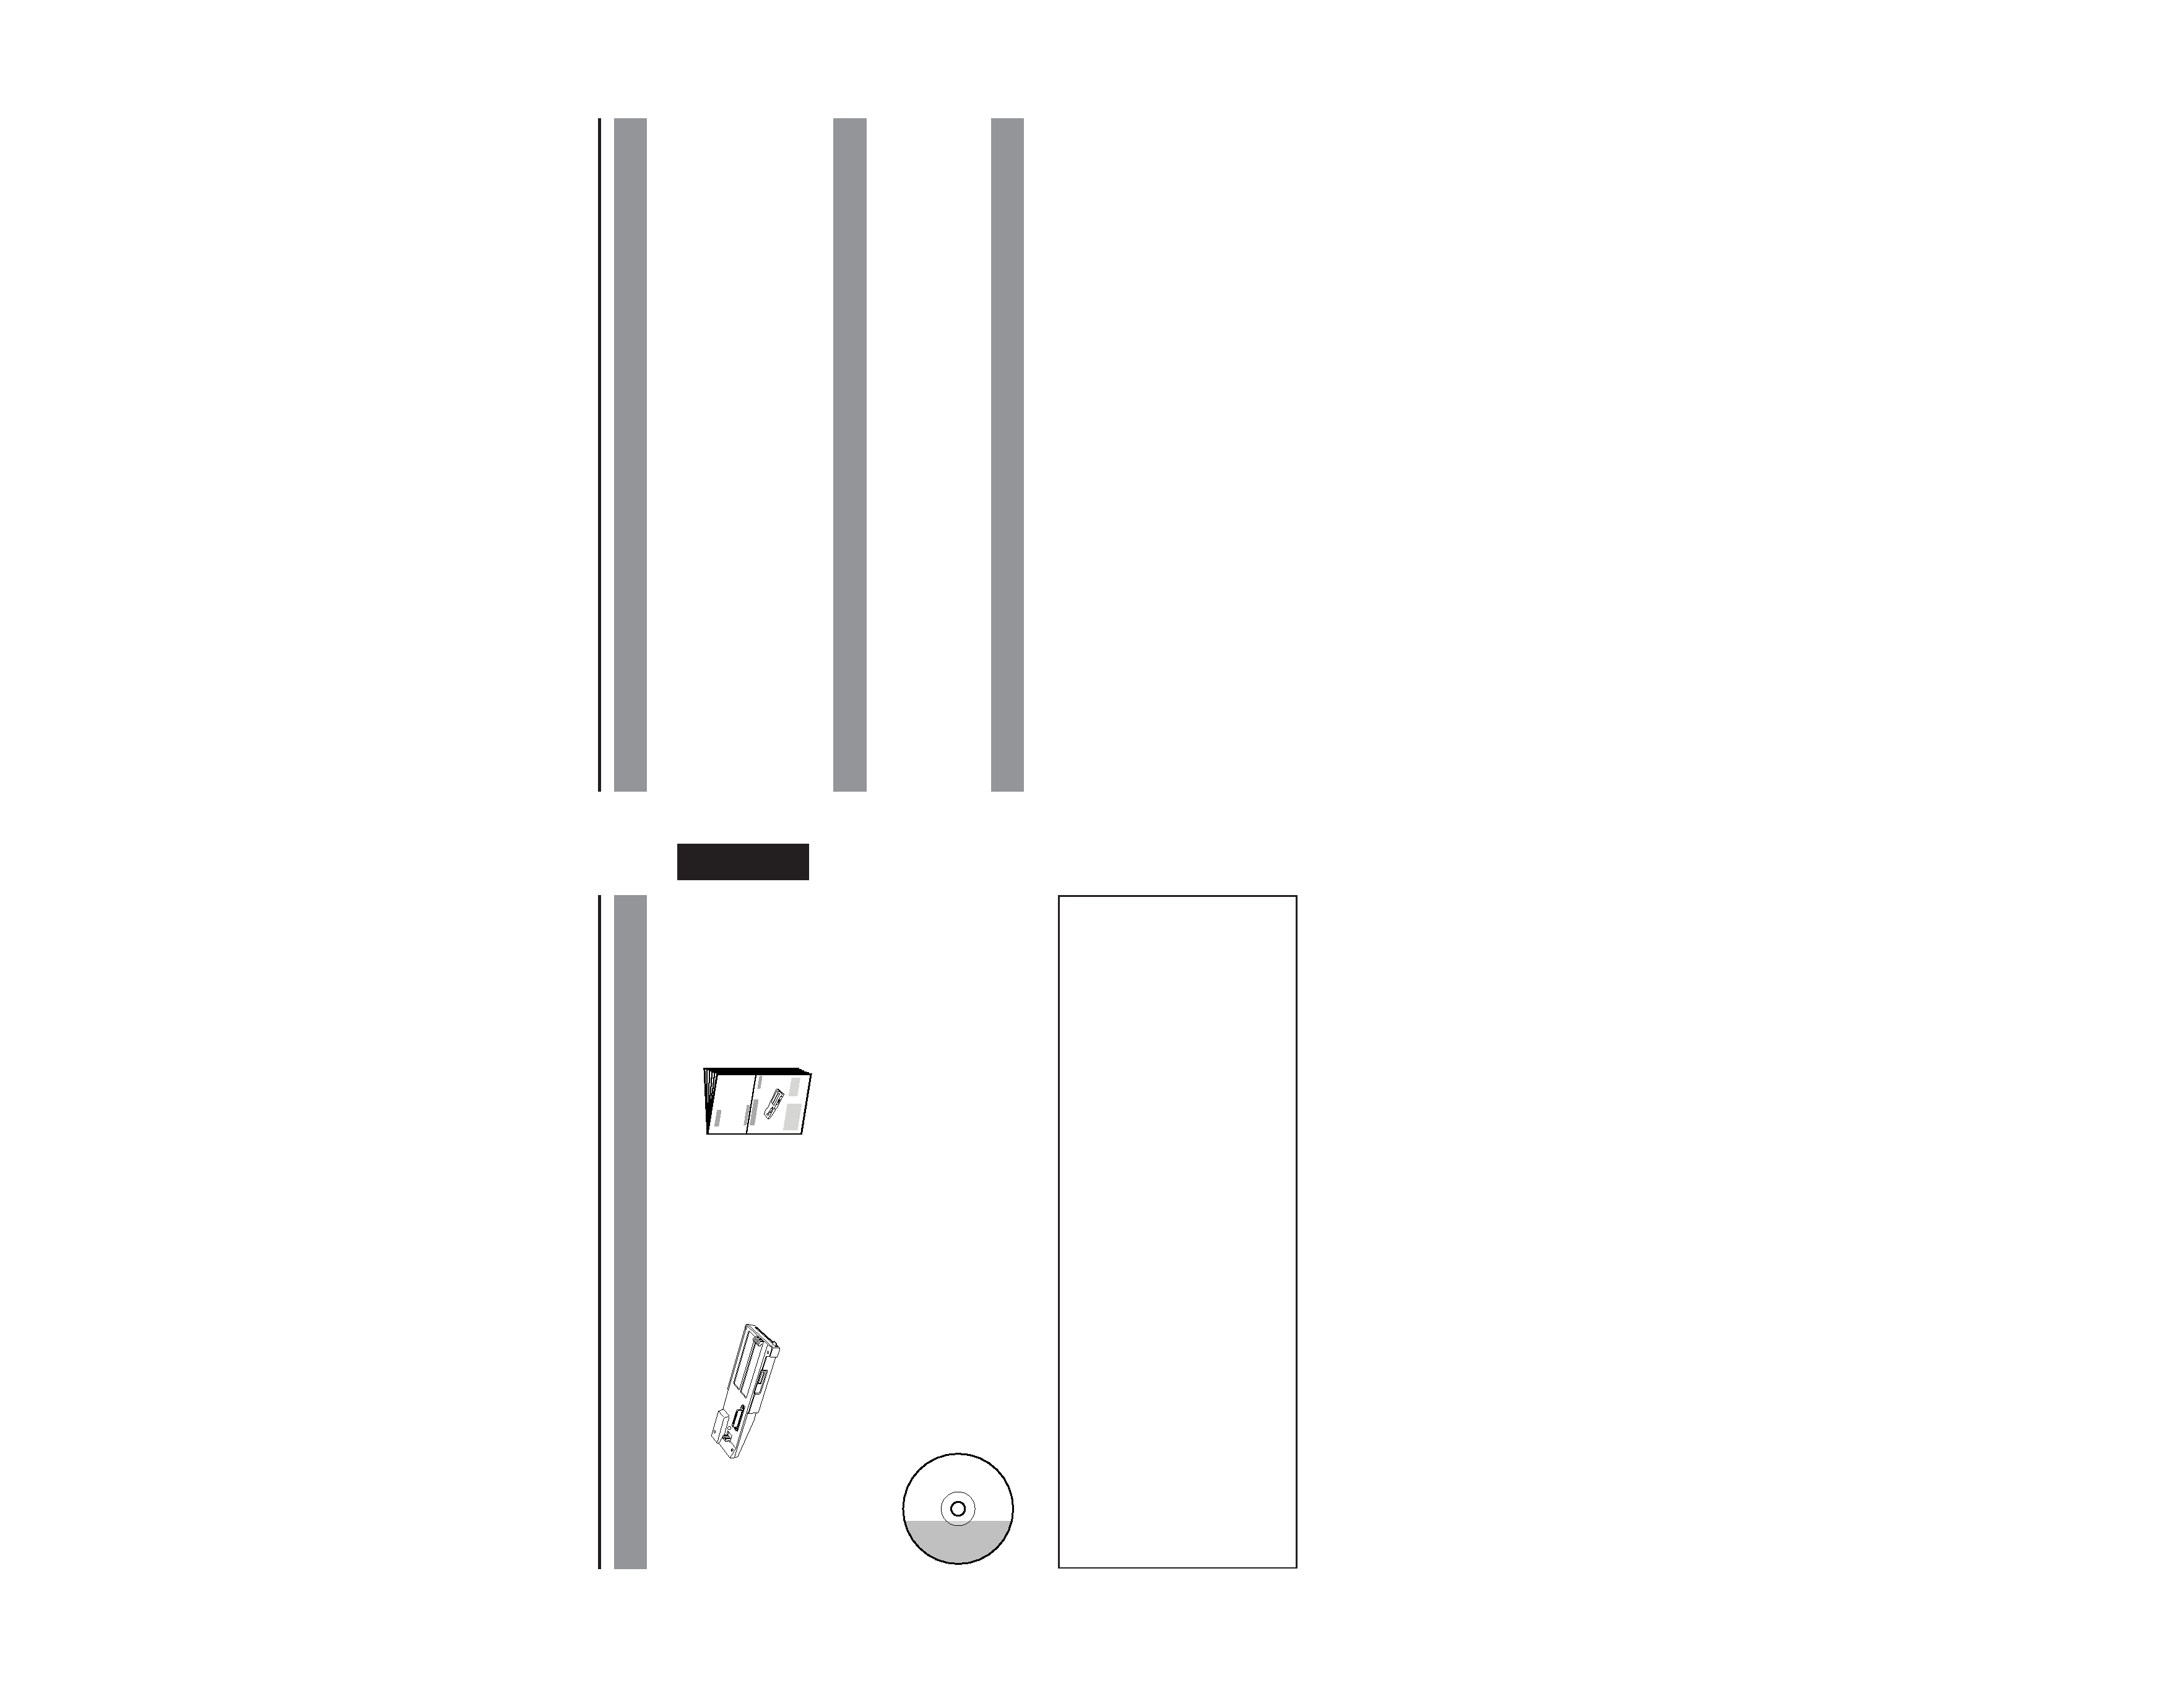
Network Pack Startup Guide
(This document)
This document describes the basic
matters for use of the Network Pack.
The following software and these Instructions are included on the provided
CD-ROM.
· Streamproducer Software
Software used for distributing movies on a network.
· Network Pack User's Guide (pdf)
Reference guide for the Network Pack.
· User's Guide (pdf) to "Streamproducer" the software for network distri-
bution.
Software for live broadcasting and distribution on networks.
CD-ROM
Product Components
E-4
Contents
Features ................................................................................................................................................. 4
Precautions ............................................................................................................................................ 4
What the KA-DV300 can be used for ..................................................................................................... 6
Controls, Connectors and Indicators ...................................................................................................... 8
How to Attach ......................................................................................................................................... 9
Confirming correct attachment ............................................................................................................. 10
Installing Streamproducer .................................................................................................................... 11
Specifications ....................................................................................................................................... 12
Features
By connecting the unit to GY-DV300, video/audio of camera or tape playback can be encoded/
decoded in realtime. Video data is converted to MPEG-4 and audio data is converted to G726.
Installing a LAN-card in the PC card slot enables real-time streaming.
Installing a Compact Flash card in the PC card slot enables real-time capturing.
Network distribution of the video/audio file created by the KA-DV300 is possible when the
"Streamproducer" program included on the provided CD-ROM is installed on the PC.
Precautions
Be sure to turn the camcorder's power supply OFF before the KA-DV300 is attached to the camcorder.
Be sure to turn the camcorder's power supply OFF before inserting or removing CF (Compact
Flash) cards, etc., into and from the camcorder. Inserting or removing cards while the camcorder's
power supply is turned ON can result in corruption of the recorded sections of the card or damage
to the card itself.
The KA-DV300 accepts the following cards for which operation has been confirmed:
Operating voltage
3.3 V
Current consumption
Max. 300 mA
· Wired LAN-card
US:
EA2900-117 (Revision C) (Name of manufacturer: Socket Communications, Inc)*1
Europe: EA2903-162 (Revision C) (Name of manufacturer: Socket Communications, Inc)*1
Asia:
EA2906-194 (Revision C) (Name of manufacturer: Socket Communications, Inc)*1
(The Revision designation is indicated in the upper right of the serial number label affixed to the
package.)
· Wireless LAN-card
TEW-PC16 (firmware version 0.8.3 or later) (Name of manufacturer: TRENDware)
WCF11 (Name of manufacturer: LINKSYS)*2
· CF (Compact Flash) card
SDCFB-16-801 ~ SDCFB-256-801 (Name of manufacturer: SunDisk)*1
*1: Use PCMCIA card TYPE
1 or TYPE 2 adapter
*2: Use PCMCIA card TYPE
2 adapter
Do not use other cards that those for which operation has been confirmed. Improper installation
may cause damage to the KA-DV300.
(For the latest cards for which operation have been confirmed, please consult the person in charge
of professional video equipment at your nearest JVC-authorized service agent.)
* The names of actual companies and products mentioned in this document may be the trademarks or
registered trademarks of their respective owners.
In this document, symbols like TM, ®, ©, etc. have been omitted.

E-6
What the KA-DV300 can be used for
Sending camera video/audio by email using CF (Compact Flash) card
Viewing and filing camera images on your PC using "Streamcapture"
INTERNET
Operation method
See Network Pack User's Guide (pdf) "CF card recording"
1. Using the KA-DV300 for filing
the camera image on a CF card.
2. Sending an image file stored on a
CF card as an e-mail attachment
VIEW
STOP
CAPTURE
MUTE
PROPERTY
CAPTURING
00 : 00 : 00
CAMERA CONTROL
FULL AUTO
BARS
WHITE BAL
IRIS
GAIN
SHUTTER
ZOOM
OK
CANCEL
AUTO
MANUAL
Lolux
ALC
STEP
0dB
STEP
OFF
WIDE
TELPHOTO
STOP
ON
ON
FAW
JVC
NETWORK PACK
KA-DV300
NETWORK
PACK
SETUP
NETWORK
PORT SETUP
ENCODE
PARAMETERS
CAMERA
CONTROL
CONTROL
STREAMING
CAPTURE
VTR
SETUP
0
1. Using the KA-DV300
to transfer the camera
images to a PC
2. Using Streamcapture for
viewing and/or filing the
camera images on a PC
Operation method
· See "LAN card", "Streamcapture" in the Network Pack User's Guide (pdf)
· See the User's Guide to the "Streamproducer" software for network distribution.
Operating environment
· Windows 2000
· Internet Explorer 5.0 or later
E-5
English
Precautions (cont'd)
Streamproducer Operating Environment
Under the following conditions, the Streamproducer can be used in the required operating environment.
· When using 1 camera or 1 file.
· When recording of the camera image is not performed.
· When switched distribution is not performed.
Required operating environment
Hardware
CPU
Pentium III 700 MHz
Memory
128 MB
Display
XGA (1024 X 768)
Hard disk
* 50 MB for installation
* 1 hour viewing time requires empty hard disk space equivalent to 25 MB (high
compression) to 200 MB (low compression).
Network
* 1 LAN system for connecting the network pack
* Internet connection to download codec program for playback of moving pictures
* Other network environment for distribution if distribution is to be performed in other
environment than that described above
Software
OS
Windows 2000 Professional (English)
Others
An environment in which Windows Media Player 7.1 or later is already installed is
necessary for installation of Streamproducer
When using multiple cameras or files, the following operating environment is recommended in order to
make full use of the application's functions.
Recommended Operation Environment
Hardware
CPU
Pentium 4
2.2 GHz or higher
Memory
512 MB or more
Display
SXGA (1280 X 1024) or more
Other operating environment demands are the same as the required operating environment demands.
MEMO
The described required operating environment and recommend operating environment are both
meant as guidelines to ensure optimal use of the application but are not meant as guarantee of
operation. Also, even if you use a computer that complies with the operating environment, optimal
use of the application may not be obtainable due to the configuration of your system.
E-7
English
Connecting a notebook computer for remote control with monitor
VIEW
STOP
CAPTURE
MUTE
PROPERTY
CAPTURING
00 : 00 : 00
CAMERA CONTROL
FULL AUTO
BARS
WHITE BAL
IRIS
GAIN
SHUTTER
ZOOM
OK
CANCEL
AUTO
MANUAL
Lolux
ALC
STEP
0dB
STEP
OFF
WIDE
TELPHOTO
STOP
ON
ON
FAW
JVC
NETWORK PACK
KA-DV300
NETWORK
PACK
SETUP
NETWORK
PORT SETUP
ENCODE
PARAMETERS
CAMERA
CONTROL
CONTROL
STREAMING
CAPTURE
VTR
SETUP
0
e
x
VTR CONTROL Microsoft InternetEx
REC
REW
FF
PLAY
STILL
PAUSE/
STOP
Distributing camera images on an intranet
HUB
Windows Media Server
1. Using the KA-DV300
to transfer the camera
images to a PC
2. Using Streamproducer to
redistribute the camera
images transferred to the PC
Operating environment
· Windows 2000
· Internet Explorer 5.0 or later
3. Using Windows Media Player
to view the distributed camera
images on a PC
Operating environment
· Windows 98 (SE), Me, 2000
Camera settings and VTR control can be performed using a notebook computer.
What the KA-DV300 can be used for (cont'd)
Operation method
See "Streamcodec" in the Network Pack User's Guide.
Operation method
· See the User's Guide to the "Streamproducer" software for network distribution.
· See "Network settings", "LAN card" in the Network Pack User's Guide (pdf)
E-8
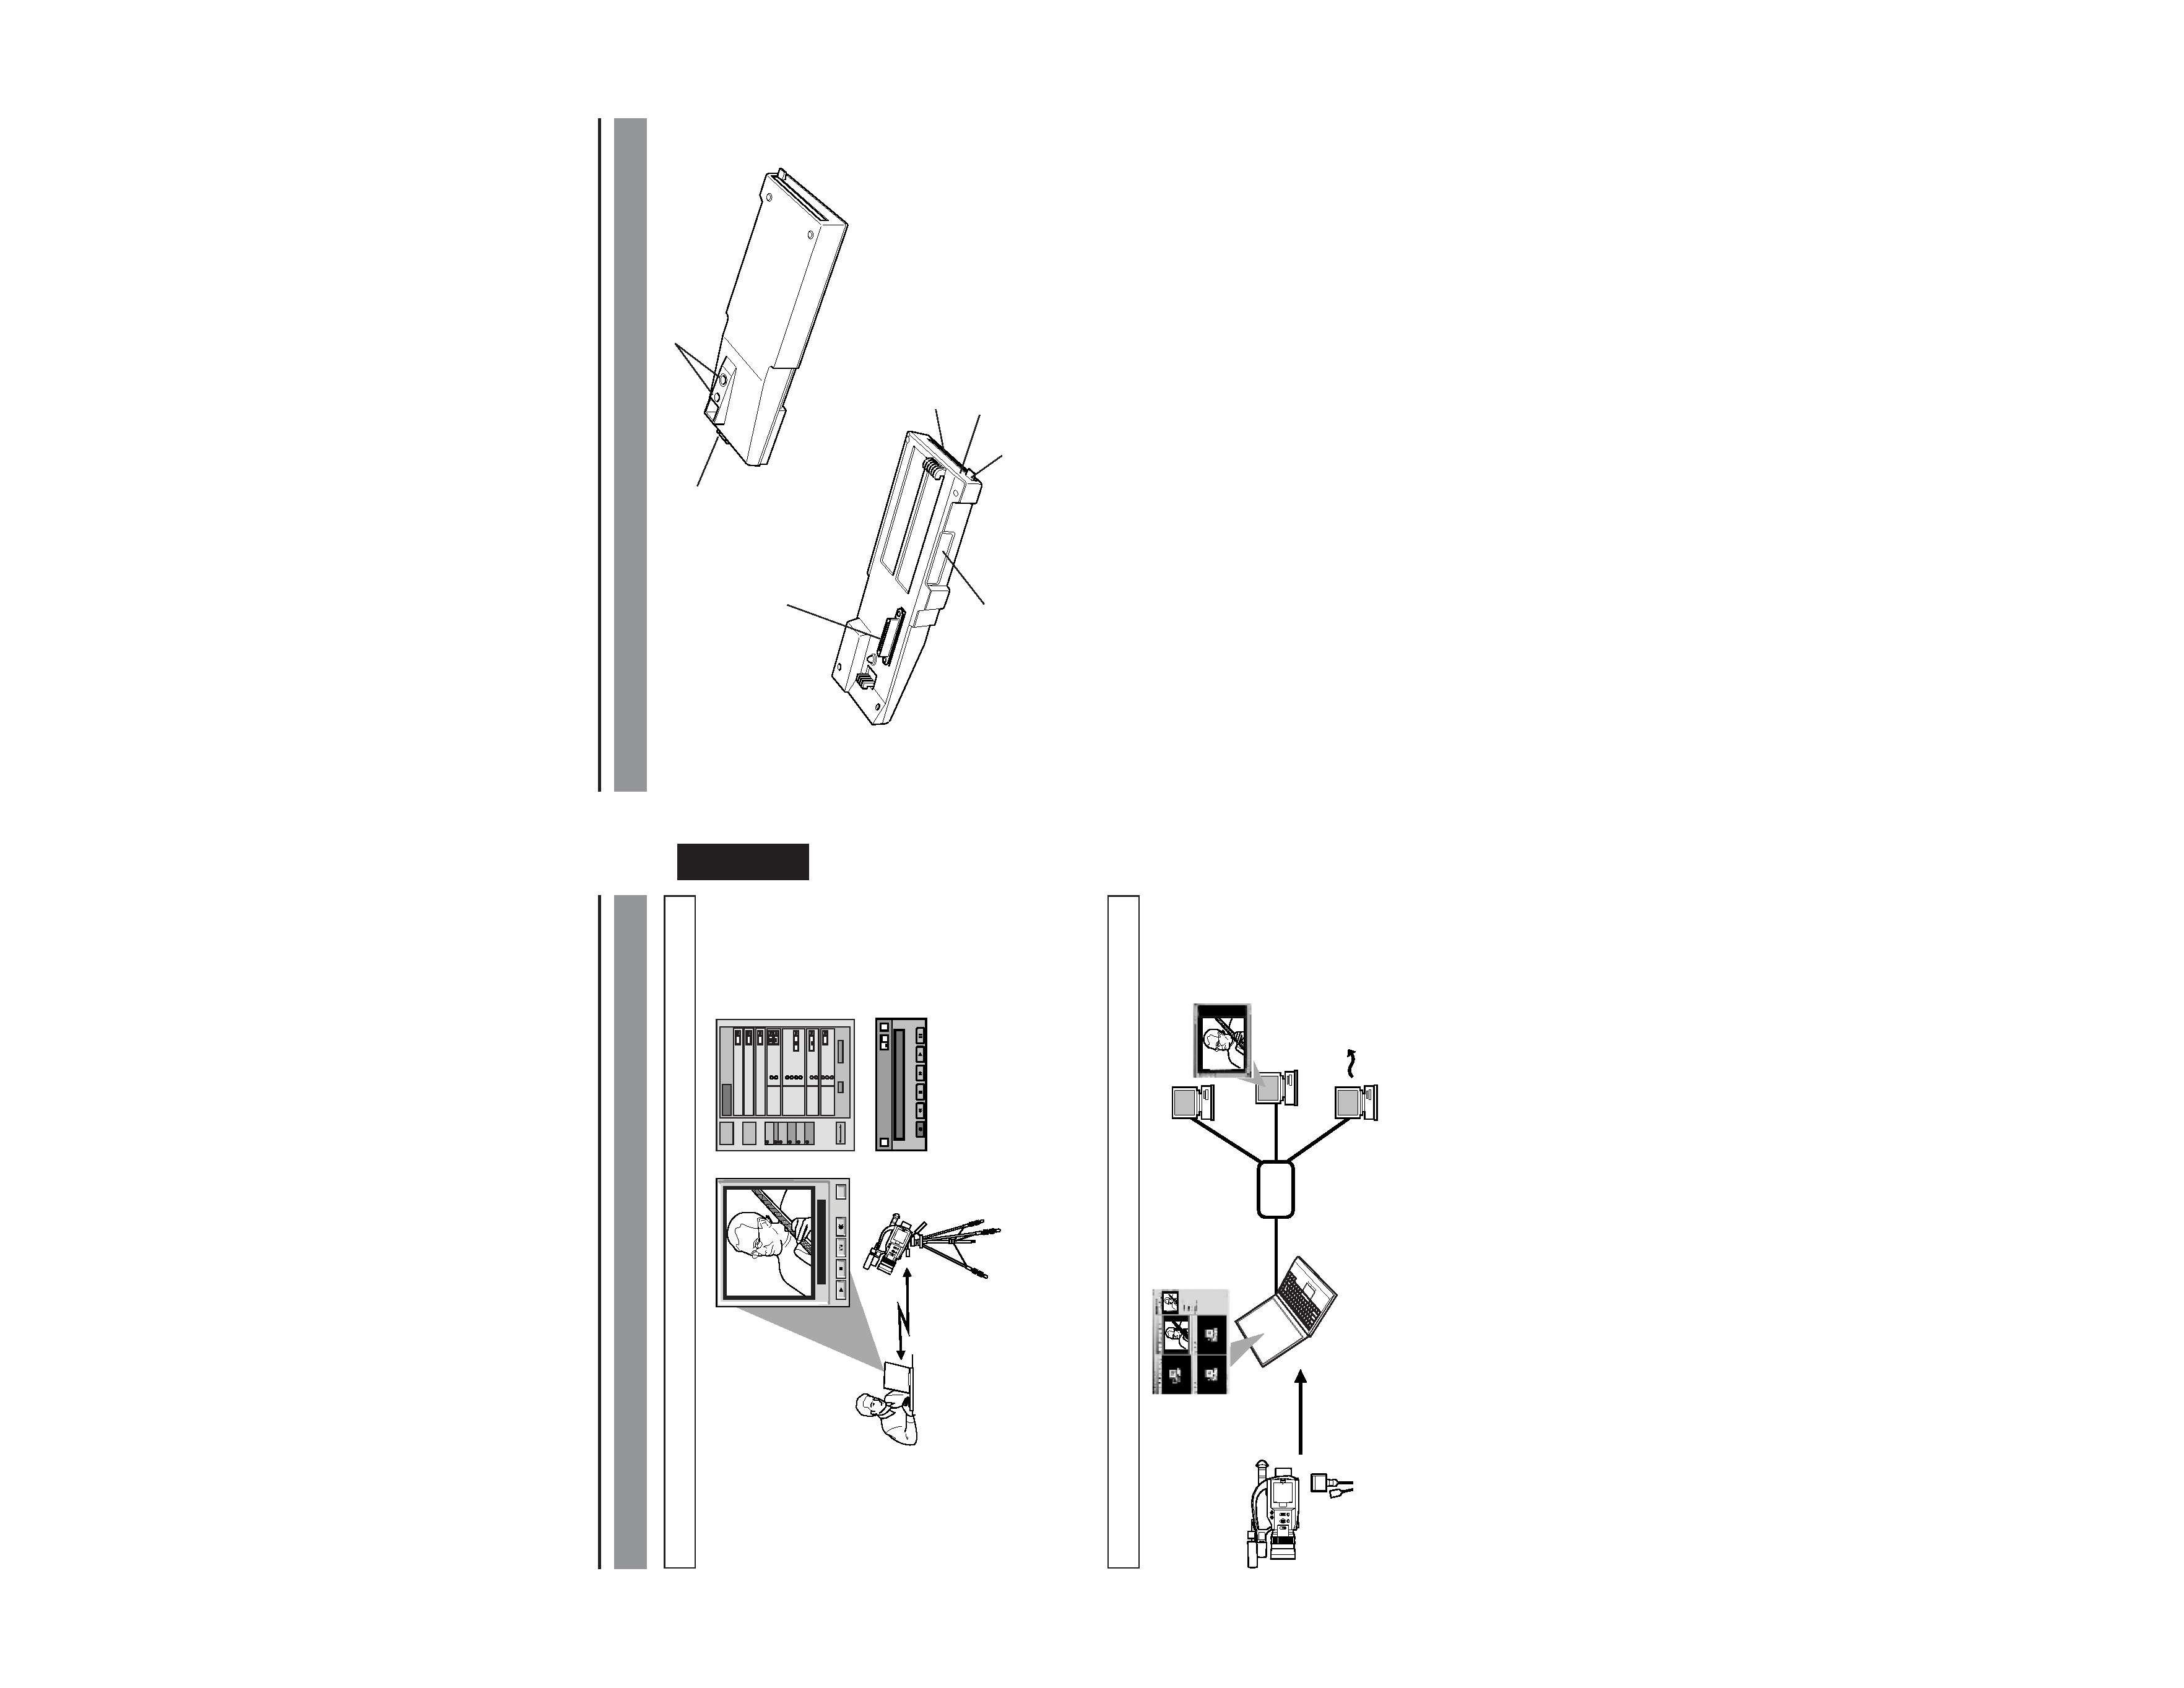
Controls, Connectors and Indicators
1 Camera connection terminal
To connect the DV camcorder (GY-
DV300).
(
See E-9 "How to Attach")
2 PC card slot
To insert a LAN card, Compact Flash
card, etc.
3 Access lamp
This lamp lights when the card is in use.
4 Guard
Guard to prevent the card from being
inadvertently ejected.
5 Service terminal.
Do not use this terminal.
6 Camera mounting screw holes (1/4 inch)
Used to mount the KA-DV300 and the GY-
DV300 on a camera tripod.
7 Release button
Press this button to release the KA-DV300
from the GY-DV300.
1
5
4
3
2
7
6
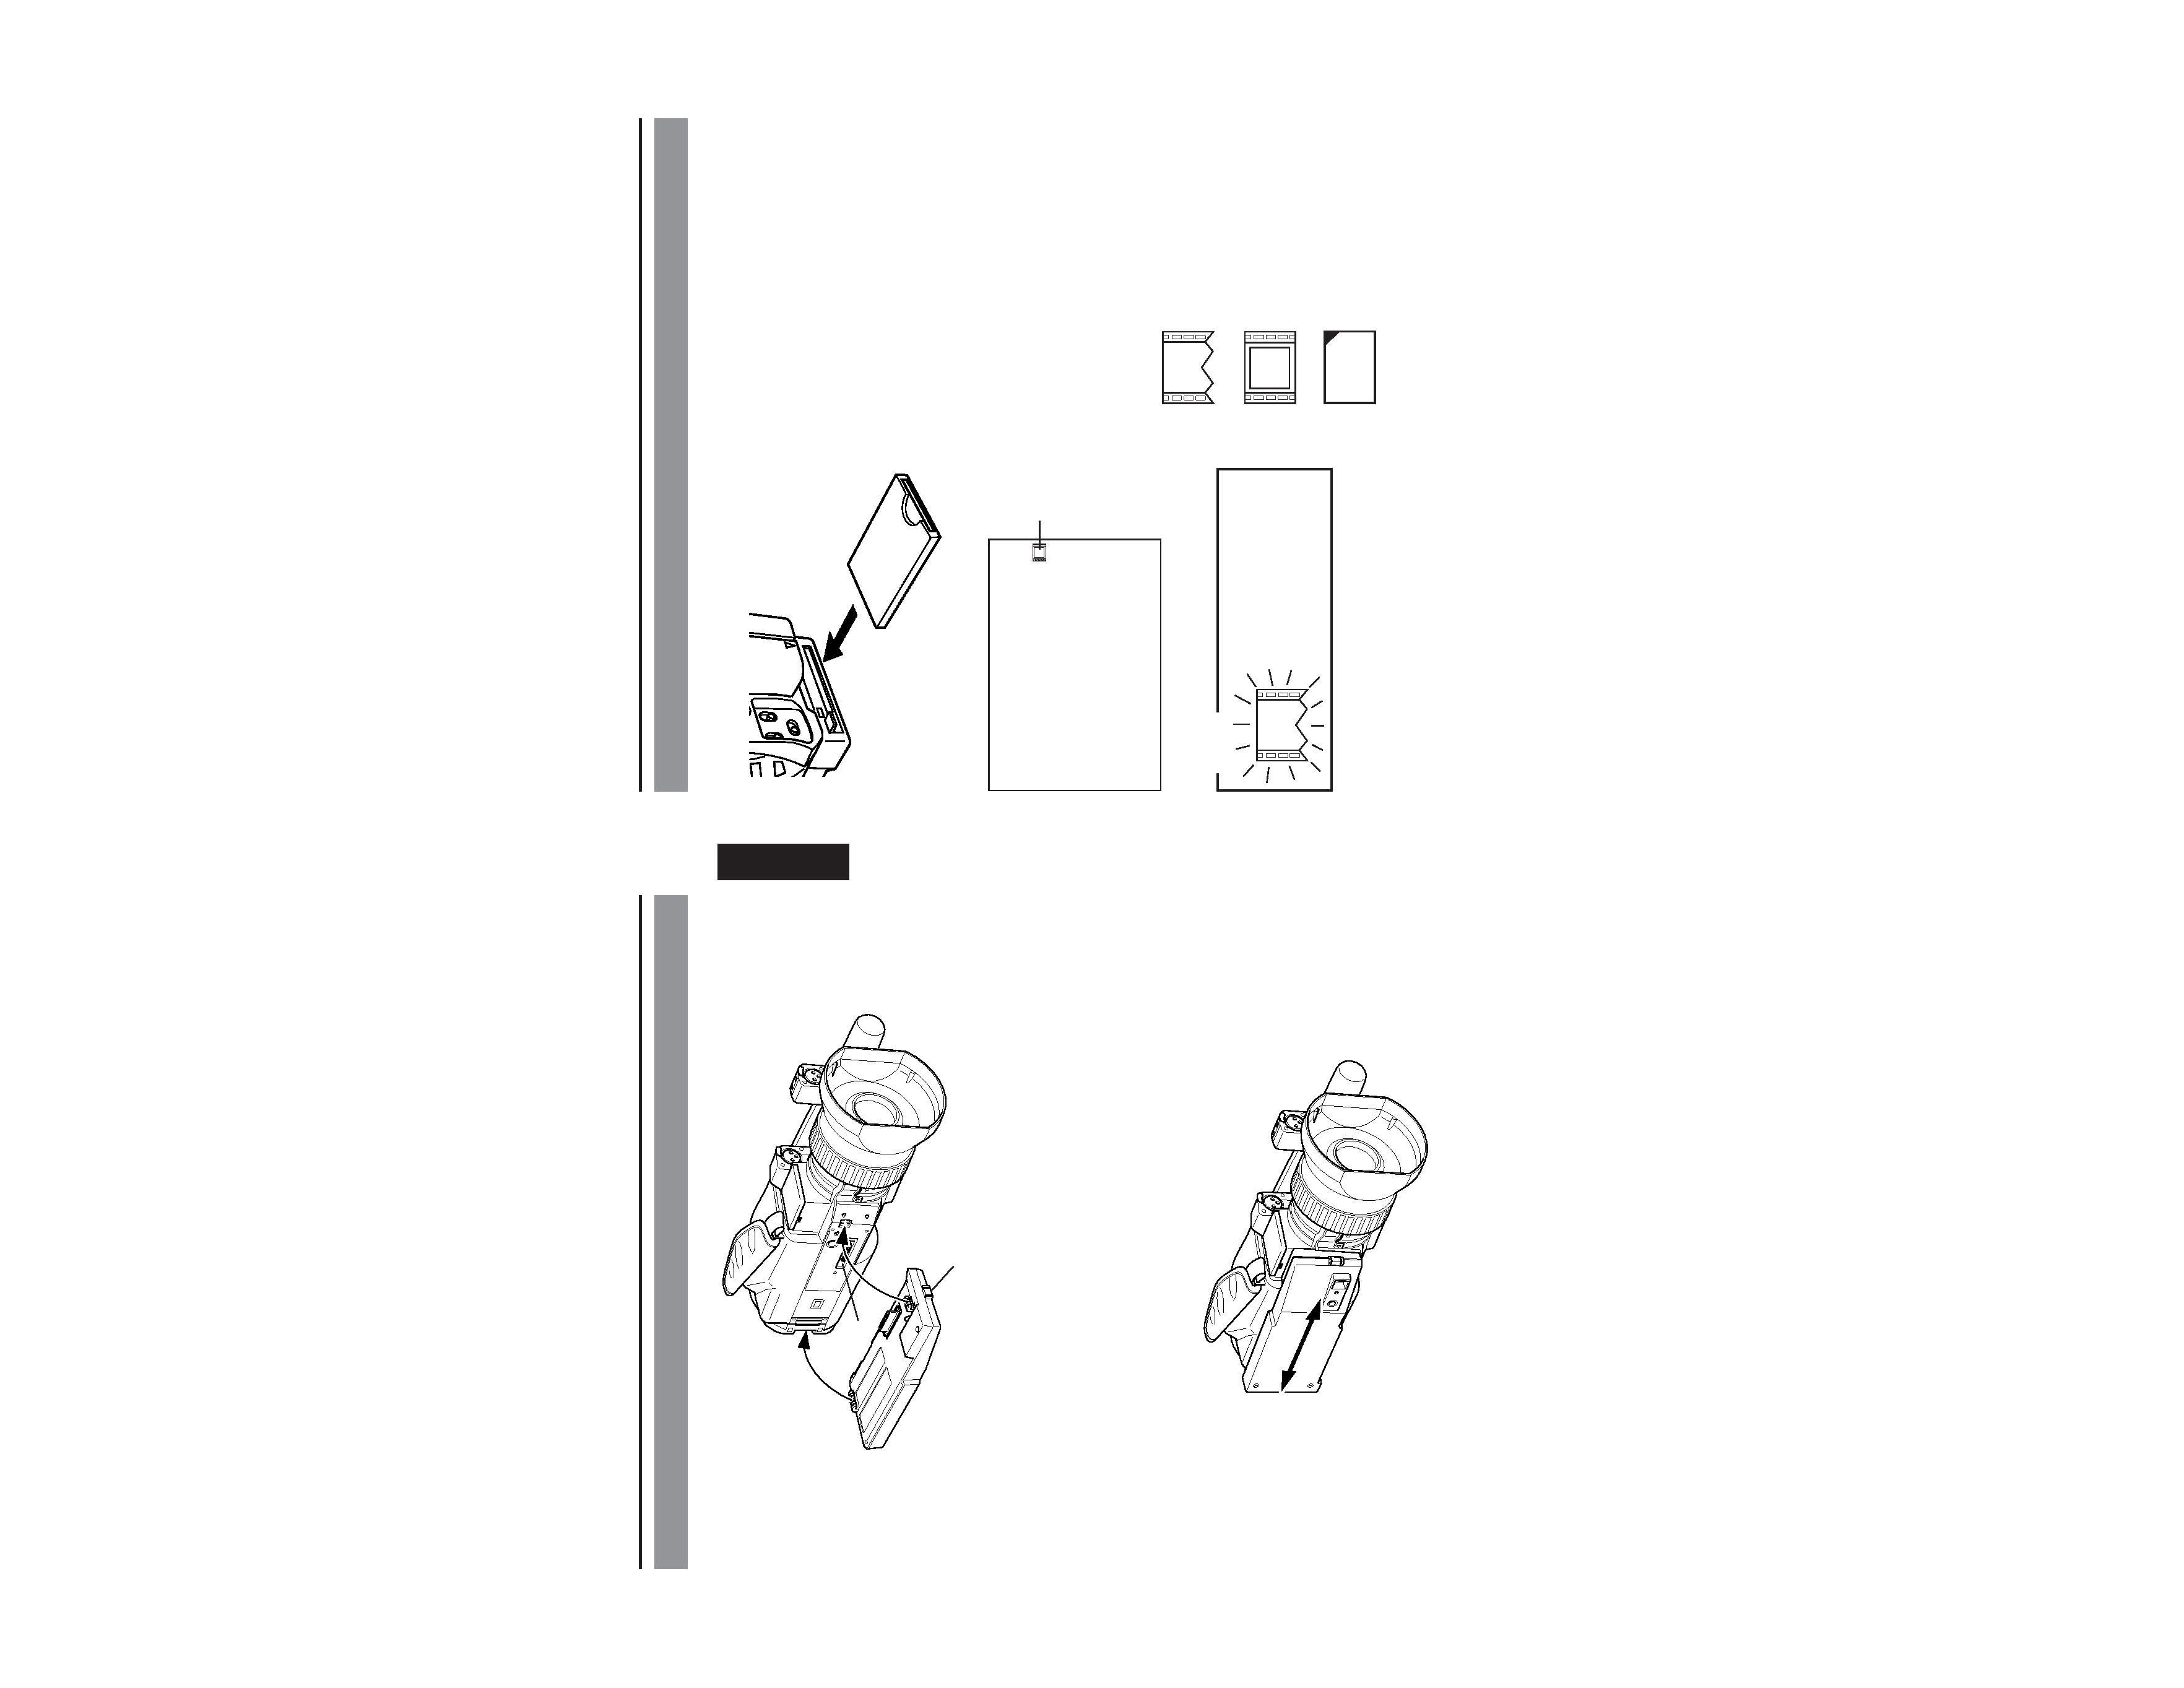
E-10
Confirming correct attachment
Use the following procedure to confirm that the KA-DV300 is correctly attached.
* Be sure to turn OFF the GY-DV300's power supply before the card is removed from the
camcorder.
e
Card status
indicator
1. Turn OFF the GY-DV300.
2. Insert the card.
3. Turn ON the GY-DV300.
4. Confirm the card status.
The card status is displayed on the GY-
DV300's LCD screen or viewfinder
screen in accordance with the type of
the card.
: Card not inserted
e : LAN card
C F : CF card
The
card
indicator
shown on the right blinks
during the initialization
operation right after the
power is turned on.
Memo
E-9
English
How to Attach
Be sure to turn OFF the GY-DV300 and open the "cover" at the lower part of the camera
before attaching the KA-DV300 using the following procedure.
1. Hook the claw at the rear of the KA-DV300 onto the notch of the GY-DV300.
2. While pressing the Release button, press the claw at the front of the KA-DV300 into the
notch of the GY-DV300.
3. Attempt to move the KA-DV300 back and forth to ensure that it is securely attached to
the camcorder.
To detach, perform steps
2. and 1. in order while pressing the Release button.
Release button
1.
2.
Cover