
HS-V1EG
LYT0002-0P5A
Supplementary instruction manual for JLIP Player Software Ver. 1.1
Ergänzende Bedienungsanleitung für JLIP Player Software-Version 1.1
Mode d'emploi complémentaire pour le logiciel de montage JLIP
version 1.1
Extra aanwijzingen voor JLIP Player Software Versie 1.1
Manual de instrucciones complementarias para el software reproductor
JLIP Ver. 1.1.
Manuale supplementare di istruzioni per il Software Versione 1.1 per il
lettore JLIP.
Supplerende brugsanvisning for JLIP Player Software version 1.1
Lisäohjekirjanen JLIP-toistolaiteohjelmaversiolle 1.1
Supplement till bruksanvisning för JLIP Player-programmet version 1.1
Tillegg til bruksanvisningen for programvare til JLIP spiller versjon 1.1
JLIP Player,
1.1.
ENGLISH
DEUTSCH
NORSK
NEDERLANDS
CASTELLANO
ITALIANO
DANSK
SUOMI
SVENSKA
FRANÇAIS
2 EN
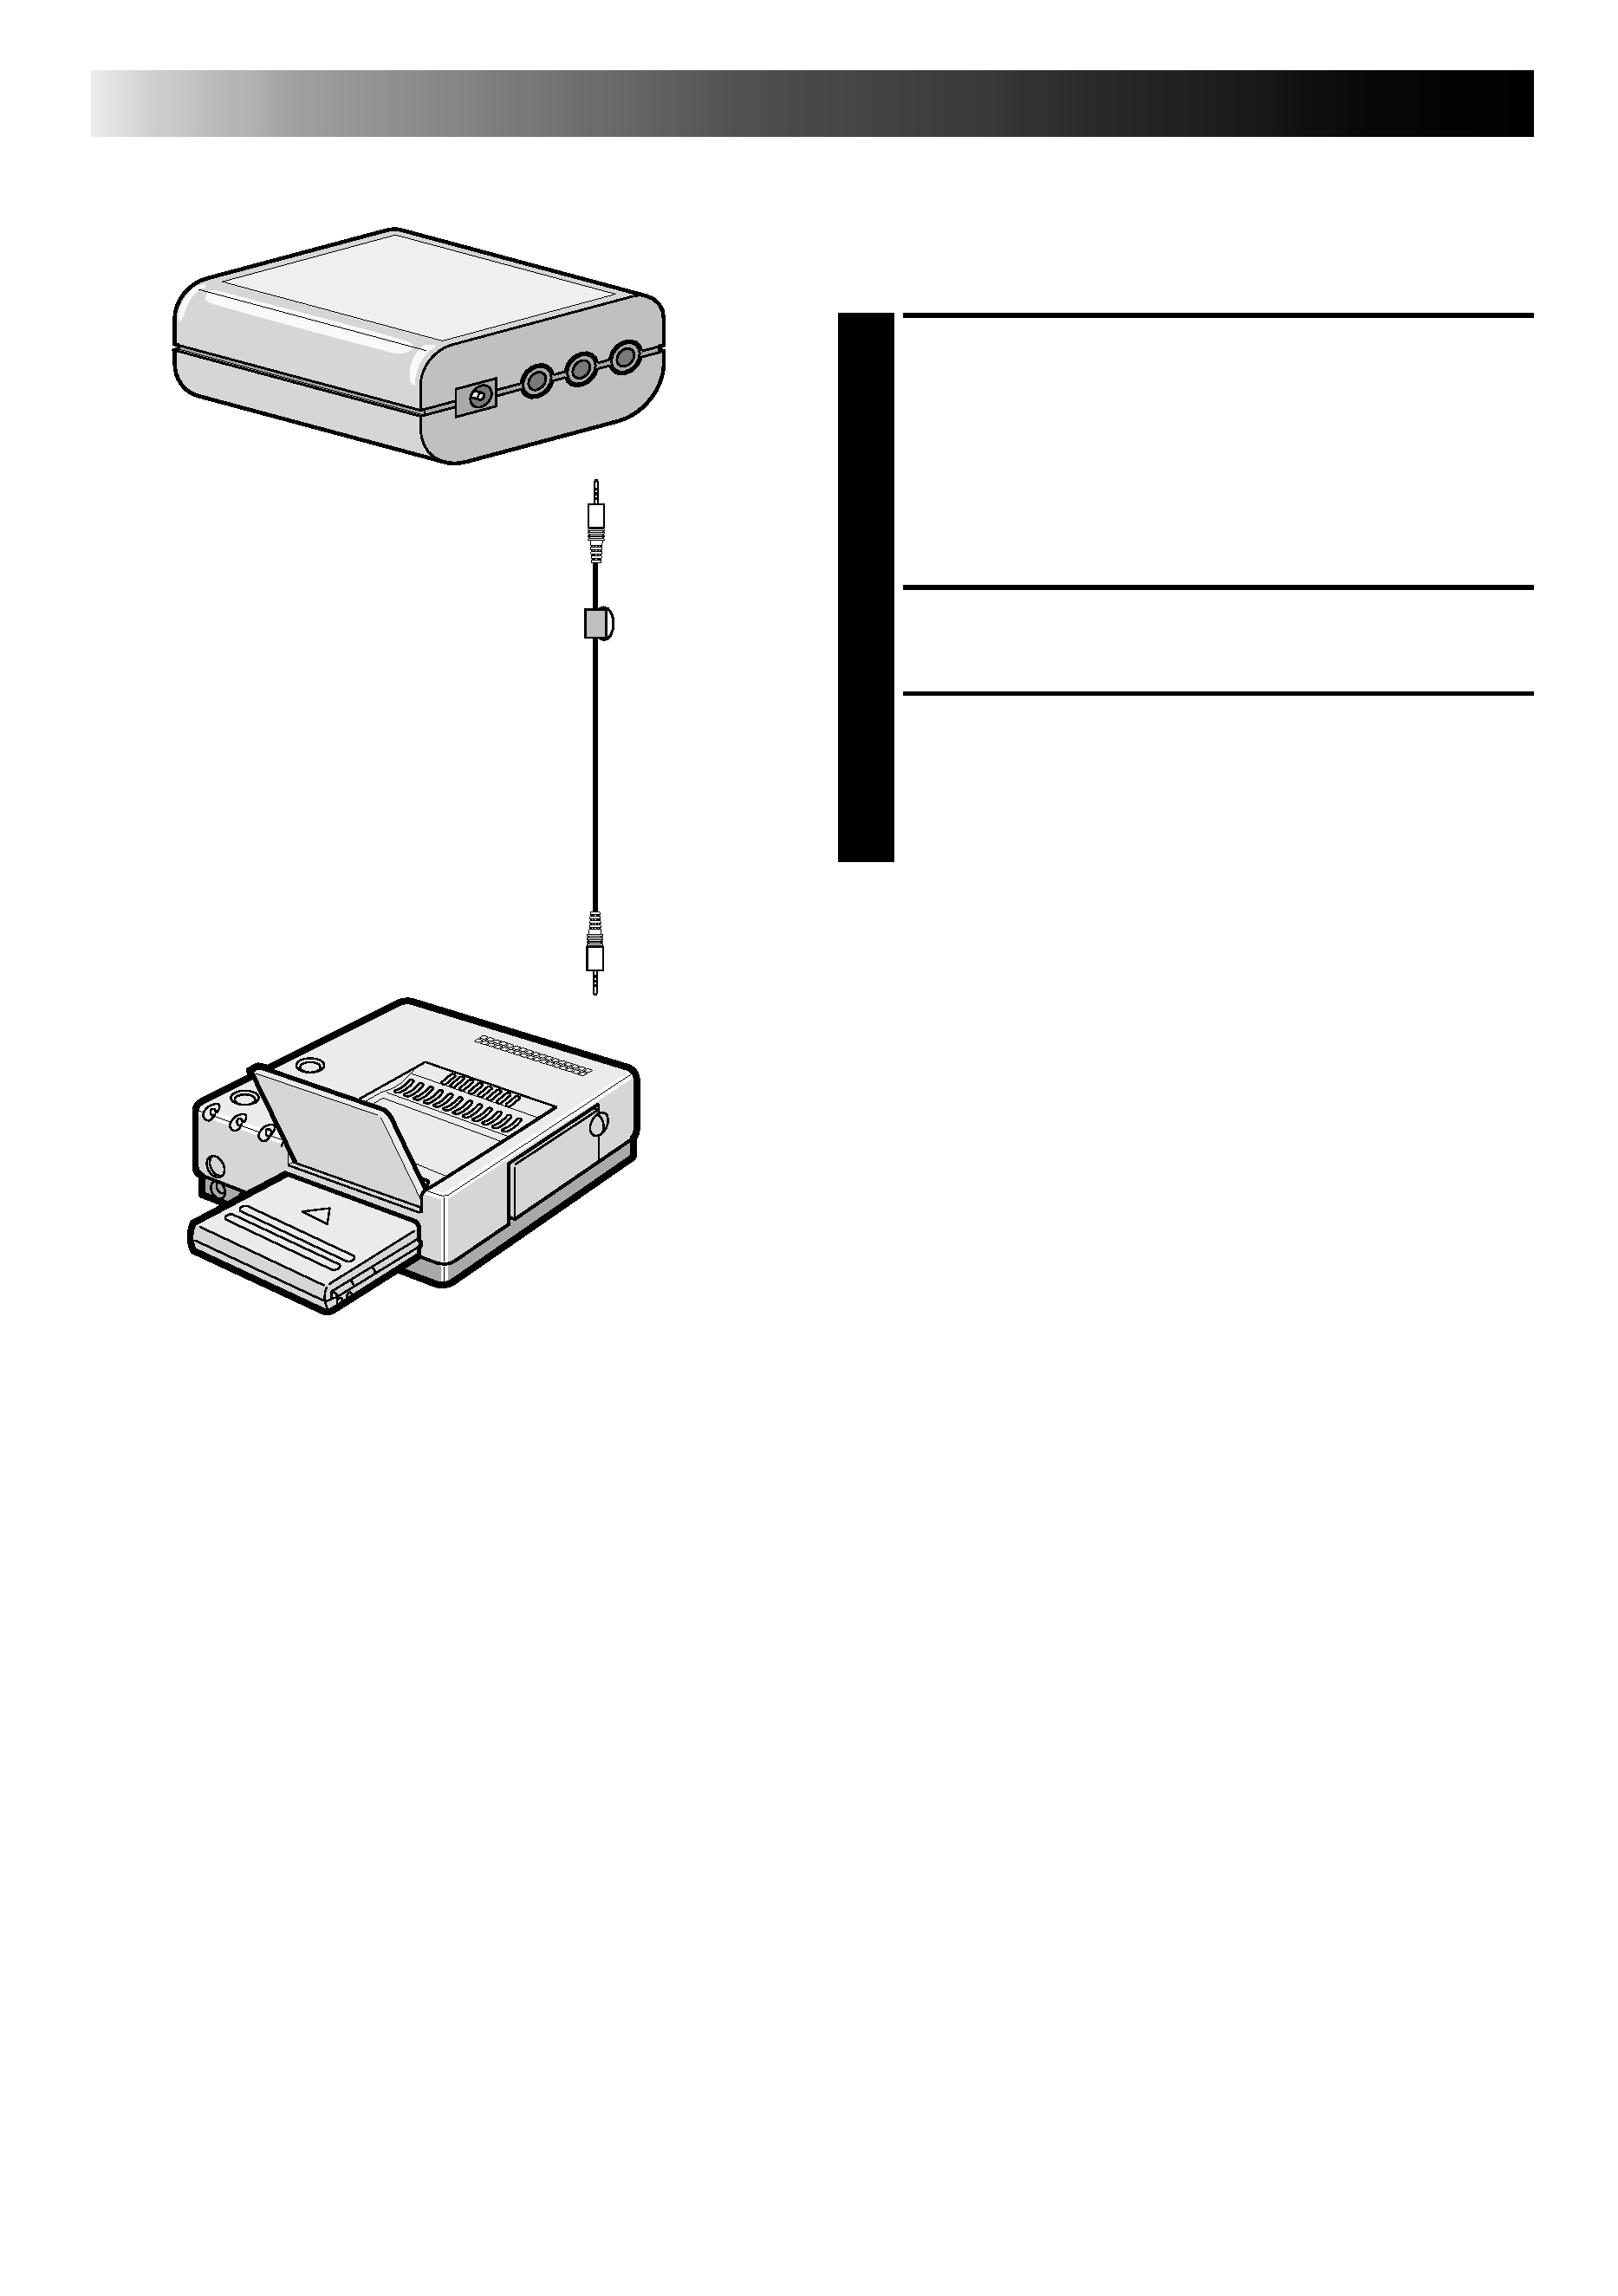
CONNECTIONS
The Video Printer GV-PT2 allows you to print
still images captured from the connected
image source unit.
1 Referring to pg. 10 of the JLIP Player
Pack HS-V1's instruction manual,
·Connect the PC Junction Box to PC.
·Connect the PC Junction Box to the
image source unit equipped with JLIP
connector.
2 Connect the PC Junction Box to the
Video Printer GV-PT2.
3 Referring to pg. 12 and 13 of the Video
Printer GV-PT2's instruction manual,
connect the Video Printer GV-PT2 to the
image source unit connected in step 1.
To JLIP
connector
GV-PT2 Video Printer
PC Junction Box
To JLIP
connector
3.5 mm
Diameter
4-pole Cable
EN
3
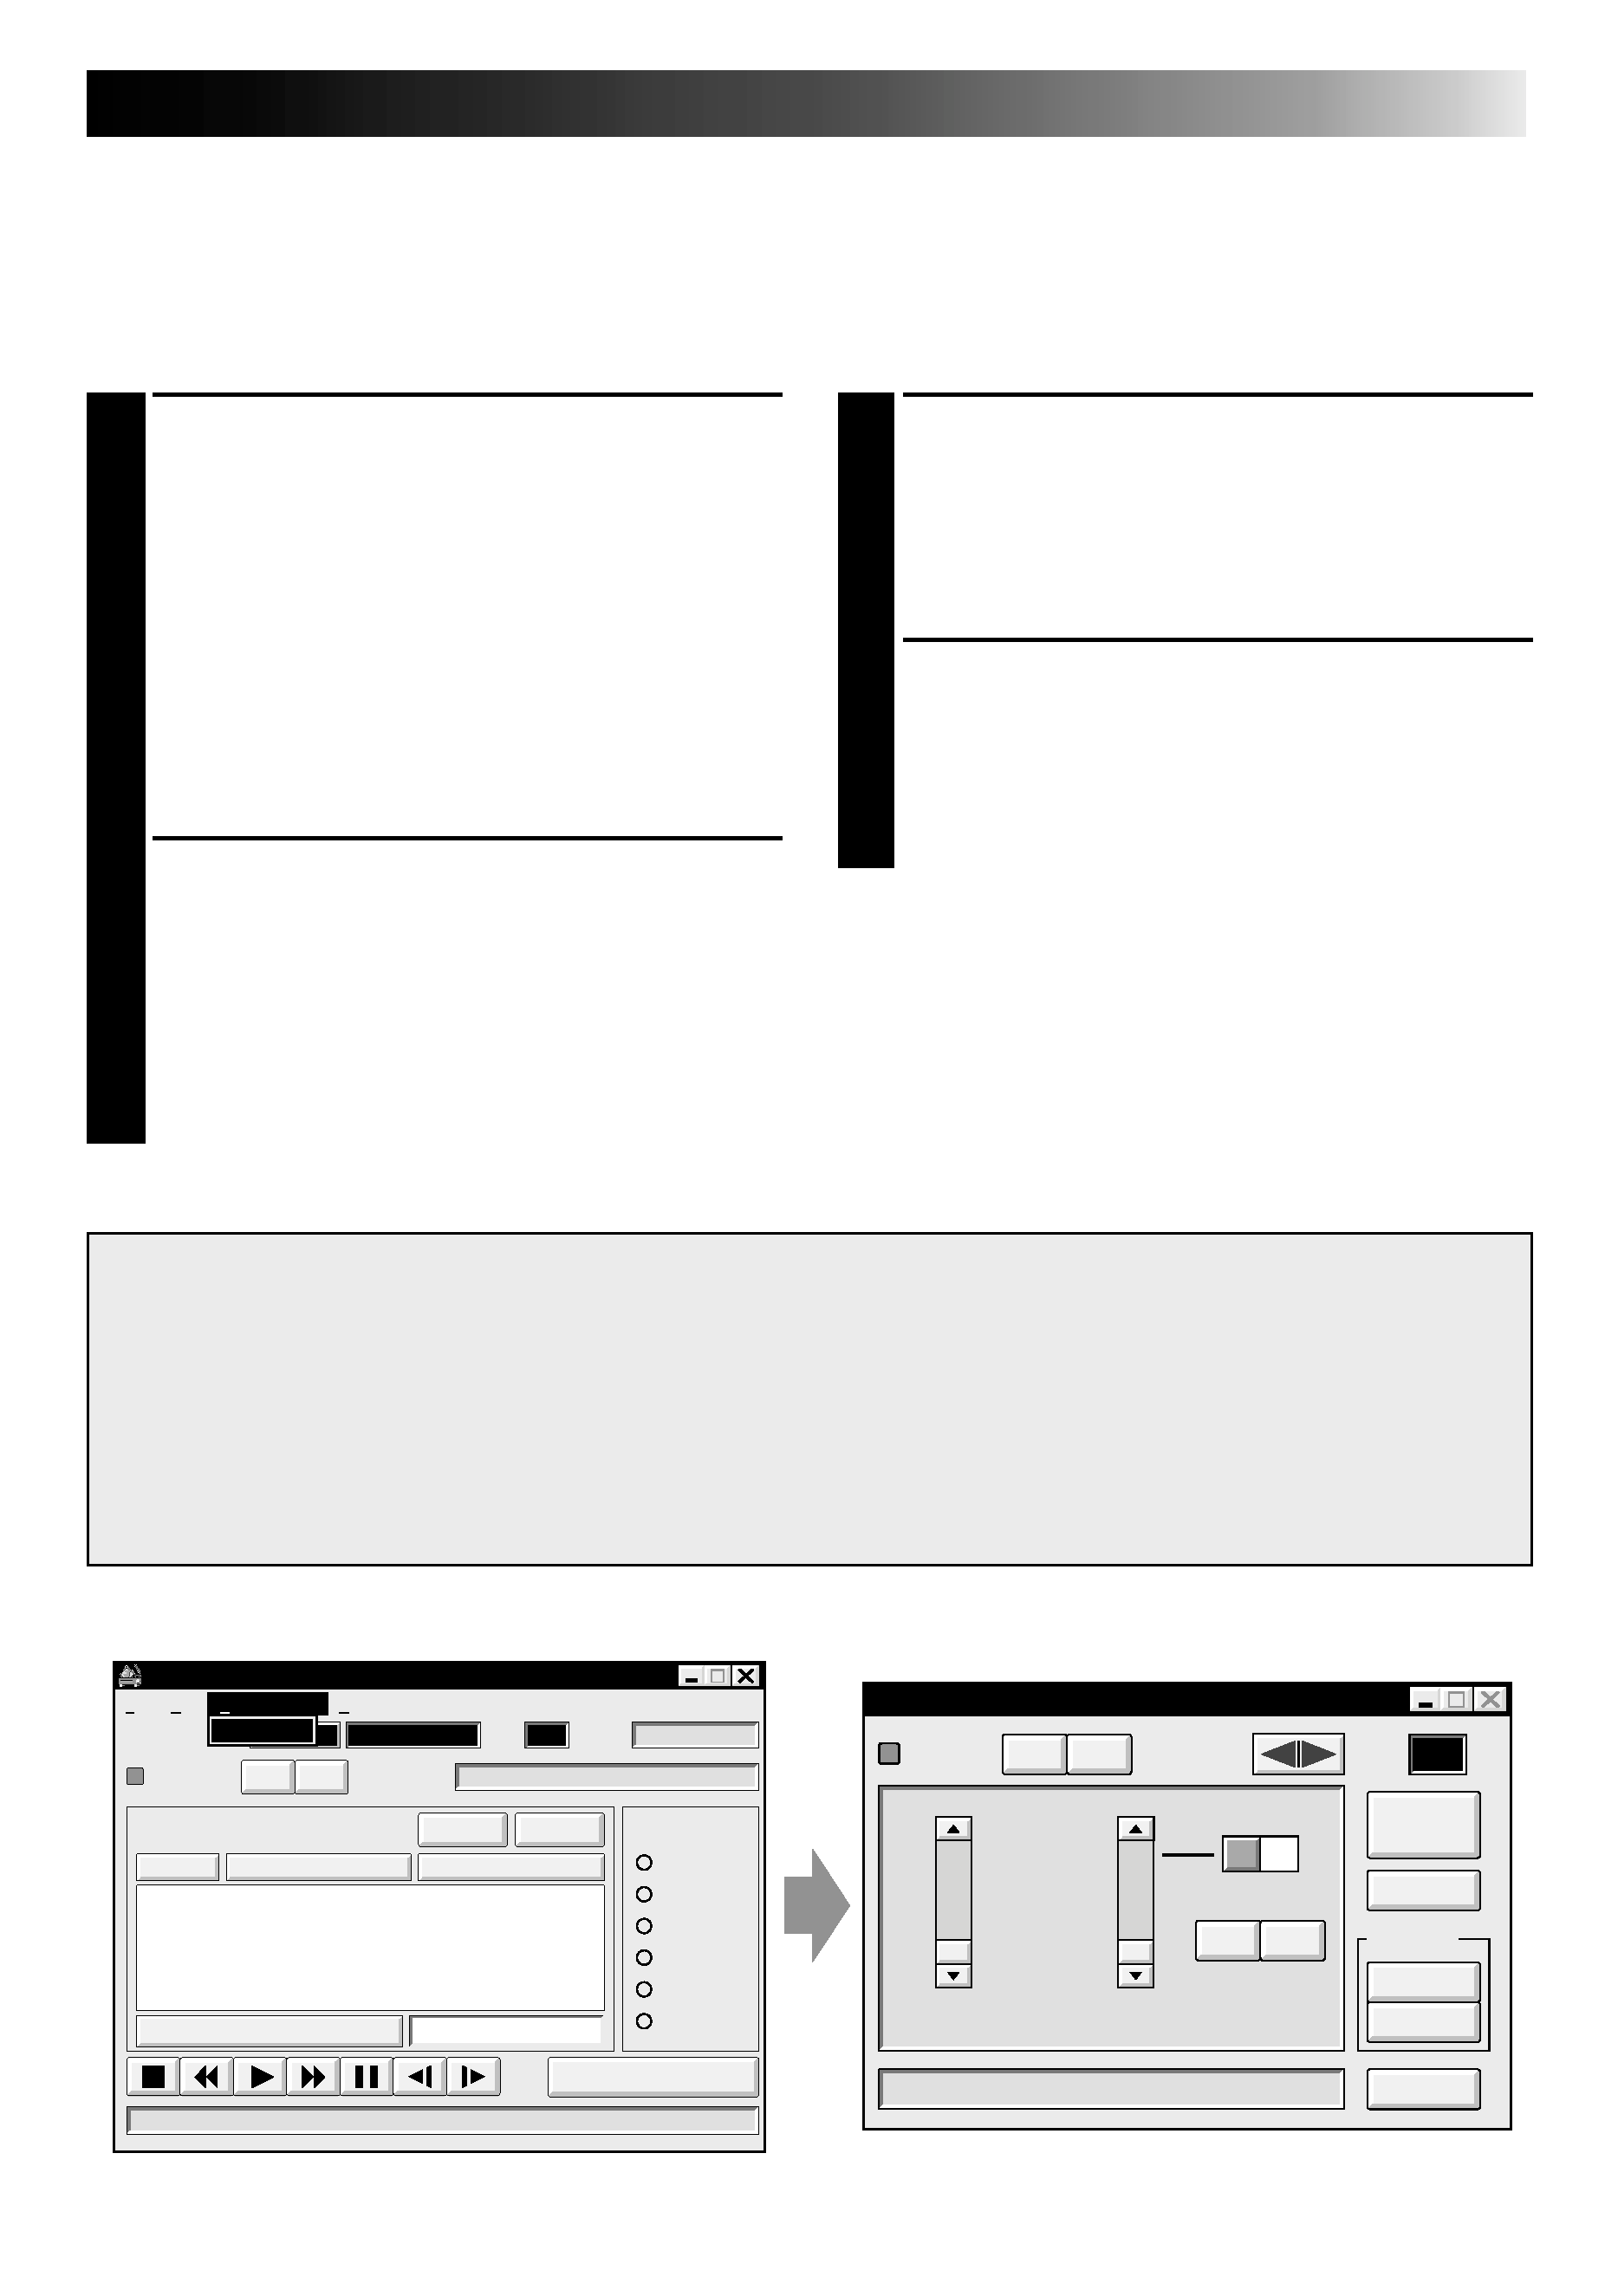
VIDEO PRINTER OPERATION
Printing
Before printing, perform the procedure listed below.
Set VCR to external input.
Set TV to VIDEO mode so that images from video printer appear.
1 BRING UP VIDEO PRINTER
WINDOW
Select "Set-up" from "Video Printer" on
the MOVIE PLAYER window.
·The "Video Printer" window appears.
·To view the buttons on the MOVIE
PLAYER window, move the "Video
Printer" window to the right and up
keeping the title bar on the "Video
Printer" window clicked.
2 PLAYBACK
Click
on the MOVIE PLAYER window.
·The "Video Printer" window appears
behind the MOVIE PLAYER window.
·To view the "Video Printer" window,
click the title bar labelled "Video
Printer".
3 STORE SCENE
Click "STORE" on the "Video Printer"
window at the scene you want to print.
·The selected scene is stored in memory
and appears on the TV monitor.
4 PRINT
Insert print paper into the video printer
and click "PRINT".
·Also refer to the video printer's
instruction manual.
The following print styles are also available:
Printing the same scene 4 or 16 times on one sheet. (Multi-Print)
Printing various scenes on the same print sheet. (Multi-Print)
Printing a scene within a scene. (Inset Print)
Storing a selected number of images at short intervals and printing them on one sheet.
(Strobe)
Also refer to the video printer's instruction manual.
MOVIE PLAYER
FILE
POWER
PROGRAM PLAYBACK
COUNTER
Drop
MEMO
ID
SCENE
CUT IN
CUT OUT
START
SCENE
ELAPSED TIME
00:00:00:00F
IN/OUT
OFF
ON
MODE
STILL
PLAY
SEARCH
SLOW
FF
REW
00:00:00:00F
06
File
Video Printer
Help
Edit
Set-up
Video Printer
Video Printer
POWER
SELECT
PIX STABILIZER
OFF
ON
POSITION
ID
20
STORE
PRINT
SOURCE
MEMORY
CLOSE
STROBE SPEED
HIGH
LOW
@
@
À
À
@@
@@
ÀÀ
ÀÀ
16
4
OFF
STROBE
SELECTED
SAME
MULTI-PIX
CONTENT
Aperture Off ! !
OFF
ON
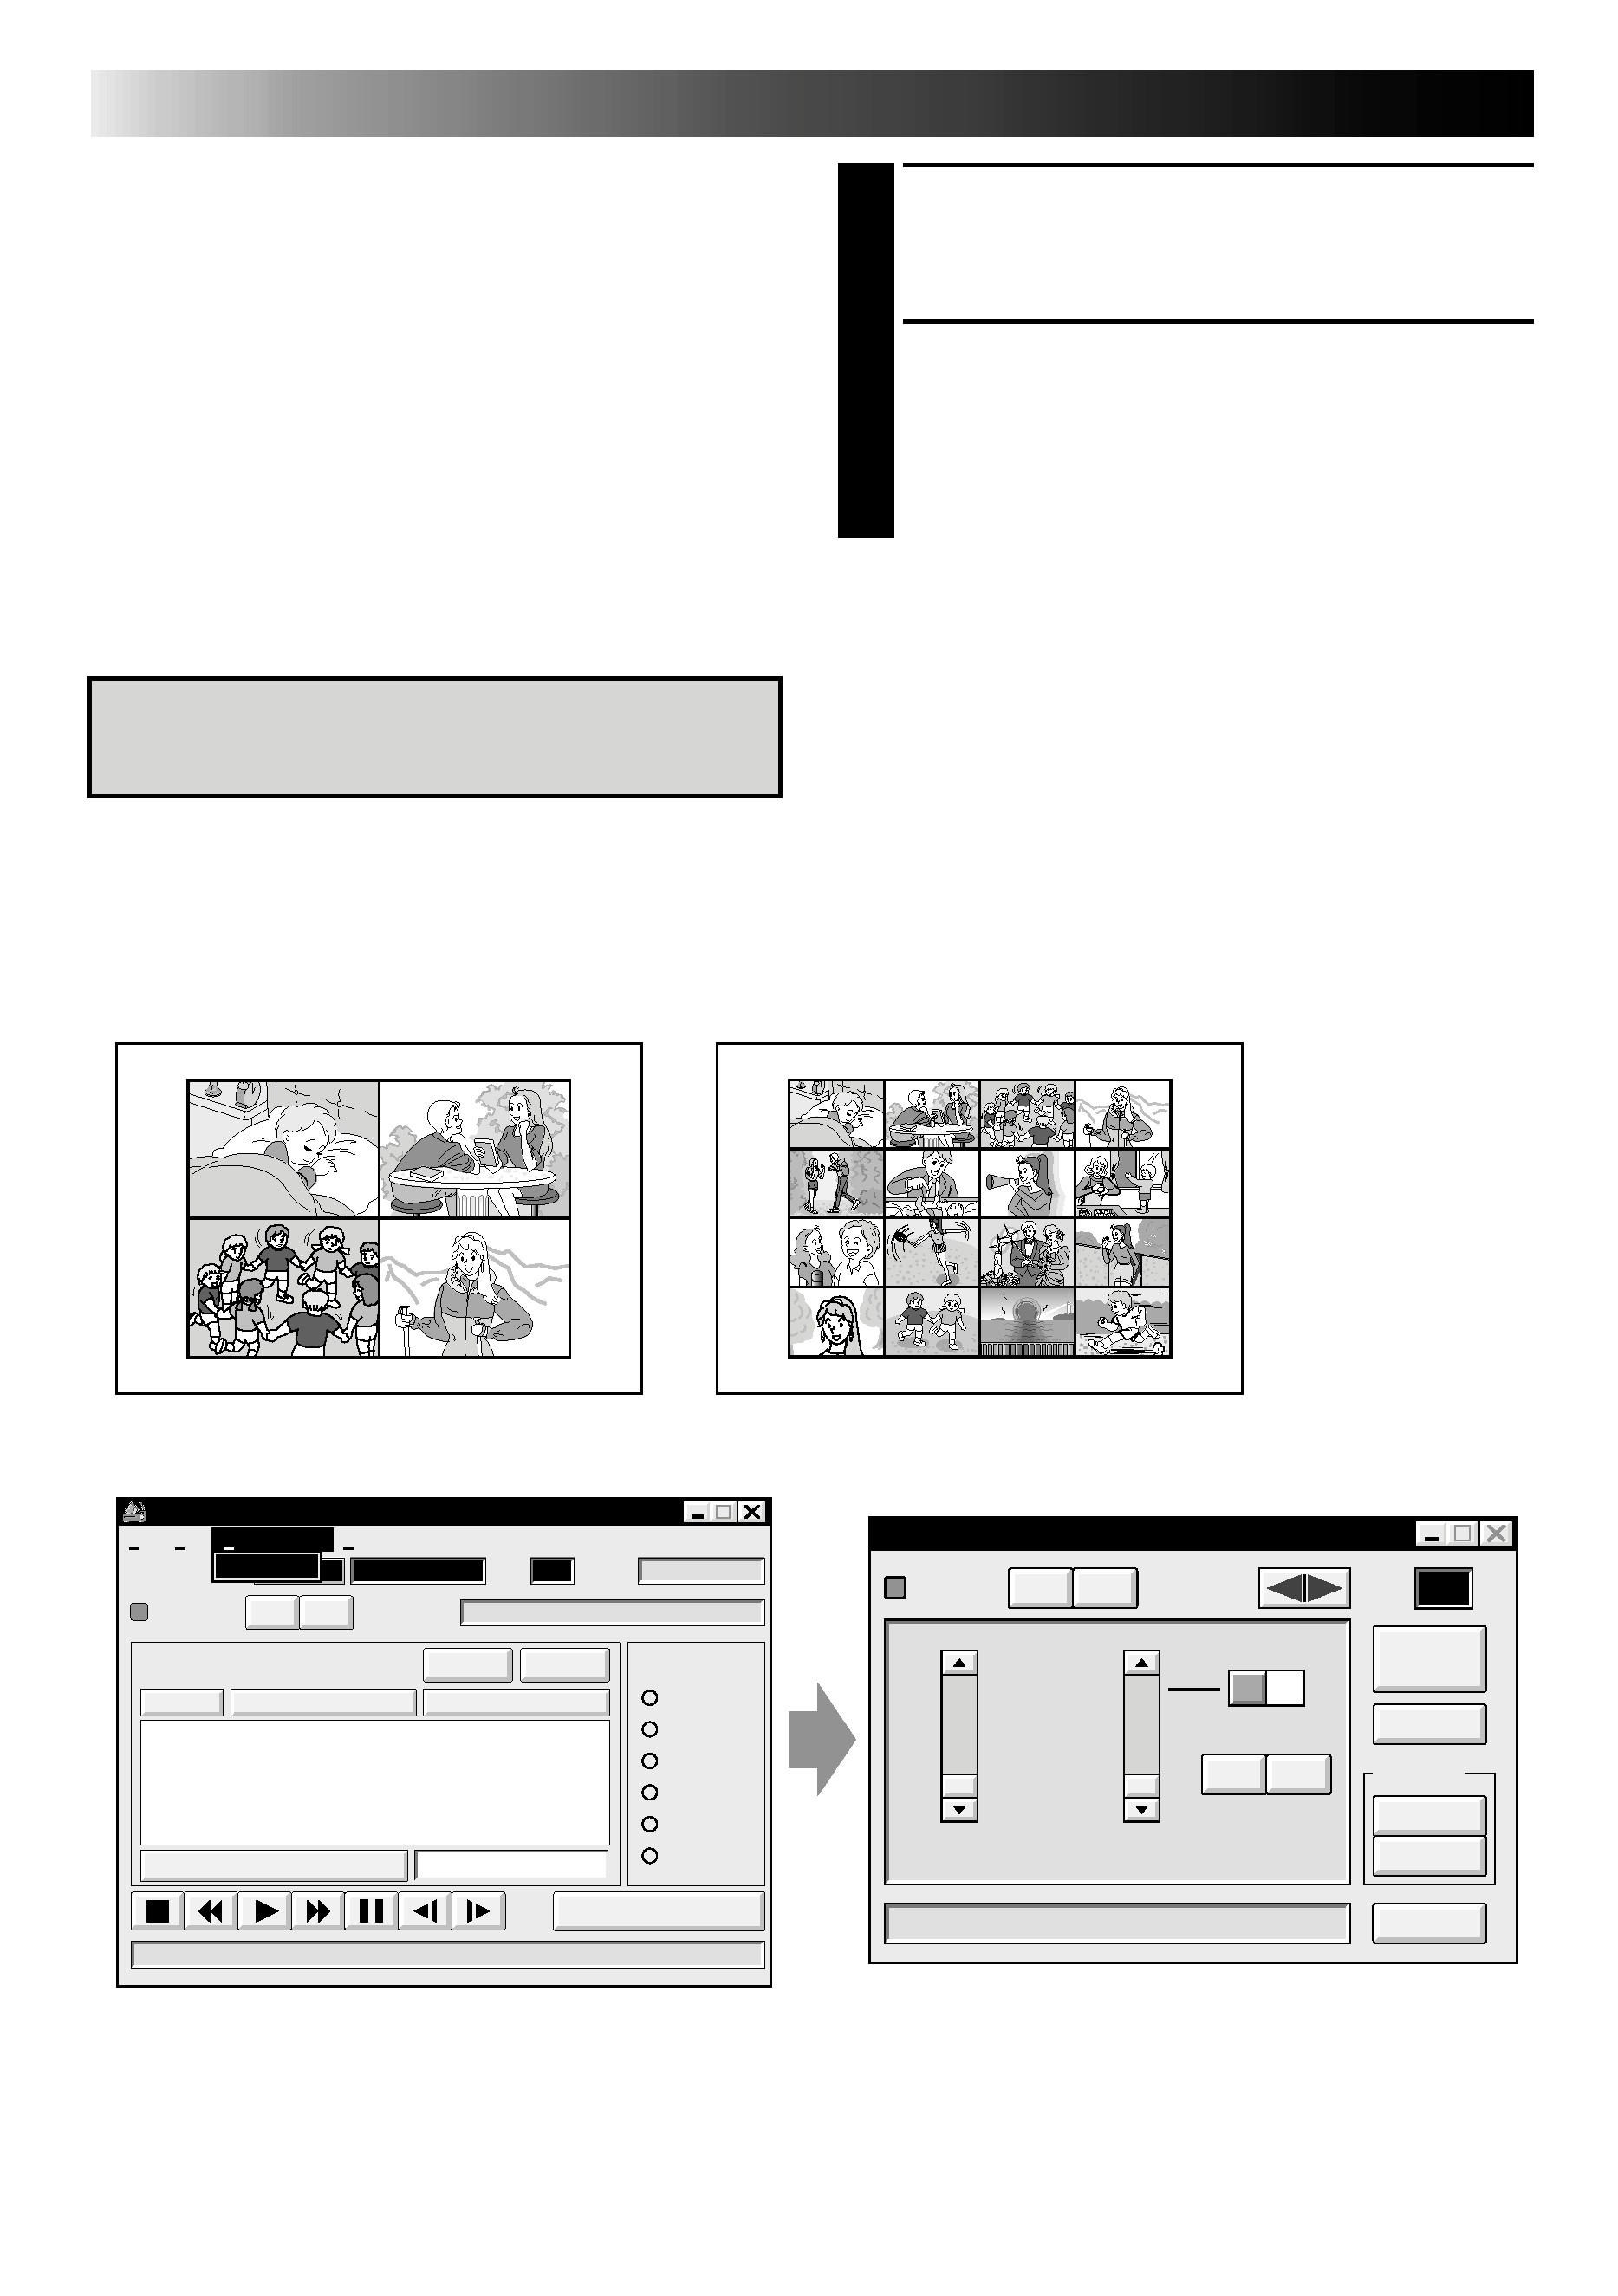
4 EN
VIDEO PRINTER OPERATION (cont.)
Preparation
· Load the tape into the video unit.
· Open a saved file (
pg. 20 of the JLIP
Player Pack HS-V1's instruction manual).
· Select file name (
pg. 20 of the JLIP
Player Pack HS-V1's instruction manual).
· Prepare for printing (refer to the GV-PT2
instruction manual).
· Select desired layout using the remote
control unit provided with the GV-PT2.
To Print Captured Video Data with
Video Printer
Captured video data can be automatically
scanned and printed.
You can print OFF, 4 or 16 images on one
sheet.
Auto Capture
MOVIE PLAYER
FILE
POWER
PROGRAM PLAYBACK
COUNTER
Drop
MEMO
ID
SCENE
CUT IN
CUT OUT
START
SCENE
ELAPSED TIME
00:00:00:00F
IN/OUT
OFF
ON
MODE
STILL
PLAY
SEARCH
SLOW
FF
REW
00:00:00:00F
06
File
Video Printer
Help
Edit
Set-up
Video Printer
Video Printer
POWER
SELECT
PIX STABILIZER
OFF
ON
POSITION
ID
20
STORE
PRINT
SOURCE
MEMORY
CLOSE
STROBE SPEED
HIGH
LOW
@
@
À
À
@@
@@
ÀÀ
ÀÀ
16
4
OFF
STROBE
SELECTED
SAME
MULTI-PIX
CONTENT
Aperture Off ! !
OFF
ON
1 Select "Video Printer" -- "Set-up" in the
MOVIE PLAYER window.
·Video Printer window appears.
2 Select the number of scenes (OFF/4/16)
and select "SAME" or "SELECTED" for the
content.
·Select this by clicking the buttons
( / ).
EN
5
3 Click Title in the MOVIE PLAYER
window and activate the window.
4 Select "Edit" -- "Set Function" -- "Auto
Capture".
5 Click "START"
·The captured video data set first is
searched and stored in the video
printer.
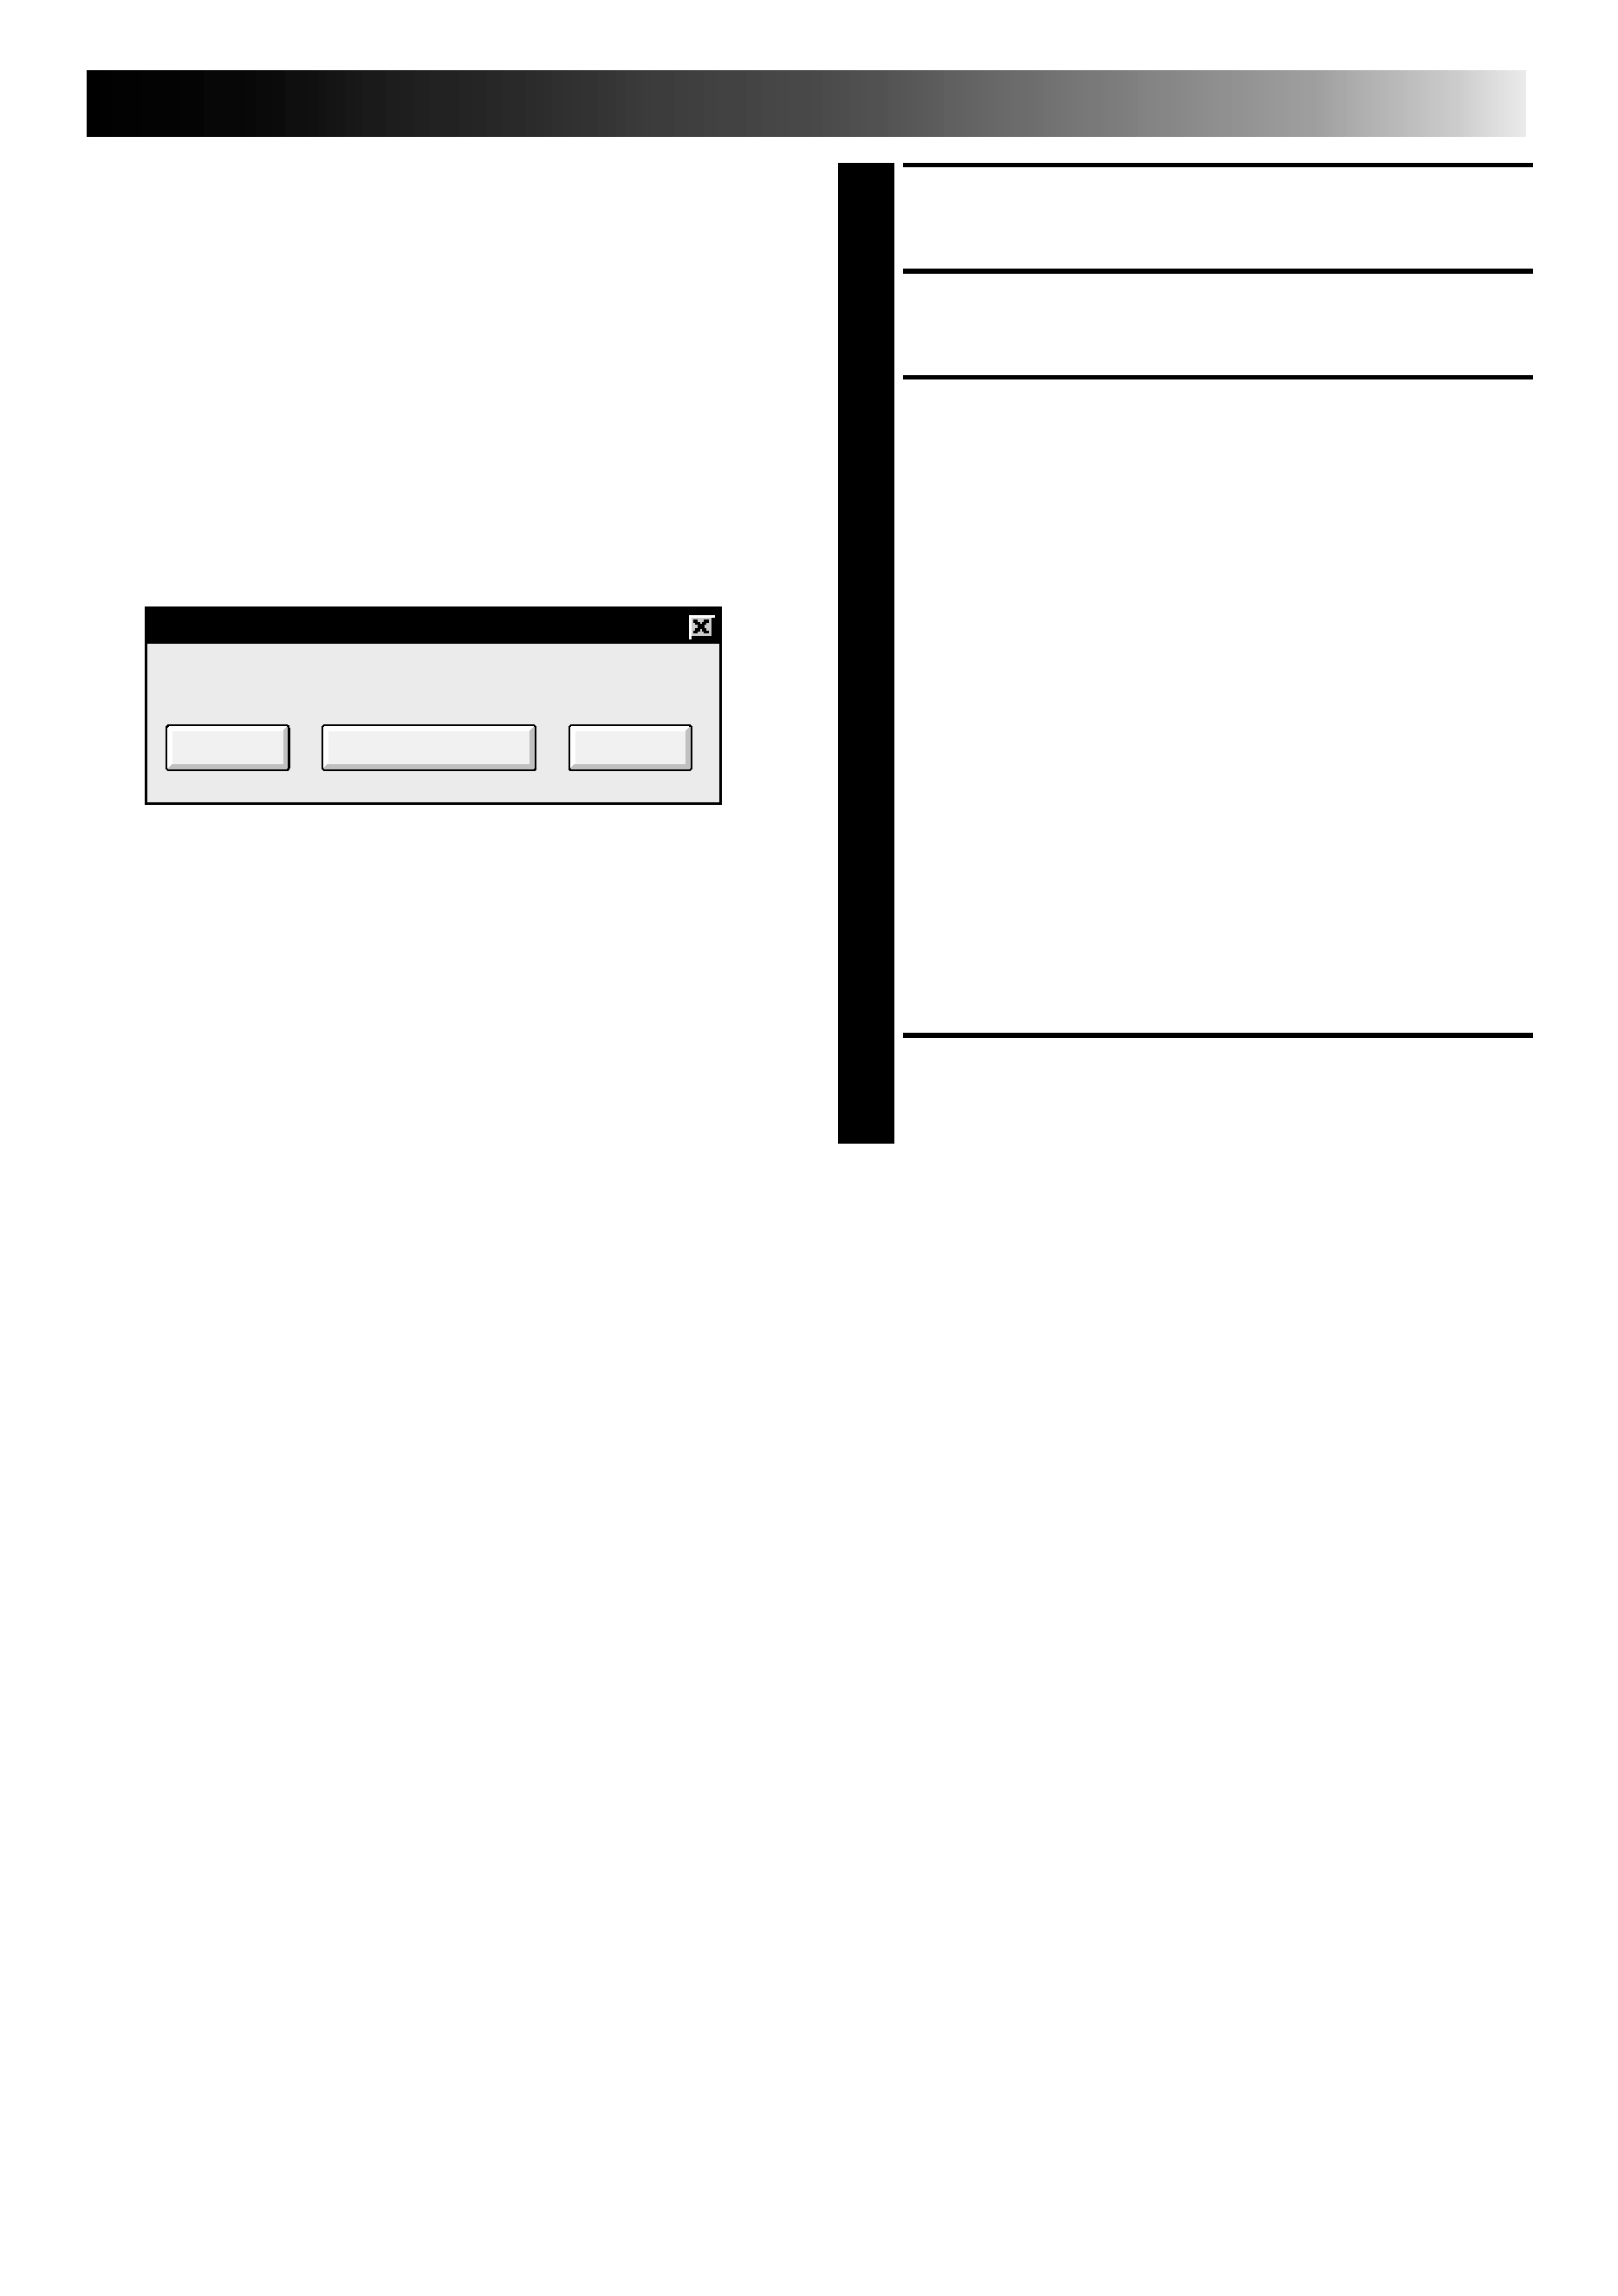
·When the data has been stored, the
message "Image has been captured by
printer." appears.
·If the number of scenes was set to
"OFF", or "4 or 16" in step 2 and then to
"SAME", you can start printing simply
by clicking "PRINT".
·If the number of scenes was set to "4 or
16" in step 2 and then to "SELECTED",
click "NEXT SCENE . . .". The next
scene is automatically searched and
stored in the video printer.
6 Click "PRINT" to start printing.
NOTES:
To print only the cut-in scene on the
edited tape
1 Perform editing (refer to pages 16 through
18).
2 Print (follow steps 1 through 5 above).
Select "Auto Capture" in step 4.
Click "START" in step 5. The cut-in point
of Scene No. 1 is automatically
searched and stored in the video printer.
You cannot start storing from Scene No.
2 or subsequent scenes.
Even if the video unit is in Stop mode,
clicking "START" automatically starts
playback to search the cut-in point of
Scene No. 1.
If you want to print a particular scene
only, click "SCENE" in step 5.
Auto-Capture
Image has been captured by printer.
PRINT
NEXT SCENE...
CANCEL