GR-AX210
COMPACT VHS CAMCORDER
INSTRUCTIONS
YU30052-520
Compact VHS
PAL
GETTING STARTED
6
Power ................................... 6
Clock (Lithium) Battery
Removal/Insertion .................... 8
Date/Time Settings .................... 8
Viewfinder Adjustment ................ 9
Tape Length/Recording Mode
Setting ................................... 9
Loading/Unloading A Cassette ....... 9
Grip Adjustment ...................... 10
Shoulder Strap Attachment ......... 10
Tripod Mounting ...................... 10
RM-V20U Remote Control Unit .... 11
RECORDING
12
Basic Recording....................... 12
Basic Features ........................ 13
Advanced Features ................... 14
PLAYBACK
26
Using The Cassette Adapter ........ 26
Basic Connections .................... 27
Basic Playback ........................ 28
Features ............................... 29
EDITING
30
Tape Dubbing ......................... 30
Random Assemble Editing
(R.A.Edit) ............................. 30
Insert Editing ......................... 34
Audio Dubbing ........................ 35
USER MAINTENANCE 36
TROUBLESHOOTING 37
INDEX
38
Controls ............................... 38
Connectors ............................ 38
Indicators ............................. 38
Other Parts ........................... 38
Viewfinder ............................ 39
Terms .................................. 40
CAUTIONS
41
SPECIFICATIONS
43
OPTIONAL ACCESSORIES 43
CONTENTS
2
Dear Customer,
Thank you for purchasing the JVC Compact VHS
camcorder. Before use, please read the safety
information and precautions contained in the
following pages to ensure safe use of your new
camcorder.
SAFETY
PRECAUTIONS
Using This Instruction Manual
· All major sections and subsections are listed in the
Table Of Contents (
cover page).
· Notes appear after most subsections. Be sure to
read these as well.
· Basic and advanced features/operation are
separated for easier reference.
It is recommended that you . . .
.... refer to the Index (
pgs. 38 40) and
familiarize yourself with button locations, etc.
before use.
.... read thoroughly the Safety Precautions that
follow and cautions (
pgs. 41, 42). They
contain extremely important information
regarding the safe use of your new camcorder.
CAUTIONS:
To prevent shock, do not open the cabinet.
No user serviceable parts inside. Refer
servicing to qualified personnel.
When you are not using the AC Power
Adapter/Battery charger for a long period of
time, it is recommended that you disconnect
the power cord from AC outlet.
Warning on lithium battery
The battery used in this device may present a
fire or chemical burn hazard if mistreated. Do
not recharge, disassemble, heat above 100°C or
incinerate.
Replace battery with Panasonic (Matsushita
Electric), Sanyo or Maxell CR2025; use of
another battery may present a risk of fire or
explosion.
Dispose of used battery promptly.
Keep away from children.
Do not disassemble and do not dispose of in
fire.
WARNING:
TO PREVENT FIRE OR SHOCK
HAZARD, DO NOT EXPOSE
THIS UNIT TO RAIN OR
MOISTURE.
This unit is produced to comply with Standard
IEC Publ. 65.
NOTES:
The rating plate (serial number plate) and
safety caution are on the bottom and/or the
back of the main unit.
The rating plate (serial number plate) of the
AC Power Adapter/Charger is on its bottom.
Crossed Out Dust Bin Mark
The Crossed Out Dust Bin Mark on
the battery pack indicates that the
product complies with Directives
91/157/EEC and 93/86/EEC.
Nickel-Cadmium (Ni-Cd) battery
pack must be recycled or disposed
of properly.
3
This camcorder is designed to be used with
PAL-type colour television signals. It cannot be
used for playback with a television of a different
standard. However, live recording and
viewfinder playback are possible anywhere.
Use the BN-V12U/BN-V22U/BN-V25U battery
packs and, to recharge them, the provided
multi-voltage AC Power Adapter/Charger. (An
appropriate conversion adapter may be
necessary to accommodate different designs of
AC outlets in different countries.)
ATTENTION USERS OF RECHARGEABLE BATTERIES
DO NOT DISPOSE RECHARGEABLE BATTERIES OR PRODUCTS POWERED
BY NON-REMOVABLE RECHARGEABLE BATTERIES, THESE BATTERIES AND
PRODUCTS CAN BE RECYCLED.
AT THE END OF NORMAL LIFE,
IN AUSTRALIA, RETURN TO YOUR POINT OF PURCHASE OR MAIL TO:
Hagemeyer (Australasia)
B.V. Attn : Service Dept.
5-7 Garema Circuit Kingsgrove
NSW 2208 Australia
Phone : (02)750 3777
IN NEW ZEALAND, PLEASE RETURN BATTERIES BY MAIL TO:
Hagemeyer (NZ) Limited
Phone : (09)415 8758
P.O. Box 100589
Auckland 1000
This camcorder is designed exclusively for the
VHS-C video cassette. Only cassettes marked
VHS-C can be used with this unit.
HQ VHS is compatible with existing VHS
equipment.
PAL
4
REMEMBER
Programme AE with Special
Effects (
P. 14)
Auto Mode Lock
Auto Mode Release
Electronic Fog Filter
ND Effect
Sepia
Twilight
Sports
High Speed (1/2000 sec.) Shutter
15 sec. Self Timer
Intelligent Function Control
(
P. 16 23)
SEL
F1
F2
12x Variable-Speed Hyper
Zoom (
P. 13)
Random Assemble Editing
(
P. 30 33)
8
8
2
2
5
5
4
4
1
1
6
6
3
3
7
7
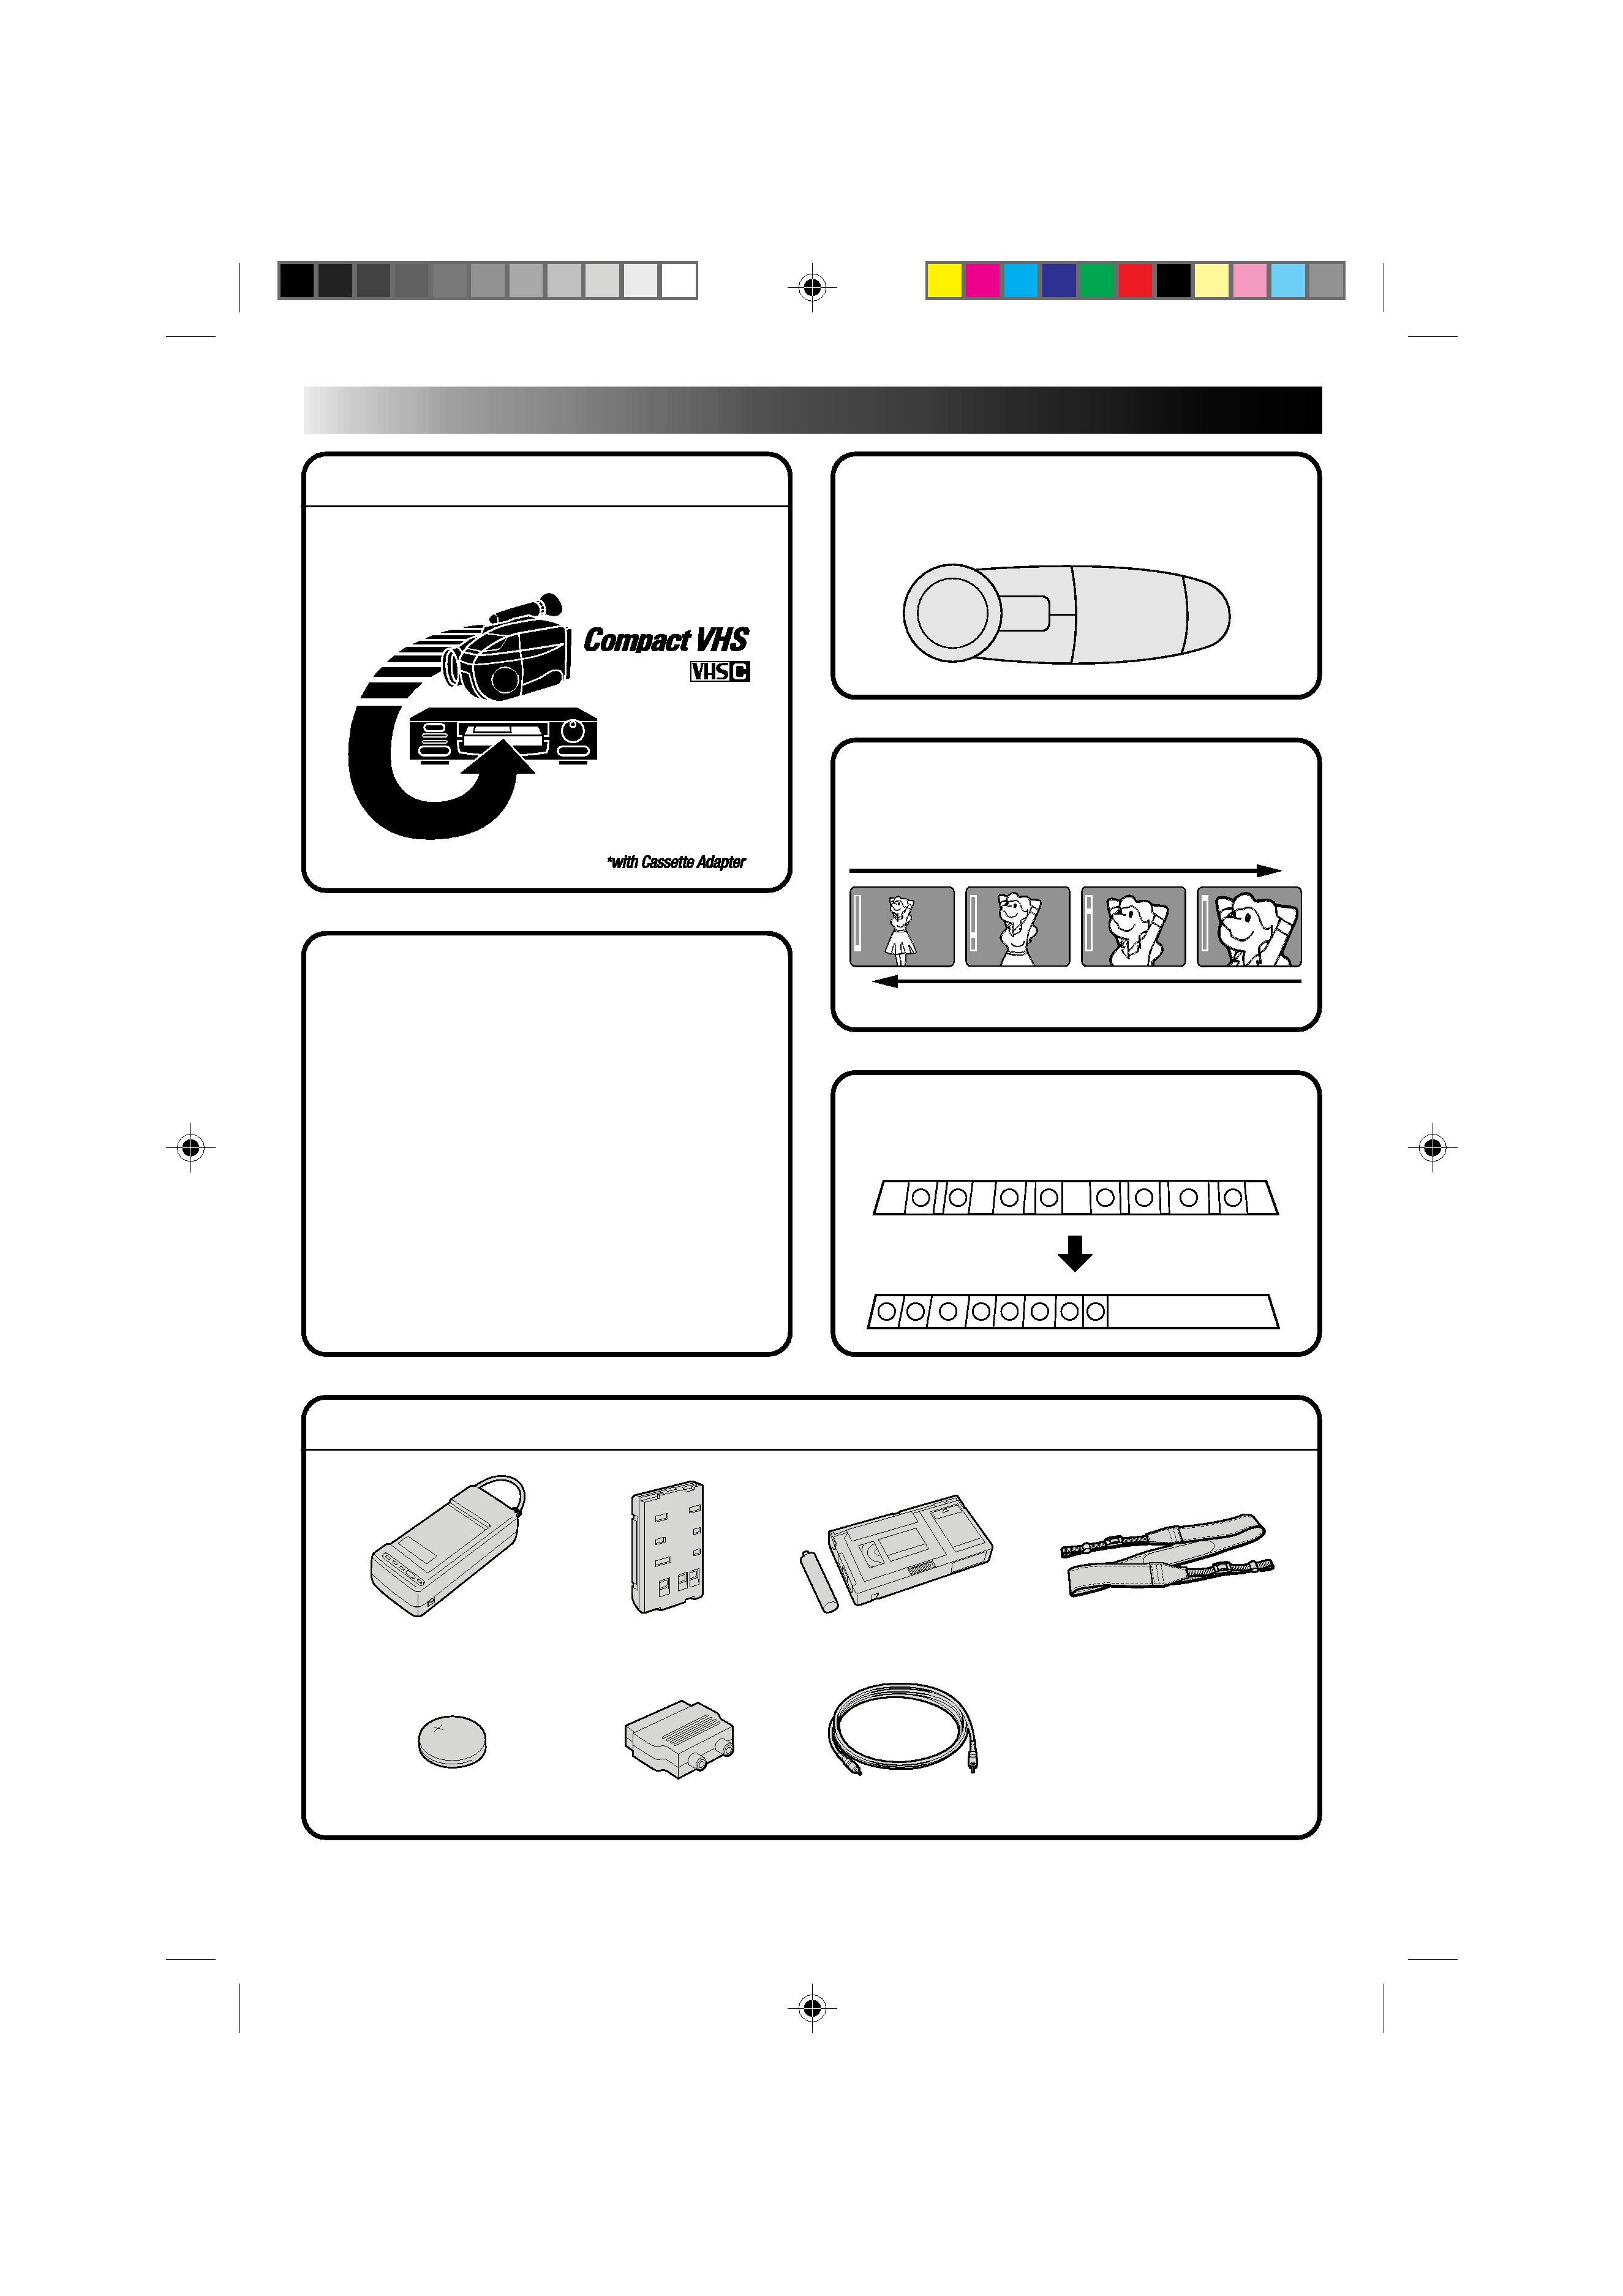
PROVIDED ACCESSORIES
T
W
T
W
T
W
T
W
Zoom-in
Zoom-out
MAJOR FEATURES
The Logical Choice
PAL
The only compact video
cassettes that can be
used with your VHS VCR*
·AC Power Adapter/
Charger AA-V11EA
·Battery Pack
BN-V12U
·Cassette Adapter C-P7U
· Lithium Battery
· Cable adapter
·Editing cable
·Shoulder Strap
5
QUICK OPERATION GUIDE
SUPPLY POWER
Using the battery pack
1 Hook-on the battery pack's top end to the
camcorder. (Charging procedure,
pg. 6)
2 Push in the battery pack until it locks into
place.
To remove the battery pack
Slide BATT. RELEASE and pull out the battery
pack.
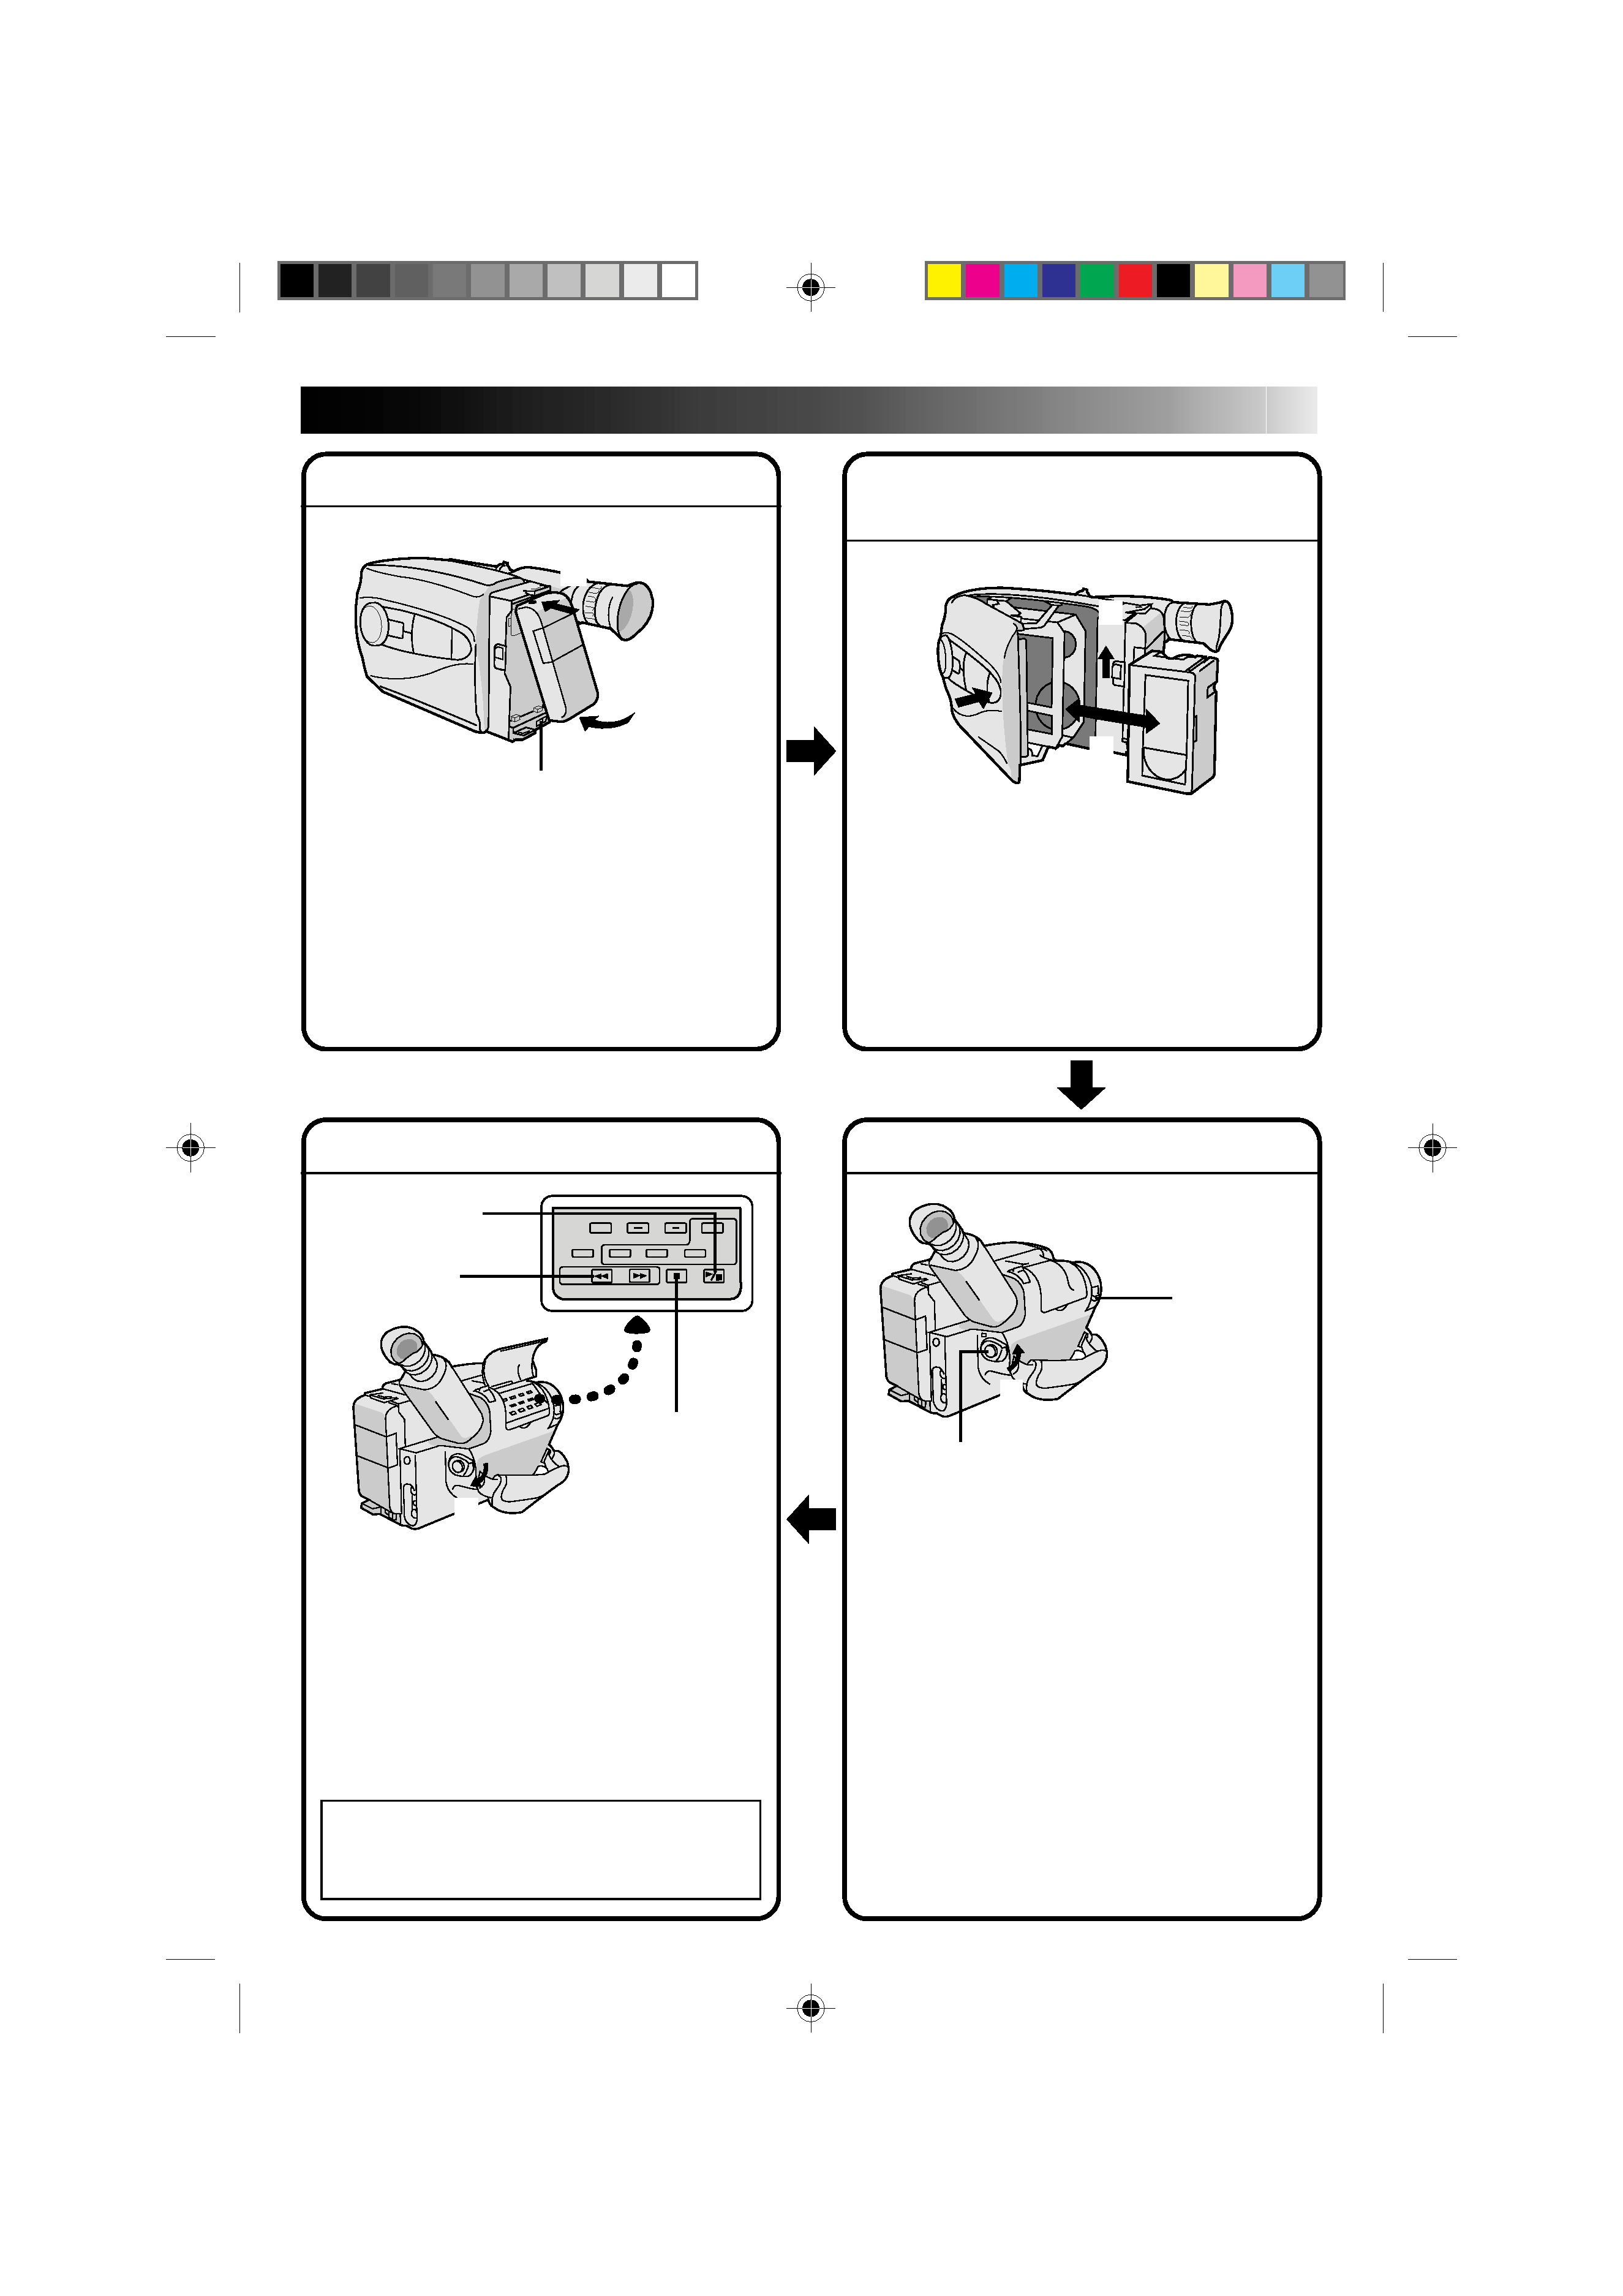
PLAYBACK
1 Set the power switch to "PLAY".
2 Press REW.
-- The tape will automatically stop at the
beginning of the tape.
3 Press PLAY/PAUSE.
-- Playback starts and playback picture
appears in the viewfinder.
·To stop playback, press STOP.
(For more details,
pg. 28.)
Or simply play back the tape on a VHS
VCR using the Cassette Adapter.
pg. 26
SHOOTING
1 Slide the LENS COVER open/close knob to
open the lens cover.
2 Set the power switch to "CAMERA".
-- The power indicator will light and image
will be seen in the viewfinder.
3 Press the Recording Start/Stop button.
-- Recording starts.
· To stop recording temporarily, momentarily
press the Recording Start/Stop button once
again.
(For more details,
pg. 12)
2 Push in.
1
Hook on.
BATT. RELEASE
3
1
PUSH
Insert.
EJECT
2
2 REW
1
Set to "PLAY".
1
LENS COVER
open/close knob
3 Recording Start/Stop button
2
Set to "CAMERA".
INSERTING A VIDEO
CASSETTE
1 Slide EJECT.
2 Insert a video cassette.
3 Press PUSH.
(For more details,
pg. 9)
STOP
3 PLAY/PAUSE