WORLDSPACE DIGITAL RECEIVER
INSTRUCTIONS
LVT0147-001A
[U]
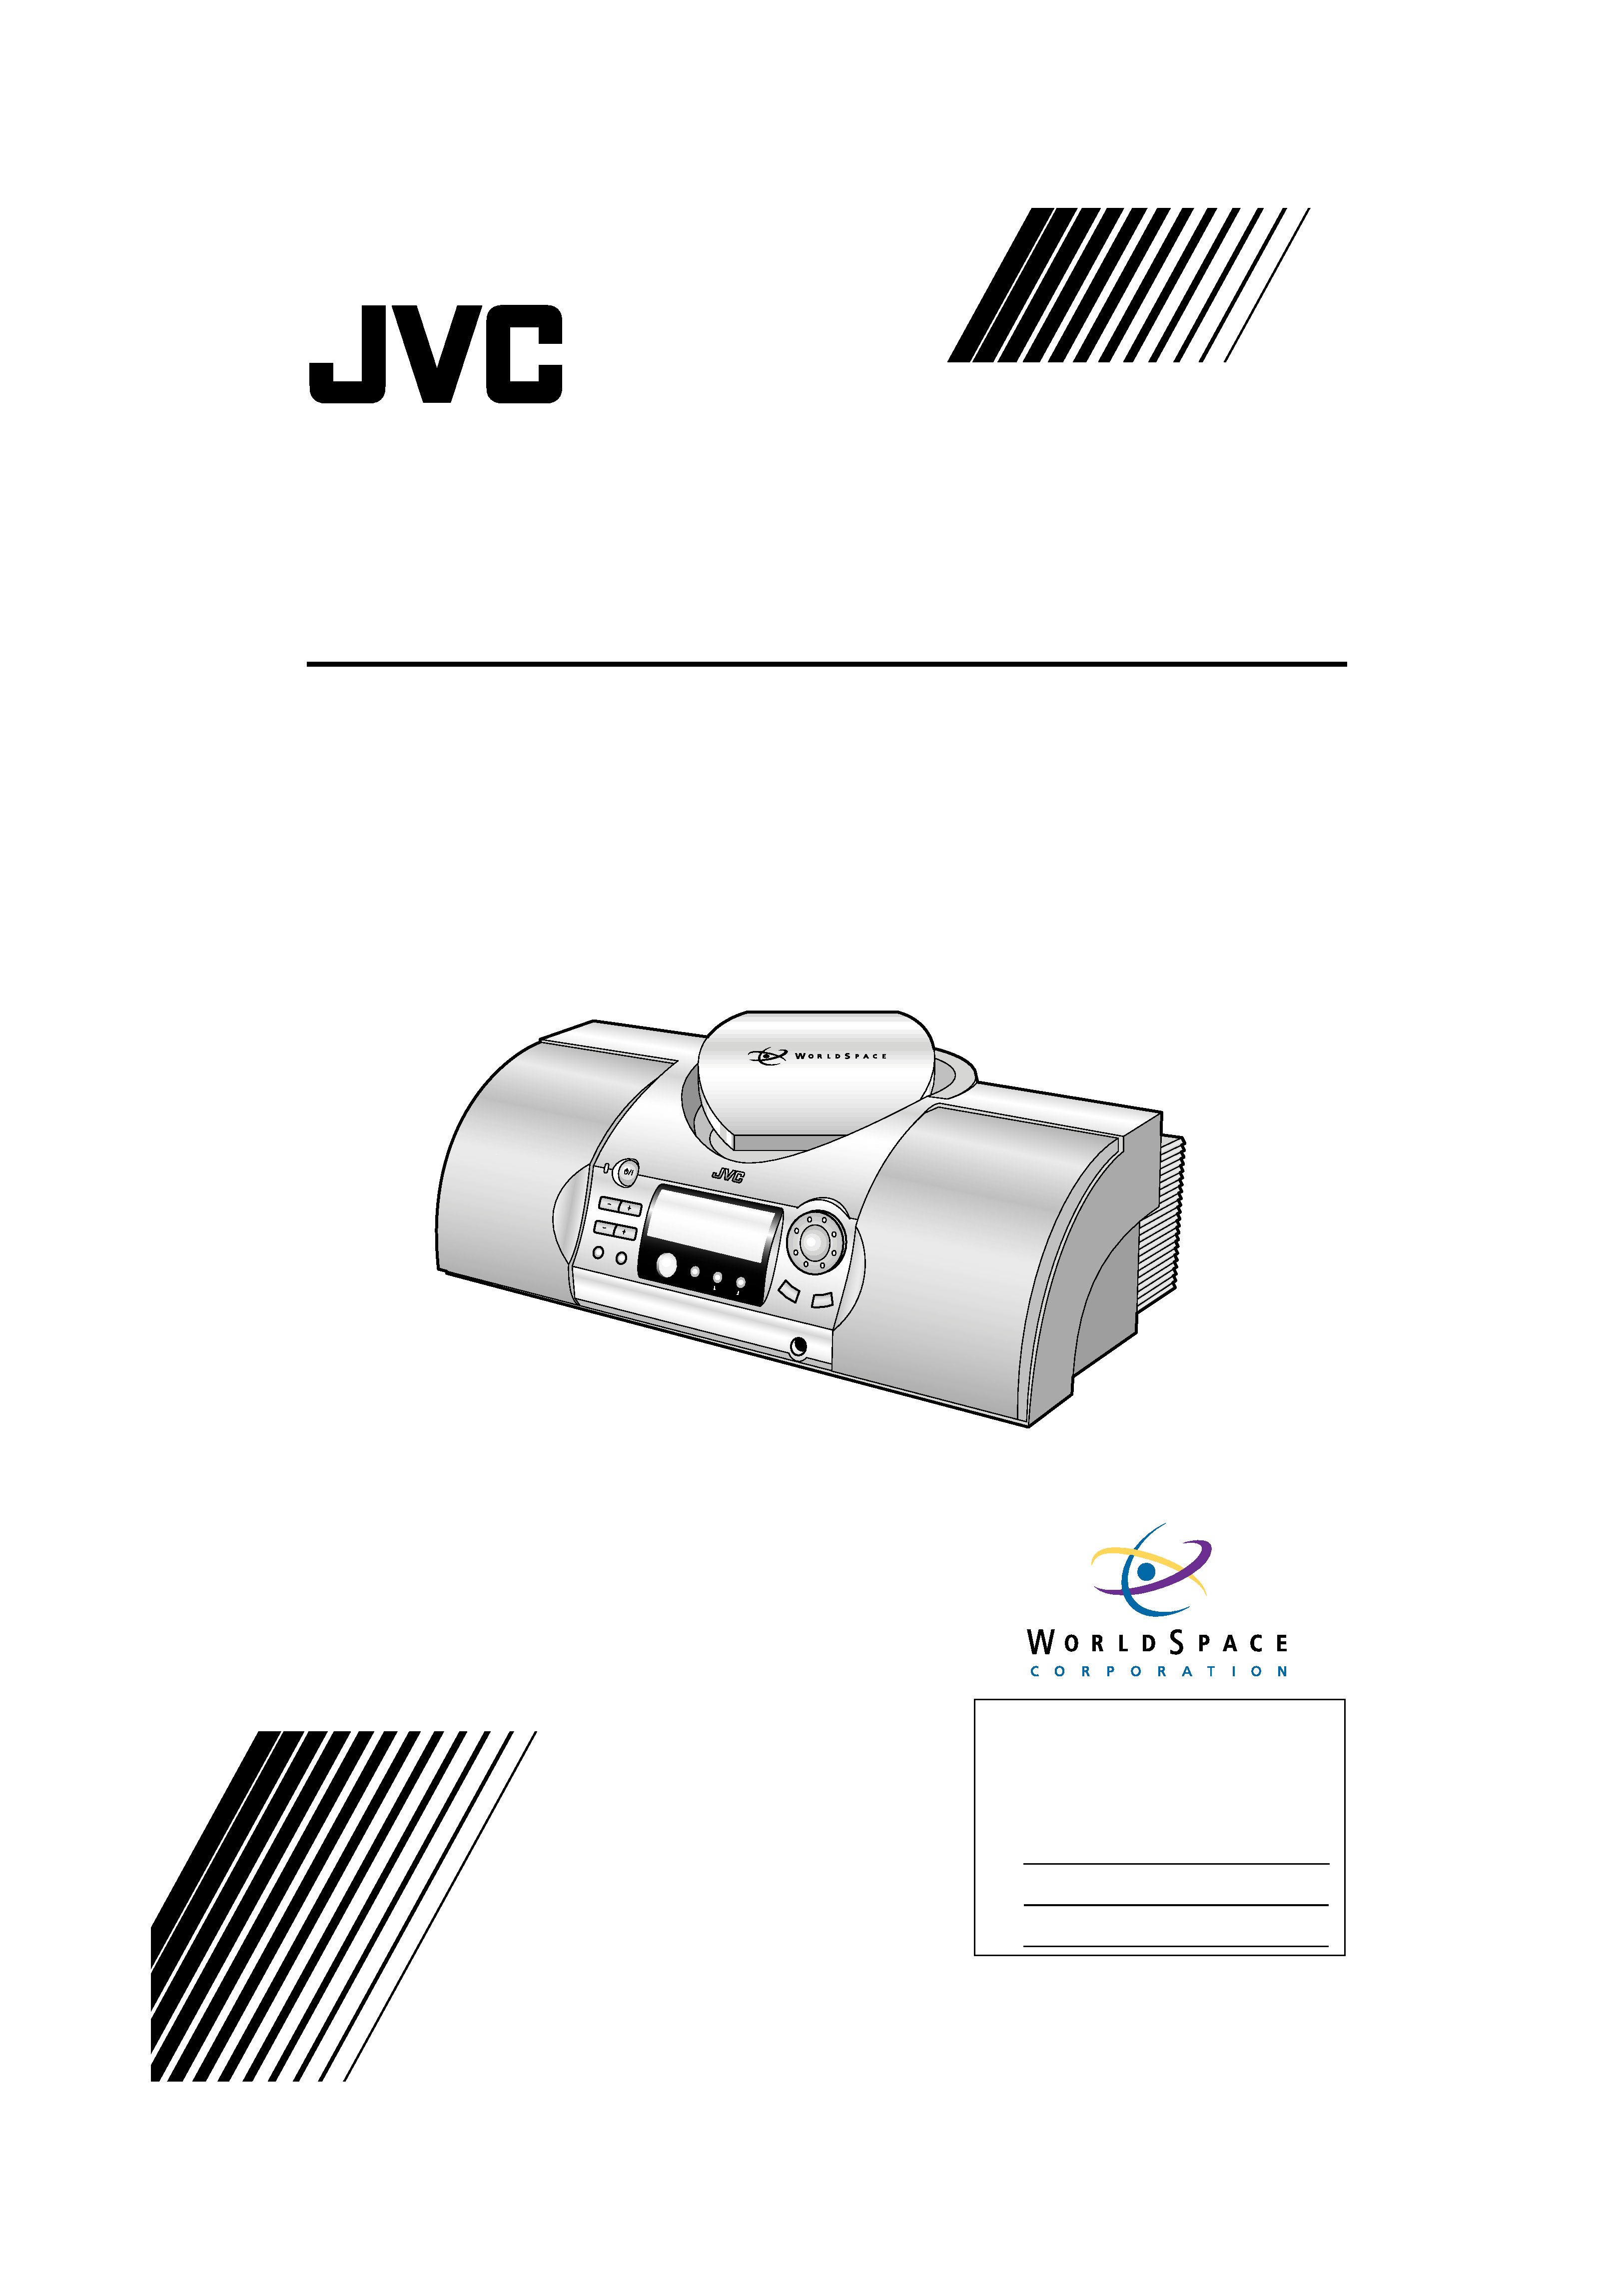
FR-DS100
,,,
,,,
,,,
,,,
,,,
,,,
,,,
,,,
,,,
,,,
,,,
,,,
,,,,,
,,,,,
,,,,,
,,,,,
,,,,,
,,,,,
,,,,,
,,,,,
,,,,,
,,
,,
,,
,,
,,,,,,,
,,,,,,,
,,,,,,,
,,,,,,,
,,,,,,,
,,,,,,,
,,,,,,,
,,,,,,,
,,,,,,,
,,,,,,,
,,,,,,,
,,,
,,,
,,,
,,,
,,,
,,,
,,,
,,,
,,,
,,,
WORLDSPACE ANTF
WORLDSPACE
DIGITAL
RECEIVER
FR - DS100
WS
LEARN
PTY
MULTI/LANG
PASSWORD
TUNING
/ SELECT
BAND
PHONES
MEMORY
/ CANCEL
VOLUME
PRESET
SOUND
AUTO PRESET
ON /
STANDBY
For Customer Use:
Enter below the Model No. and Serial
No. which are located either on the rear,
bottom or side of the cabinet. Retain this
information for future reference.
Model No.
Serial No.
ID No.
FR-DS100.U.COVER
5/6/99, 10:31
3
2
Warnings, Cautions and Others
Caution:
switch!
Disconnect the mains plug to shut the power off
completely. The
switch in any position does not
disconnect the mains line. The power can be remote
controlled.
CAUTION
To reduce the risk of electrical shocks, fire, etc.:
1.
Do not remove screws, covers or cabinet.
2.
Do not expose this appliance to rain or moisture.
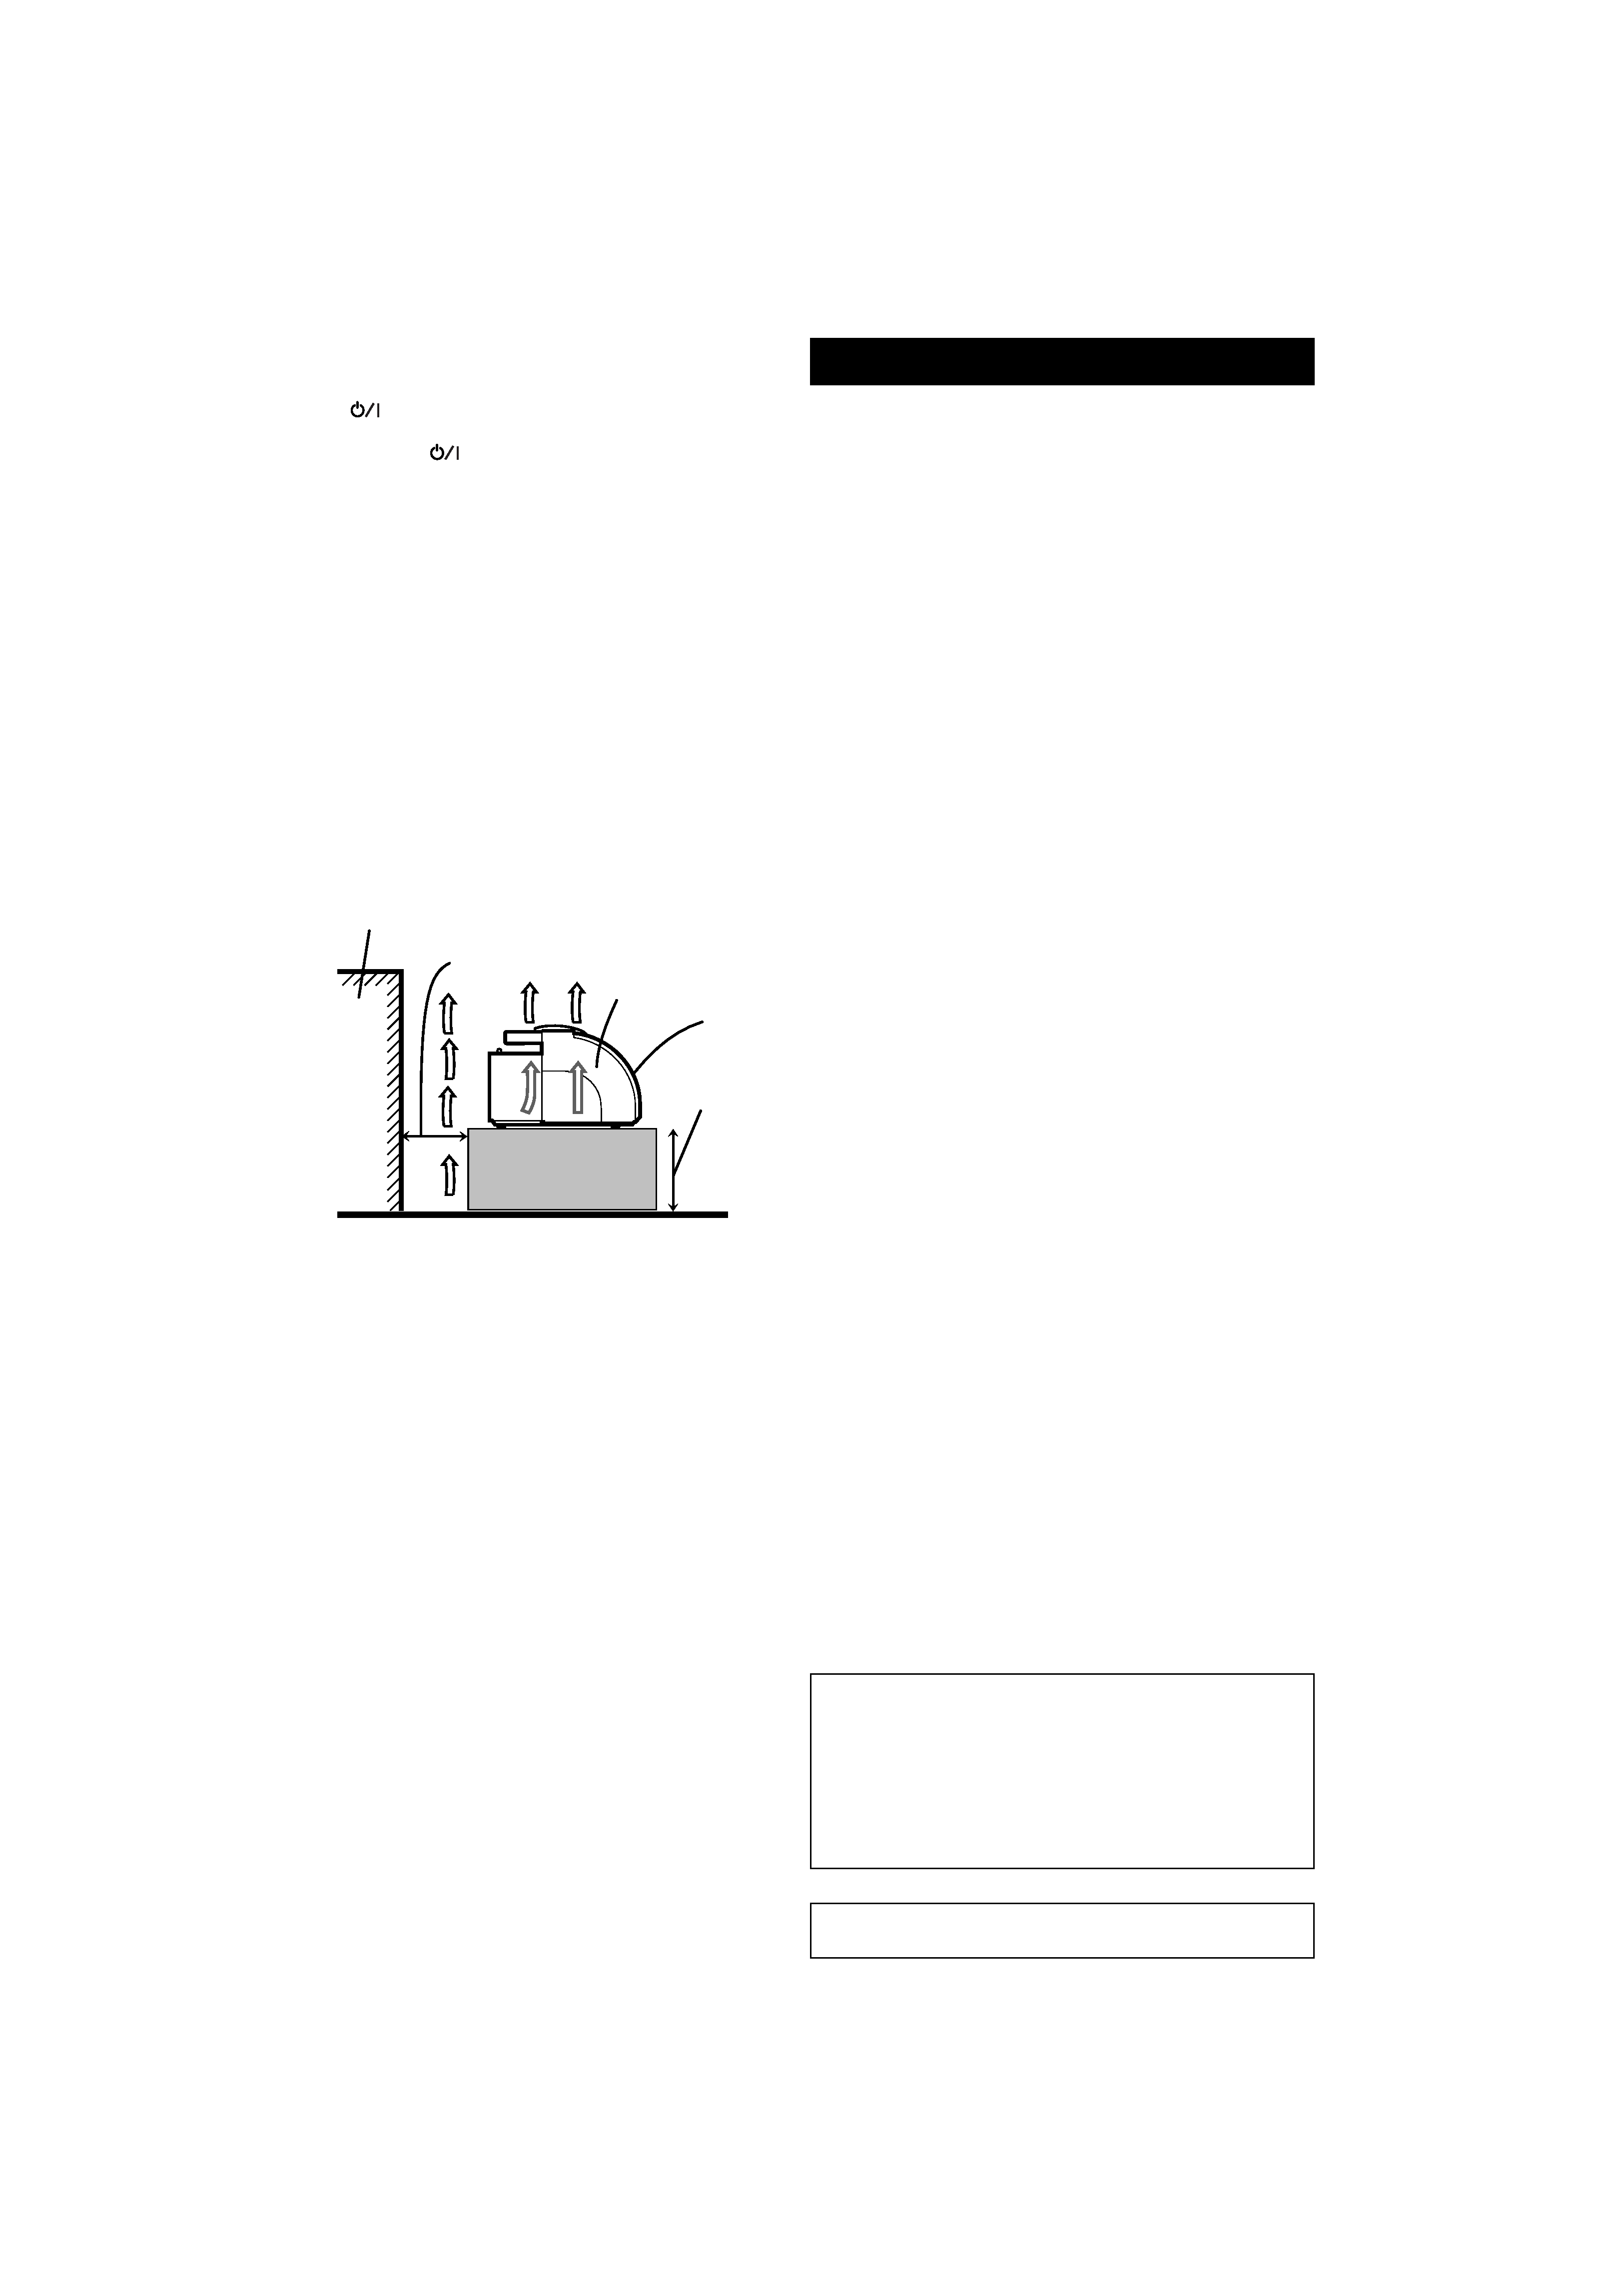
Caution: Proper ventilation
To avoid risk of electric shock and fire and to protect
from damage, locate the apparatus as follows:
Front:
No obstructions, open spacing
Sides:
No obstructions within 10 cm from the sides
Top:
No obstructions within 10 cm from the top
Back:
No obstructions within 15 cm from the back
Bottom: No obstructions, level surface
In addition, maintain the best possible air circulation
as illustrated below.
CONTENTS
WorldSpace
TM is a registered trademark of
Worldspace corporation. All rights reserved
Features ..................................................................... 3
Safety Precautions .................................................... 3
Handling Precautions ............................................... 3
Unpacking .................................................................. 4
Power Supply ............................................................ 4
Connecting the WS antenna .................................... 5
Names of Parts and Their Functions ................. 6
Front Panel ................................................................ 6
Rear Panel .................................................................. 7
Display Panel ............................................................. 8
Basic Operations ................................................. 9
Setting up for WorldSpace reception ...................... 9
Listening to WorldSpace broadcasters ................. 10
Listening to the radio (FM/AM (MW/SW)) ............ 11
Changing the audio presentation
of the broadcast .................................................... 11
Presetting WS broadcasters
and radio stations ................................................. 12
Clearing WS broadcaster presets .......................... 12
Preset Tuning .......................................................... 13
AC power resume function .................................... 13
Additional Operations ...................................... 14
Searching for a preferred language ...................... 14
Searching for a program type (PTY) ..................... 15
Regarding encrypted broadcaster signals ............ 16
Displaying the unit ID number ............................... 16
Recording a broadcast from the radio
or WS band ........................................................... 16
Tuning the Time Division Multiplex (TDM)
frequencies manually ........................................... 17
Additional Information ..................................... 18
WorldSpace
TM Coverage Area ................................ 18
Troubleshooting ...................................................... 20
Specifications .......................................................... 20
WorldSpace
TM Center Addresses ........................... 21
Floor
Stand height
15 cm or more
Front
FR-DS100
Spacing 15 cm or more
Wall or obstruction
Regarding WorldSpace broadcast audio quality
Programs broadcast by WorldSpace utilize the
newest technology in data compression (MPEG
LAYER III) enabling audio ranging from telephone
quality to that approaching CD quality.
Audio quality of individual programs, however,
depends on the broadcaster.
FR-DS100.02-08
5/5/99, 12:46 PM
2

3
Features
High quality digital sound
· Listen to near CD-quality broadcasts from all over the
world when listening to the WorldSpace network band.
Detachable WorldSpace satellite antenna
· Freely position the antenna for optimal signal reception
using the supplied WS specified extension cable.
Program and language search
· Easily find the type of program you want to listen to and
the language you want to hear (subject to availability).
Digital synthesizer tuner
· Receive AM (MW/SW) and FM radio stations.
Additionally, the AUTO PRESET function can be used to
automatically create a list of presets for frequencies that
can be received in your area.
LCD Display with back-light
· Read broadcaster information and display messages with
ease. The back-light does not function when using
batteries.
Handling Precautions
1. Avoid installing in the following places.
· Where it could be subject to vibrations.
· Where it is excessively humid, such as in a
bathroom.
· Where it could be magnetized by a magnet or
speaker.
2. Do not place cassette tapes, etc. near the
speakers.
Since there are magnets in the speakers, do not
place tapes or magnetic cards on them as
recorded data could be erased.
3. Keep this unit away from your TV.
When this unit is used near a TV, the TV picture
could be distorted. If this happens, move this unit
away from the TV. If this does not correct the
situation, avoid using this unit when the TV is
turned on.
4. Cleaning the cabinet
If the cabinet gets dirty, wipe it with a soft dry
cloth. Never use benzene or thinner as these
could damage the surface finish.
5. When listening with headphones
· Do not listen at high volumes as it could
damage your hearing.
· For safety, do not drive while listening to this
unit on headphones.
6. Carrying handle
· Do not raise or lower the carrying handle with
the telescopic antenna extended, to avoid
damaging the antenna. Place the carrying
handle so that it does not interfere with
operation.
· After connecting the WS antenna cable, be sure
to check that the cable is under and not over
the carrying handle. If the cable is over the
handle, using the handle to carry this unit may
stretch the cable and cause the unit to
malfunction.
Safety Precautions
Prevention of Electric Shocks, Fire Hazards, and
Damage
1. Even when the
(STANDBY/ON) button is set
to standby, a very small current will flow. To save
power and for safety reasons, when not using the
unit for an extended period of time, disconnect
the power cord from the AC outlet.
2. Do not handle the power cord with wet hands.
3. When unplugging from the wall outlet, always
grasp and pull the plug, not the power cord.
4. Consult your nearest dealer when damage,
disconnection, or connect failure is found with
the power cord.
5. Do not bend sharply, pull or twist the cord.
6. Do not modify the power cord in any manner.
7. To avoid accidents, do not remove screws to
disassemble the unit and do not touch anything
inside the unit.
8. Do not insert any metallic objects into the unit.
9. Unplug the power cord when there is a
possibility of lightning.
10. If water gets inside the unit, unplug the power
cord from the outlet and consult your dealer.
11. Do not block the ventilation holes of the unit so
that heat can escape. Do not place the unit in a
badly ventilated place.
(STANDBY/ON) button
When the power cord is connected to an AC
outlet, the standby indicator is lit red, when the
unit is in the standby mode (this indicator does
not light when DC power is supplied). When the
power is switched on, the indicator turns off
showing that the power is on.
When this unit is plugged into an AC outlet, it
consumes a small current to back up the memory
of the microprocessor, even when the
(STANDBY/ON) is set to standby.
PRECAUTIONS REGARDING WS ANTENNA
SHORT-CIRCUIT
When there is a possible short-circuit in the WS
antenna, the unit will exhibit the following.
1. The WS antenna reception indicator and
WorldSpace band indicator will occasionally
disappear.
2. When the WS band is selected, the WS band
indicator and WS antenna reception indicator will
blink.
3. After broadcaster reception is initiated, the sound
will be muted for about two seconds before
being received.
When these precautionary signs are noted, bring the
unit to an authorized JVC dealer or service station.
FR-DS100.02-08
5/5/99, 12:46 PM
3
4
Unpacking
Check that the following items were supplied with the FR-DS100.
WorldSpace (WS) antenna (1)
AC power cord (1)
Plug adapter (1)
WS specified extension cable (1)
ID number sticker sheet (1) *
* The 16-digit ID number is not the serial number. The ID number is necessary when subscribing to
WorldSpace broadcaster services. Using the ID number stickers, keep the ID number of your unit in safe
locations where it can be easily found or referred to if necessary. (Refer to page 16.)
Power Supply
A. Operation on AC power
1. When the FR-DS100 is used in an area where the
supply voltage is different from the preset
voltage, set the voltage selector to the correct
position. For more information, refer to "To set
the voltage selector" below.
2. Insert the AC power cord firmly and completely
into the AC IN jack on the unit.
CAUTIONS:
1. ONLY USE WITH JVC POWER CORD PROVIDED
WITH THIS UNIT TO AVOID MALFUNCTION OR
DAMAGE TO THE UNIT. REMOVE BATTERIES
WHEN USING THE POWER CORD.
2. BE SURE TO UNPLUG THE POWER CORD FROM
THE OUTLET WHEN GOING OUT OR WHEN THE
UNIT IS NOT IN USE FOR AN EXTENDED PERIOD
OF TIME.
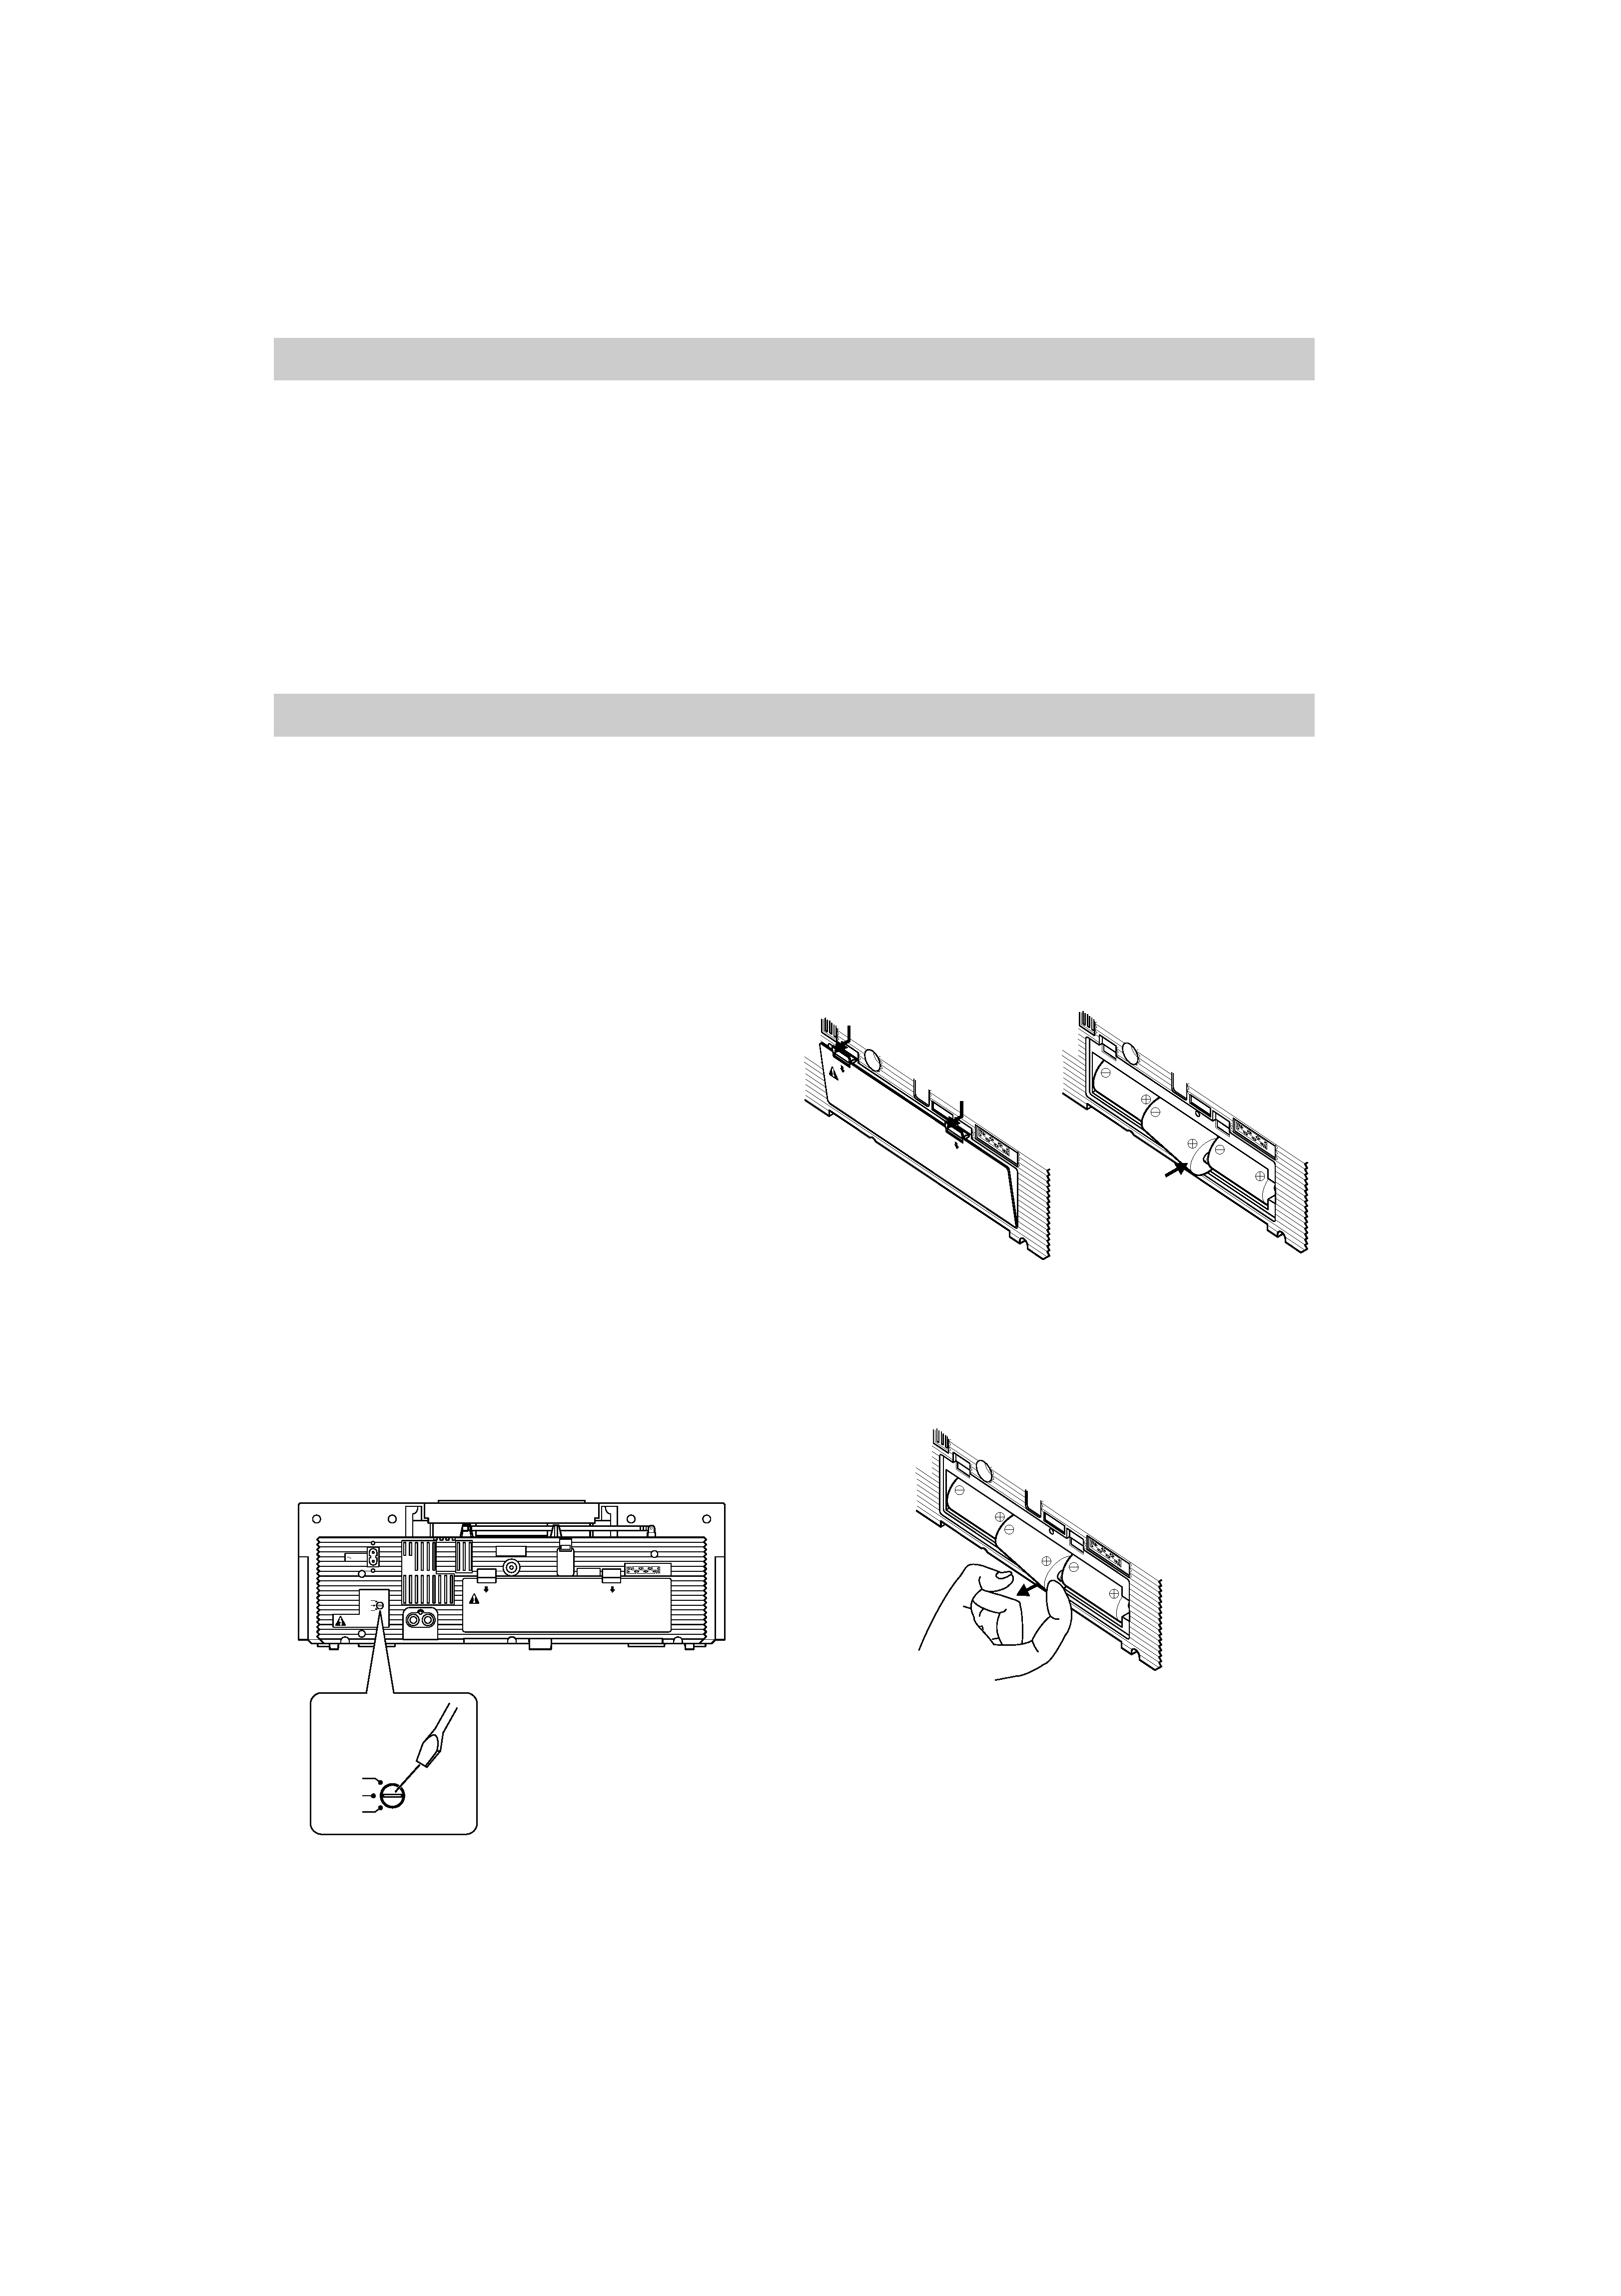
To set the voltage selector
Before attempting to use this unit, check the voltage
selector on the rear panel of this unit to determine if
the selected voltage is appropriate for the power
supply in your area. If you need to change the setting
to match your local power supply, use a screwdriver
to turn the arrow mark until it is pointed at the
appropriate voltage setting.
B. Operation on batteries
Loading batteries
1. Open the battery cover by pulling it toward you
while pressing down on the tabs marked by the
arrows.
2. Insert 6 "D" size/R 20 batteries as shown in the
diagram below. A similar diagram can also be
found on the rear panel of the unit.
* Be careful to insert the batteries with the
ª
and
· terminals oriented correctly.
3. Replace the cover.
Removing batteries
1. Open the battery cover as indicated above.
2. Remove the center battery by hooking your finger
onto the cusp of the
ª side of the battery, and
pulling outward. The other batteries should then
be easily removable.
3. Repeat step 2 with the other row of batteries.
CAUTIONS WHEN USING BATTERIES:
When batteries are used incorrectly, it may result in
the leakage of chemicals from the batteries or they
may explode. If chemicals from the batteries come in
contact with your skin, wash them off immediately
with water. If chemicals leak onto the unit, clean the
unit completely.
The following care should be taken;
· Check that the positive
ª and negative · terminals of the
batteries are oriented correctly and load them as shown in
the diagram.
· Do not mix old and new batteries together, or mix
different types of batteries.
· Do not try to recharge non-rechargeable batteries.
· Remove the batteries when the unit is not to be used for
an extended period of time.
VOLTAGE
SELECTOR
230V
127V
110V
AC IN
SEE BOTTOM
VOLTAGE
SELECTOR
R
LINE
ANTENNA
WARNING
· DO NOT PUT BATTERY IN BACKWARDS, MIX WITH
USED OR OTHER BATTERY TYPES-MAY EXPLODE
OR LEAK AND CAUSE PERSONAL INJURY.
· REMOVE THE BATTERIES ("D" SIZE, R20) WHEN
USING THE AC POWER.
· SEE INSTRUCTION MANUAL.
EXTERNAL
L
OUT
230V
127V
110V
2
3
1
4
6
5
1.5Vx6
EXTERNAL
2
3
1 4
6
5
1.5Vx6
4
5
6
=
EXTERNAL
2
3
1 4
6
5
1.5Vx6
WARNING
· DO
NOT
PUT
BATTERY
IN
BACKWARDS,
MIX
WITH
USED
OR
OTHER
BATTERY
TYPES-MAY
EXPLODE
OR
LEAK
AND
CAUSE
PERSONAL
INJURY.
· REMOVE
THE
BATTERIES
("D"
SIZE,
R20)
WHEN
USING
THE
AC
POWER.
· SEE
INSTRUCTION
MANUAL.
EXTERNAL
2
3
1 4
6
5
1.5Vx6
3
2
1
FR-DS100.02-08
5/6/99, 9:33 AM
4
5
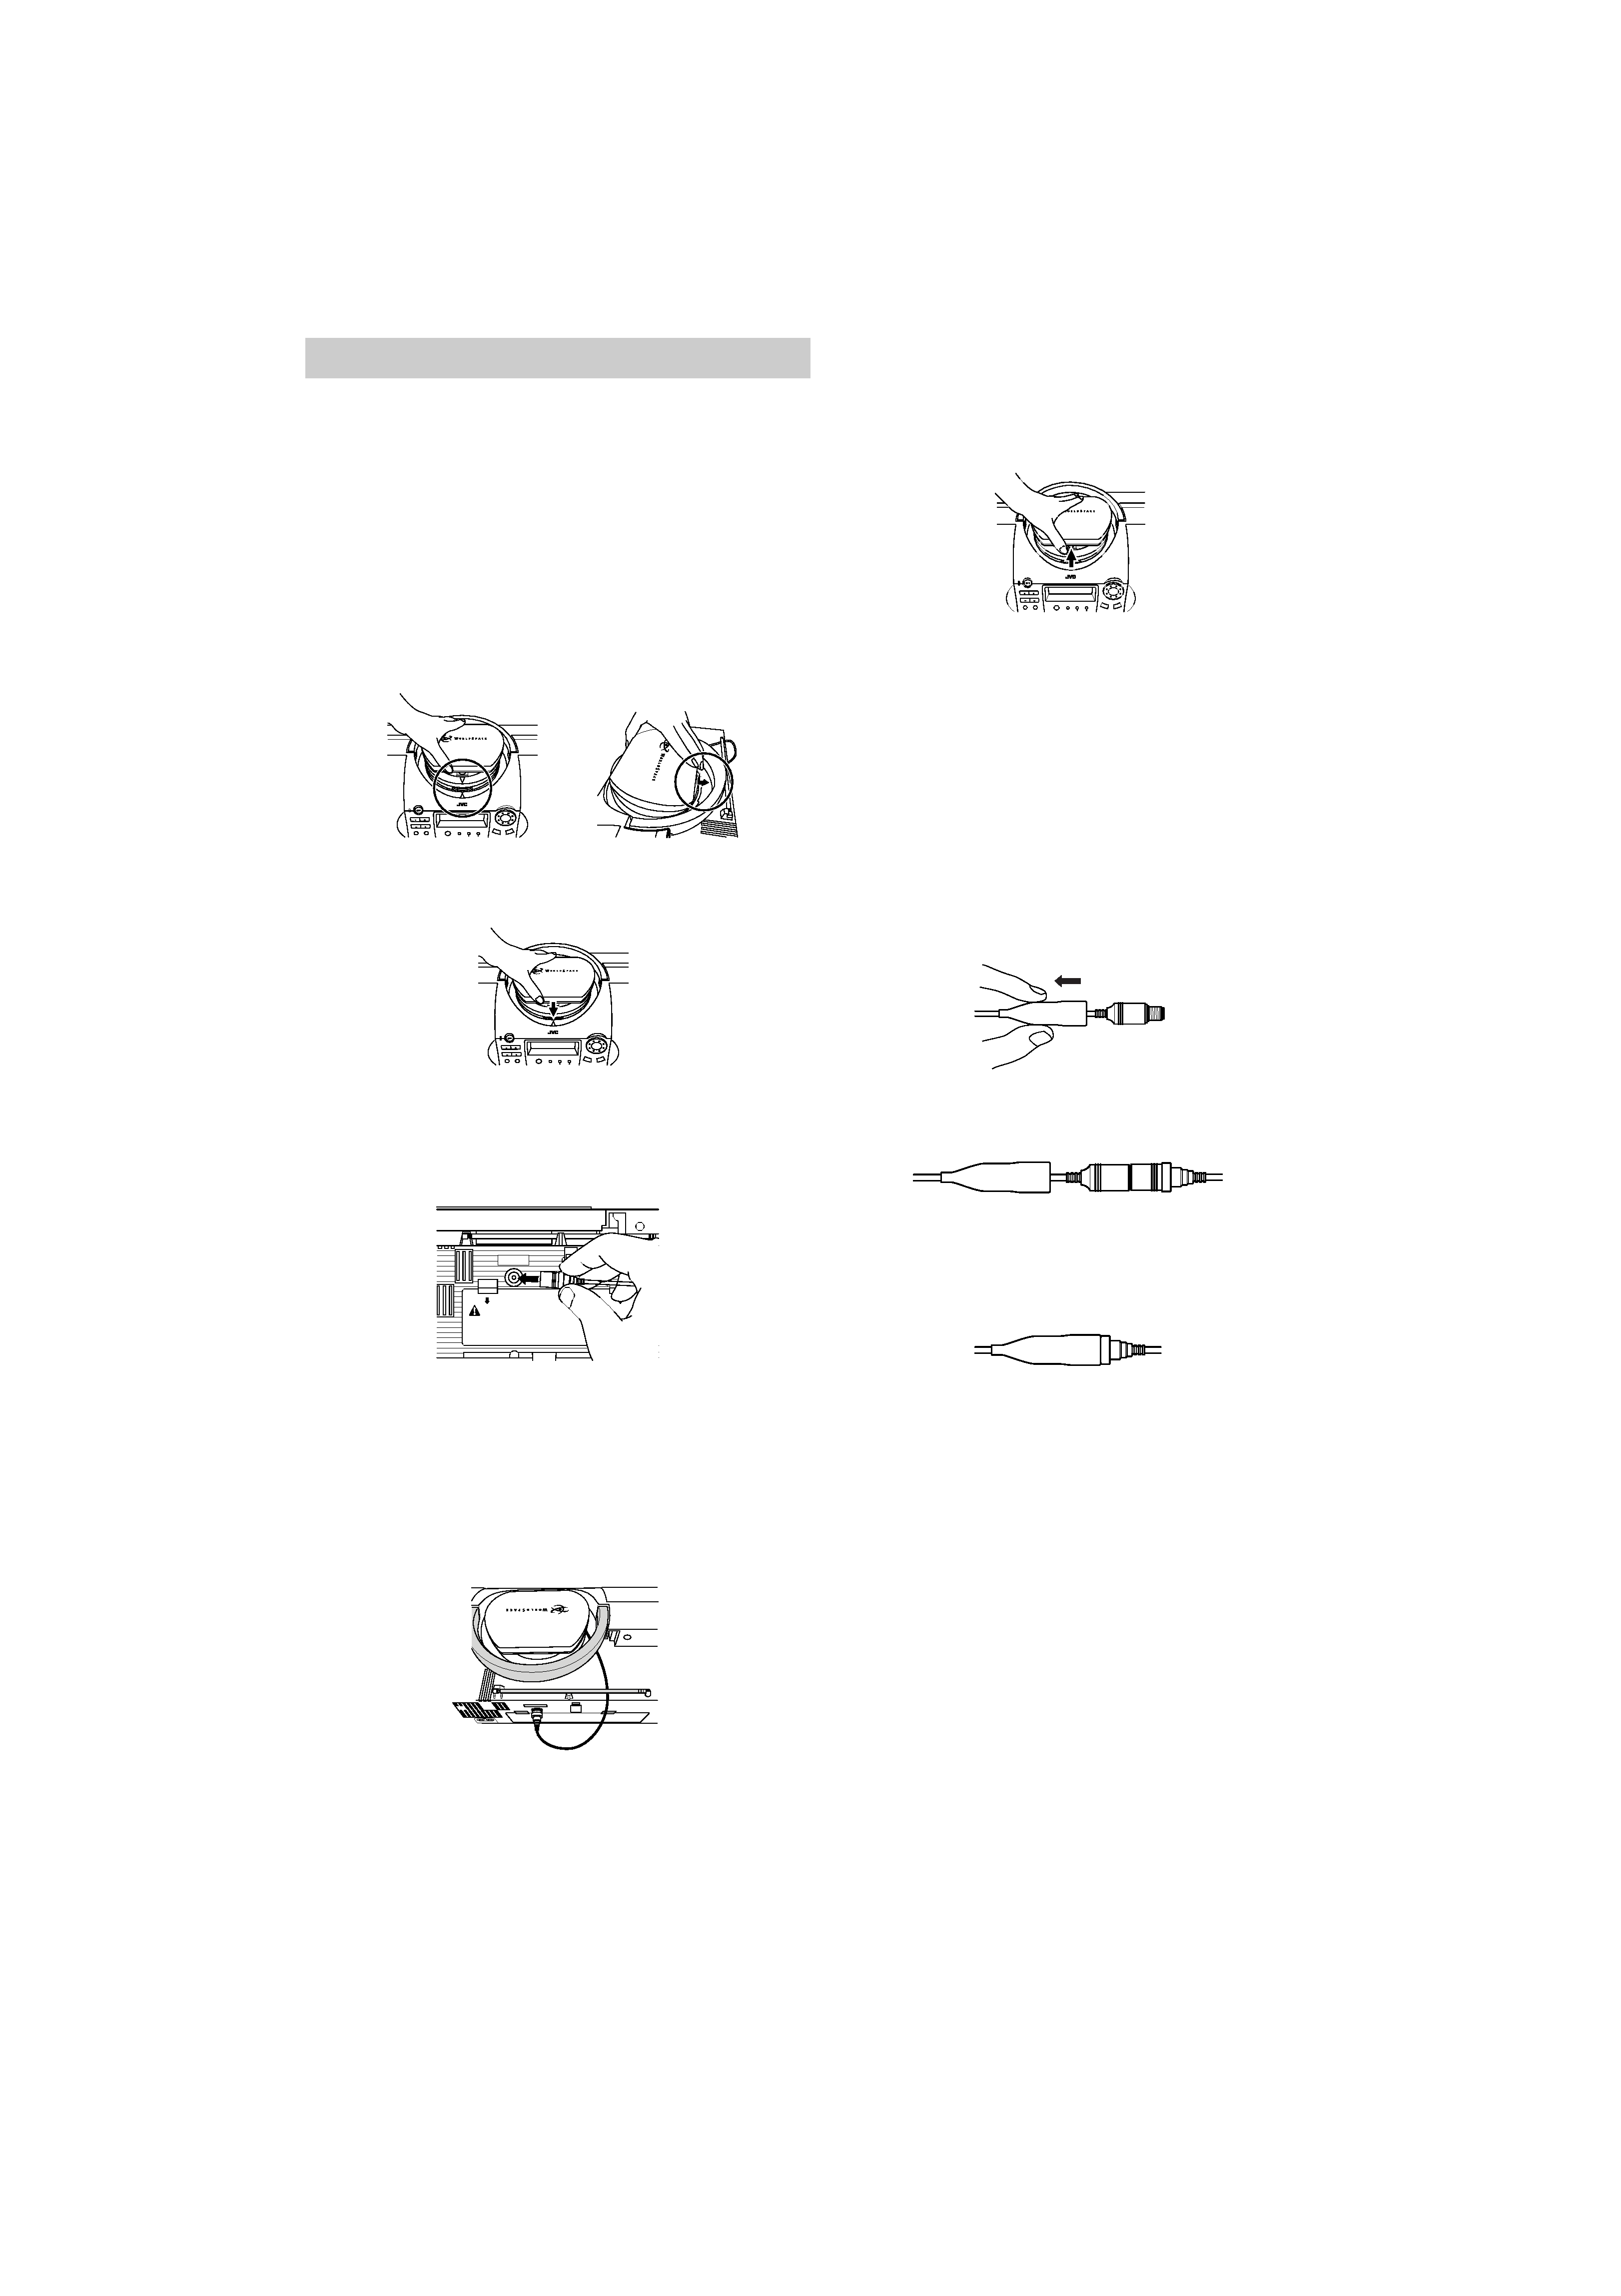
Connecting the WS antenna
For safety reasons, make sure that the unit is not
plugged in and batteries are not installed when
making connections.
To install the WS antenna
1. To install the WS antenna, orient the antenna by
lining up the arrow marks on the front of the WS
antenna and on the front side of the housing
platform. Slide the antenna into the housing
platform at an angle so that the groove on the
back side of the base of the antenna fits into the
corresponding tab on this unit.
2. Push down on the front end of the base of the
antenna until it clicks into place.
To connect the antenna cable
Connect the antenna cable to the antenna jack
located on the rear panel of the unit.
Notes:
· Be sure not to place the back of this unit against a wall or
other surface when the antenna cable is connected as it
may damage the cable and/or antenna jack.
· Be sure to check that the cable under and not over the
handle of the unit. If the cable is over the handle, using
the handle to carry this unit may be the cause of
malfunction.
To remove the WS antenna from the
housing platform
Pull up on the front end of the antenna unit to unlock
the base. The WS antenna should then be easily
removable.
CAUTION:
DO NOT FORCE THE WS ANTENNA INTO OR OUT
OF THE HOUSING PLATFORM. THIS MAY CAUSE
DAMAGE TO THE WS ANTENNA AND CAUSE THIS
UNIT TO PERFORM IMPROPERLY.
To connect the extension cable.
1. Disconnect the WS antenna from the antenna
jack.
2. Connect the extension cable into the antenna jack
on the rear panel of the unit.
3. Slide the rain protection cover on the extension
cable back so that the connector protrudes.
4. Firmly connect the extension cable with the WS
antenna cable.
5. Slide the rain protection cover over the
connected section completely for best
performance.
CAUTION:
The rain protection cover is not intended to be left
out in heavy rain or submerged in water. Please
avoid exposing this section of the cable to excessive
moisture.
Notes:
· To help ensure long-lasting performance of this unit, do
not leave the extension cable and antenna outside or in
direct sunlight for long periods of time. It is
recommended that you restore the WS antenna to the
housing platform when you are finished using the unit.
· The WS specified extension cable supplied with this unit
is specially designed for use with this unit. Should you
use a cable not supplied with this unit nor recommended
by JVC for use with this unit, JVC cannot guarantee the
performance of this unit. For details regarding
compatibility with this unit, please consult with the
manufacturer of the cable.
To adjust the WS antenna
For details on how to position the WS antenna for
best possible reception, refer to page 9.
ACE ANTENNA SYSTEM
WS
LEARN
PTY
MULTI/LANG
PASSWORD
TUNING / SELECT
BAND
MEMORY
/ CANCEL
VOLUME
SOUND
AUTO PRESET
ON /
STANDBY
PRESET
ANTENNA
WARNING
· DO NOT PUT BATTERY IN BACKWARDS, MIX WITH
USED OR OTHER BATTERY TYPES-MAY EXPLODE
OR LEAK AND CAUSE PERSONAL INJURY.
· REMOVE THE BATTERIES ("D" SIZE, R20) WHEN
USING THE AC POWER.
· SEE INSTRUCTION MANUAL.
EXTERNAL
LITE ANTENNA SYSTEM
WS
LEARN
PTY
MULTI/LANG
PASSWORD
TUNING / SELECT
BAND
MEMORY
/ CANCEL
VOLUME
SOUND
AUTO PRESET
ON /
STANDBY
PRESET
PACE ANTENNA SYSTEM
WS
LEARN
PTY
MULTI/LANG
PASSWORD
TUNING / SELECT
BAND
MEMORY
/ CANCEL
VOLUME
SOUND
AUTO PRESET
ON /
STANDBY
PRESET
\
FR-DS100.02-08
5/5/99, 12:46 PM
5