AV-28BK5ECB
AV-28BK5ECS
COLOUR TELEVISION
FARBFERNSEHGERÄT
TELEVISEUR COULEUR
TELEVISORE A COLORI
INSTRUCTIONS
BEDIENUNGSANLEITUNG
MANUEL D'INSTRUCTION
ISTRUZIONI
ENGLISH
DEUTSCH
FRANÇAIS
ITALIANO

2
T
TABLE OF CONTENTS
ABLE OF CONTENTS
SAFETY PRECAUTIONS
Installation .......................................................................................3
Use ..................................................................................................3
INSTALLATION
STEP 1 : Connect aerial cables ......................................................4
STEP 2 : Install batteries.................................................................4
STEP 3 : Connect AC Cord .............................................................4
STEP 4 : Turn Mains switch-on ...................................................4~5
PRODUCT OVERVIEW ..........................................................................6
GENERAL OPERATION
Switching-on/off with mains switch .................................................7
Switching into/from standby mode ..................................................7
Programme selection ......................................................................7
Sound & Picture settings.................................................................8
On Screen language setting ...........................................................8
Picture mode selection and personal preference setting............8~9
Stereo & Bilingual Reception...........................................................9
ADDITIONAL FUNCTIONS
Child lock .........................................................................................9
16:9 format signal reception ............................................................9
Bass expander ................................................................................9
Programme information display .......................................................9
Time display ....................................................................................9
USING AV EQUIPMENT
Selection of AV mode ....................................................................10
Setting of AV2 input mode.............................................................10
Use of front AV3 terminal ..............................................................10
Selection of sound track from the equipment................................10
Selection of colour system ............................................................10
VCR/DVD controls .........................................................................10
Connections...................................................................................11
Use of Camcorder and game equipment ......................................11
Use of Headphones.......................................................................11
TIMER
Off Timer Setting ...........................................................................12
On-Timer Setting ...........................................................................12
Alarm Timer Setting.......................................................................13
PRESETTING
ATS EURO PLUS (Auto-tuning system) ........................................13
PRG. PRESET (Manual tuning).................................................... 14
Channel Swapping........................................................................ 14
TELETEXT........................................................................................15~16
OTHERS
TV Specifications...........................................................................17
SCART Specifications ...................................................................17
Servicing........................................................................................18
Helpful Hints ..................................................................................18
Channel Table ................................................................................19
What is 100Hz ?
Flicker-free picture resulting from the use of
100Hz technology. Conventional sets use
50 fields per second (50Hz) a frequency to
which the human eye is sensitive. With
100Hz the picture is much easier on the
eye.
3
SAFETY PRECA
SAFETY PRECAUTIONS
UTIONS
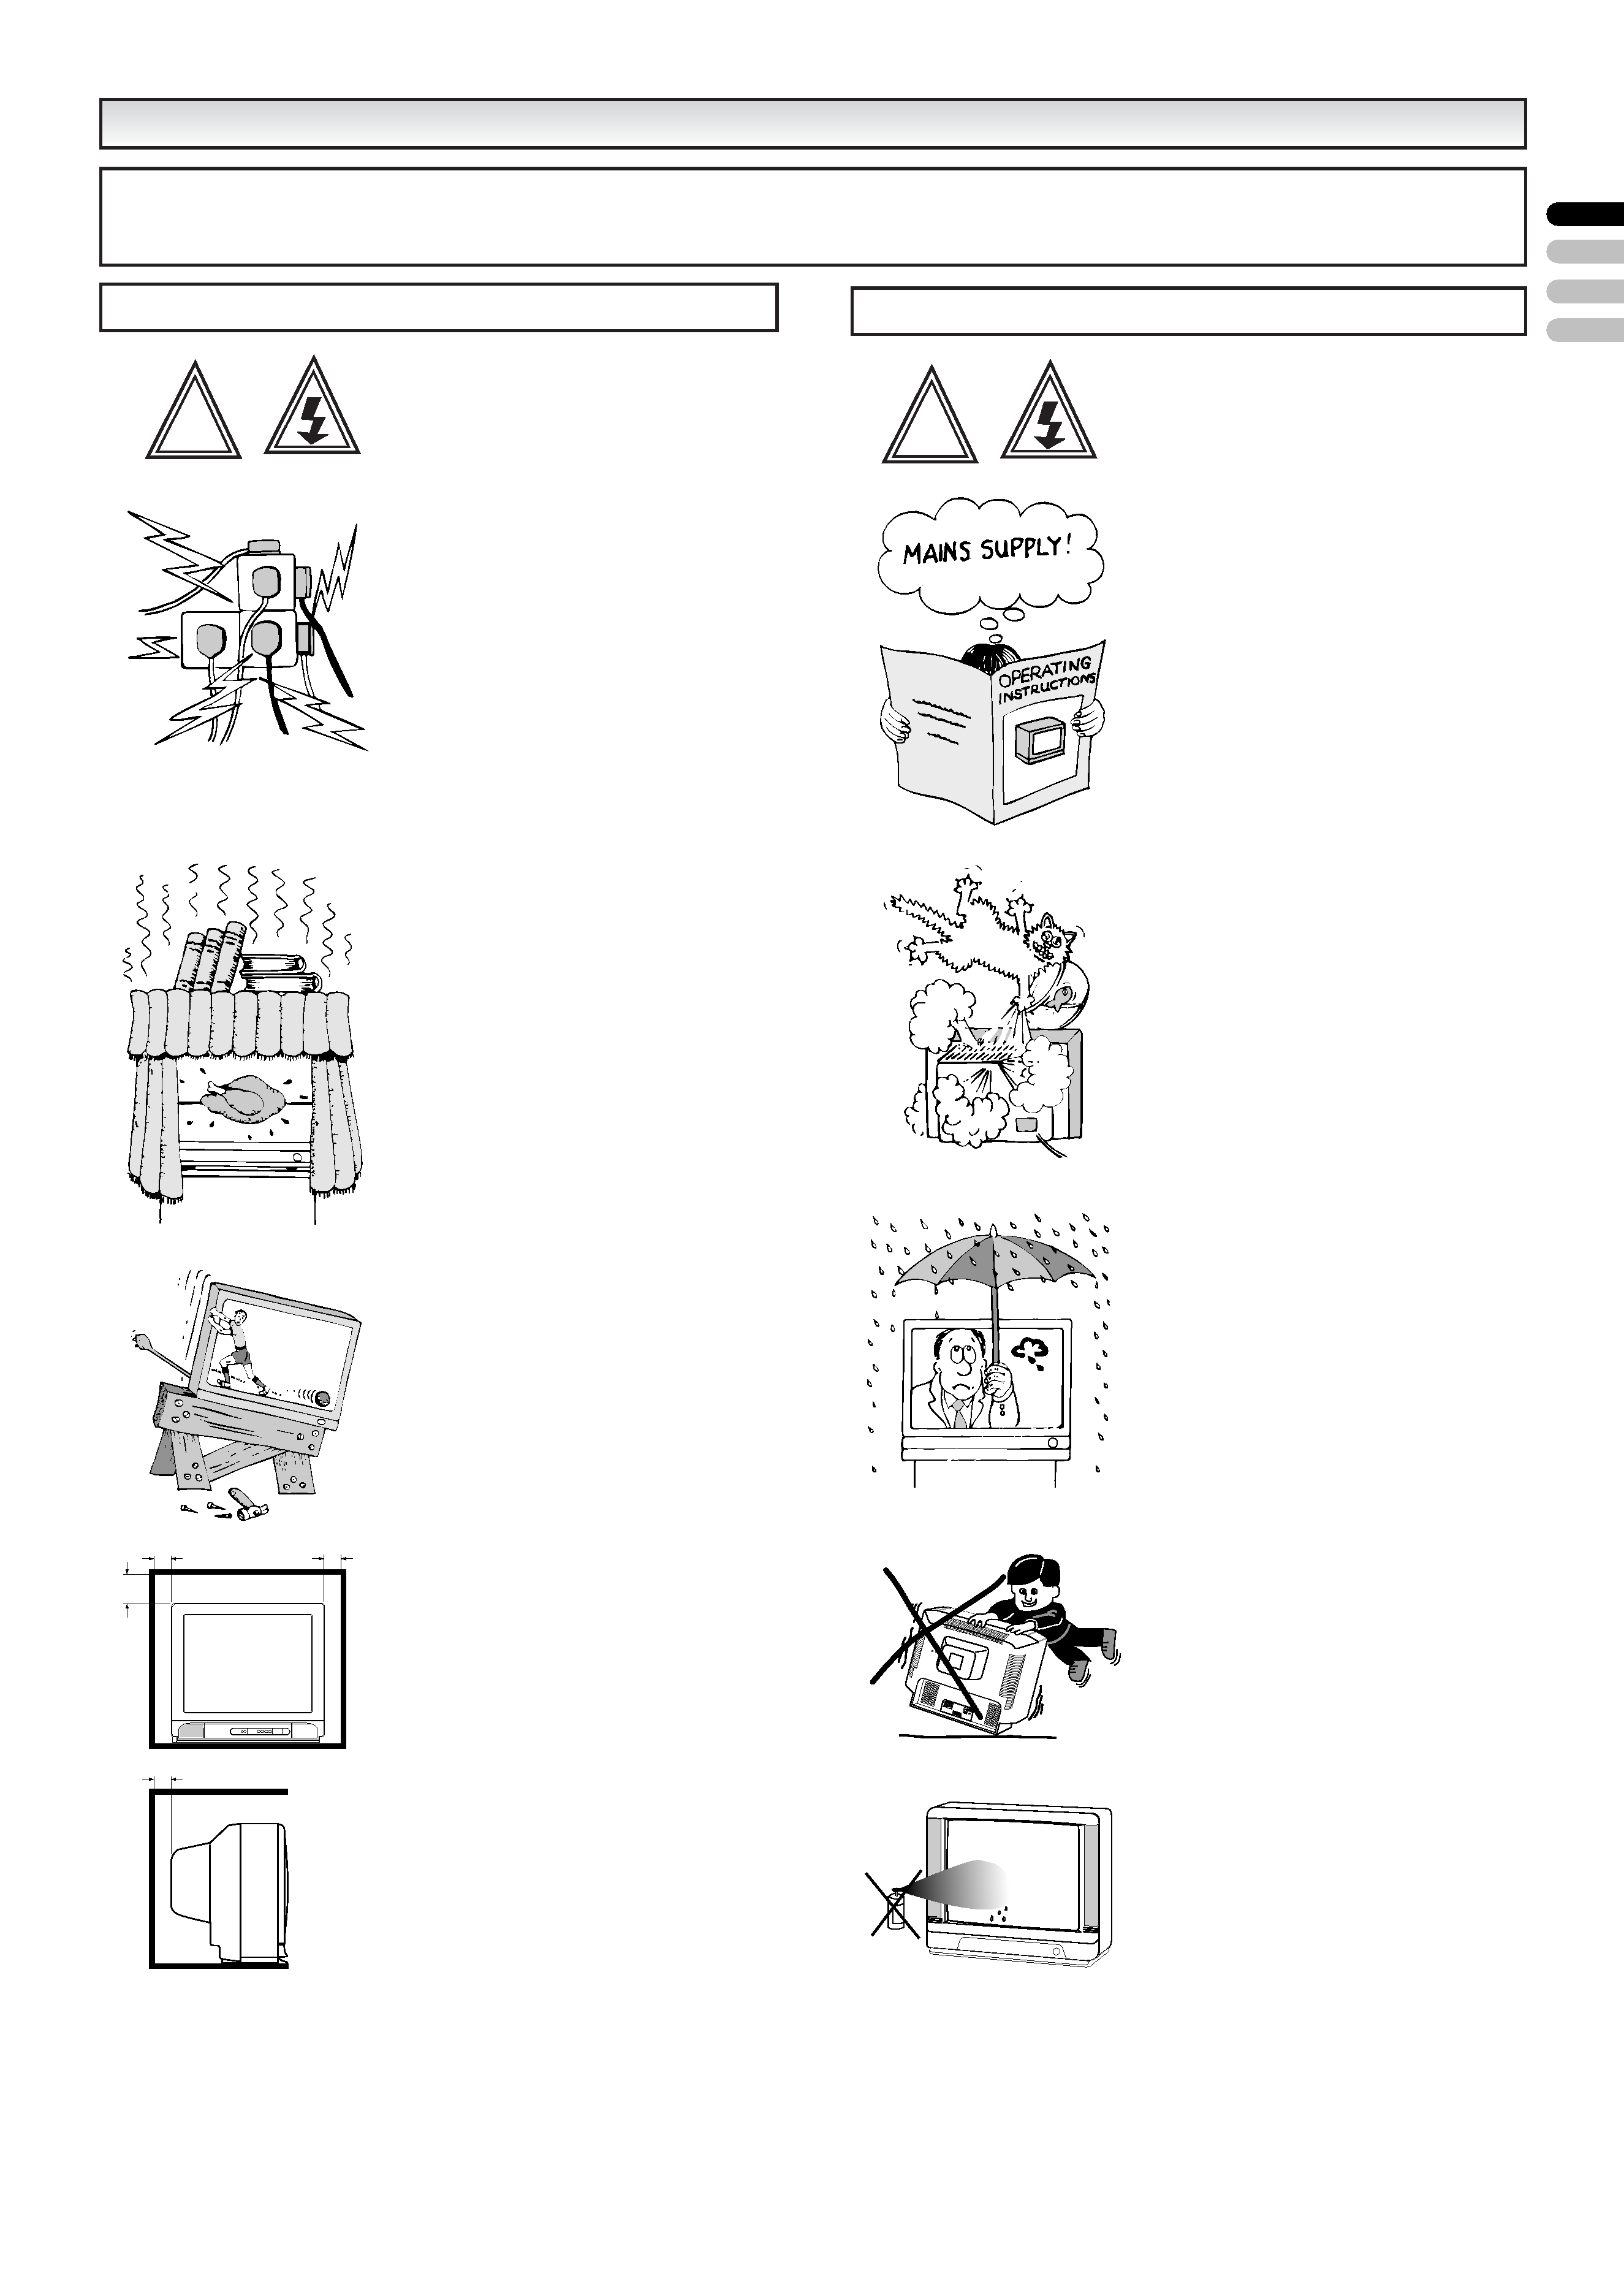
Do not allow anything to rest on the
power cord. Do not locate this televi-
sion receiver where the cord will be
damaged by people walking on it.
Do not overload wall outlets and
extension cords as this can result in
fire or electric shock.
Slots and openings in the cabinet and
in the back or bottom are provided for
ventilation to ensure reliable operation
and to protect it from overheating.
These openings must not be blocked
or covered. The opening should
never be covered with a cloth or other
material, and the bottom openings
should not be blocked by placing the
television receiver on a bed, sofa, rug,
or other similar surface. This television
receiver should never be placed near
or over a radiator or heater.
Do not place your television receiver
on an unstable stand, shelf or table.
Serious injury to an individual, and
damage to the television may result
if it should fall.
This television receiver should not
be placed in a built-in installation
such as a bookcase unless proper
ventilation is provided.
If the television is built into a unit, or
enclosed, the minimum distances for
ventilation must be maintained. Heat
build up can reduce the life of your
television, and can be dangerous.
This television receiver should be
operated only from the type of
power source indicated on the
television or as indicated in the
Operating Instructions. If you are
not sure of the type of power
supply in your home, consult your
sales person or your local power
company.
Never add accessories that have
not been specifically designed for
this television.
Do not drop or push objects into
the television cabinet slots or
openings. Some internal parts carry
hazardous voltages and contact
may result in an electric shock
hazard. Never spill liquids of any
kind on the television receiver.
Do not expose the television
receiver to rain or use near water.
For example, near a bathtub,
kitchen sink, in a wet basement,
etc. Before cleaning, unplug the
television receiver from the wall
socket.
Never stand on, lean on or push
suddenly the television or its stand.
You should pay special attention to
children. Serious injury may result
if it should fall.
Do not apply liquid cleaners or
aerosol cleaners directly onto the
television receiver. Use a damp
cloth for cleaning.
MINIMUM DISTANCES
10cm
5cm
20cm
10cm
!
Installation
!
Use
CAUTION: Please read and retain for your safety. This unit has been engineered and manufactured to assure your personal safety.
But improper use can result in potential electric shock or fire hazards. In order not to defeat the safeguards incorporated in this receiver
observe the following basic rules for its installation, use and servicing.
ENGLISH
4
INST
INSTALLA
ALLATION
TION
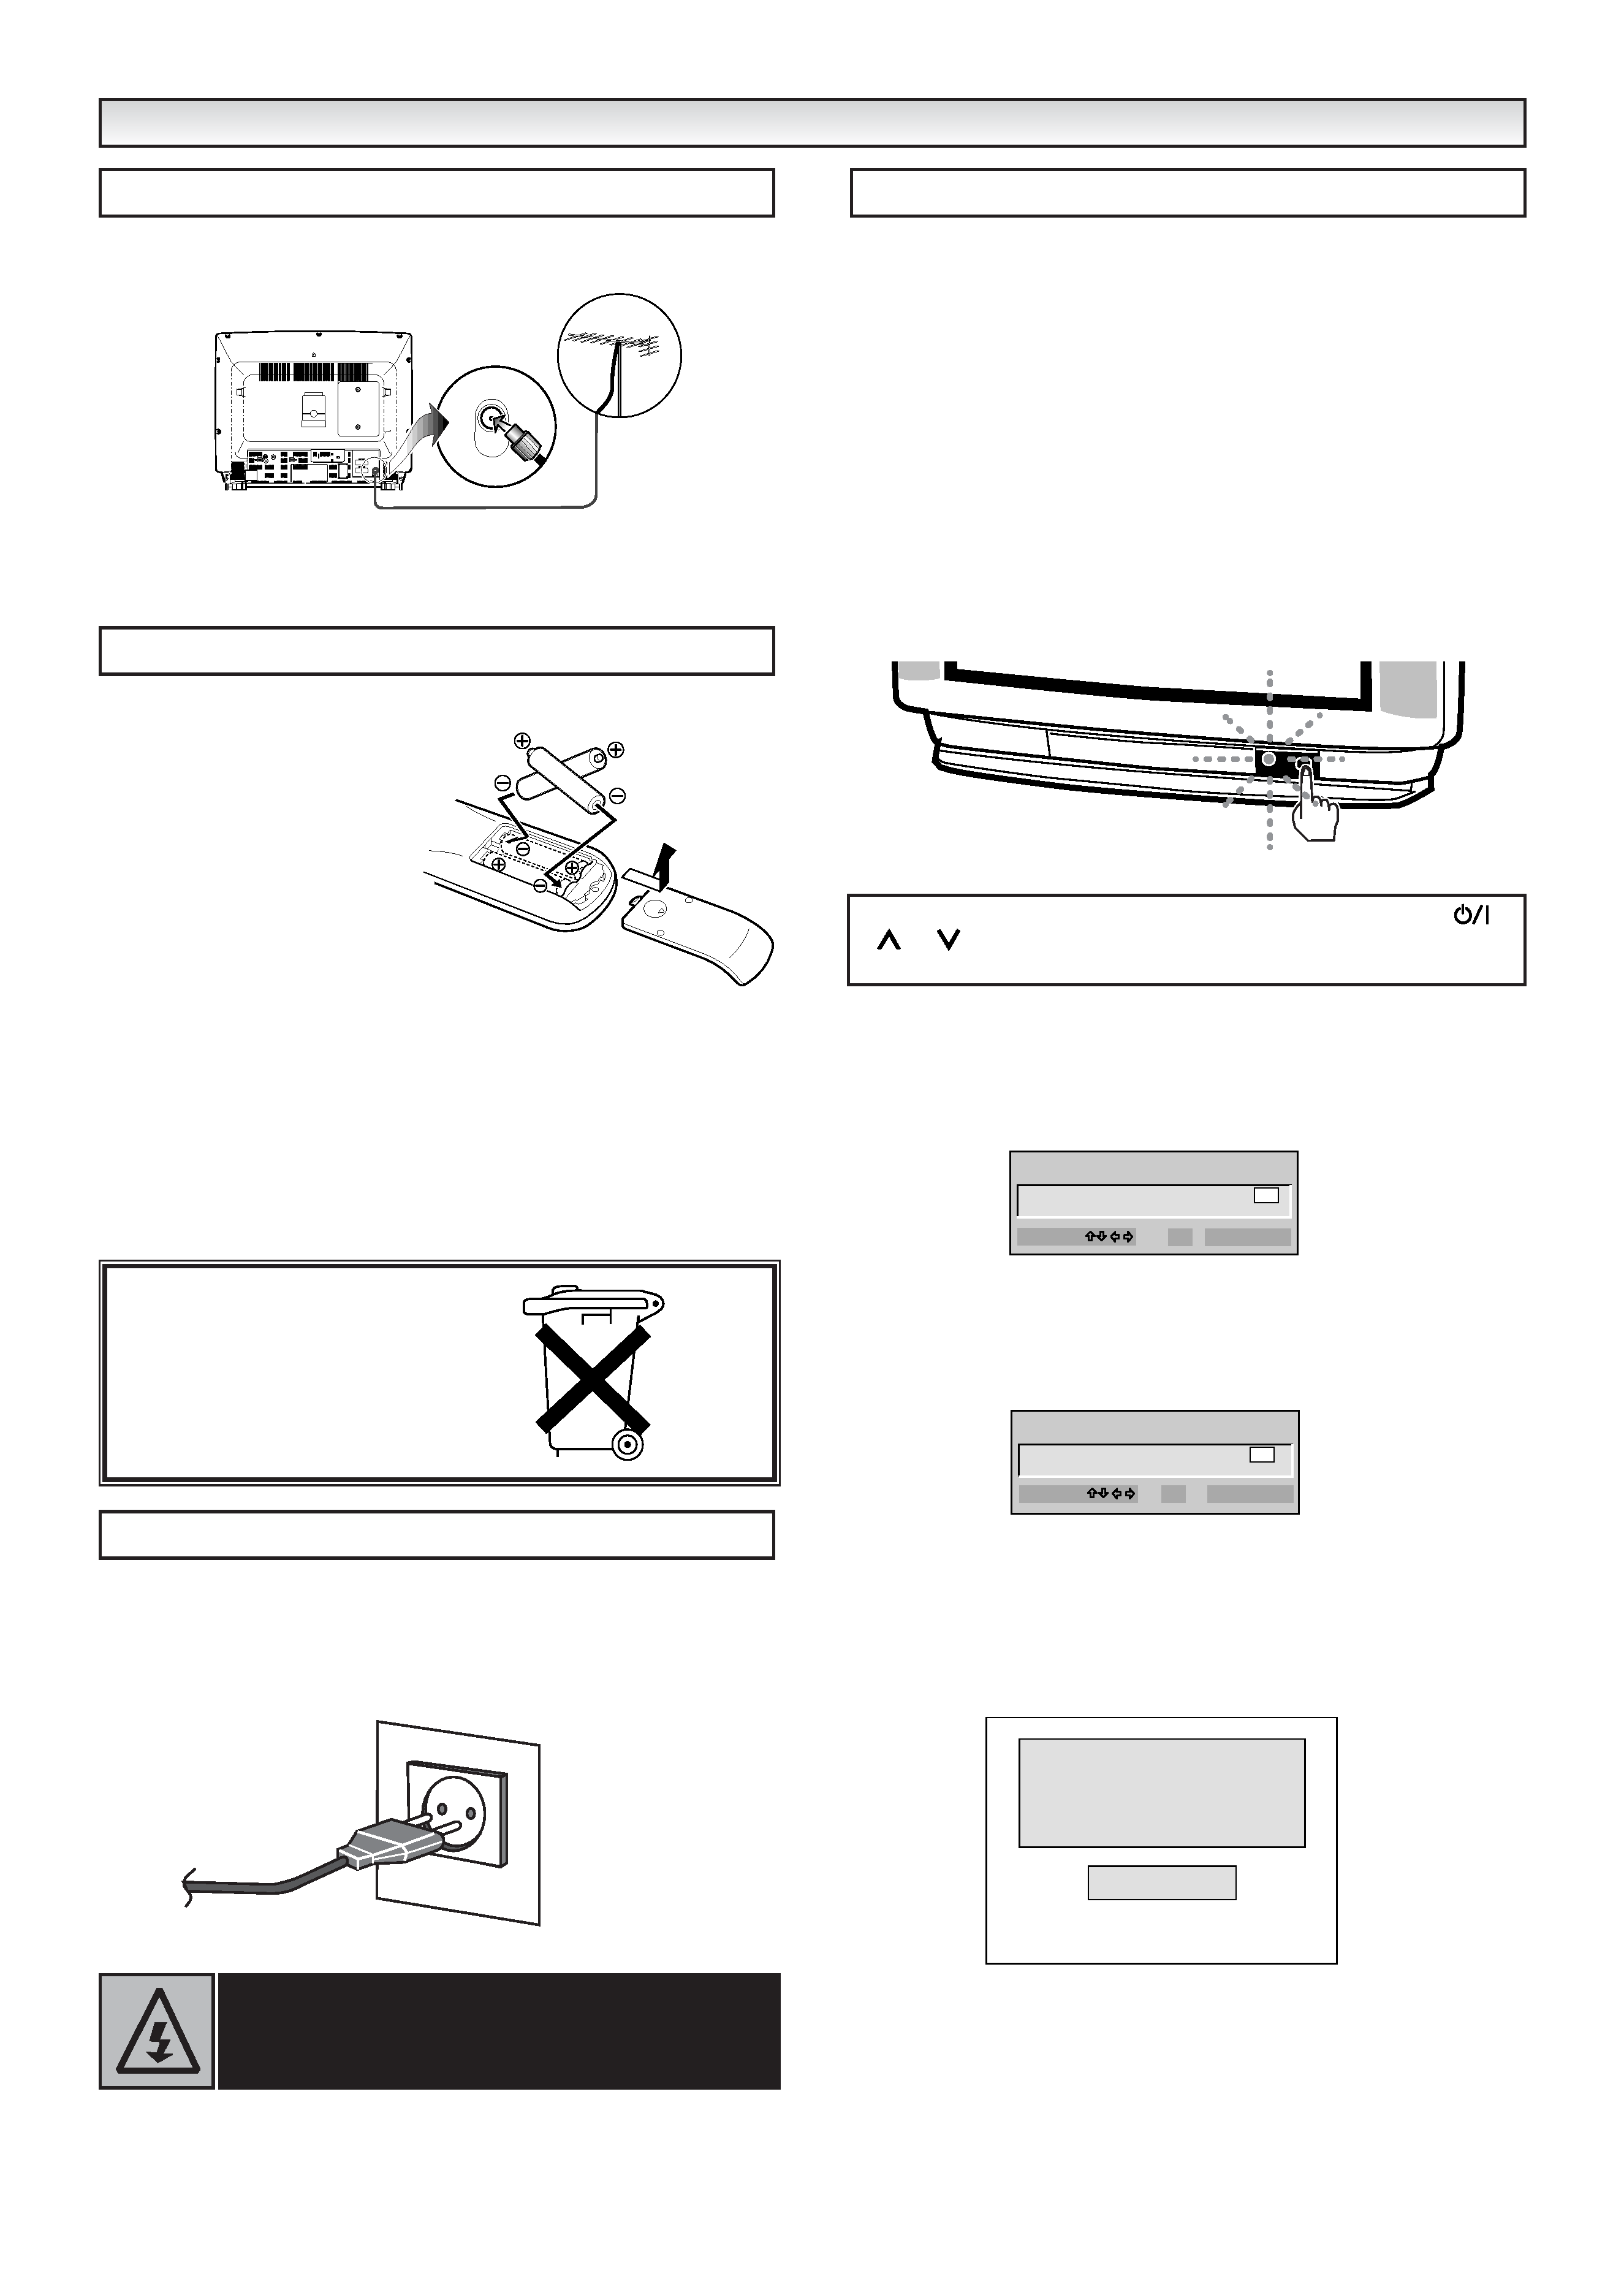
Insert an aerial plug tightly into the aerial socket on the back of the
TV set.
i For all aerial problems please consult your local dealer.
i The connection to the peripheral AV equipment, refer to section
"USING AV EQUIPMENT" on page 10, 11.
1 Remove the battery cover
by sliding it in direction of
the arrow.
2 Install two "AAA/R03" 1.5
volt batteries so that the
"+" and "-" marks on the
batteries match the "+"
and "-" marks inside the
unit.
3 Close the battery cover.
i Replace the batteries when the TV set is showing the following
symptoms: Operation is unsteady or erratic, sometimes the TV
does not work with the transmitter. Discharged batteries may leak
and damage the unit. The normal life of batteries should be from
nine to ten months.
The TV set is prepared for a mains voltage AC220~240V, 50Hz.
Connect the power cord of the TV set to a wall outlet. When the TV
set is not to be used for an extended period of time, it is advisable to
disconnect the power cord from the power outlet.
This TV set provides a self-automatic tuning function called
"Plug & Play". The first time you switch on this TV set, it will
automatically begin to search and store all available channels.
To ensure that this feature works properly please follow the
steps below before you switch on the TV set.
Please make sure that your aerial cable is connected to the aerial
socket of the TV set before switching on.
Plug the Mains cable plug into a wall socket.
i This TV set is prepared for a mains voltage of AC220~240V 50Hz.
1 You are now ready to switch on.Simply press the Mains
ON/OFF switch on the front of the TV set.
A red power indicator will appear.
The first page of "ATS euro plus" appears.
Select country and Language
2 Select the country using the
v ,w or
or
button. Press the
P.MODE/OK button.
The next page appears for selecting your display language.
3 Select the language identification letter by using the
v ,w or
or
button. Press the P.MODE/OK button.
After you have selected a language, all messages and information
which subsequently appear on the screen will be in this language.
s The ATS euro plus system will start as follows: The tuning status
and welcome messages will appear on the screen.
ANT.75
STEP 3 : Connect AC Cord
STEP 4: Turn Mains switch-on
STEP 2 : Install batteries
STEP 1 : Connect aerial cables
AC Outlet
AB
CH
D
DK
E
F
GB
I
N
NL
P
S
SF
OTHERS
COUNTRY
SELECT :
OK
EXIT : MENU
DDK
E
F
GB
INL
P
S
SF
LANGUAGE
SELECT :
OK
EXIT : MENU
Thank you for purchasing your
JVC TV.
Now I am searching and storing all
programmes.
Please wait .
POS.
2
CH
C 5
If no picture appears but the power indicator is on, press the
,
P
, P
, Pv,Pw or 0 - 9 button as the TV set is in the
standby mode.
WARNING!
High voltages are used in the operation of this
set. Refer service to qualified service personnel.
Bij dit produkt zijn
batterijen geleverd.
Wanneer deze leeg zijn,
moet u ze niet
weggooien maar
inleveren als KCA.

5
After completing the searching operation for all available stations,
the
Auto sorting will be done according to ATS euro plus sorting rule
based upon your country selection. Then the programme position 1
is selected. The ending messages appears on the screen in your
language.
To make this message disappear, press the
, v, w,
,
or 0 - 9
button.
Now the installation is completed!
To receive the satellite broadcasting, a satellite tuner is required.
Before carrying out the automatic setting up, receive the satellite
broadcasting on the satellite tuner.
This procedure only appears the first time you switch on.
If additional channels become available (you move to another city or
cable is installed), please follow the description "PRESETTING". (on
page 13, 14).
INST
INSTALLA
ALLATION
TION
Auto set-up completed. Happy viewing!
ENGLISHENGLISH