A
V
-14JT5EU
/
A
V
-21JT5EU
AV-14JT5EU
AV-21JT5EU
VICTOR COMPANY OF JAPAN, LIMITED
PMJV1V2022
0500-T-CR-DW
© 2000 VICTOR COMPANY OF JAPAN, LIMITED
COLOUR TELEVISION
VIDEO AUDIO
P
TV/AV
INSTRUCTIONS

ADDITIONAL INFORMATIONS FOR THE SET SOLD IN GREAT BRITAIN
The appliance is supplied with a moulded three pin main plug fitted with 5Amp fuse.
Should the fuse require replacement, it must be replaced with a fuse rated at 5 amp
and approved by ASTA or BSI to BS1362.
The plug contains a removable fuse cover that must be refitted when the fuse is
replaced.In the event of the fuse cover being lost or damaged, the plug must not be
used until a replacement cover has been obtained.Replacement fuse covers can be
purchased from your nearest electrical dealer and must be the same colour as the
original.
If the moulded means plug is unsuitable for the socket outlet in your home or is
removed for any other reasons, then the fuse should be removed and the cut off plug
dispose of safely to prevent the hazard of electric shock.
There is a danger of electric shock if the cut off plug is inserted into any socket outlet.
If a replacement plug is to be fitted, please observe the wiring code shown below.The
wires in the mains lead are are coloured in the accordance with the following code:
Blue-neutral
Brown-live
As the colours of the wires in the main lead of this appliance may not correspond with
the coloured markings identifying the terminals in your plug, proceed as follows:
The wire which is coloured blue must be connected to the terminal which is marked
with theletter N or coloured black.The wire which is coloured brown must be connected
to the terminal which is marked with the letter E or coloured red.
Do not make any connections to the terminal in the plug which is marked by the letter
E by the safety earth symbol or coloured green or green and yellow.
AV-14JT5/21JT5 (TOC) EN
5/3/00, 1:33 PM
2

IMPORTANT SAFEGUARDS ................................ 2
BEFORE LAUNCHING ......................................... 3
CONNECTING THE EXTERNAL EQUIPMENT .... 4
IDENTITY OF FEATURES ON LOCAL AND
REMOTE CONTROL ............................................ 6
INSTALLATION...................................................... 8
DAILY USE ............................................................ 16
TELETEXT ............................................................ 24
TROUBLESHOOTING .......................................... 26
SPECIFICATIONS ................................................. 27
CONTENTS
1
AV-14JT5/21JT5 (TOC) EN
5/3/00, 1:33 PM
3

2
IMPORTANT SAFEGUARDS
WATER AND MOISTURE
Never install the set in the following places; In a wet basement, bath-
room. Do not place any container with liquid on the set.
HEAT
Never place the set near heat sources.
VENTILATION
Do not cover the ventilation opening in the cabinet and never place
the set in a confined space such as bookcase or built-in unless
proper ventilation is provided.
Leave a minimum 10cm gap all around the unit.
OBJECT ENTRY
Do not insert foreign objects, such as needles and coins, in the venti-
lation openings.
LIGHTNING STRIKING
You should disconnect the set from the mains and the aerial system
during thunderstorms.
CLEANING
Unplug the set from the mains during cleaning.
AFTER MOVING THE SET
If the set is moved in a different direction, the MAIN POWER button
must be switched off for at least 15 minutes in order to take out a
colour strain on the screen.

3
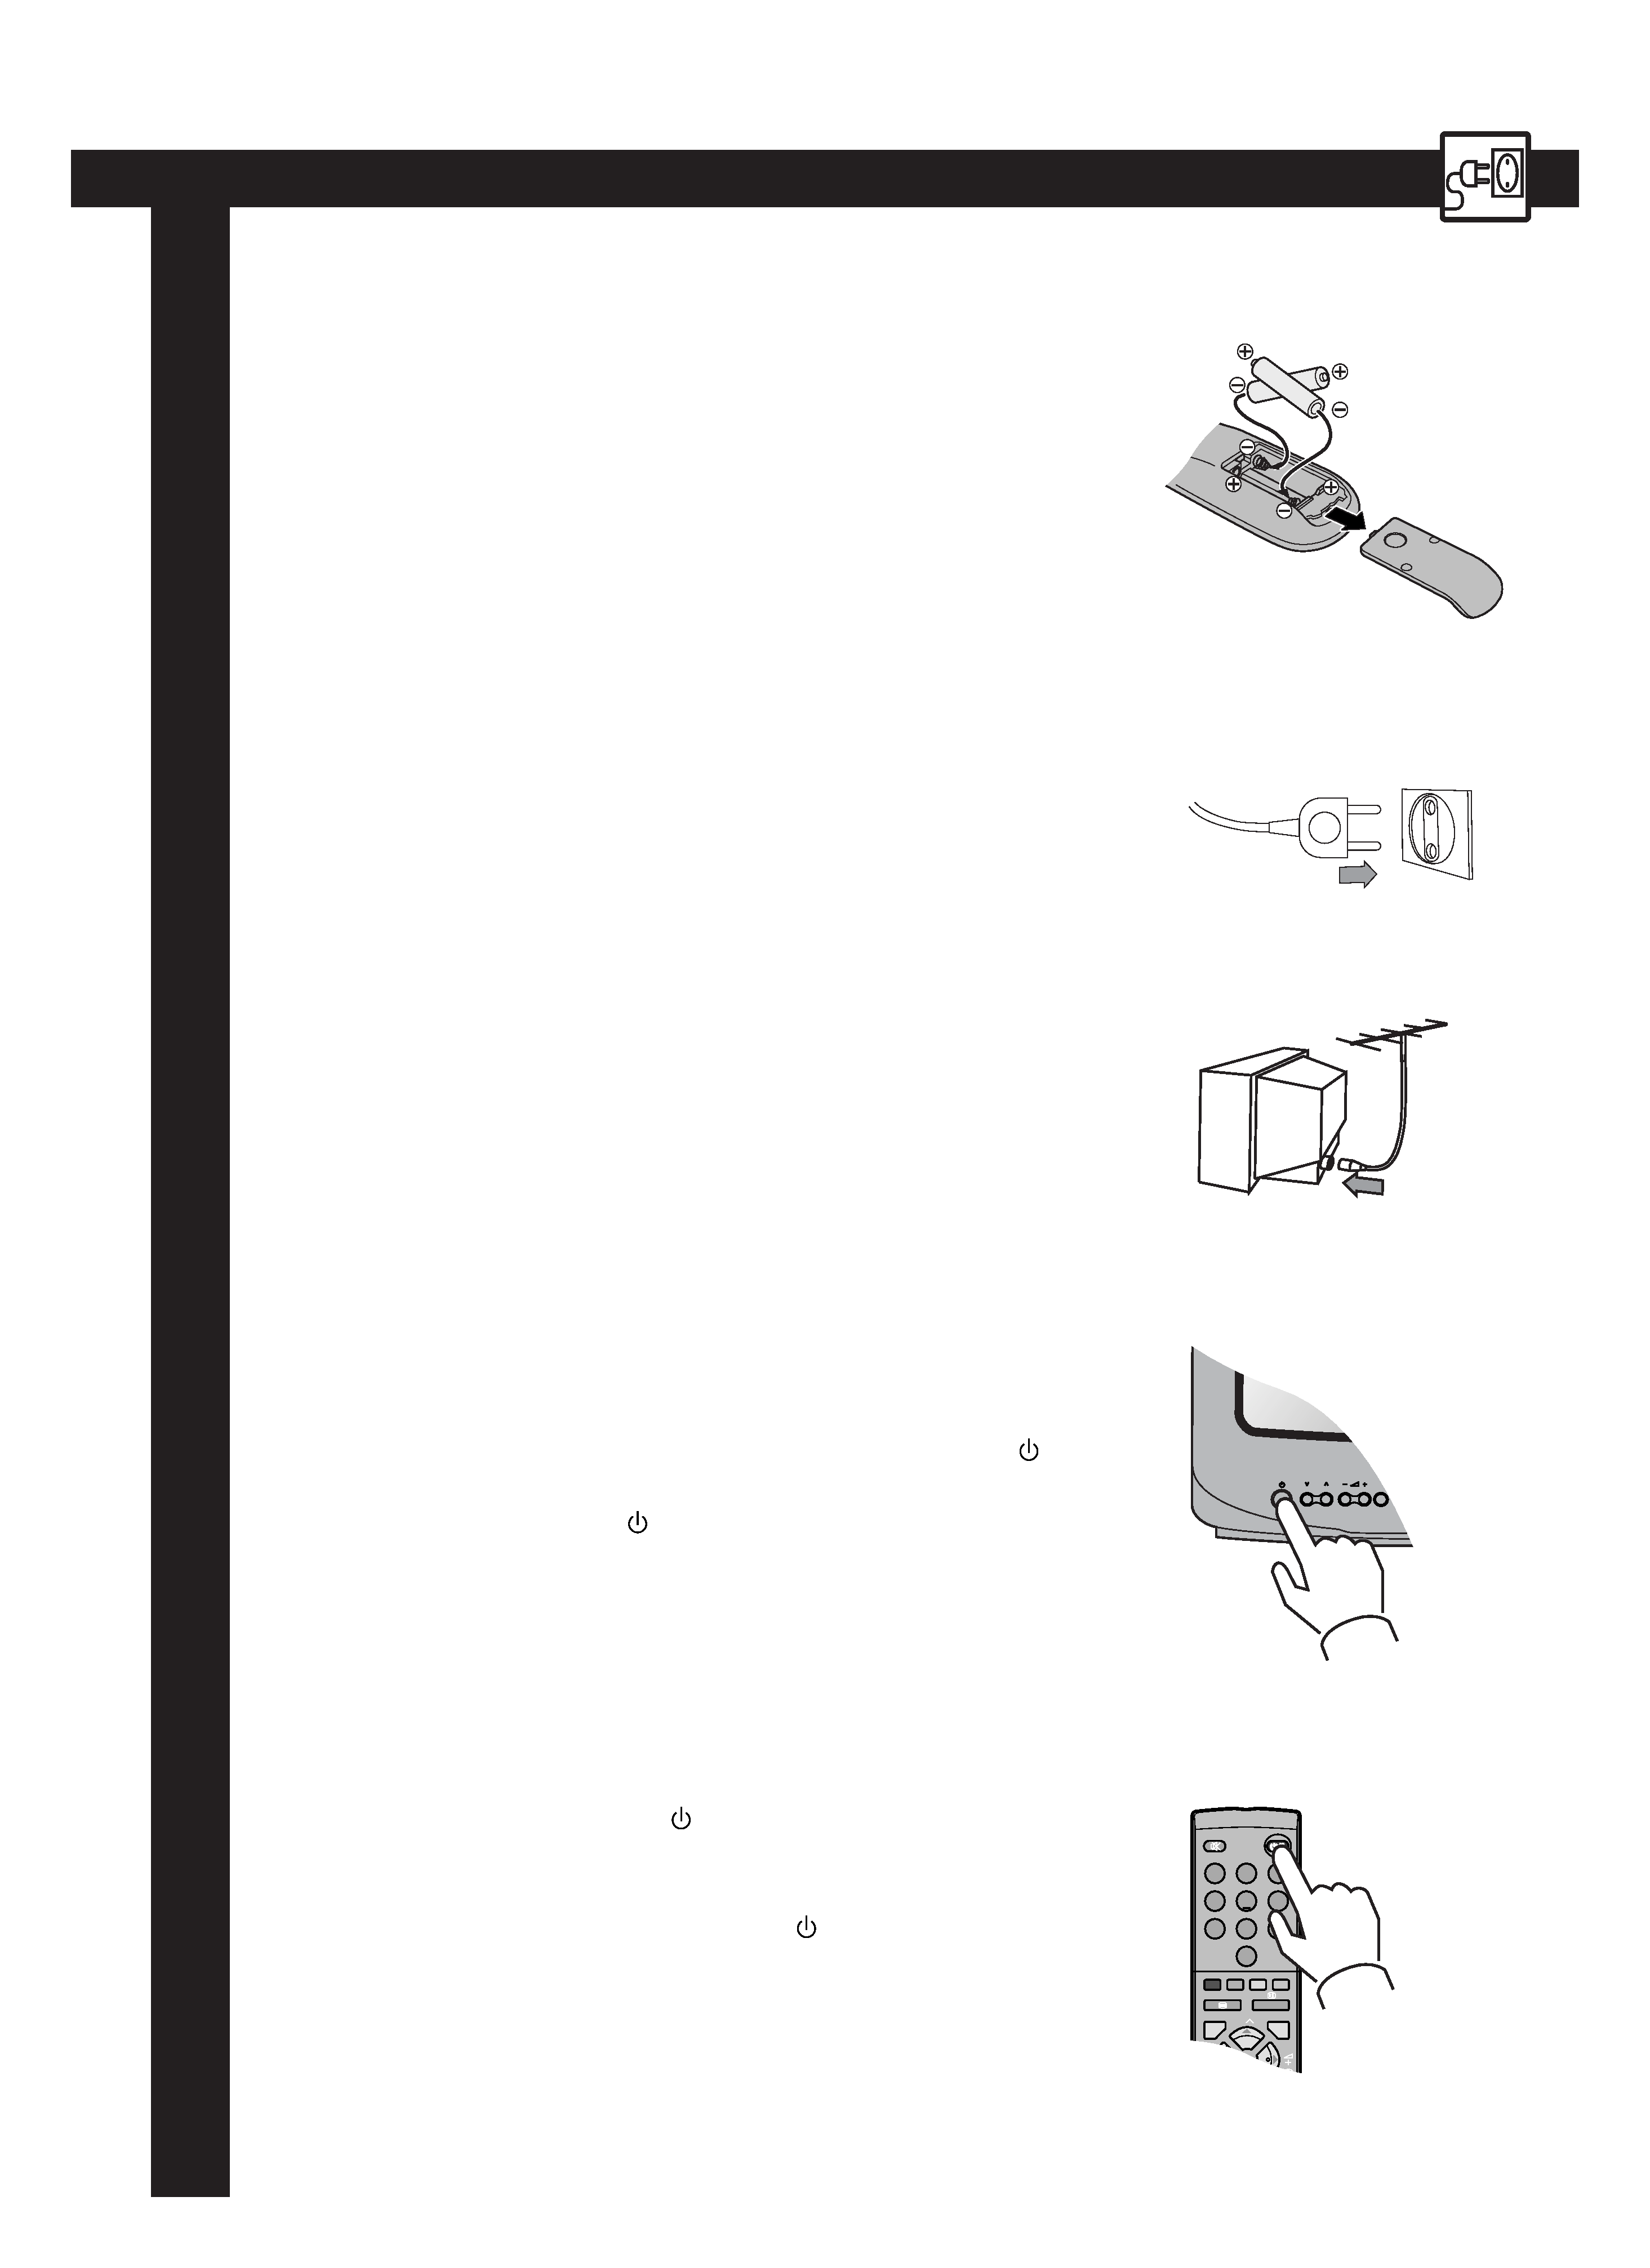
INSERTING BATTERIES INTO THE CONTROL UNIT
Insert the batteries (two 1.5V, type AAA(R03))
MAINS CONNECTION
Plug the mains cable into the power socket with
230V/50Hz AC.
AERIAL CONNECTION
When using an outdoor aerial, it is usually con-
nected to the set by means of 75 ohms.
SWITCHING ON AND OFF
Switching on
Switch the set on with the MAIN POWER button (
), and
then PR UP or DOWN button (8P9) on the front of the set.
Or POWER button (
/ I ) or the UP/DOWN button or one of
the NUMBER buttons on the remote control.
Switching off
Press POWER button (
/ I ) on the remote control to return
the set to its stand by mode.
If you do not use the set for an extended period of time, turn
it off with MAIN POWER button (
) on the set.
P
TV/AV
BEFORE LAUNCHING
3
1
2
6
4
5
9
7
8
0
P
AV
P.MODE/OK
MENU
