
VIDEO CASSETTE RECORDER
VT-FX960E(UKN)
Instruction manual
To obtain the best performance
please read this instruction manual completely.
PAL
BASIC
O
PERA
TIONS
SETTING
U
P
ADDITIONAL
O
PERA
TIONS
SUBSIDIAR
Y
INFORMA
TION
QR32067
VIDEO Plus+ and PlusCode are
registered trademarks of Gemstar
Development Corporation. The
VIDEO Plus+ system is manufactured
under licence from Gemstar
Development Corporation.
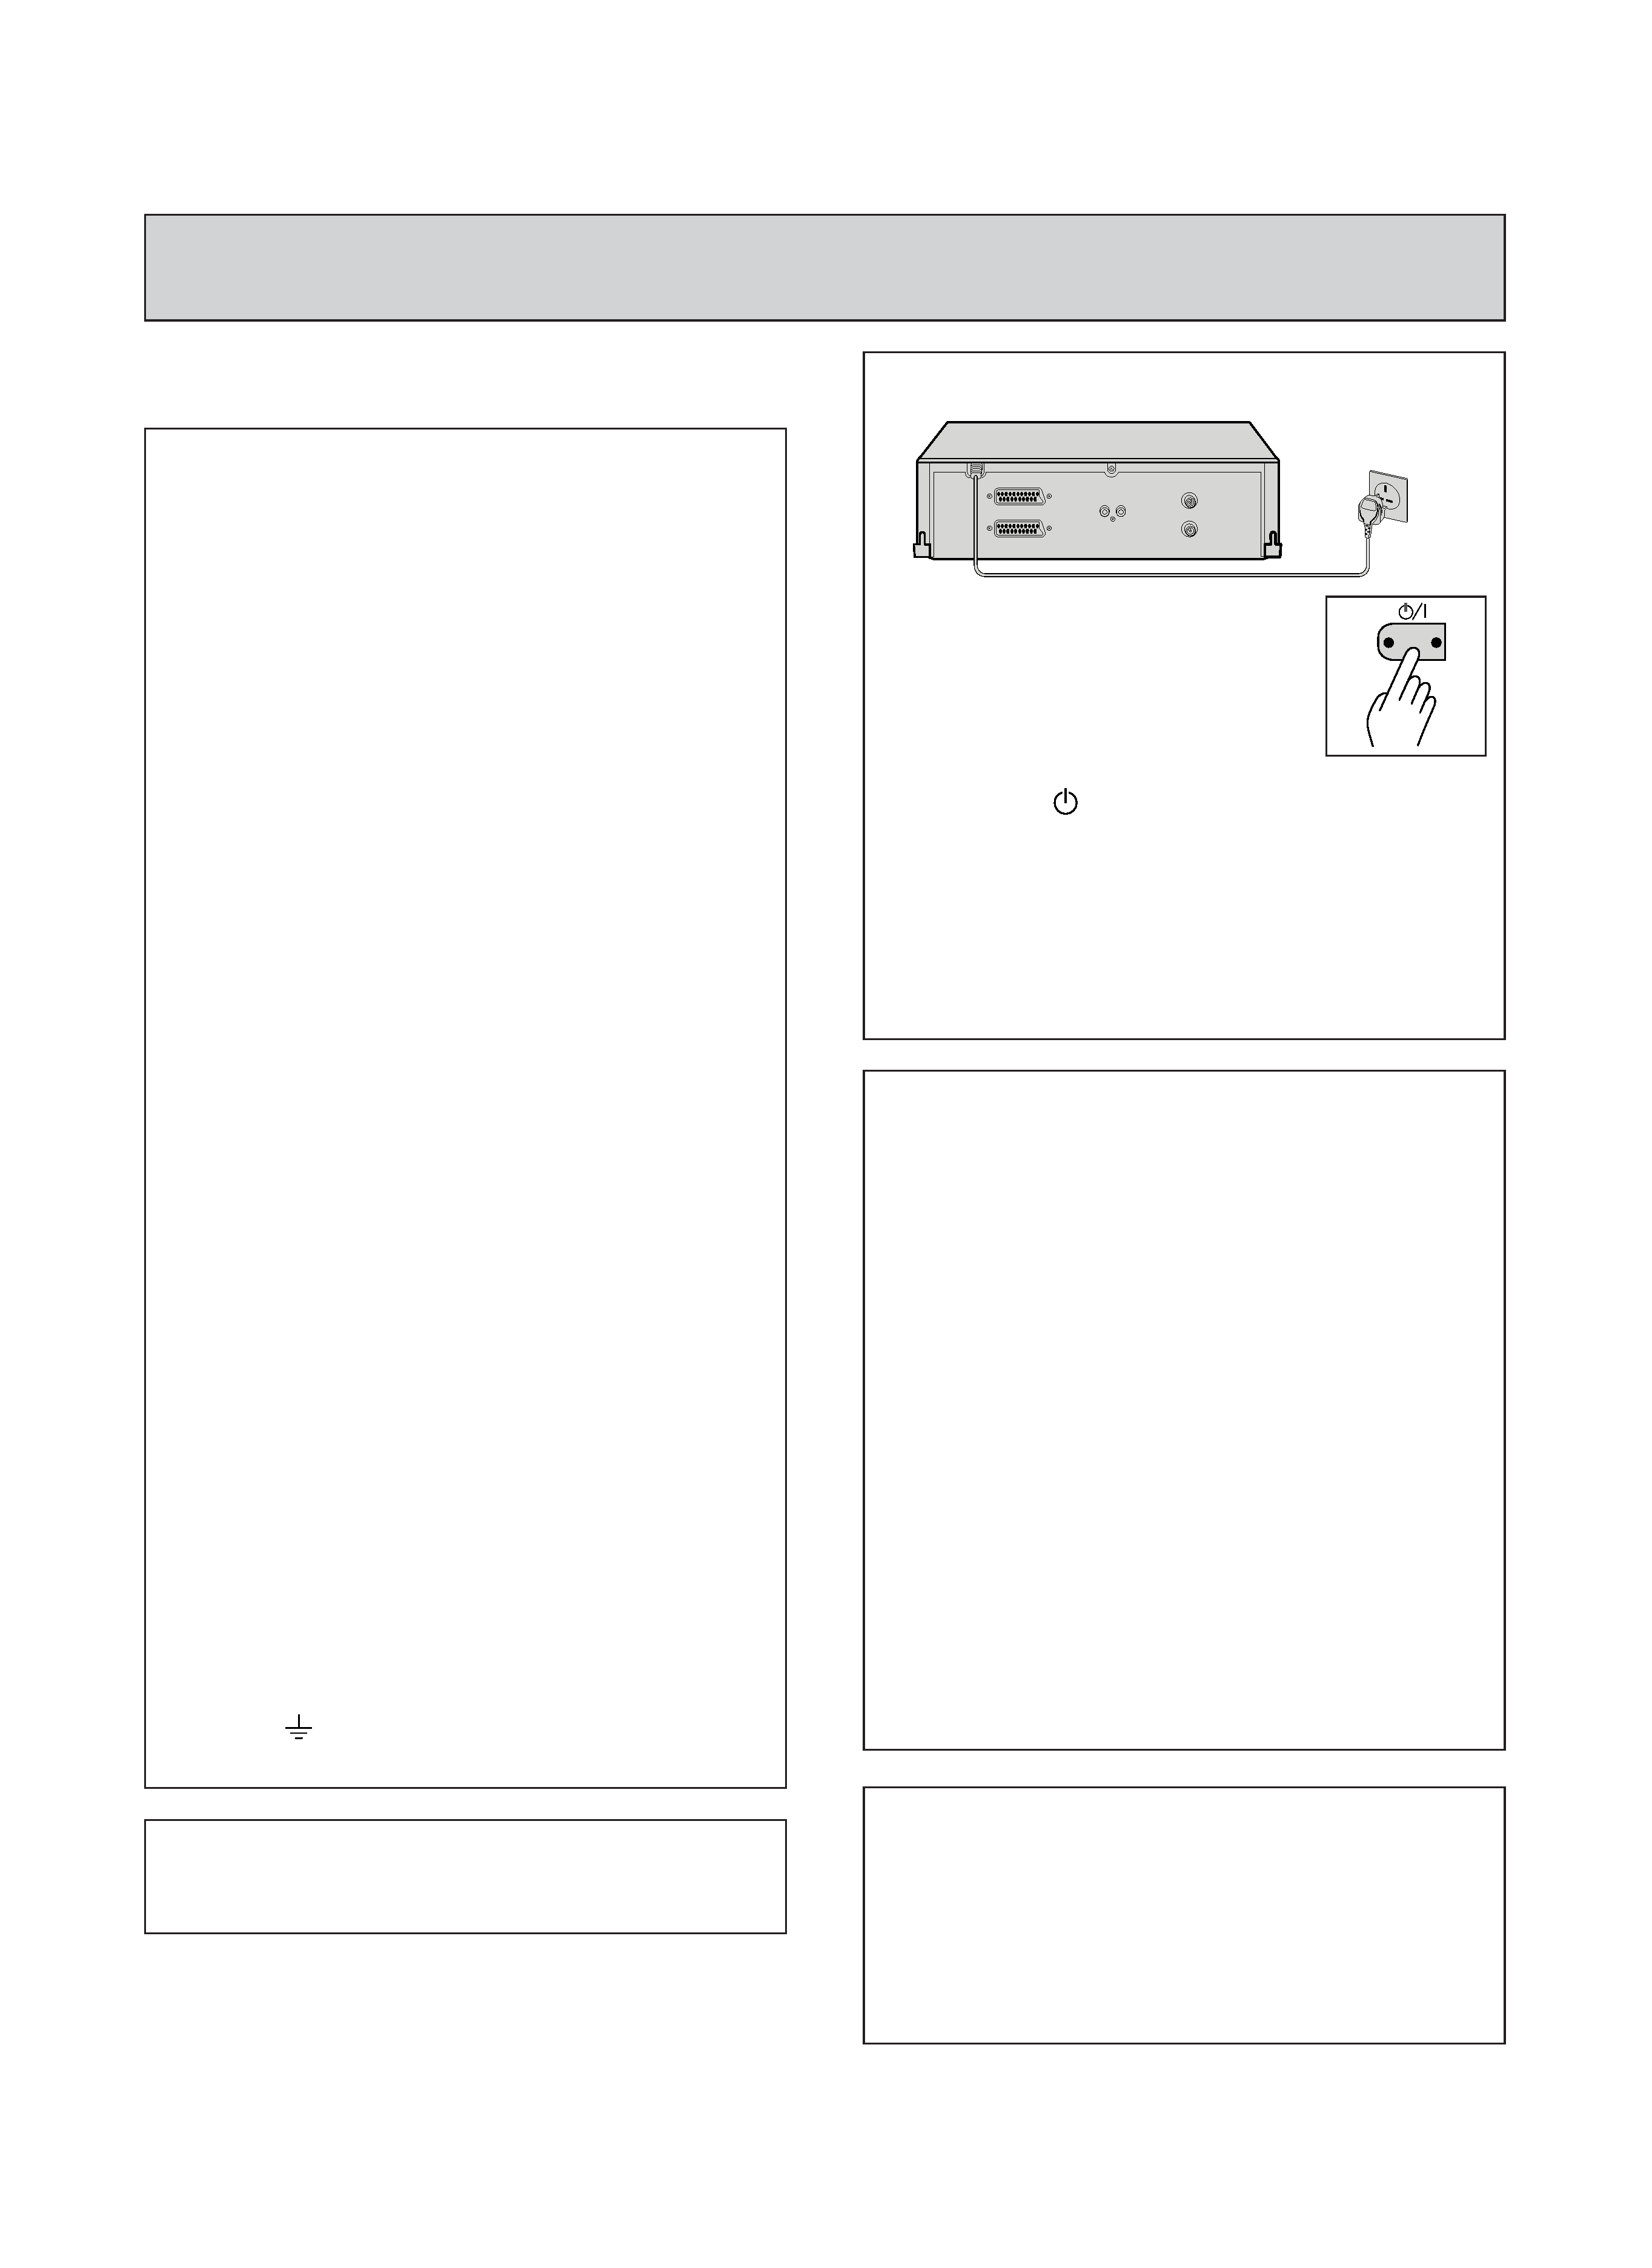
Auto Installation System
only plug in all leads and
press the OPERATE button.
FOR
FURTHER
INFORMATION
PLEASE CONTACT OUR CUSTOMER
HELP LINE ON
01628-643029
2
Dear Hitachi Customer
Congratulations on your choice of a Hitachi Video Cassette Recorder (VCR). And welcome to our
company-wide commitment to your complete satisfaction and viewing enjoyment.
Mains supply: AC 230V, 50 Hz only
· The OPERATE button
located on the front of the
VCR switches the VCR on
and off, leaving the clock
facility unaffected.
· The OPERATE button is
labelled "
/ l", this button allows you to
select operate on or electrical power
standby.
· The OPERATE button is secondarily
connected and does not separate the
apparatus from the mains supply in the
switched-off position.
INFORMATION FOR YOUR SAFETY
Please read the following instructions carefully
before using this VCR.
WARNING: To prevent fire or electric shock,
do not expose this equipment to
rain or moisture.
Cautions:
When the VCR is moved from a cold to a
warm place, dew condensation can occur on
the cylinder.
To avoid damaging the cylinder or tape, do
not operate the set immediately. Allow it to
dry by leaving it powered on for 2 ~ 3 hours.
Safety
· Do not remove panel covers by
unscrewing.
There are no user serviceable parts inside.
Refer all servicing to qualified service
personnel.
· Should any solid object or liquid fall into
the cabinet, remove the mains lead and
have it checked by qualified personnel
before operating it any further.
· To disconnect the mains lead, pull out the
plug itself. Never pull the lead.
· If the unit is to be left unattended for a
long period and it is not intended to use
the timer recording function, it is
recommended that the VCR be switched
off and the plug removed. If you intend to
record during your absence, remember
there is no necessity for the TV receiver to
be switched on.
The mains lead on this equipment is
supplied with a moulded plug incorporating
a fuse, the value of which is indicated on the
pin face of the plug. Should the fuse need to
be replaced, an ASTA or BSI approved
BS1362 fuse must be used of the same
rating.
If the fuse cover is detachable never use the
plug with the cover omitted.
If a replacement fuse cover is required,
ensure it is of the same colour as that visible
on the pin face of the plug. Fuse covers are
available from your dealer.
DO NOT cut off the mains plug from this
equipment. If the plug fitted is not suitable
for the power points in your home or the
cable is too short to reach a power point,
then obtain an appropriate safety approved
extension lead or consult your dealer.
If there is no alternative to cutting off the
mains plug, ensure that you dispose of it
immediately, having first removed the fuse,
to avoid a possible shock hazard by
inadvertent connection to the mains supply.
IMPORTANT
The wires in the mains lead are coloured in
accordance with the following code:
Blue = Neutral, Brown = Live
As these colours may not correspond with
the coloured markings identifying the
terminals in your plug, proceed as follows:
The wire coloured BLUE must be connected
to the terminal marked with the letter N or
coloured BLUE or BLACK. The wire coloured
BROWN must be connected to the terminal
marked with the letter L or coloured BROWN
or RED.
On no account connect either of these wires
to the terminal marked E or by the earth
symbol
or coloured green or green and
yellow.
DECODER/CANAL PLUS
EURO. A/V
AERIAL
ANTENNE
RF OUT
SORTIE
RF
AUDIO OUT/
SORTIE SON
R/D.
L/B.
AC 230V, 50Hz

3
CONTENTS
This instruction manual consists of the following four sections.
Section-1
Setting Up
Section-2
Basic Operations
Section-3
Additional Operations
This section tells you how to set up your
new VCR and how to use the VCR's
controls.
Connection................................................................................. 6
Customer Controls ................................................................... 8
Customer Control and Remote Operation ............................ 9
Auto Installation Function ..................................................... 10
Pre-tuning of Built-in TV Tuner ............................................ 12
Guide Channel Setting........................................................... 18
Auto Clock Setting Using PDC Signal ................................. 19
Setting the Clock Manually ................................................... 20
Cassette Tapes ........................................................................ 21
This section tells you how to playback a
tape and record a TV programme.
Playback ................................................................................... 23
Playback Using Shuttle Ring................................................. 26
Recording TV Programmes................................................... 27
Tape Analyzer ......................................................................... 30
Timer Recording ..................................................................... 31
VIDEO LINK-Recording Using Satellite Decoder or TV ......39
This section tells you how to use the
additional functions.
Section-4
Subsidiary Information
Tape Navigation ..................................................................... 41
Navi Lock .................................................................................48
Soap Recording ...................................................................... 50
MOVIETEXTTM......................................................................... 52
Special Characteristics
· Linear Time Counter...................................................... 53
· Automatic Rewind ......................................................... 53
· Rewind Shut Off............................................................. 53
· Tape Remaining Display Function............................... 53
· Index Function................................................................ 54
· Rental Play ...................................................................... 54
Menu Features ........................................................................ 55
Editing
· Tape Dubbing ................................................................. 58
Satellite/Cable Box Decoder Operation ............................... 60
Hi-Fi Sound.............................................................................. 62
Problem Guide ........................................................................ 64
User Guide Display..................................................................65
Maintenance............................................................................ 66
Specifications .......................................................................... 67
PDC (Programme Delivery Control) function...................... 68
Battery Safety Guidelines...................................................... 69
Warranty Letter ....................................................................... 71
Some Do's and Don'ts........................................................... 73
CAUTION:
AUTO INSTALLATION SYSTEM - Please ensure that all leads are connected as illustrated as in page 6 and 7,
otherwise auto installation will not work.
4
FEATURES
-- Auto Head Cleaning system minimizes the
need for accessory cleaners and professional
head cleaning.
-- Auto Tracking system automatically adjusts
the tracking so the picture is optimized.
-- Rental Play immediately starts to play a tape
without its safety tab, rewinds the tape after
play is ended and eject it, then turns the VCR
off .
-- Auto Play immediately starts to play a tape
without its safety tab.
-- Auto Eject & Auto Tape Canceller ejects a
cassette without its tab when the REC button
is pressed.
-- Auto Operate On turns the VCR on by simply
inserting a cassette.
-- Auto Rewind/Rewind Shut-off automatically
rewinds a tape at its end and automatically
shuts off at its beginning if the VCR is
switched off into the standby mode, while
rewinding.
· Fine slow motion.
· Easy preset tuning provides up to 49
programmes.
· Index function -- convenient for locating the
desired programme on your tape.
· PDC (Programme Delivery Control) function --
no chance of missing your programme.
· Video Link function allows you to easily
prepare the VCR to record signals from a
satellite/cable decoder or TV.
· Soap Recording function is an easy way to
set timer programming by choosing a
registered programme from Tape Navi data
menu.
· Navi Lock function prevent accidently deleting
of important programmes.
· Tape Analyzer (ATRS) automatically detect the
type of tape used during recording.
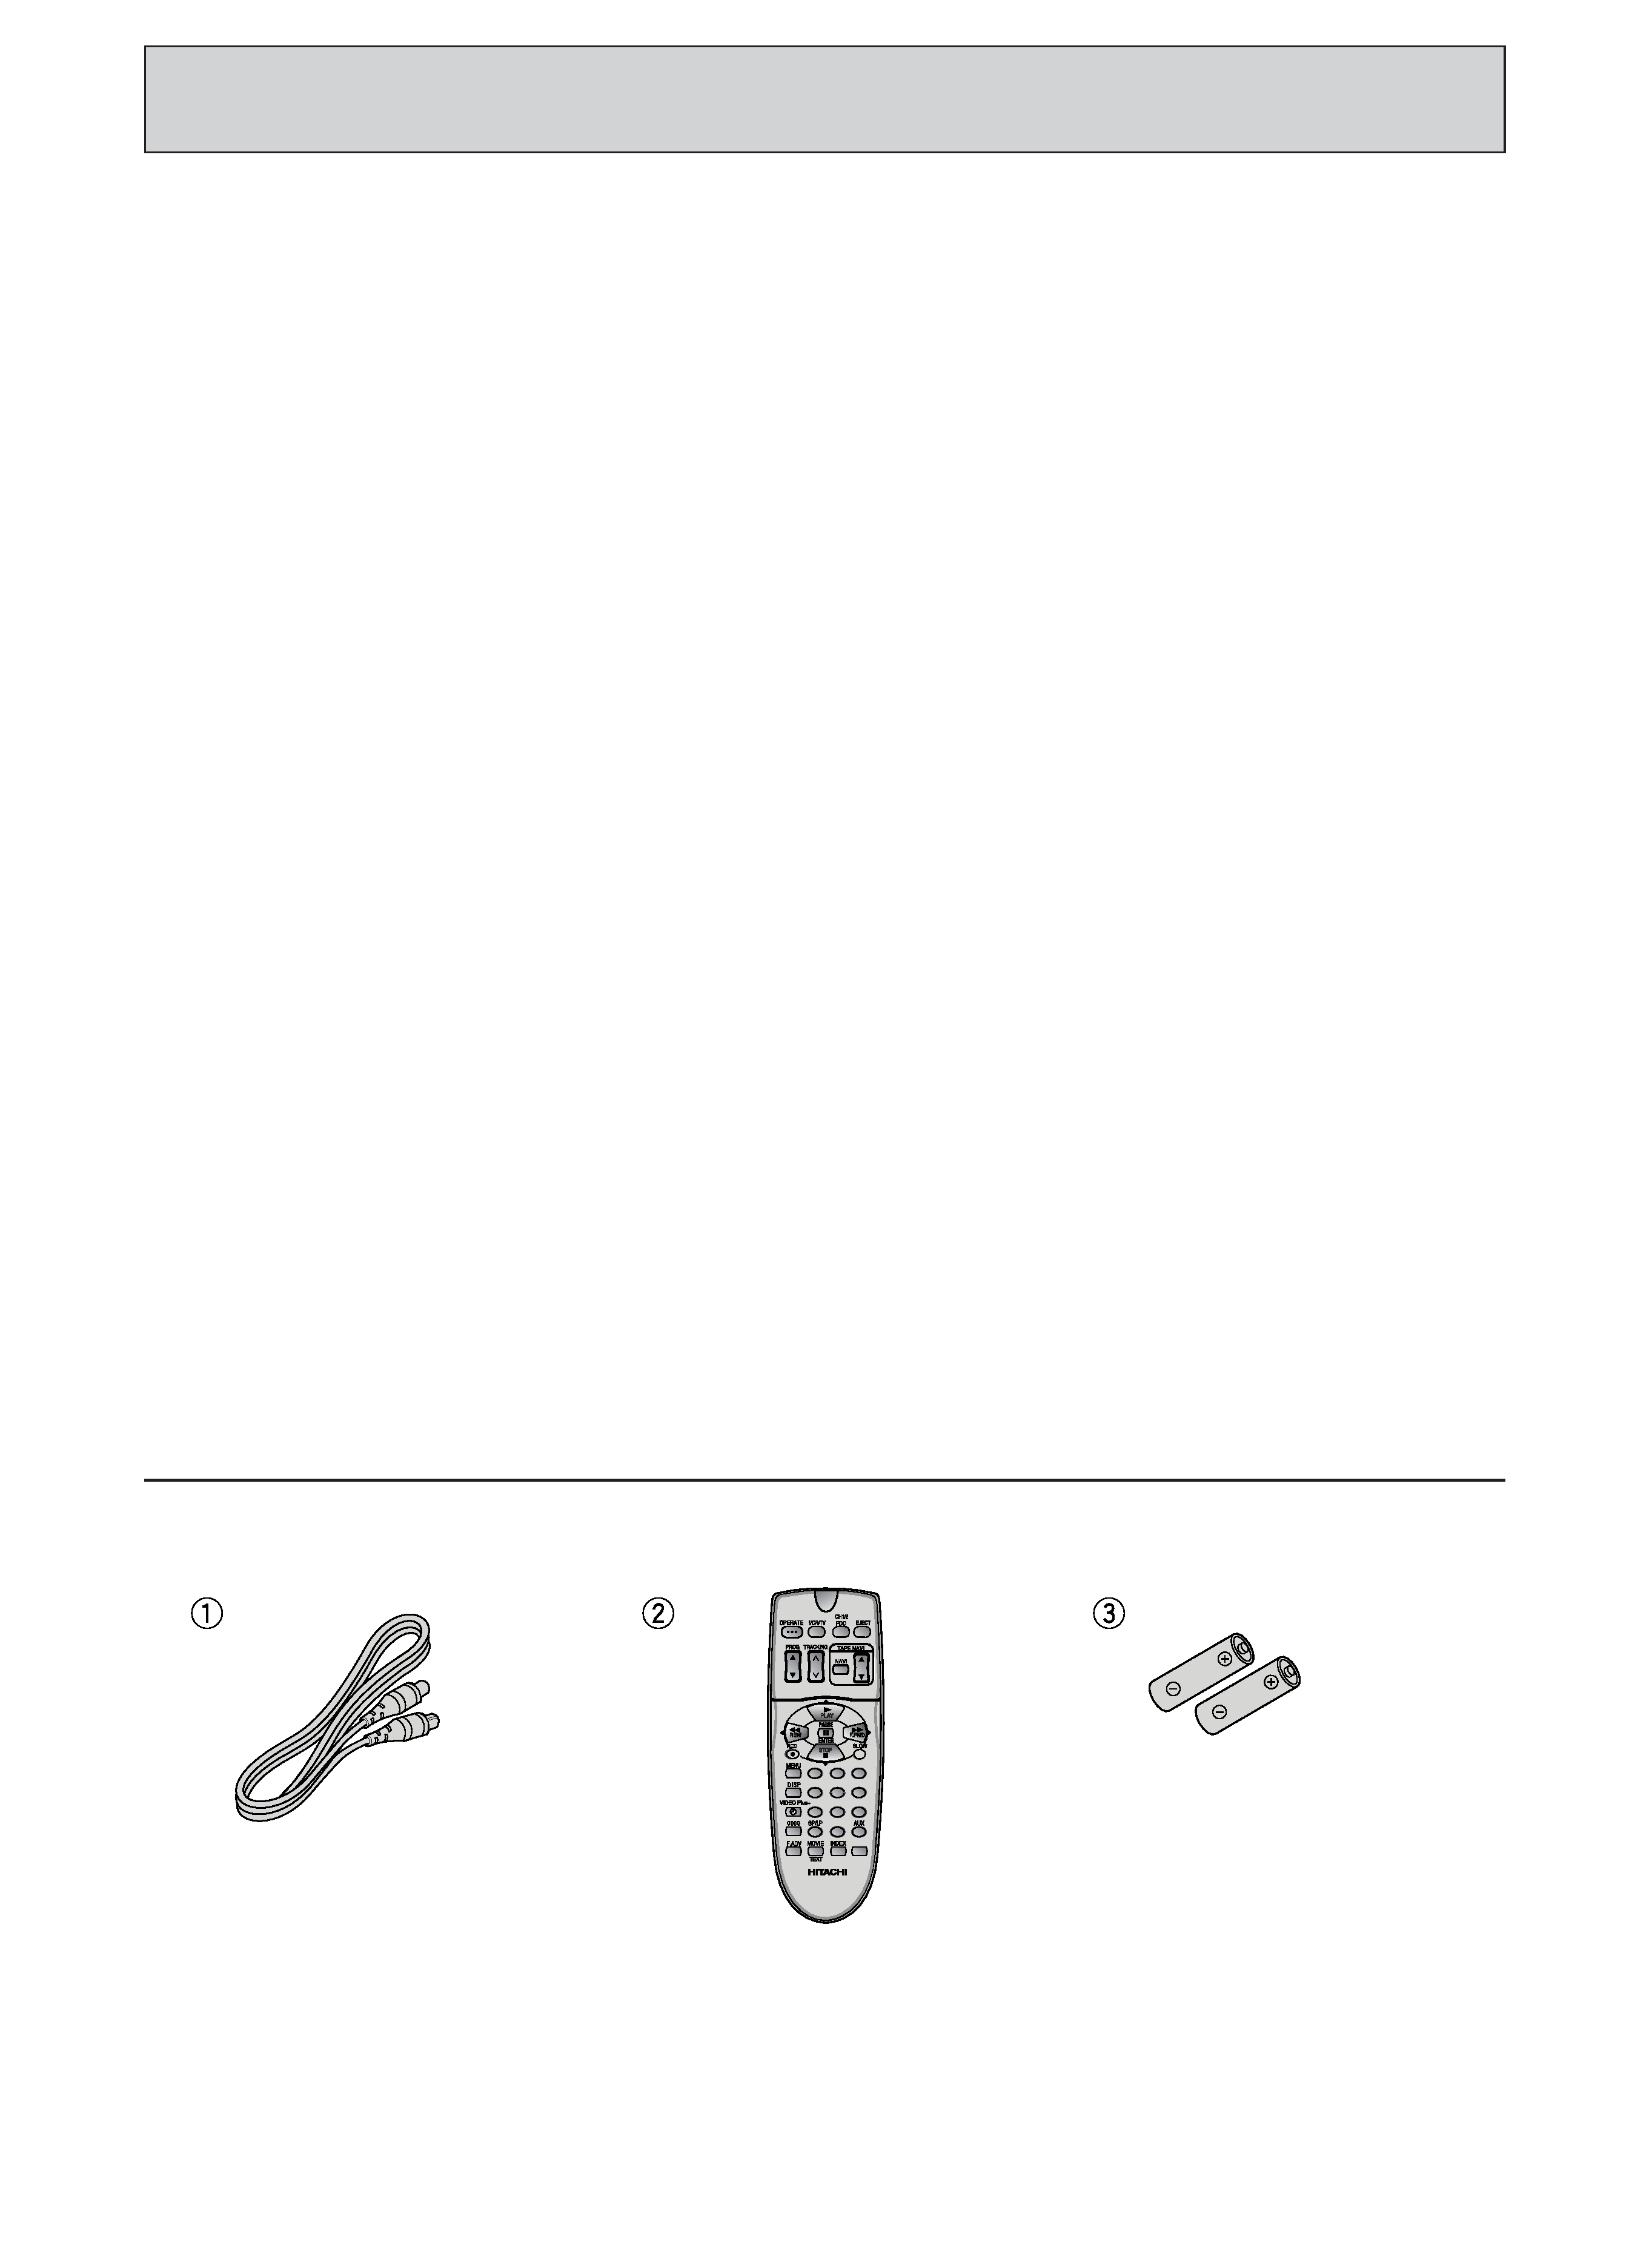
2 pcs.
"
#$
!
%
&
'
Aerial Cable for connecting
this VCR and a TV
Remote Control Handset
Batteries for remote
control handset (R6)
· The VIDEO Plus+® programming system
function allows you to programme the VCR for
timer recording by simply entering a PlusCode®
programming number.
· MOVIETEXTTM
* MOVIETEXT is a registered trademarks of
Hitachi Home Electronics (Europe) Ltd.
· Tape Navigation allows you to automatically
locate a programme you want to view, and
also to list on the TV screen the recorded
contents of every tape you have recorded on
this VCR.
· "Satellite/Cable box" decoder socket provided.
· The built-in digital stereo sound decoder
permits the reception of NICAM (Near
Instantaneous Compand Audio Multiplex)
broadcast.
· 12-programme/1-year preset recording.
· Dynamic picture equalizer.
· Shuttle function on VCR -- shuttle control for
fast search and variable speed playback.
· Auto Install System (Plug and Play) -- tunes in
stations, sorts into correct order, sets clock and
date.
· Auto Tuning -- tunes in stations, sorts into
correct order, and sets clock.
· High quality slow motion/still frame pictures.
· Stereo Sound -- record and playback.
· Phono audio outputs.
· NTSC playback.
· Graphic OSD.
· 2 Scart Sockets.
· Setting the clock using a PDC signal (Auto
clock set).
· Up to 8 hours recording and playback.
· Automatic controls for easier operation.
-- Auto Programme Play immediately starts to
play a recorded programme by simply
turning the VCR on after timer recording has
finished.
Accessories supplied
Check and identify the accessories supplied.
If any are missing or appear damaged, consult your dealer.

5
Section-1
Setting Up
Connection
Pages 6 -- 7
This tells you how to connect your VCR to an aerial, TV, etc.
Customer Controls and Remote Operation
Pages 8 -- 9
This tells you the location and the detailed functions of the
switches, buttons, VCR's display and connection terminals on
the VCR.
This also tells you how to insert batteries into the remote
control handset and how to operate your VCR remotely.
Auto Installation Function
Pages 10 -- 11
This tells you how to automatically tune in all broadcast
channels and set the clock and date.
Pre-tuning of Built-in TV Tuner
Pages 12 -- 17
This VCR incorporates a complete TV tuner (just like your
normal TV) and can be pre-tuned to receive up to 49 TV
programmes.
Guide Channel Setting
Page 18
This tells you how to match VCR channel to PlusCode/
ShowView Guide Channel when timer programming with
PlusCode/ShowView is used.
Auto Clock Setting using PDC Signal and
Setting the Clock Manually
Pages 19 -- 20
The clock display area in the VCR's display panel will look like
" :" until you set the 24-hour clock. The clock must be set
to the correct time before you can programme the VCR for
timer recording.
This section explains the two clock setting methods.
A. Setting the VCR's clock automatically using a PDC signal.
B. Setting the VCR's clock on the TV screen.
Cassette Tapes
Page 21
This tells you how to insert and remove a cassette, and how to
protect recordings from accidental erasure.