Congratulations!
You are now the proud owner of the compact but powerful Crate
BX25DLX/BX50DLX Bass Amplifier. The BX25DLX/BX50DLX features two differ-
ent channels: a distortion channel, featuring Crate's exclusive Shape control for
quick and easy access to the tone you need, and a clean channel with a four-band
rotary EQ. Another unique and valuable feature of this amplifier is its Octave con-
trol which allows you to add a second signal, one octave lower than the original
signal, to your bass. An active electronic tuner, conveniently located on top of the
amplifier, allows you to get in tune and stay in tune "on the fly." Front panel jacks
are provided for connecting a CD player and a pair of headphones, optimizing your
practice time.
Like all Crate products, your BX25DLX/BX50DLX is designed by musicians
and built using only the best components. Extensive testing at the hands (and
ears) of skilled technicians and musicians insures you that this amplifier is the
absolute best it can be.
In order to get the most out of your new bass amp, we urge you to check out
the information in this manual before you begin playing.
And thank you for choosing
BASS AMPLIFIER
BASS AMPLIFIER
2
Table Of Contents:
The Front Panel . . . . . . . . . . . . . . . . . . . . . . . . . . . .3,4
The Electronic Tuner . . . . . . . . . . . . . . . . . . . . . . . . . .5
The Rear Panel . . . . . . . . . . . . . . . . . . . . . . . . . . . . . .5
Some Suggested Settings: . . . . . . . . . . . . . . . . . . . . .6
System Block Diagram . . . . . . . . . . . . . . . . . . . . . . . .7
Technical Specifications . . . . . . . . . . . . . . . .back cover
THIS EQUIPMENT HAS BEEN DESIGNED AND ENGINEERED TO PROVIDE SAFE AND RELIABLE OPERATION. IN ORDER TO PRO-
LONG THE LIFE OF THE UNIT AND PREVENT ACCIDENTAL DAMAGES OR INJURY, PLEASE FOLLOW THESE PRECAUTIONARY
GUIDELINES:
CAUTION: TO REDUCE THE RISK OF ELECTRIC SHOCK, DO NOT OPEN CHASSIS; DO NOT DEFEAT OR REMOVE THE GROUND
PIN OF THE POWER CORD; CONNECTONLY TO A PROPERLY GROUNDED AC POWER OUTLET.
WARNING: TO REDUCE THE RISK OF FIRE OR ELECTRIC SHOCK, DO NOT EXPOSE THIS EQUIPMENT TO RAIN OR MOISTURE.
DO NOTEXPOSE THE UNIT TO SPLASHING OR DRIPPING LIQUID. DO NOT PLACE LIQUID FILLED OBJECTS ON THE UNIT.
CAUTION: NO USER-SERVICEABLE PARTS INSIDE. REFER SERVICING TO QUALIFIED SERVICE PERSONNEL.
CAUTION: OUR AMPLIFIERS ARE CAPABLE OF PRODUCING HIGH SOUND PRESSURE LEVELS. CONTINUED EXPOSURE TO HIGH
SOUND PRESSURE LEVELS CAN CAUSE PERMANENT HEARING IMPAIRMENT OR LOSS. USER CAUTION IS ADVISED AND EAR
PROTECTION IS RECOMMENDED IF UNITIS OPERATED AT HIGH VOLUME.
CAUTION
RISK OF ELECTRIC SHOCK
DO NOT OPEN
CAUTION: TO REDUCE THE RISK OF ELECTRIC SHOCK,
DO NOT REMOVE COVER.
NO USER-SERVICEABLE PARTS INSIDE.
REFER SERVICING TO QUALIFIED SERVICE PERSONNEL.
"IT IS NECESSARY FOR THE USER TO REFER TO THE INSTRUCTION MANUAL"
"ES NECESARIO QUE EL USUARIO SE REFIERA AL MANUAL DE INSTRUCCIONES."
"REFERREZ-VOUS AU MANUAL D'UTILISATION"
EXPLANATION OF GRAPHICAL SYMBOLS:
EXPLICACION DE SIMBOLOS GRAFICOS:
EXPLICATIONDESSYMBÔLESGRAPHIQUES:
"DANGEROUS VOLTAGE"
"VOLTAJE PELIGROSO"
"DANGER HAUTE TENSION"
=
=
PRECAUCION
RIESGO DE CORRIENTAZO
NO ABRA
PRECAUCION PARA DISMINUOIR EL RIESGO DE CORRIENTAZO
NO ABRA LA CUBIERTA
NO HAY PIEZAS ADENTRO QUE EL USARIO PUEDO REPARAR
DEJE TODO MANTENIMIENTO A LOS TECHNICOS CALIFICADOS
ATTENTION
RISQUE D'ELECTROCUTION
NE PAS OUVRIR
ATTENTION: POUR REDUIRE D'ELECTROCUTION NE PAS
ENLEVER LE COUVERCLE. AUCUNE PIECE INTERNE N'EST REPRABLE
PAR L'UTILISATEUR. POUR TOUTE REPARATION, S'ADRESSER A UN
TECHNICIEN QUALIFIE.
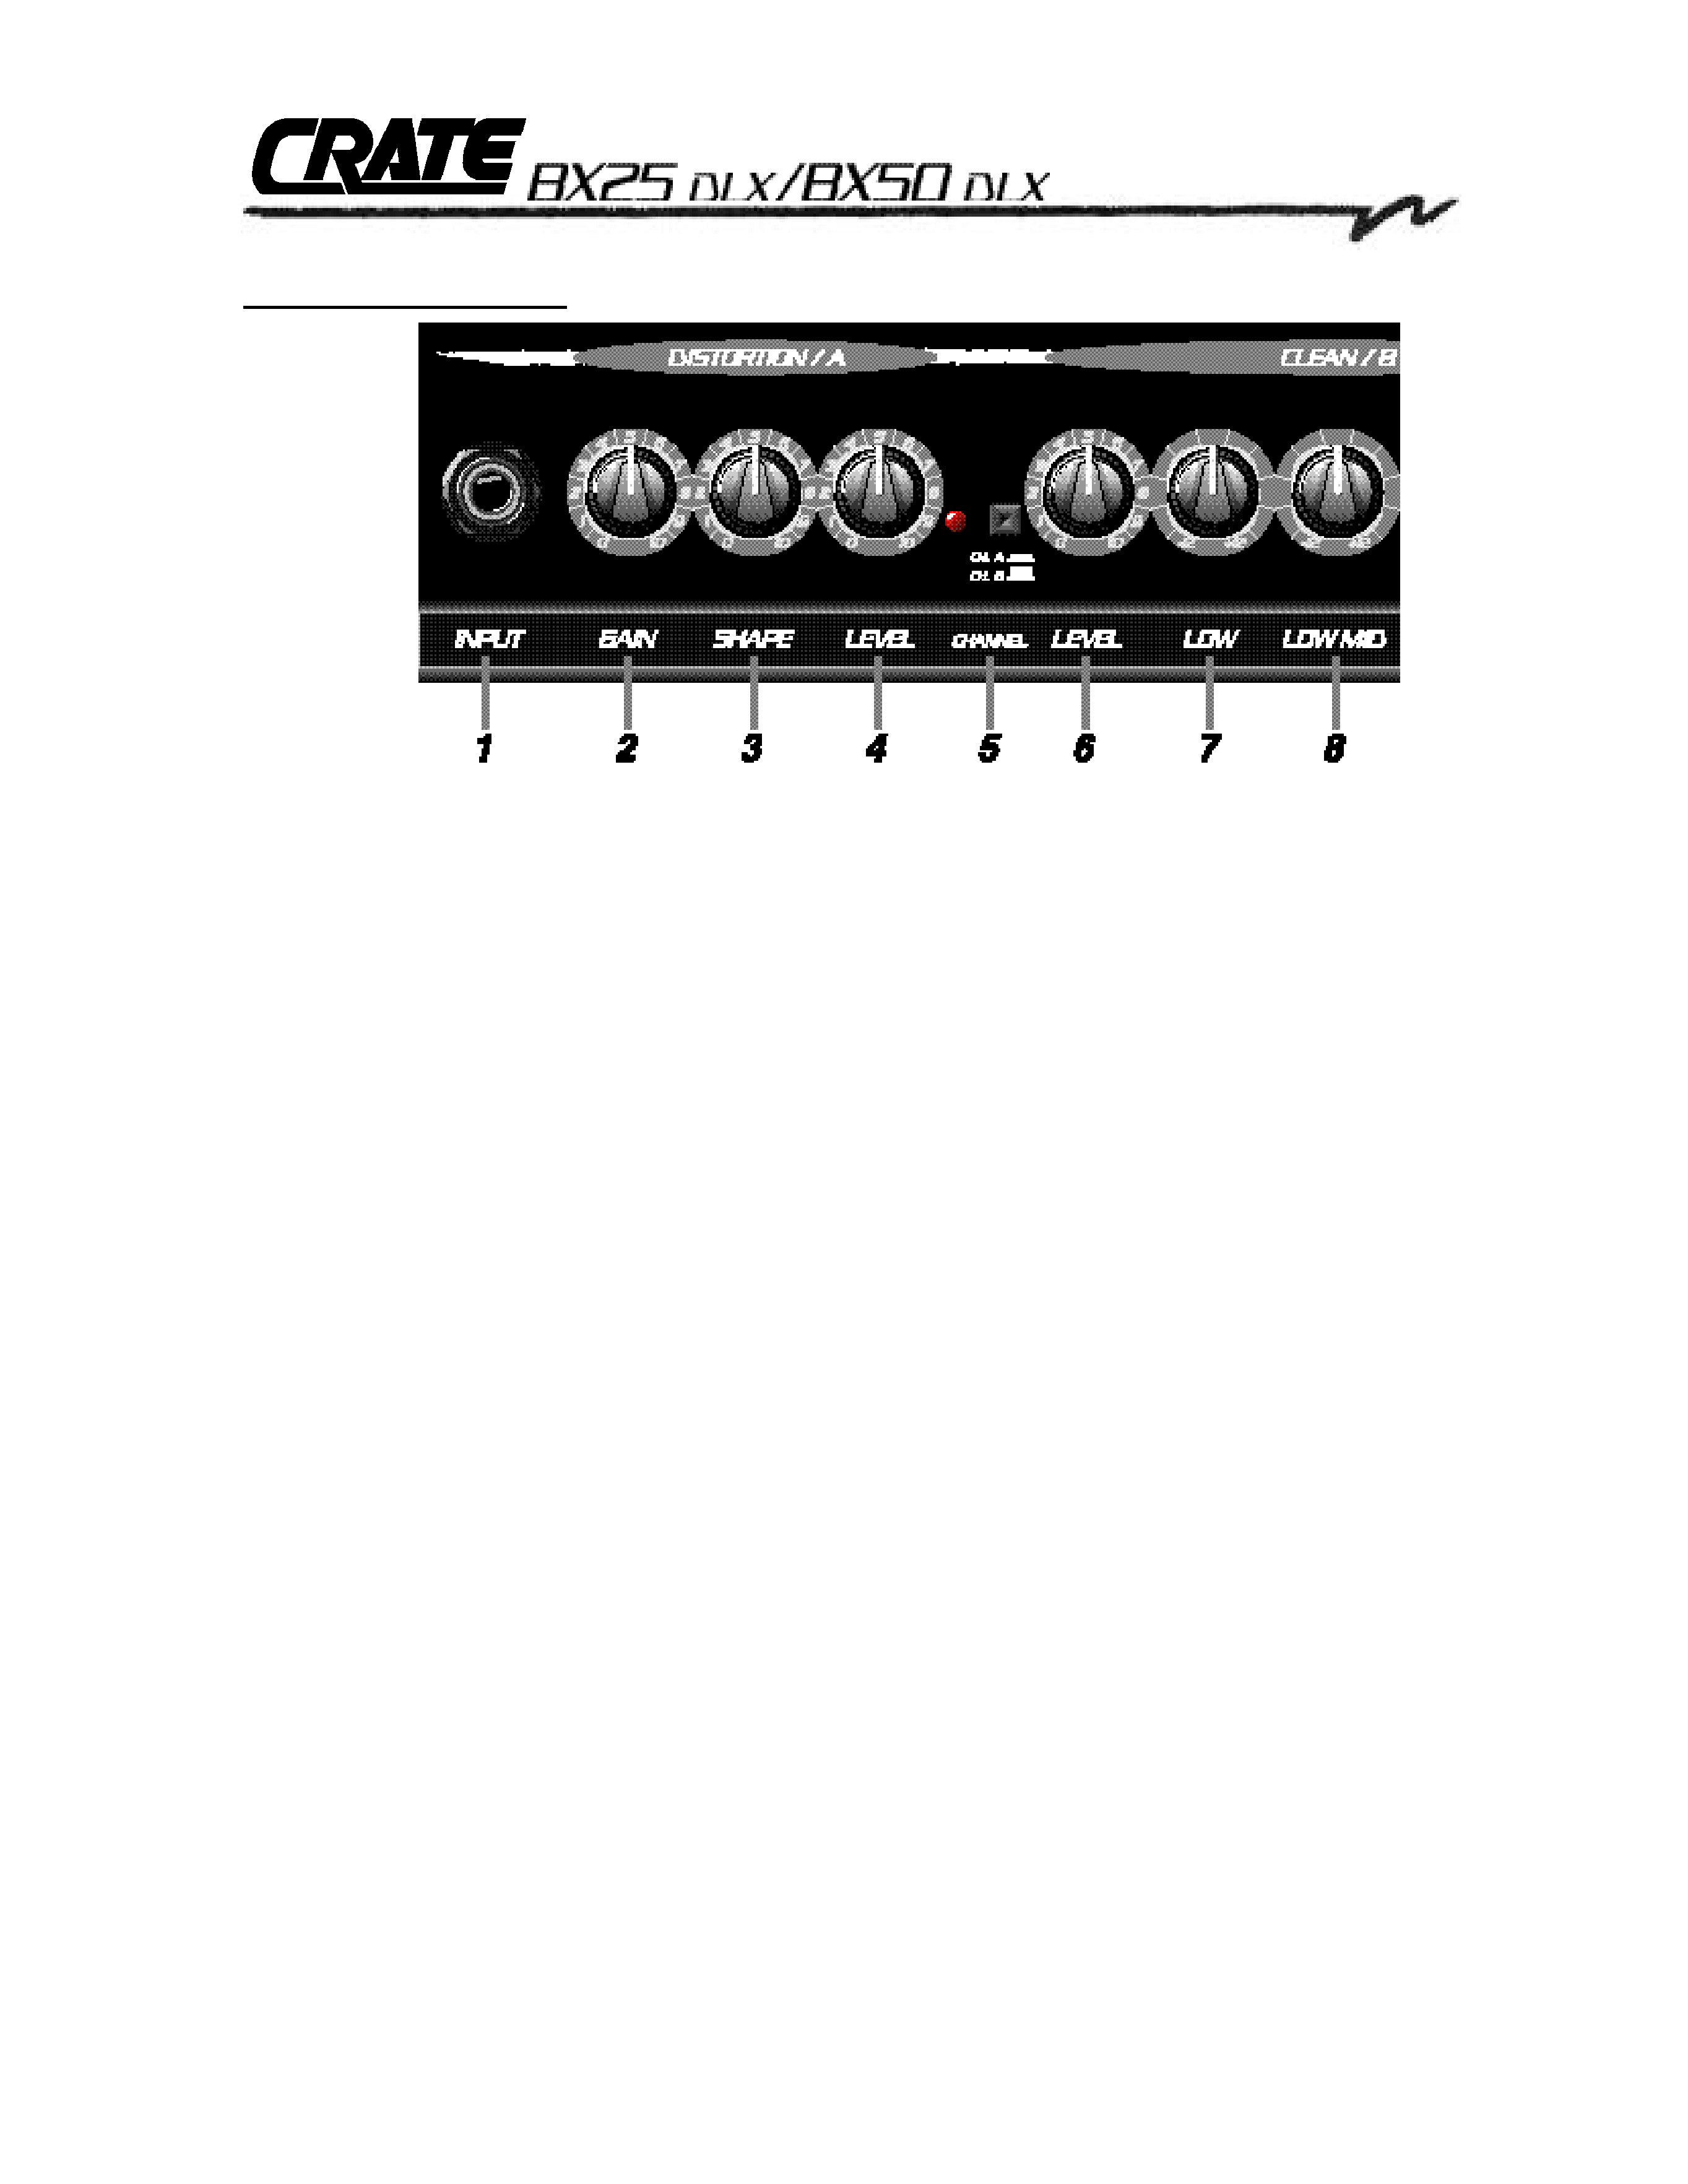
1. INPUT: Use this 1/4" jack to connect your bass to the amplifier by means of a
shileded instrument cable.
2. GAIN: Use this control to adjust the amount of distortion for the Distortion/A
channel. As you rotate the control clockwise the amount of distortion increases.
3. SHAPE: Use this control to adjust the tone of the Distortion/A channel, from a
studio "V"-shaped tone to a more "live," more present sound.
4. LEVEL: Use this control to adjust the output level of the Distortion/A channel.
5. CHANNEL SWITCH: Use this switch to select either channel. With the switch in
the out position, the Clean/B channel is selected. When the switch is depressed,
the Distortion/A channel is selected. The adjacent LED illuminates when the
Distortion/A channel is selected. NOTE: When using the footswitch (#18): with this
switch in the out position (Ch.B), the footswitch switches between the Distortion/A
channel and the Clean/B channel; when this button is depressed, the Clean/B
channel is always active, and the footswitch turns the Distortion/A channel on and
off, allowing you a blend of both channels.
6. LEVEL: Use this control to adjust the output level of the Clean/B channel, and
as part of the Octave level control (see #11).
NOTE: The BX25DLX/BX50DLX employs an internal noise gate to keep residual
noise to a minimum. Regardless of which channel is selected, the Clean/B chan -
nel's Level control (#6) must be turned up above "0" in order for the noise gate to
trigger.
7. LOW: Use this control to adjust the low frequency level of the Clean/B channel.
8. LOW MID: Use this control to adjust the lower-midrange frequency output of the
Clean/B channel.
BASS AMPLIFIER
The Front Panel:
3

9. HIGH MID: Use this control to adjust the upper-midrange frequency output of
the Clean/B channel.
10. HIGH: Use this control to adjust the high frequency output of the Clean/B
channel.
11. OCTAVE: The BX25DLX/BX50DLX features internal circuitry which creates a
second signal which is one octave lower than the input signal. Use this control in
conjunction with the Clean/B channel's Level control (#6) to adjust the level of the
octave signal.
12. MASTER: Use this control to adjust the overall output level of the amplifier.
13. CD INPUT: Use these RCA jacks to connect the line level (or headphones)
output of a CD player, tape deck or rhythm machine to the amplifier. The signal
level from these jacks is adjusted by the Master control (#12). If the signal from
the source connected to these jacks is too strong, use the output level control on
the source to adjust the signal to obtain the proper level for a good mix.
14. HEADPHONES: Use this jack to listen to the amplifier through a pair of stereo
headphones. The internal speaker is disconnected when the headphones jack is
used.
CAUTION: To avoid possible damage to your hearing, do not use head-
phones for extended periods of time at extremely loud listening levels.
15. POWER: Use this switch to turn the amplifier on and off. The adjacent LED
illuminates when the amplifier is turned on.
BASS AMPLIFIER
4
The Front Panel (con't):
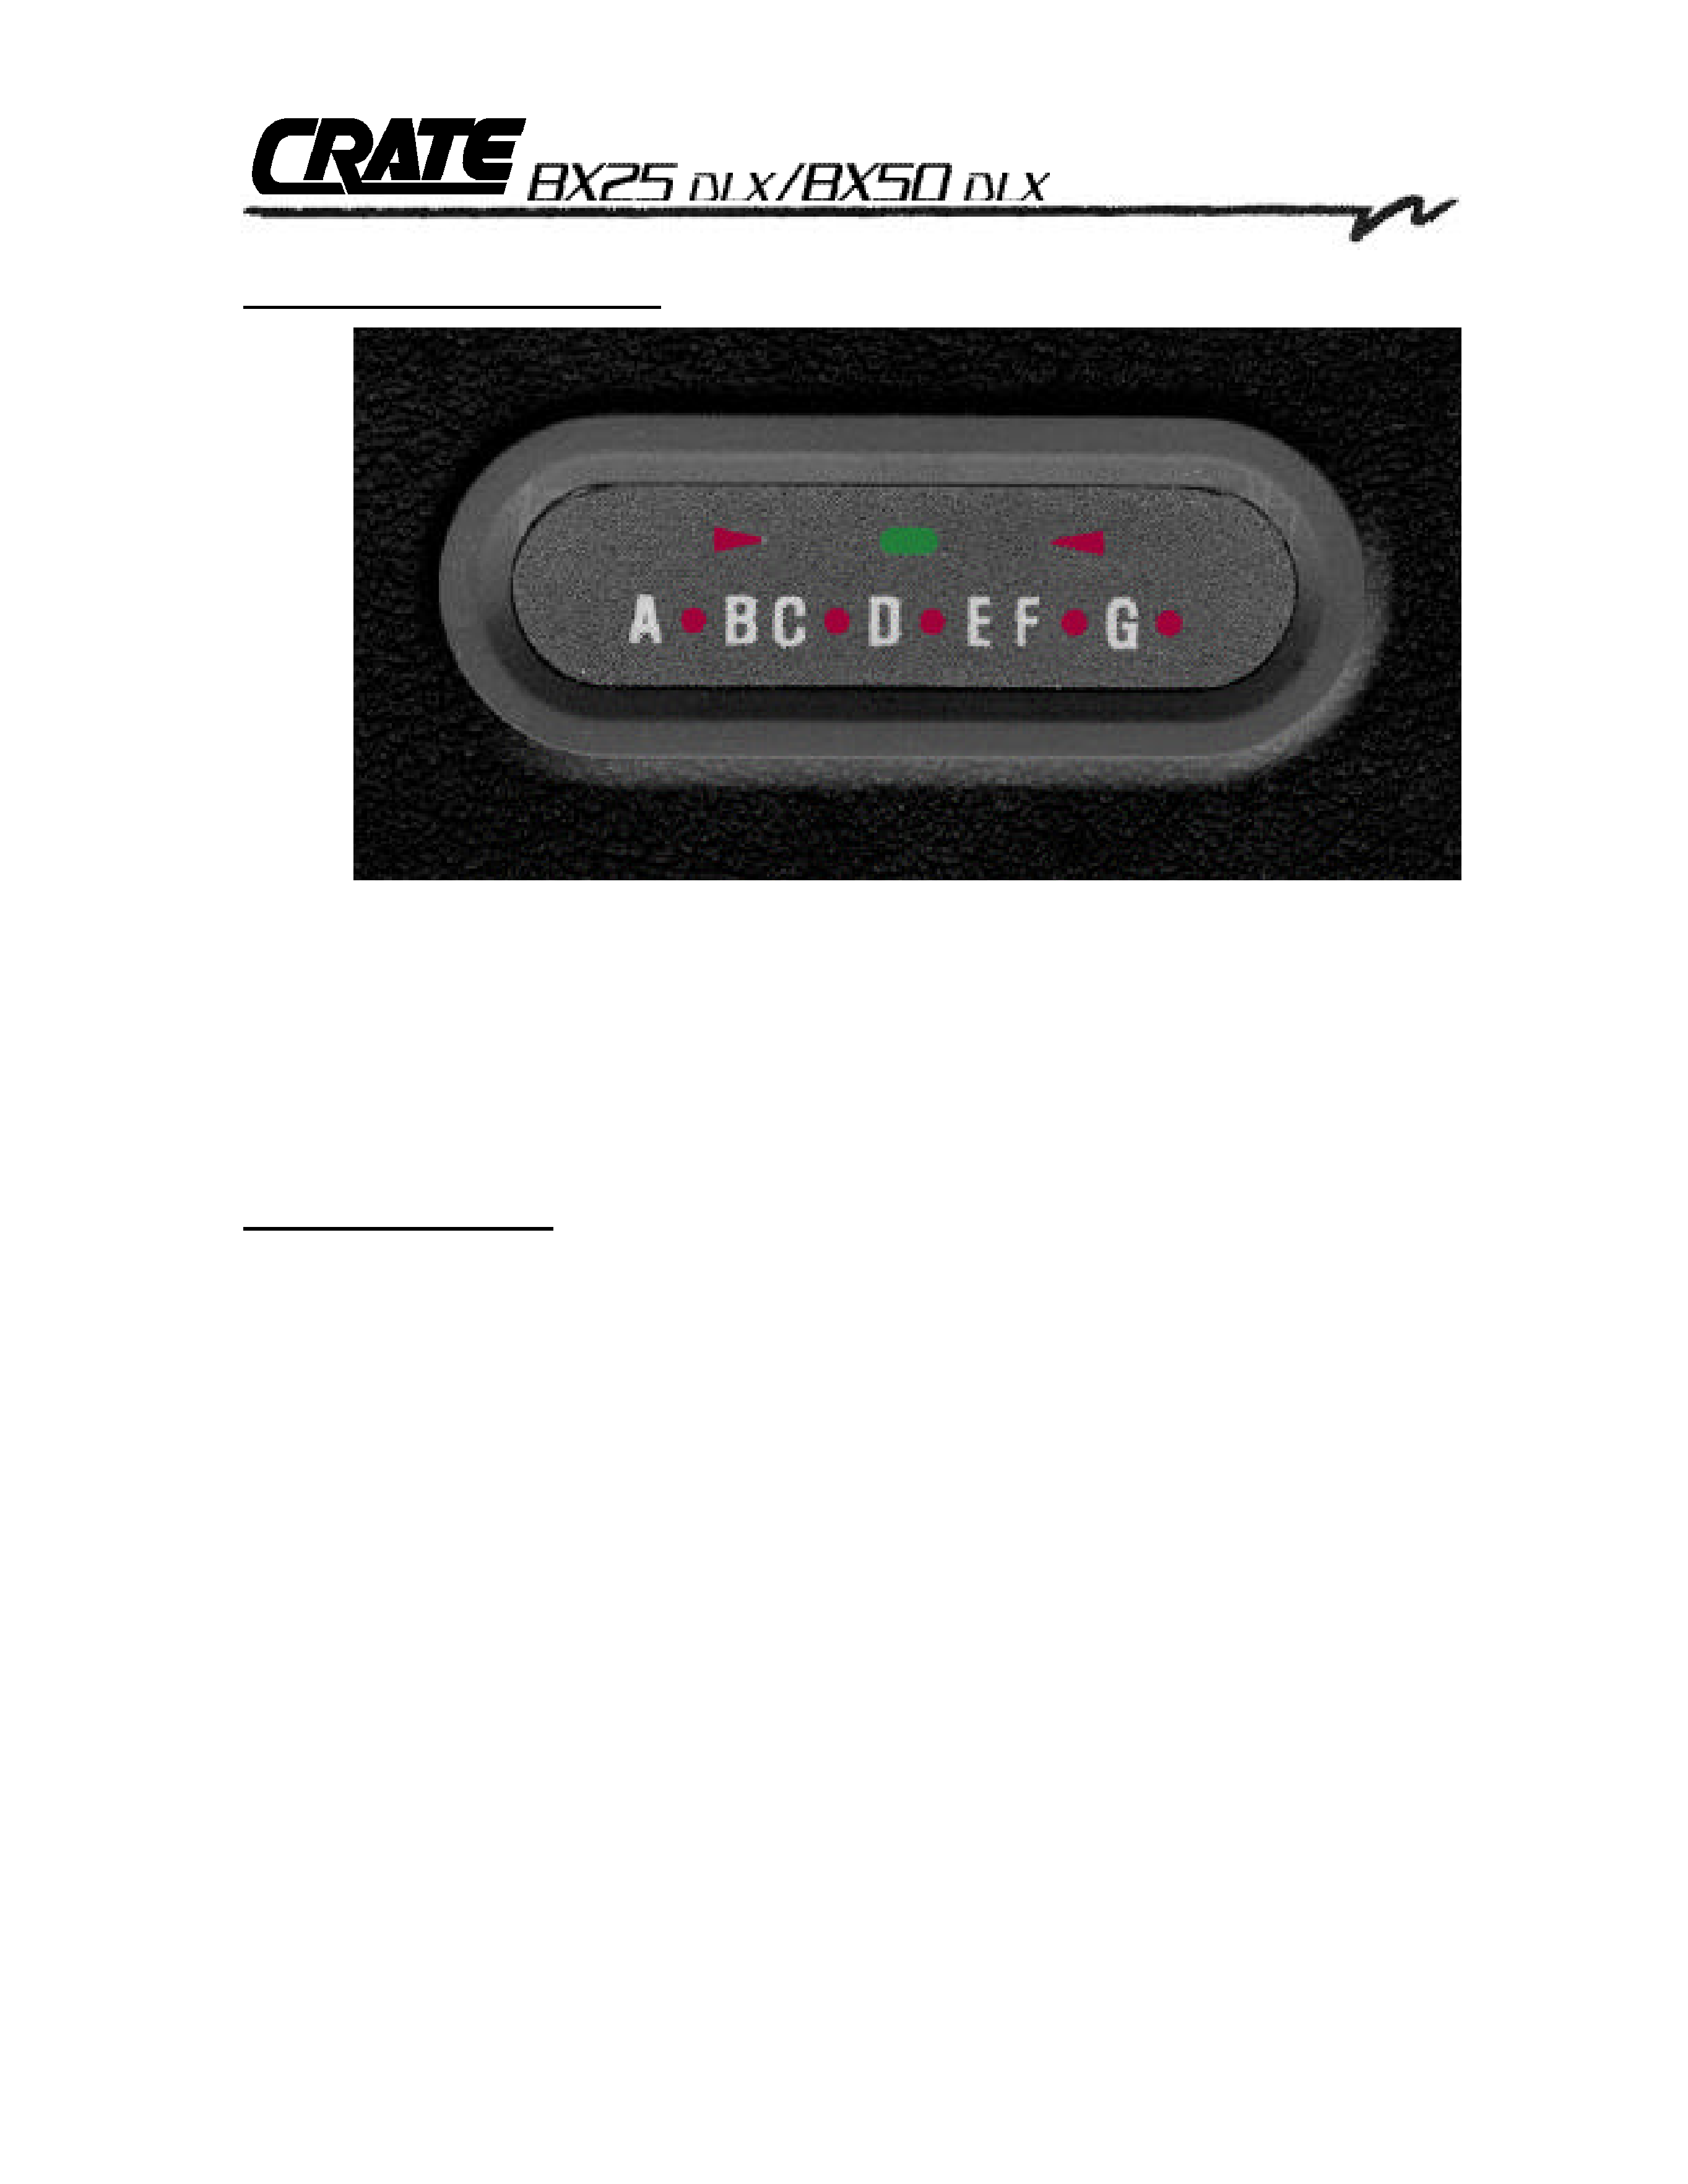
16. ELECTRONIC TUNER (top panel): This active electronic tuner is on when-
ever the amplifier is turned on, allowing you constant, "real-time" tuning. The tuner
is fully chromatic use the flat and sharp indicators until the LED between them
illuminates, indicating proper tuning.
17. AC LINE CORD (rear panel, not shown): This heavy duty, grounded, three
wire power cord is to be plugged into a safely-wired, grounded, 120 volt, 60 cycle
AC power outlet. DO NOT attempt to defeat the ground connection of this cable!
If your amplifier was purchased outside of the United States, see the unit's rear
panel for its power and voltage ratings and follow the above guidelines.
18. FOOTSWITCH (rear panel, not shown): Connect the supplied two-button
footswitch here for remote control of the channel selection/"blend" (see #5") and
octave on/off. (When the Channel Switch [#5] is set to the Clean/B channel, the
footswitch switches between the Clean/B channel and the Distortion/A channel;
when the switch is set to the Distortion/A channel, the Clean/B channel is always
active, and the footswitch turns the Distortion/A channel on and off, allowing you
a blend of both channels.)
19. EXTERNAL SPEAKER (rear panel, not shown): Use this jack to connect the
amplifier to an external speaker cabinet (BX25DLX = 4
minimum, BX50DLX =
8
minimum). The internal speaker is disconnected when the external speaker
jack is used.
BASS AMPLIFIER
5
The Electronic Tuner:
The Rear Panel: